1. Home
  2. Jira Cloud
  3. Integrating and Importing Issues from Jira Cloud

Integrating and Importing Issues from Jira Cloud

Integrating Jira with Ducalis allows you to quickly get your Jira backlog in Ducalis for prioritization. It enables you to create issues for your Jira backlog in Ducalis and to also send your prioritization results to Jira.

Integrating Jira with Ducalis

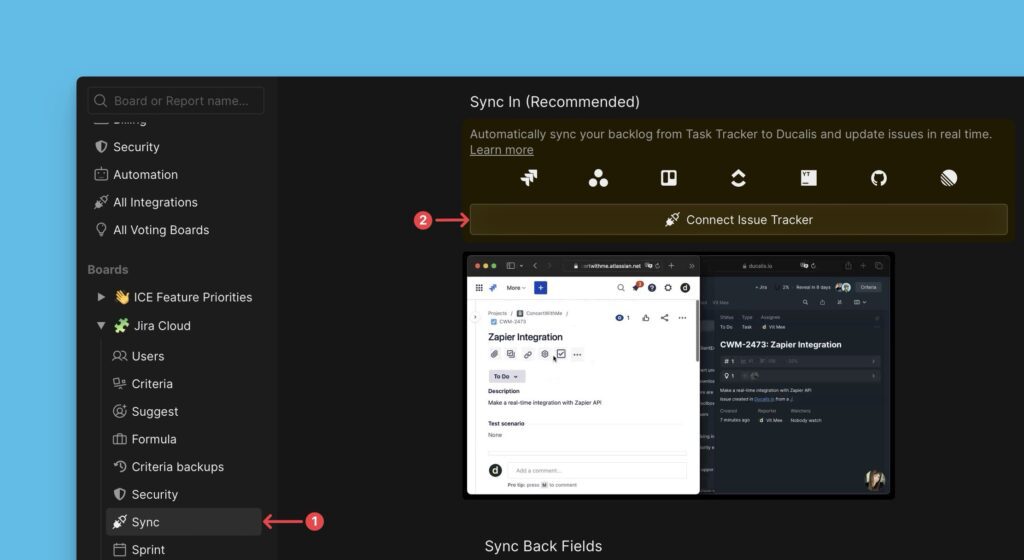
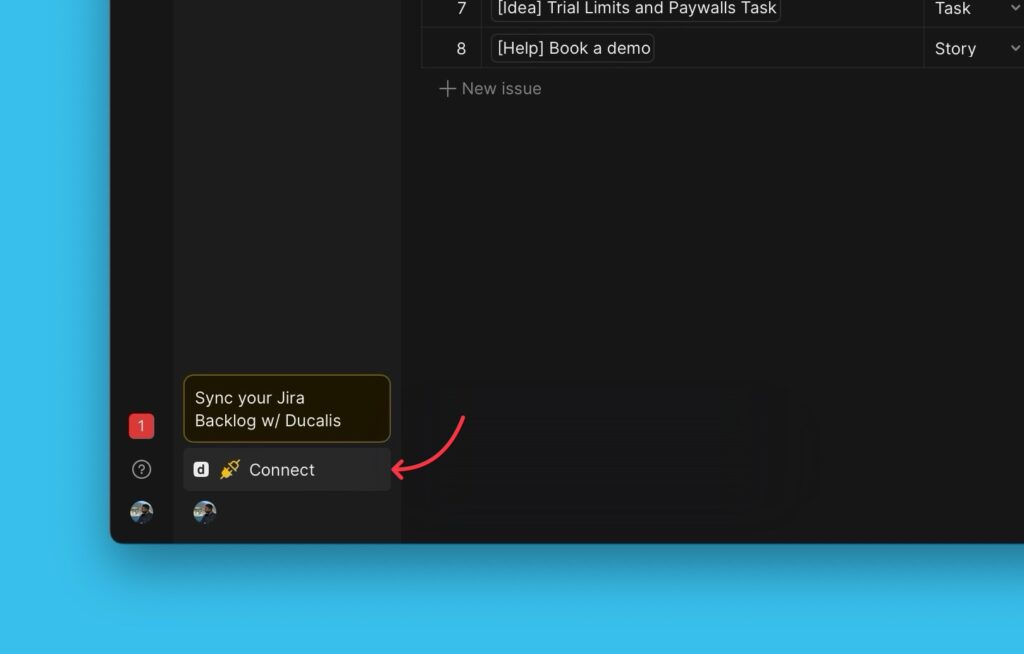
  1. In the board you’ve just created, go to the left-side menu, and click Connect to access the Sync settings.
  1. Under Sync settings, go to Sync In and click Connect Issue Tracker
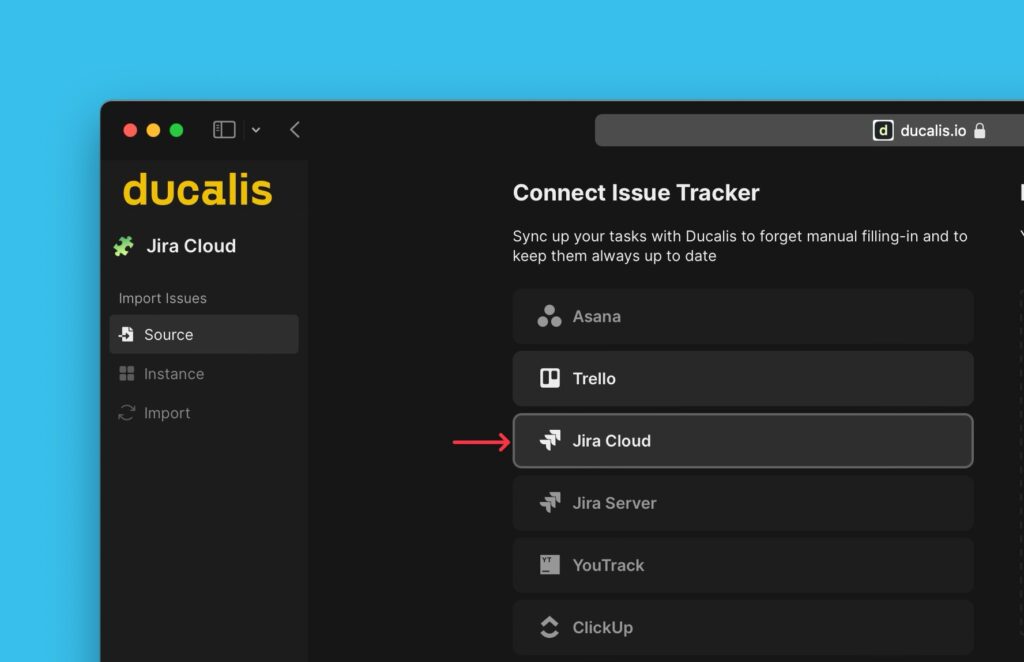
  1. Choose Jira Cloud as the source of your issues.
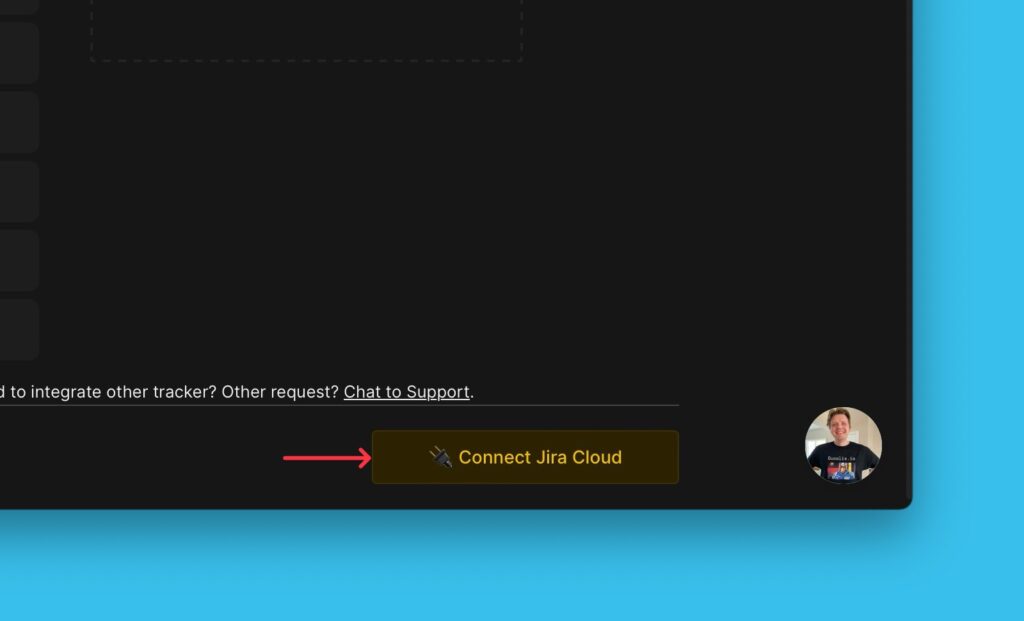
  1. Then click Connect Jira Cloud
  1. Authorize Ducalis to access your Jira account.
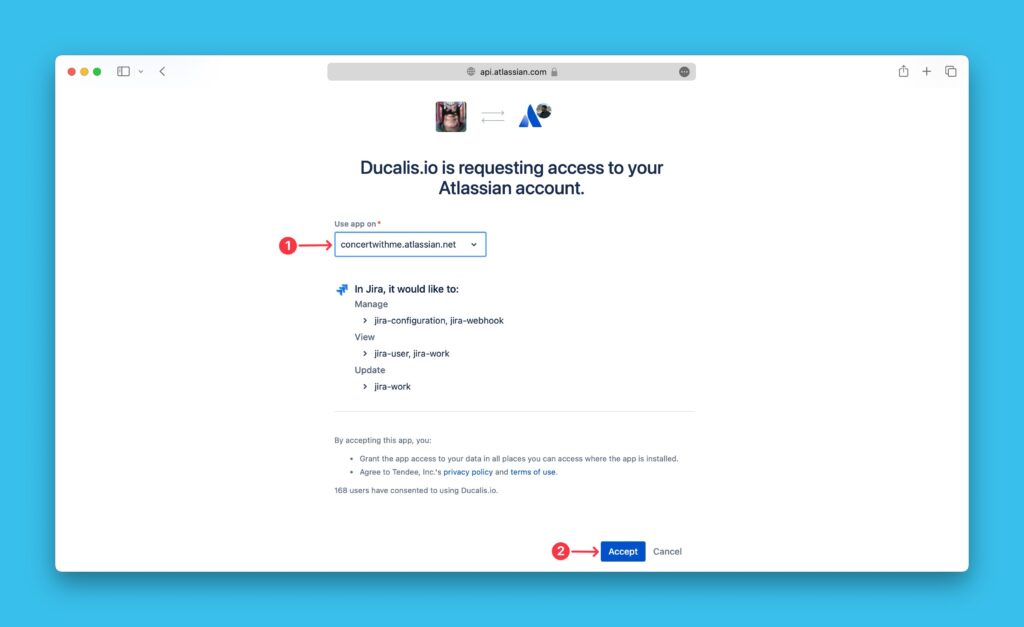
  1. Proceed to import issues from Jira.

Importing issues from Jira

  1. Choose the Instance you want, or Add a new instance to get issues from.
  1. After you choose your instance, click import form [Instance].
  • Chose the way you want to import issues. You can filter in Ducalis, switch to Jira filters or you can use JQL filters.
  1. After you’re done, click Start Import.

Importing Sub-tasks

You can import sub-tasks of tasks in a particular project. To do this: 

  1. When selecting the import filters, choose the project containing the tasks that have the sub-tasks you want to import. 
  2. On Issue type select Sub-tasks. Continue to select the required filters and any optional filters that you want.
  1. You can get a preview of some issues falling under the filters you have selected. 
  2. Click Start import.
  1. All the tasks together with the sub-tasks will be imported.
  2. On the Issues list, all the sub-tasks will have a sub-task icon on the left. 
  1. When you open the issue card of a sub-task, you will see the parent-tasks on the top part. You can click on it to be redirected to the parent task in Jira.
  1. When you open the issue card of a parent-task, If it has sub-tasks, you will see them (completed sub-tasks included), and their scores if they were also imported and evaluated. 

Didn’t find some filters?

If you already have a filter in Jira, but don’t see it when you switch to Jira filters, the problem might be with the filter access status.

Note! For Jira Cloud, the filter access status must be Public, Open, or My Organization.

To check or change the filter status:

  1. Click Details in the required filter in Jira.
  2. Edit permissions.
  1. Change access to Public, Open, or My Organization.
  2. Click Add.
  3. Ensure the access status has been added.
  4. Click Save.

Return to Ducalis.

  1. Click Refresh Filter List.
  2. Type the filter name—it must become available.

 If you still have problems, please contact us in the chat bottom right.

How to create a filter in your Jira Cloud account.

  1. Go to FiltersView all filtersCreate filter.
    <a href=
  2. Set up the filter by data (Project, Type, Status, and other) and click Save as.
    <a href=
  3. Name filter. Note that this will be the name of the board in Ducalis. Click Submit.
    <a href=
  4. Go to Details next to the filter name and click Edit Permissions.
    <a href=
  5. Find the Access field and change filter status to Open. Click Add and Save.
    <a href=

Editing import-filters.

Editing import-filters helps to:

  • Import more issues from Jira to the same board.
  • Remove issues from a board without removing the integration.

To edit filters:

  1. Go to the Sync settings.
  1. Under Sync settings scroll down to Sync In and click Edit Sync-In Conditions
  1. Add or remove some filters to add more issues or remove some issues, respectively.
  2. Click Save to keep your changes.

Removing the Integration

On how to delete an integration between Ducalis and Jira Cloud, check out this article.

What’s Next?

Once you have integrated and imported your issues from Jira Cloud, you can go ahead and enable Back sync so that you can sync back your prioritization results to your Jira Cloud account. 

Learn more about how to enable Back sync with Jira Cloud

Updated on April 19, 2024

Was this article helpful?

Related Articles

Leave a Comment