Learn how you can embed Ducalis voting boards using an embed code.
To enhance user experience, it is important to integrate a voting board within your product seamlessly. This will allow users to access the voting board directly from their account and make it appear as a single application.
Below is an example of a Ducalis board embedded into the page and opened in a frame.
How to embed a board as a frame
Follow these steps:
1. Choose the board and make sure it is published.
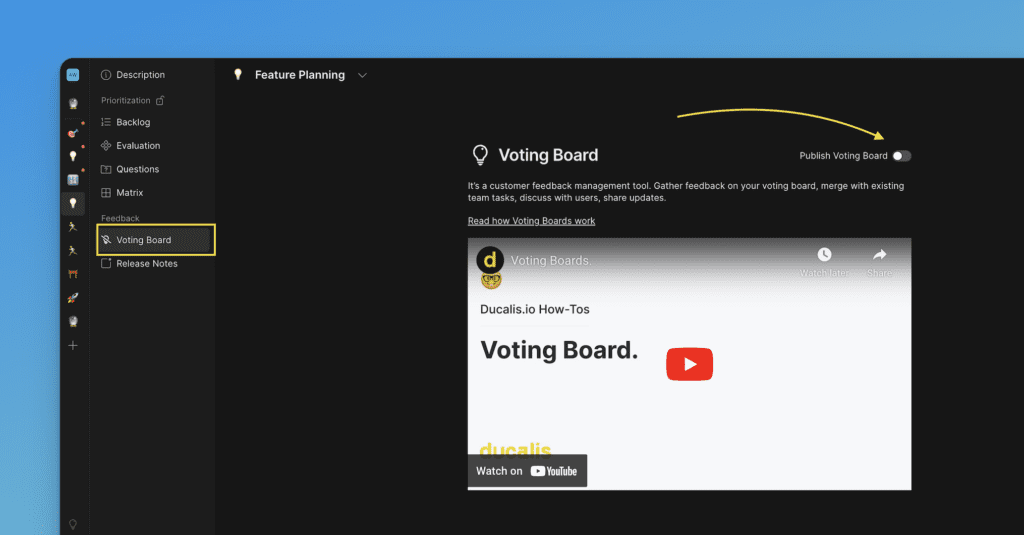
2. Go to Voting settings, choose Embed, find Embed The Whole Board stripe.
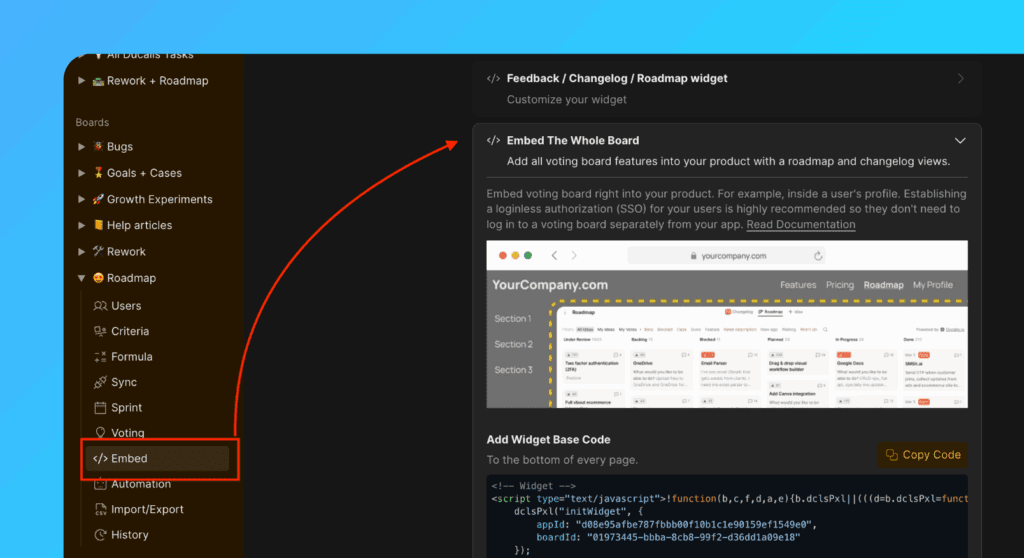
3. Copy and paste the Widget Base Code.
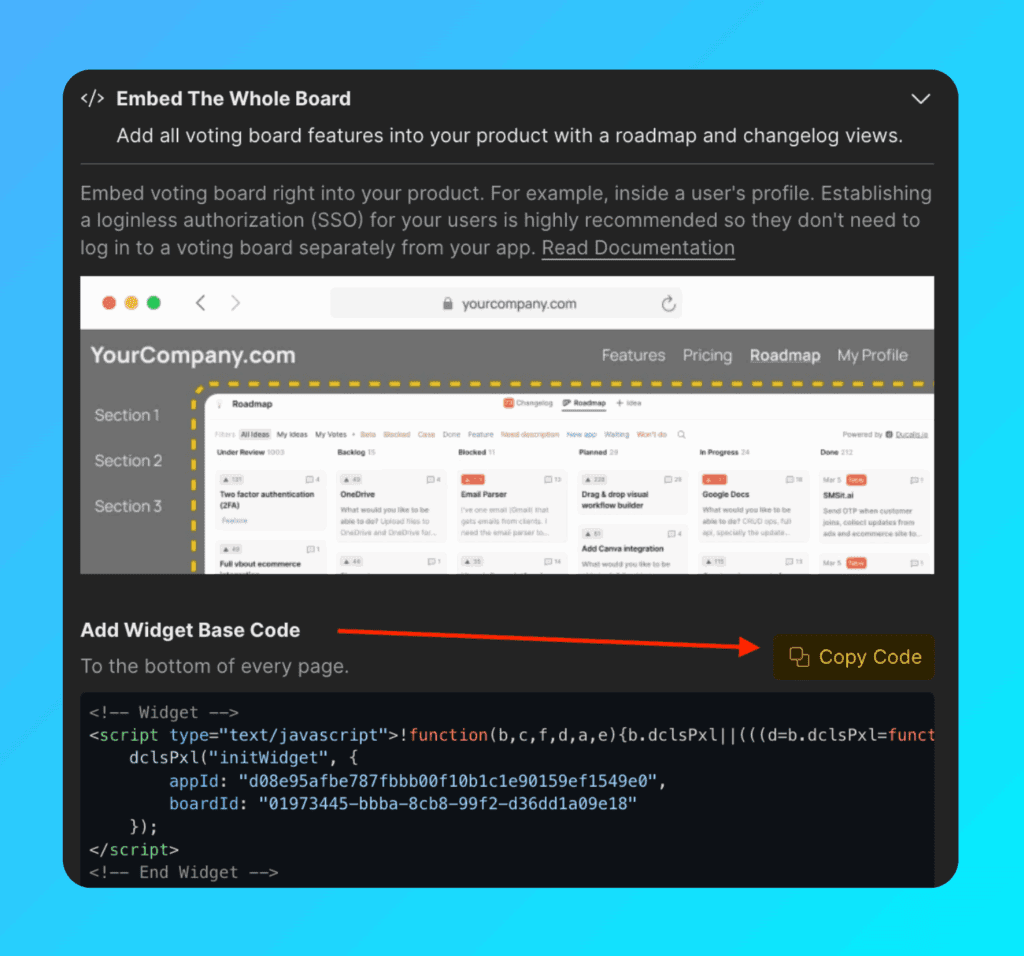
4. Add to the widget code base “// Required for Voting board embedding”.

So you will have the code below (pay attention to optional and required).
dclsPxl("initWidget", {
    // required
    appId: "dc9ae89*******",
    boardId: "78aef2c7c0********",

    user: {
        // required
        email: "Your user Email",
        hash: "User hash (read instruction)",

        // optional
        userID: "Your user ID",
        name: "Your user Name",
        avatar: "https://you-user-avatar-domain/avatar.png",
        company: {
            id: 123,
            name: "Your user Company name",
            customFields: {
                created_at: "2019-06-02 17:10:00",
                spend: 123000,
                mrr: 100,
		plan: "pro",
		prop: value,
            }
        }
    },

    // required for Voting board embedding
    embedBoard: {
	 selector: "#selector-where-show-iframe", // css-selector where to render voting board
	 style: undefined, // optional, iframe styles object, e.g. "style: {position: 'absolute', top: 0}"
    },
});
Specify which page you want to open in By Default
You can choose whether the Roadmap or Changelog page will be opened first in your Widget.
If you want to specify the page, you need to configure defaultView in the code. Choose whether you want the Roadmap or Changelog page to be opened; for example, defaultView: roadmap.
dclsPxl("initWidget", {
  ...
    // optional, default state is undefined
    // Use 'roadmap' or 'changelog' to open specific page
    defaultView: undefined,
  ...
});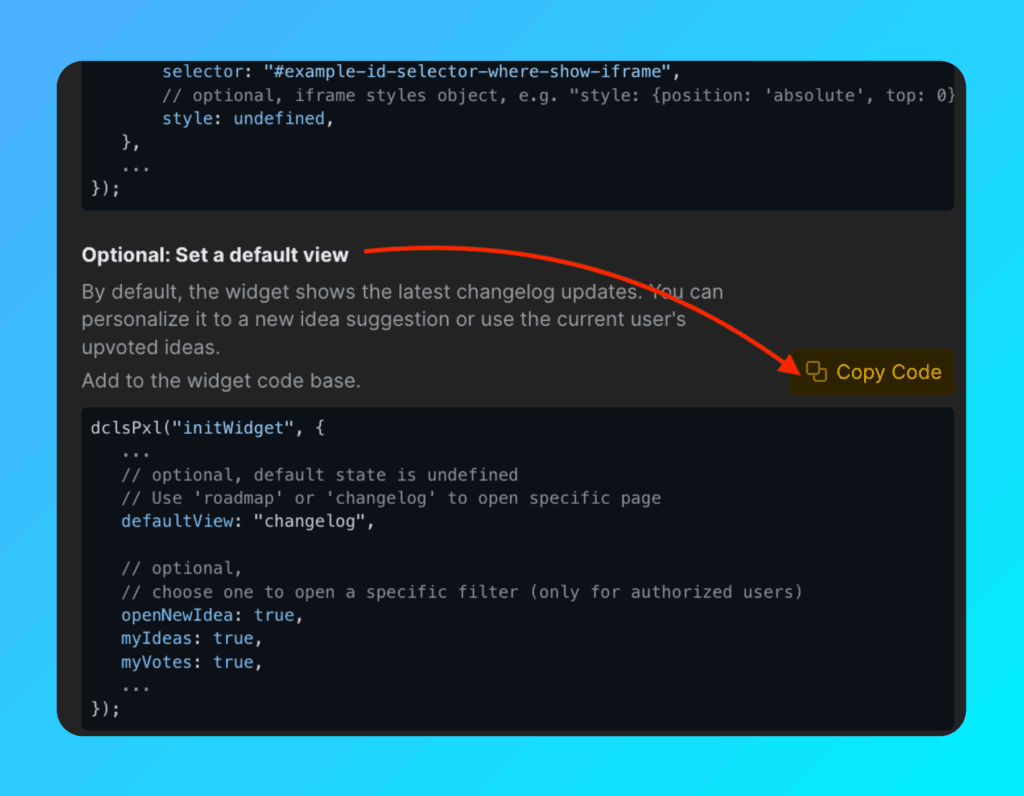
Also, for the Changelog and Roadmap pages, you can optionally open a specific filter or action (only for authorized users).
dclsPxl("initWidget", {
   ...

   // optional,
   // use it to open a specific filter (only for authorized users)
   openNewIdea: true,
   myIdeas: true,
   myVotes: true,

   ...
});
Attach Notification Bubble
Show notification signs to your customers so they do not miss important updates and releases.
Add the bubble object to the widget code above.
dclsPxl("initWidget", {
   ...

   bubble: {
      // optional, default state is ".ducalis-changelog-widget"
      // use it for bubble without widget
      selector: '#embedBoardBuble',

      // optional, default state is undefined
      // clear initial styles. Use it for custom styles by className ONLY.
      className: 'some-class-name',

      // optional, default state is undefined
      // customization initial styles.
      style: {
	 right: '7px',
	 top: '7px',
	 backgroundColor: '#db3737',
         borderRadius: '4px',
	 fontSize: '13px',
      }
   },
   ...
});
Customize board background
To match the board your interface and brand there is an option to add transparent background.
embedBoard: {
     ...
     // optional, Default: false
     // iframe and board with transparent background
     transparent: true,
     ...
}
Your additional custom CSS class
For advanced use only! Аdd’s custom class name to the notification bubble without styles from our side. You can customize the Notification bubble with your CSS.
bubble.className: "_SOME_CLASS_NAME"
bubble: {
    ...
    // optional - clear initial styles
    // Usage for custom styles by className ONLY. Default undefined
    className: 'some-class-name',
    ...
}
NOTE! The parameters
bubbleClassNameis still working, but will beDeprecated. Use the parameterbubble.classNameinstead.
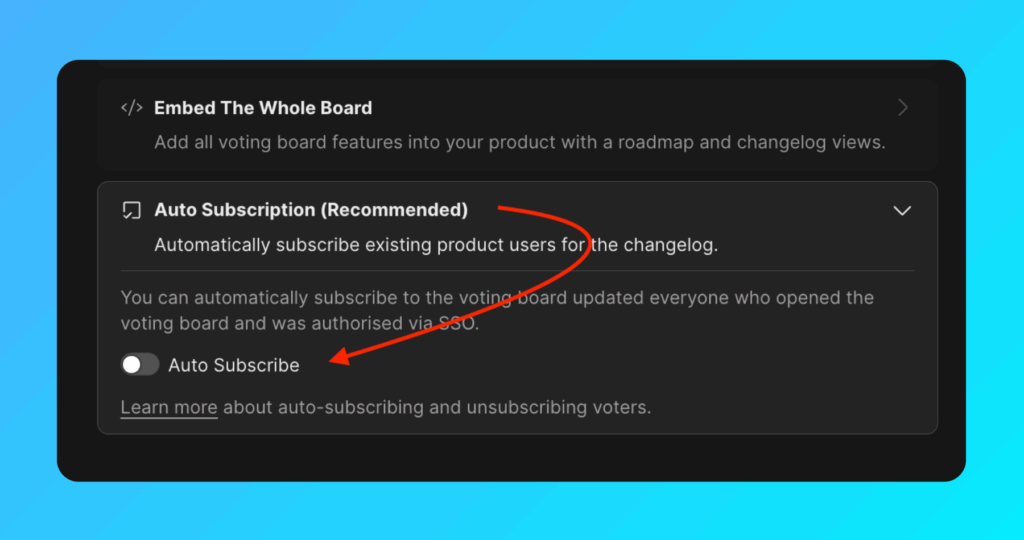
How customers’ subscriptions to release notes work
One of the most useful features of voting boards is the automation of release notes.
Since the voting board is a separate application, and to avoid constantly importing lists of new active users of your product, the auto-subscription to release notes is enabled by default.
And there are following conditions to subscribe users automatically:
- you need to send users data to Ducalis via Widget (user.email + user.hash are required),
- user should open a widget or a board frame.
With these two completed conditions users will be subscribed to release notes automatically.
BUT! in order for those users to receive release notes updates, you need to set up a custom email domain.
Useful links: