Ducalis Prioritization Workflow
In this article, we’d like to describe the process of issues prioritization with Ducalis and how we build our everyday work around it.
One-Time Set-Up
Step 1: Connect a Tracker and Invite Members
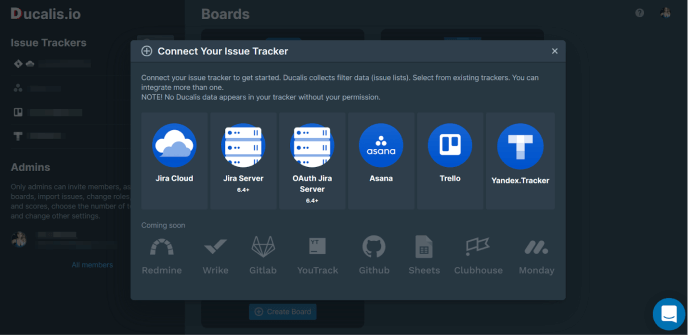
Prioritization starts with What and Who. First, integrate management tools where your teams keep track of their tasks to prioritize them all in one place.
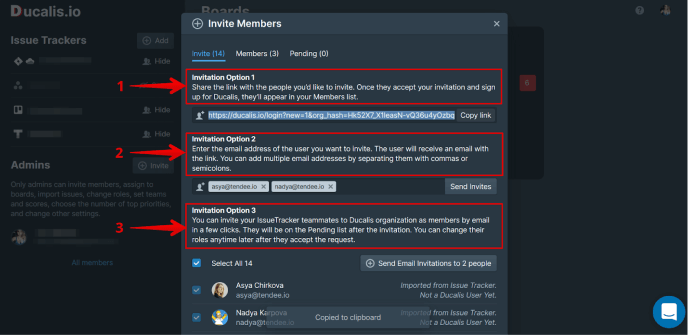
Then, invite all your team members to participate in issue evaluation. Prioritization should be collaborative and works best when all the diverse viewpoints are taken into consideration.
Step 2: Create a Board
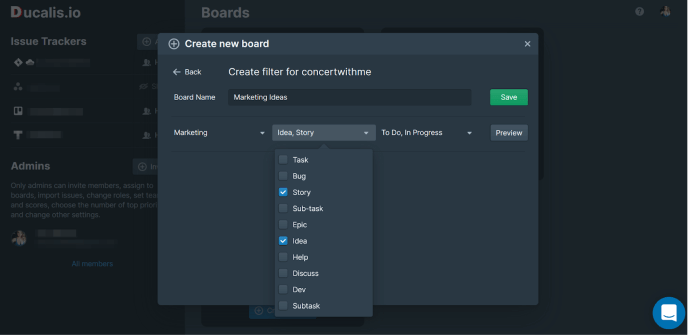
A board in Ducalis is a set of issues, users, and evaluation parameters like formula and criteria. When creating a board, you filter the issues you need to prioritize in a certain way.
Create boards for different issue types, scopes, purviews, teams, projects, and so on. It depends on your product and management style.
Step 3: Manage Users and Add Criteria
A team is a group of board users that look at the product similarly and will evaluate the issues with their unique set of criteria. Group people from Business, Marketing, Sales, Product, and other purviews to collect expert opinions.
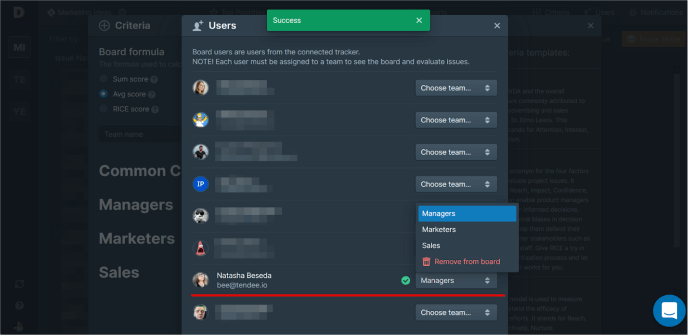
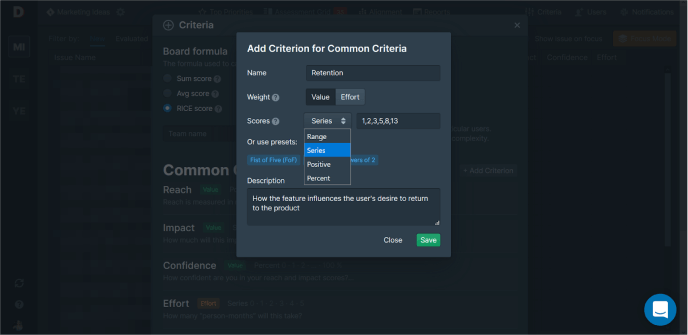
When team roles are assigned, go on with criteria—create custom or choose from our template. You can assign team-specific criteria that only one team will use. For example, you may create a DevOps team and add Time and Complexity as team-specific criteria. Thus only users assigned to the DevOps will evaluate them. You can also add common criteria, that every user will have regardless of their team.
Step 4: Set Up Reminders and Score Expiration Time
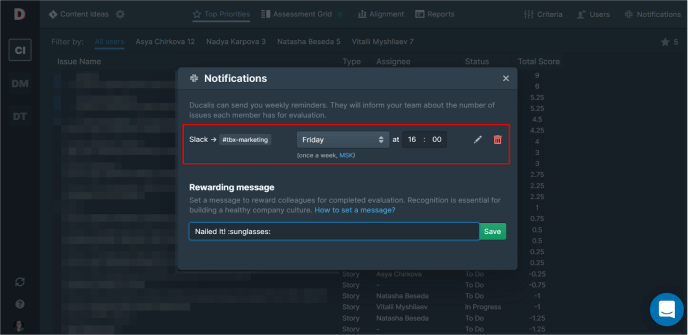
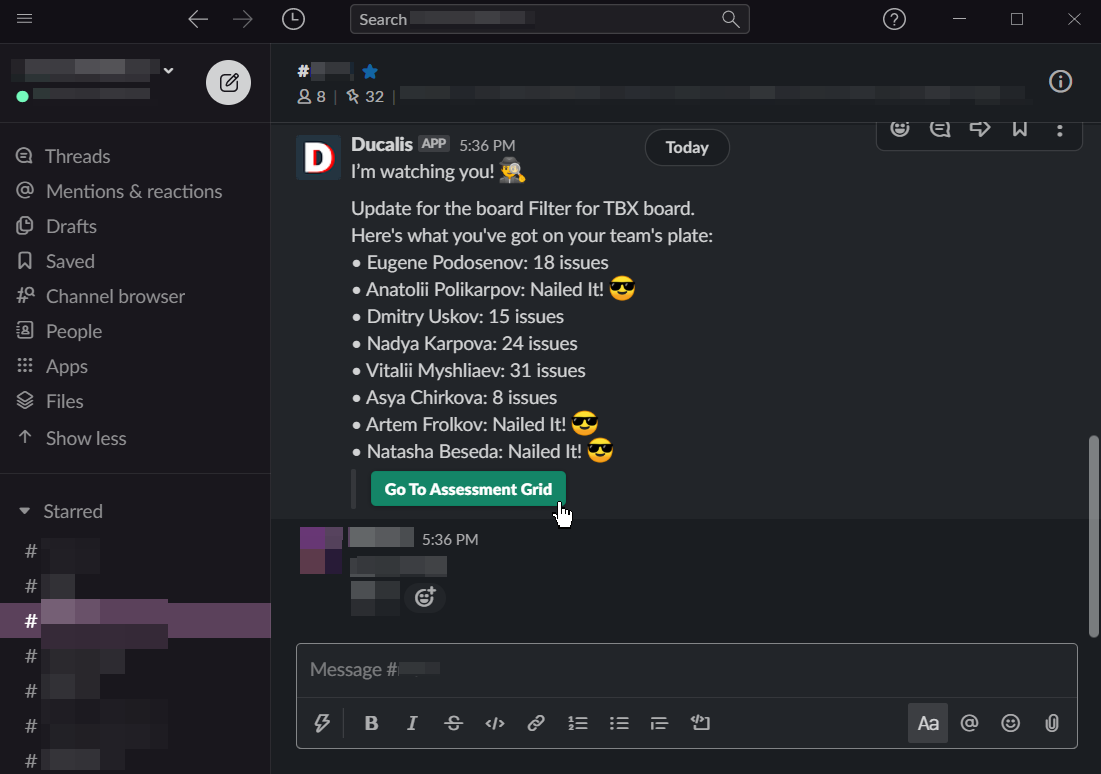
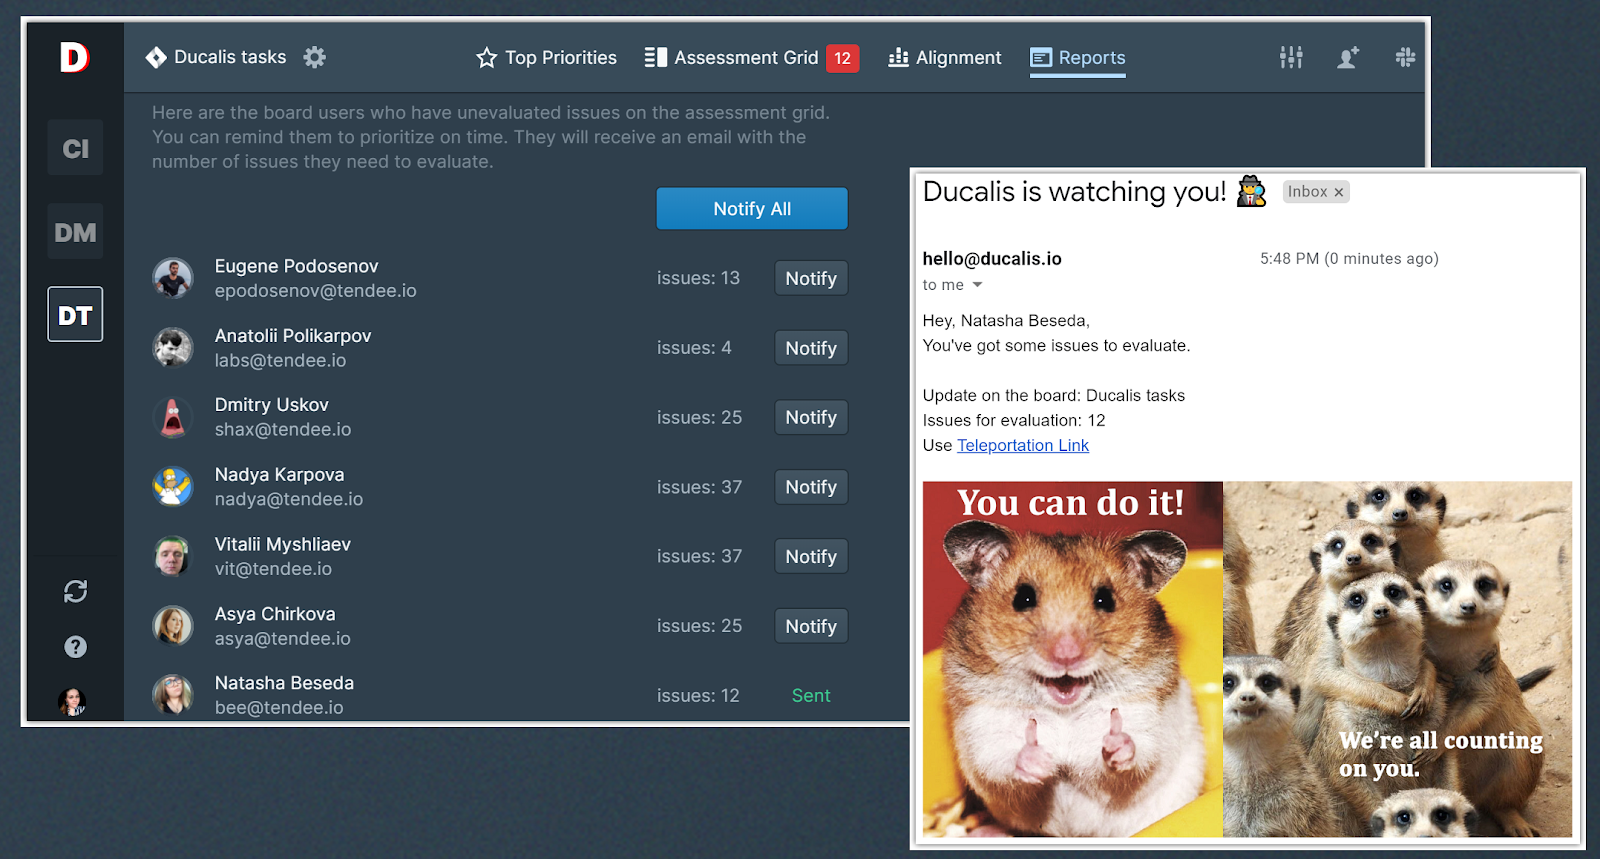
Reminders play a huge role in your team’s prioritization routine. They remind you to pay attention to the backlog and gamify the process. Praise the teammates in front of others for their great job. Set an amusing rewarding message to make people compete in a funny way.
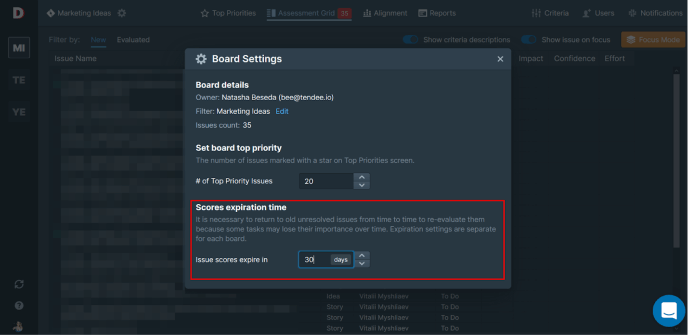
Some issues may take too long to be done and may lose their importance. Set the scores expiration time to re-evaluate the long-living tasks. Re-match them with the project’s priorities and decide whether to delete them or continue carrying out. Choose the number of days you want the scores to be valid. It may be a month or two, depending on the development approach.
Workflow
Step 5: Evaluate Issues
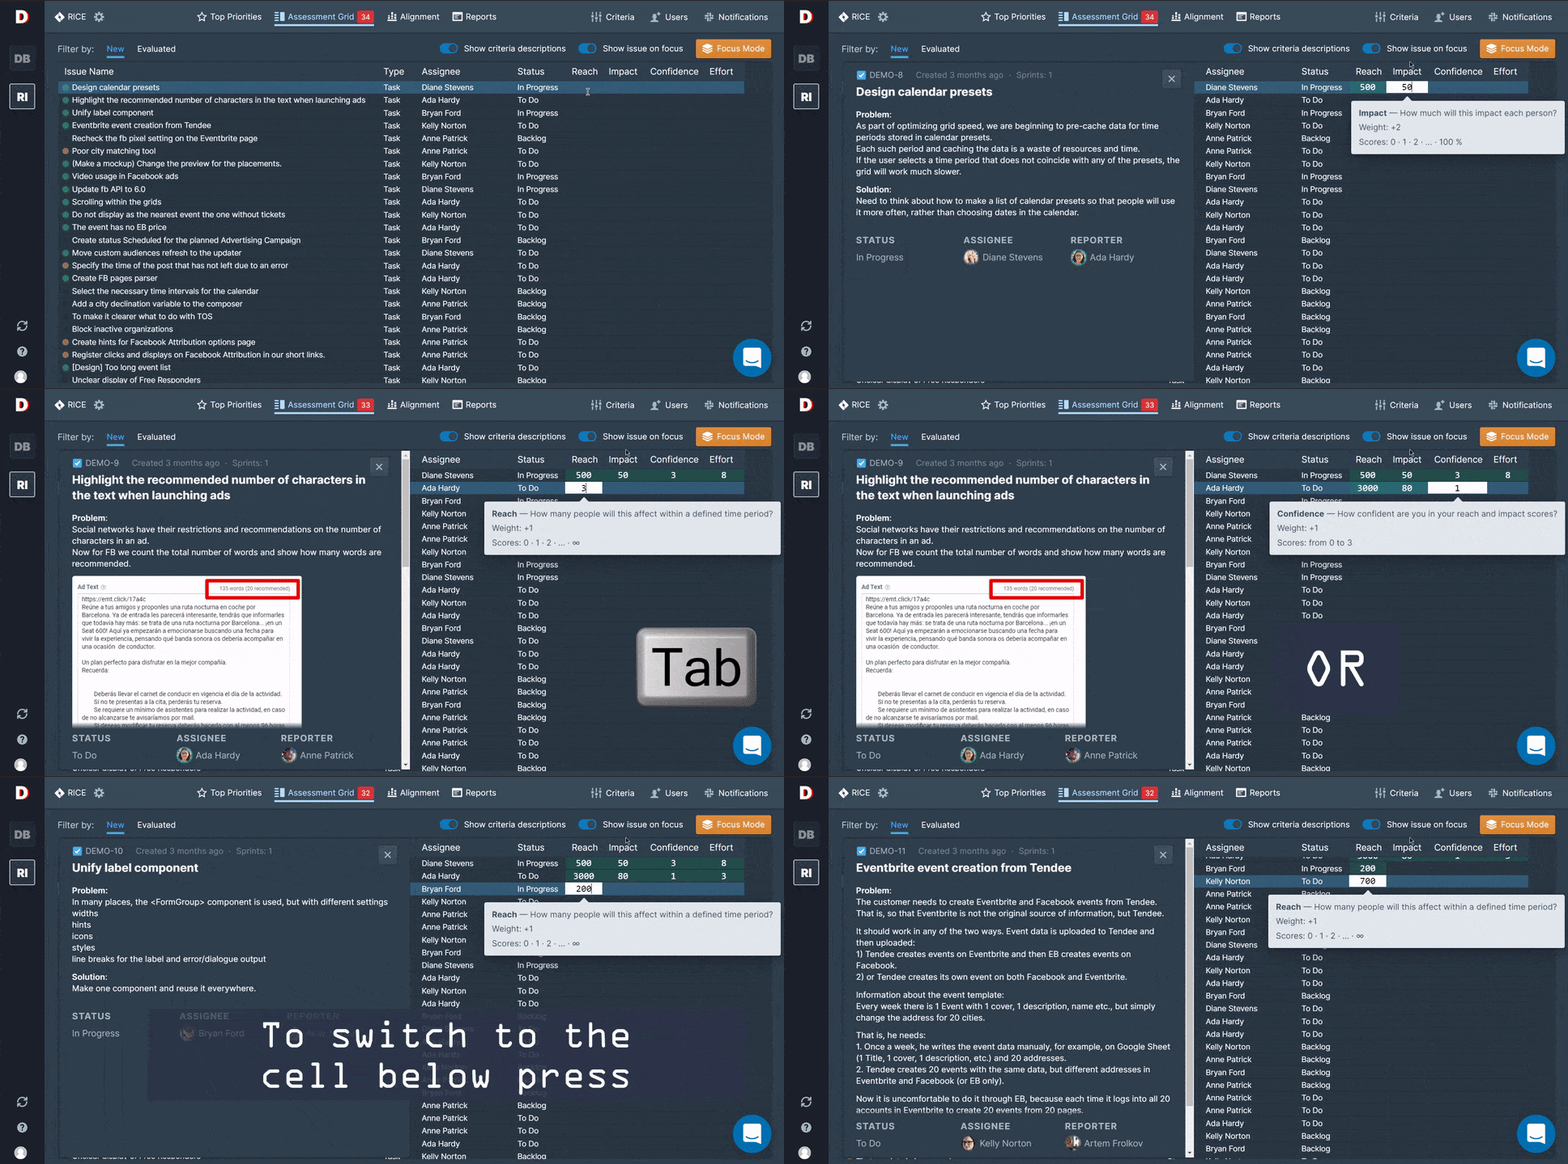
When all the prior settings are done it’s high time to begin the grooming. Go to the Assessment Grid. Use toggles top right to turn criteria and issue descriptions on or off. Having full context always visible helps to make the prioritization process faster and easier. You can also use Focus Mode to study each issue separately on a full screen for the sake of better concentration. Type the numbers you’ve chosen for the scores and use hotkeys to navigate the cells. Go to the tab Evaluated to see or change the scores you have assigned.
P.S. Don’t neglect those moments when you don’t understand an issue or a criterion. Ask questions, state your opinion, and lead constructive discussions━that’s the principal part of the method.
Step 6: Analyze Priorities and Alignment
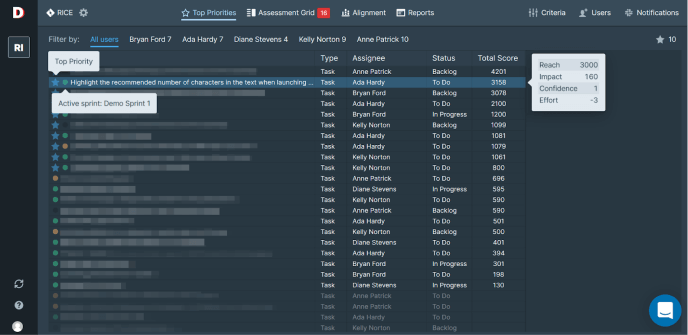
After the whole team has considered the backlog, examine your project’s top. The total score isn’t a stringent procedure to be followed. No tool will determine your actions instead of you. Seldom crucial tasks may be underrated because criteria don’t fit, the issue itself was poorly described, your team doesn’t entirely understand it, or your strategy abruptly changed overnight due to some news.
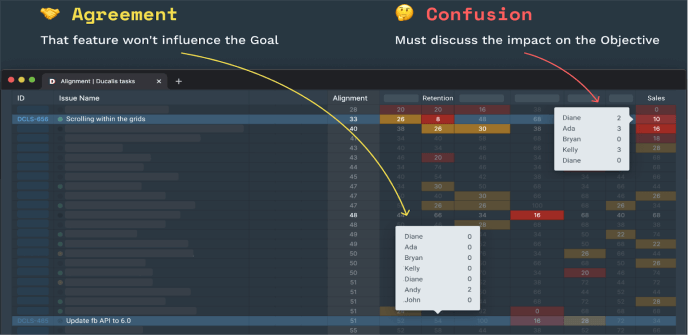
You should also pay attention to the team alignment. Use the Alignment page to analyze how your team agrees in scores and understands the criteria. We insist you discuss tasks and criteria that are highlighted red.
Step 7: Plan the Sprint
Every new sprint starts with the briefing. Will it be long and tedious, or swift and harmonious, depends on the team. If all the members know what’s on the team’s plate, you will enlist issues for the sprint without any perplexities. Now that the coworkers are synced and have a clear understanding of who is doing what and why, the project’s life will run smoothly, and people will know whom they might ask for help or offer one.
Step 8: Get the Grooming Reminders
As days go by, the set of issues in your backlog changes. New tasks appear, and previous ones may need re-evaluation. The end of the sprint means the team must go back and decide their new plans. A reminder you receive in the channel is a signal to return to Ducalis and devote some time to your prioritization routine. You can also send personal reminders manually during the sprint and brighten up the workdays with a fun notification.
Long Story Short
Prioritization takes about 1 hour a week and consists of 4 steps:
- Backlog grooming
- Priorities analyzing
- Sprint planning
- Returning to grooming
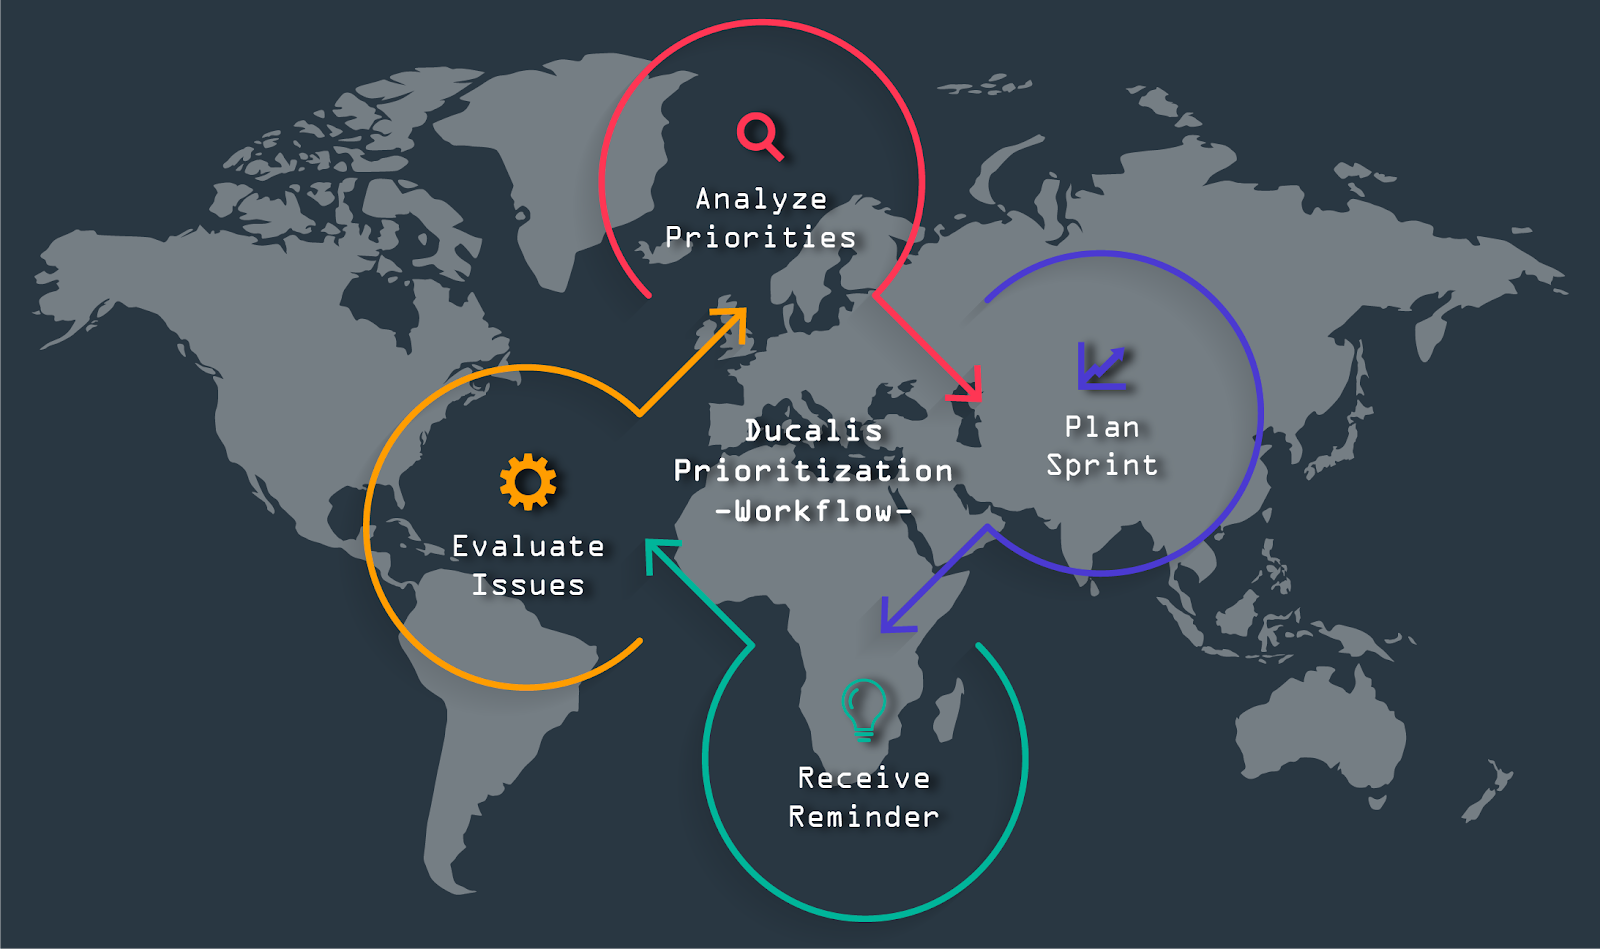
For sure, sometimes it may take longer, but at the end of the day, it’s better to spend a few hours on careful planning than waste days and days on useless work.
