To sync data from Ducalis, you must set fields that will receive the data you sync from Ducalis. The process is the same for both Cloud and Server versions.
Two options for setting up fields that will receive data
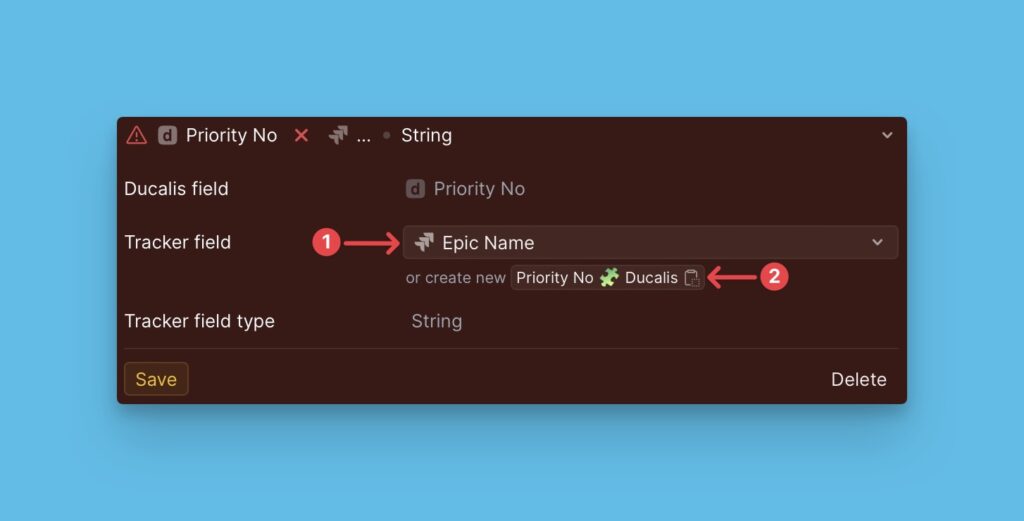
There are two options for getting data from Ducalis to Jira Cloud:
- Field Mapping (1)–You don’t have to create new fields in Jira; you can use existing fields in Jira
- Custom Fields Creation (2)–You have to create new fields in Jira that will receive the data you sync from Ducalis.
You can choose the one that suits you best.
Fields Mapping
In a case where you have a lot of custom fields in Jira and you do not want to create more fields, you can just map the Ducalis field with a field that you already have in Jira.
Here, you map the Ducalis field that you will export data from with the task tracker field that will receive the data.
How to map Fields
In Ducalis, go to the Sync settings.
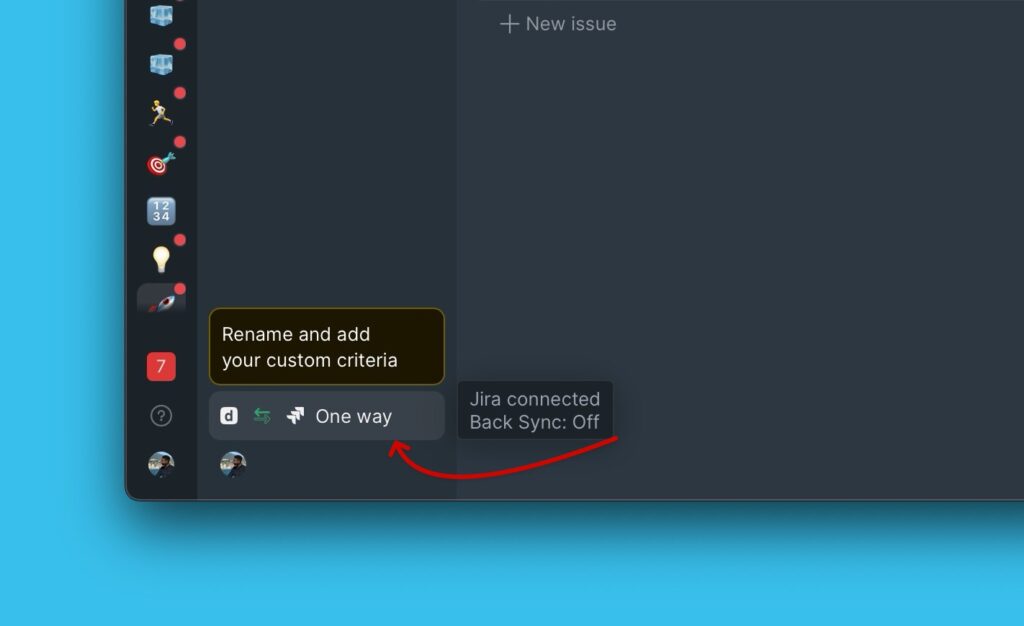
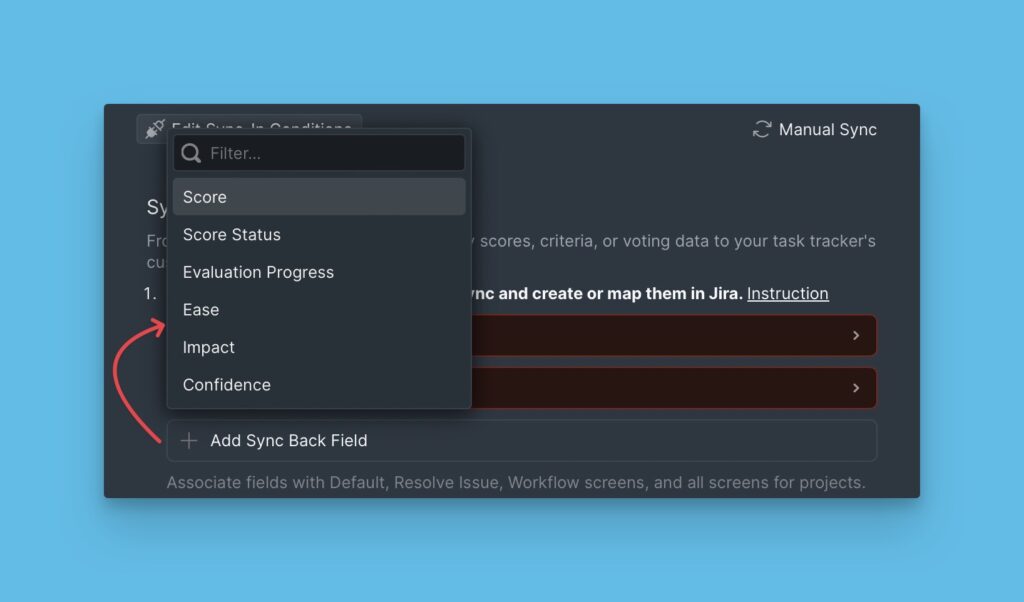
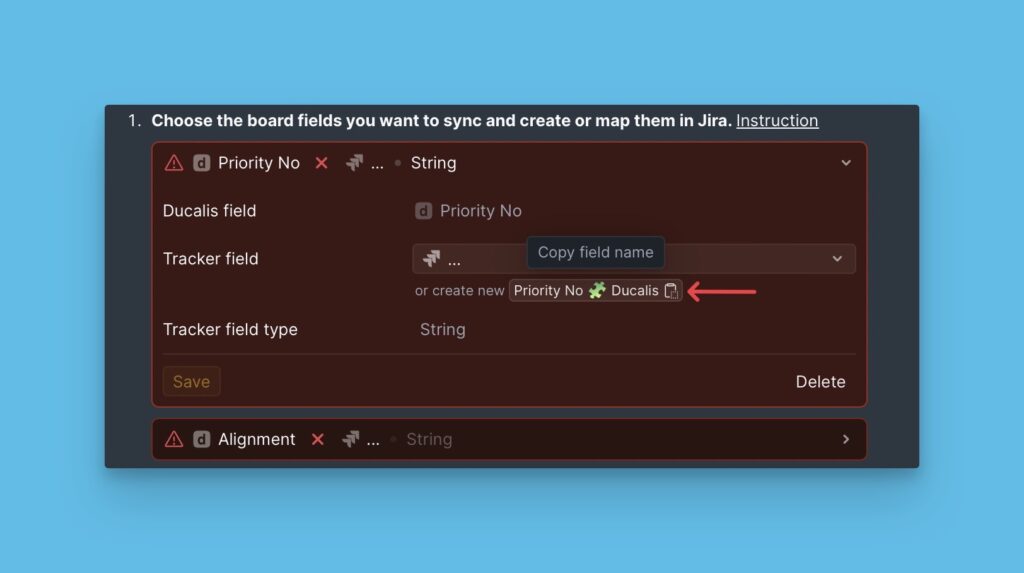
Scroll down to Sync-Back fields and start mapping your fields.
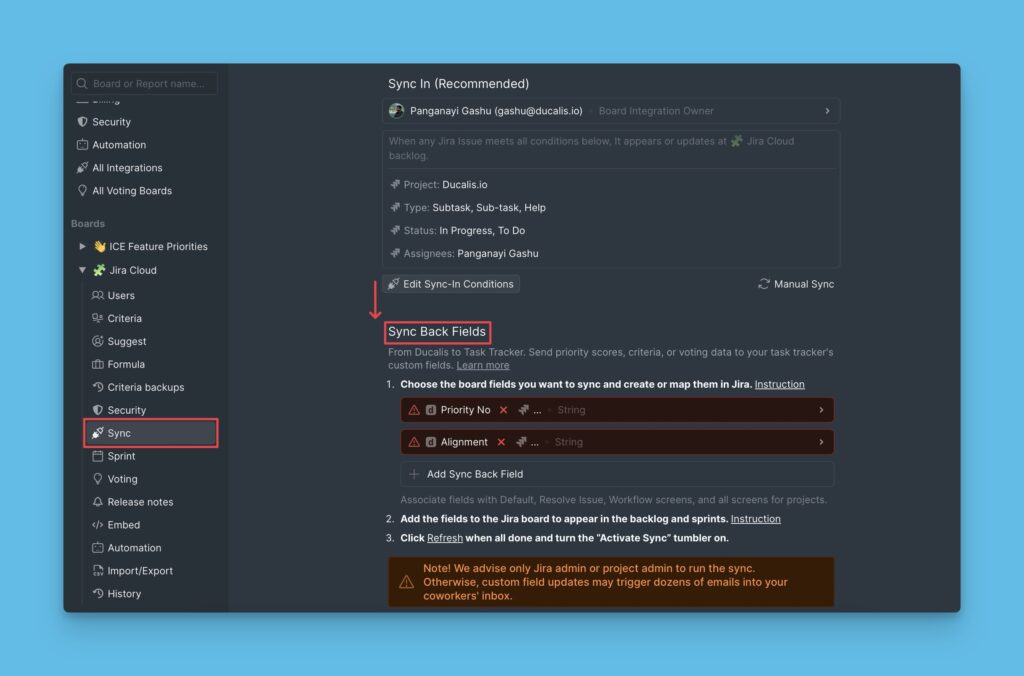
You can use the default Ducalis fields that you find or delete them.
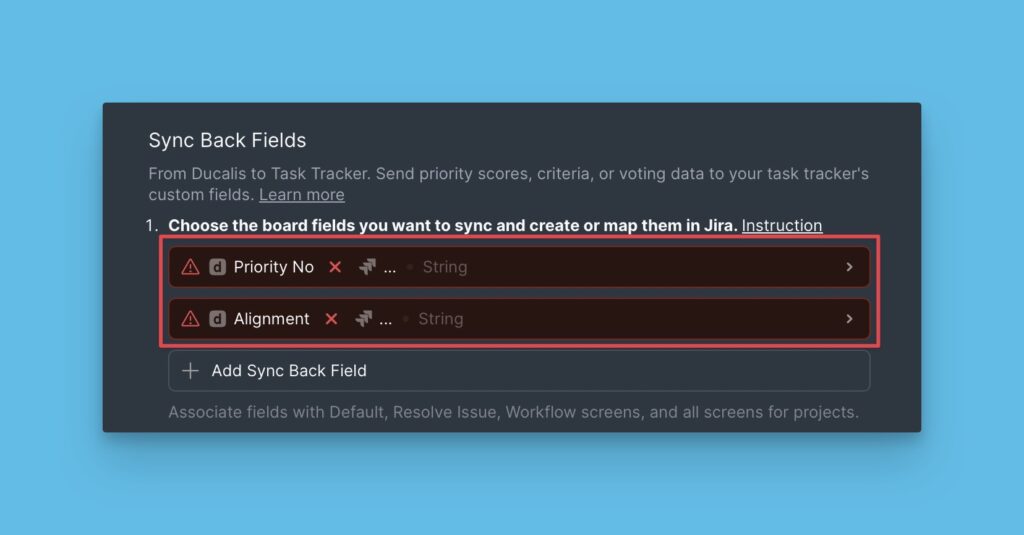
You can also choose another field if the one that you want to sync data from is not among the ones given.
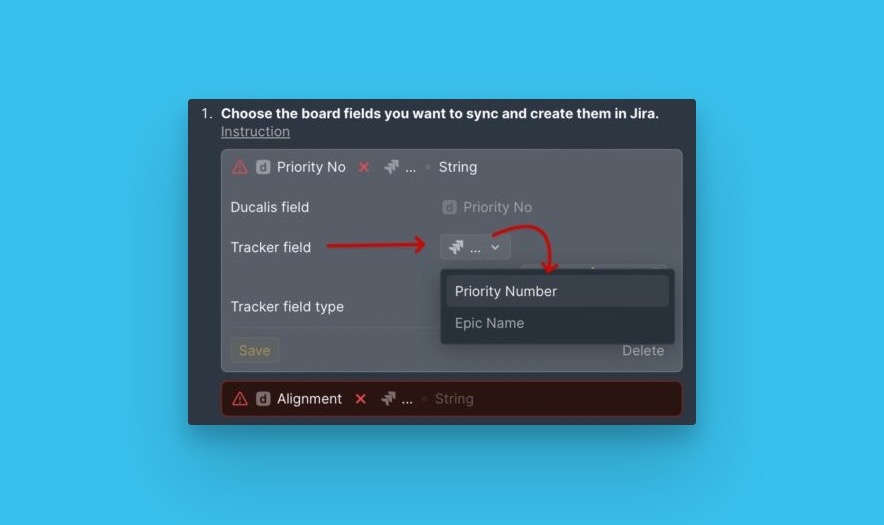
Next to the Tracker field, click to open the dropdown list of fields from your tracker that you can use and choose the field that you want to map with the Ducalis field
Then click Save.
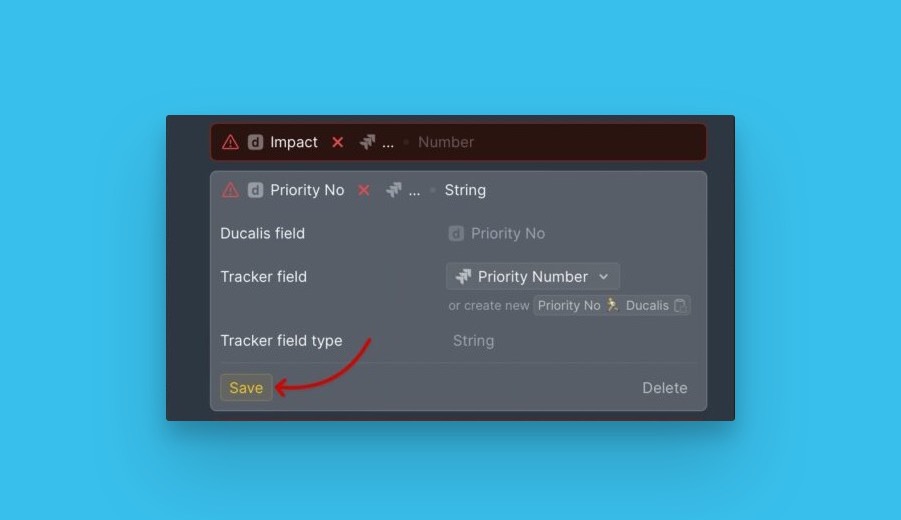
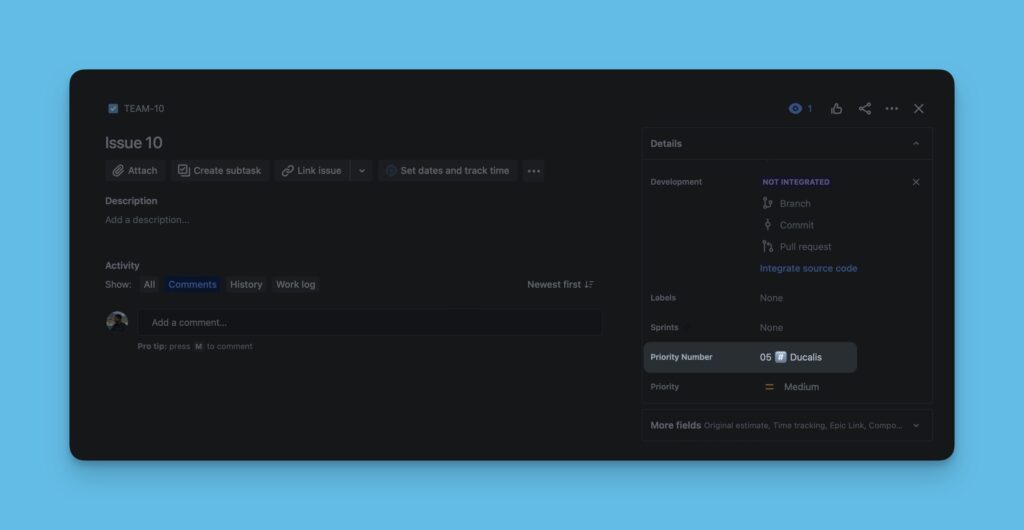
Each time back-sync takes place, data from the Ducalis field will be synced to this field
Custom Fields Creation
Here, instead of using the existing custom fields you have in Jira, you create custom fields in Jira that will receive the data you sync from Ducalis.
There are two kinds of Jira projects:
- Company-managed software.
- Team-managed software (Jira Cloud only).
Check your type of project
Firstly, you should learn the type of project you imported issues from Jira to Ducalis.
Then choose one of the instructions depending on the type.
To learn the type of project, go to All Project and check the column Type.
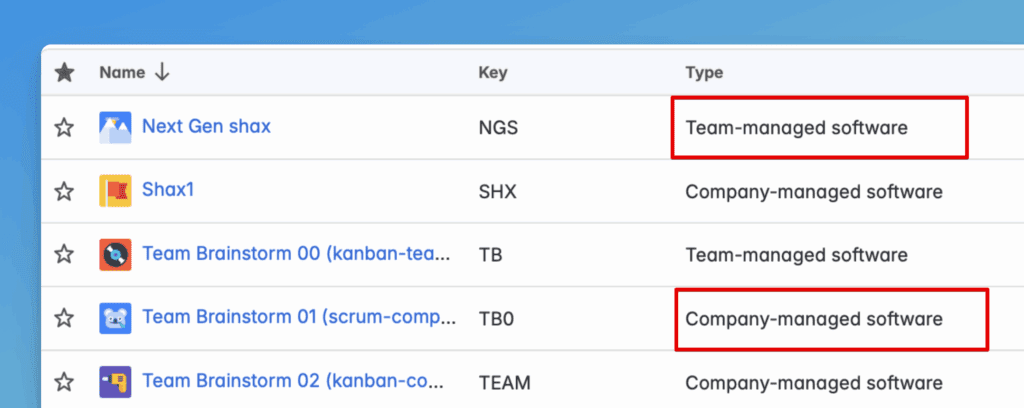
Now, you can choose the Instruction – for a company-managed project or a team-managed project.
Custom Fields Creation in a Company-managed Project
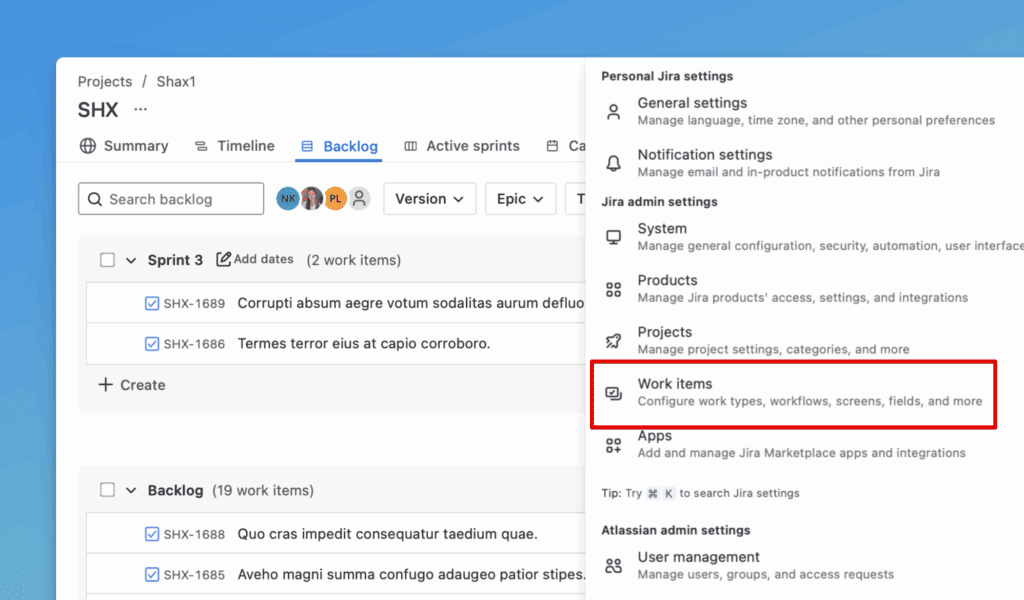
- Go to Settings (cog button next to your avatar, top right corner).
- Go to Work Items in Settings.
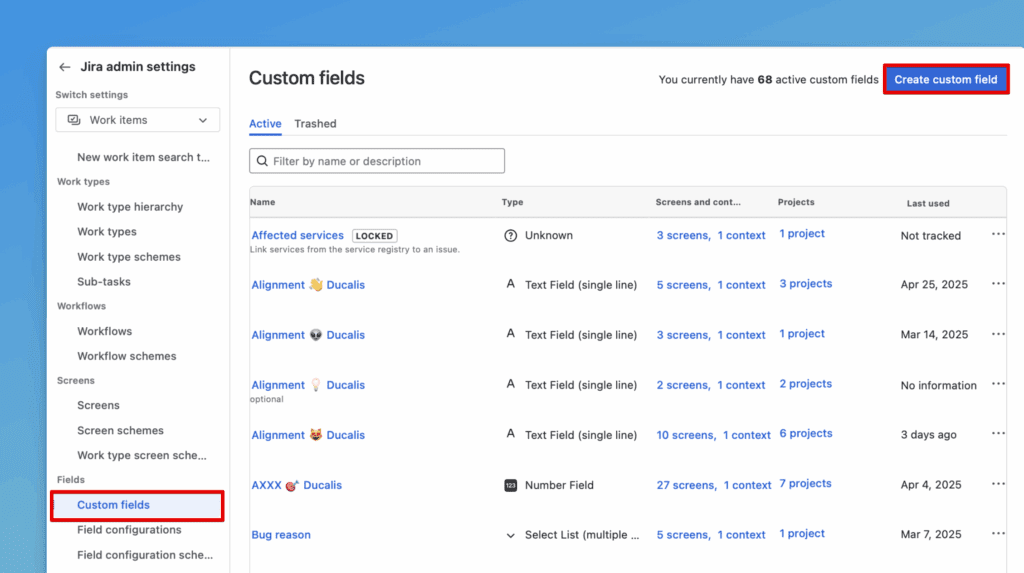
- Go to Custom Fields in the menu on the left.
- Click Create custom field in the top right corner.
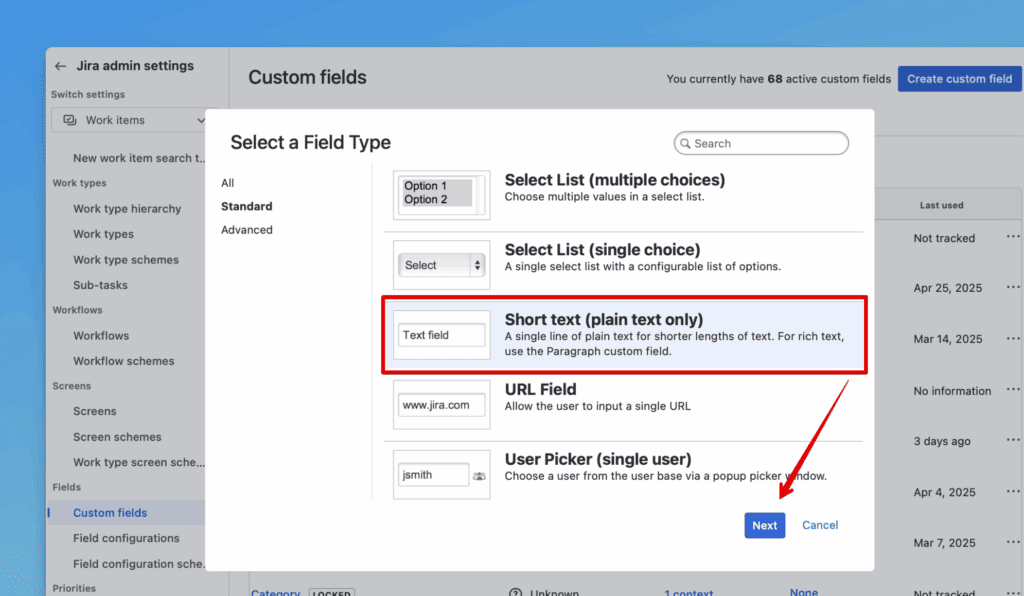
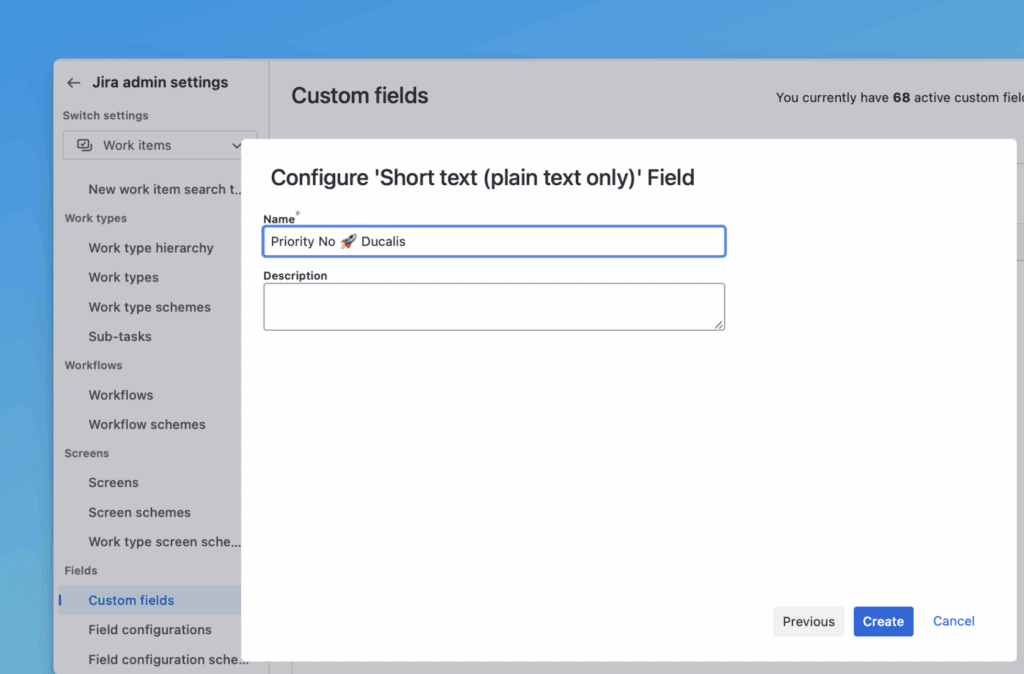
- Choose Text Field (single line).
- Click Next.
- Copy the field name from sync settings in Ducalis.
- Go to Backlog Management settings, then Sync Back Fields.
- Then click on the copy icon to copy the names. Your field names depend on your board’s emoji.
- Paste in the field name in Jira and click Create.
- Associate the field and click Update:
- Default Screen
- Resolve Issue screen
- Workflow Screen
- All screens with the project keys for projects you have in the Ducalis board filter.

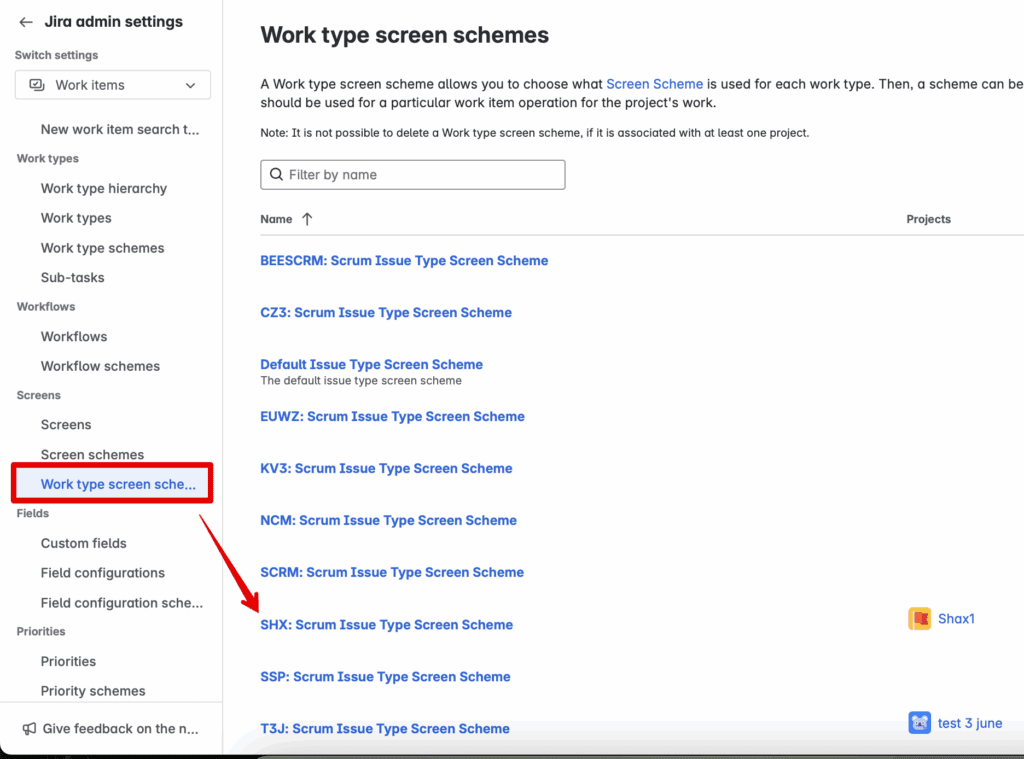
- If you don’t see your project key, it may mean that it shares settings with another project.
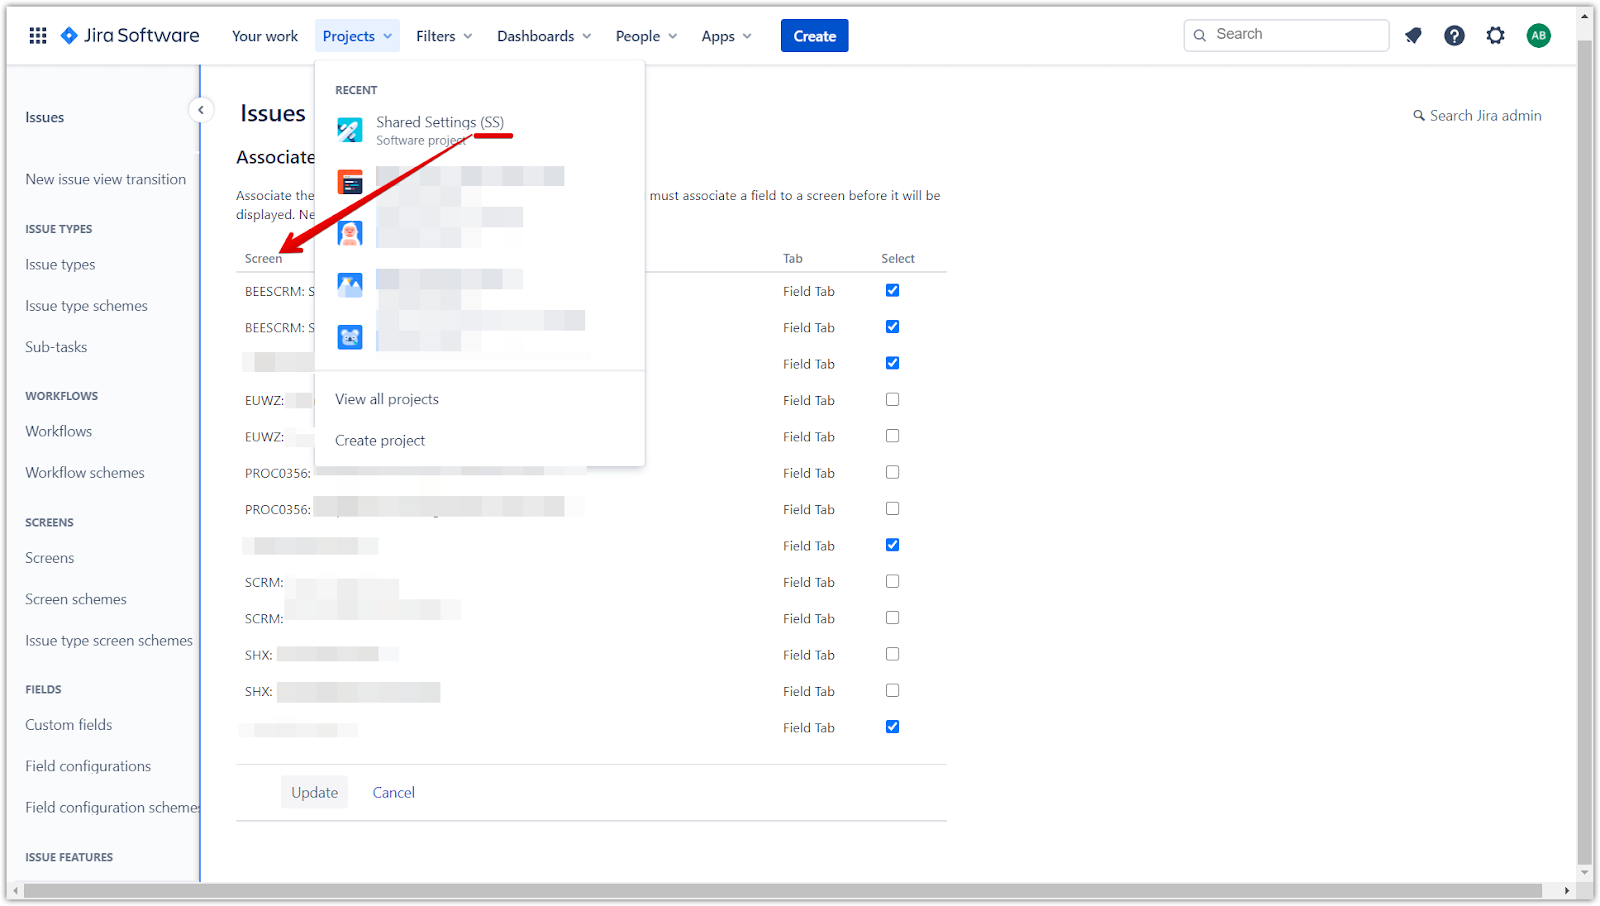
- Open Work type screen schemes in a new tab. There, you will see what project key relates to yours.
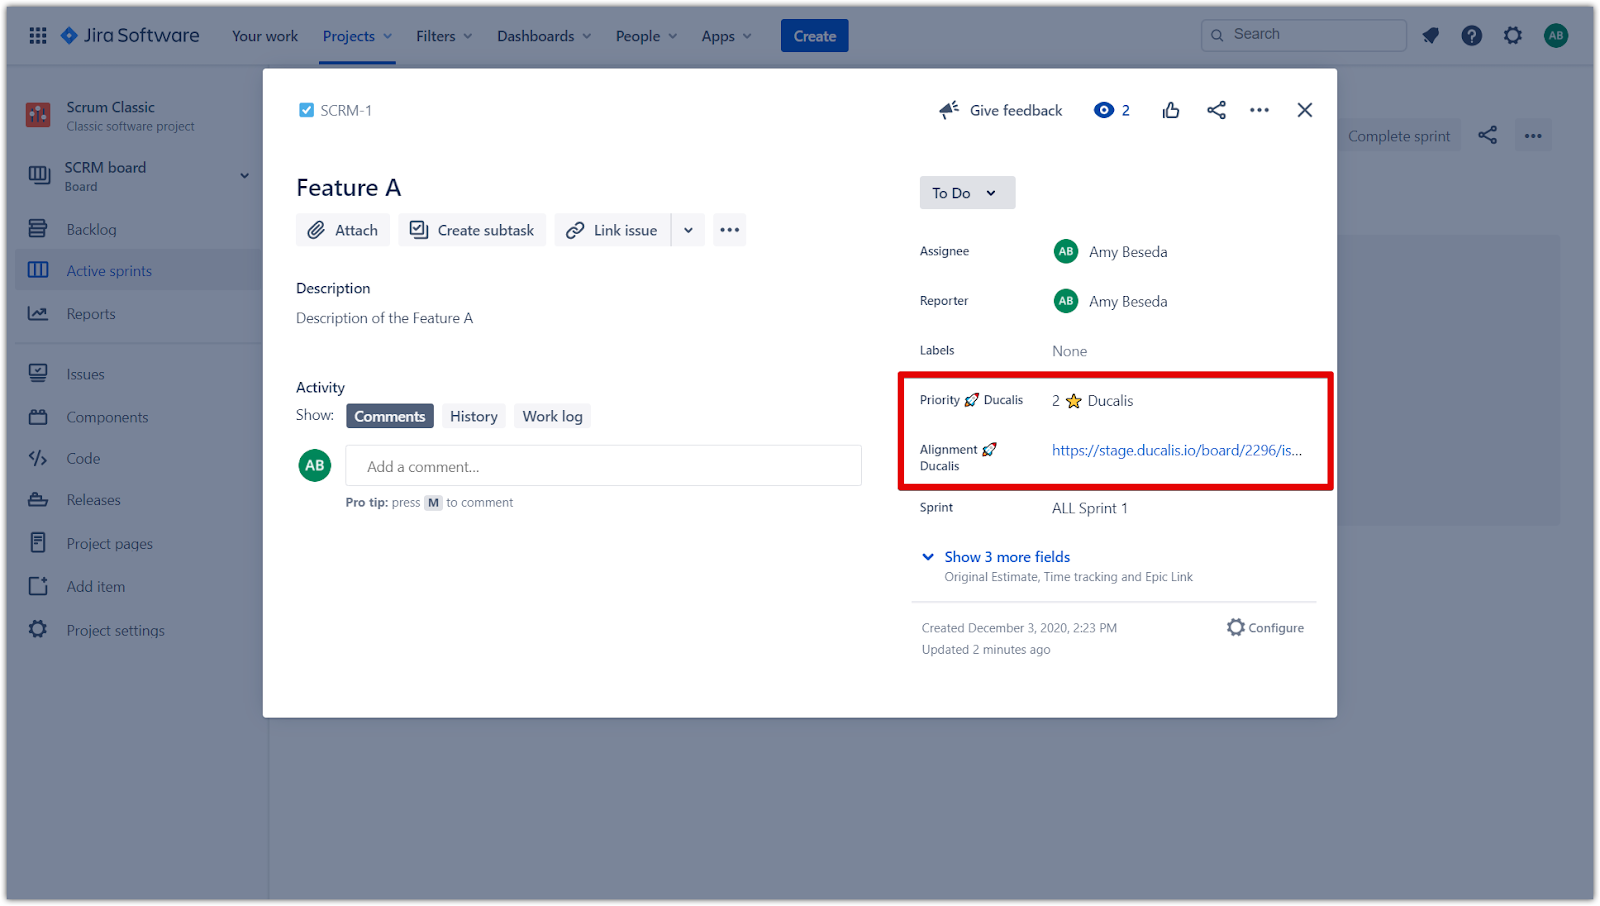
You will see the ranking and alignment analysis link inside the issues.
Custom Fields Creation in a Team-Managed Project
- Click on Projects (left menu). Choose the needed project. Click on three-dots and choose Project Settings.

- Choose any work type you’re prioritizing in Ducalis.
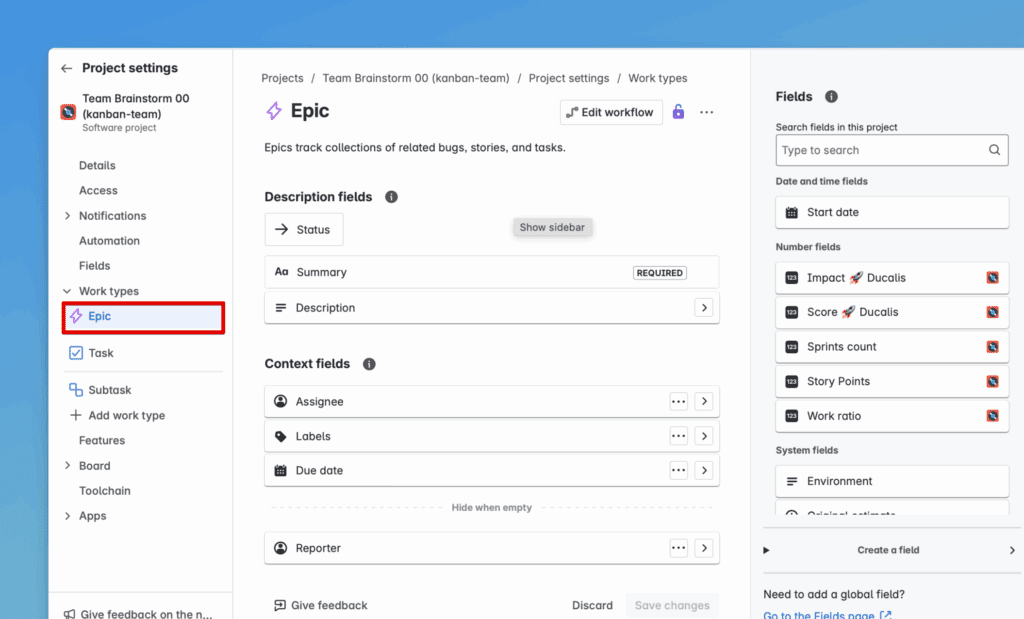
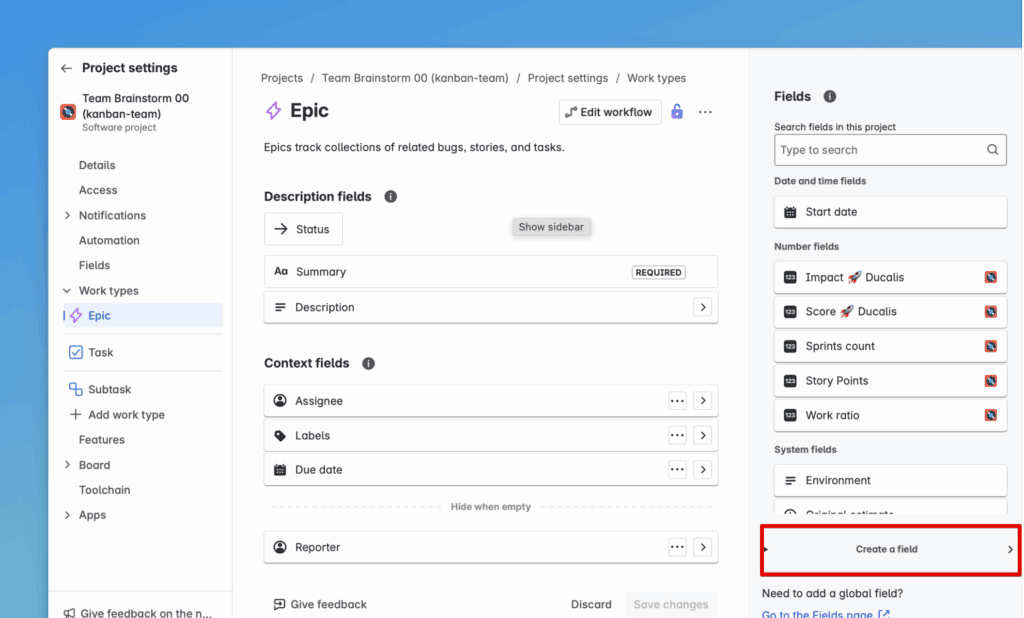
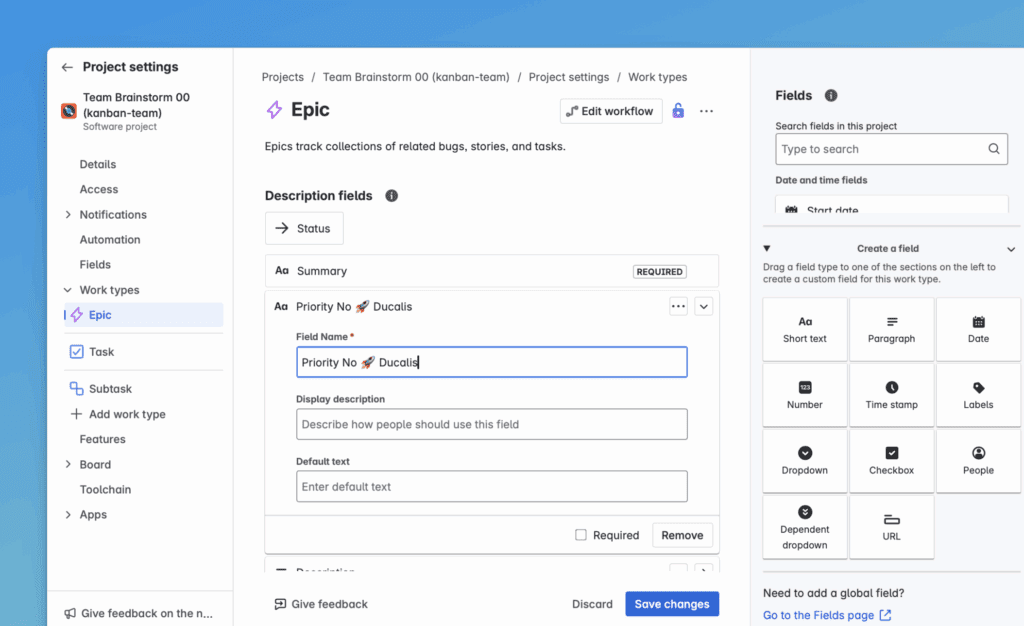
- Click Create a field.
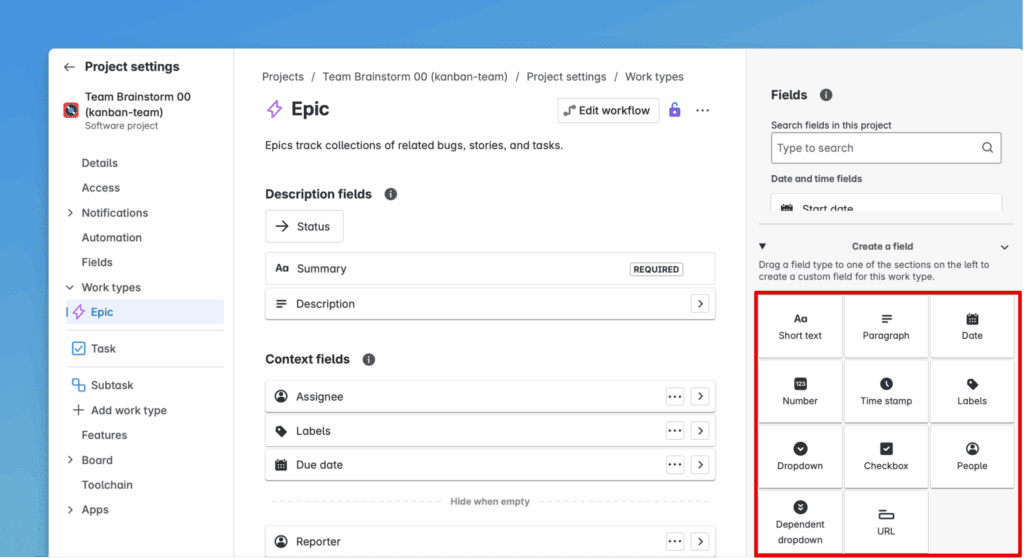
- Select the filed type. It depends on what data you want to sync.
- Enter the field name and click Update.
- Add this field to all issue types in all project(s) used in the Ducalis board.
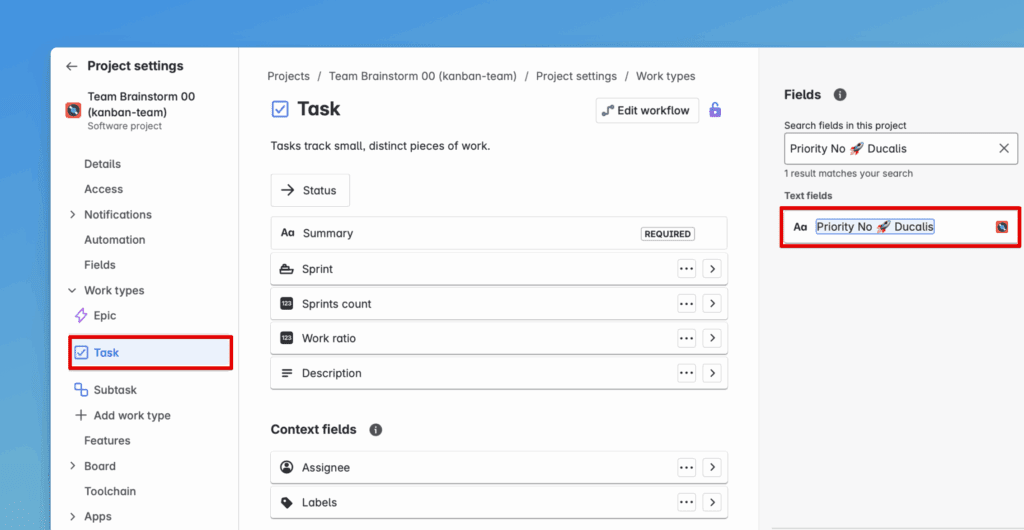
For example, if you use Project 1 with the issue types: Epic, Task, Bug, and Project 2 with the issue types: Epic, Sub-Task, you should add the field to all of them.
- Drag and drop the field into Context fields.
- Don’t forget to click Save Changes for each issue type.
Now this field will appear in Ducalis and you can match fields.
