Back Sync Overview
Sync Back sends prioritization results from Ducalis to Jira Cloud custom fields automatically. Sync data like:
- Total scores
- Priority rankings
- Criterion scores
- Score statuses
- Score percentages
- Ideas Votes
This eliminates manual switching between Jira Cloud and Ducalis when you need to view priorities in Jira Cloud.
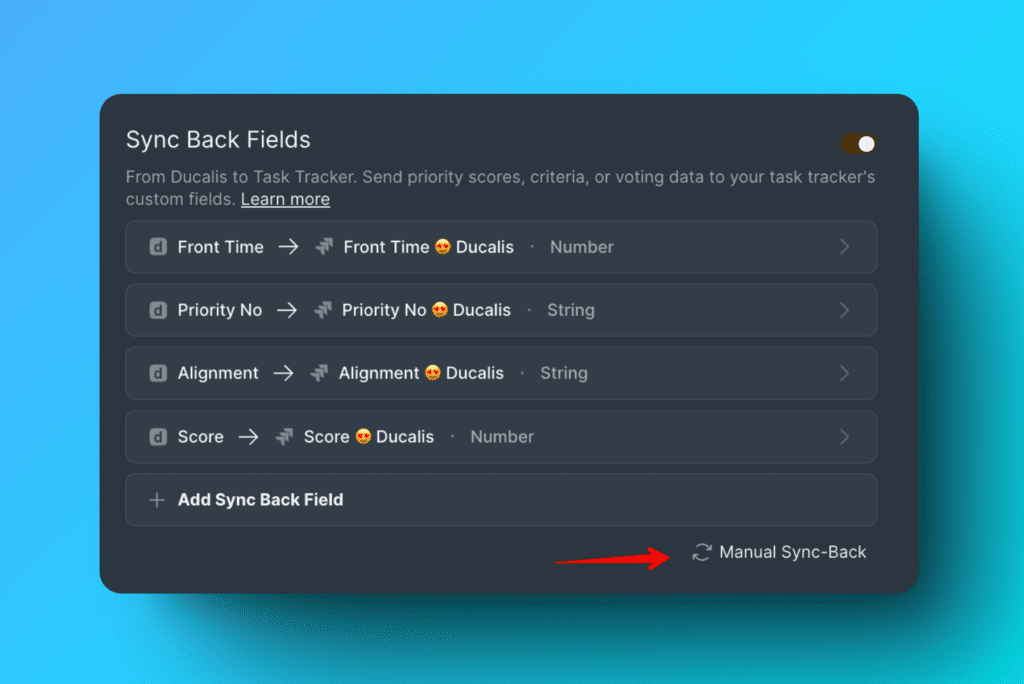
Data syncs to Jira Cloud on the schedule you configure, or you can trigger an immediate sync anytime by clicking Manual Sync Back.
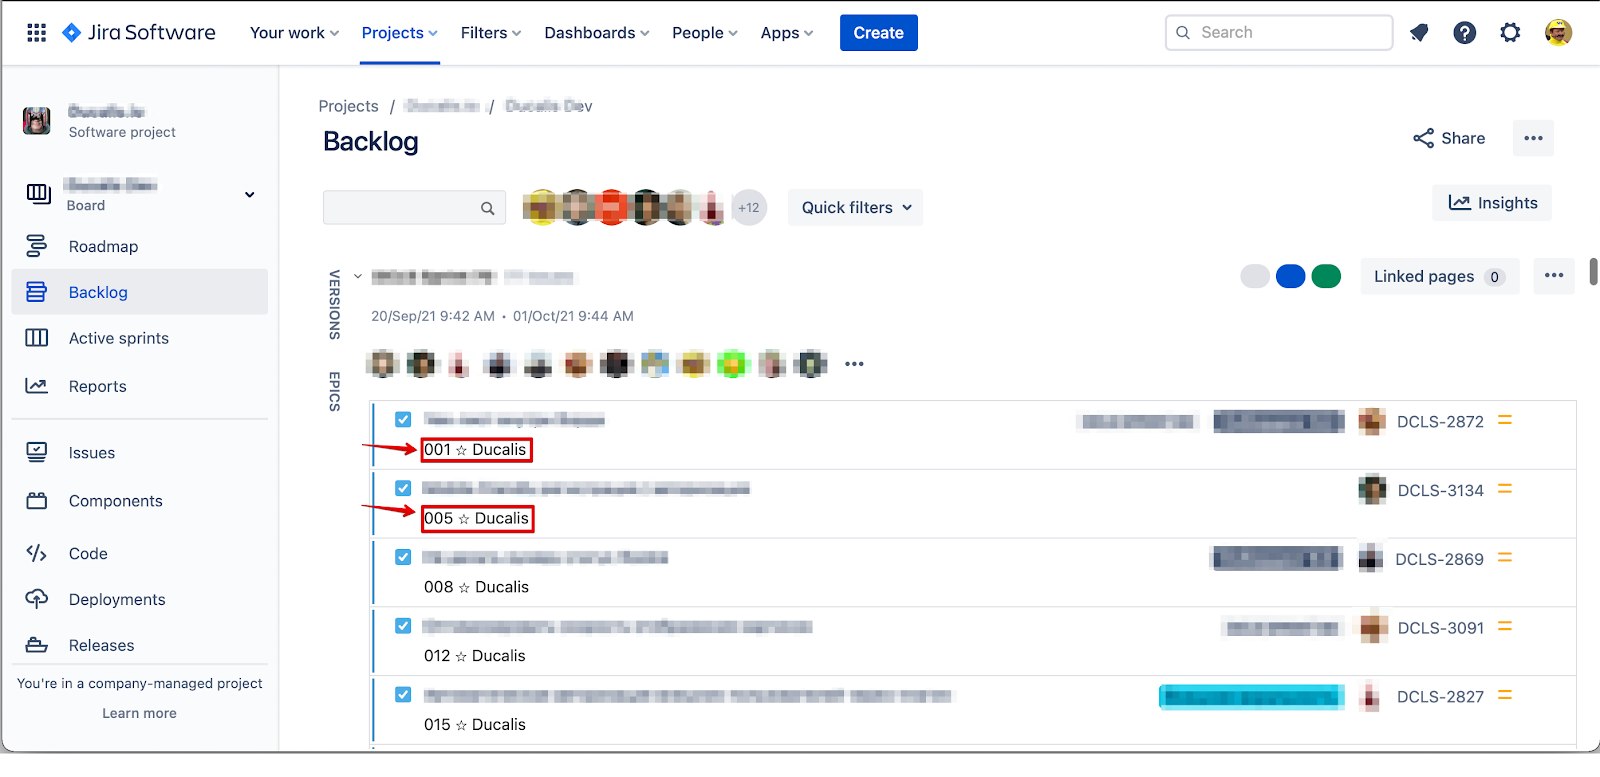
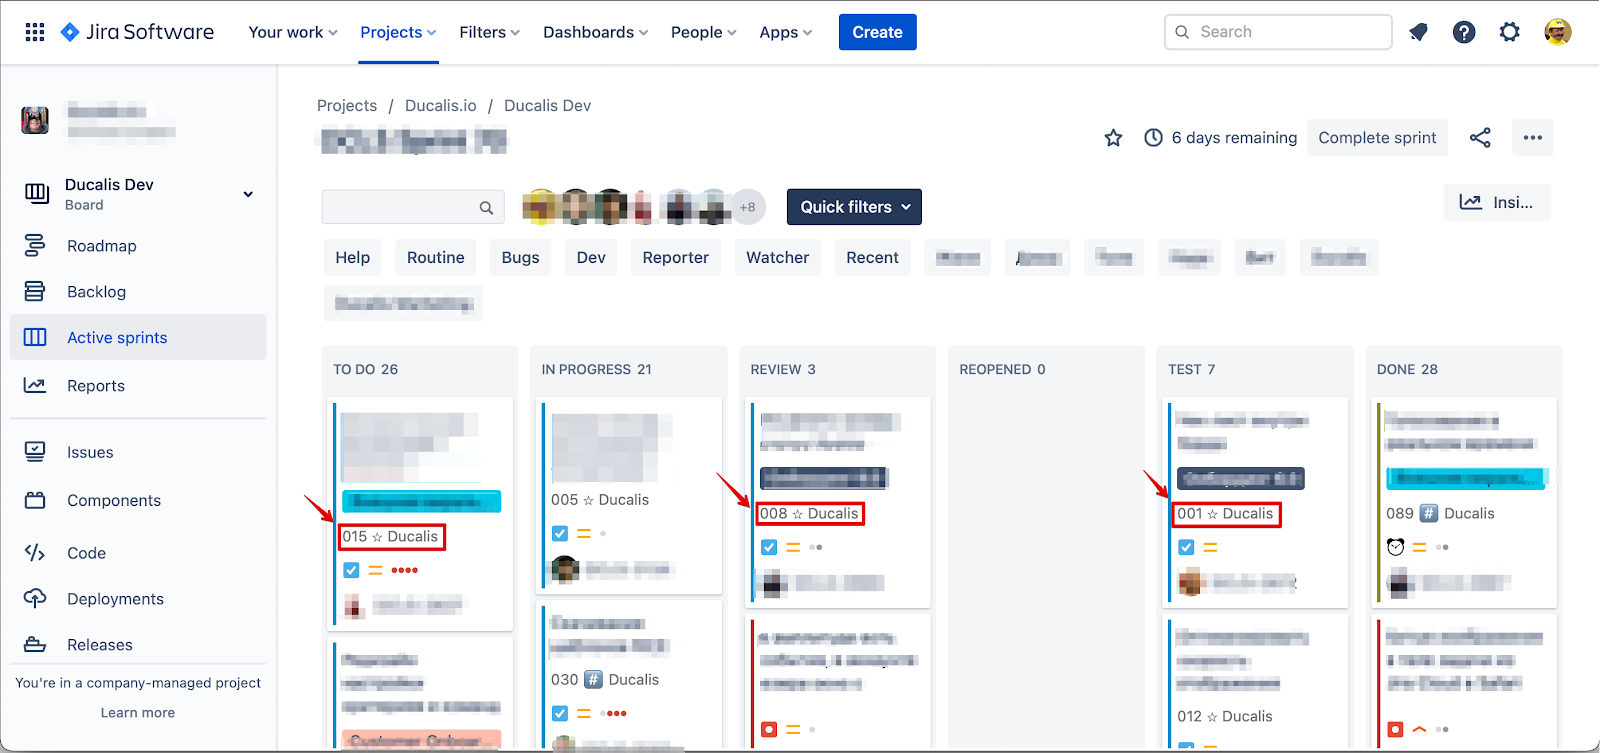
View priority rankings in Jira Cloud
After Sync Back runs, Jira Cloud displays issues with their priority rankings. Top-priority issues appear with a star icon next to their ranking.
You can view priority rankings:
-
In Active sprints.

-
In Backlog, sorted by priority order.

-
On individual issue cards.
Setup overview
To set up Sync Back with Jira Cloud:
- Choose Ducalis fields to sync
- Create custom fields in Jira Cloud (Step 1)
- Add custom fields to your Jira board (Step 2)
- Activate Sync Back
If you already have suitable custom fields in Jira Cloud, see Use existing fields for Sync Back.
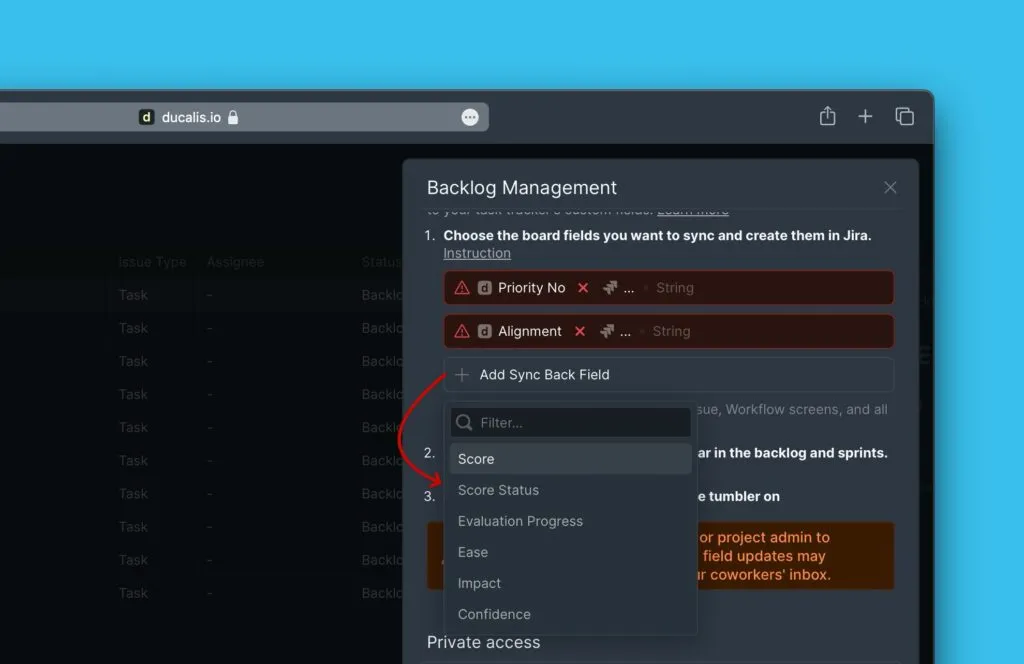
Choose fields to sync
Before creating custom fields in Jira Cloud, select which Ducalis data you want to sync.
-
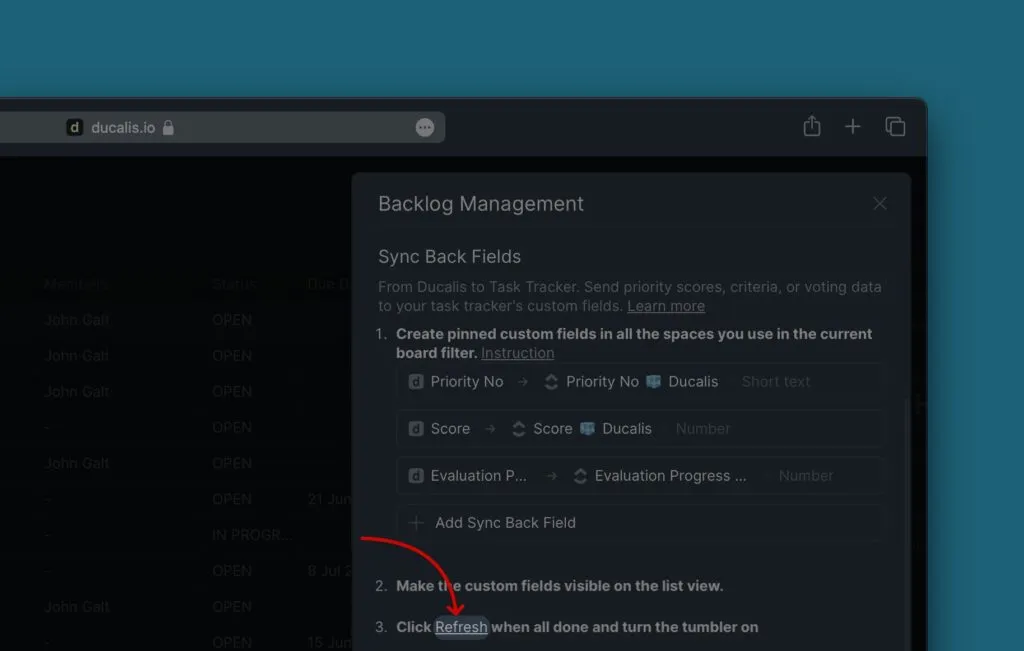
Go to Backlog Management settings.
-
Scroll down to Sync Back Fields.
-
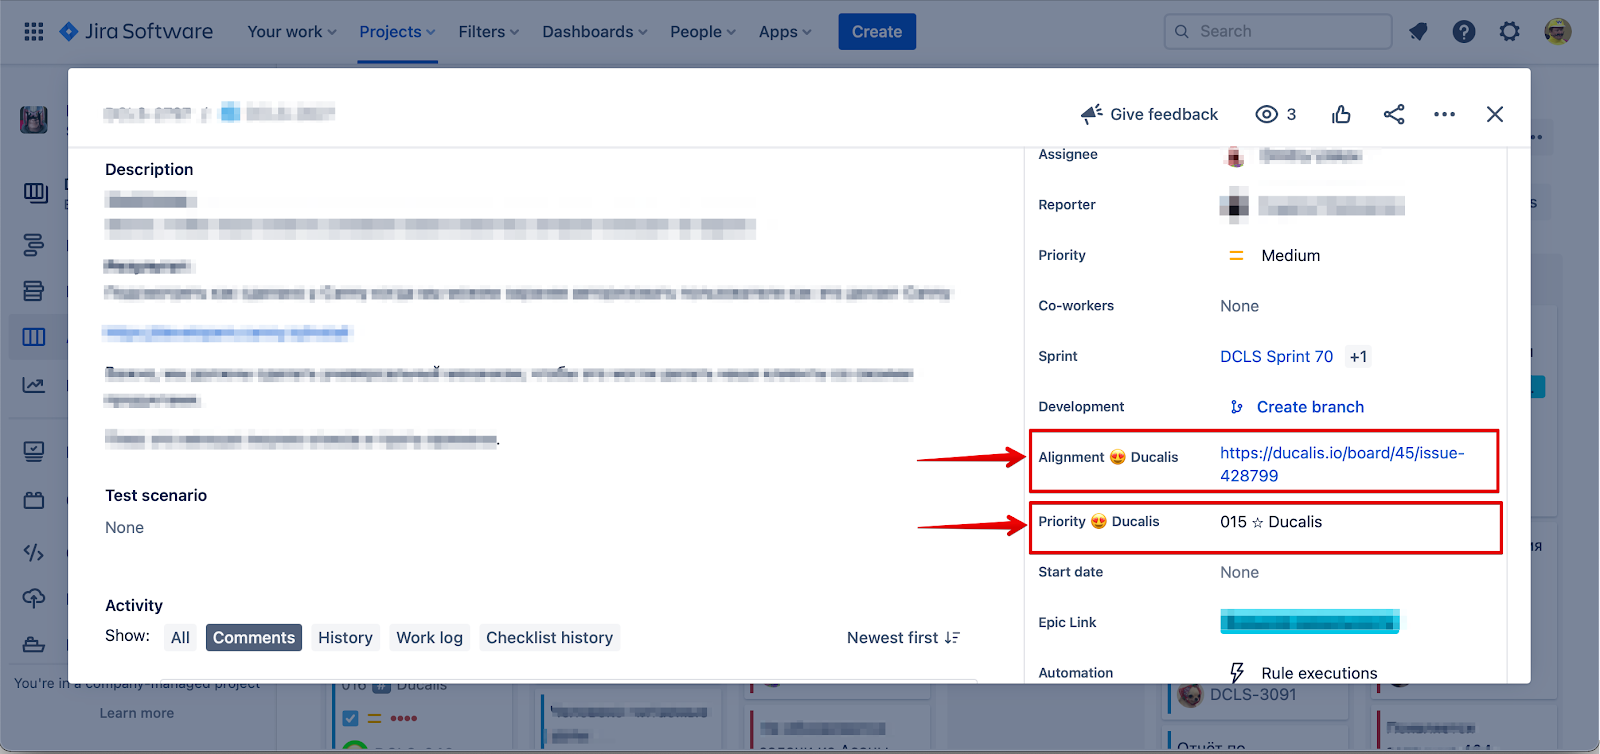
Review the two default fields:
- Priority {emoji} Ducalis
- Alignment {emoji} Ducalis
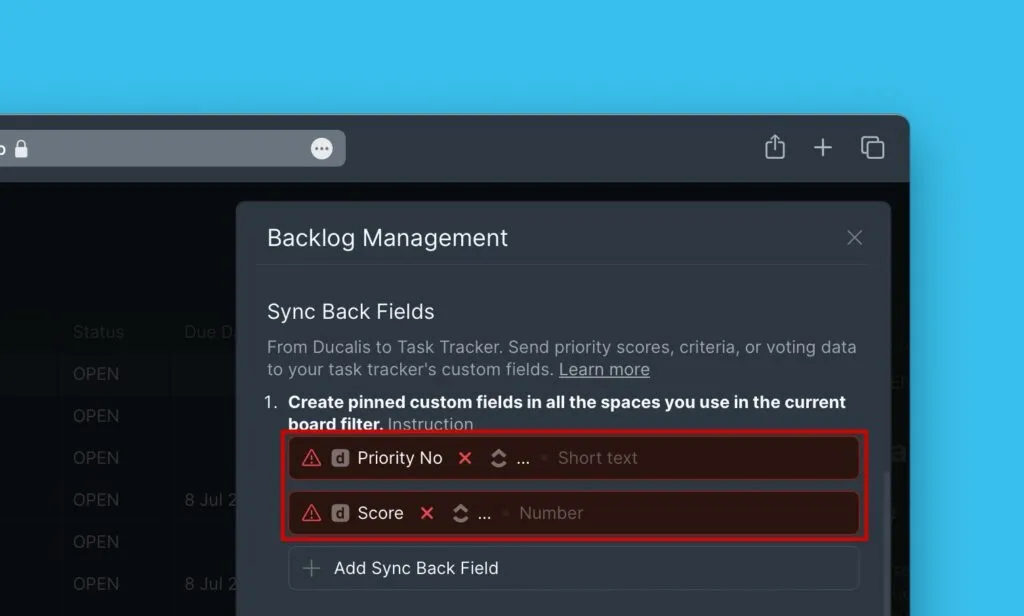
-
(Optional) Delete default fields if you don't need them.
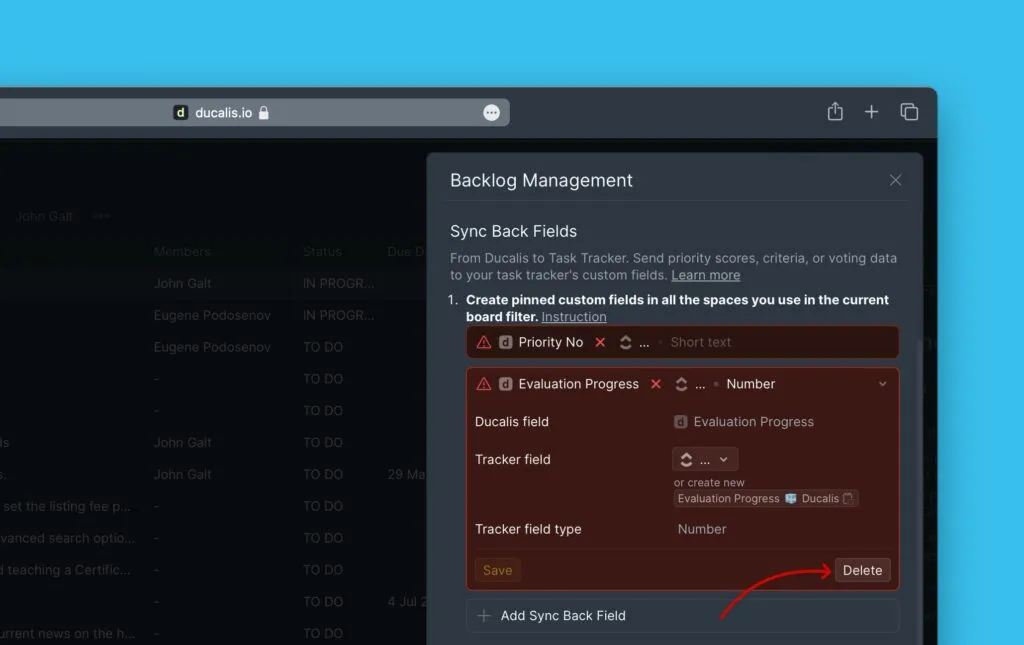
-
Click Add field and select additional fields to sync.
What's next
After selecting fields to sync, continue to:
- Step 1: Create custom fields in Jira Cloud that will receive Ducalis data
- Step 2: Add custom fields to your Jira board so they appear in Backlog and Active sprints views
Preview: Custom fields in Jira views
After completing Steps 1 and 2, custom fields appear in:
Backlog view
Active sprints view
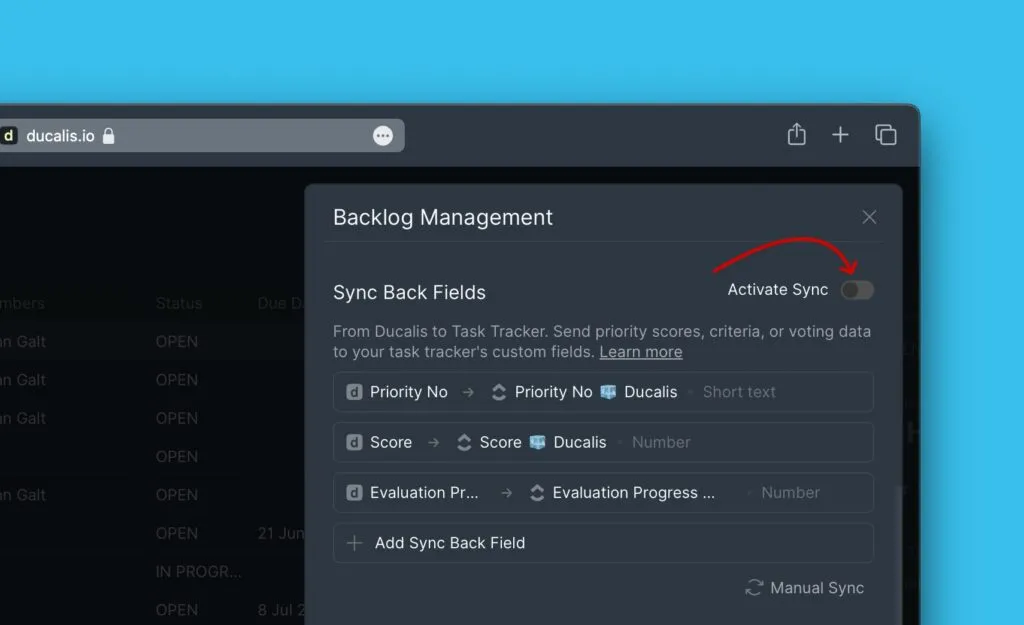
Activate Sync Back
After creating custom fields in Jira Cloud (Steps 1-2), activate Sync Back in Ducalis.
-
Click Refresh to detect the custom fields you created in Jira Cloud.
-
Toggle Activate Sync Back to enable synchronization.
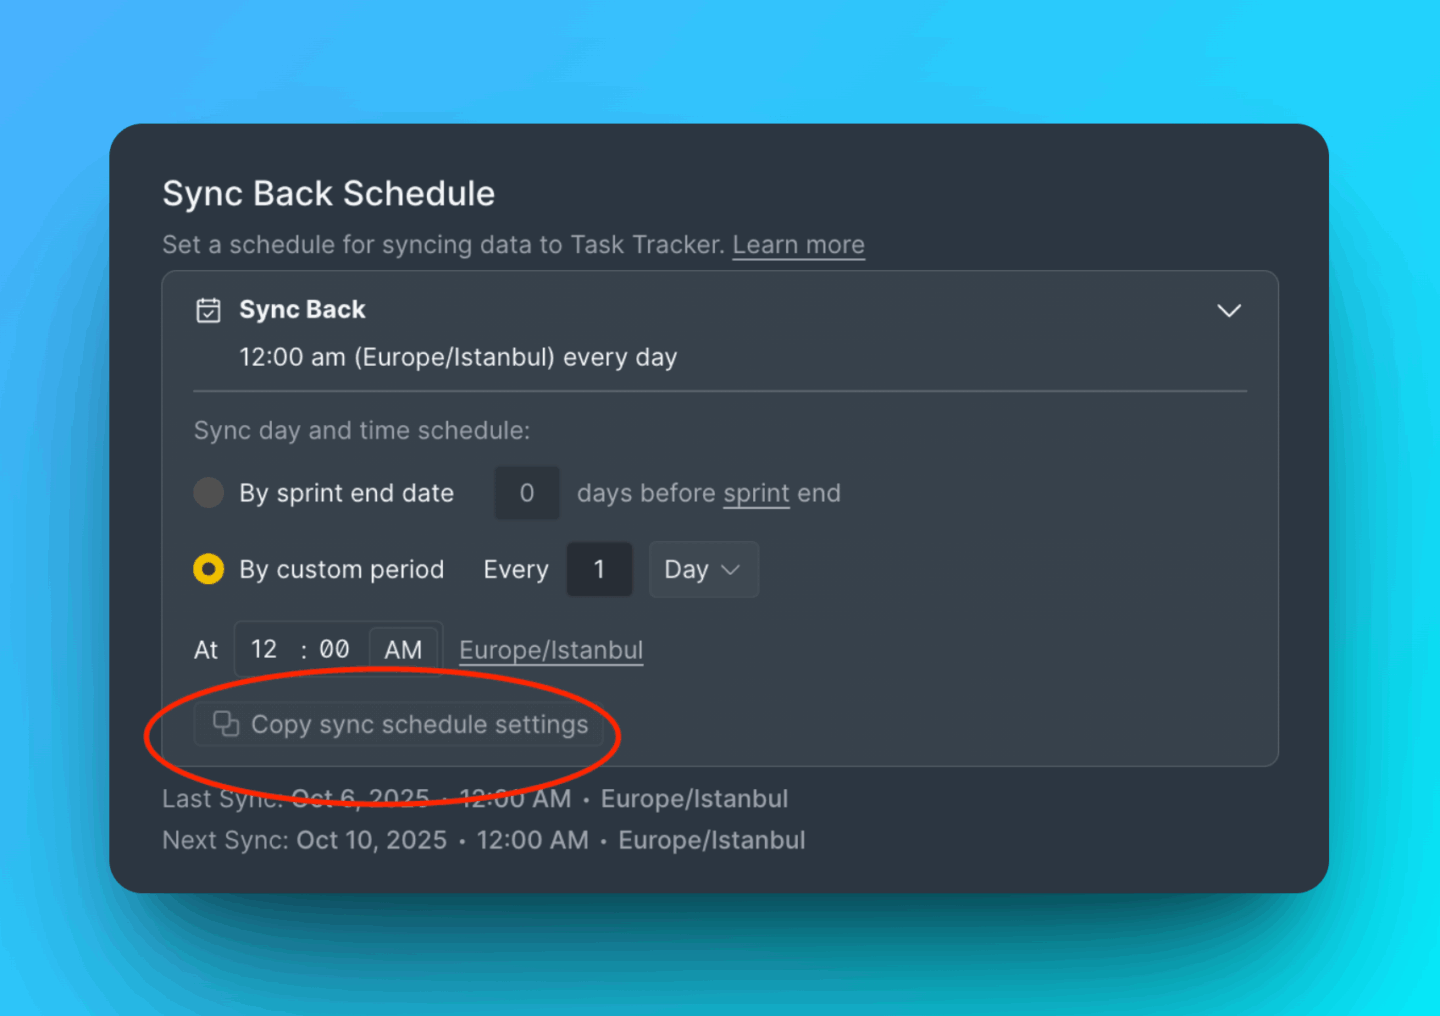
Configure sync schedule
Choose when to sync data from Ducalis to Jira Cloud.
Two schedule options:
- By sprint end date: Syncs automatically when your sprint ends
- By custom period: Syncs on specific days and times you set
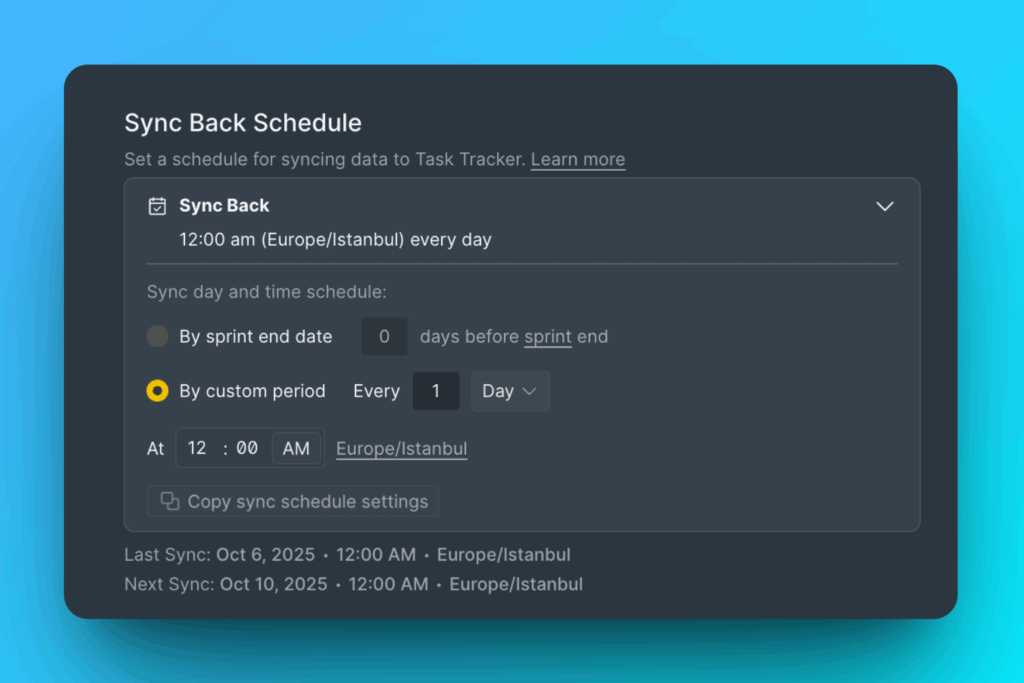
To sync immediately without waiting for the schedule, click Manual Sync Back.
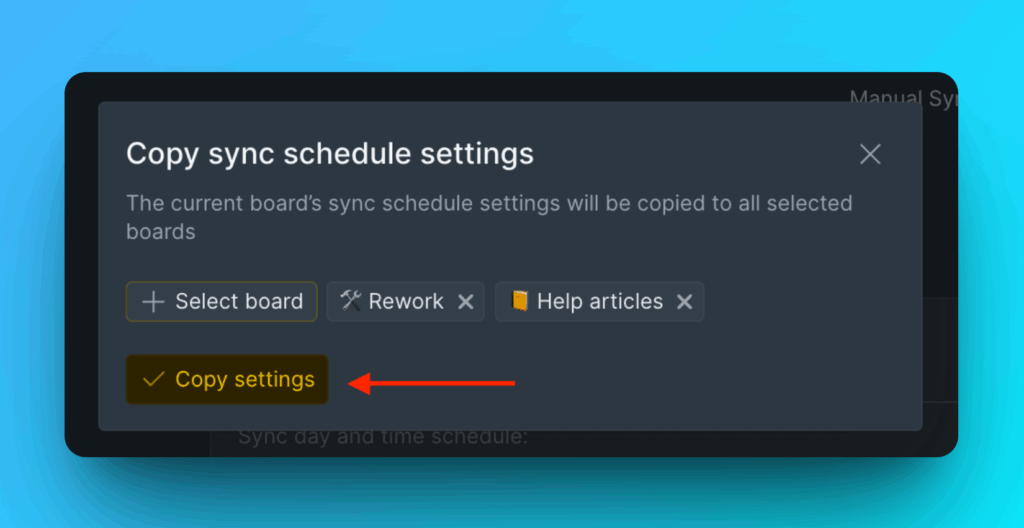
Copy sync schedule to other boards
Apply the same schedule settings to multiple boards at once.
-
Click Copy sync schedule settings.
-
Select the boards where you want to apply these settings.
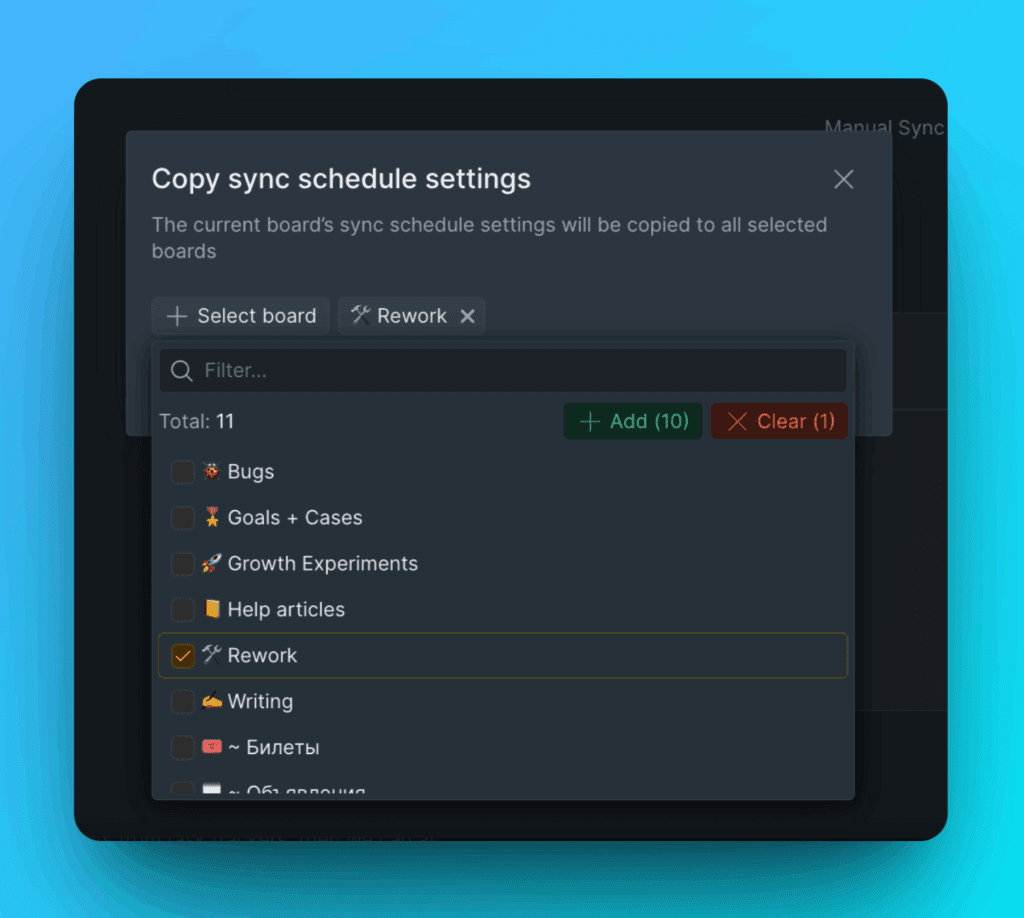
-
Click Copy Settings to confirm.