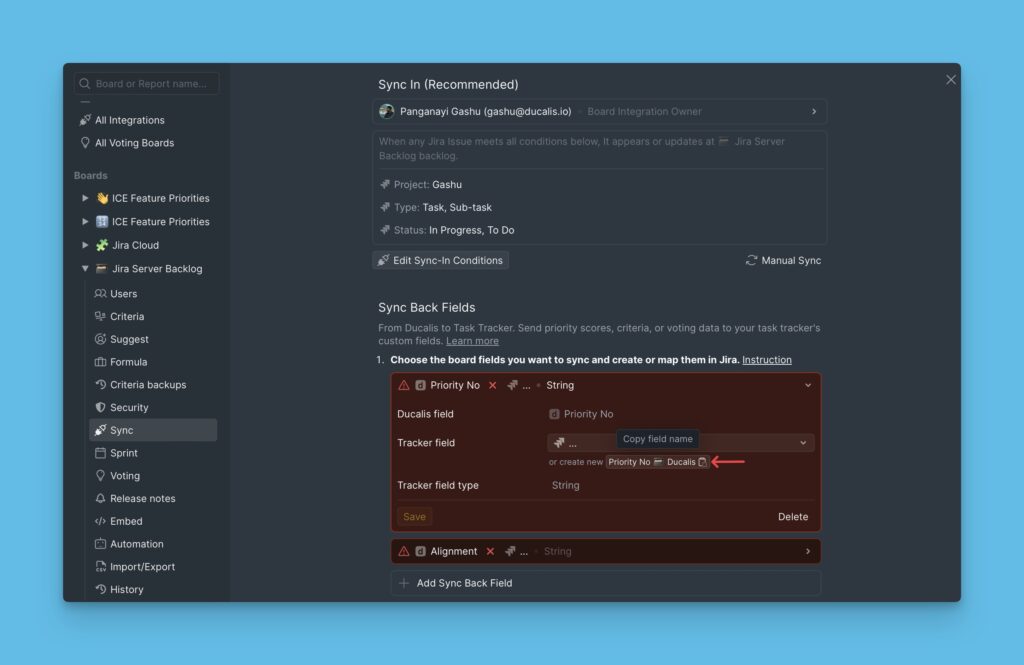
Instead of creating new custom fields when you already have a ton of custom fields in the tracker, you can just:
- Edit names of existing fields in the tracker to give them names of Ducalis fields you want to sync data from.
- Map the Ducalis fields with existing fields in Jira Server.
In this article, we will walk you through how to edit the name of an existing field in Jira Server to give the name of a Ducalis field you want to sync data from.
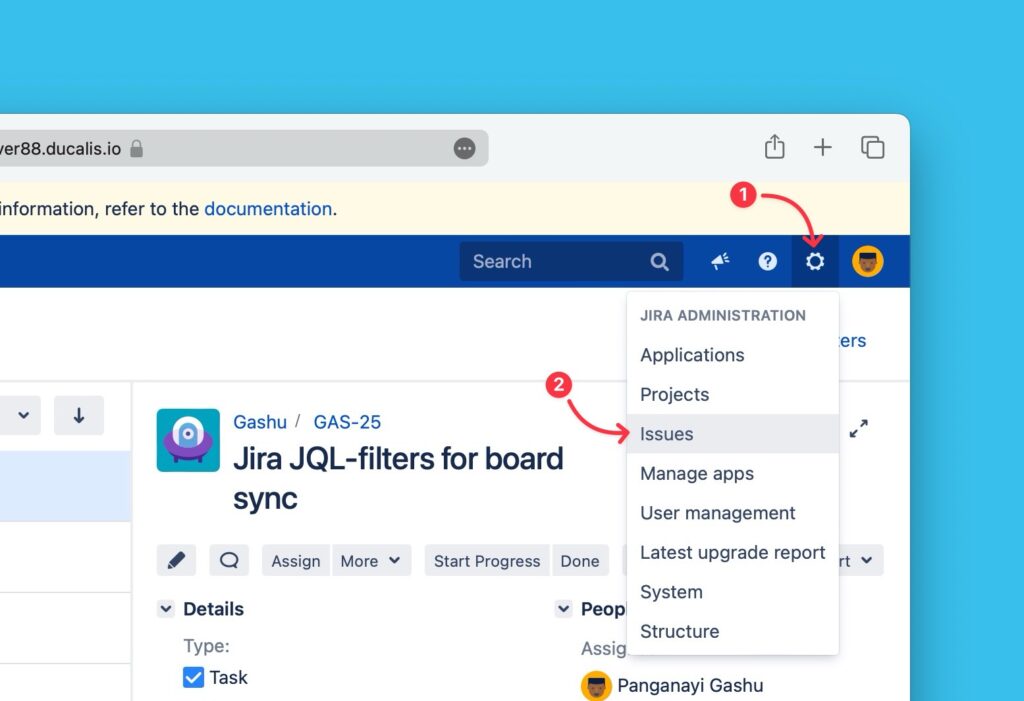
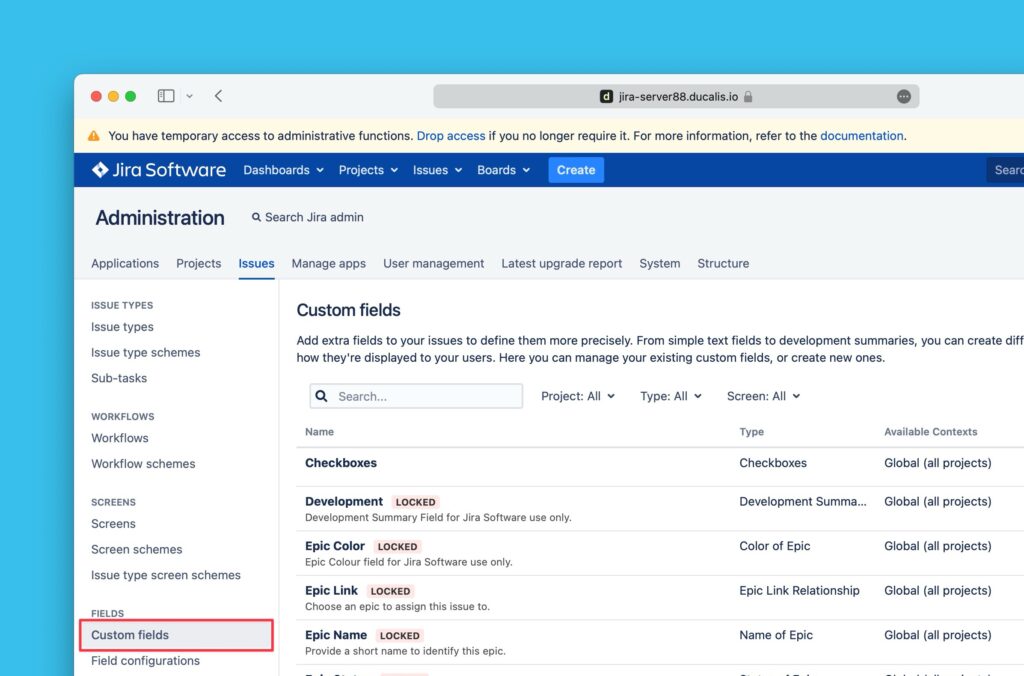
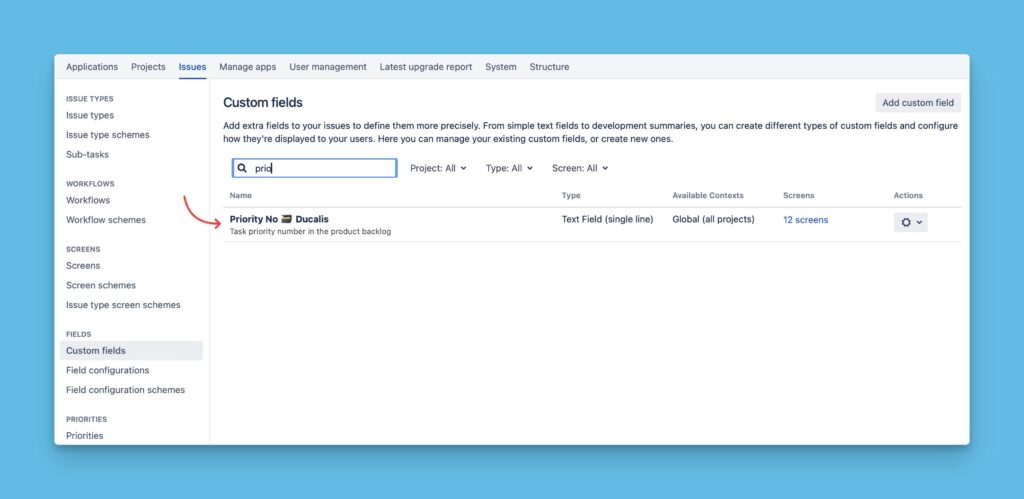
Accessing Custom Fields Settings
- Click on the cogwheel located in the top-right corner.
- Select Issues from the dropdown list.
- Then on the left-side menu navigate to fields and select Custom fields.
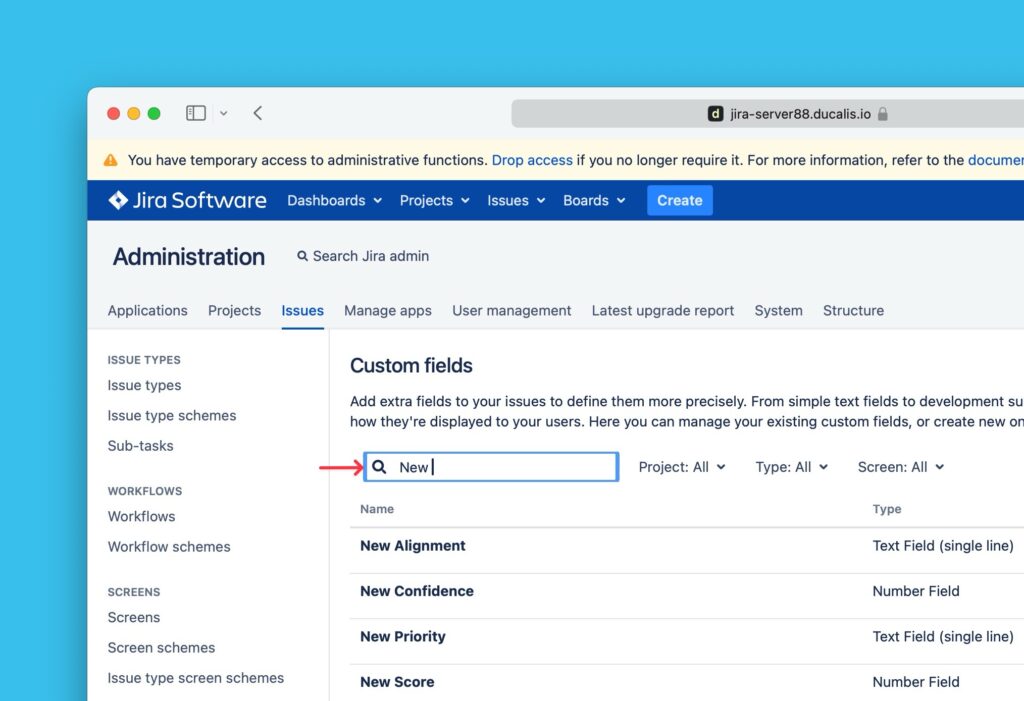
- Search for the custom field you want to edit
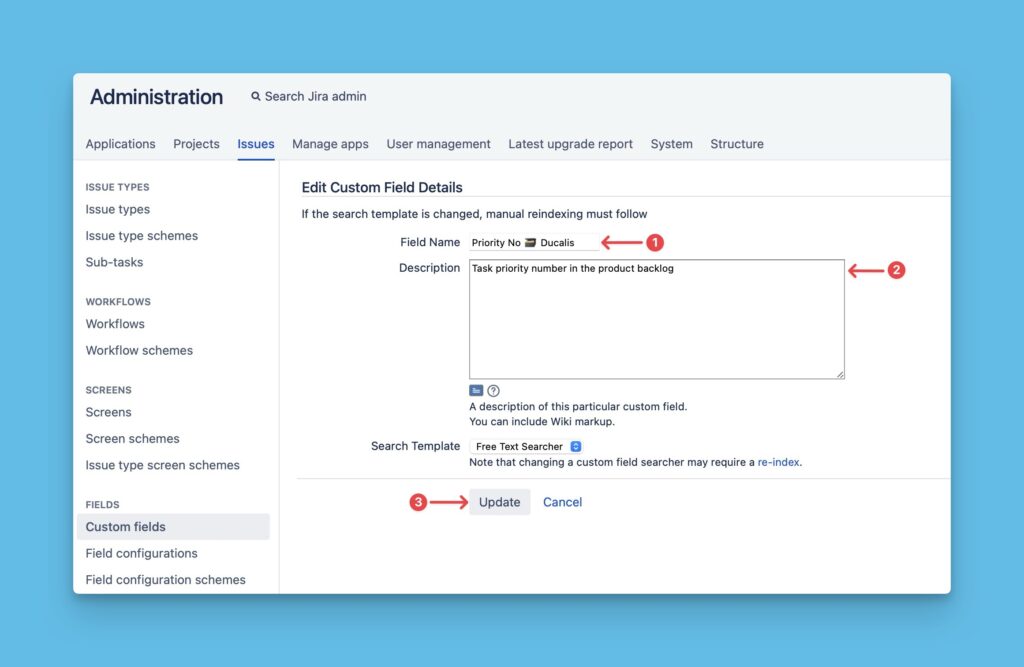
Editing the Custom Field
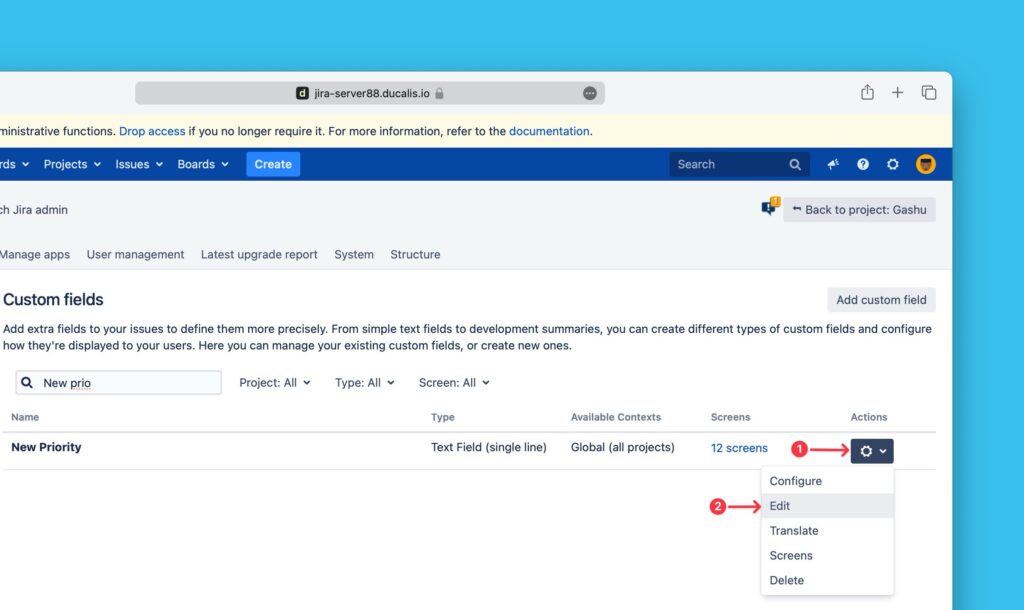
- Click on the ellipses on the far right, and choose edit from the dropdown menu
- Copy the name of the Ducalis field.
- Paste the name in Jira Server, enter the description (optional), and then click Update to save the changes.
- Updated field
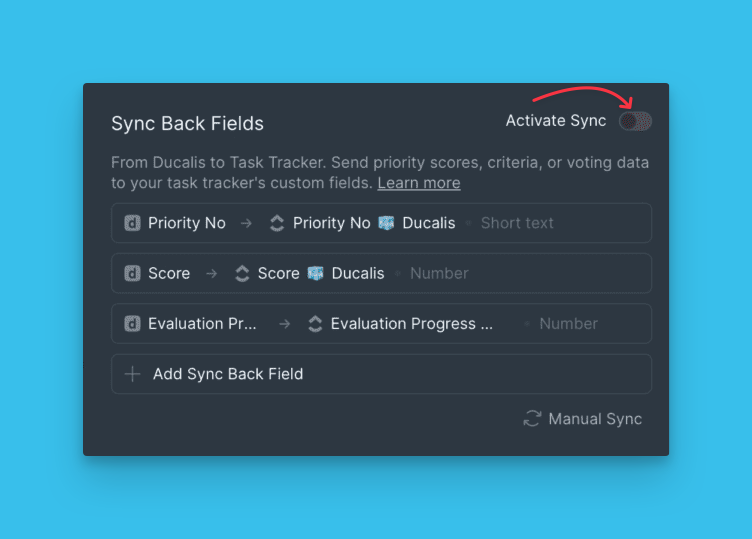
Activating Sync
When you are done preparing your fields, Click Refresh.
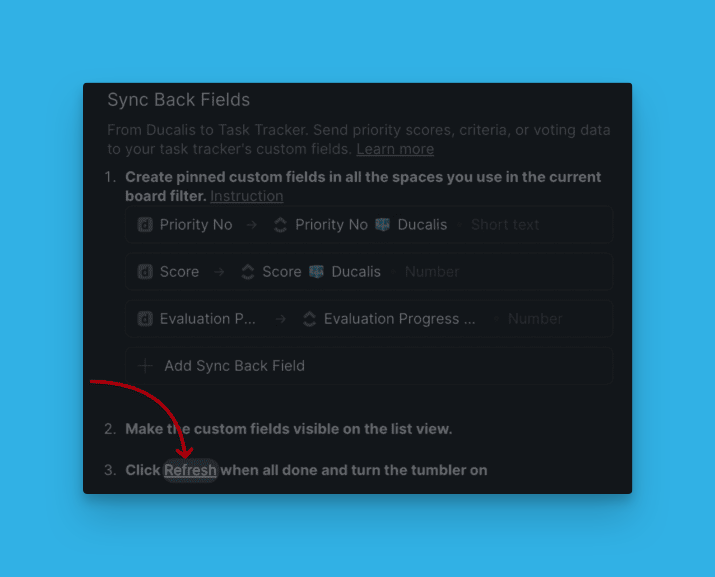
A toggle will appear, switch it on to activate sync.
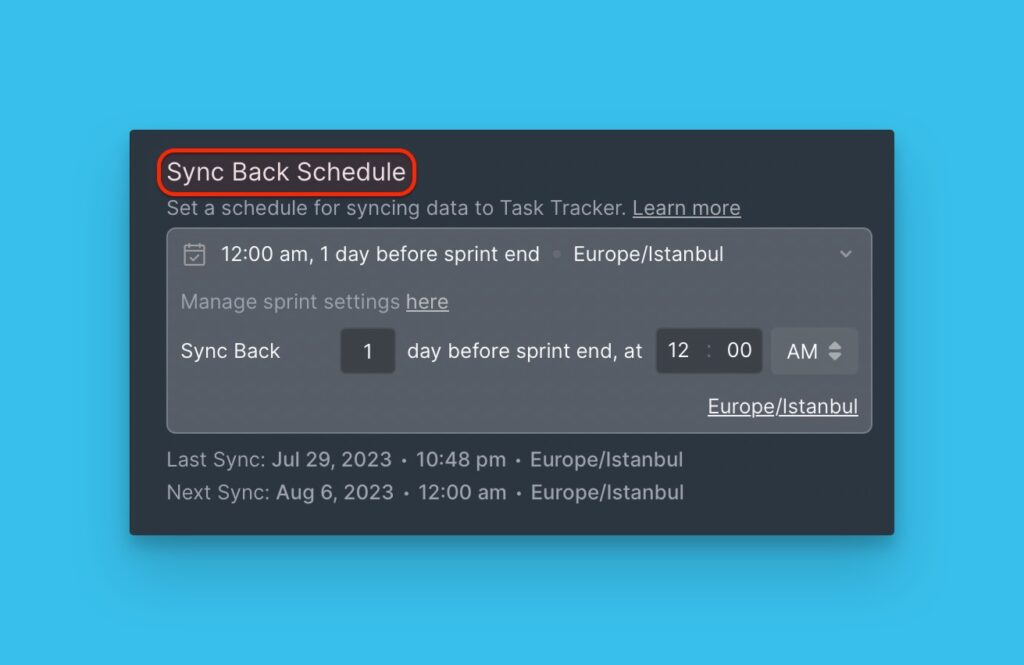
Choosing Date And Time To Sync Back
Choose the day and time to sync the issues’ priority rankings to Jira Server. It can, for example, be a day or a few days before your sprint planning meeting. You can change the timezone if it’s not set to the one you want.
What’s Next?
Learn more about how to activate Back Sync with Jira Server.