Importing from a Task Tracker
There are 3 ways to add issues into a board:
Task tracker integration offers a very fast and secure way to import issues from your task tracker for prioritization. This helps you to create a seamless workflow continuity as:
-
Every issue you create in your task tracker will be added to Ducalis in real-time
-
Any updates you make to the issues in your tracker will be added to Ducalis in real-time.
-
You can easily sync your prioritization results back to your tracker.
You must be an Admin in Ducalis to be able to integrate a task tracker and import issues from it.
Integrating a Task Tracker
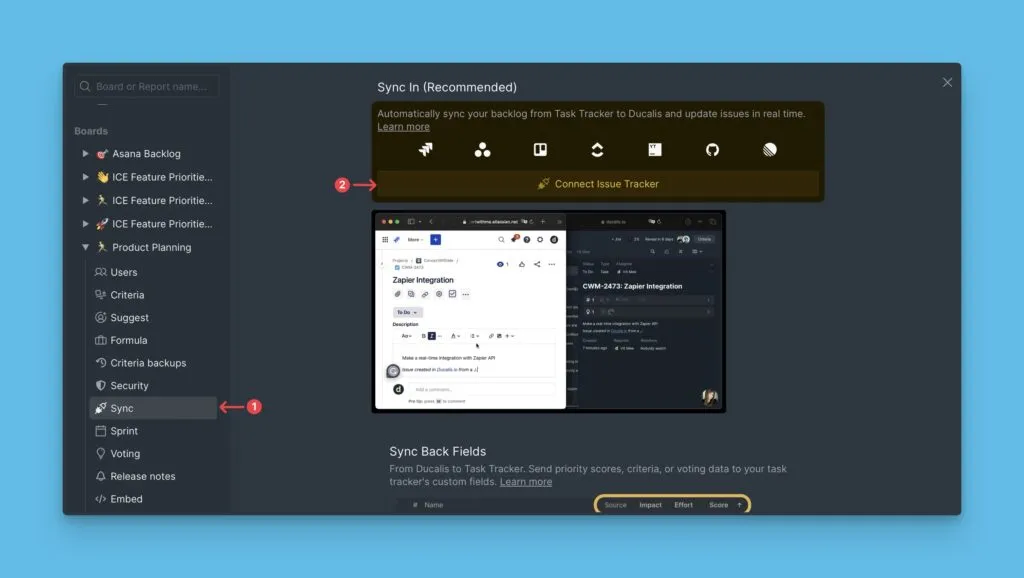
In the board, hover your mouse over to the bottom left corner and click Connect to access the Sync settings.

Under Sync, click Connect Issue Tracker.
-
Choose the source of your issues – the task tracker you want to integrate and import issues from.
-
Click 🔌 Connect [task tracker] to continue.
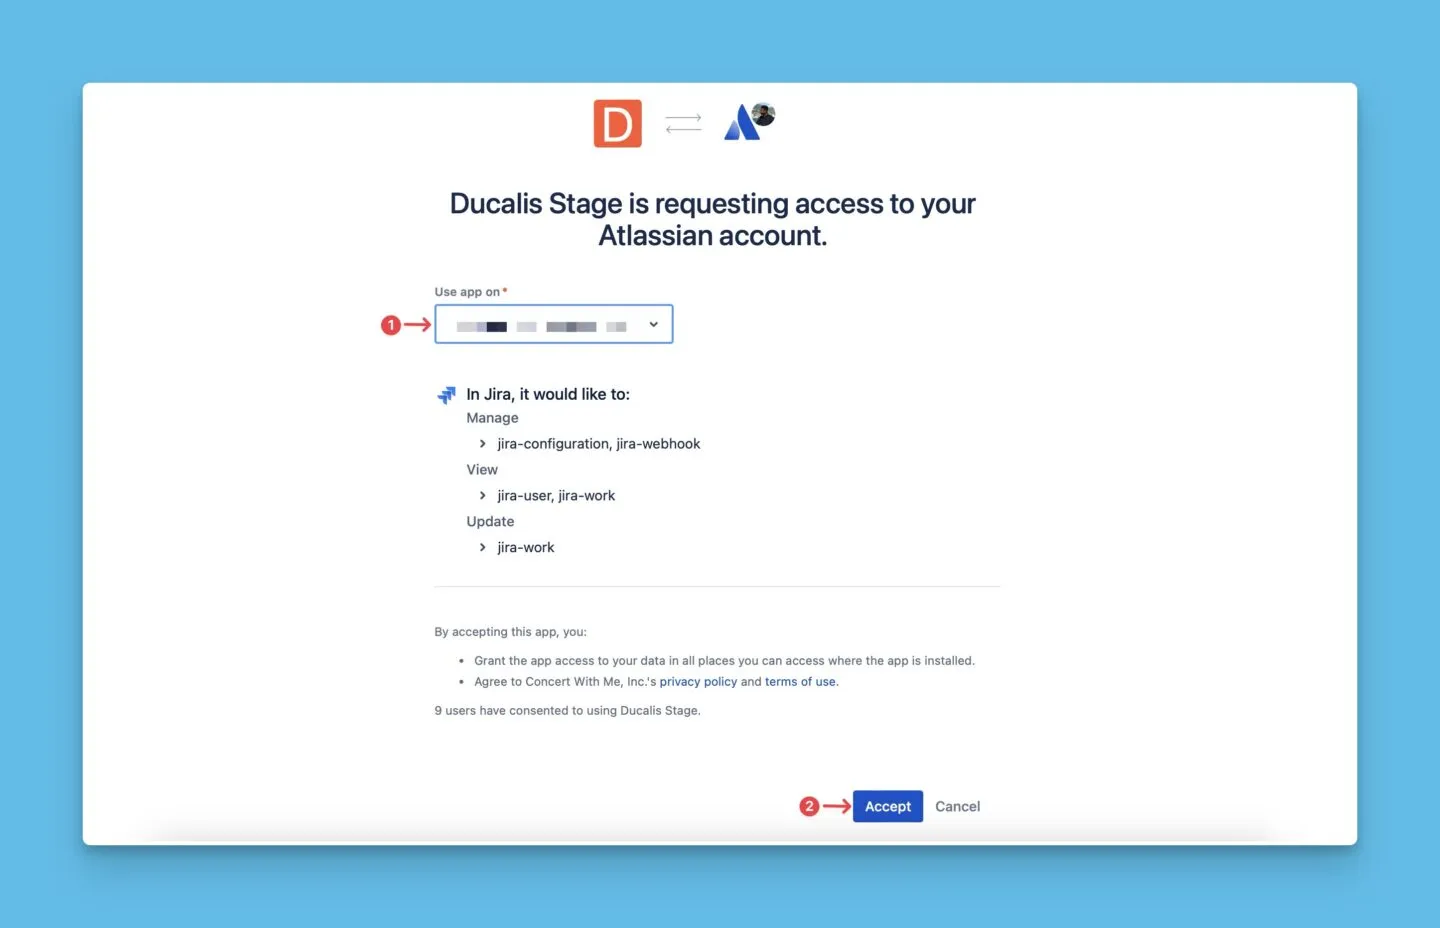
- Authorize your Ducalis to access issues in your task tracker. Authorization is different for each tracker. You can see the detailed instructions for integrating each tracker here:
Importing issues
After connecting your tracker, proceed to import your issues.
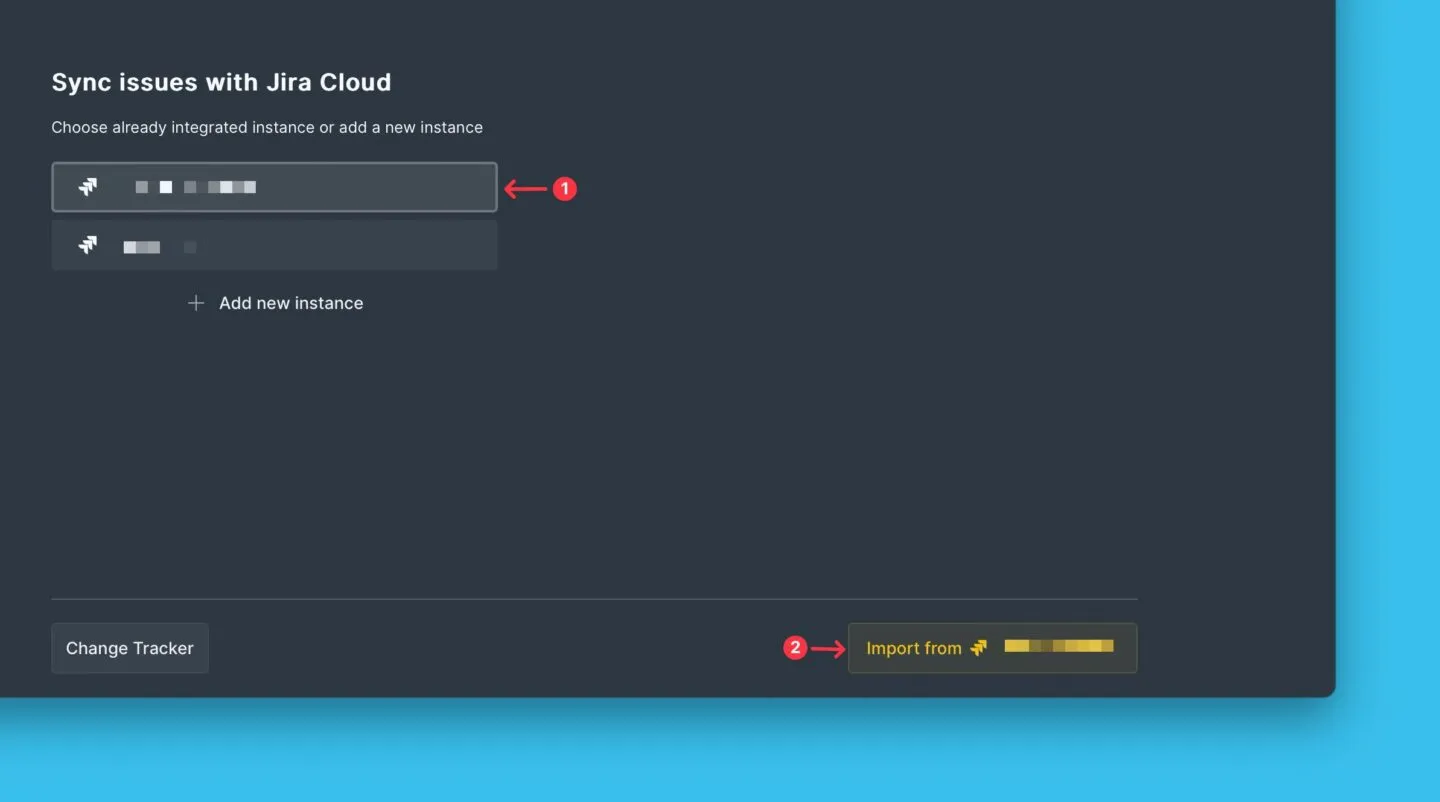
- Choose the instance. If you don’t have any instances connected, or you want to connect a new one, click on Add new instance.
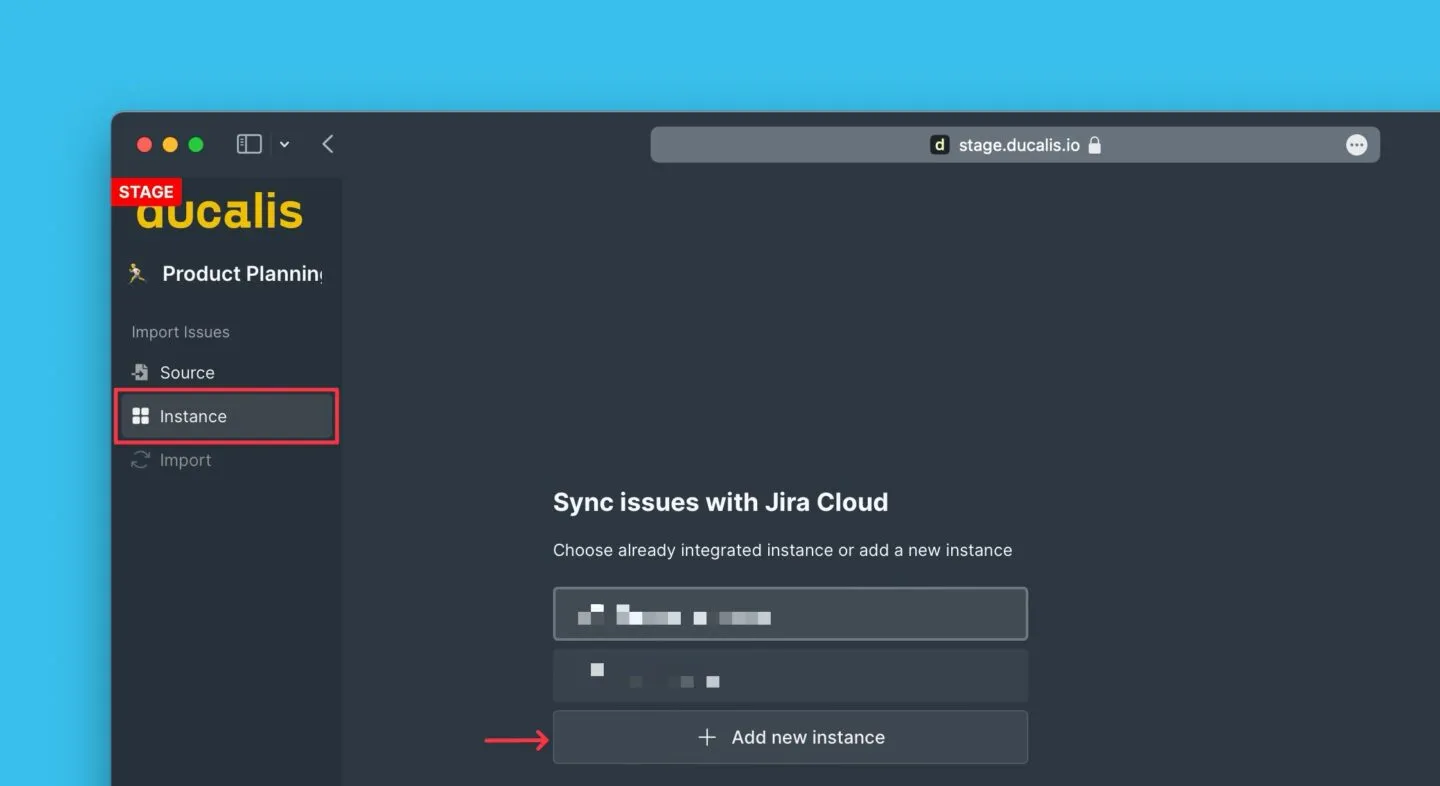
- You will be redirected to your tracker’s site to authorize Ducalis to access your tracker.
- To proceed, click on Import from [Instance].
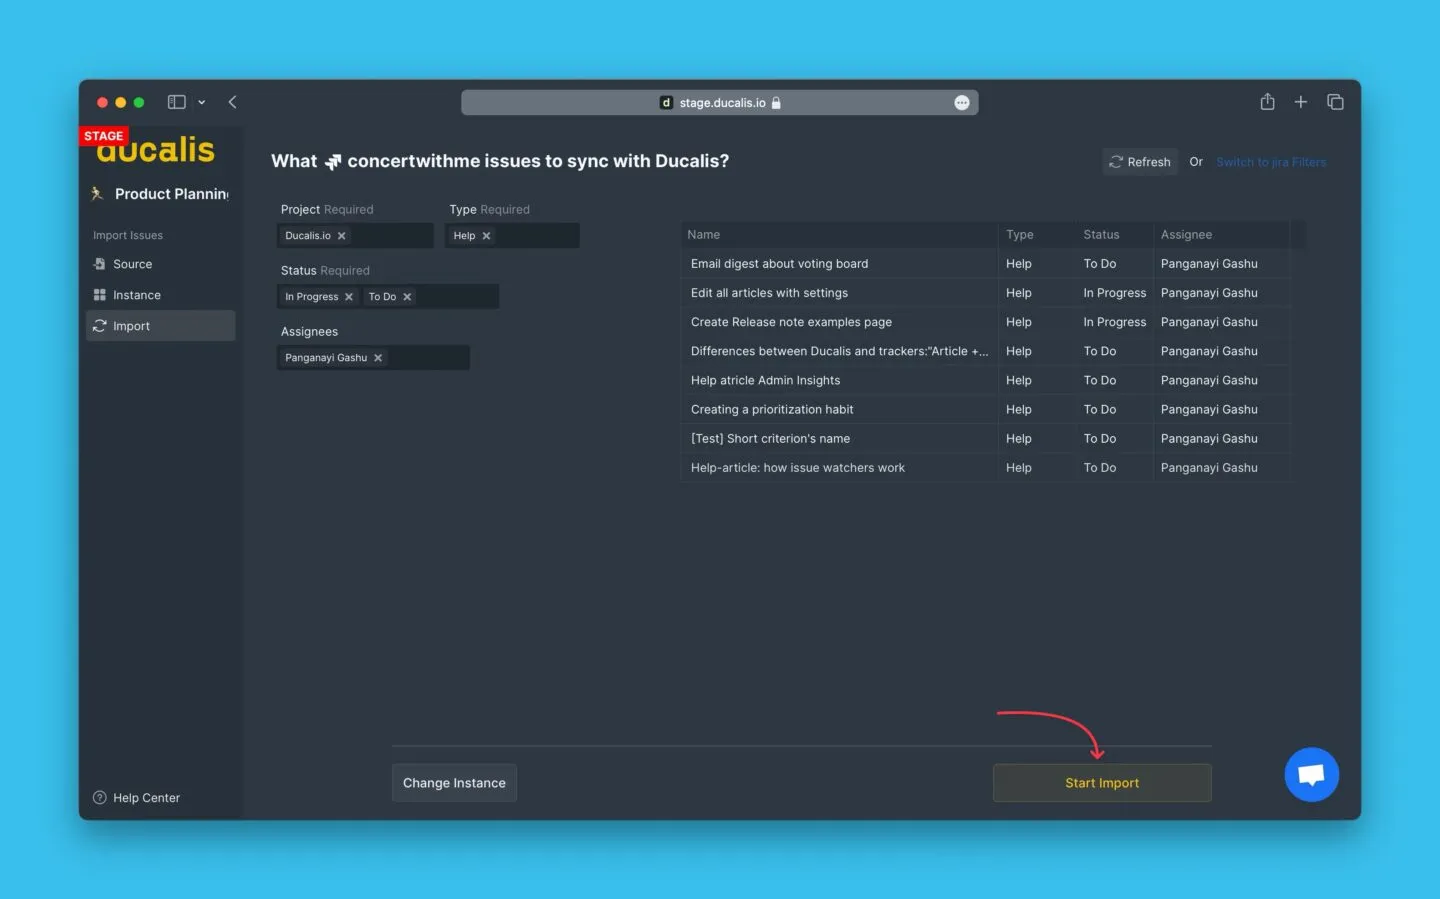
- Apply filters to choose a set of issues you want to import from your task track for prioritization. You can use:
-
Ducalis filters
-
Filters provided by your task tracker.
-
- When you have selected the filters, check the preview to see if all the issues you want to import are there, and click Start Import to finish the import.
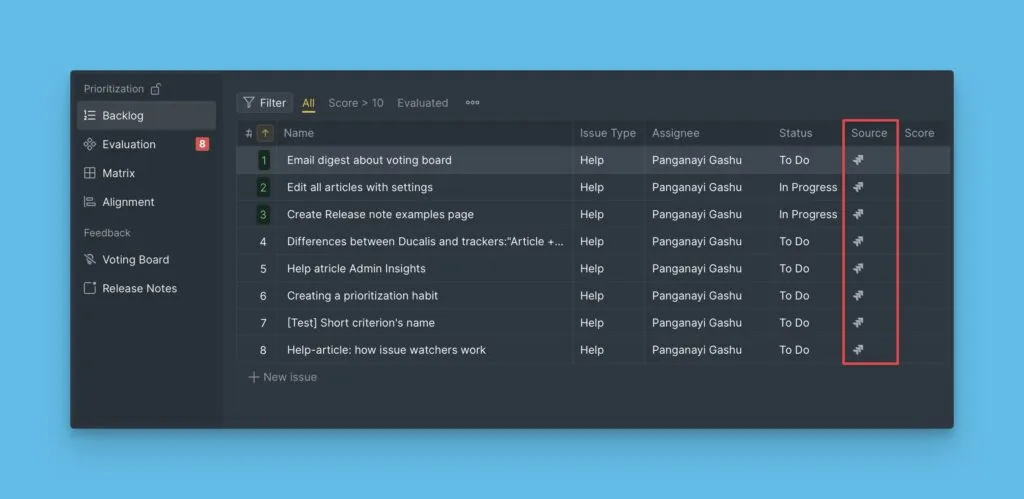
- A board with Issues imported from Jira Cloud. They are indicated with a Jira icon.
-
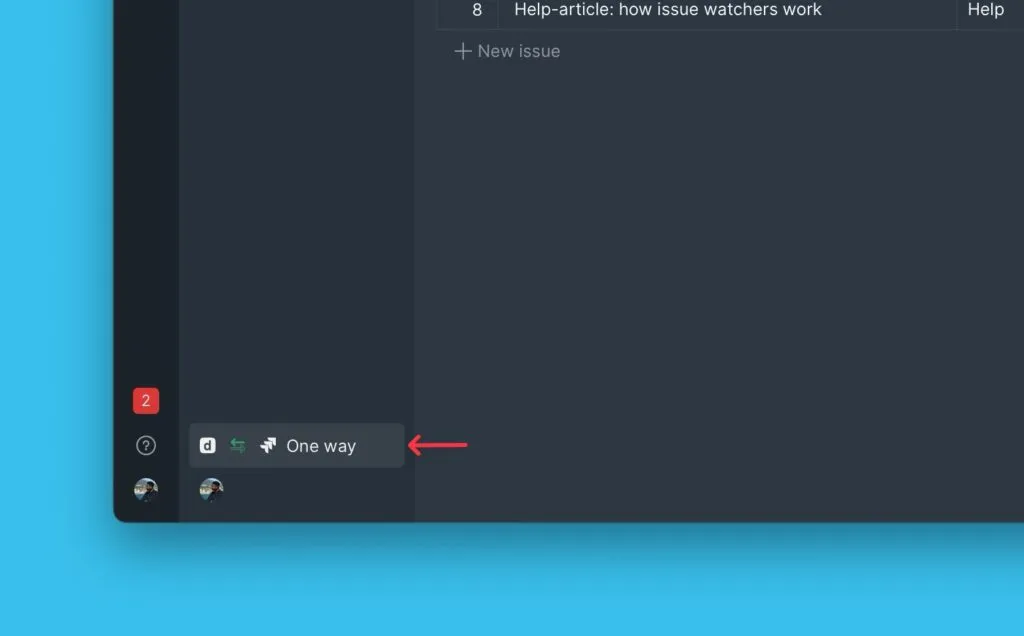
The name of the tracker where the issues are imported from is shown in the bottom left corner of the board. You can click on it to:
-
Access more set-ups like 2-way sync.
-
or to change your filter settings to add or remove issues from the board.
Any new issues you add to the task tracker you connected, which fall under the filters you applied when you import issues to a board will be automatically added to that board in real-time.
What's Next?
After Integrating a task tracker with Ducalis, and importing issues for priorities, you can go ahead and enable Back sync so that your prioritization results are synced back to your task tracker.
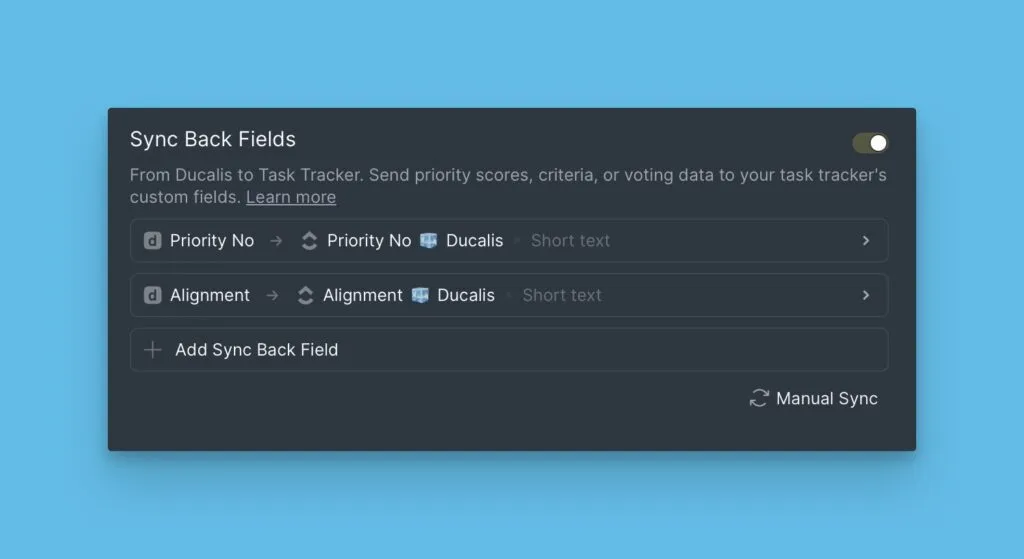
Learn more about how to enable Back sync.