If you use ClickUp as your task tracker you can integrate it with Ducalis and import issues for prioritization.
In this article, we will show you how to:
- Integrate ClickUp with Ducalis.
- Import issues from ClickUp.
Integrating ClickUp With Ducalis
In your board, hover over to the left bottom right corner and click on Connect to access the Sync settings.
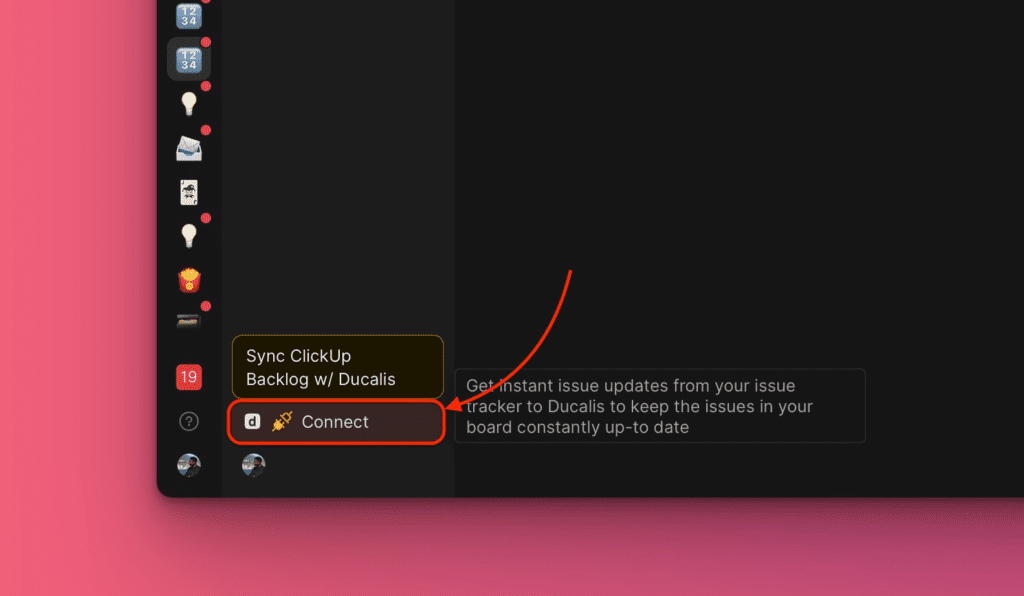
Under Sync settings, go to Sync In and click on Connect Issue Tracker.
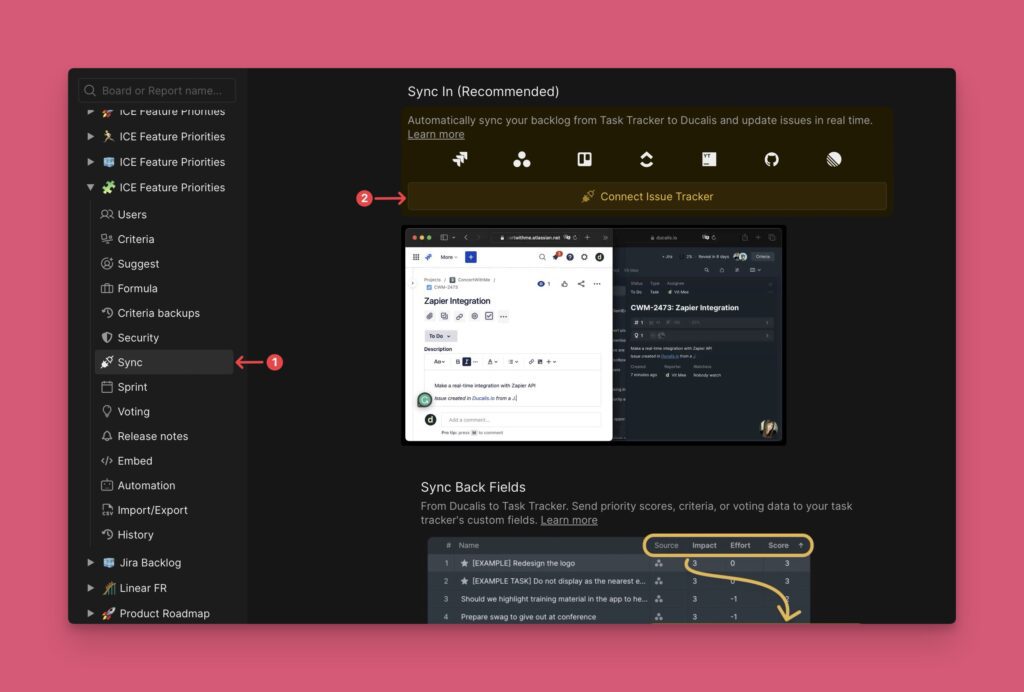
Or go to Integrations > All integrations > Connect ClickUP.
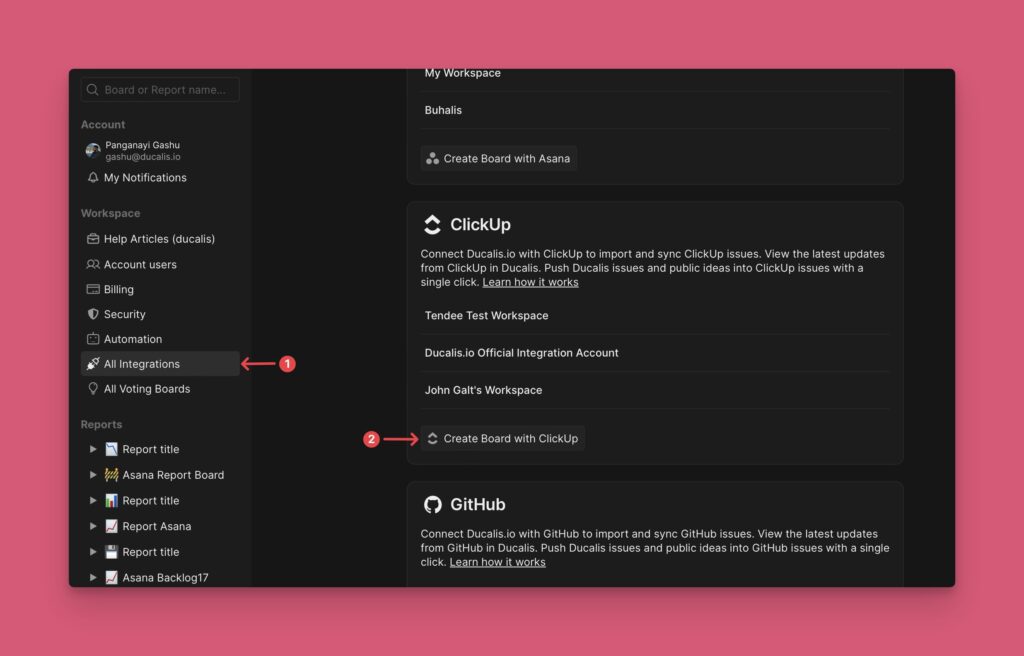
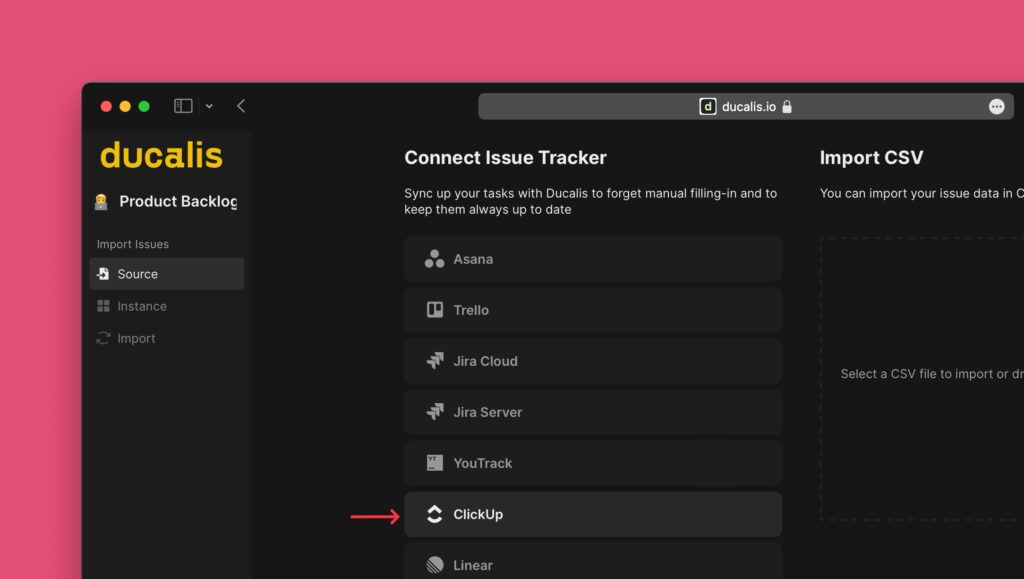
Under Source, choose ClickUp from the list of task trackers.
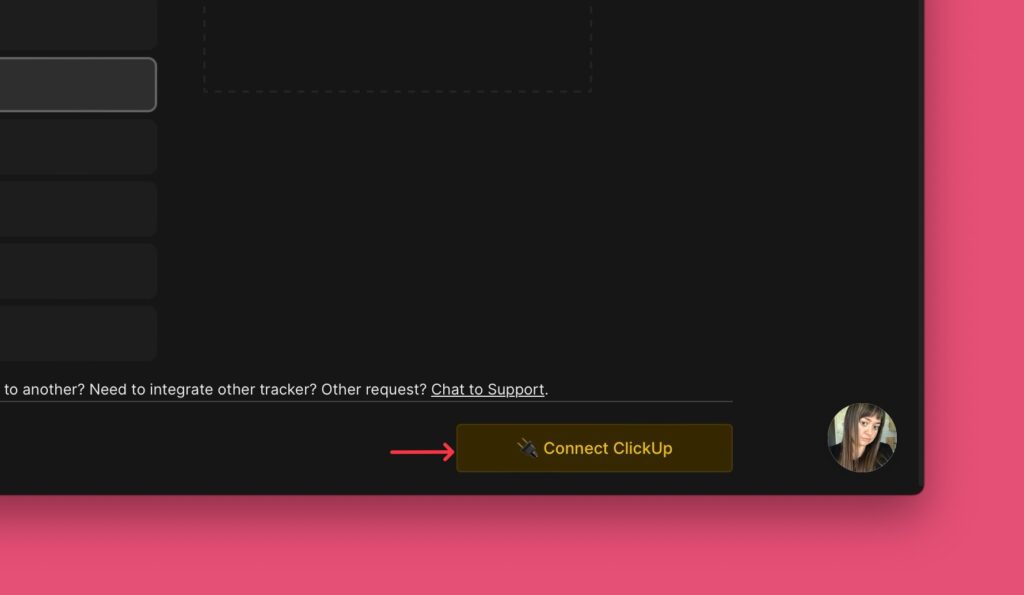
Then click Connect ClickUp in the bottom right corner to proceed.
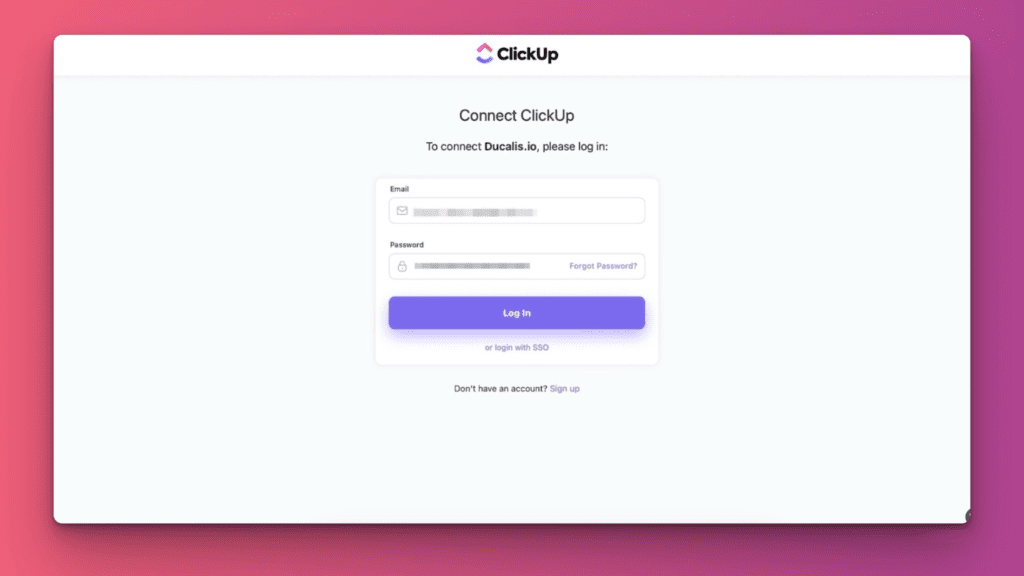
You will be redirected to ClickUp for authorization. Log into your ClickUp account.
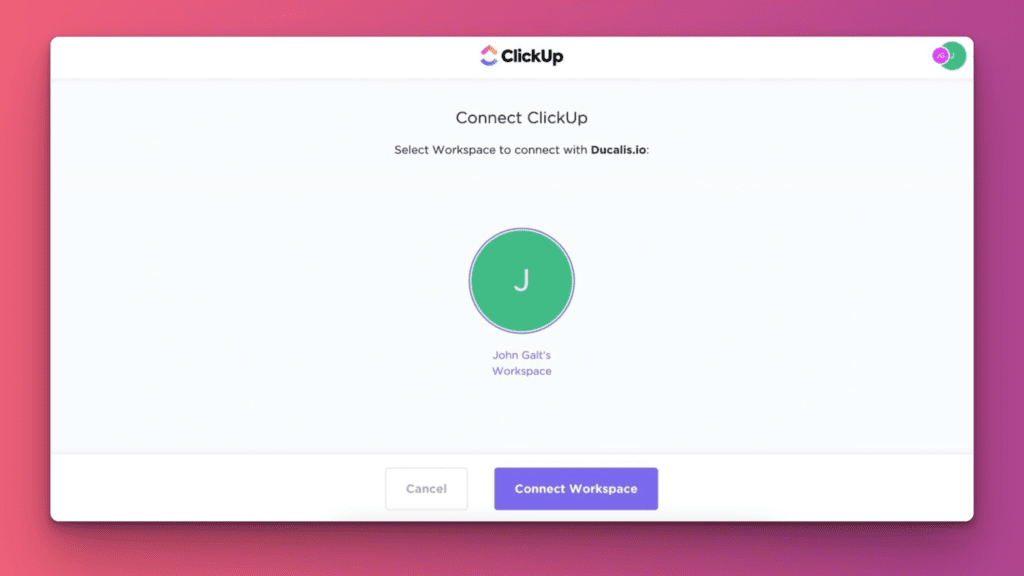
Choose the workspace you want to import issues from Click Connect Workspace.
Proceed to Importing issues.
Importing Issues
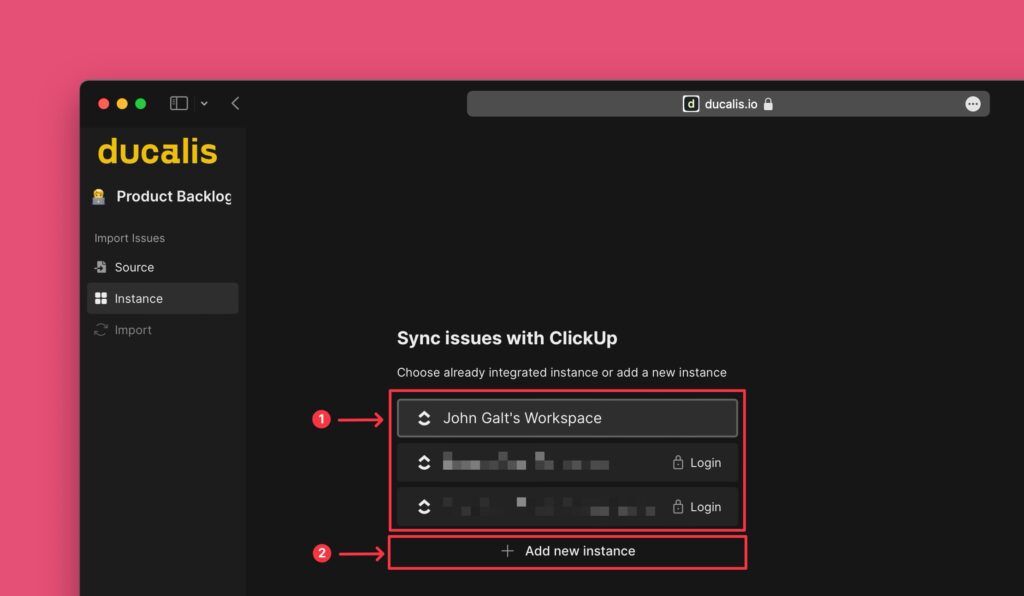
Under Instance, choose the workspace that you connected to go on and import issues from it.
If you want to add another workspace, click Add new instance.
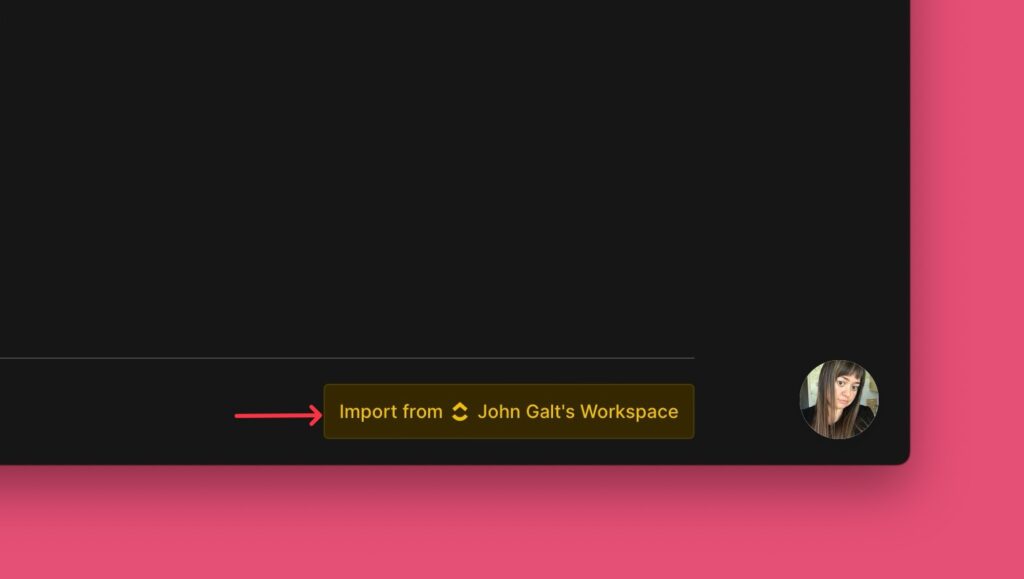
After selecting the instance, click Import from [Workspace].
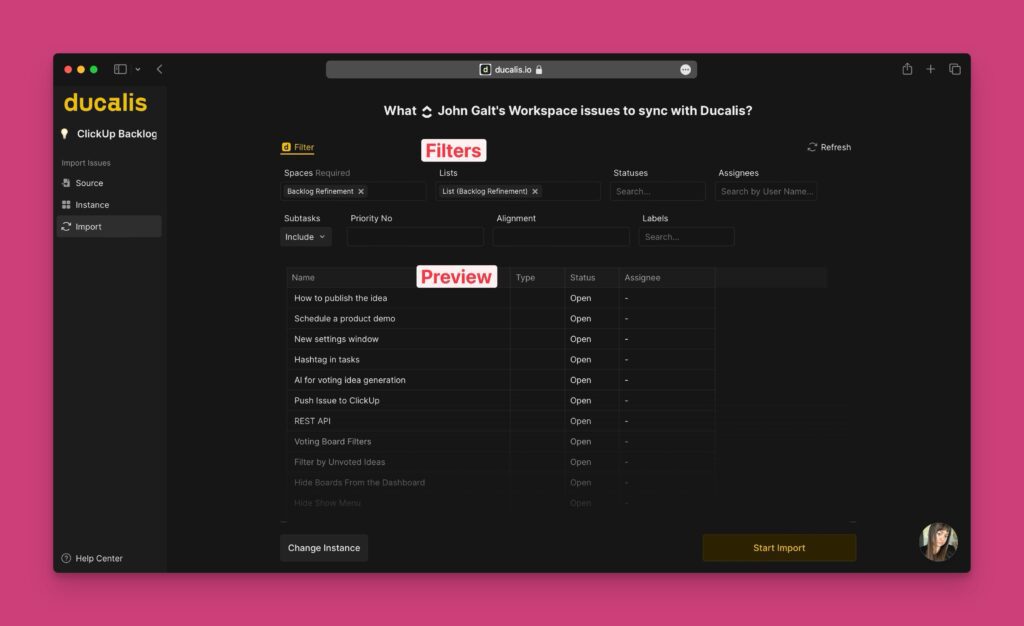
Apply filters to choose a set of issues you want to import from ClickUp for prioritization.
When you have selected the filters, check the preview to see if all the issues you want to import are there.
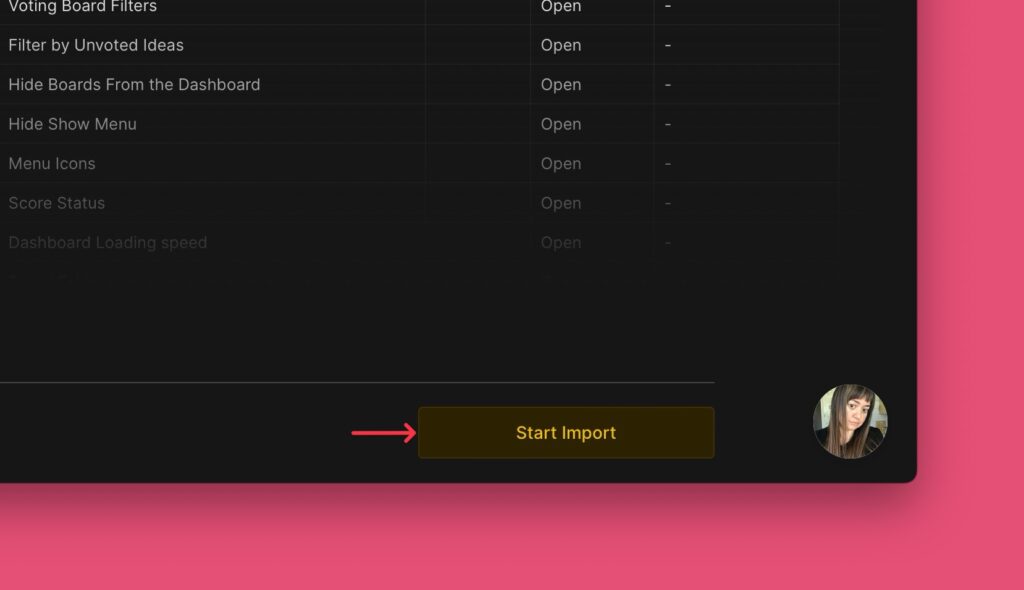
Click Start Import to finish the import.
A board with Issues imported from ClickUp. They are indicated with a ClickUp icon.
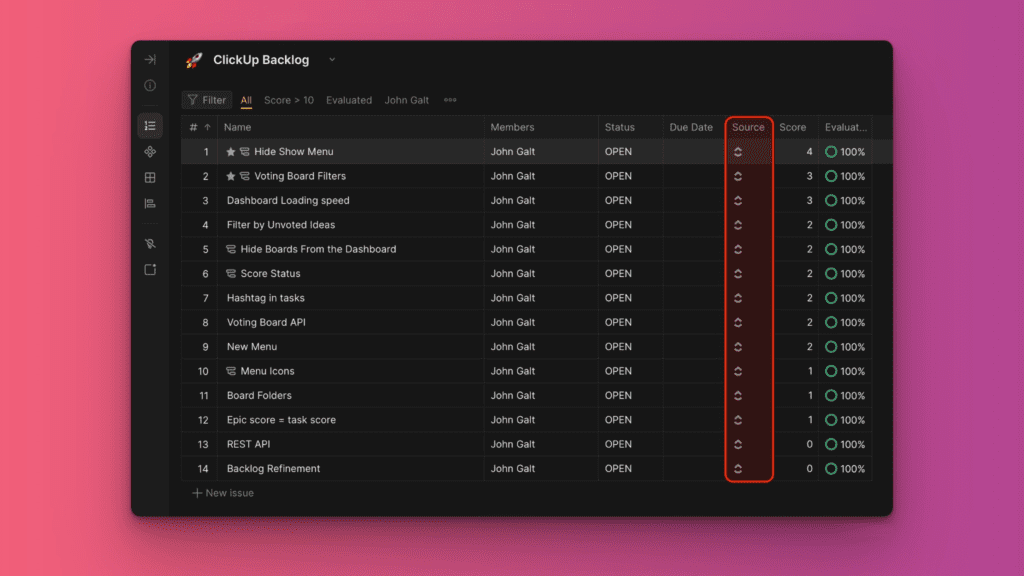
Any new task you create in ClickUp that falls under the filters you applied will be automatically added to this Ducalis board in real time.
Editing Import Filters
Editing import-filters helps to:
- add more issues that you import from ClickUp,
- or remove some issues from a Ducalis board.
To edit filters:
- Hover over to the left bottom right corner and click on the sync icon
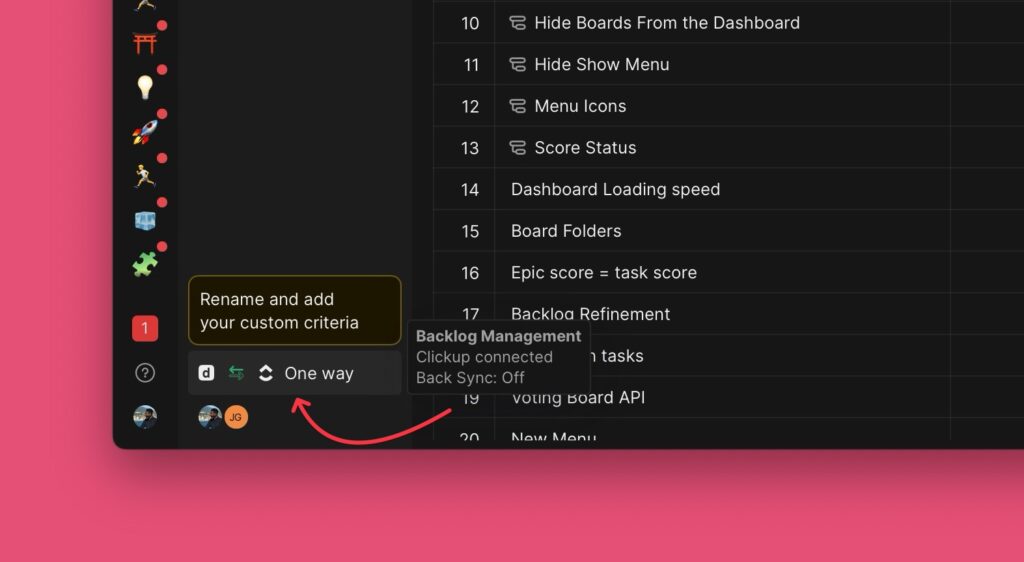
- Click on Edit Syn-In Conditions.
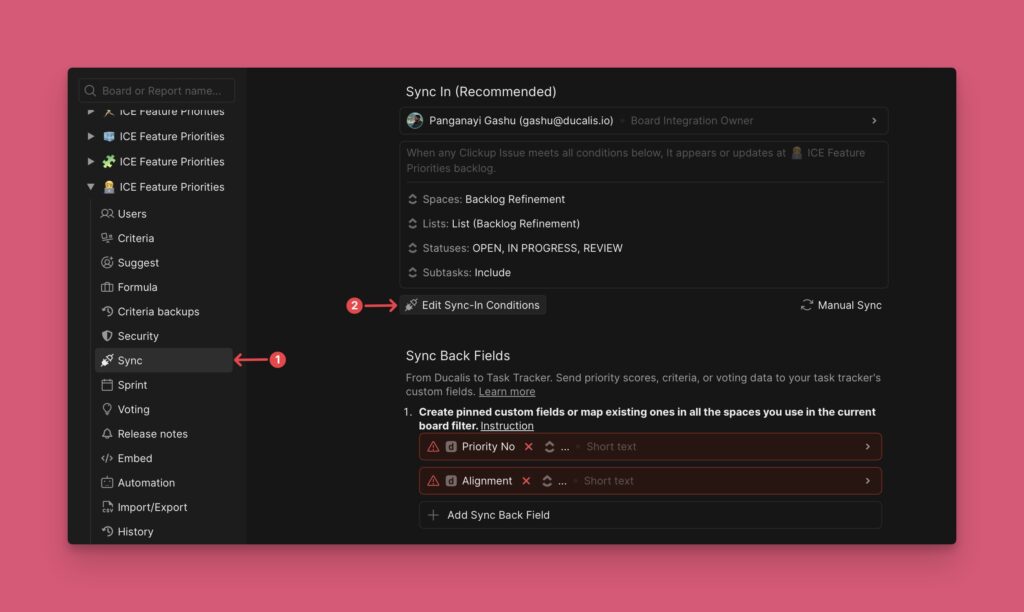
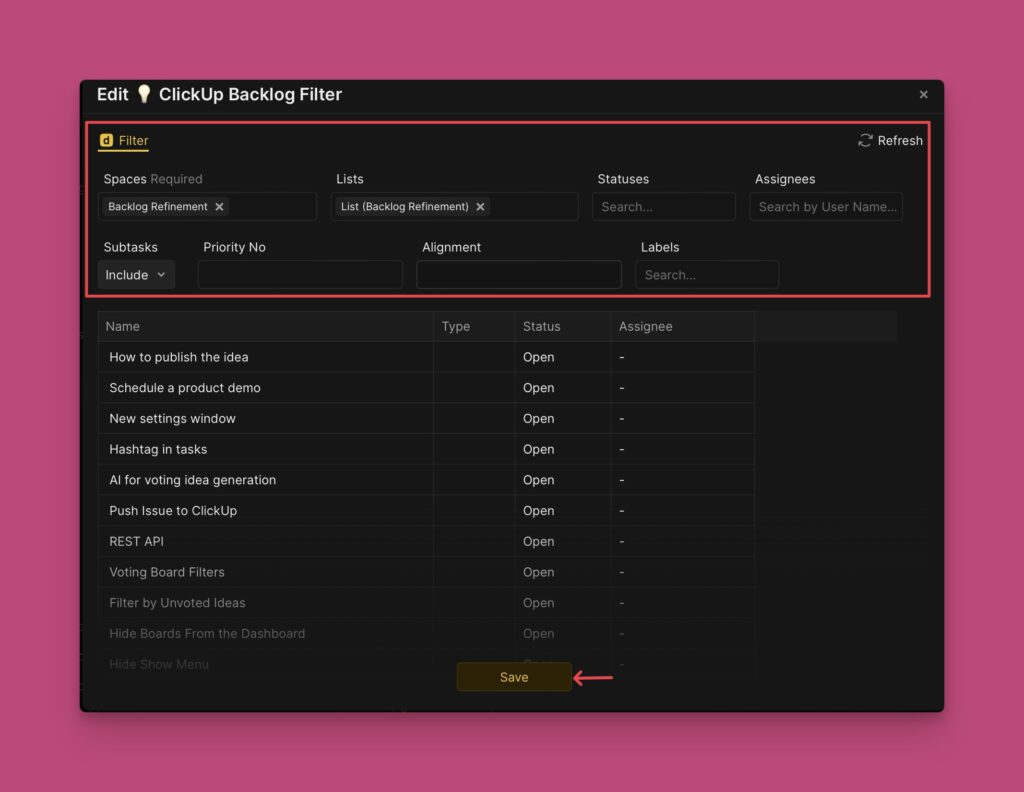
- Add or remove some filters to add more or remove some issues, respectively.
- Click Save to keep your changes.
Removing The Integration
Check out this article on how to delete an integration between Ducalis and ClickUp.
What’s Next?
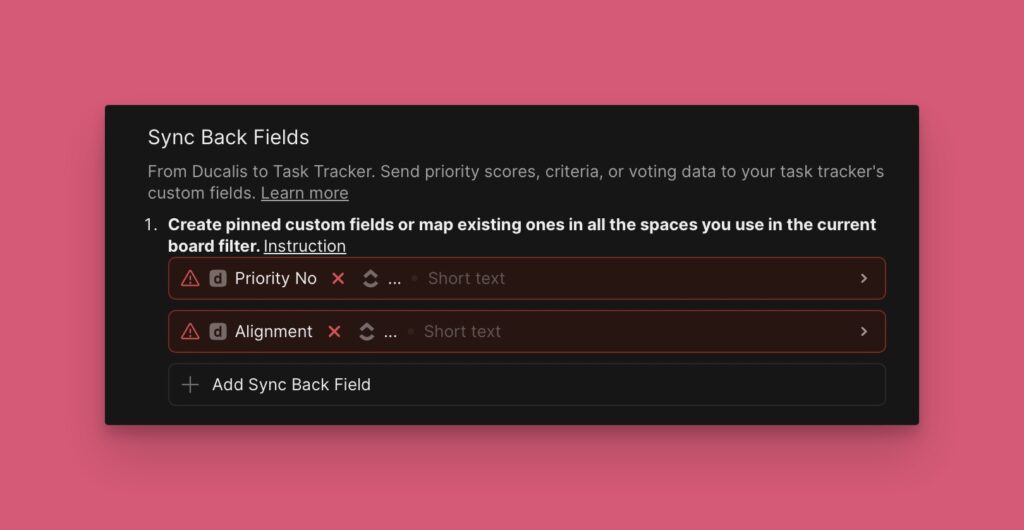
When you have integrated and imported your issues from ClickUp, you can go ahead and enable Back sync so that you can sync back your prioritization results to your ClickUp account.
Learn more about how to enable Back sync with ClickUp.