Import issues
After connecting Jira Server, import issues for prioritization in Ducalis.
Choose one of three filter types to select which issues to import:
- Ducalis filters - Use the visual filter builder
- Jira filters - Use saved Jira filters
- JQL filters - Write custom JQL queries
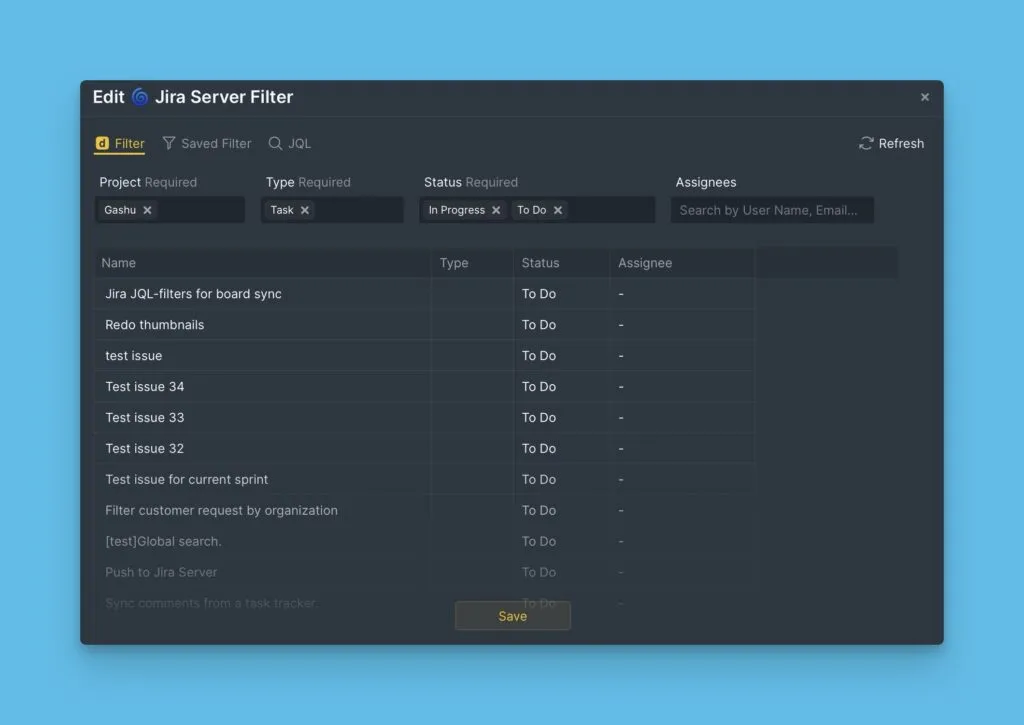
Using Ducalis Filters
Ducalis filters provide a visual interface to select issues by project, status, assignee, and other parameters.
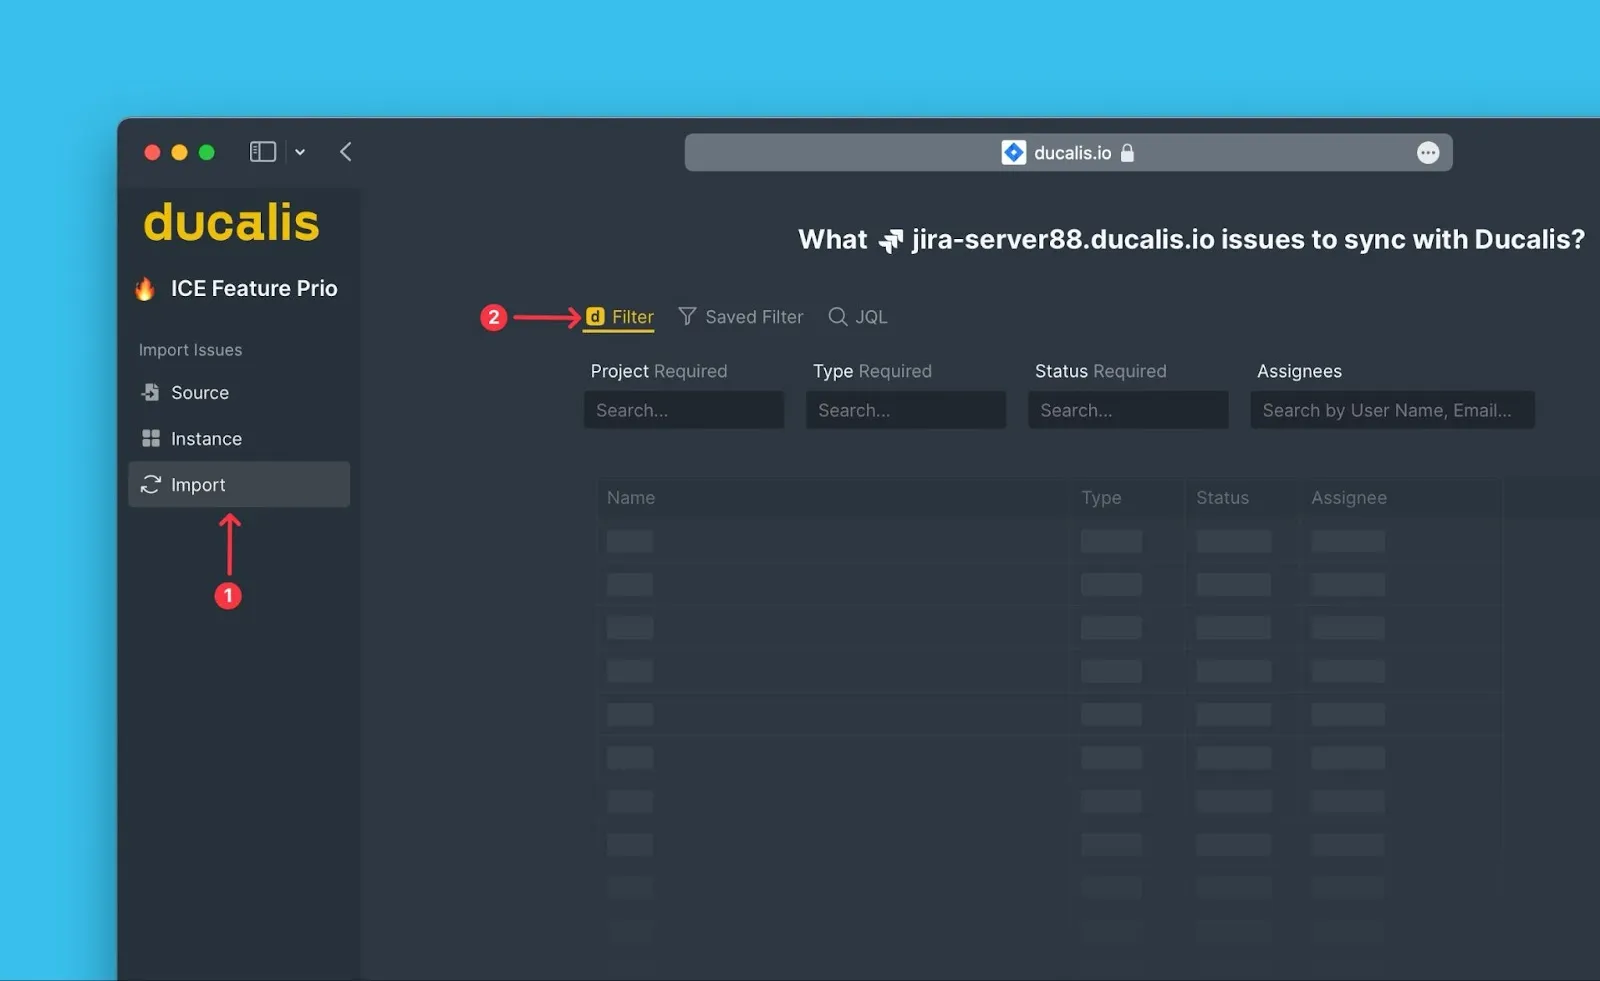
Import with Ducalis filters
-
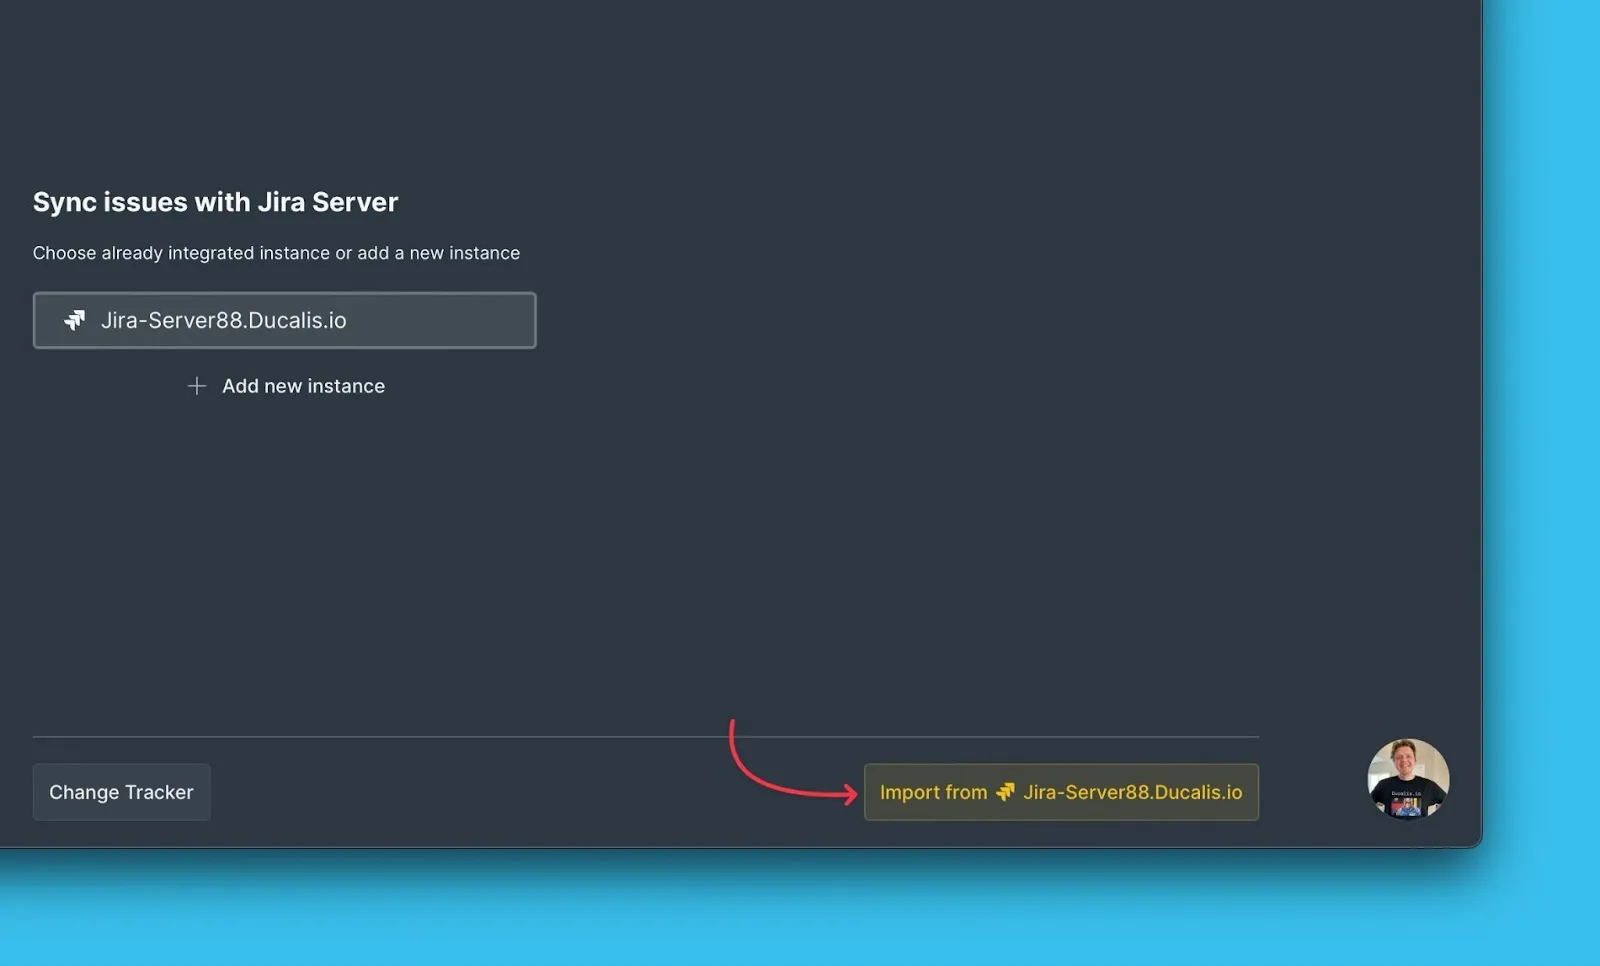
Choose the Jira Server instance you want to import from (or connect a new one).

-
Click Import from [instance].

-
Select Ducalis filters.
-
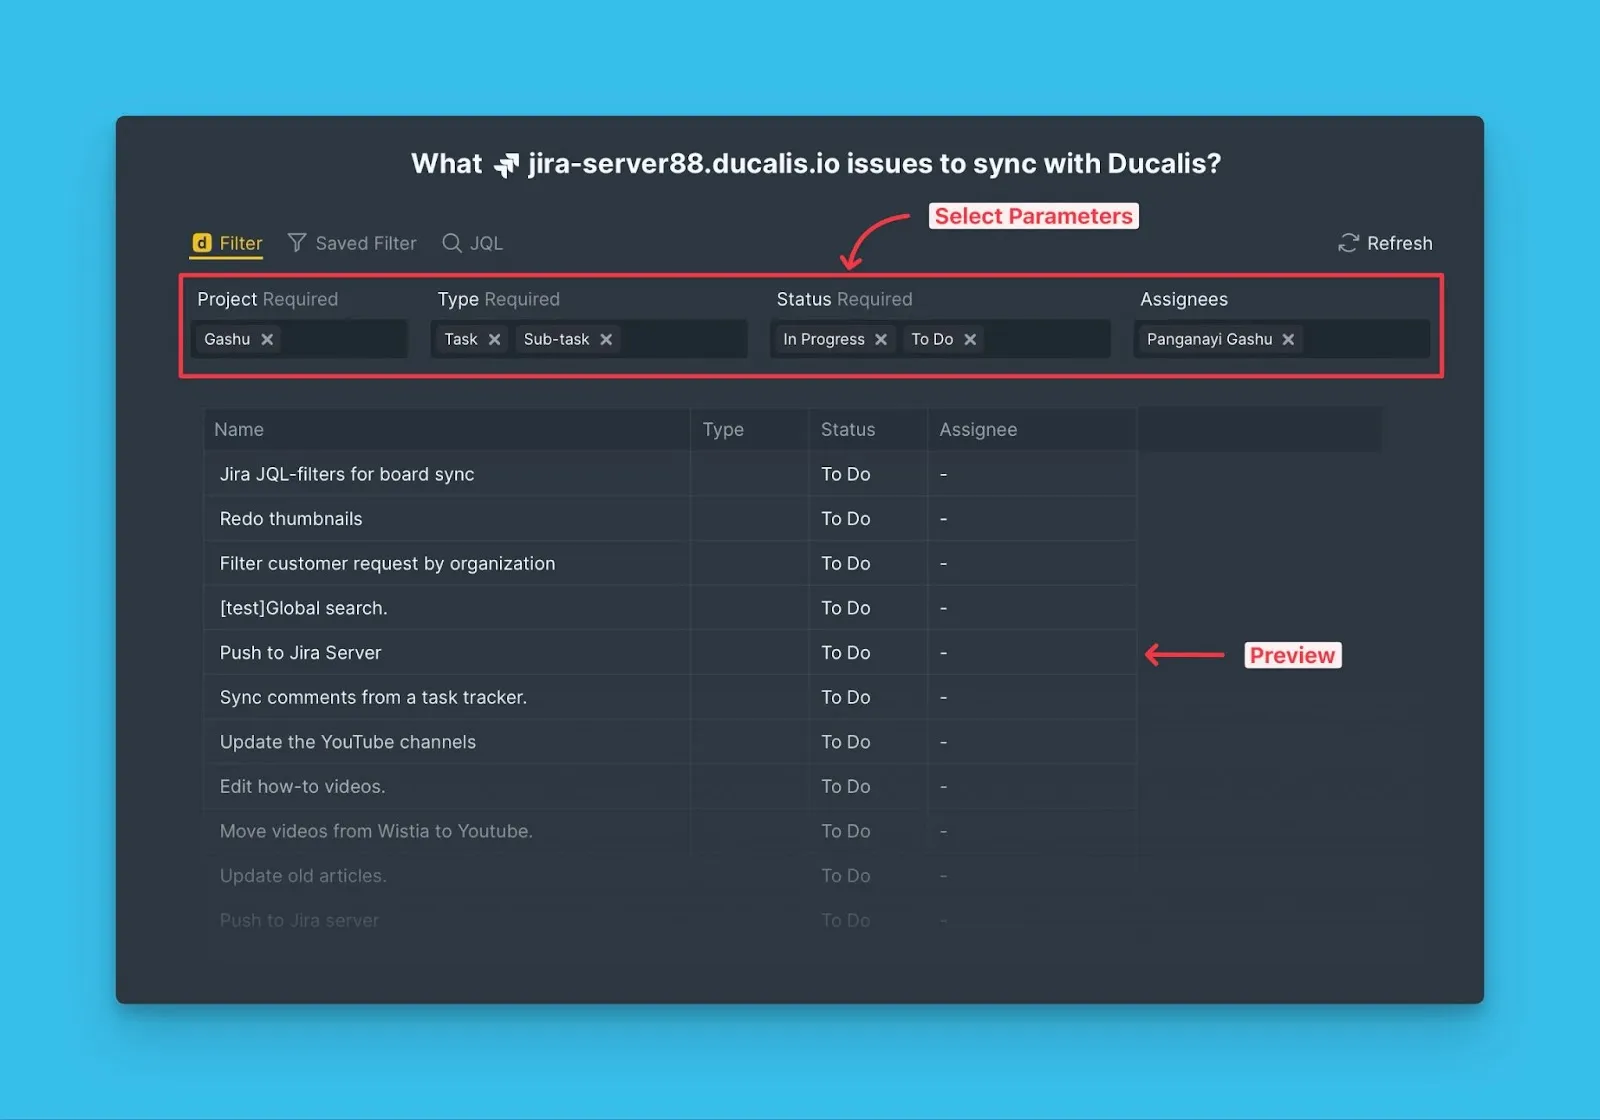
Configure the filter parameters.
- Select all required parameters
- Add optional parameters to narrow your search
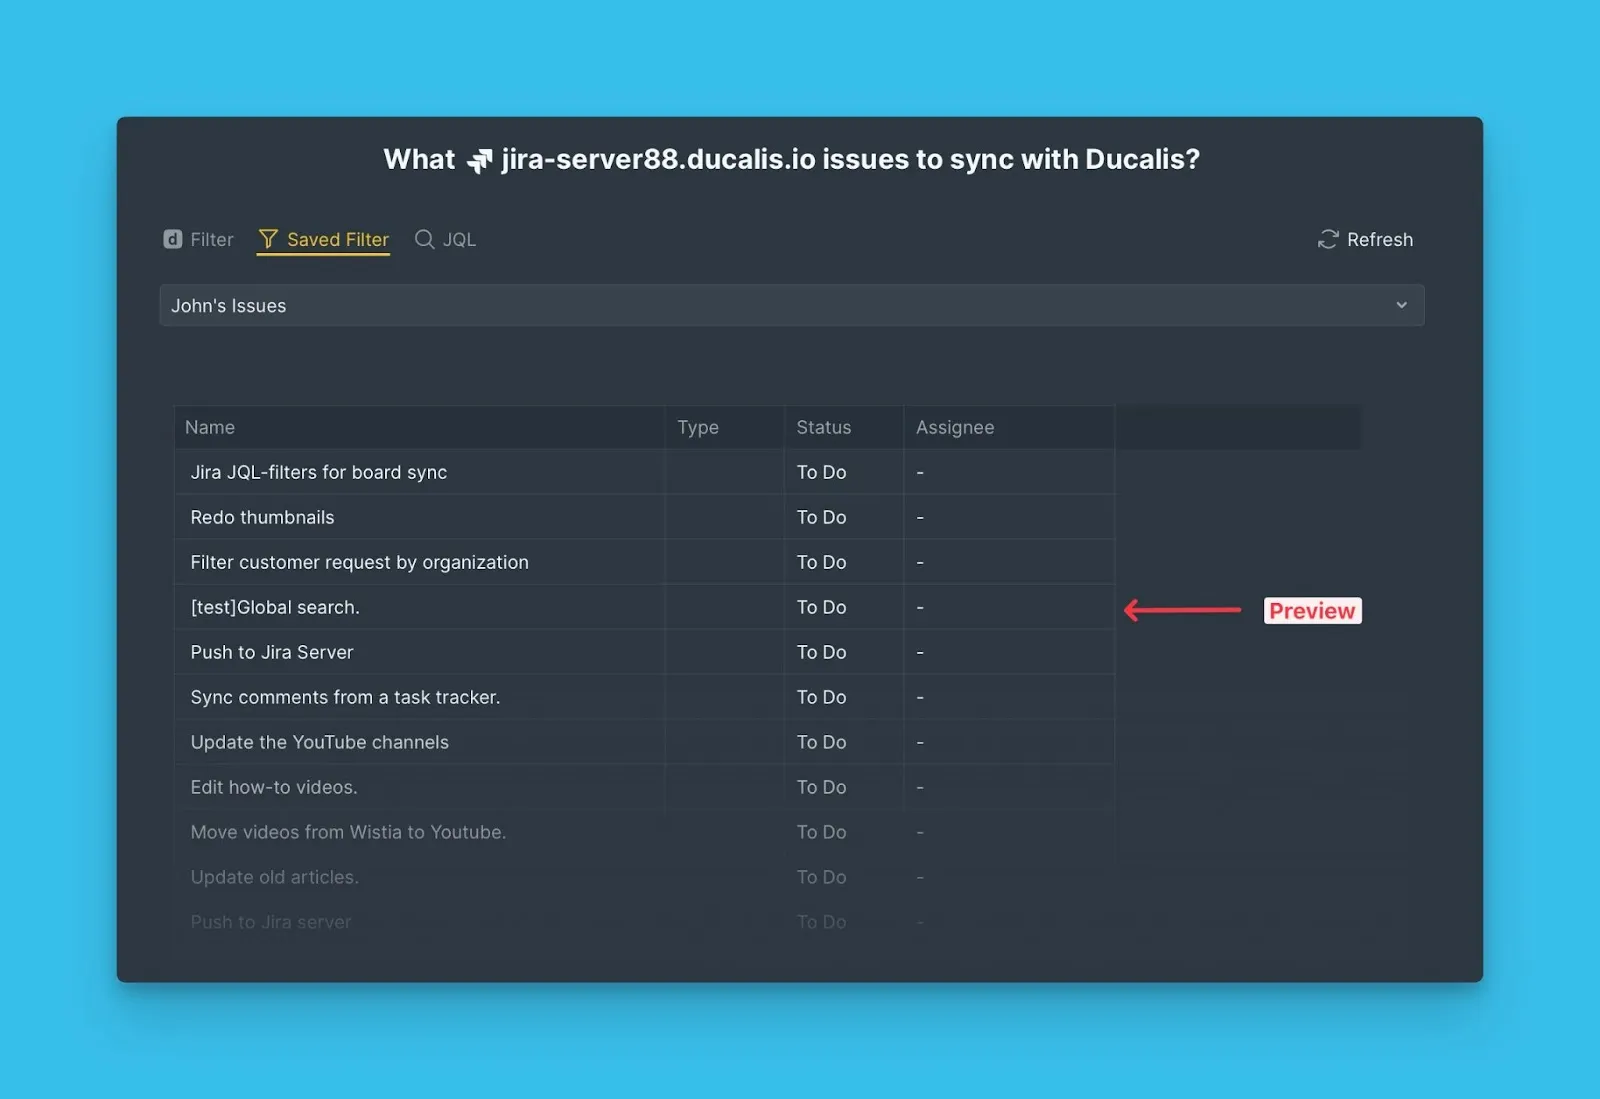
- View the real-time preview to verify which issues match
-
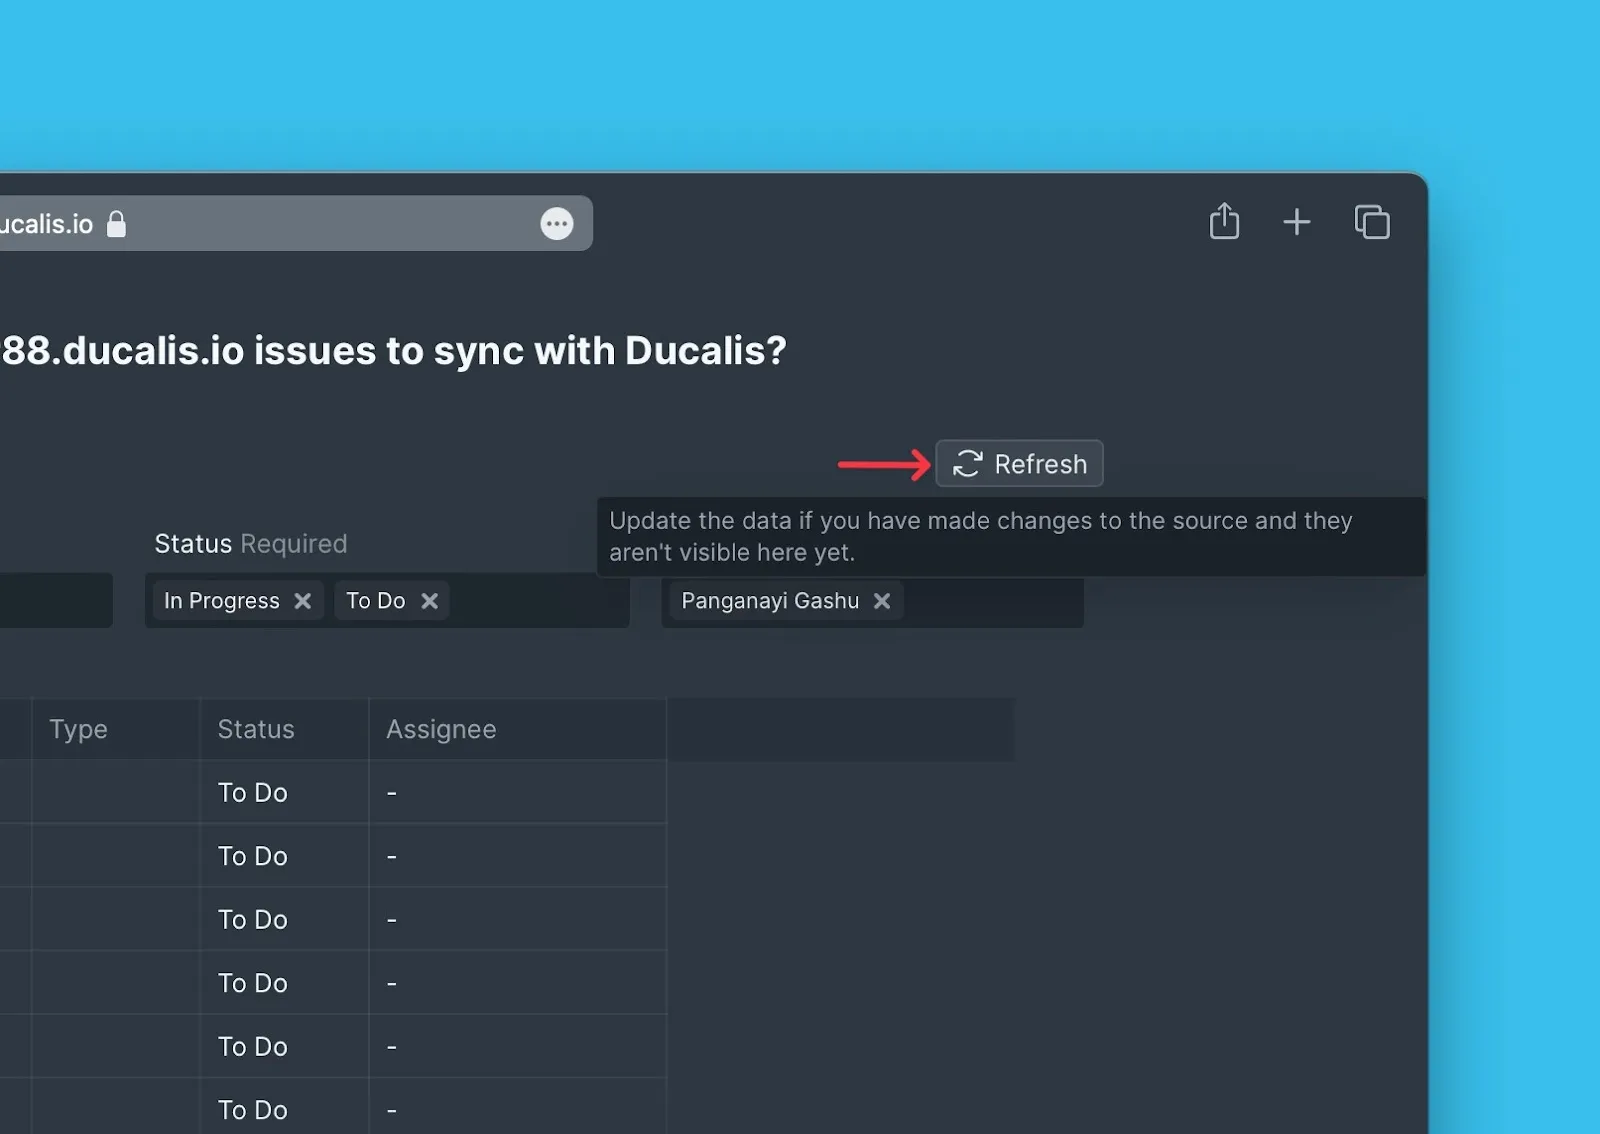
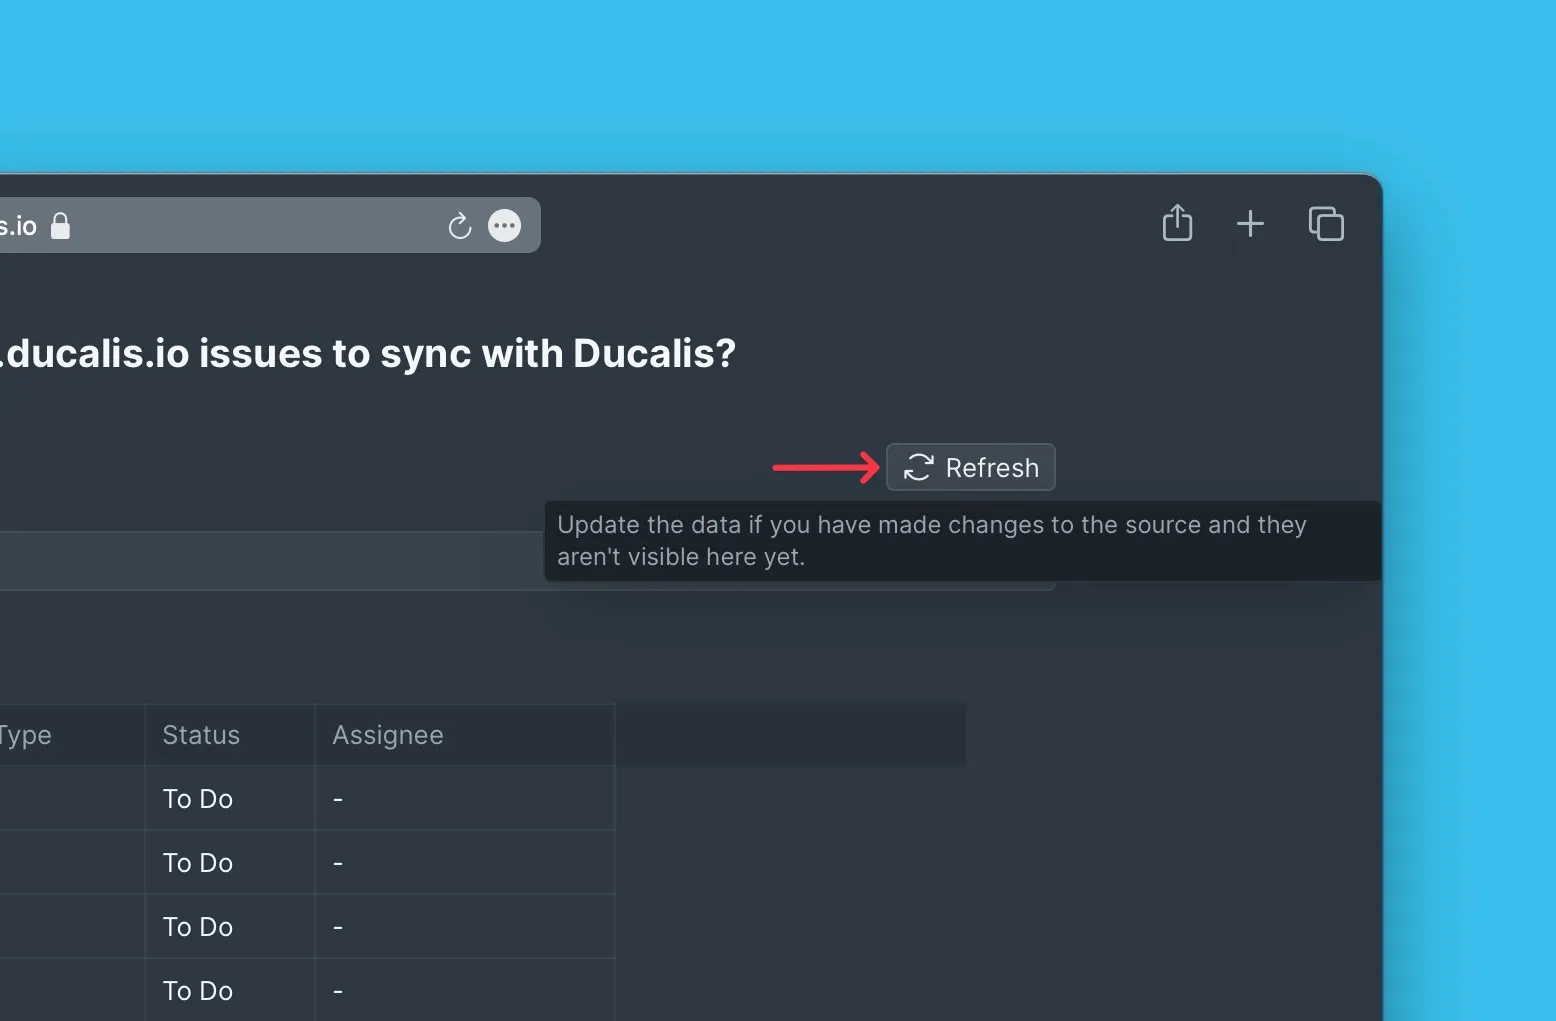
If parameters don't appear after recent Jira changes, click Refresh to update the data.
-
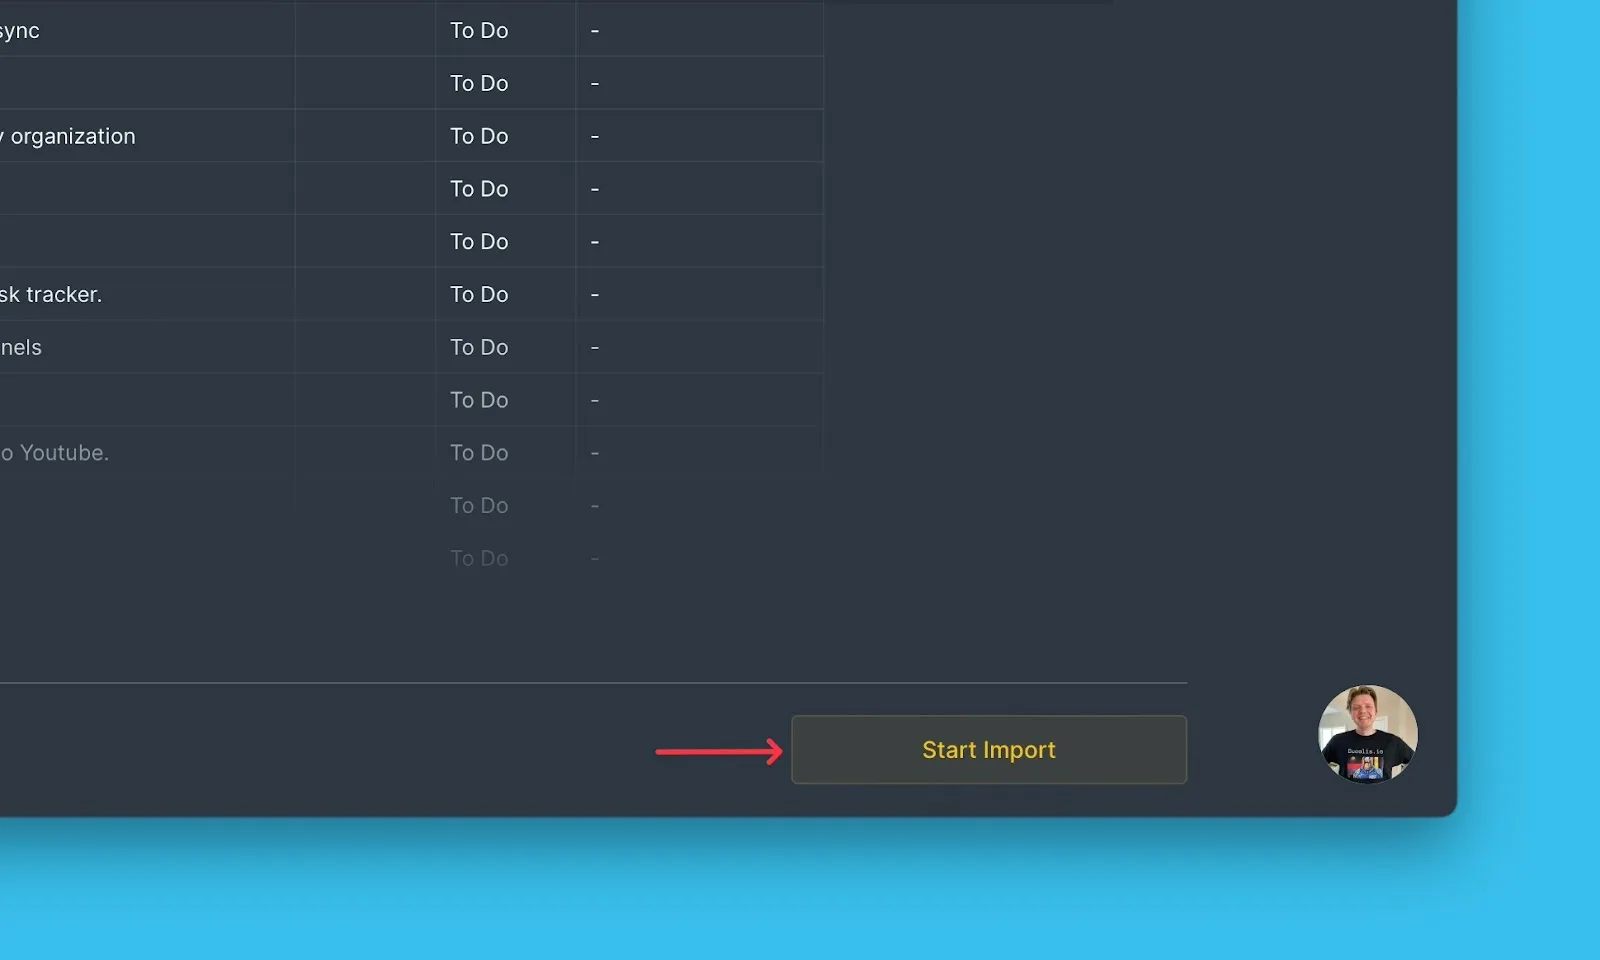
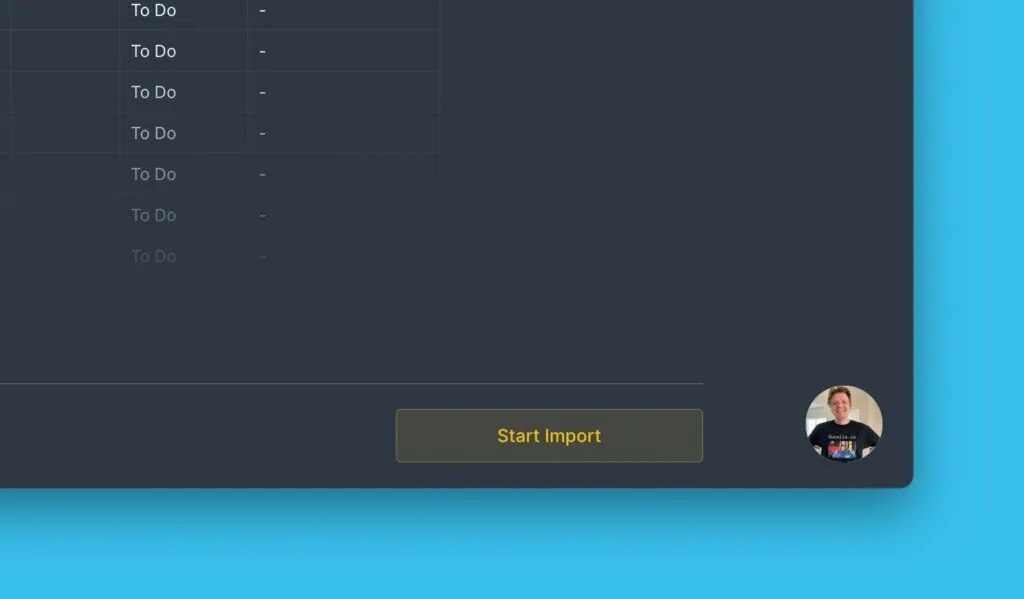
Click Start Import.
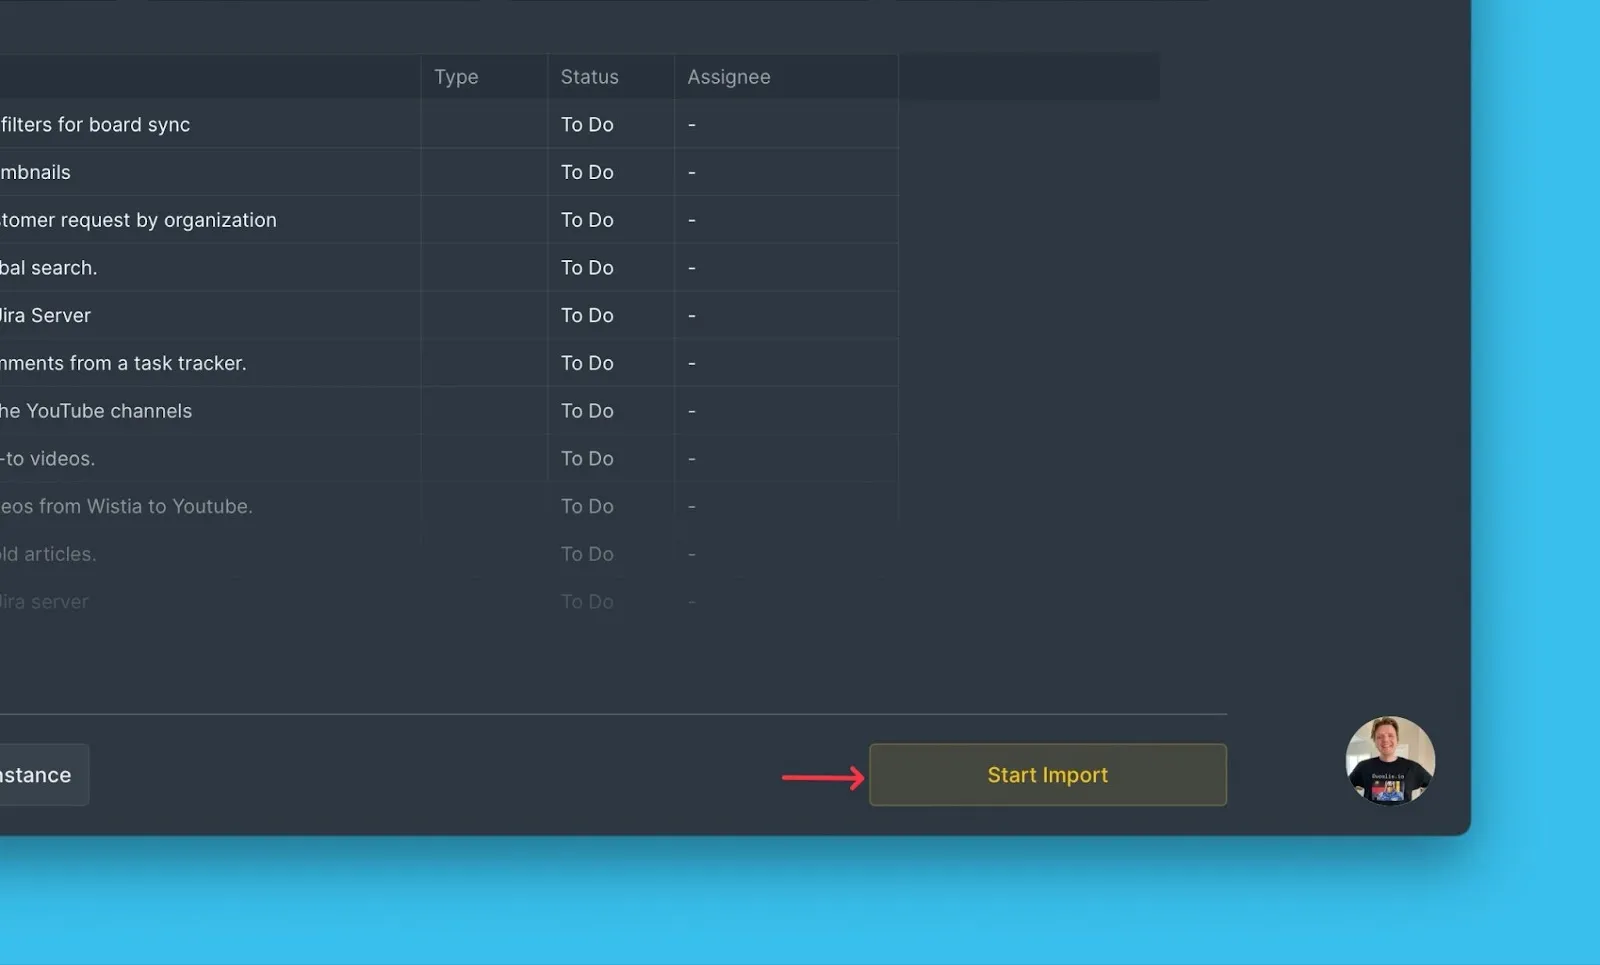
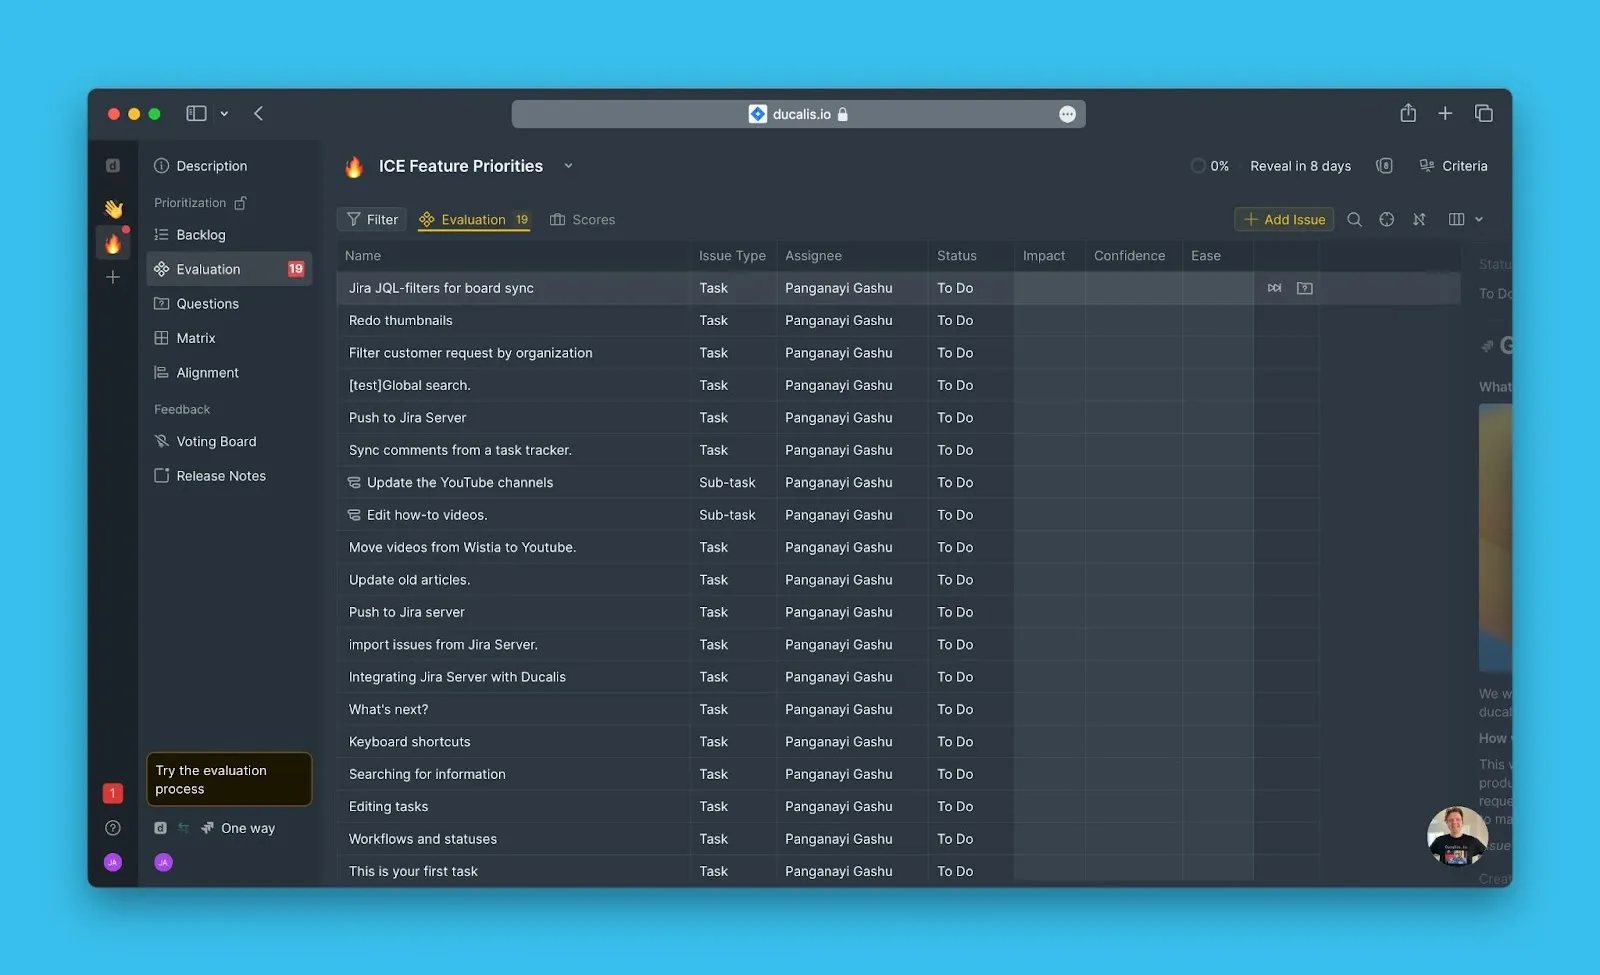
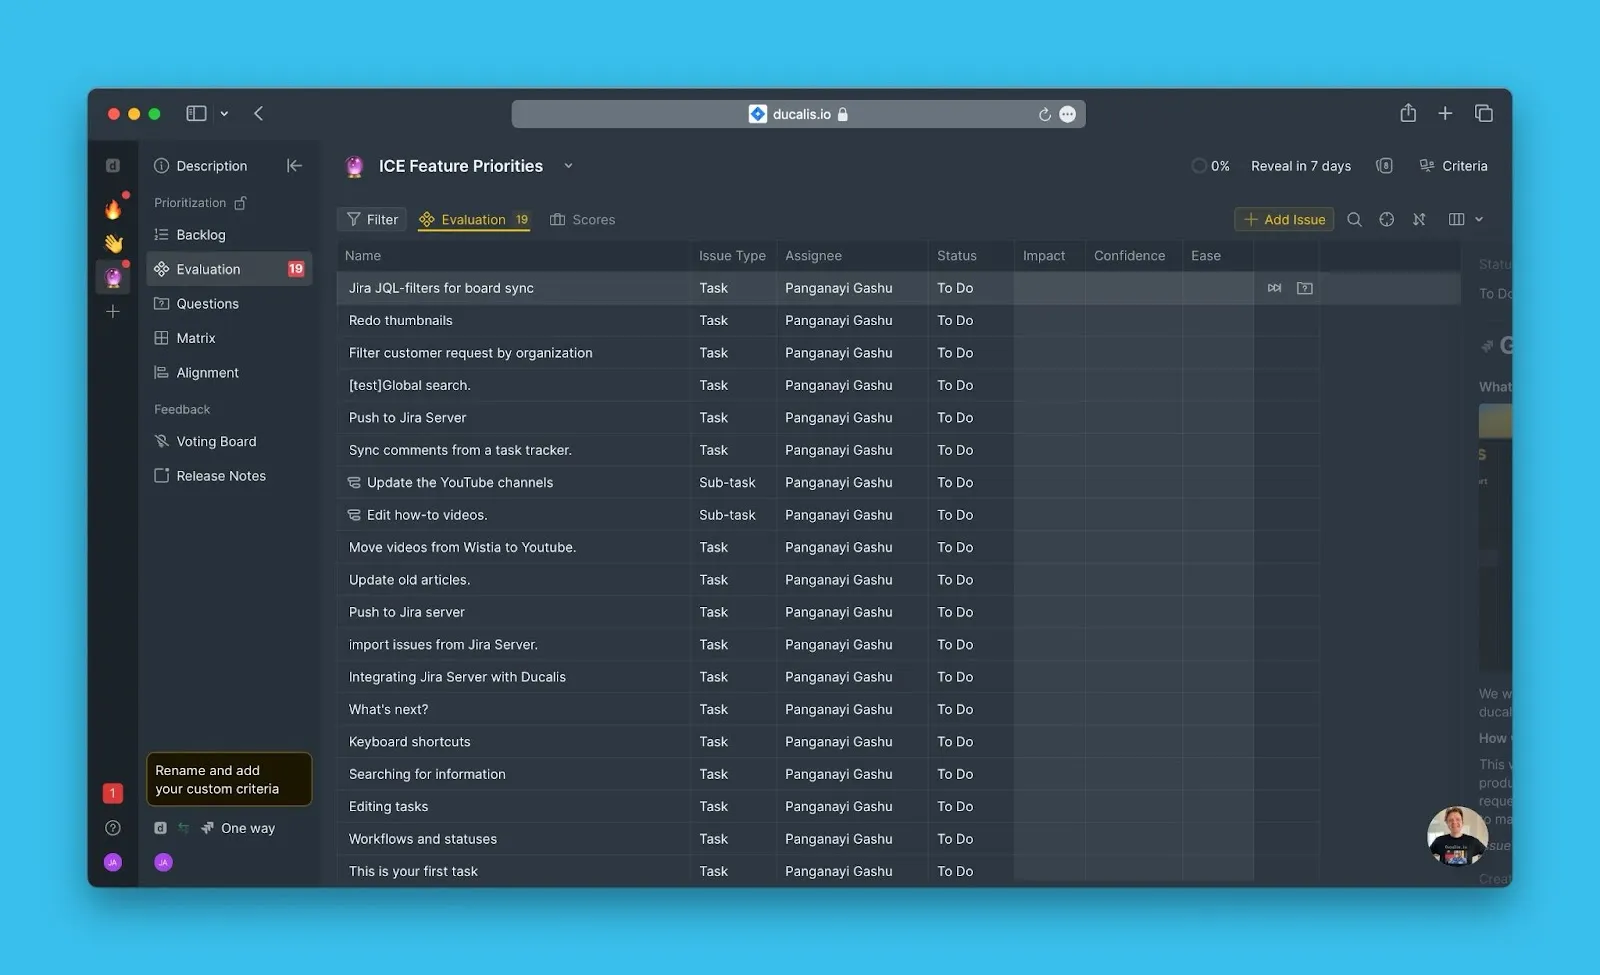
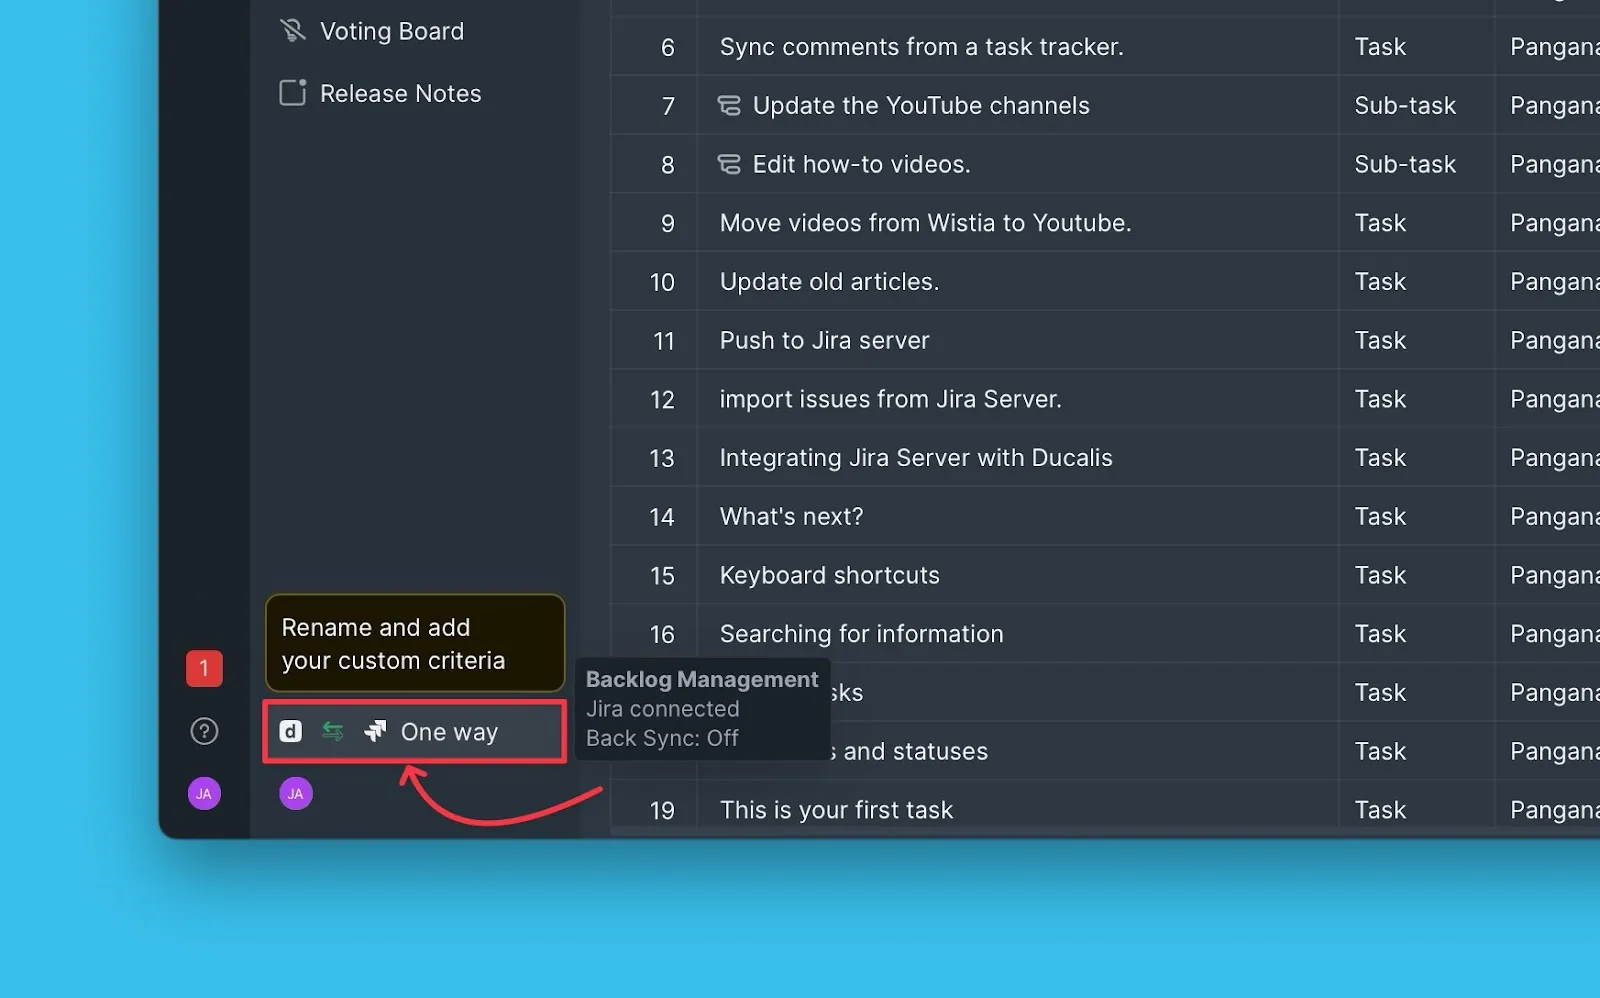
Your Board now shows the imported issues from Jira Server.
Edit Ducalis filters
Edit import filters to add more issues or remove issues from your Board without disconnecting the integration.
-
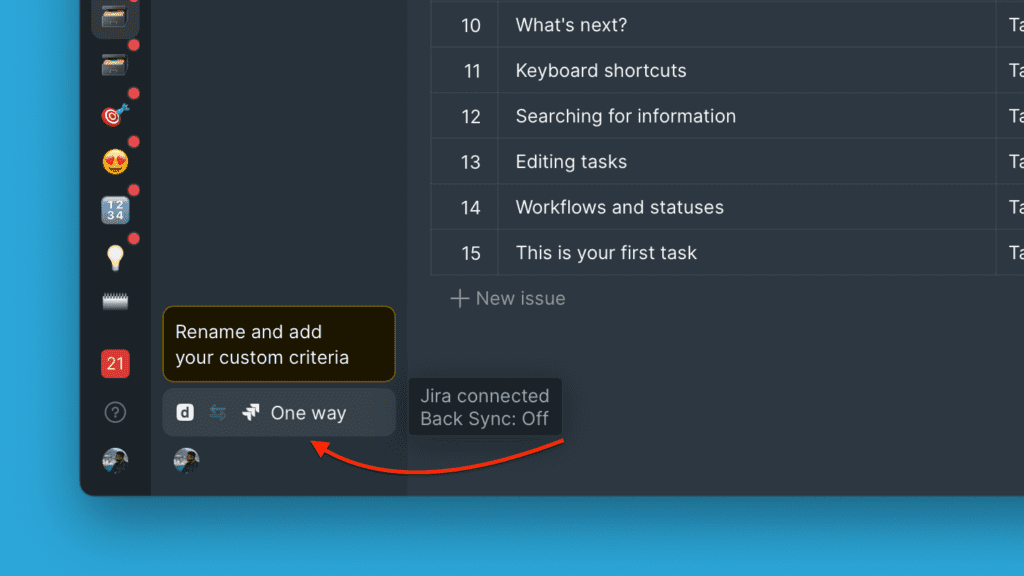
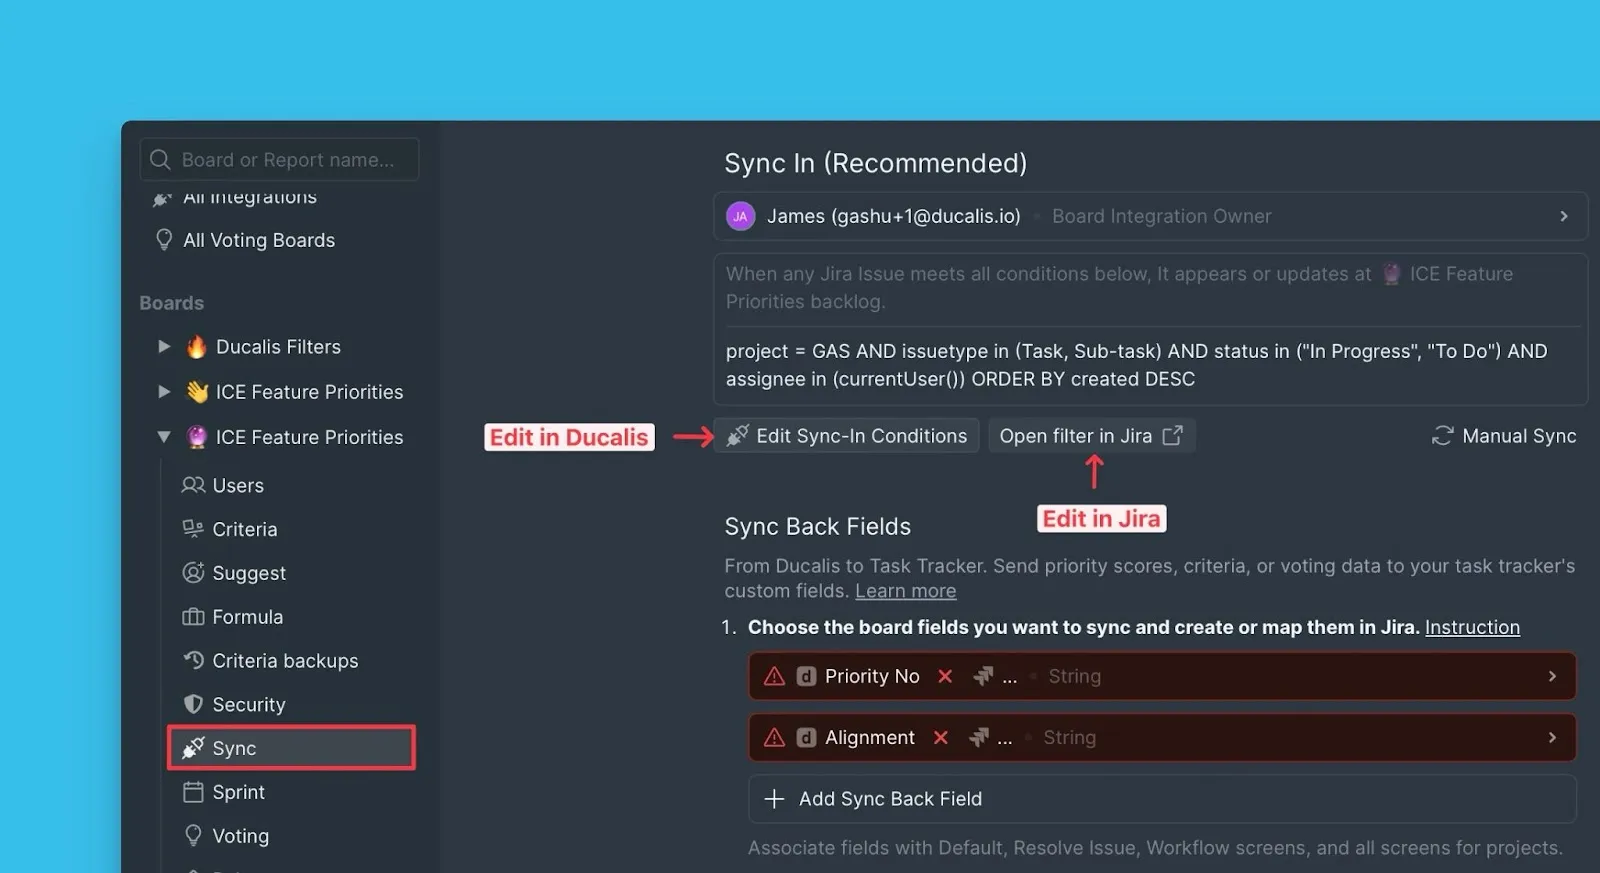
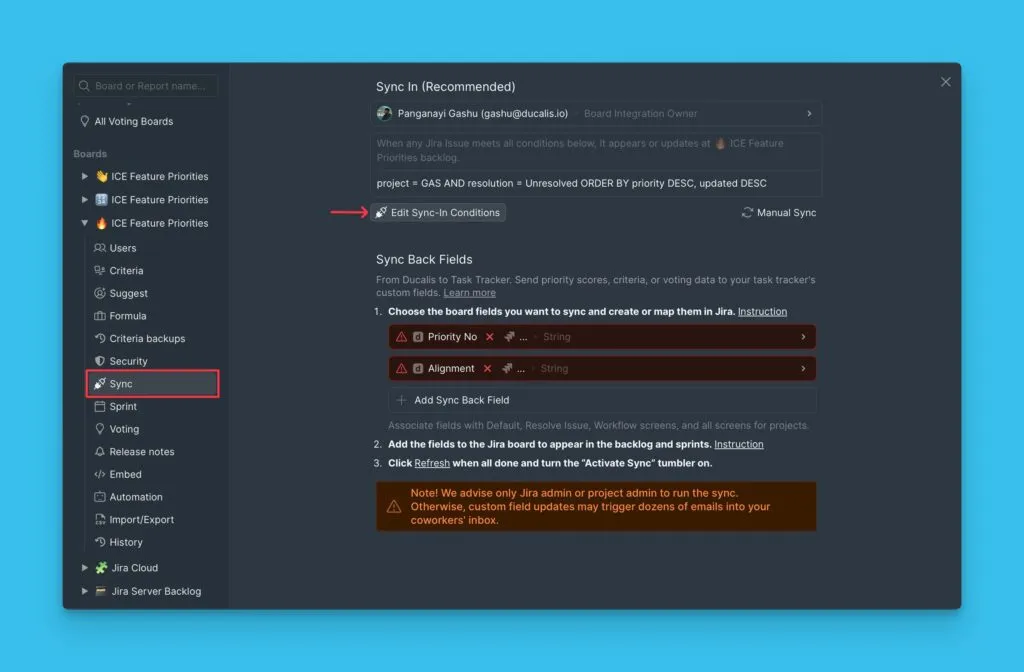
Click Sync to access sync settings.
-
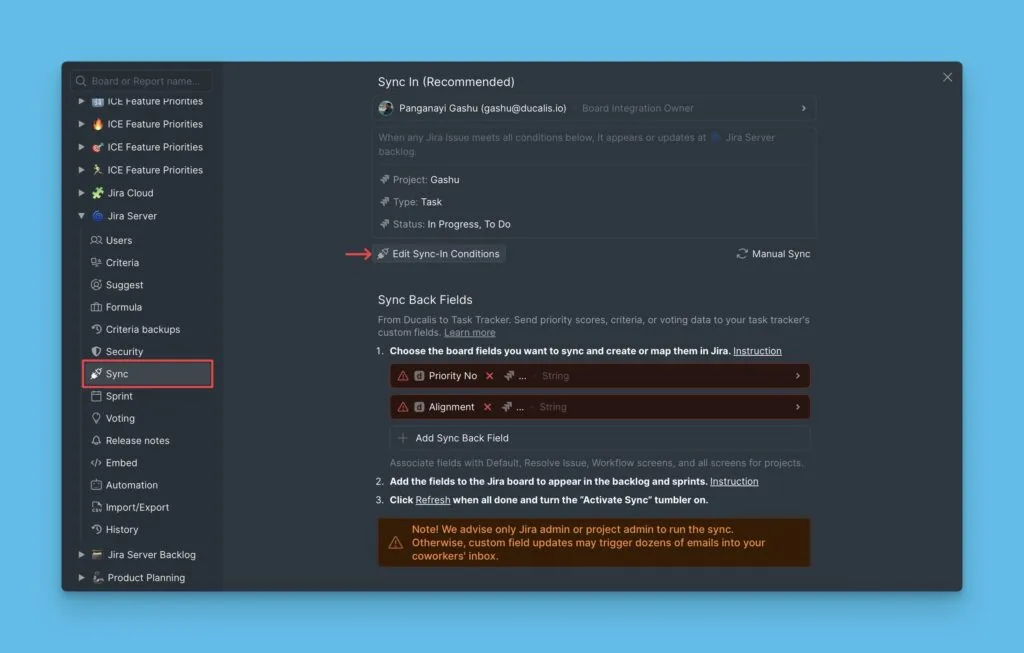
Under Sync, click Edit Sync-In Conditions.
-
Modify the filter parameters, then click Save.
Using Jira Filters
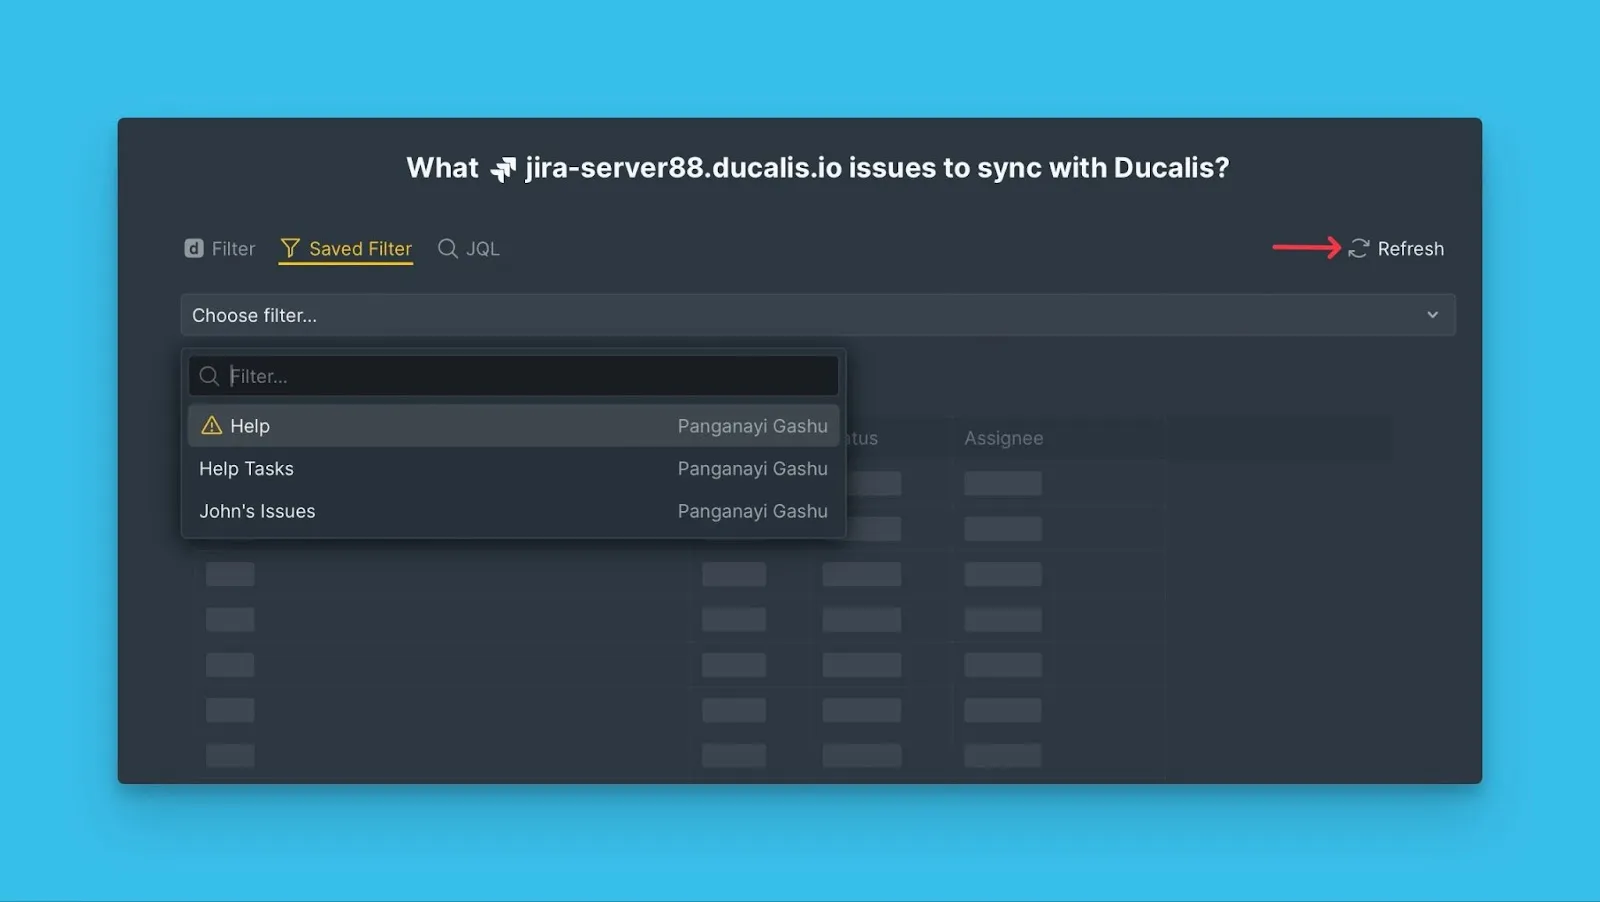
Jira filters let you import issues using saved filters from your Jira Server account.
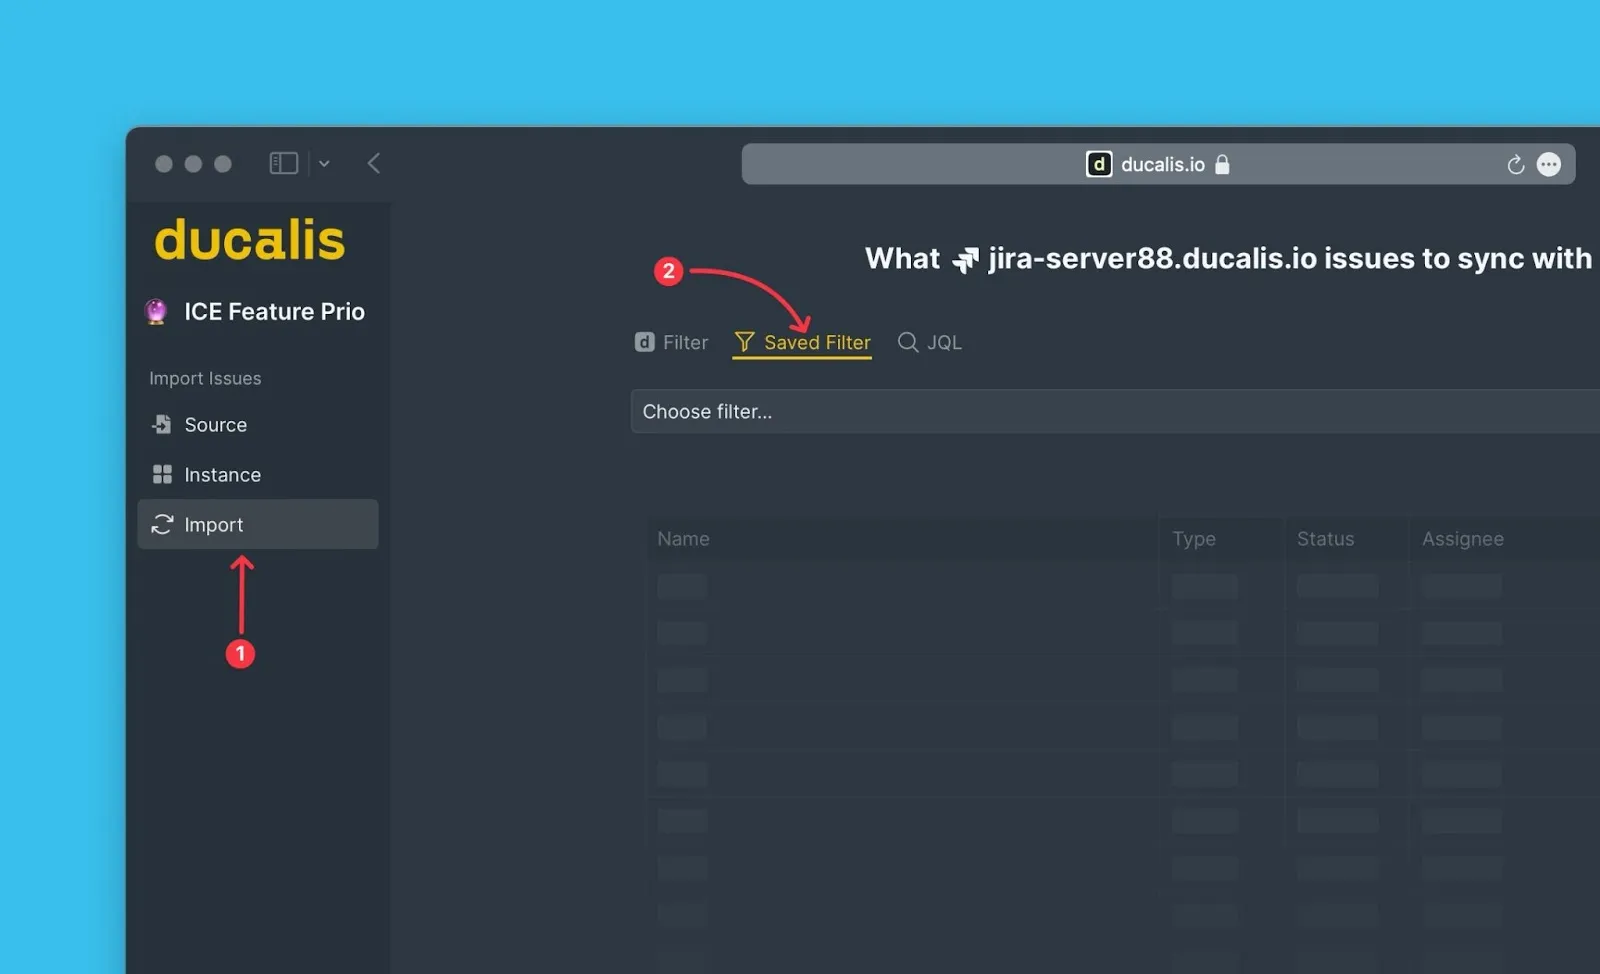
Import with Jira filters
-
Choose the Jira Server instance you want to import from (or connect a new one).

-
Click Import from [instance].
-
Select Saved filters.
-
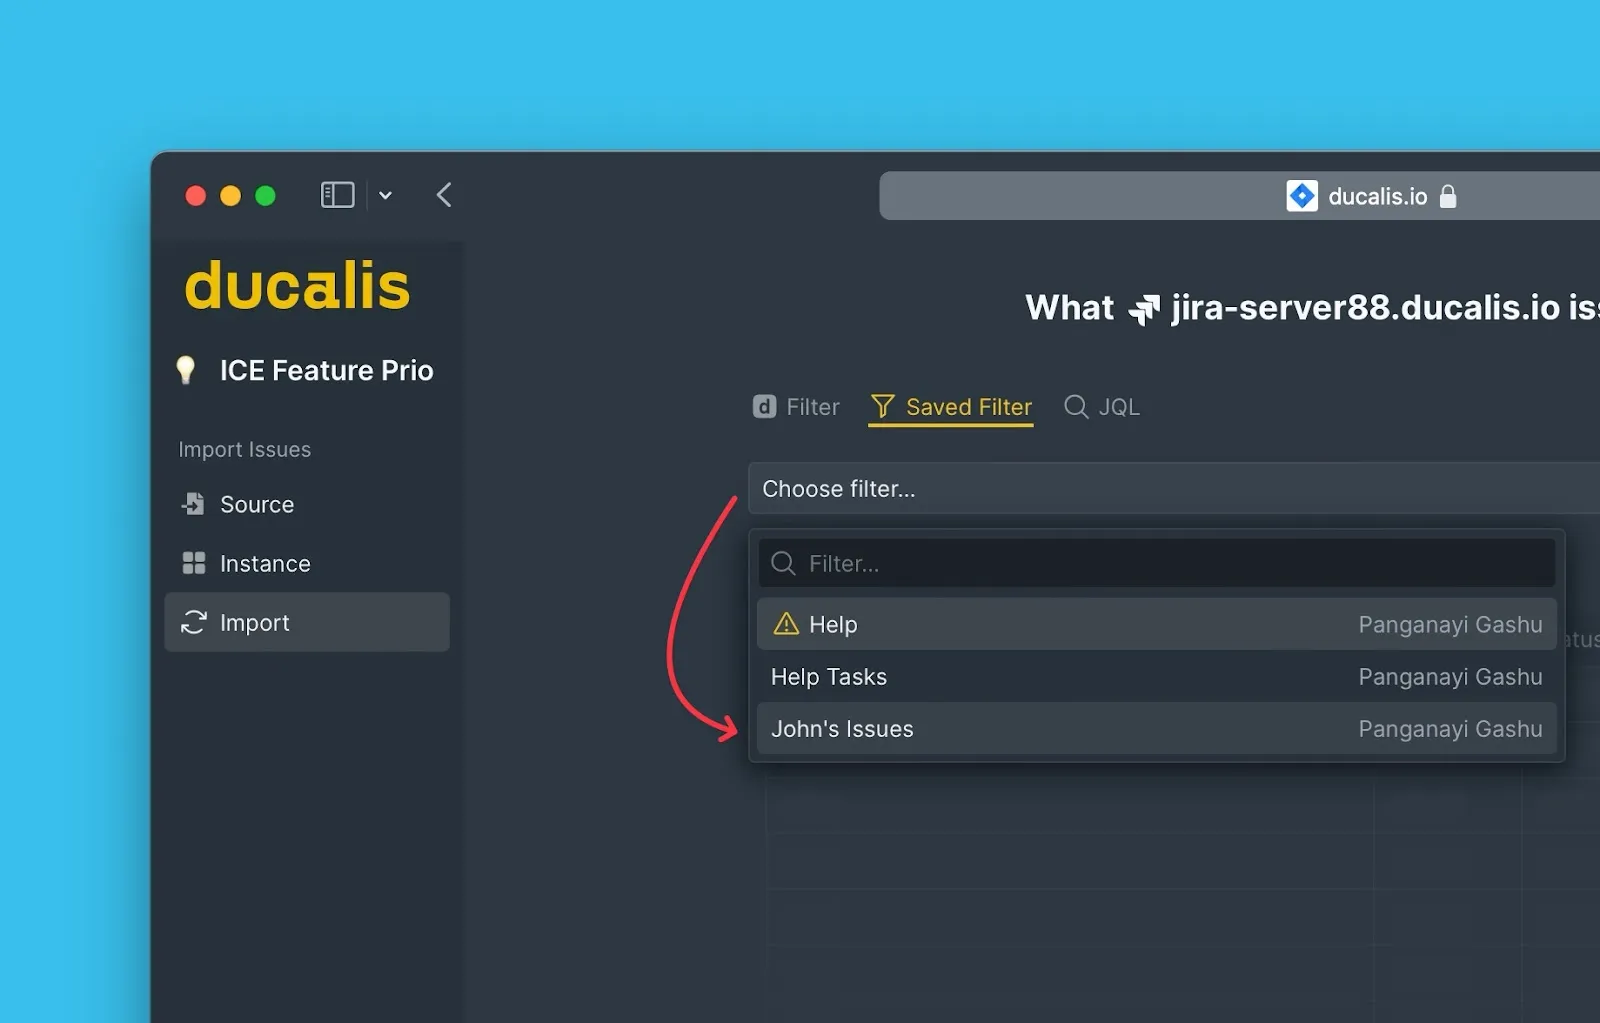
Select the filter containing the issues you want to import.
-
Review the real-time preview to verify the issues.
-
If the filter doesn't appear after recent Jira changes, click Refresh to update the filter list.
-
Click Start Import.
Your Board now shows the imported issues from Jira Server.
Troubleshoot missing filters
If a saved Jira filter doesn't appear in the filter list, check the filter's access permissions in Jira Server.
Change filter permissions
-
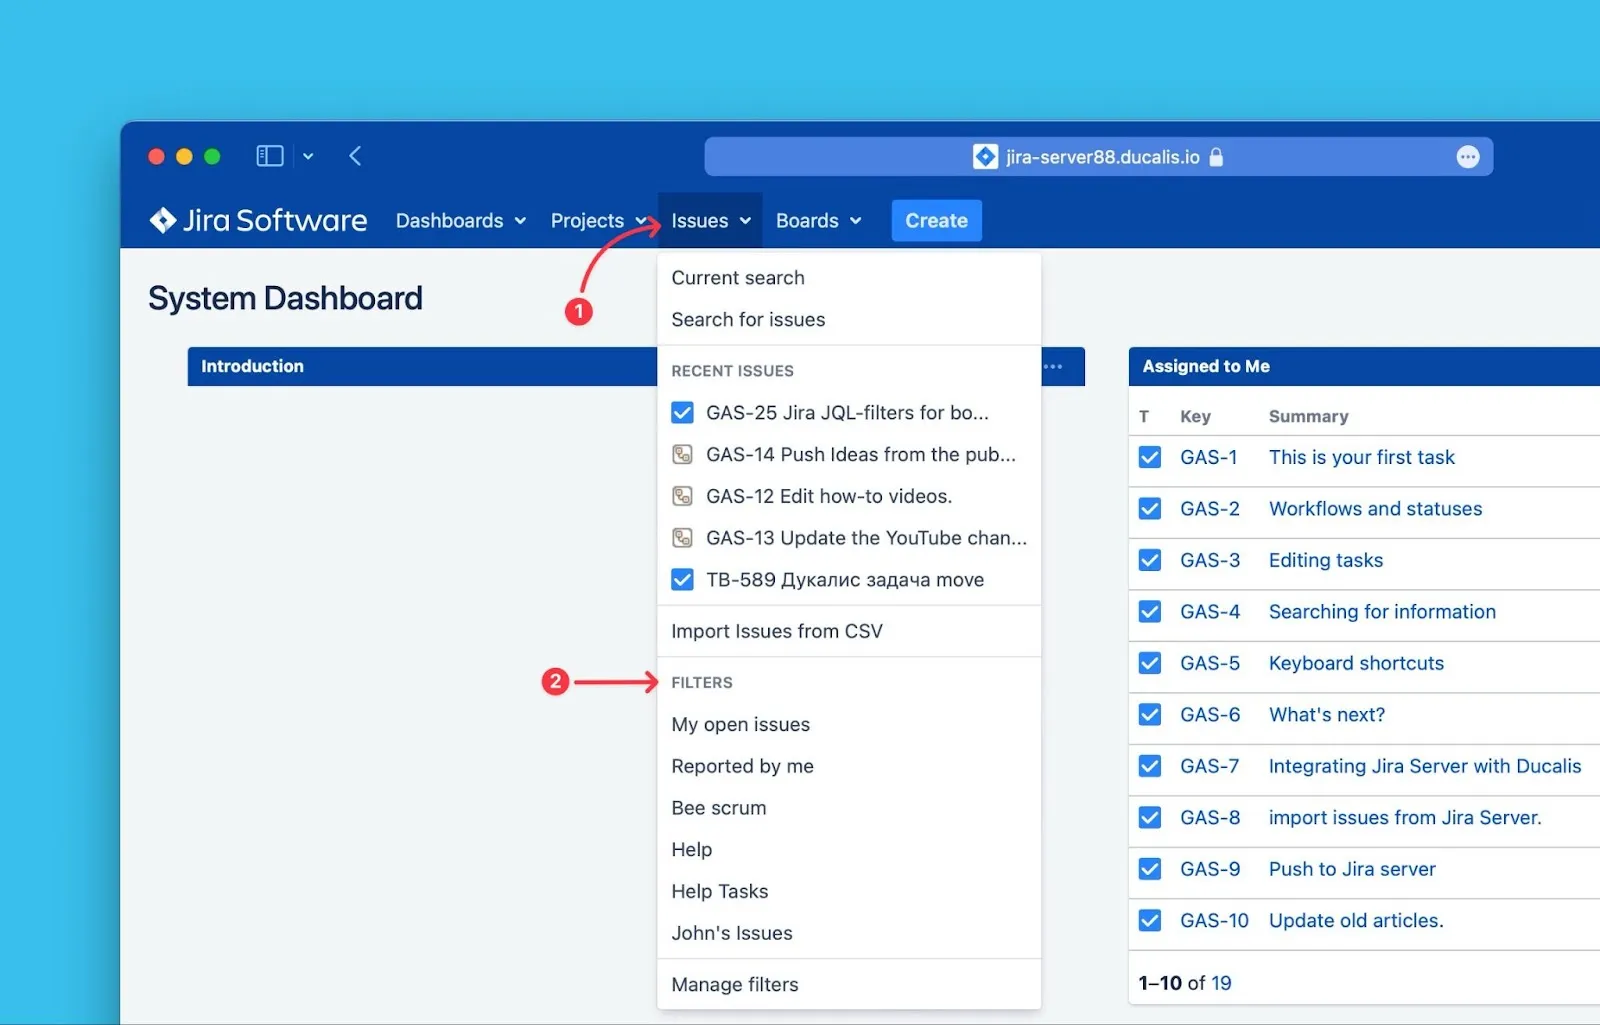
In Jira Server, click Issues from the top panel.
-
Hover over Filters and select the filter you want to use.
-
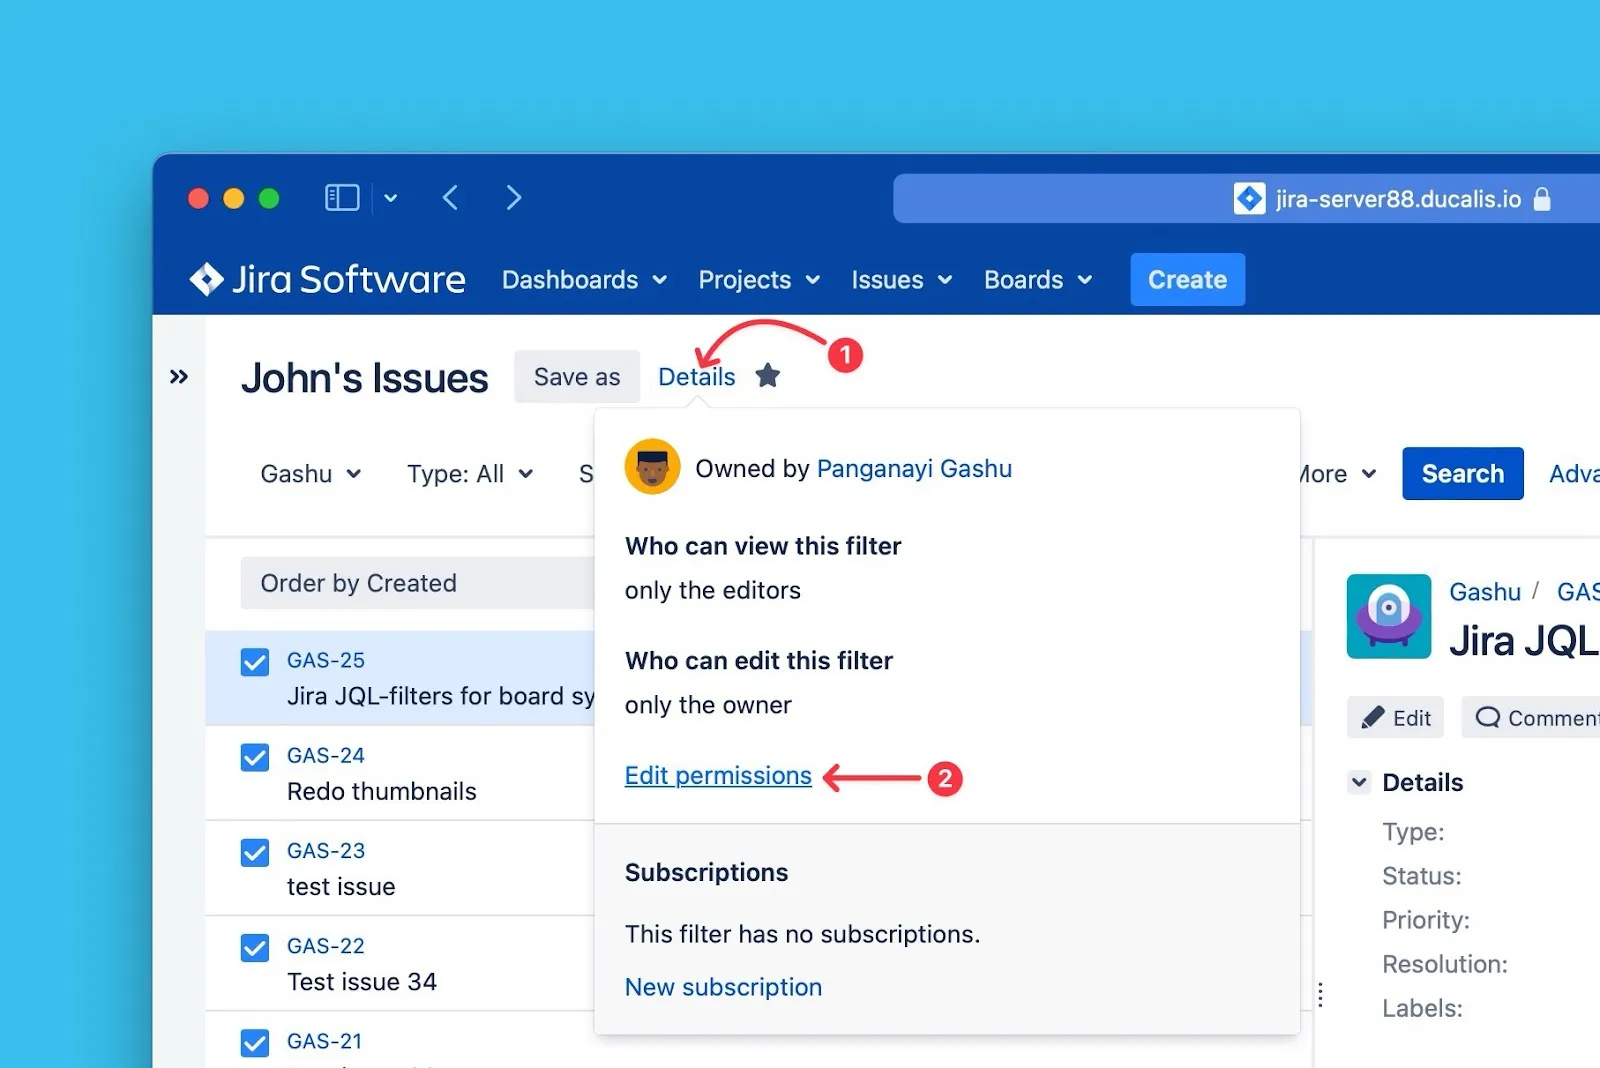
Click Details next to the filter's name.
-
Click Edit permissions.
-
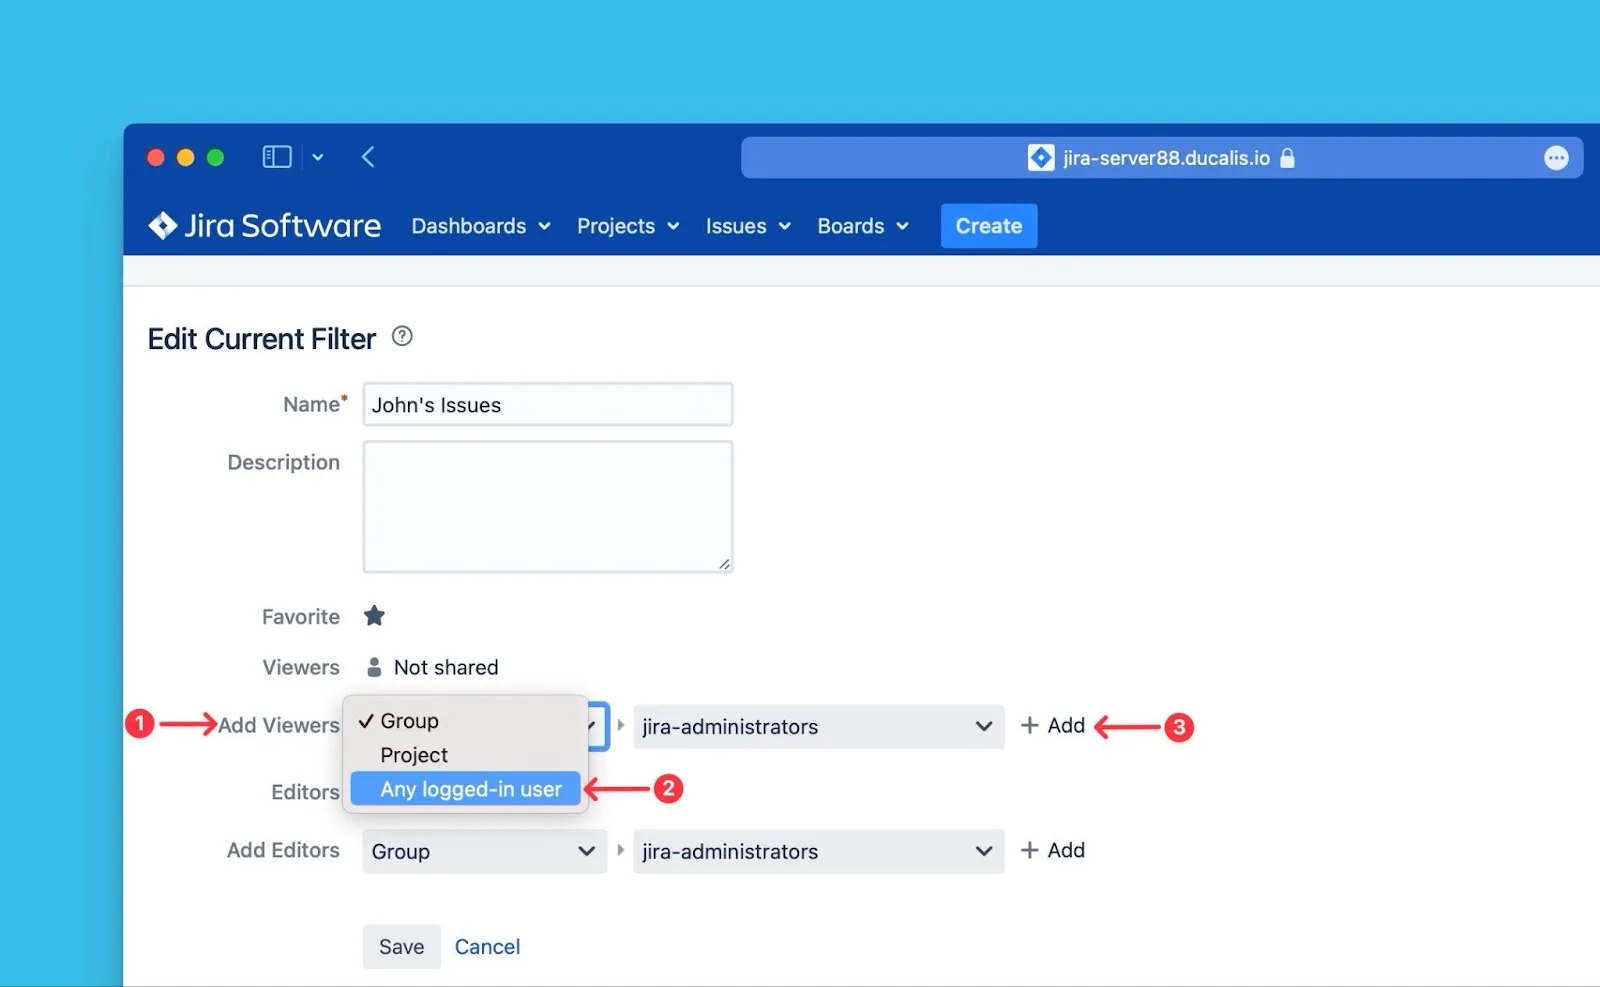
Under Add Viewers, select Any logged-in user from the dropdown.
-
Click +Add.
-
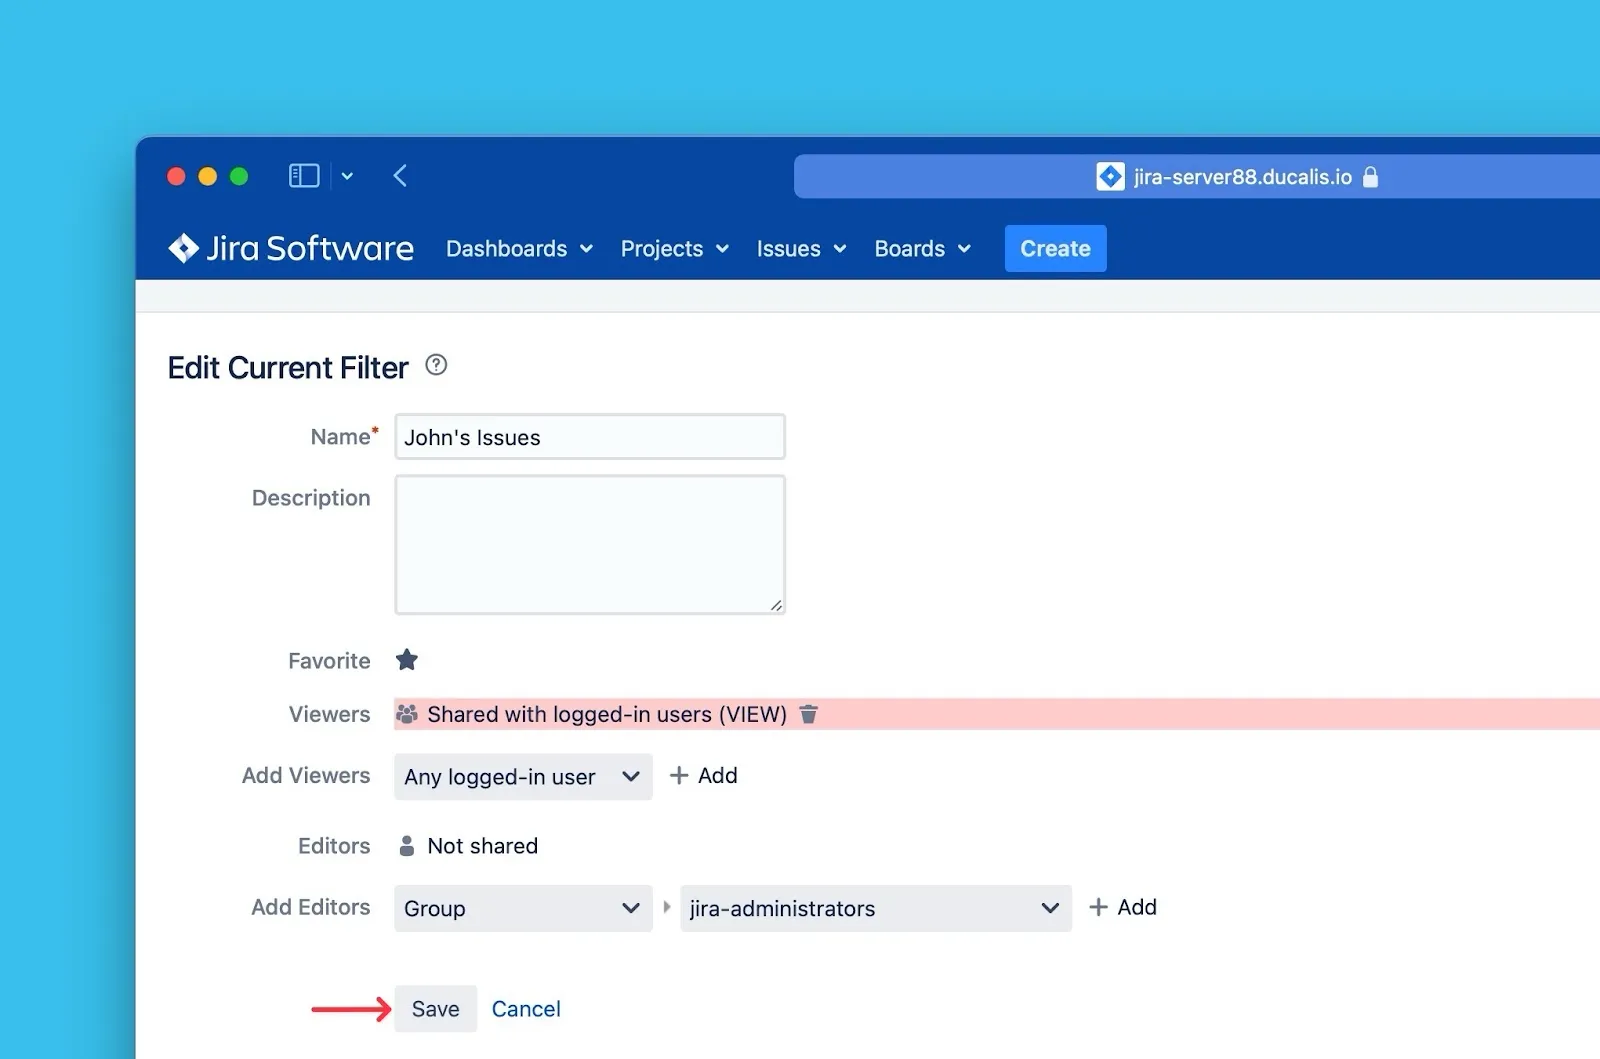
Click Save.
Refresh filter list
-
Return to Ducalis and click Refresh.
-
Search for the filter name—it should now appear.
-
Import your issues.
If you still can't find the filter, contact support using the chat in the bottom right.
Edit Jira filters
Edit Jira filters to add more issues or remove issues from your Board without disconnecting the integration.
-
Click Sync to access sync settings.
-
Under Sync, click Edit Sync-In Conditions.
-
Click Open filter in Jira to modify the filter in Jira Server.
-
Edit the filter in Jira Server, then click Save.
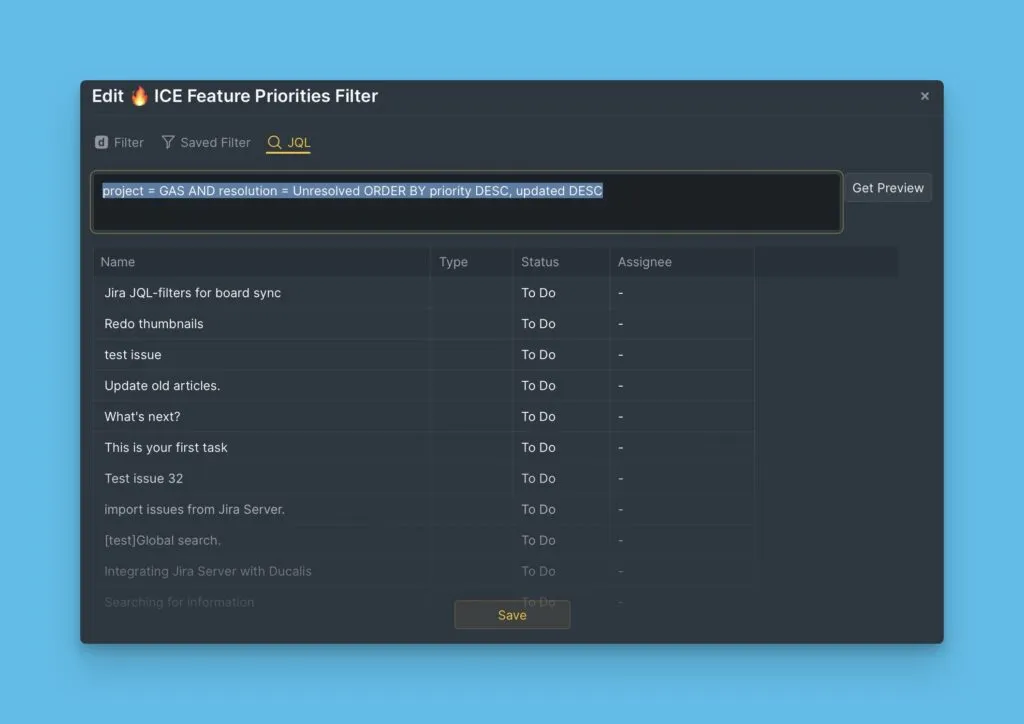
Using JQL Filters
JQL (Jira Query Language) filters let you write custom queries to find specific issues regardless of how they're structured in Jira.
Import with JQL filters
-
Choose the Jira Server instance you want to import from (or connect a new one).

-
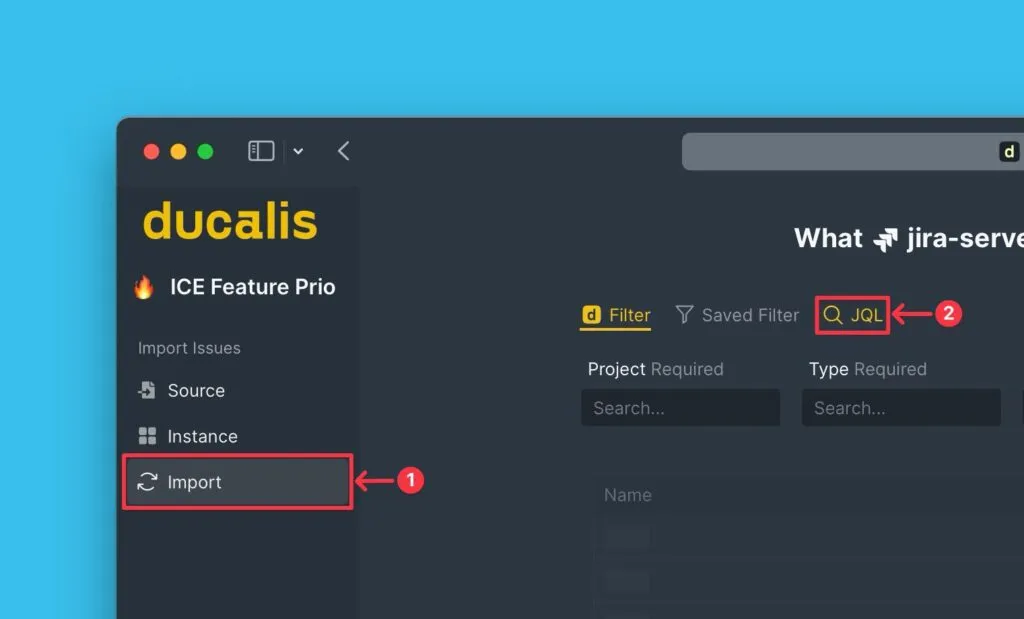
Click Import from [instance].

-
Select JQL filters.
-
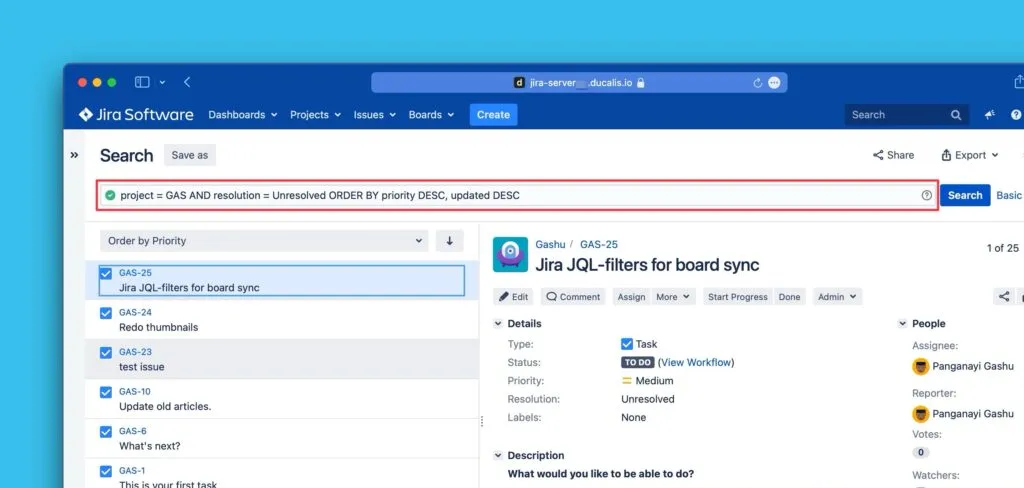
Copy your JQL query from Jira Server.
-
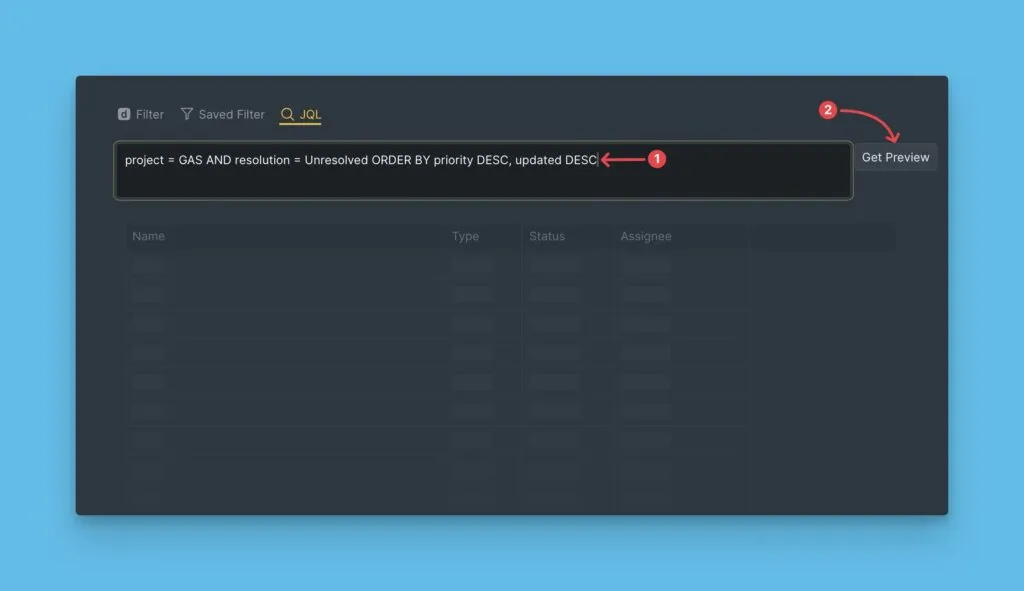
Paste the query into Ducalis, then click Get Preview to verify the issues.
-
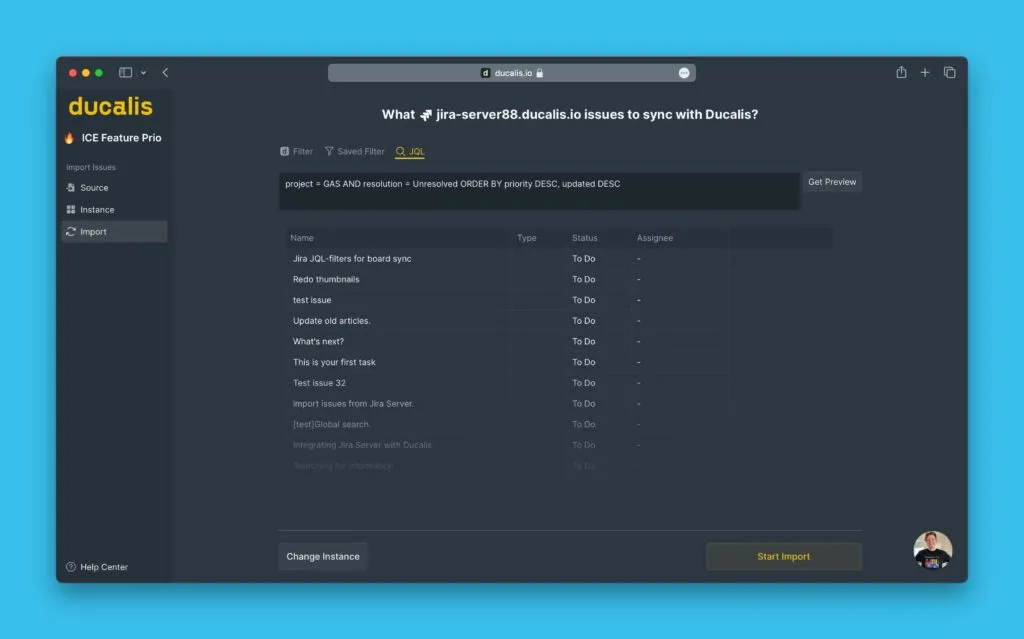
Review the preview to confirm the correct issues are selected.
-
Click Start import.
Edit JQL filters
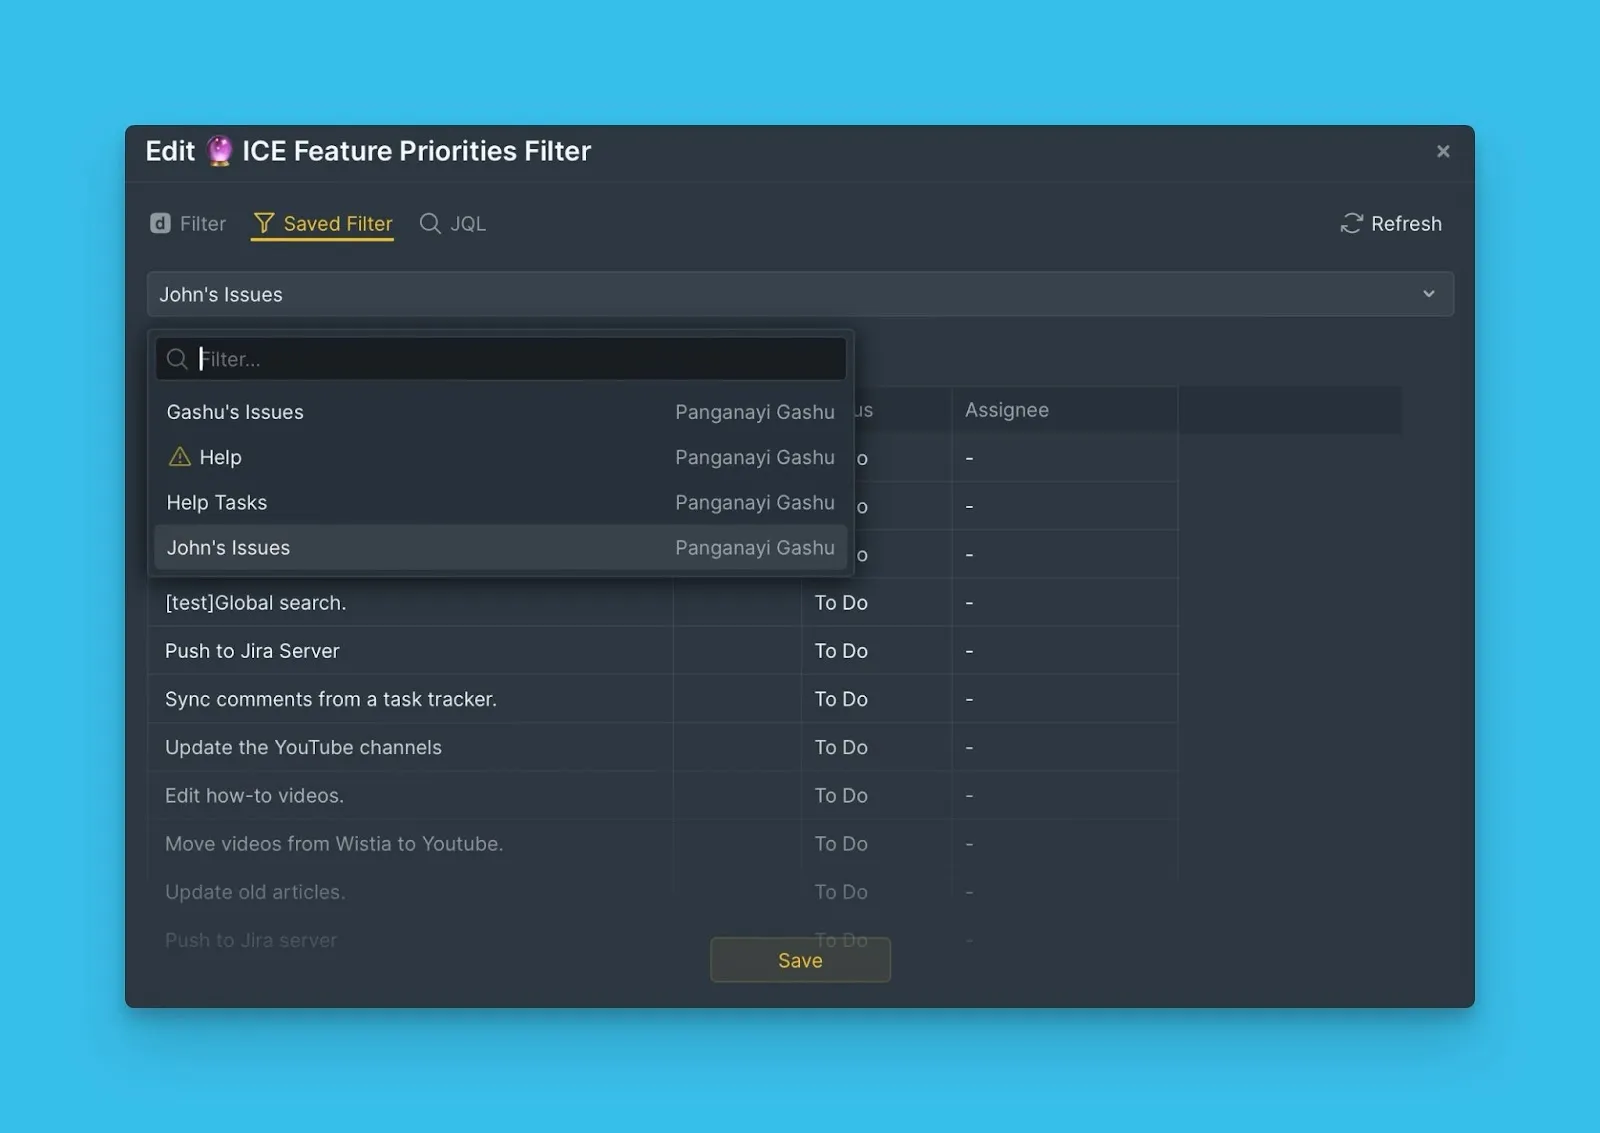
Edit JQL queries to change which issues sync to your Board.
-
Click Sync to access sync settings.
-
Click Edit Sync-In Conditions.
-
Modify your JQL query and click Save.