Step-by-step guide on how to set up WSJF prioritization at Jira with Cost of Delay calculations and WSJF scoring using Jira’s custom fields, and Jira Automation.
Add WSJF Score to Jira Backlog with Ducalis.io
It’s effortless to implement WSJF scoring for your Jira backlog.
Approximate implementation time ~ less than 2 minutes.
1. Apply the WSJF framework from our library. It will include all predefined settings as described in WSJF Guide.
2. Connect Jira to sync your backlog.
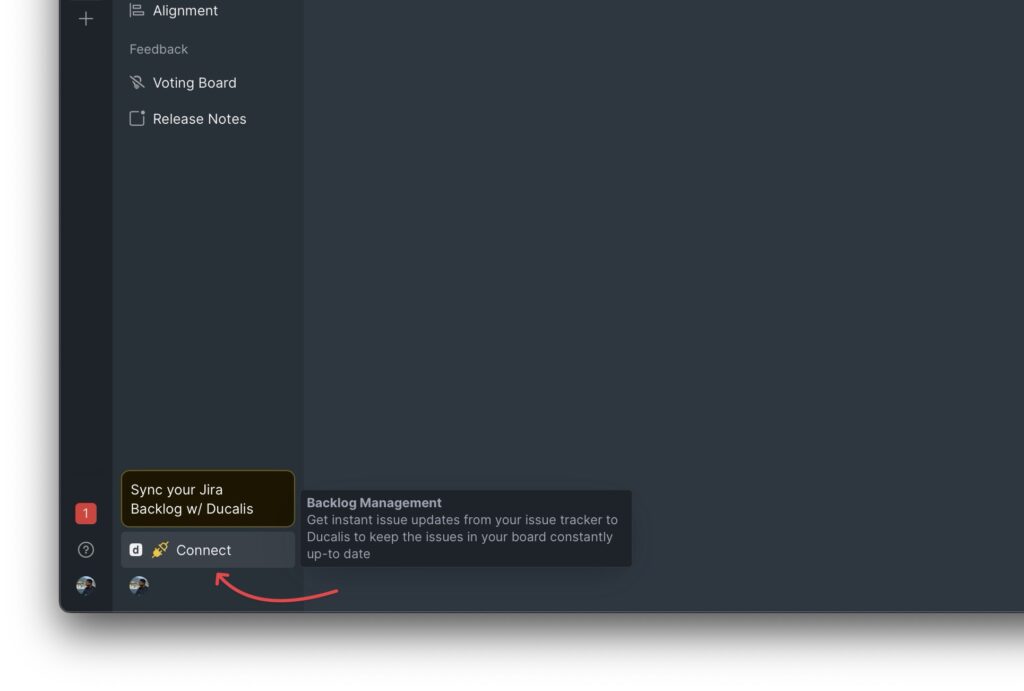
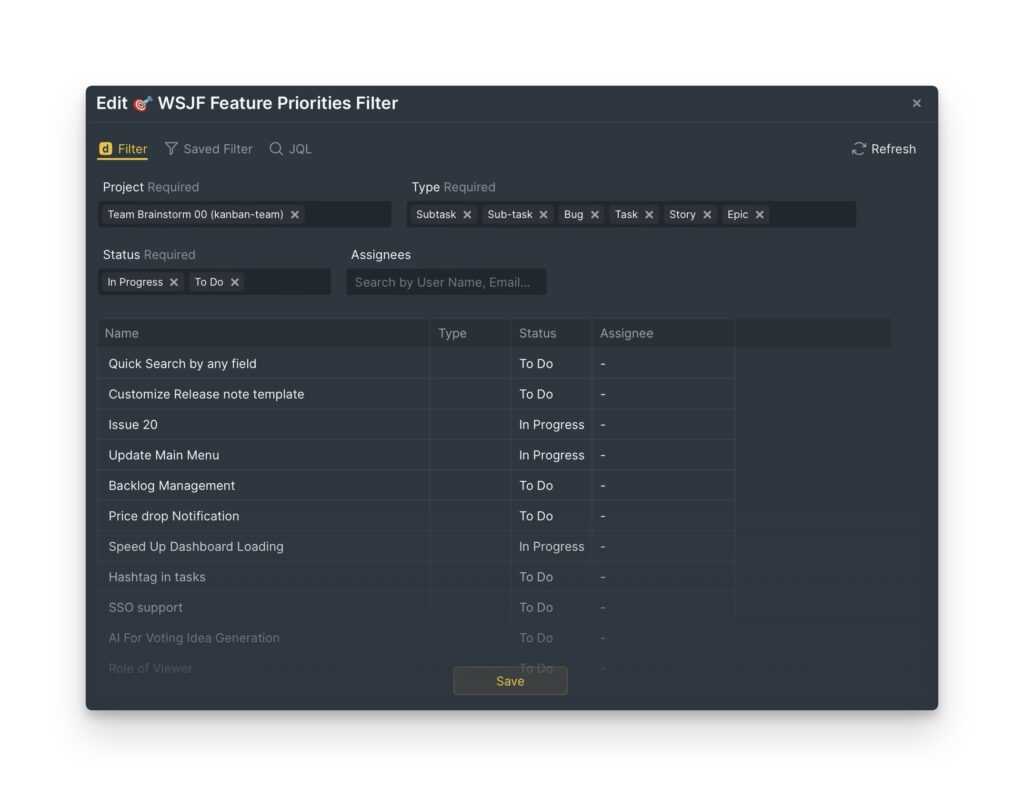
3. Edit the sync filter to choose what part of your backlog you want to evaluate. Then, every time an issue meets that filter parameter, it will immediately appear in Ducalis.
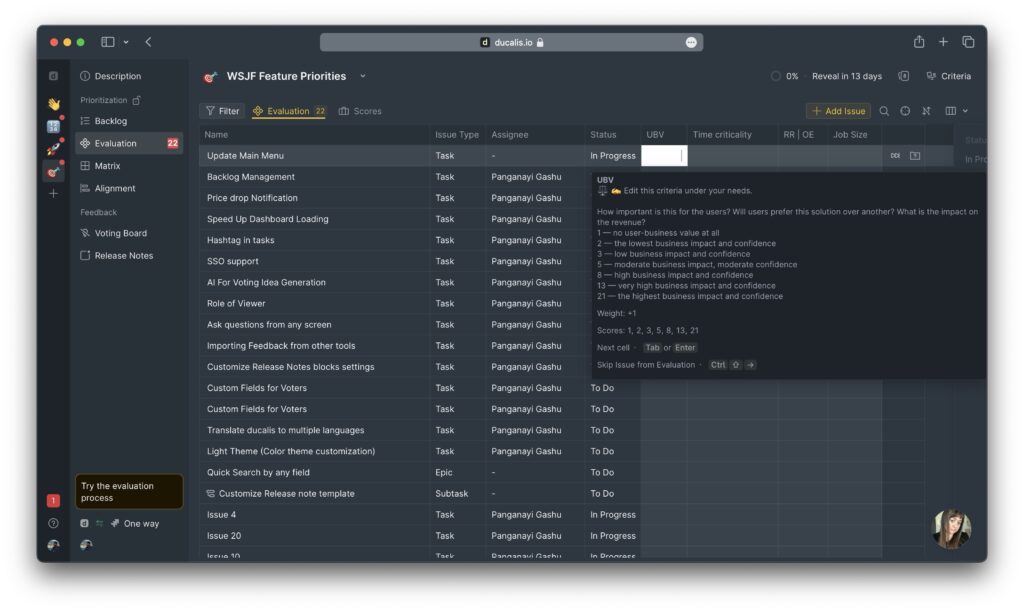
4. That’s all. You’re ready to evaluate your backlog.
Results Under 2 Minutes
Watch the video recording of setting up the WSJF score prioritization model for your Jira backlog for 1 minute and 58 seconds (actual time). That video has no edit:
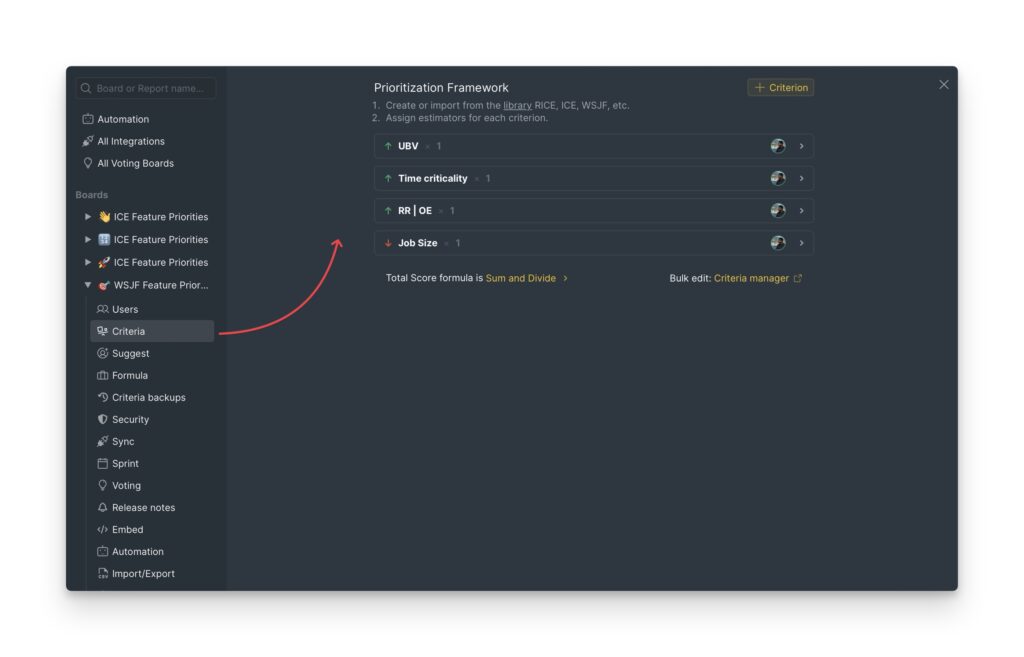
Add-on #1. Check the criteria settings if you’d like to edit any criteria description, formula, etc. It’s all here:
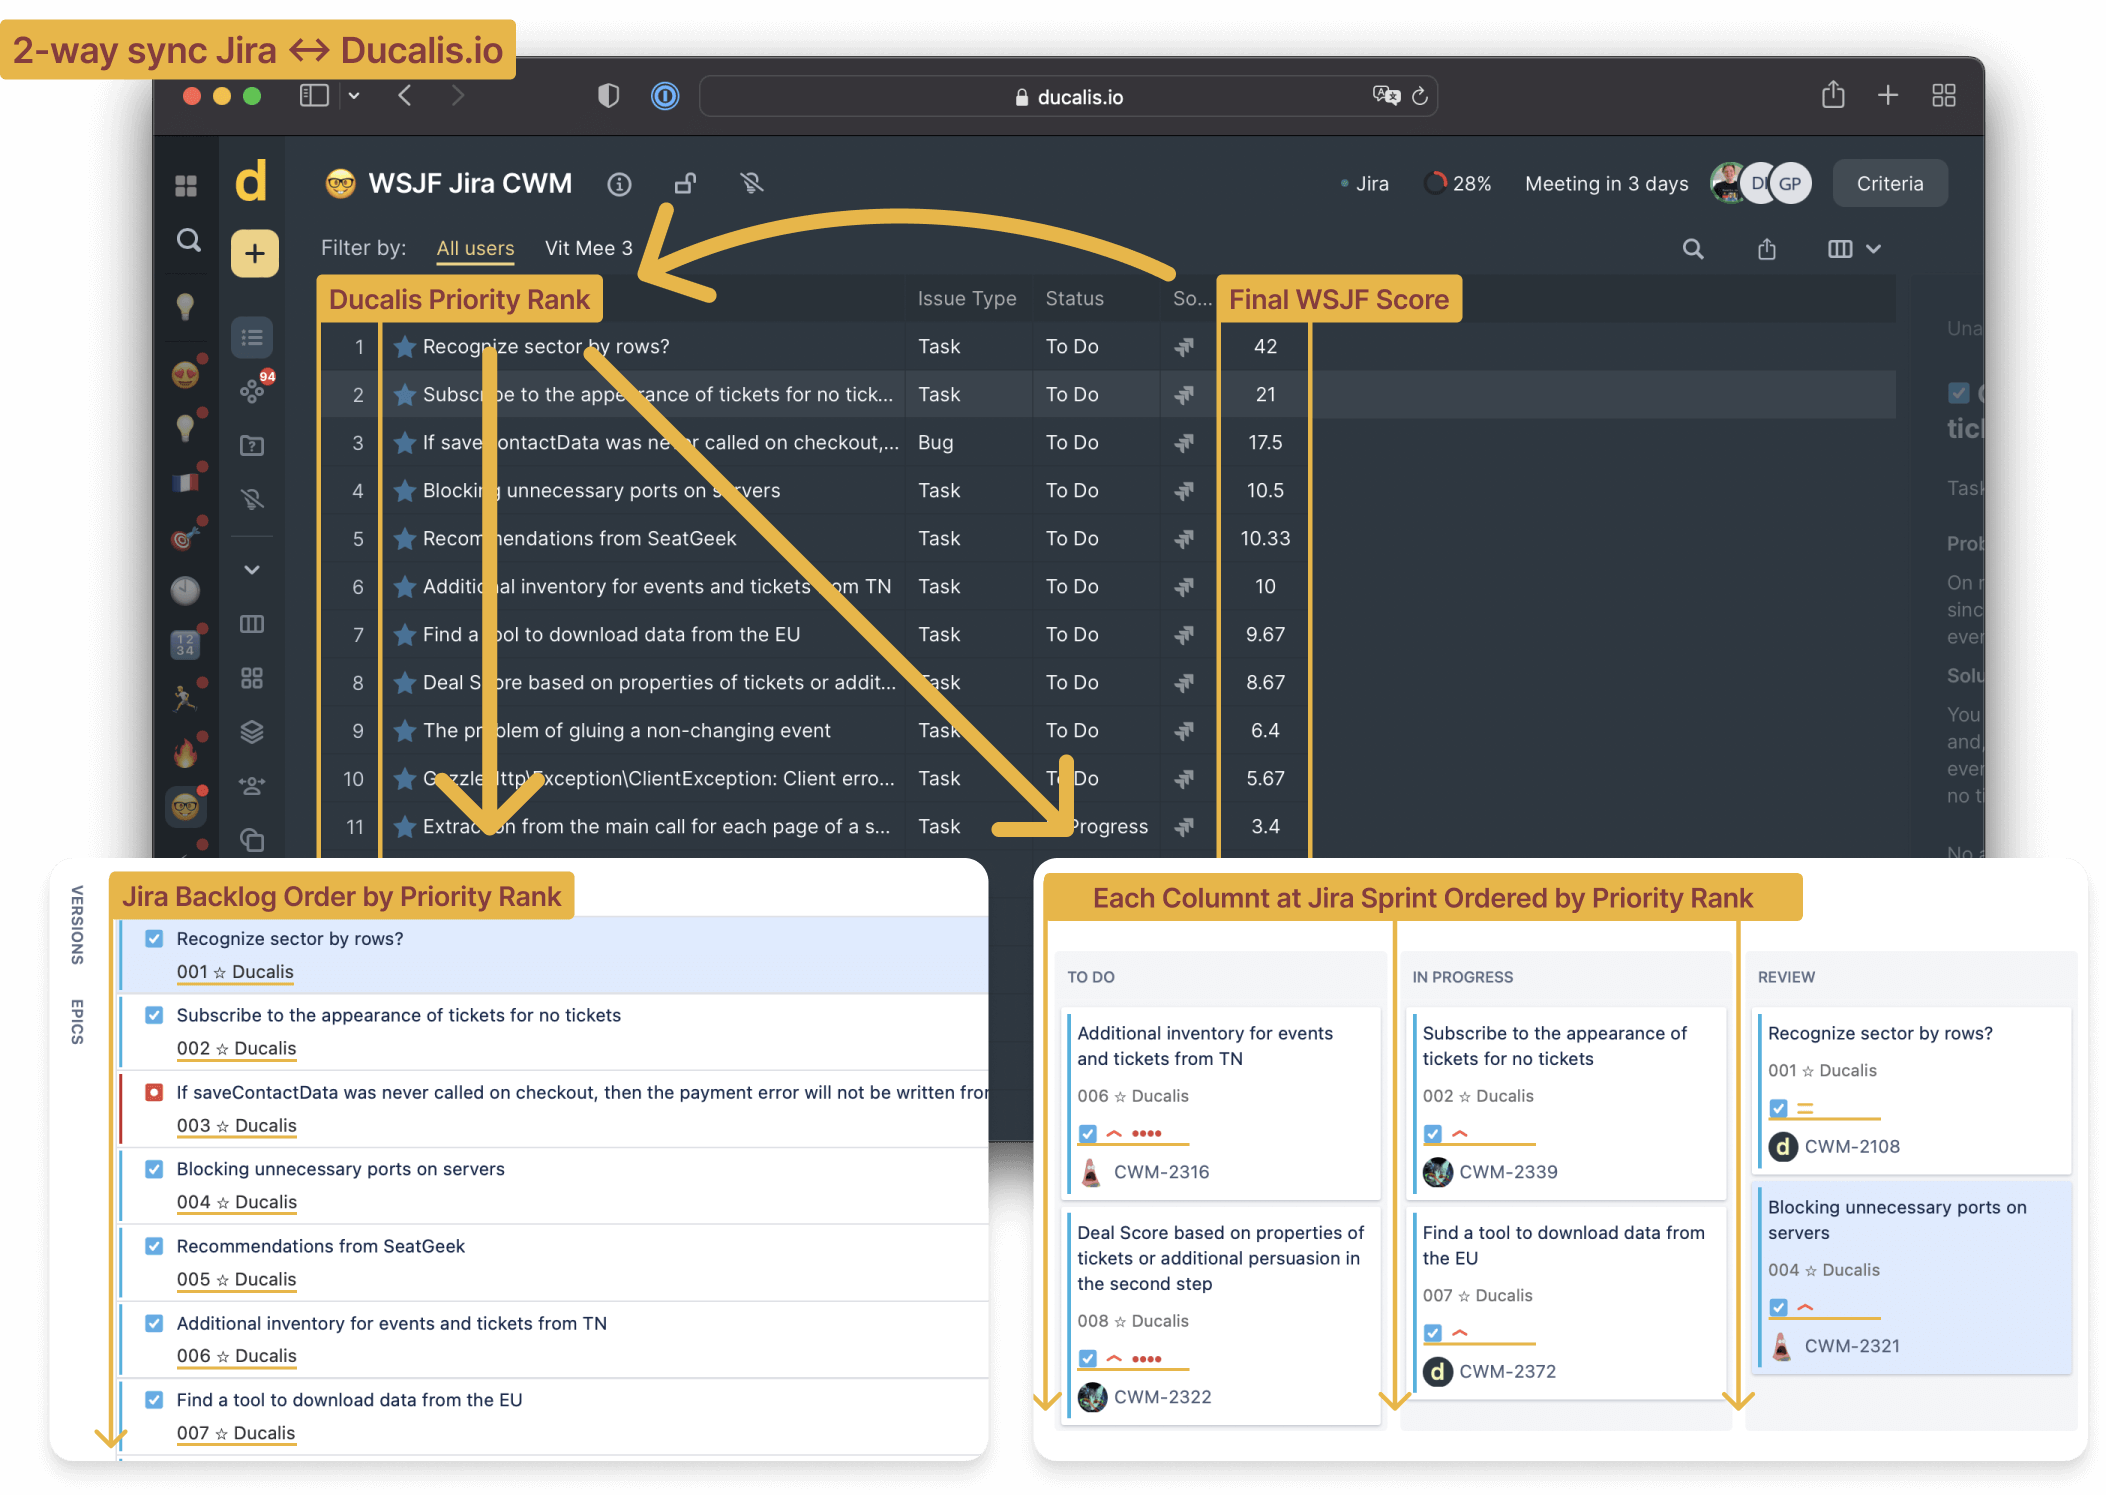
Add-on #2. Set up a priority back-sync from Ducalis to Jira.
Add WSJF Score to Jira Backlog with Built-in tools
It’s not the most convenient way, but you can set up Jira Calculated Custom Fields: automation rules which can give you a priority score.
Approximate implementation time ~ 1 hour.
Pros:
- Built-in ‘free’ Jira tools.
Cons:
- Hard to set up and maintain.
- Anybody can brake it.
- It’s just formula calculation, not a prioritization process.
Read about 8 ideas on how to Improve Jira Backlog Order by Priority.
Guide’s Goals
- Getting WSJF Score on the Jira Right Panel
- Add WSJF Score to Jira backlog and sprint views
- Sorting backlog items by WSJF Score
1. Create Custom Fields for each WSJF criterion
There are two steps to get for WSJF score:
- Cost of Delay (CoD) = Business Value + Time Criticality + Risk Reduction
- WSJF Score = CoD / Job Size
We have to create 6 new fields:
- Time Criticality (editable)
- Business Value (editable)
- Risk Reduction (editable)
- Job Size (editable)
- Cost Of Delay (calculated)
- WSJF Score (calculated)
2. Create Editable Custom Fields
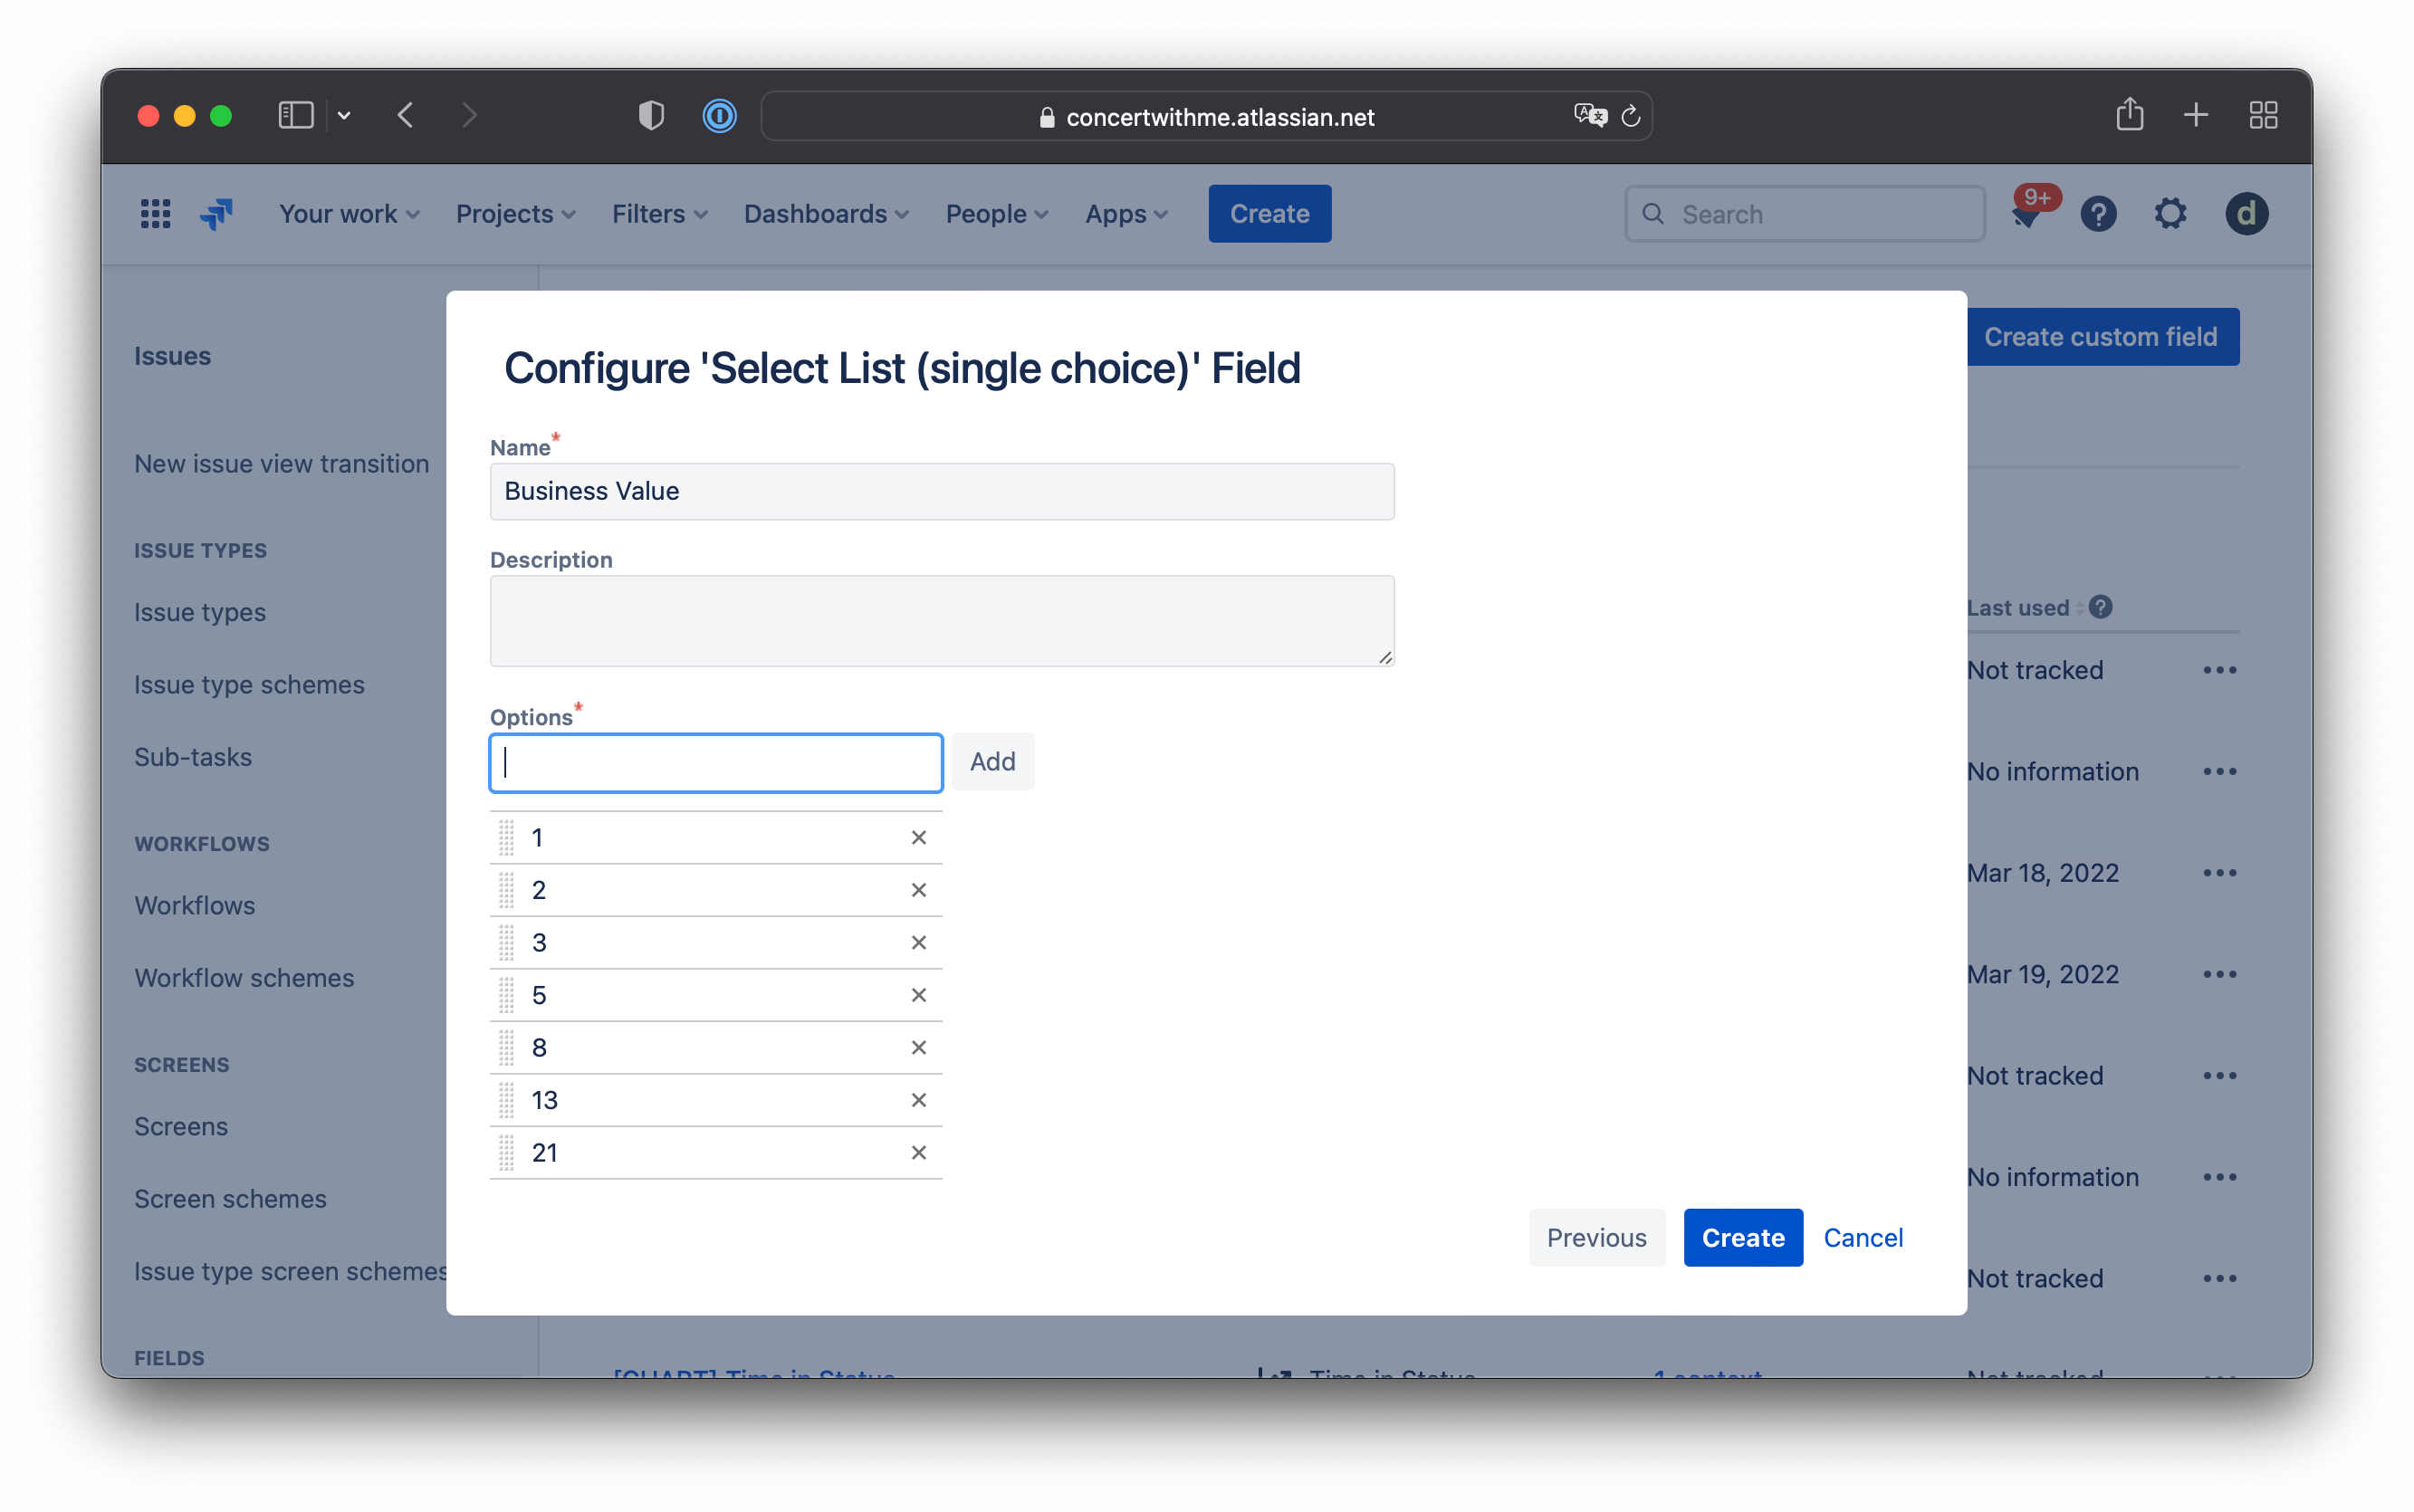
For WSJF evaluation we use the Fibonacci Sequence with a predefined list of values to avoid any accidental editing.
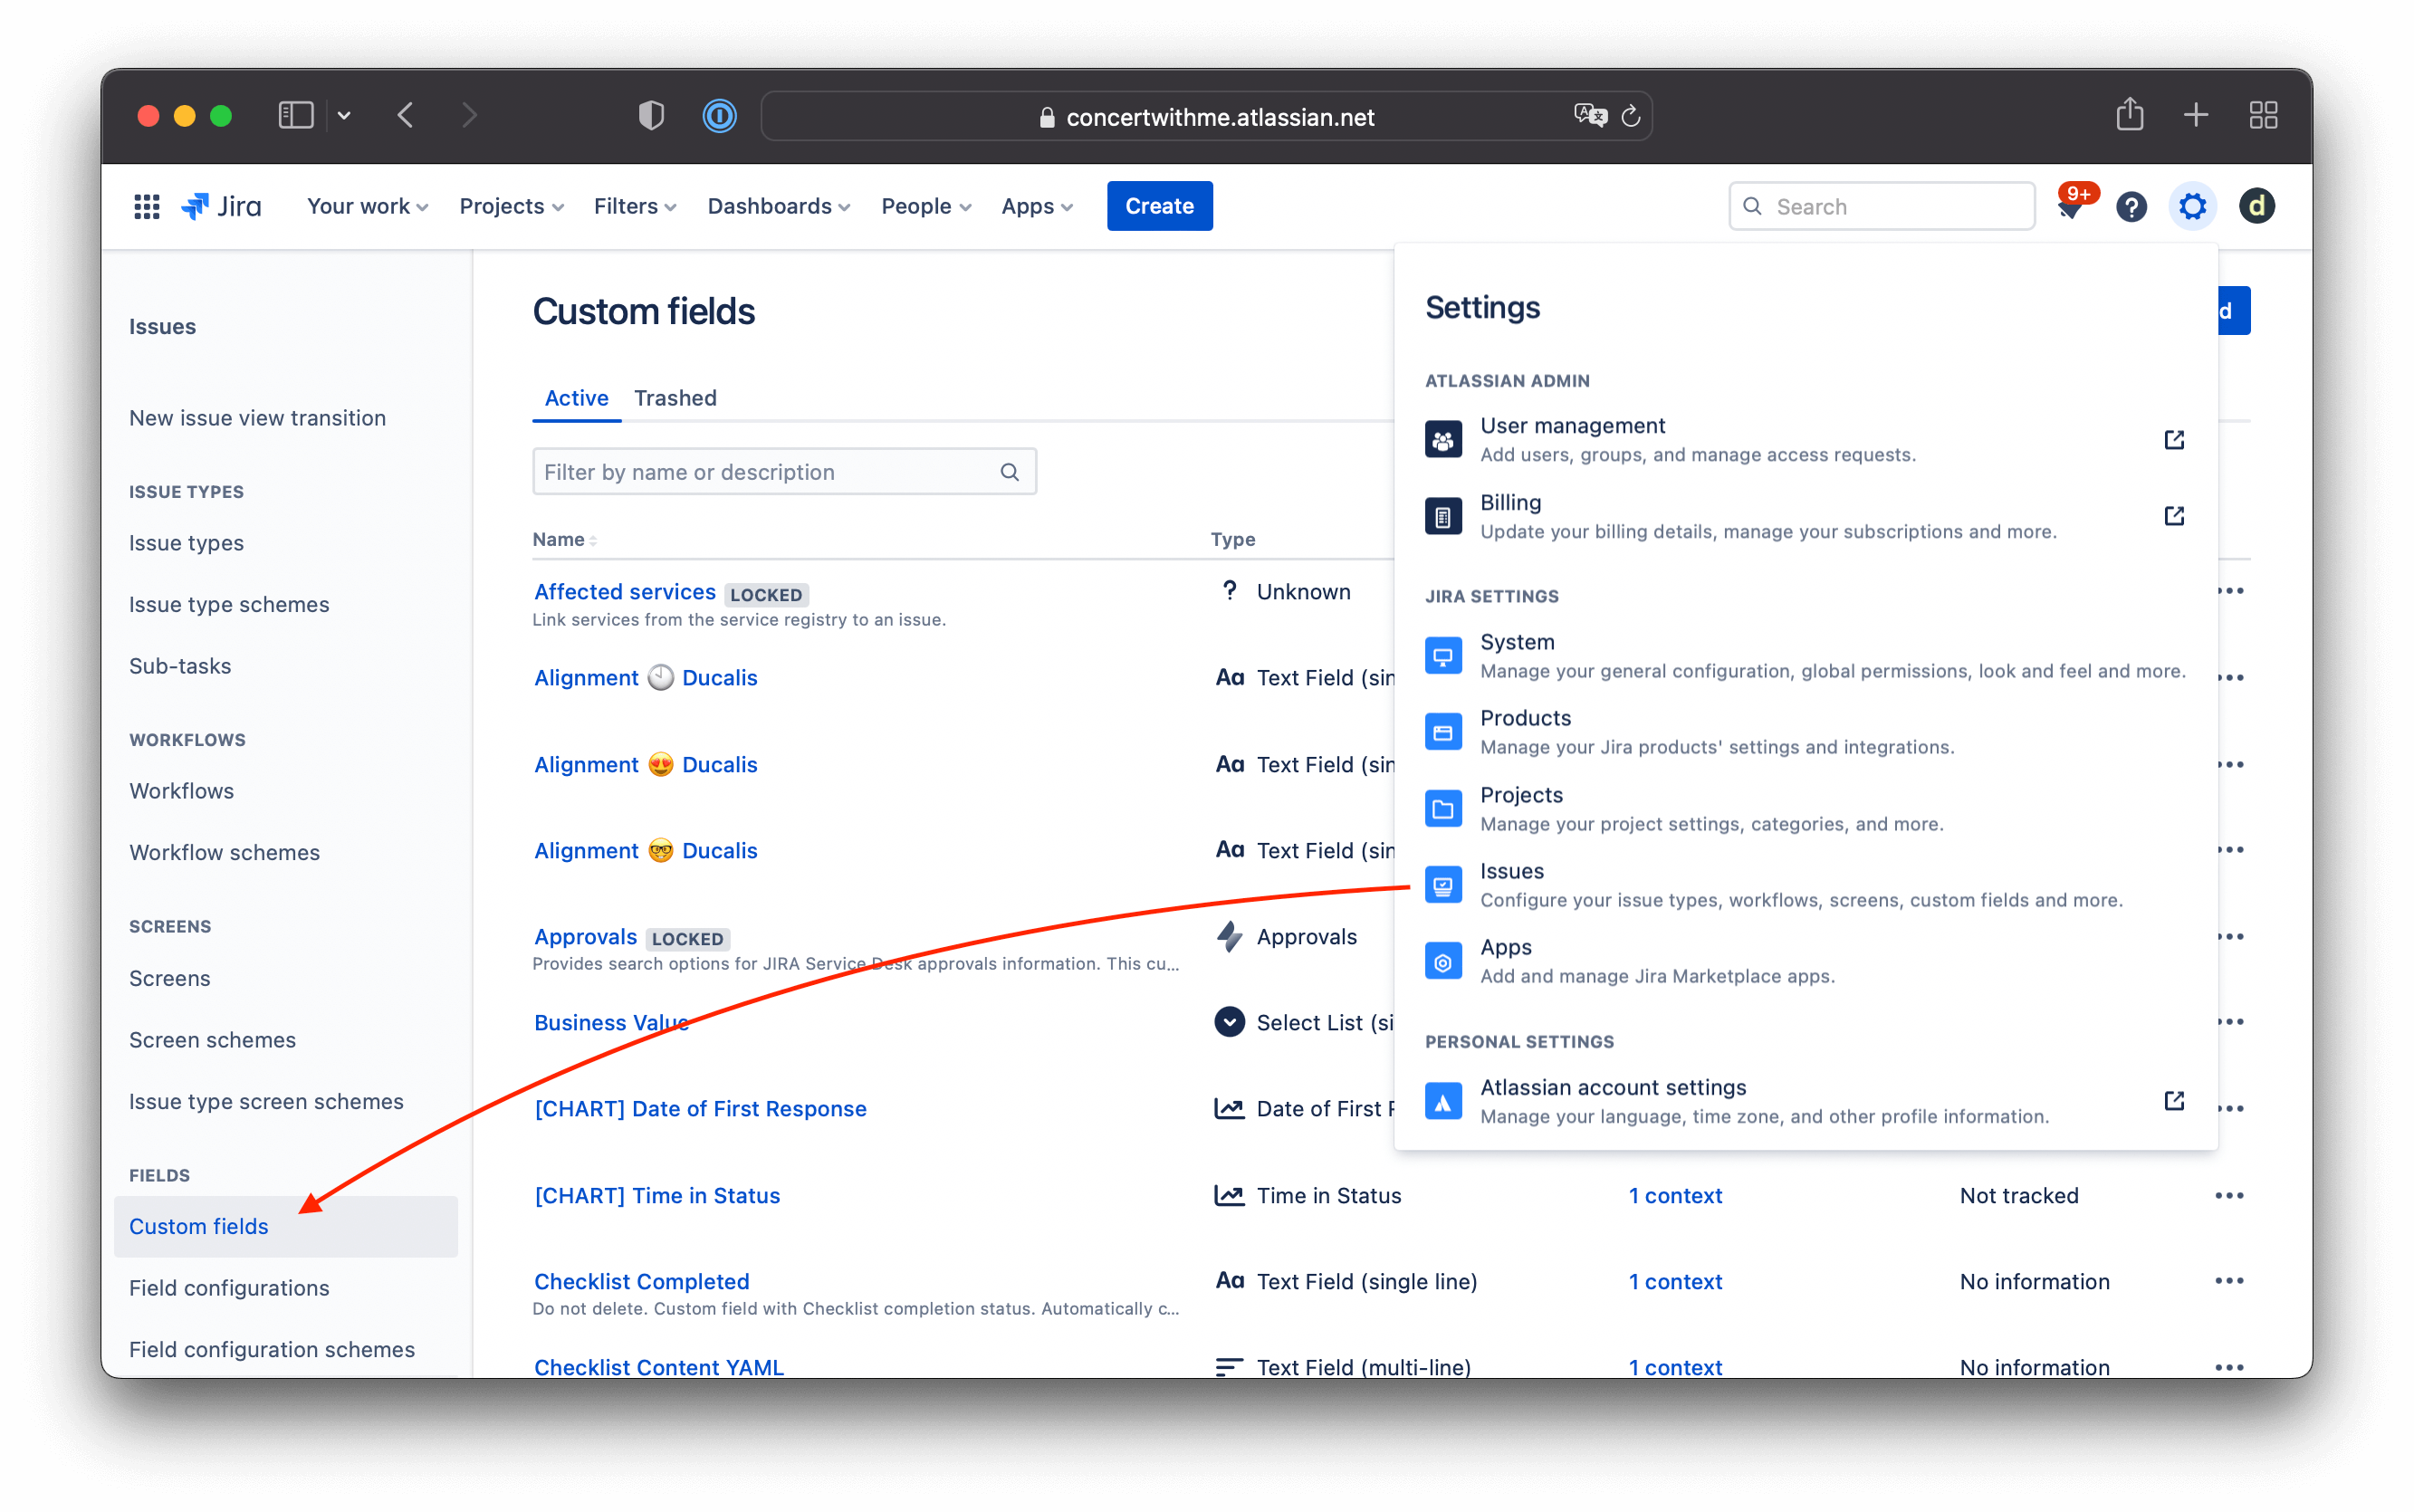
Go to Custom fields settings:
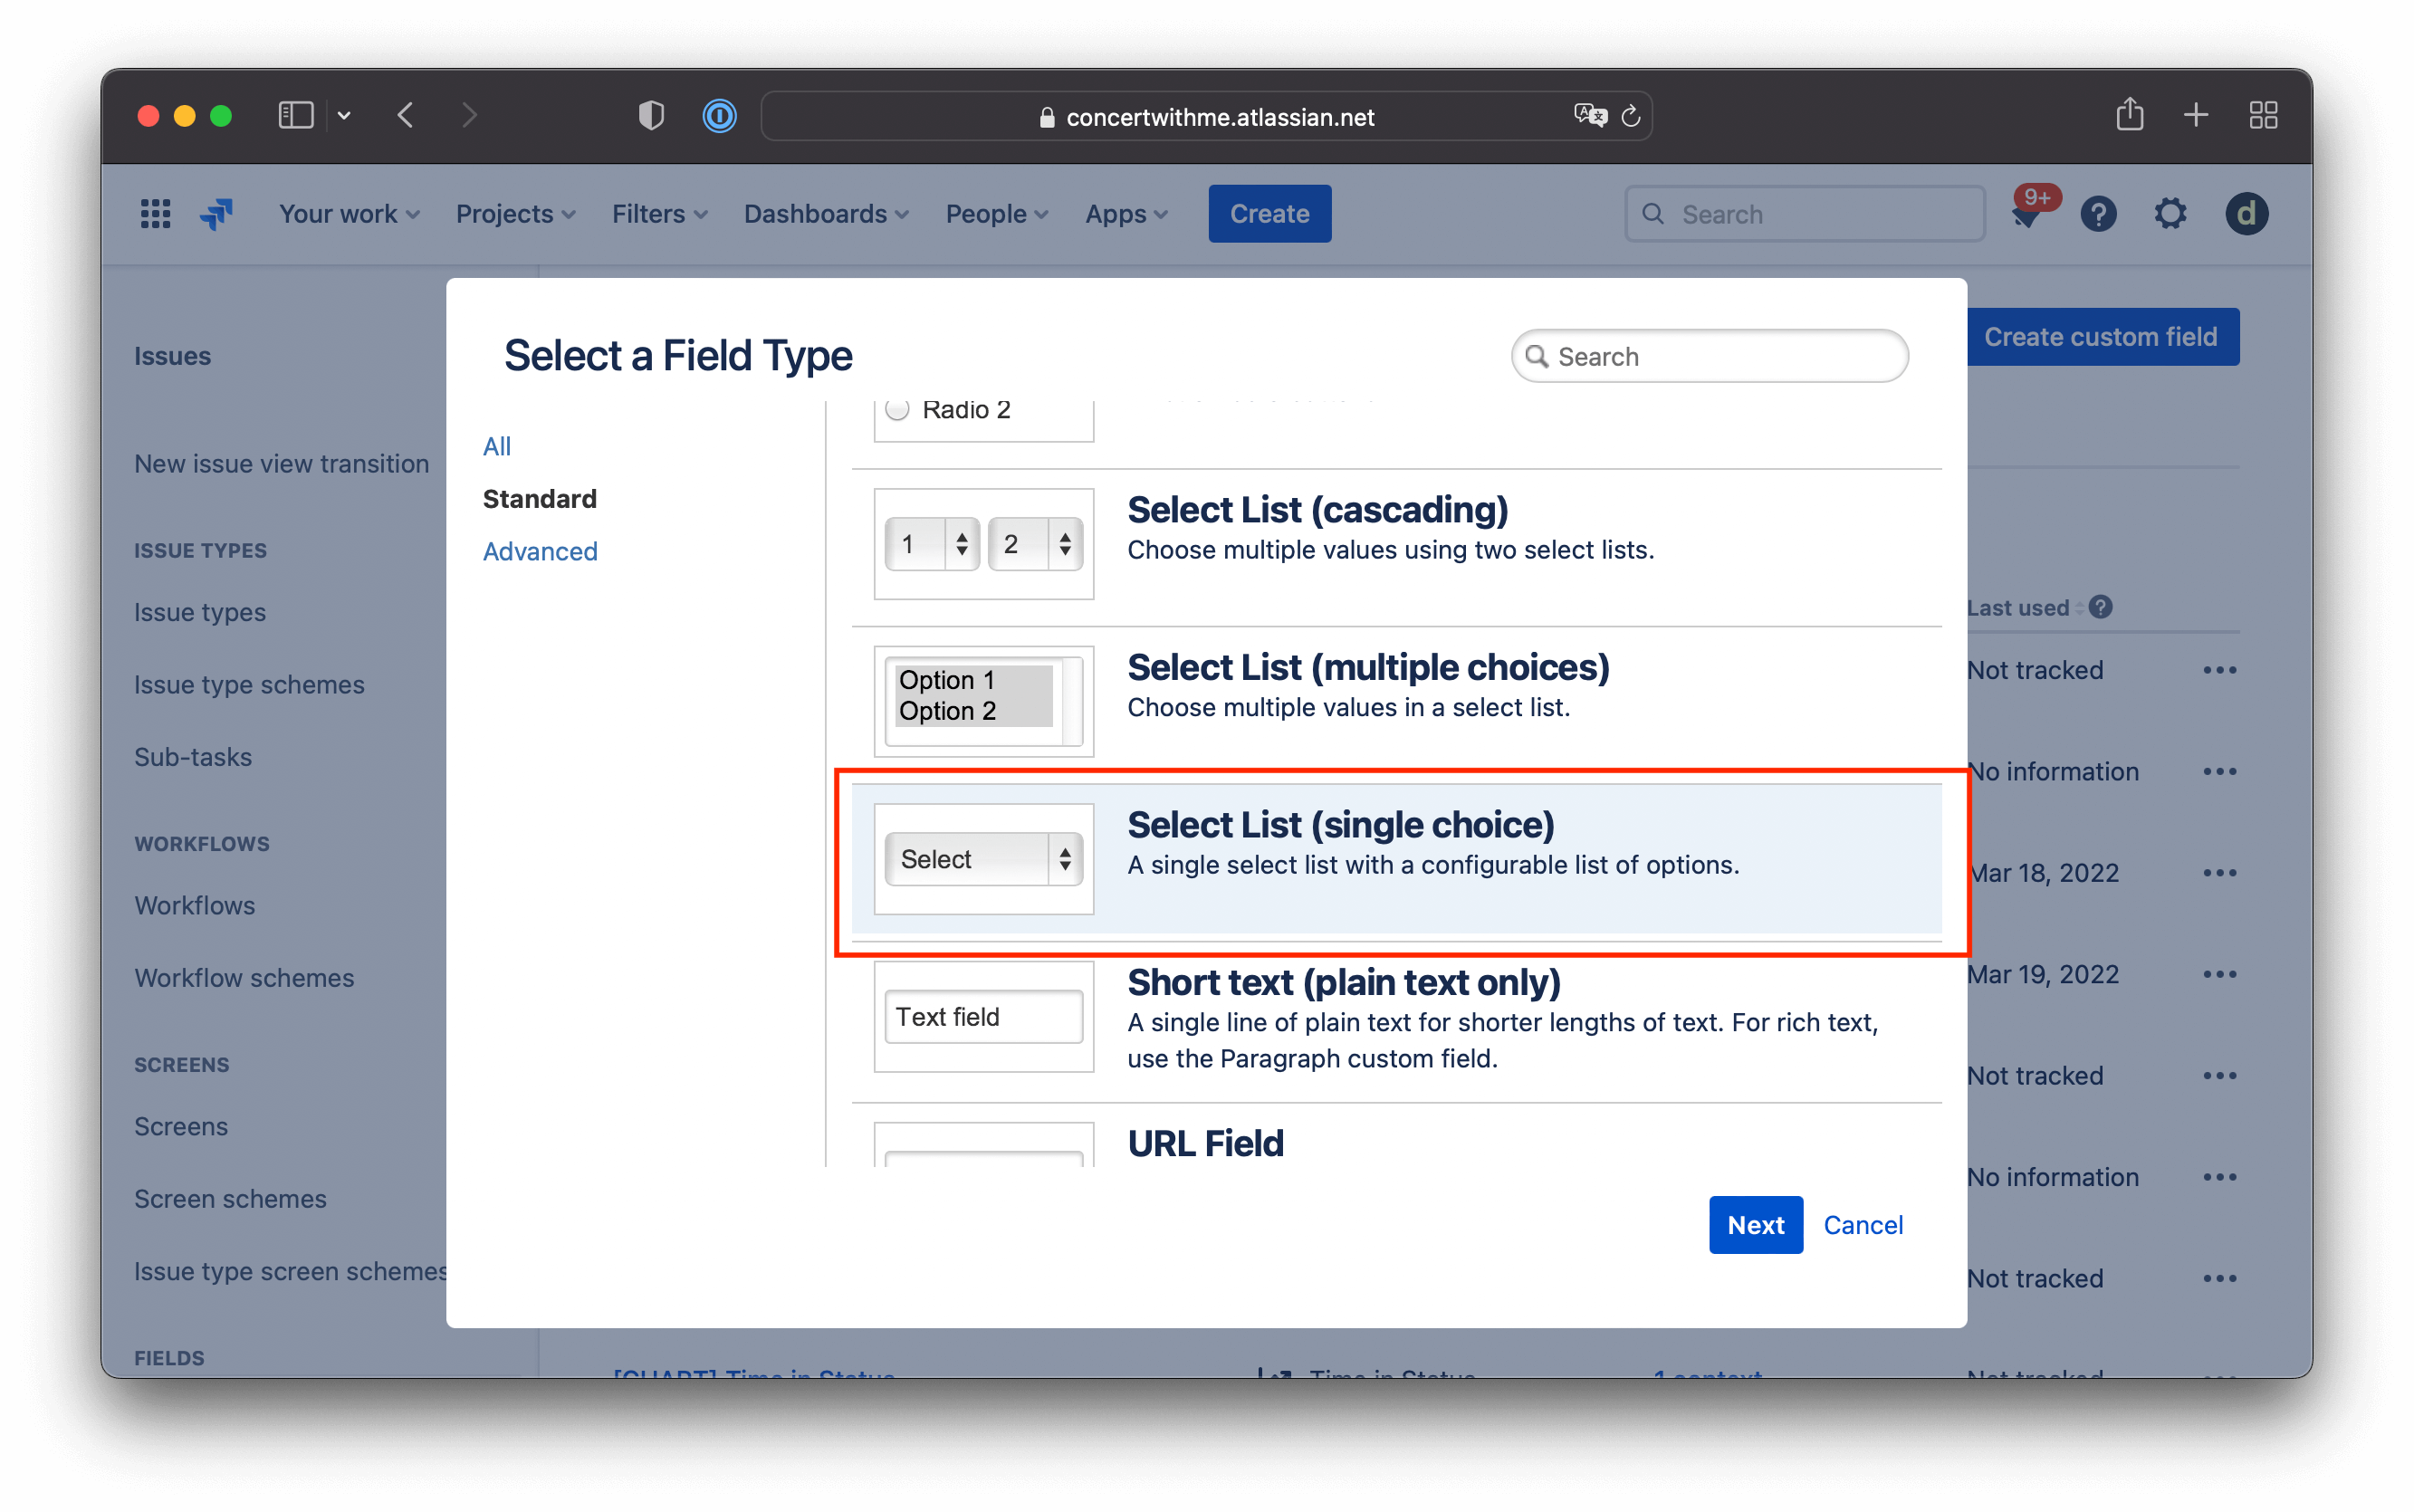
Choose Field Type ‘Select List (single choice)’. Set the name and the Fibonacci Sequence for the evaluation.
Set the name and the Fibonacci Sequence for the evaluation.
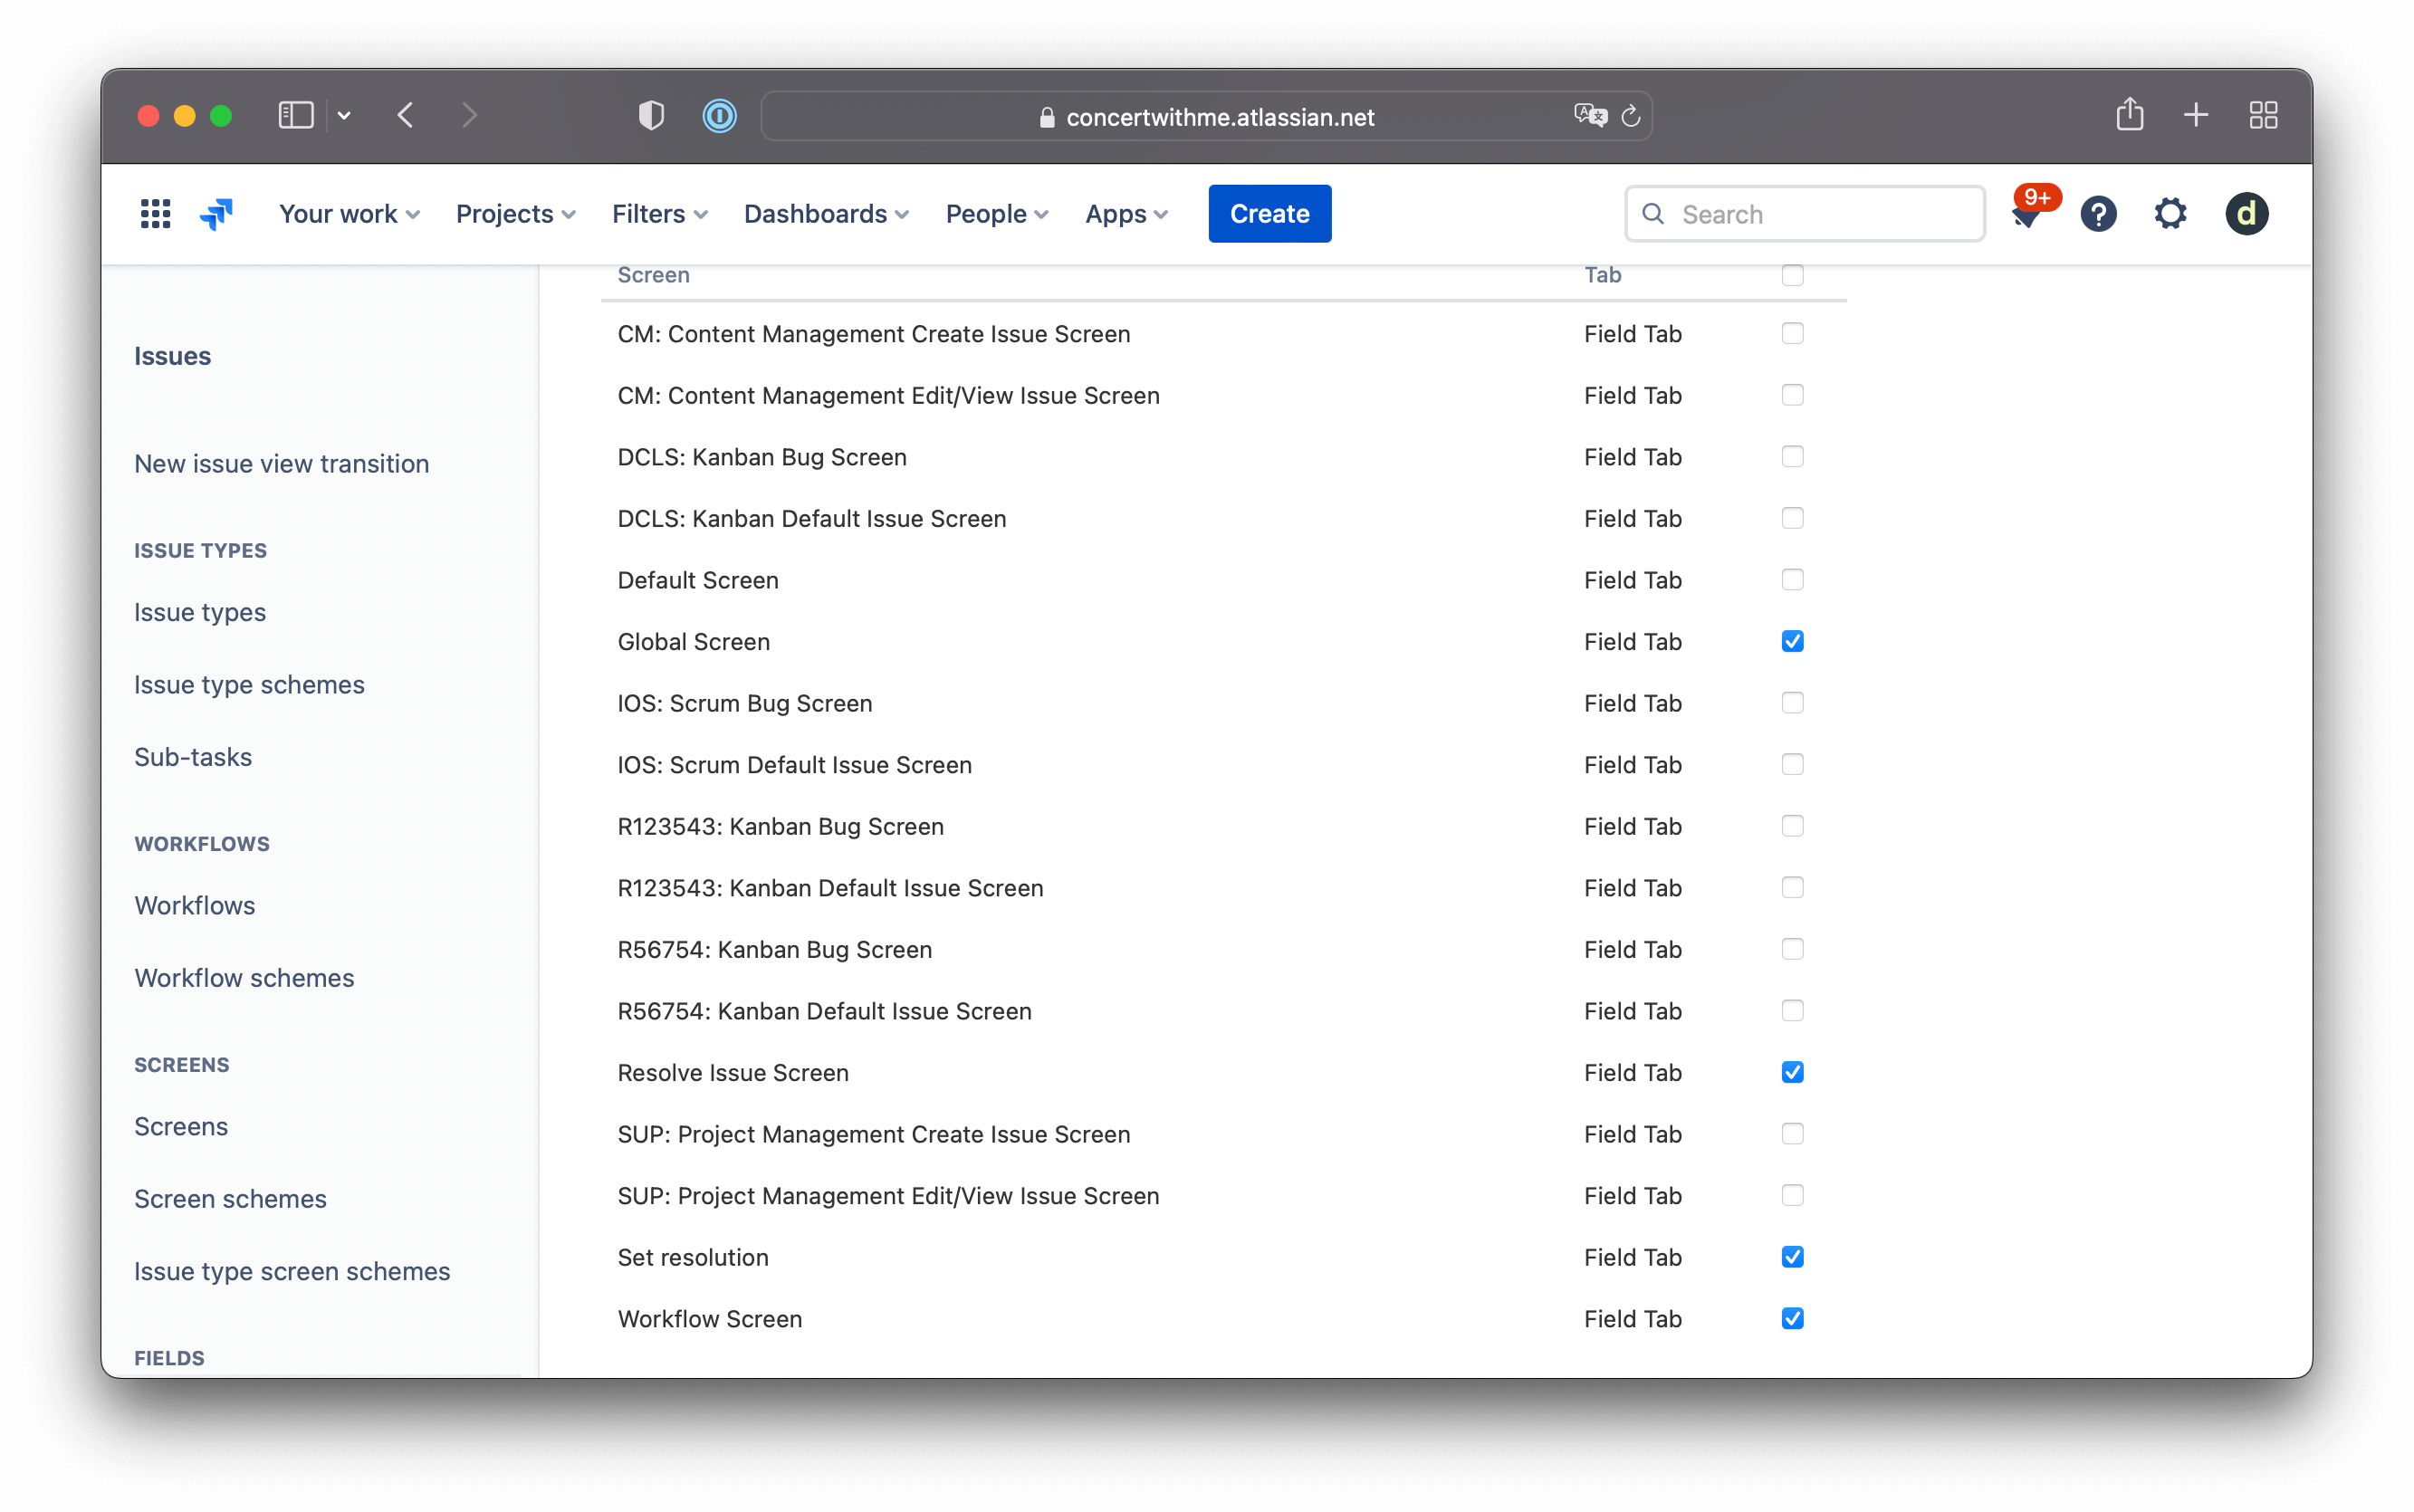
Add them to your necessary Jira Screens. This may vary depending on your Jira Environment settings, but the most popular are:
- Default Screen
- Workflow Screen
- All screens with the project keys from your board filter
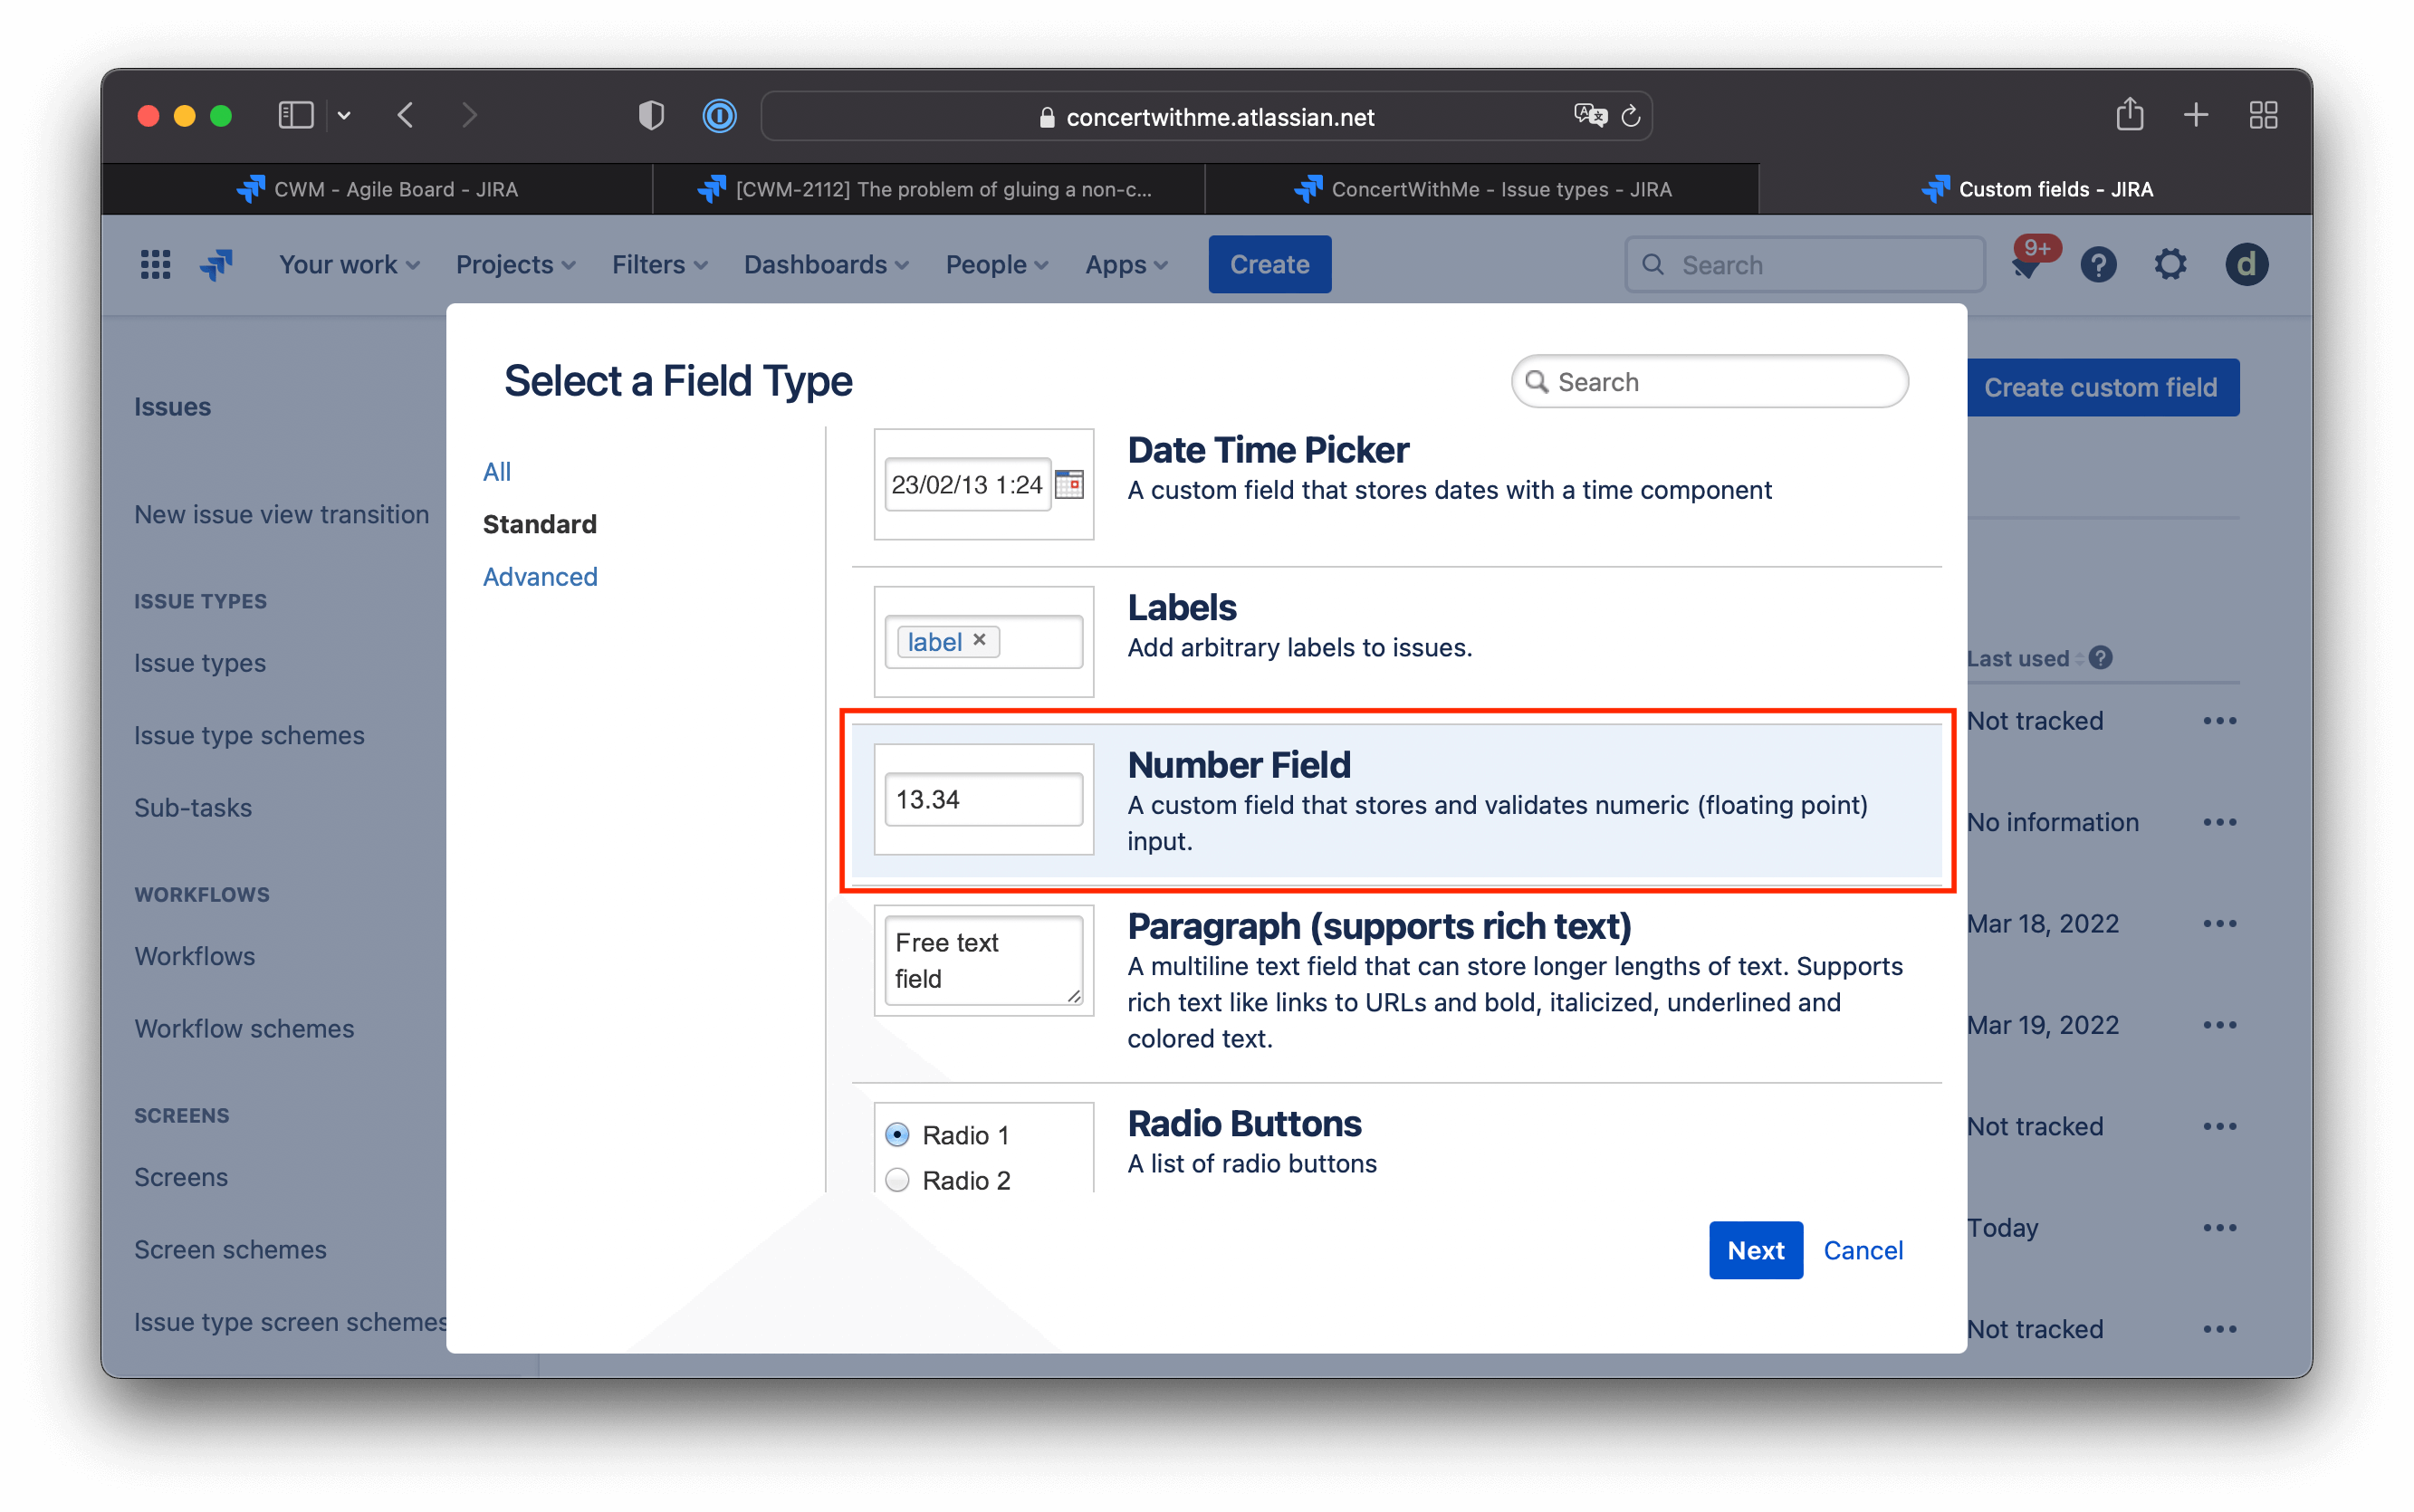
3. Create Calculated Jira Custom Fields
For calculated fields, as ‘Cost Of Delay’ and ‘WSJF Score’ must be Number Fields, we store our final calculations there.
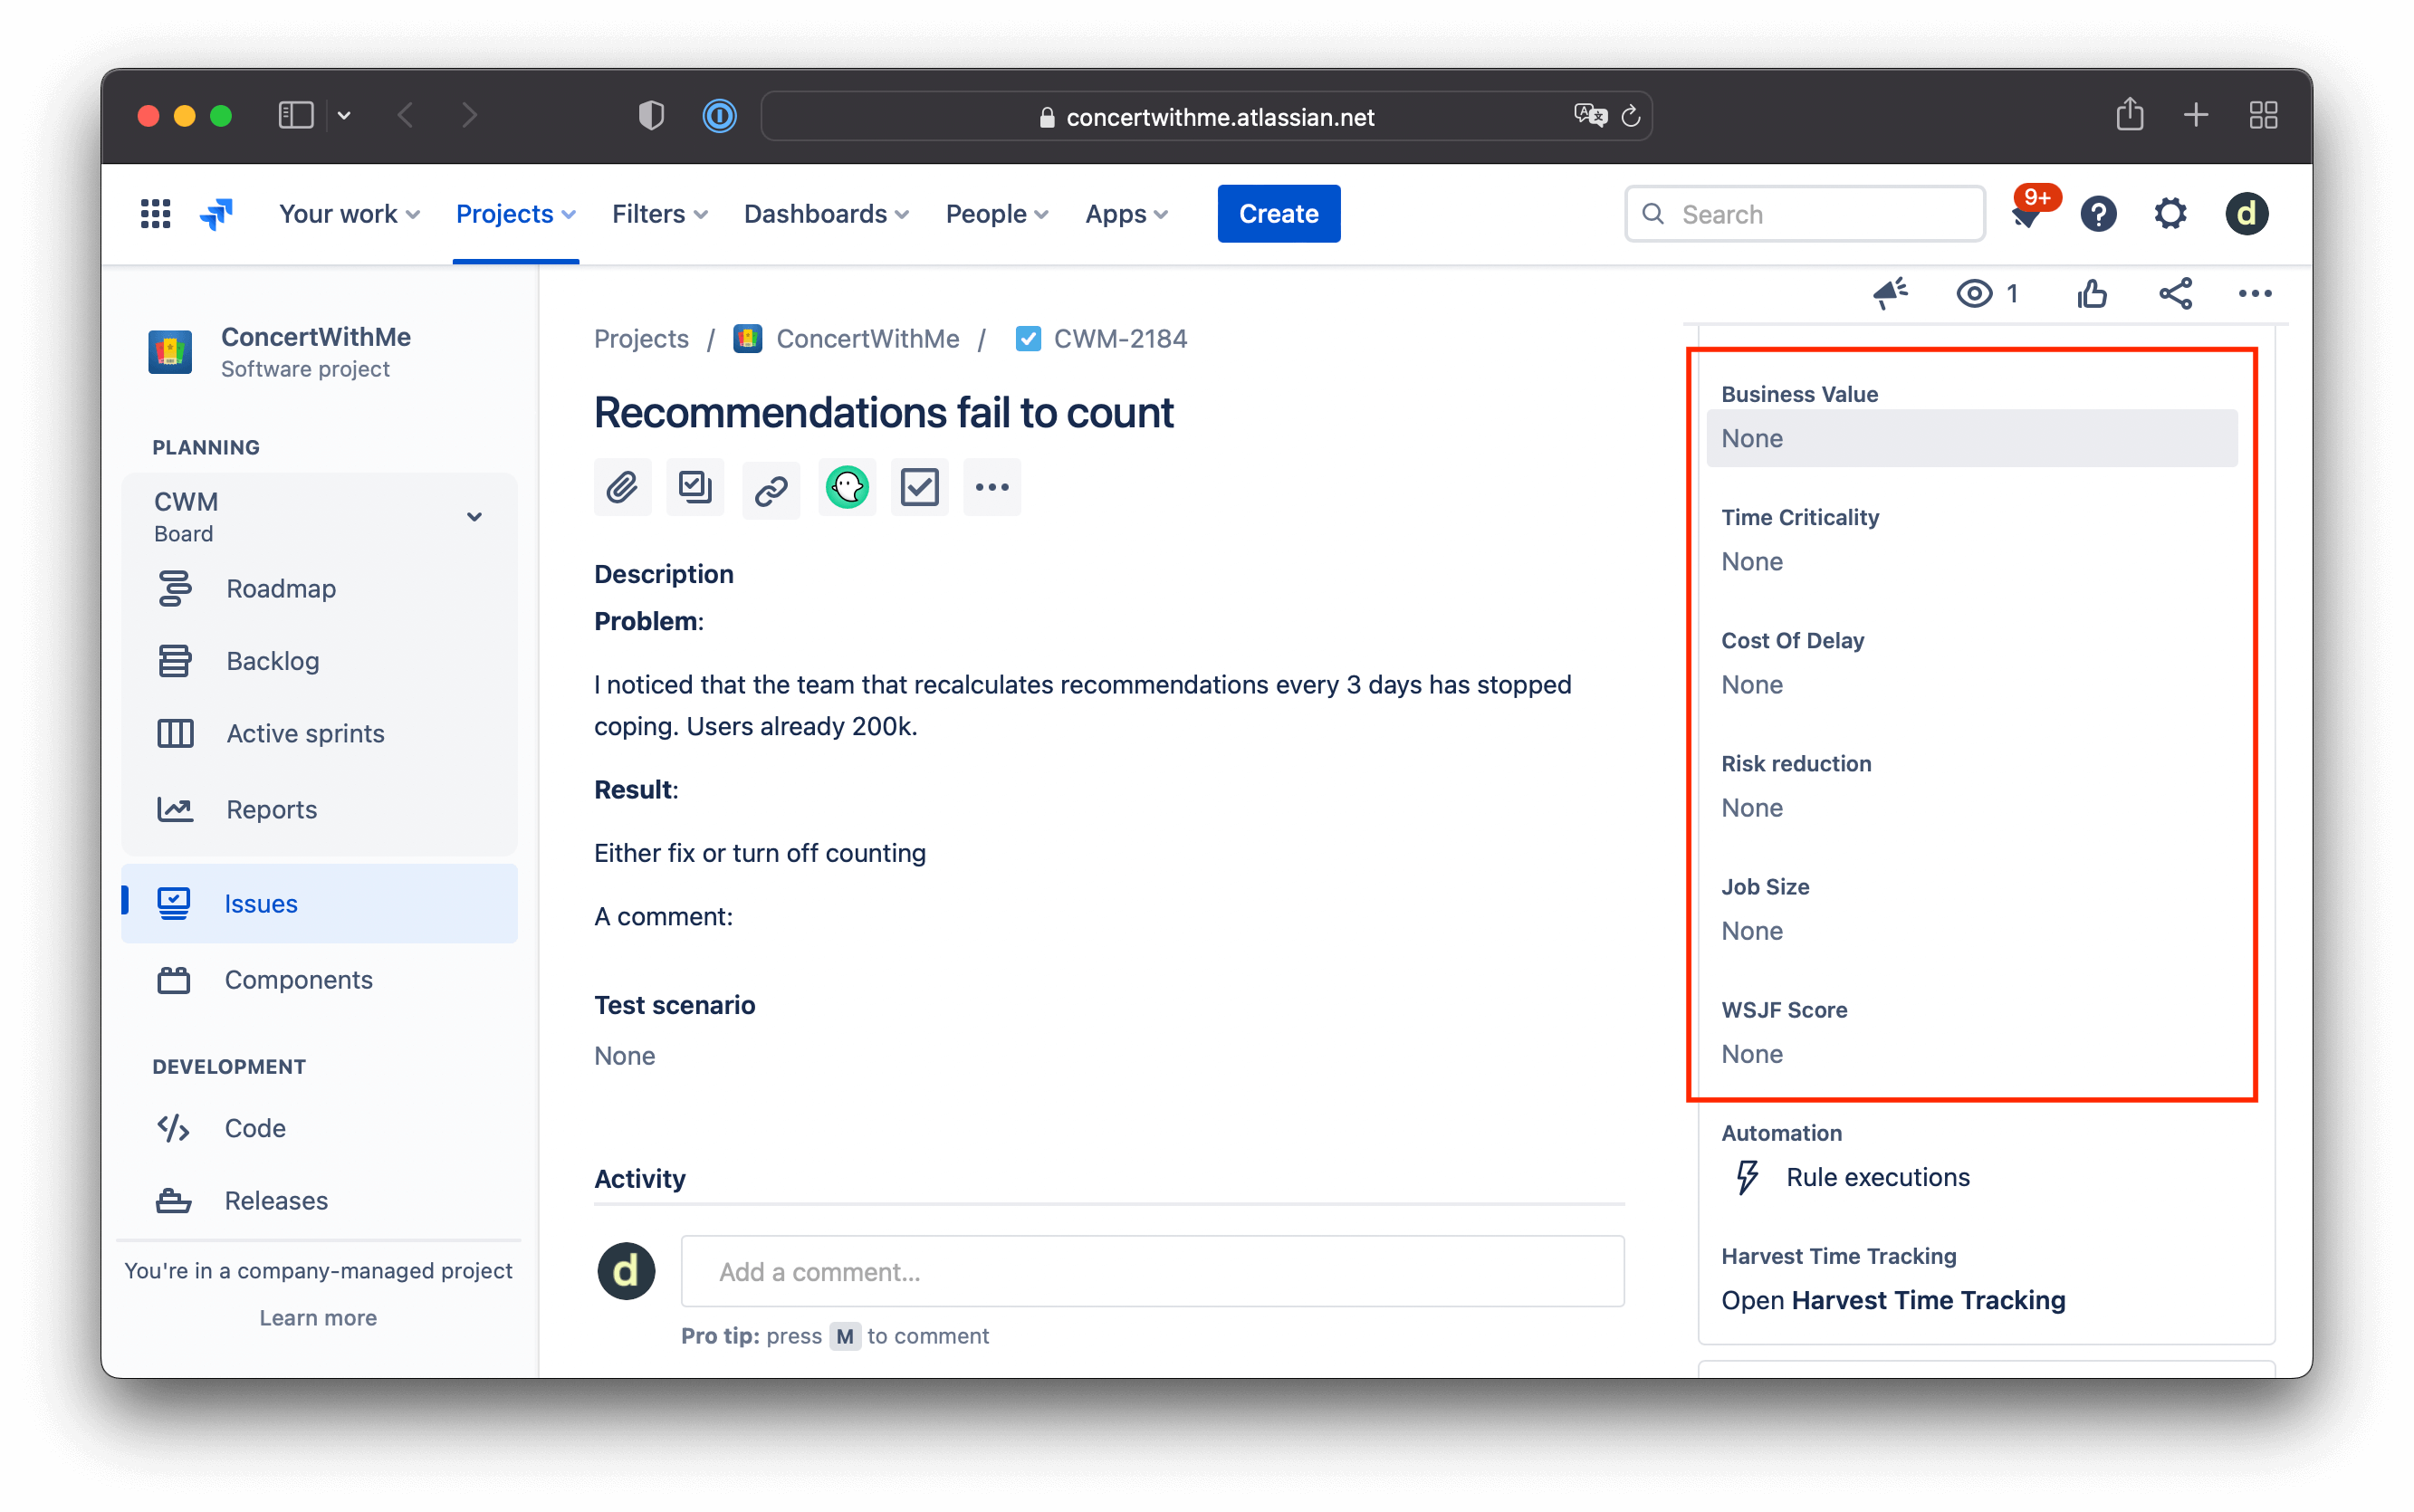
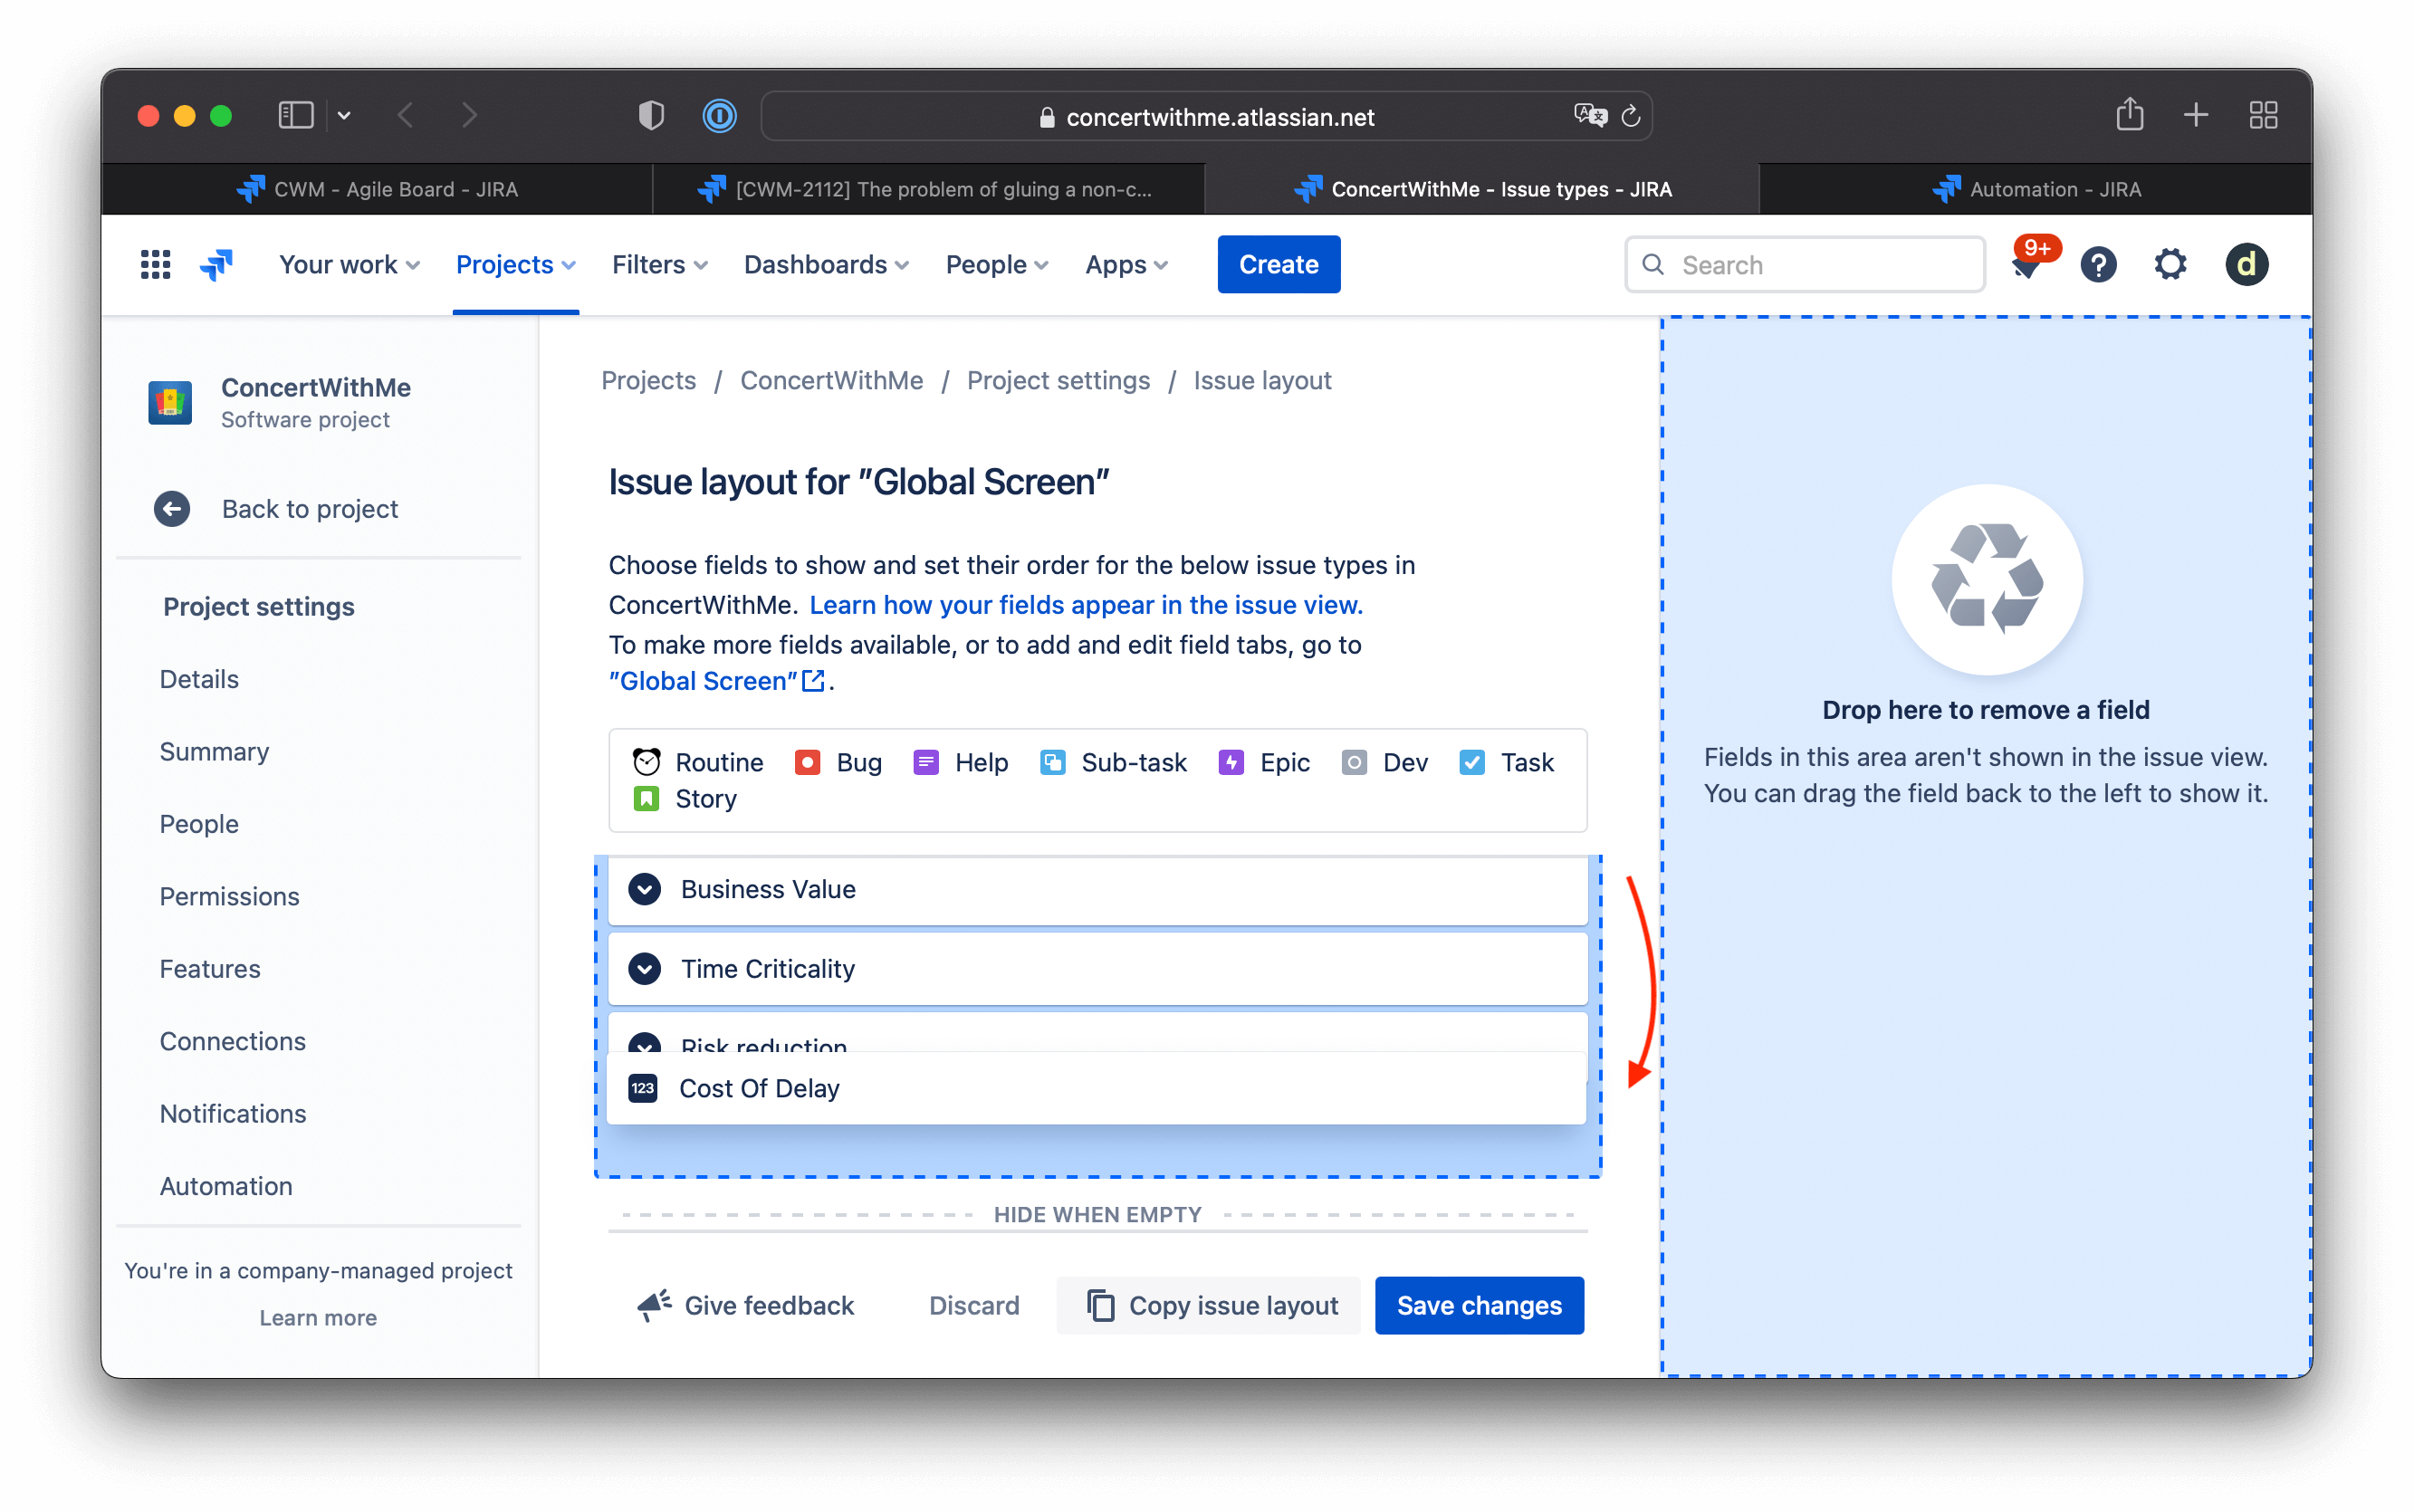
Check the visibility. Open an issue and, on the right panel, find all the brand-new fields created for the WSJF prioritization implementation.
Set visibility and the order. Click on the ‘Configure Fields’ link if you need to change the order
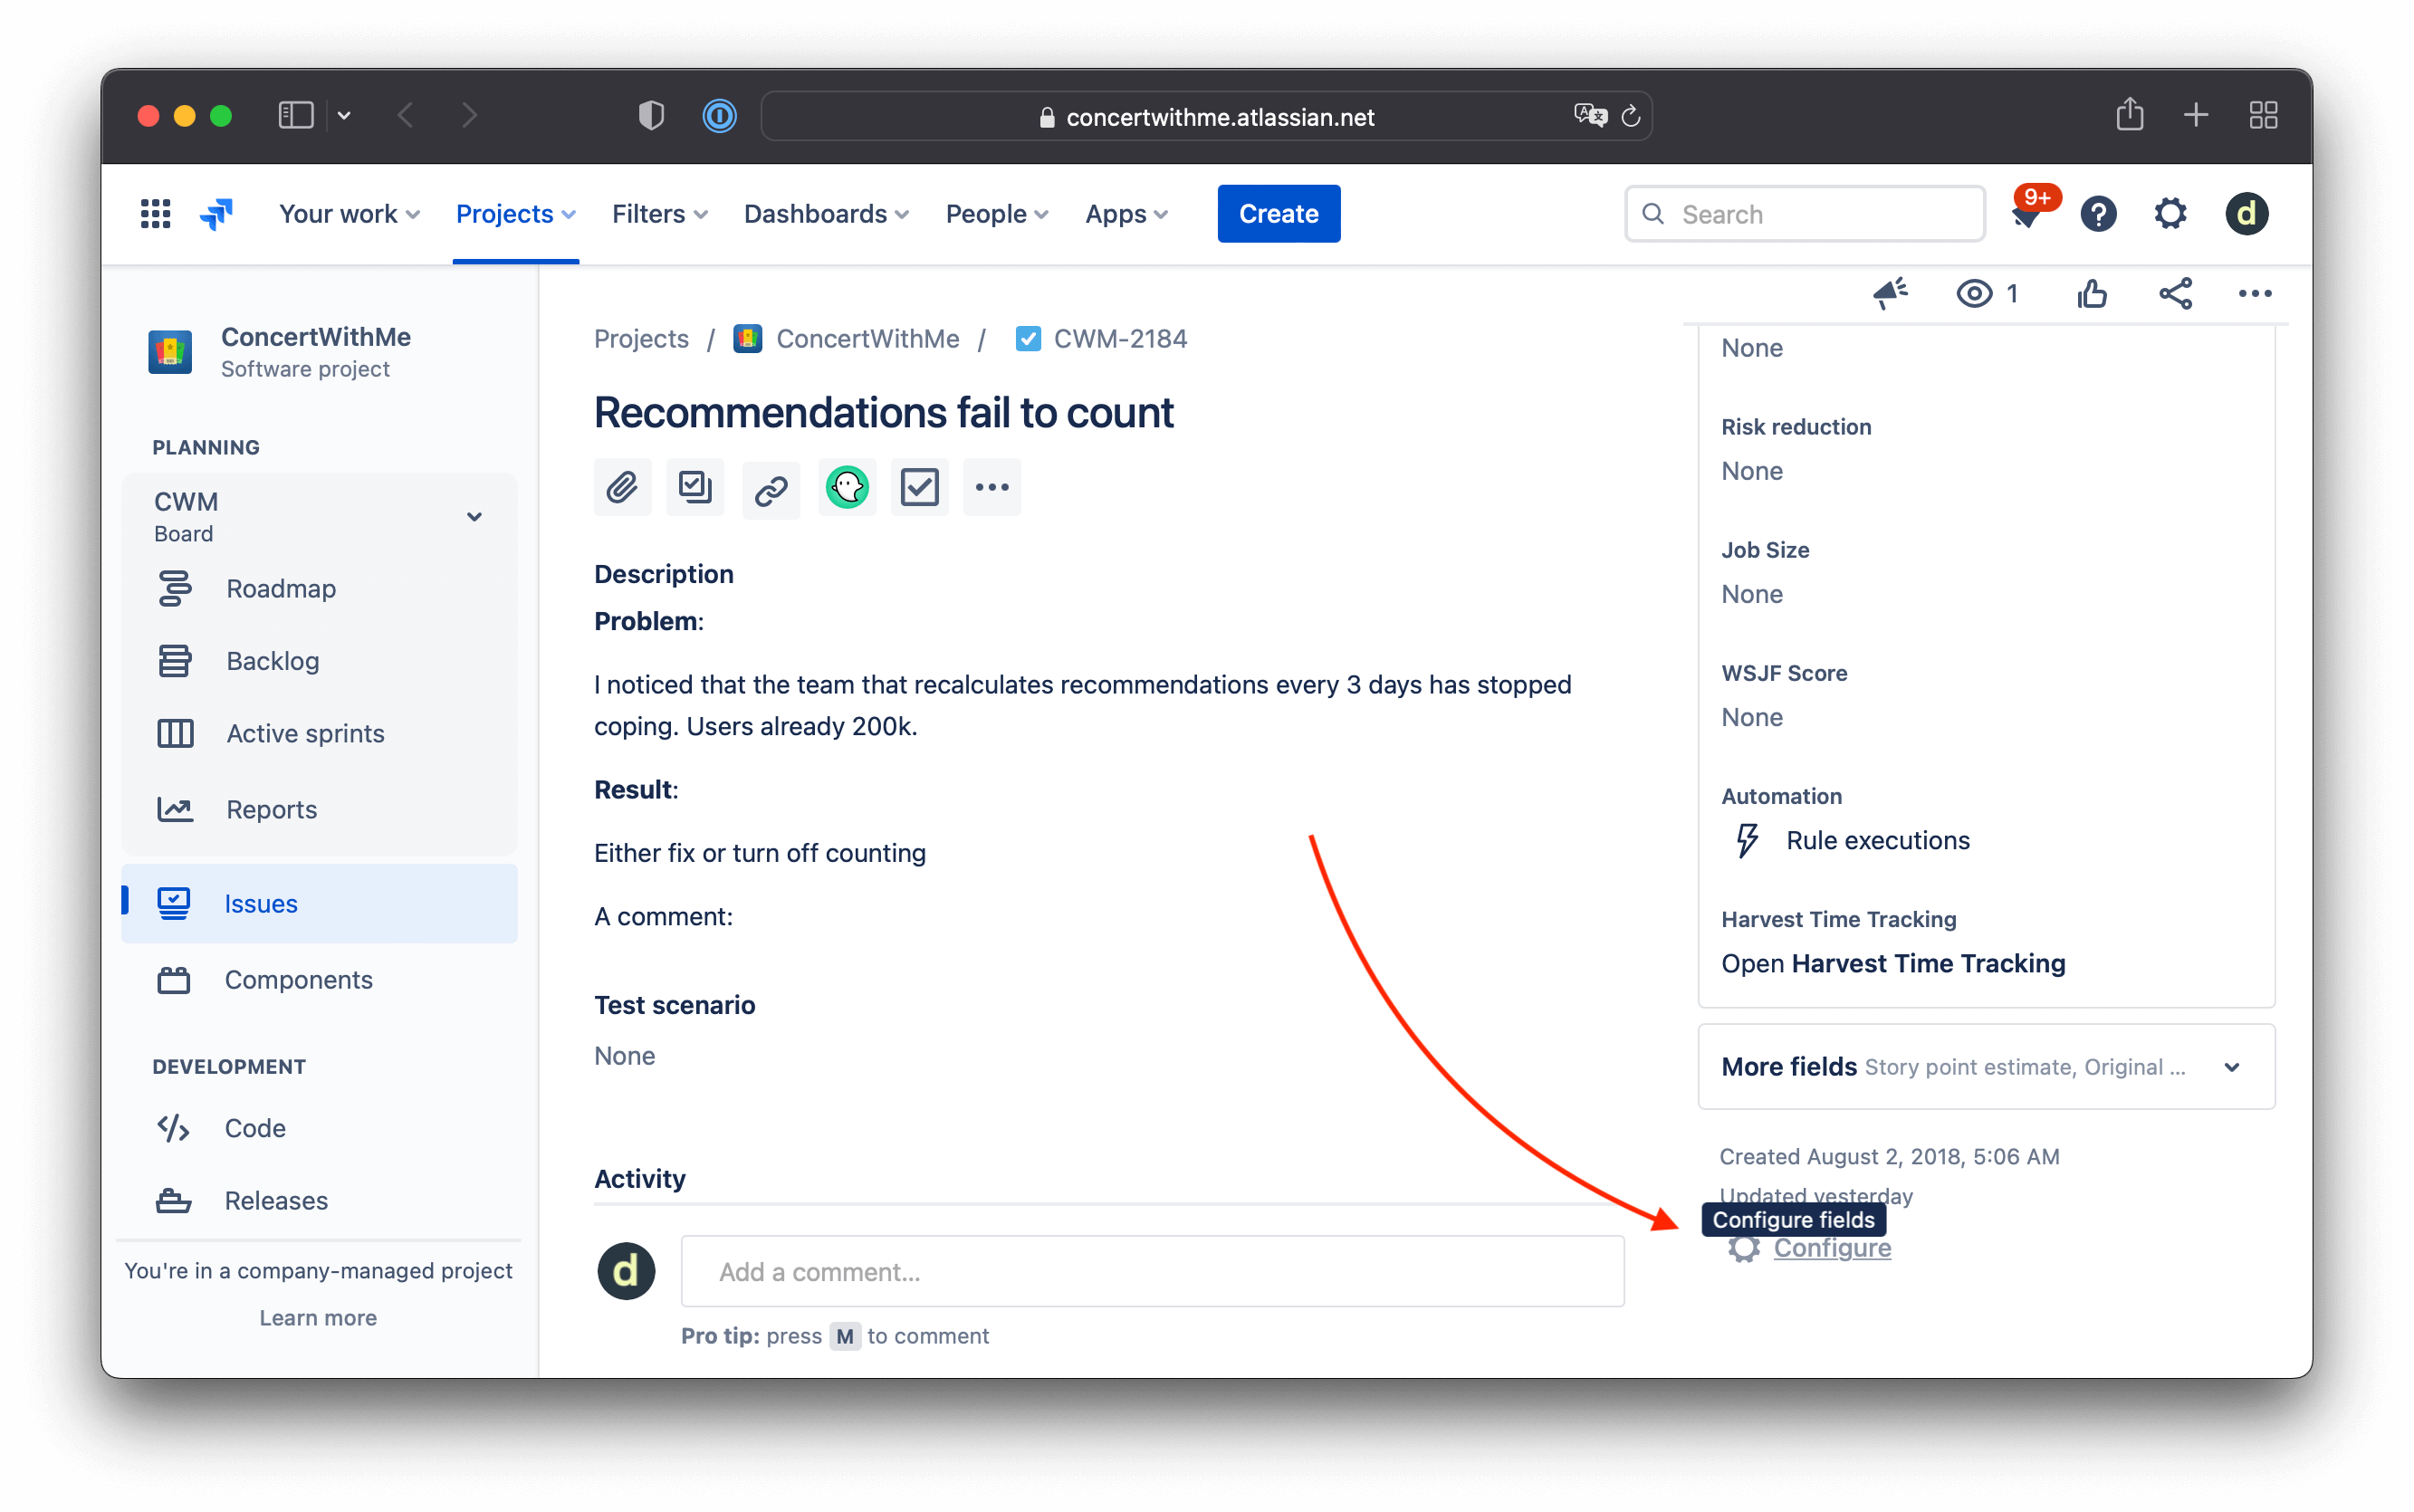
Re-order the fields as you need them.
4. Cost of Delay calculation with Jira Automation
Now it’s time to add calculations. We’ll use some Jira Automation rules.
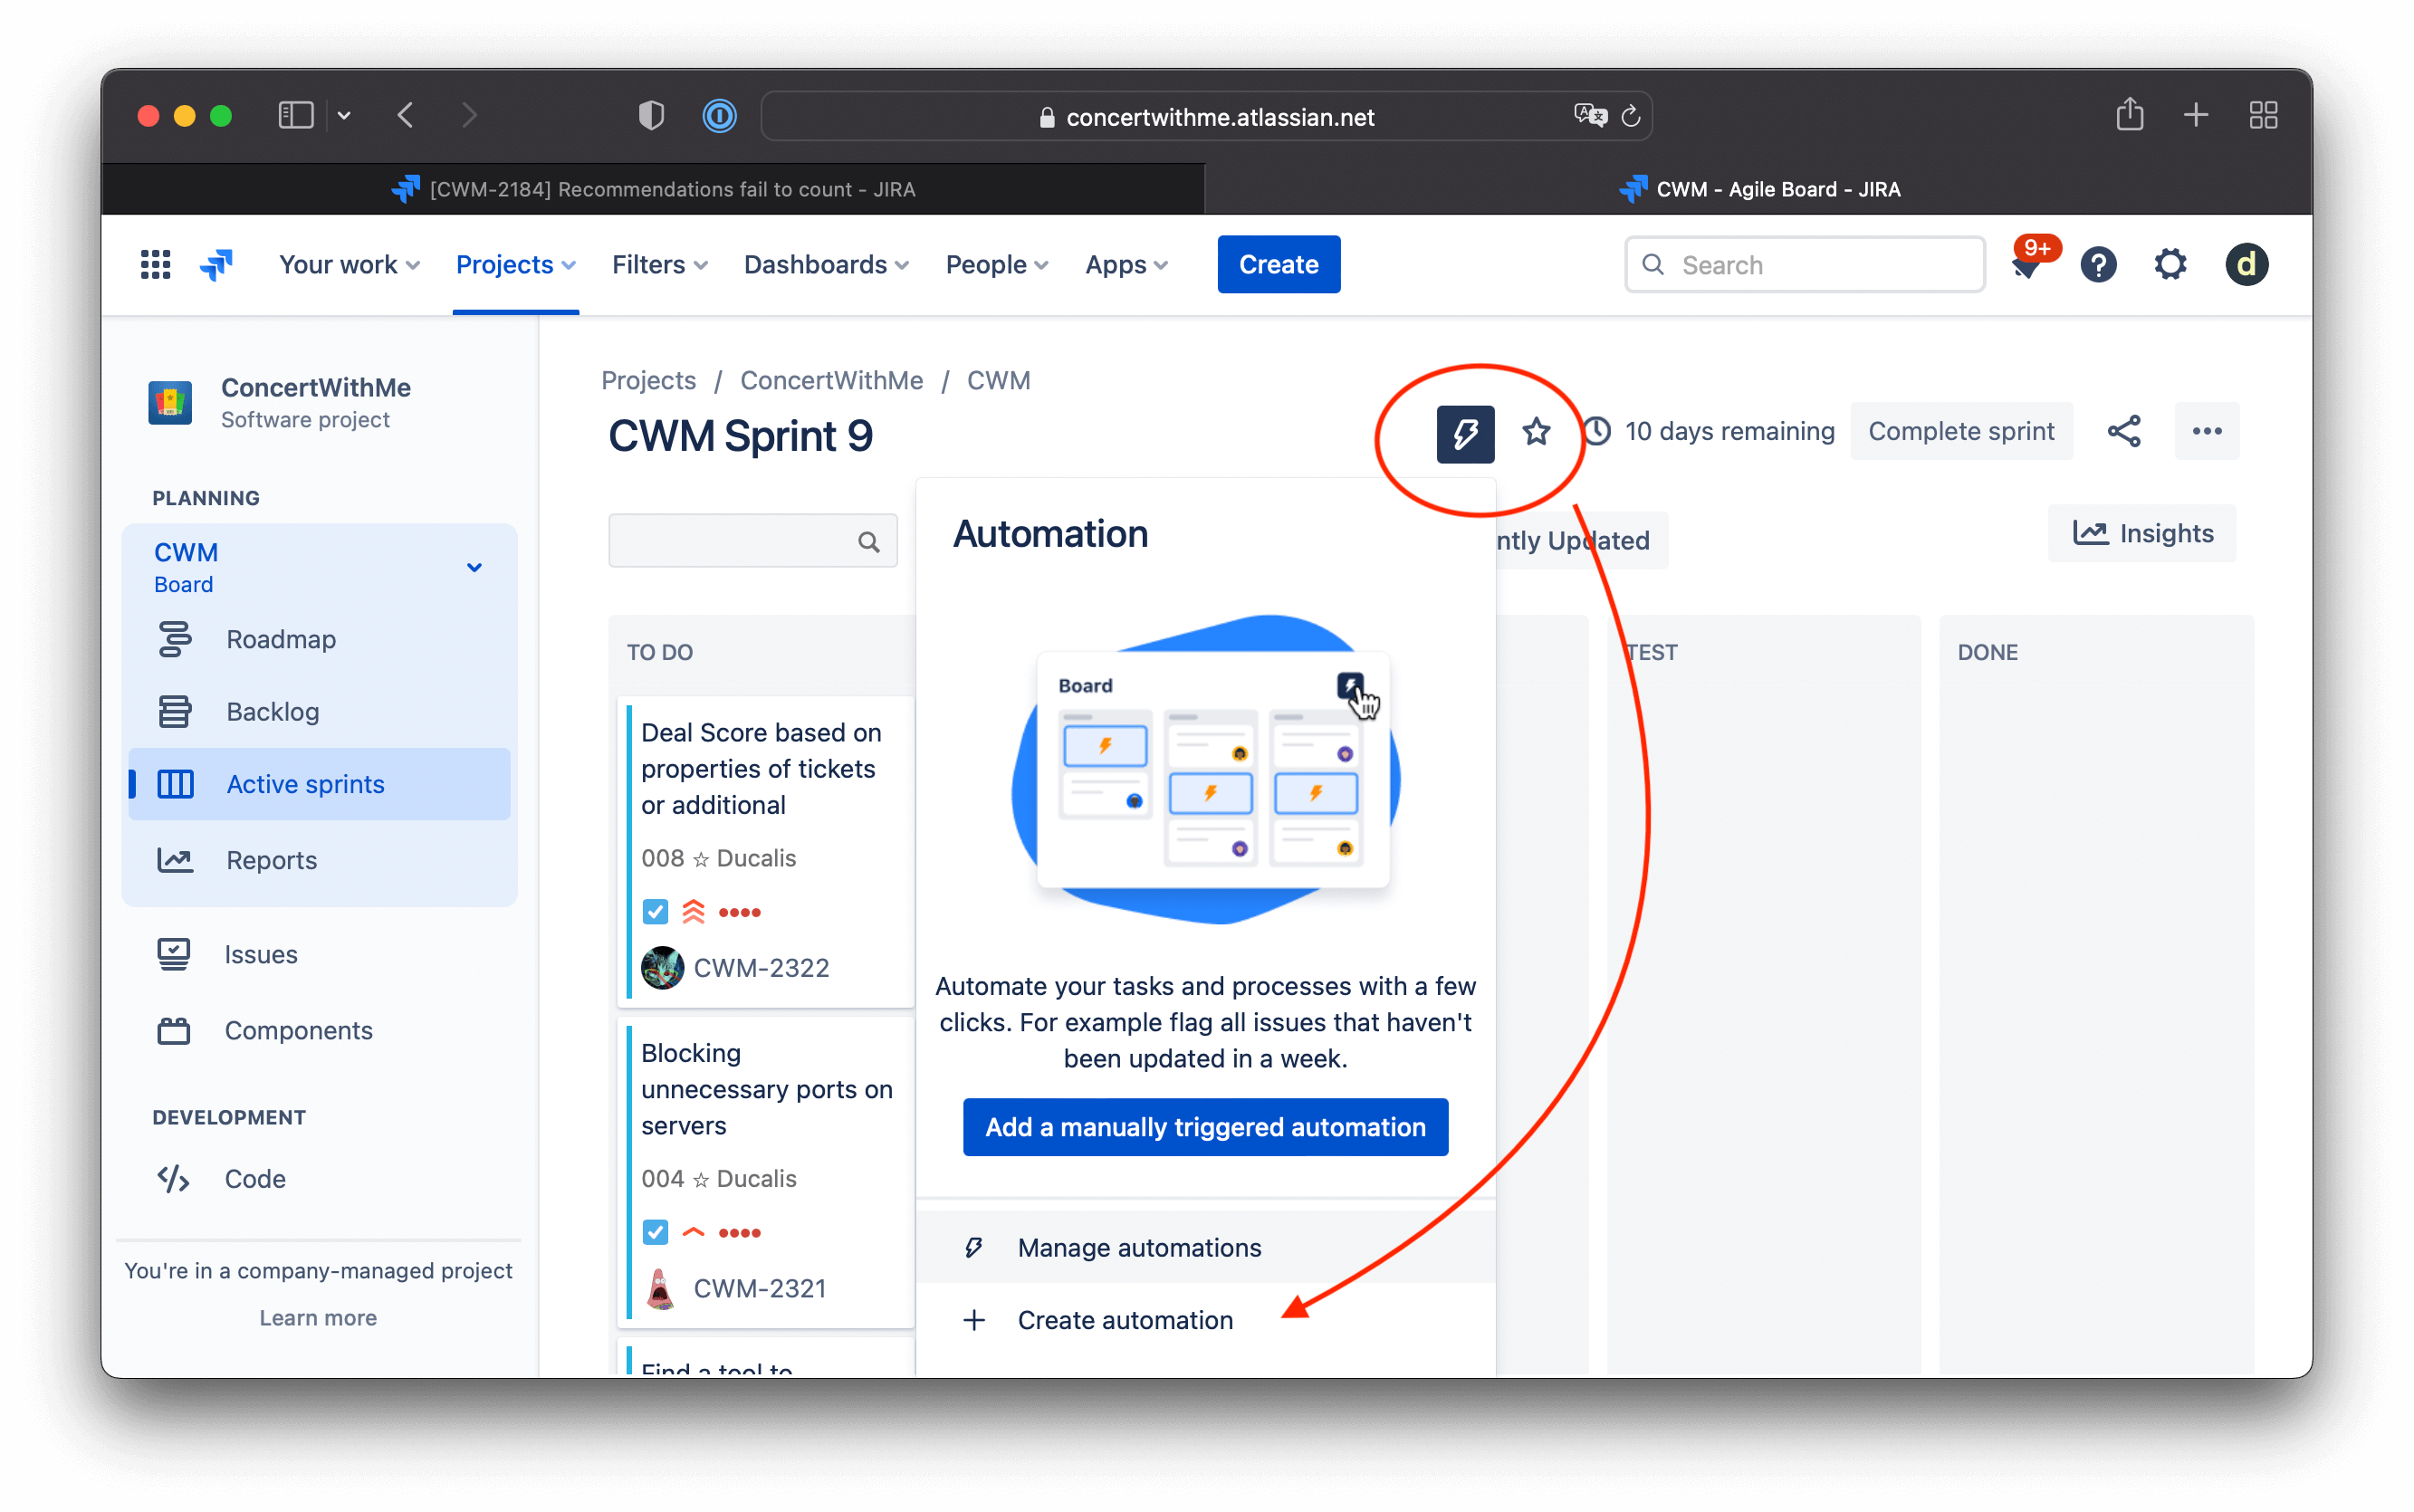
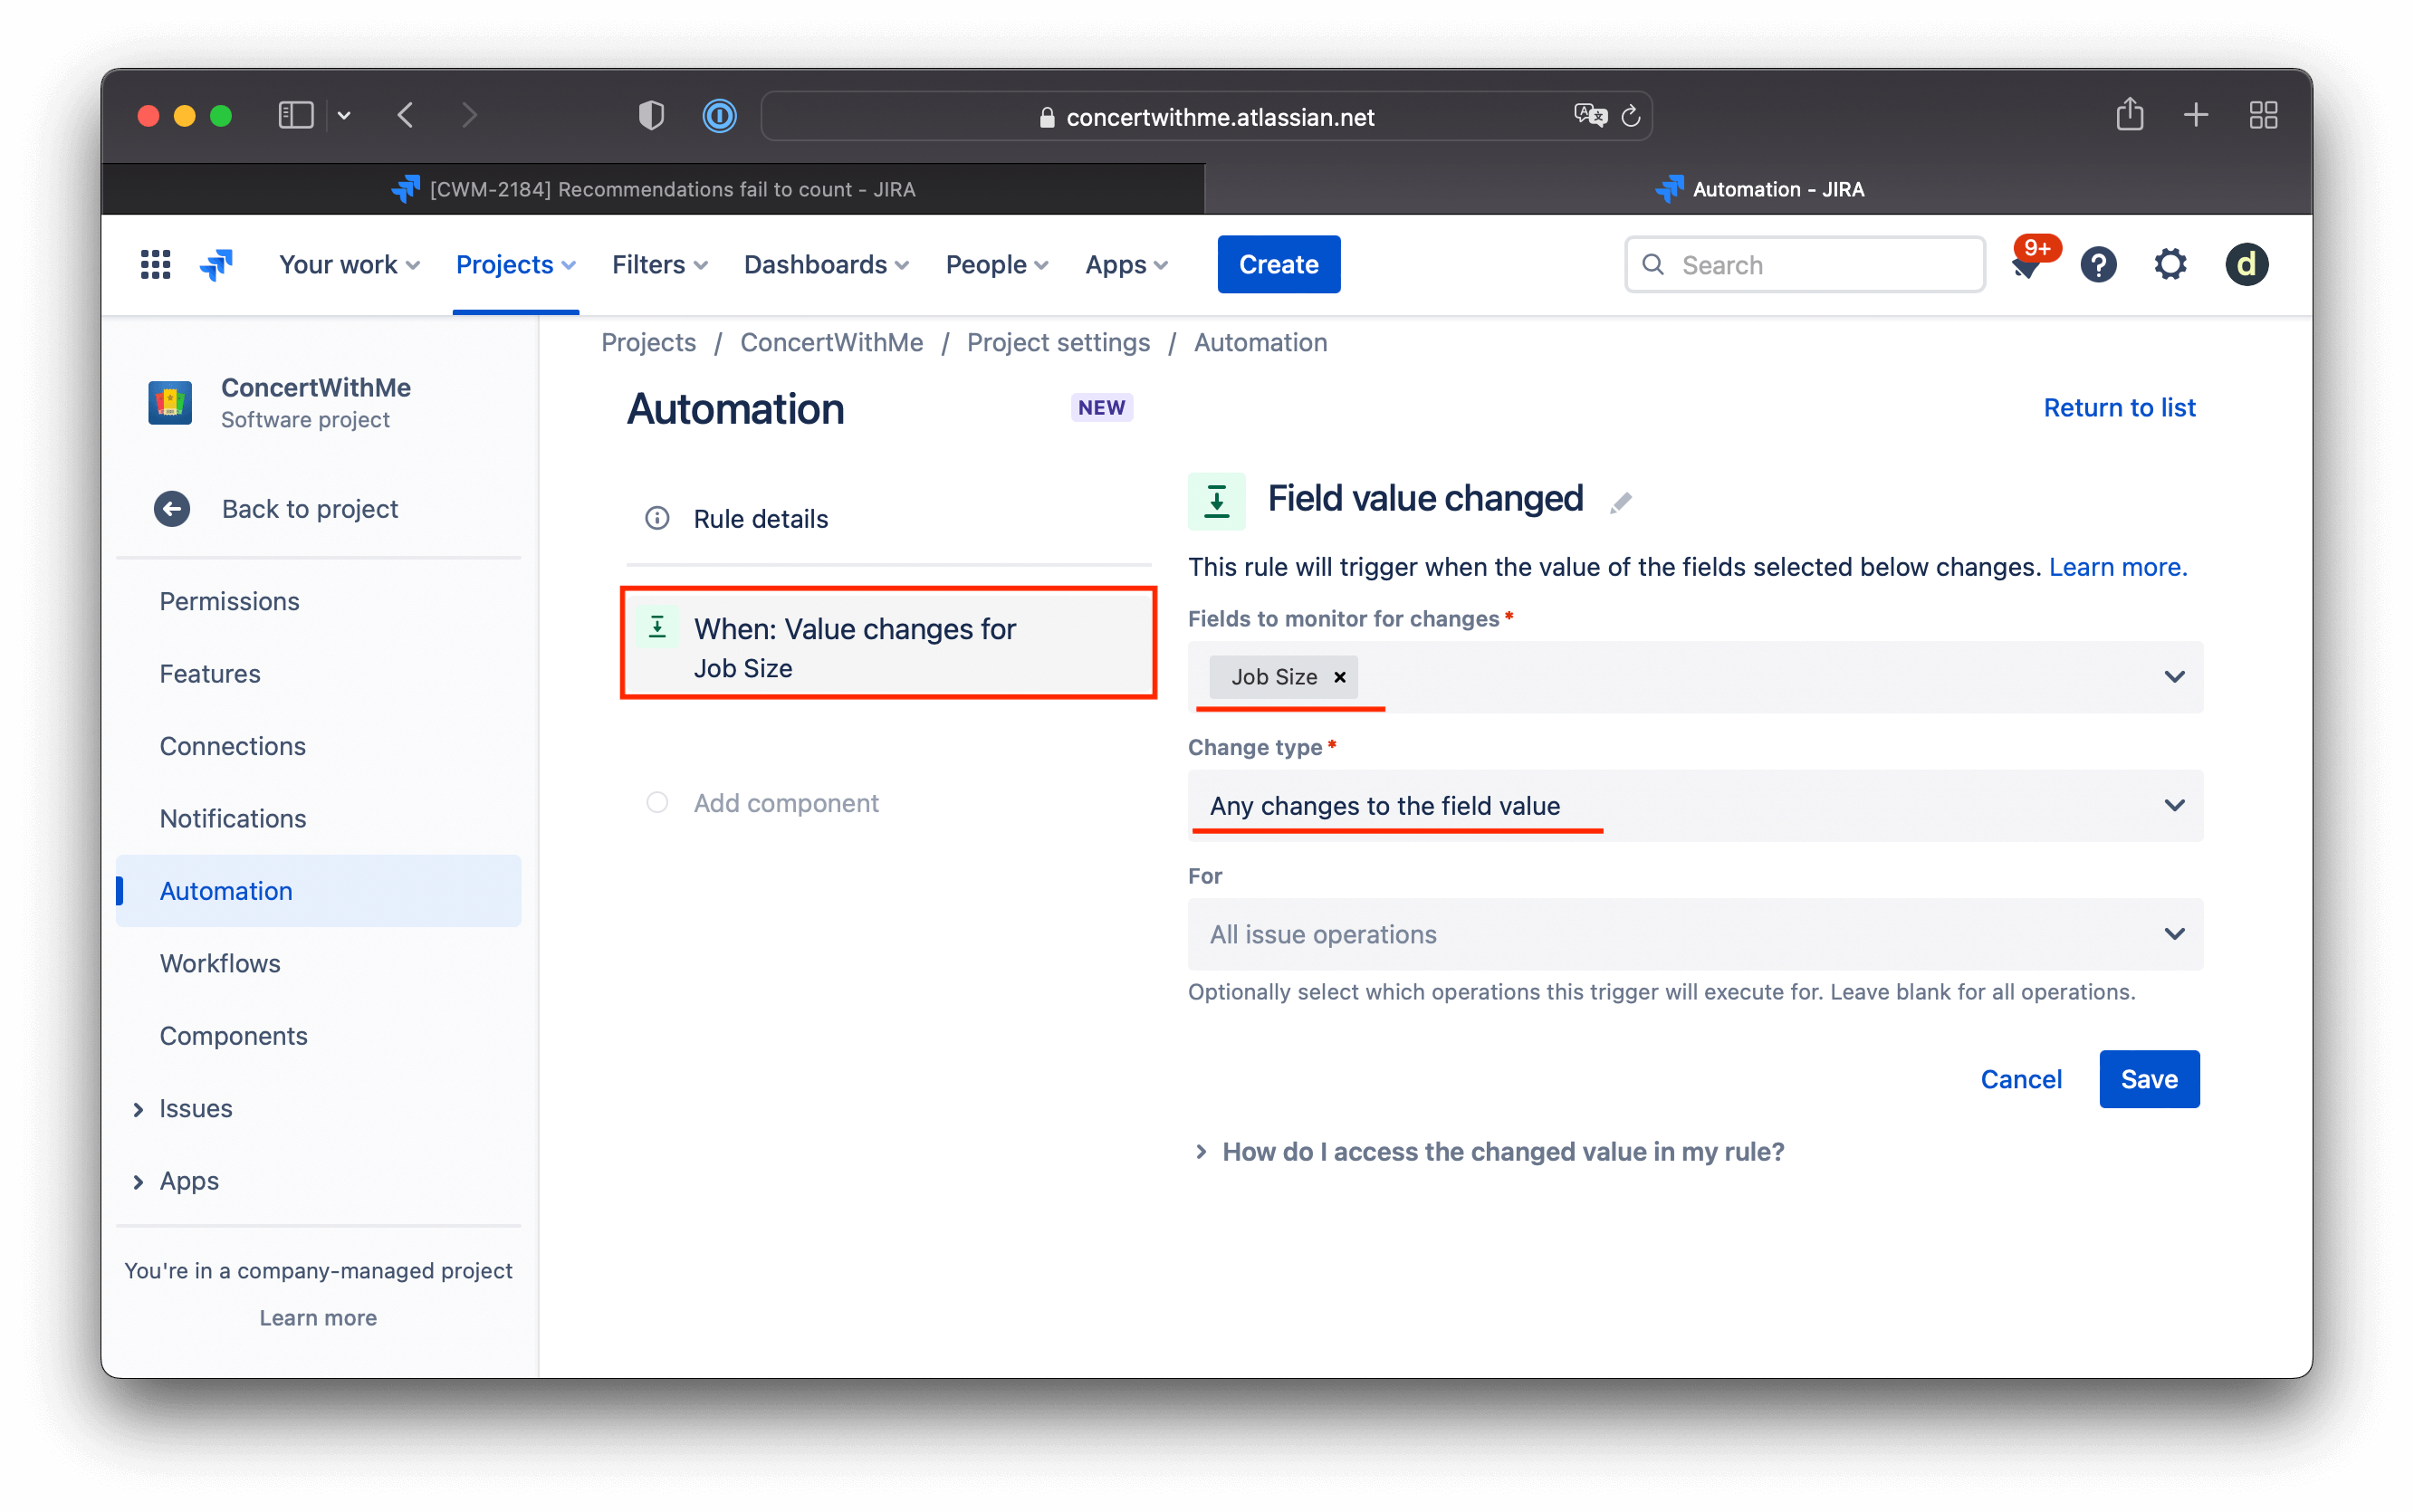
Create a new Automation Rule. Create a Trigger.
- Fields to monitor for changes: Business Value, Time Criticality, Risk Reduction.
- Change type: Any changes to the field value.
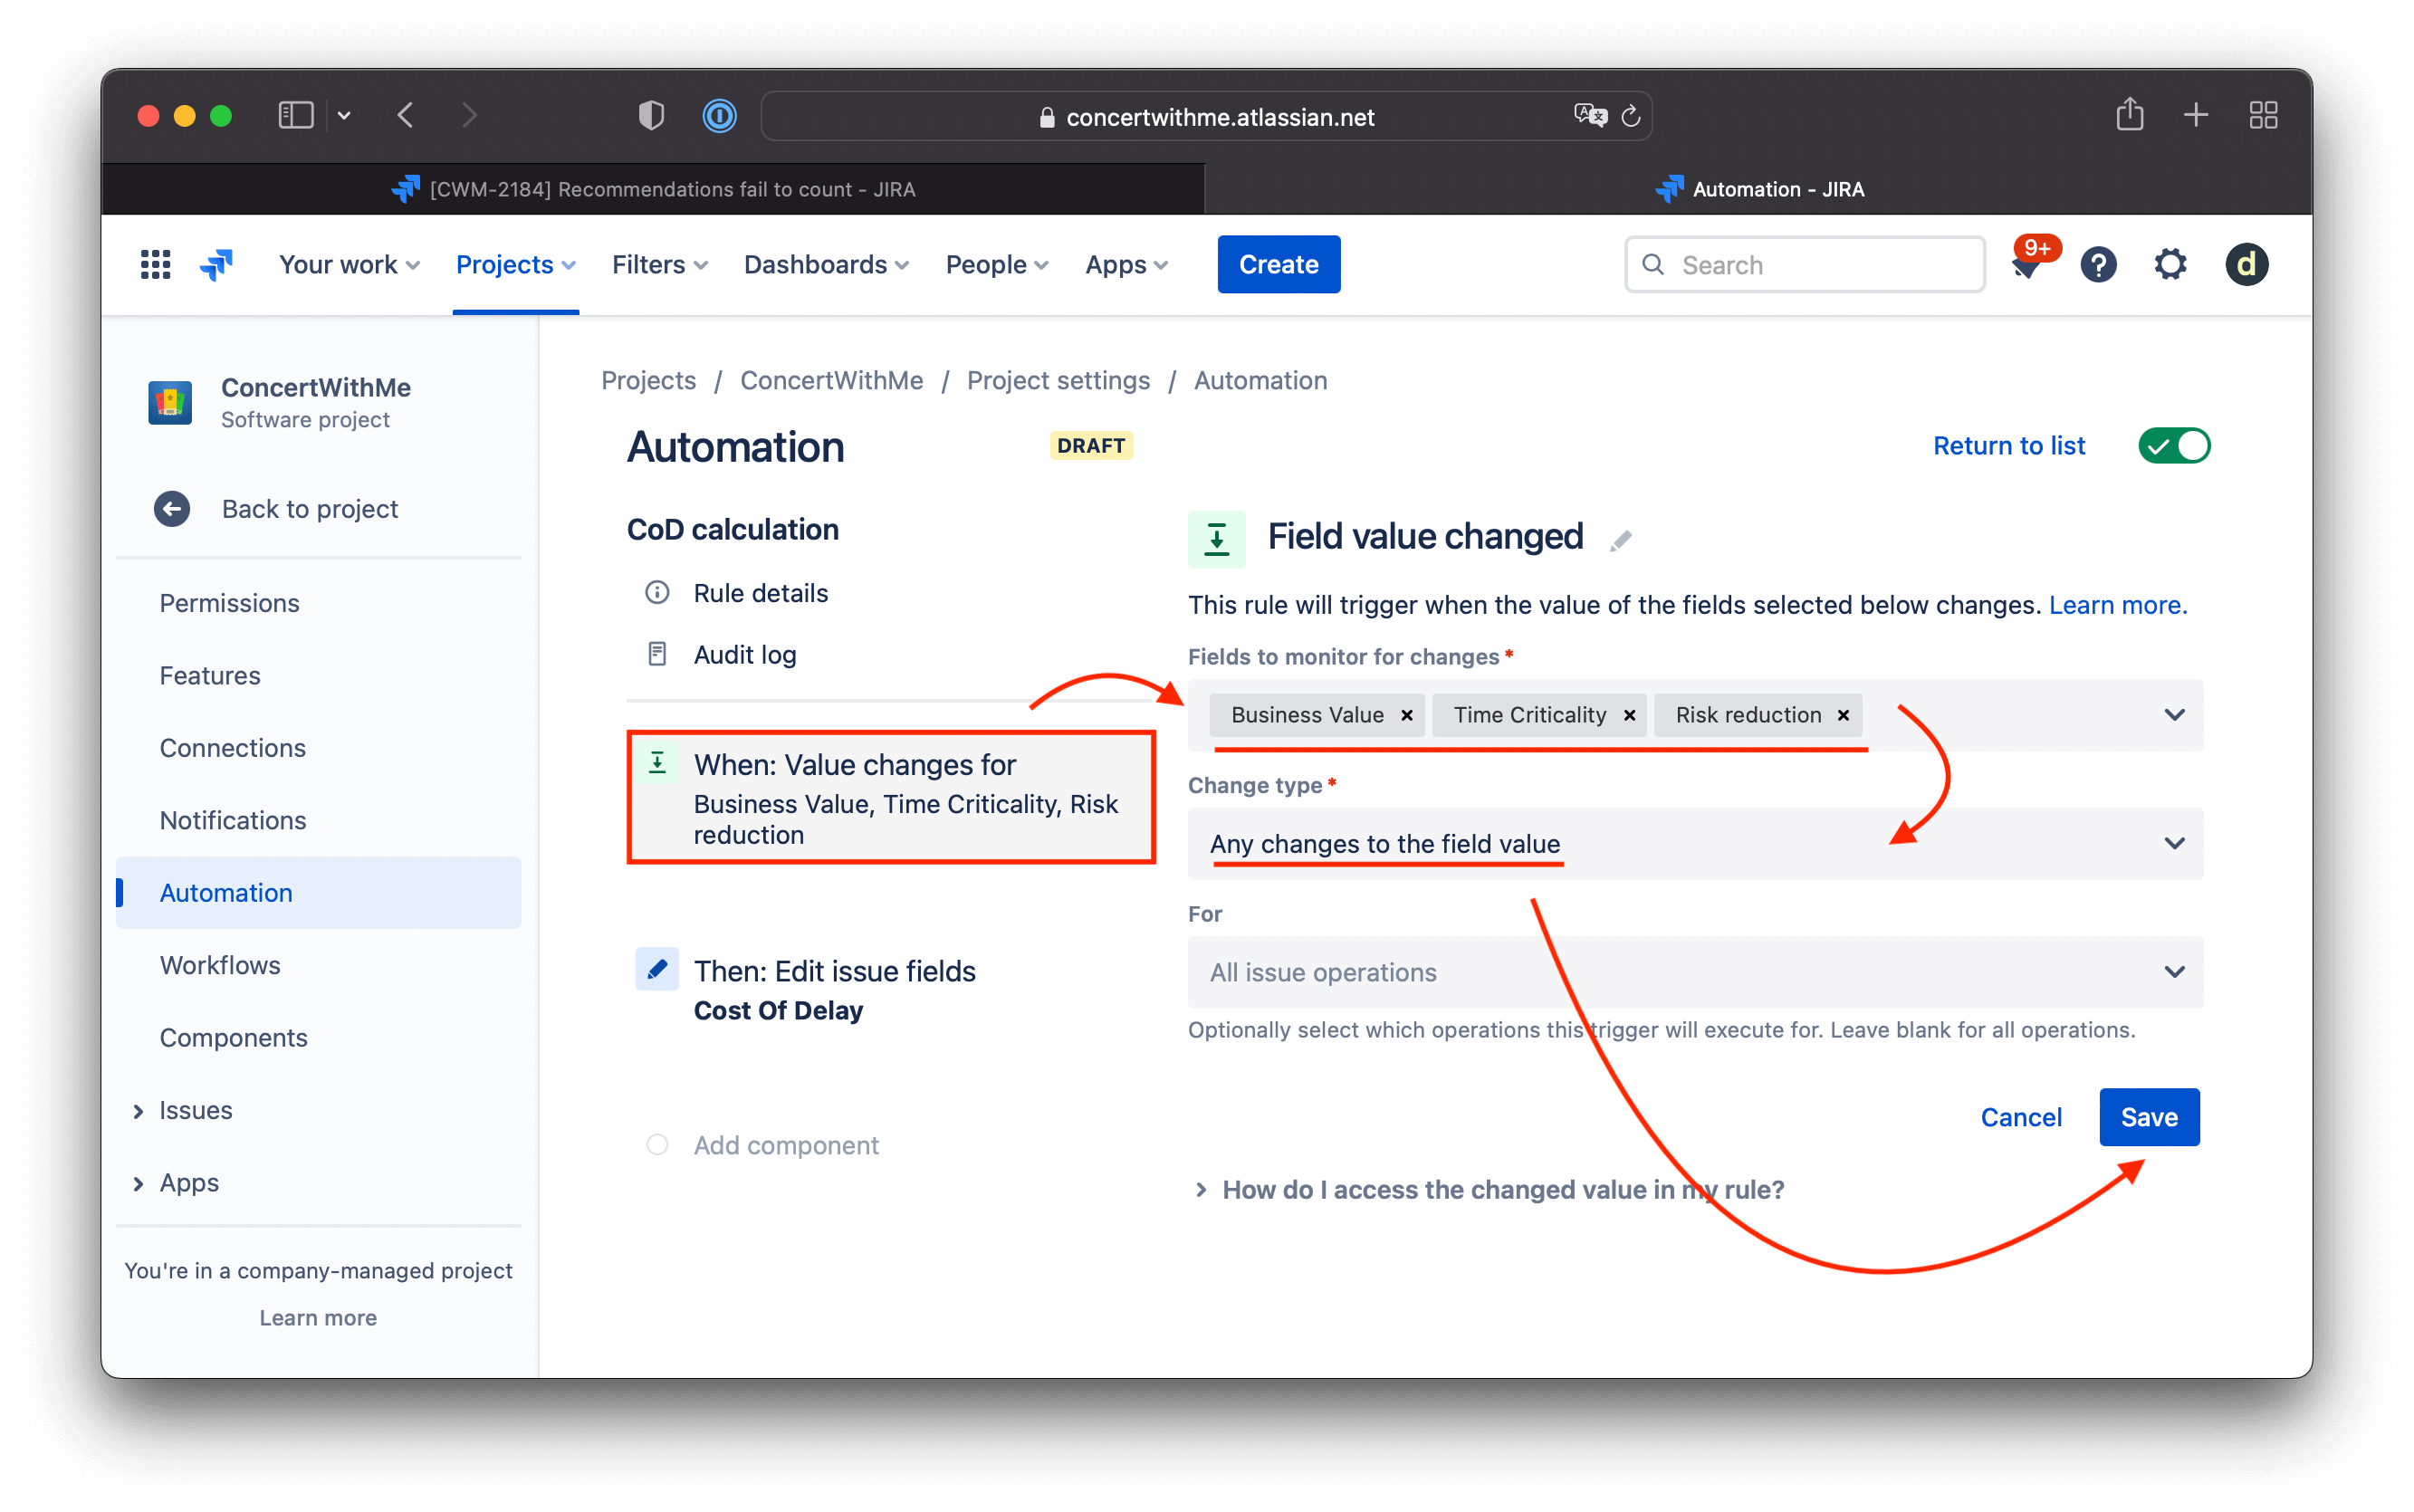
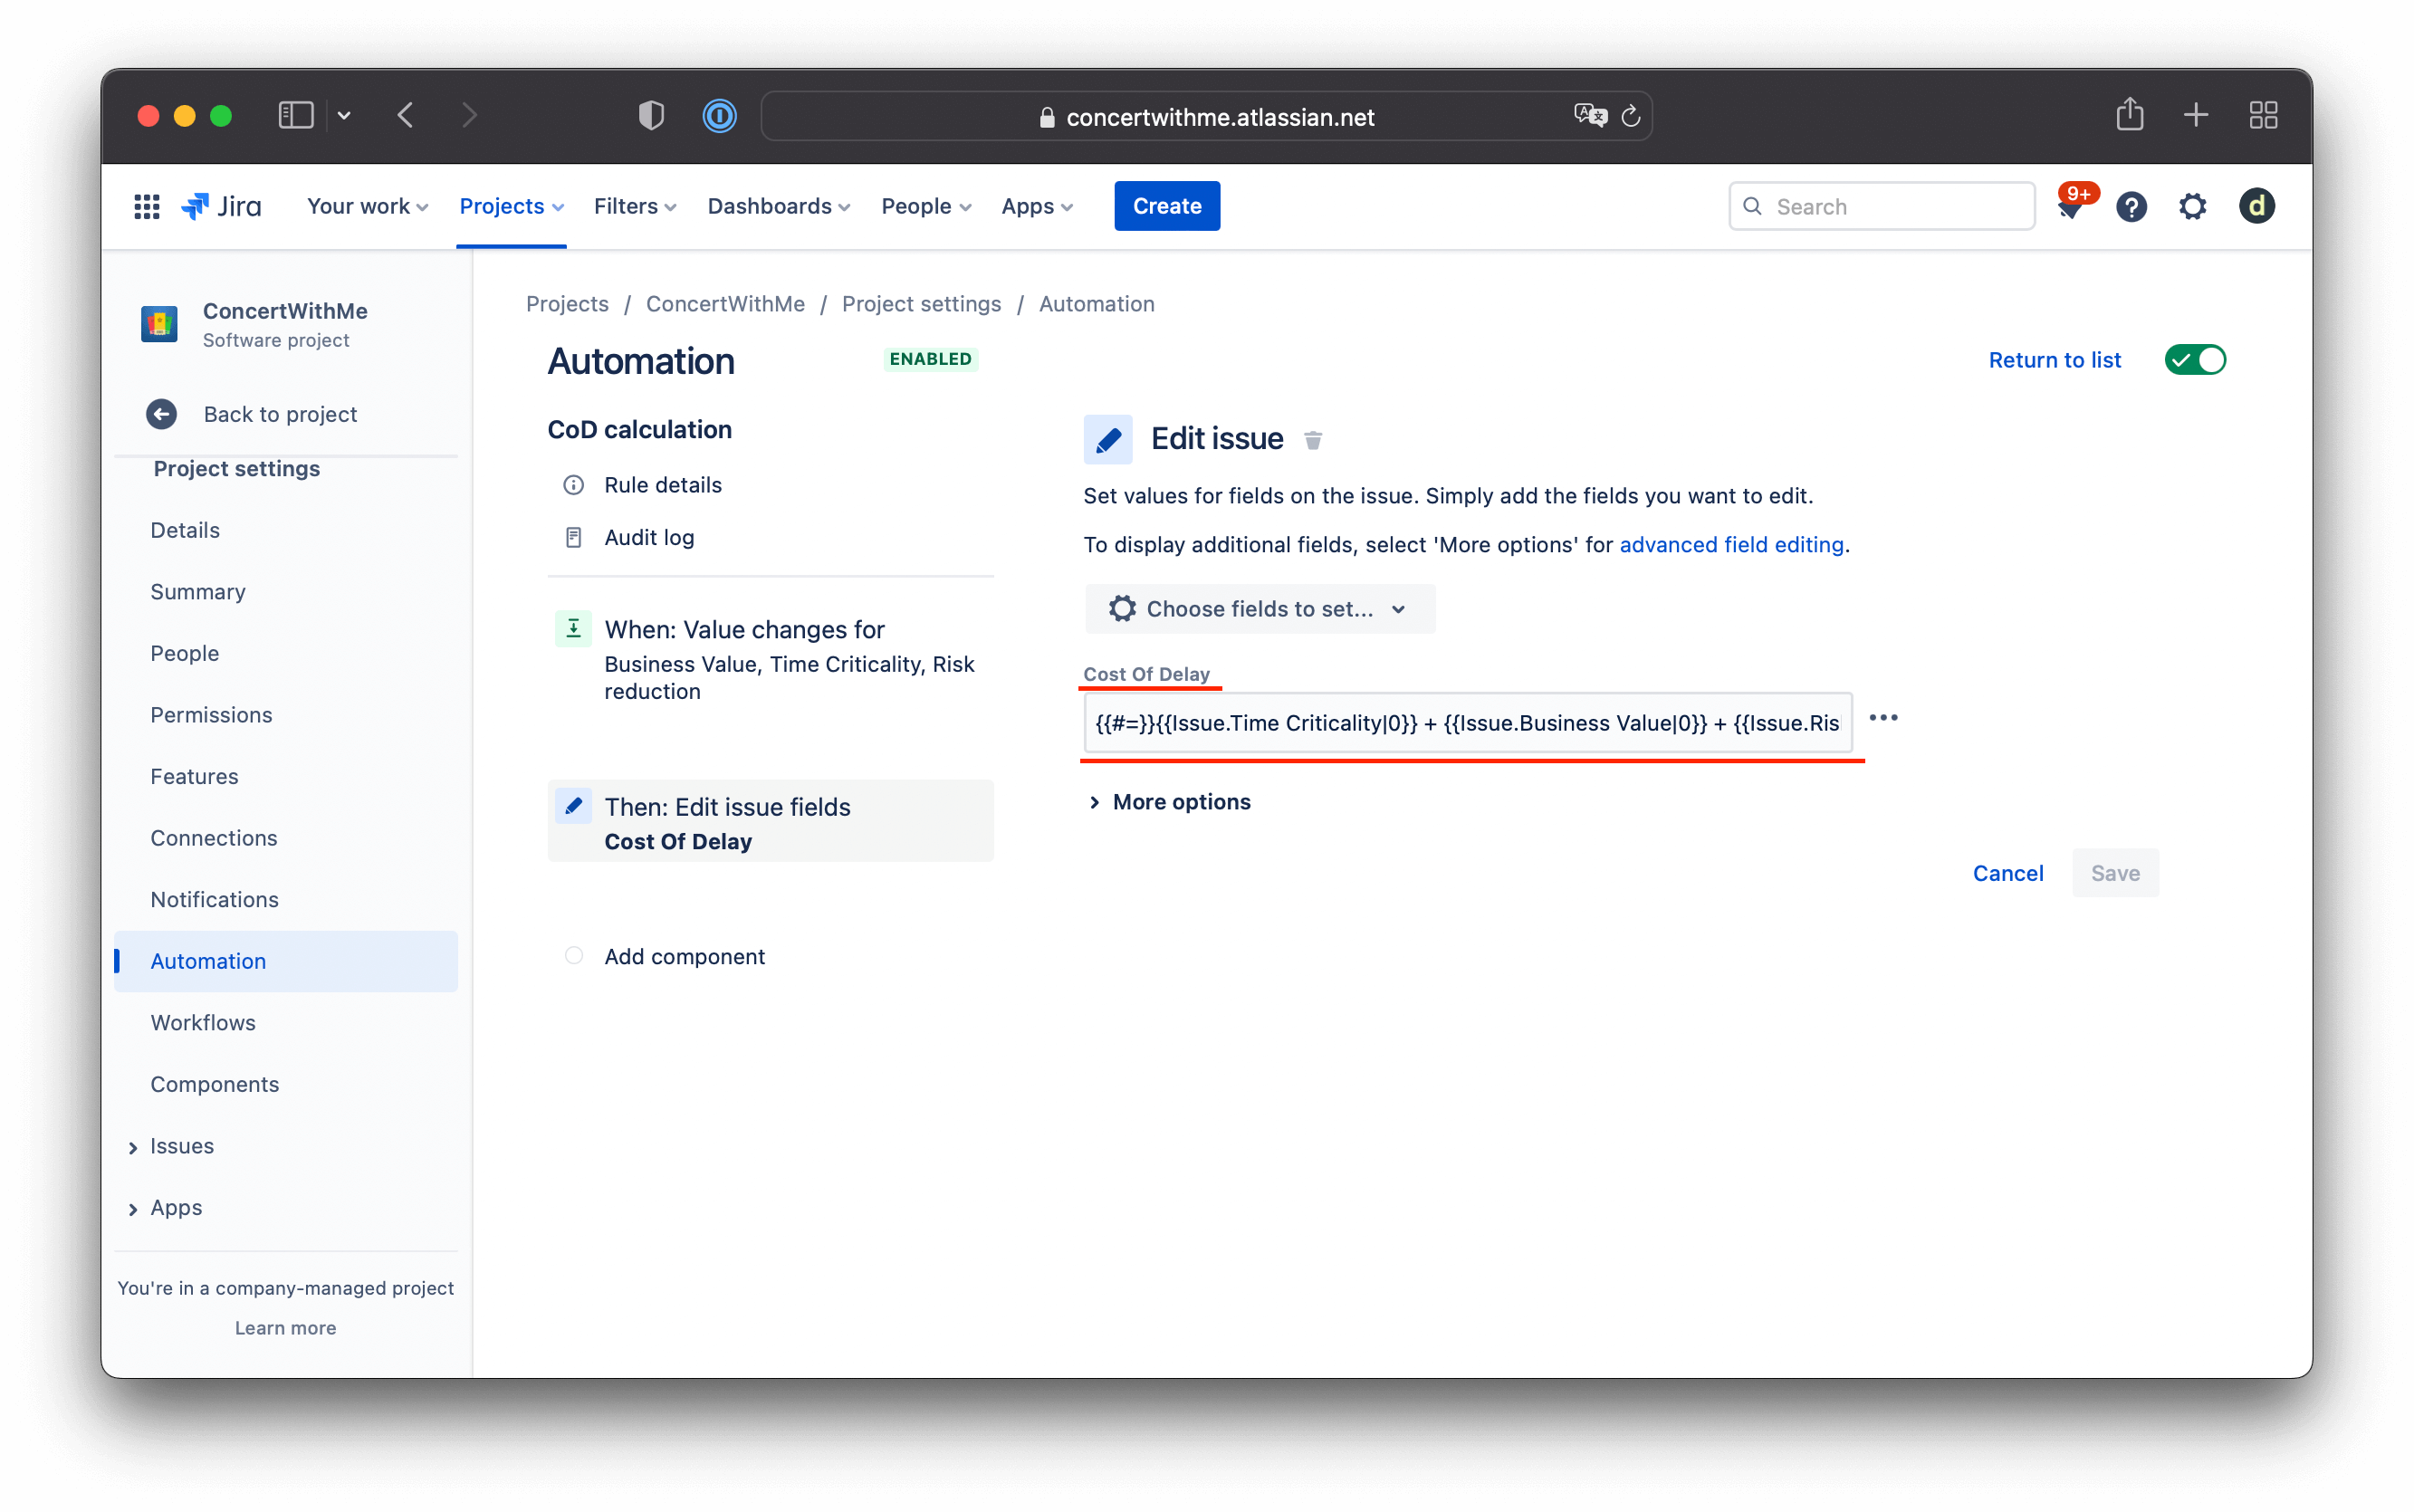
Then: add an action—Edit issue. Choose fields to set: Cost of Delay.
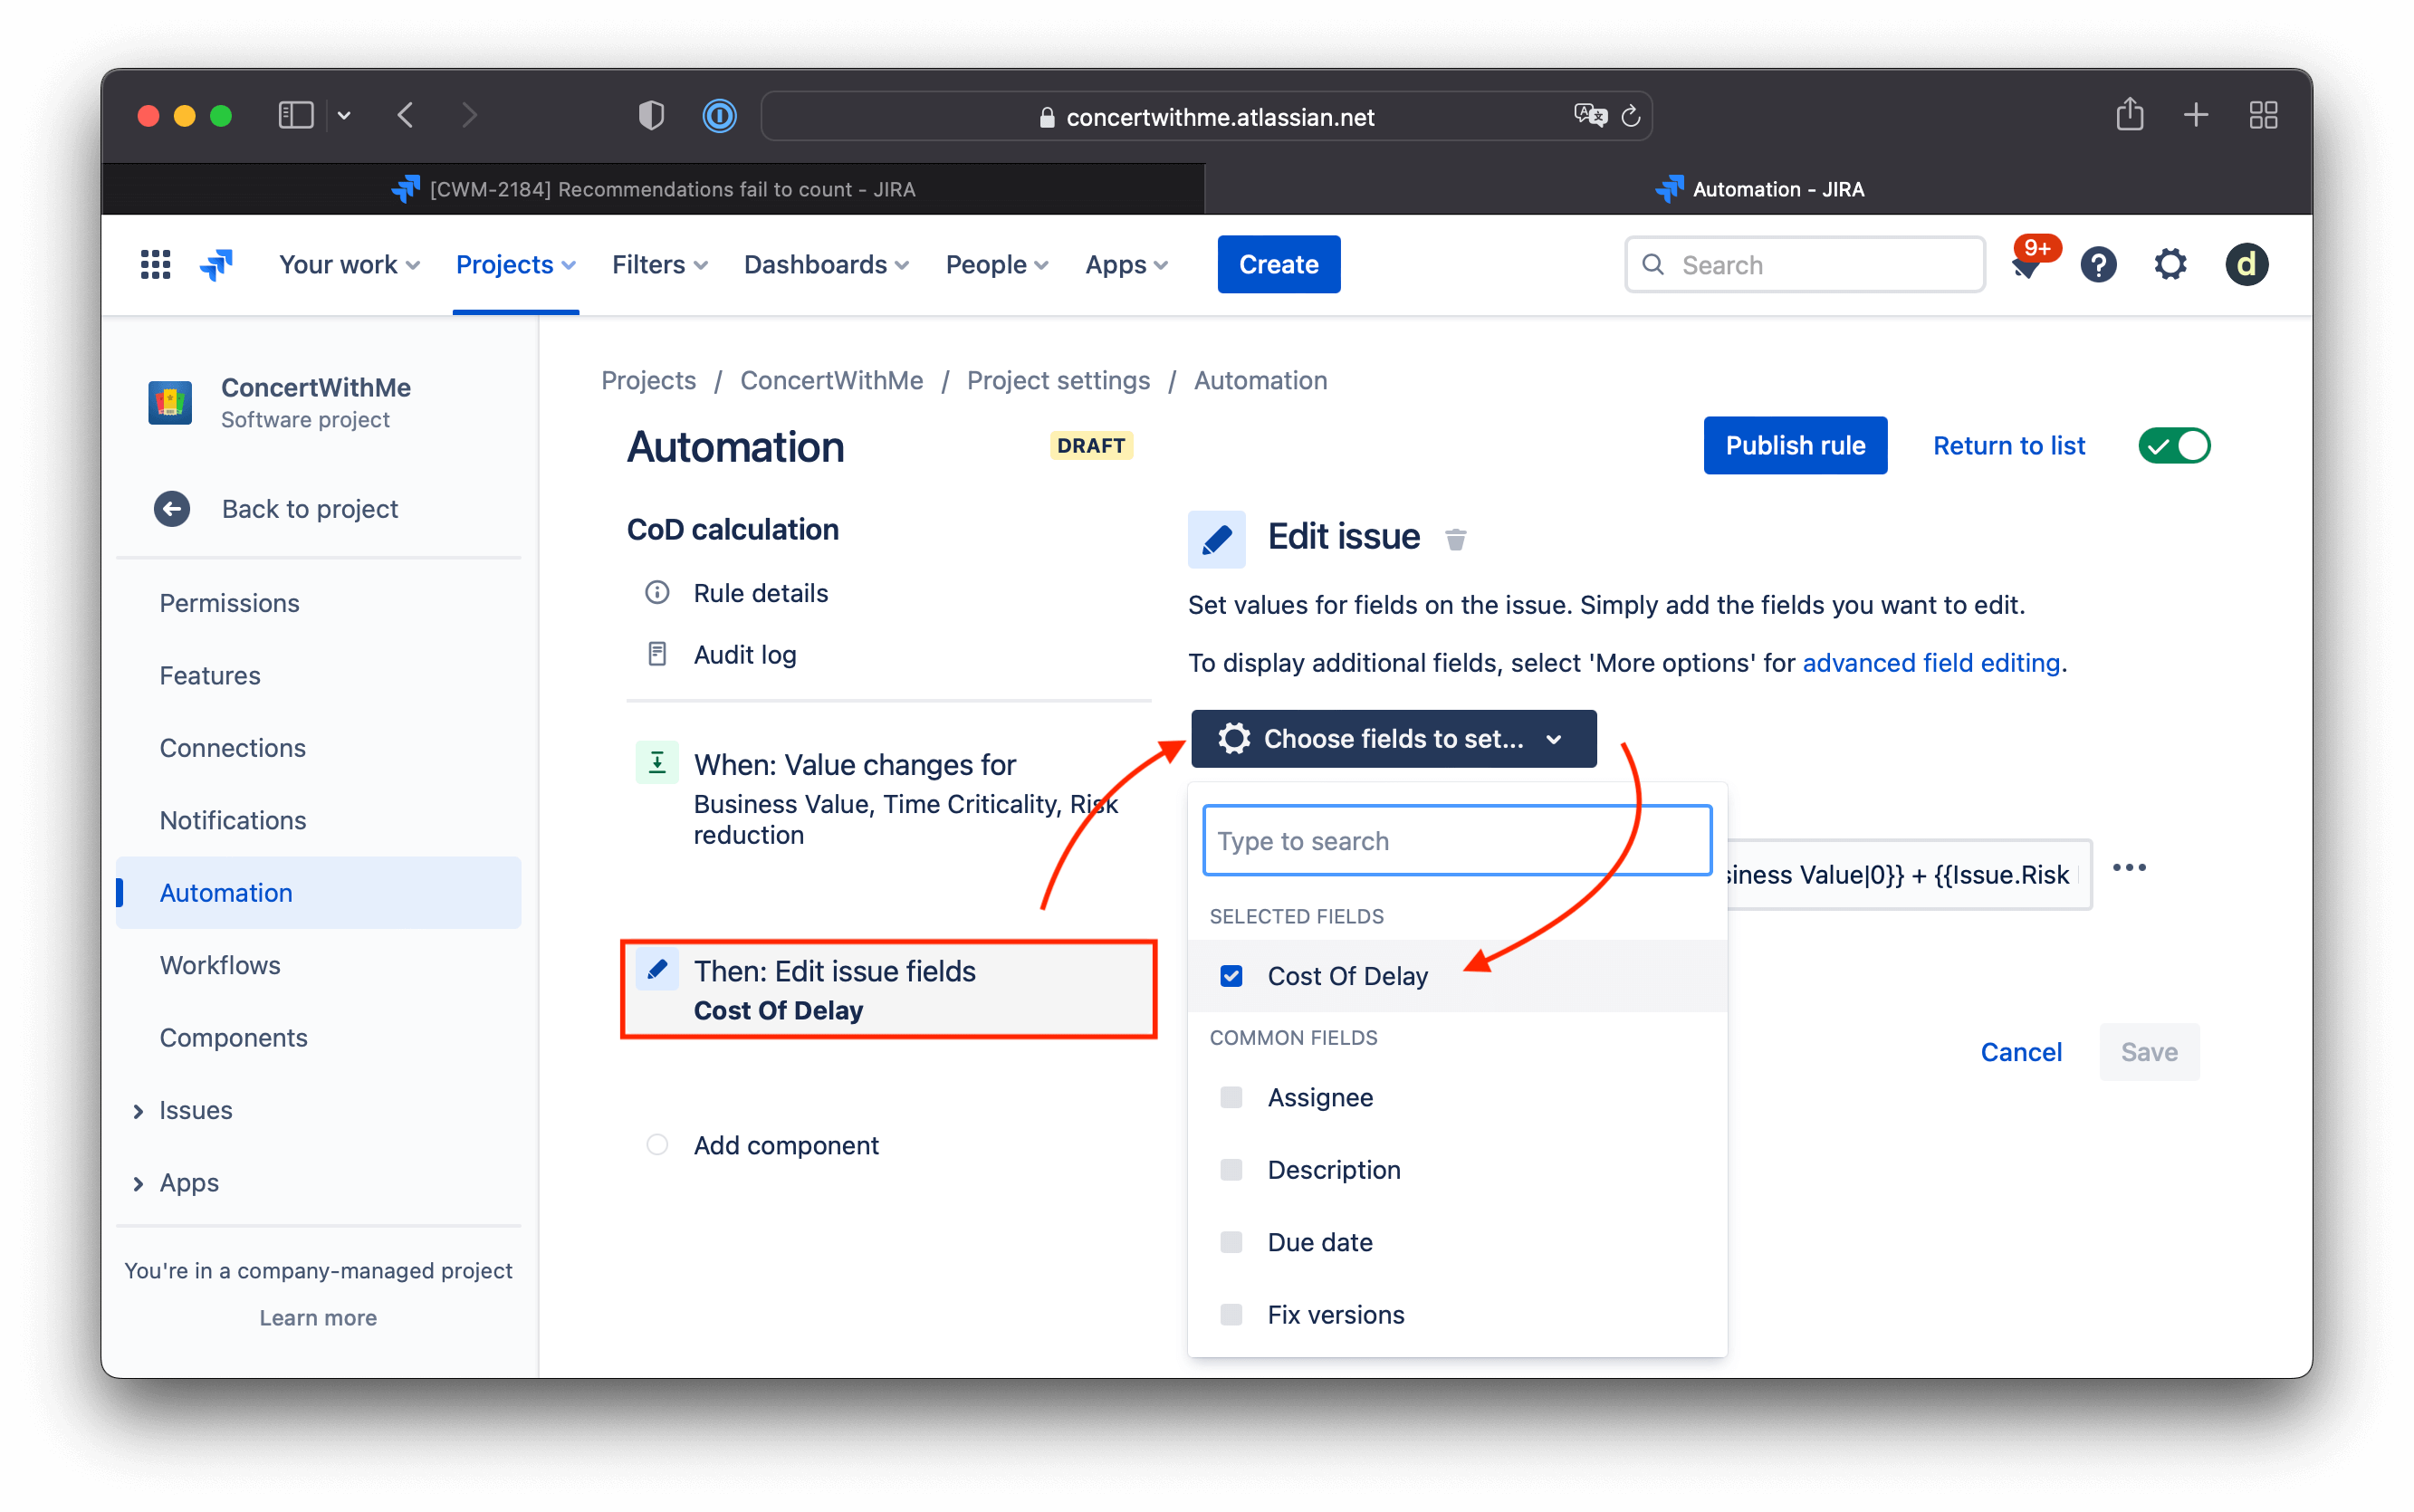
For that file, add the current formula:
{{#=}}{{Issue.Time Criticality|0}} + {{Issue.Business Value|0}} + {{Issue.Risk Reduction|0}}{{/}}
This works as a sum of all three values. If any value is empty, count it as zero.
Hit ‘Publish rule.’
5. WSJF score calculation with Jira Automation
Now we have to repeat the same process for the final WSJF score calculationю
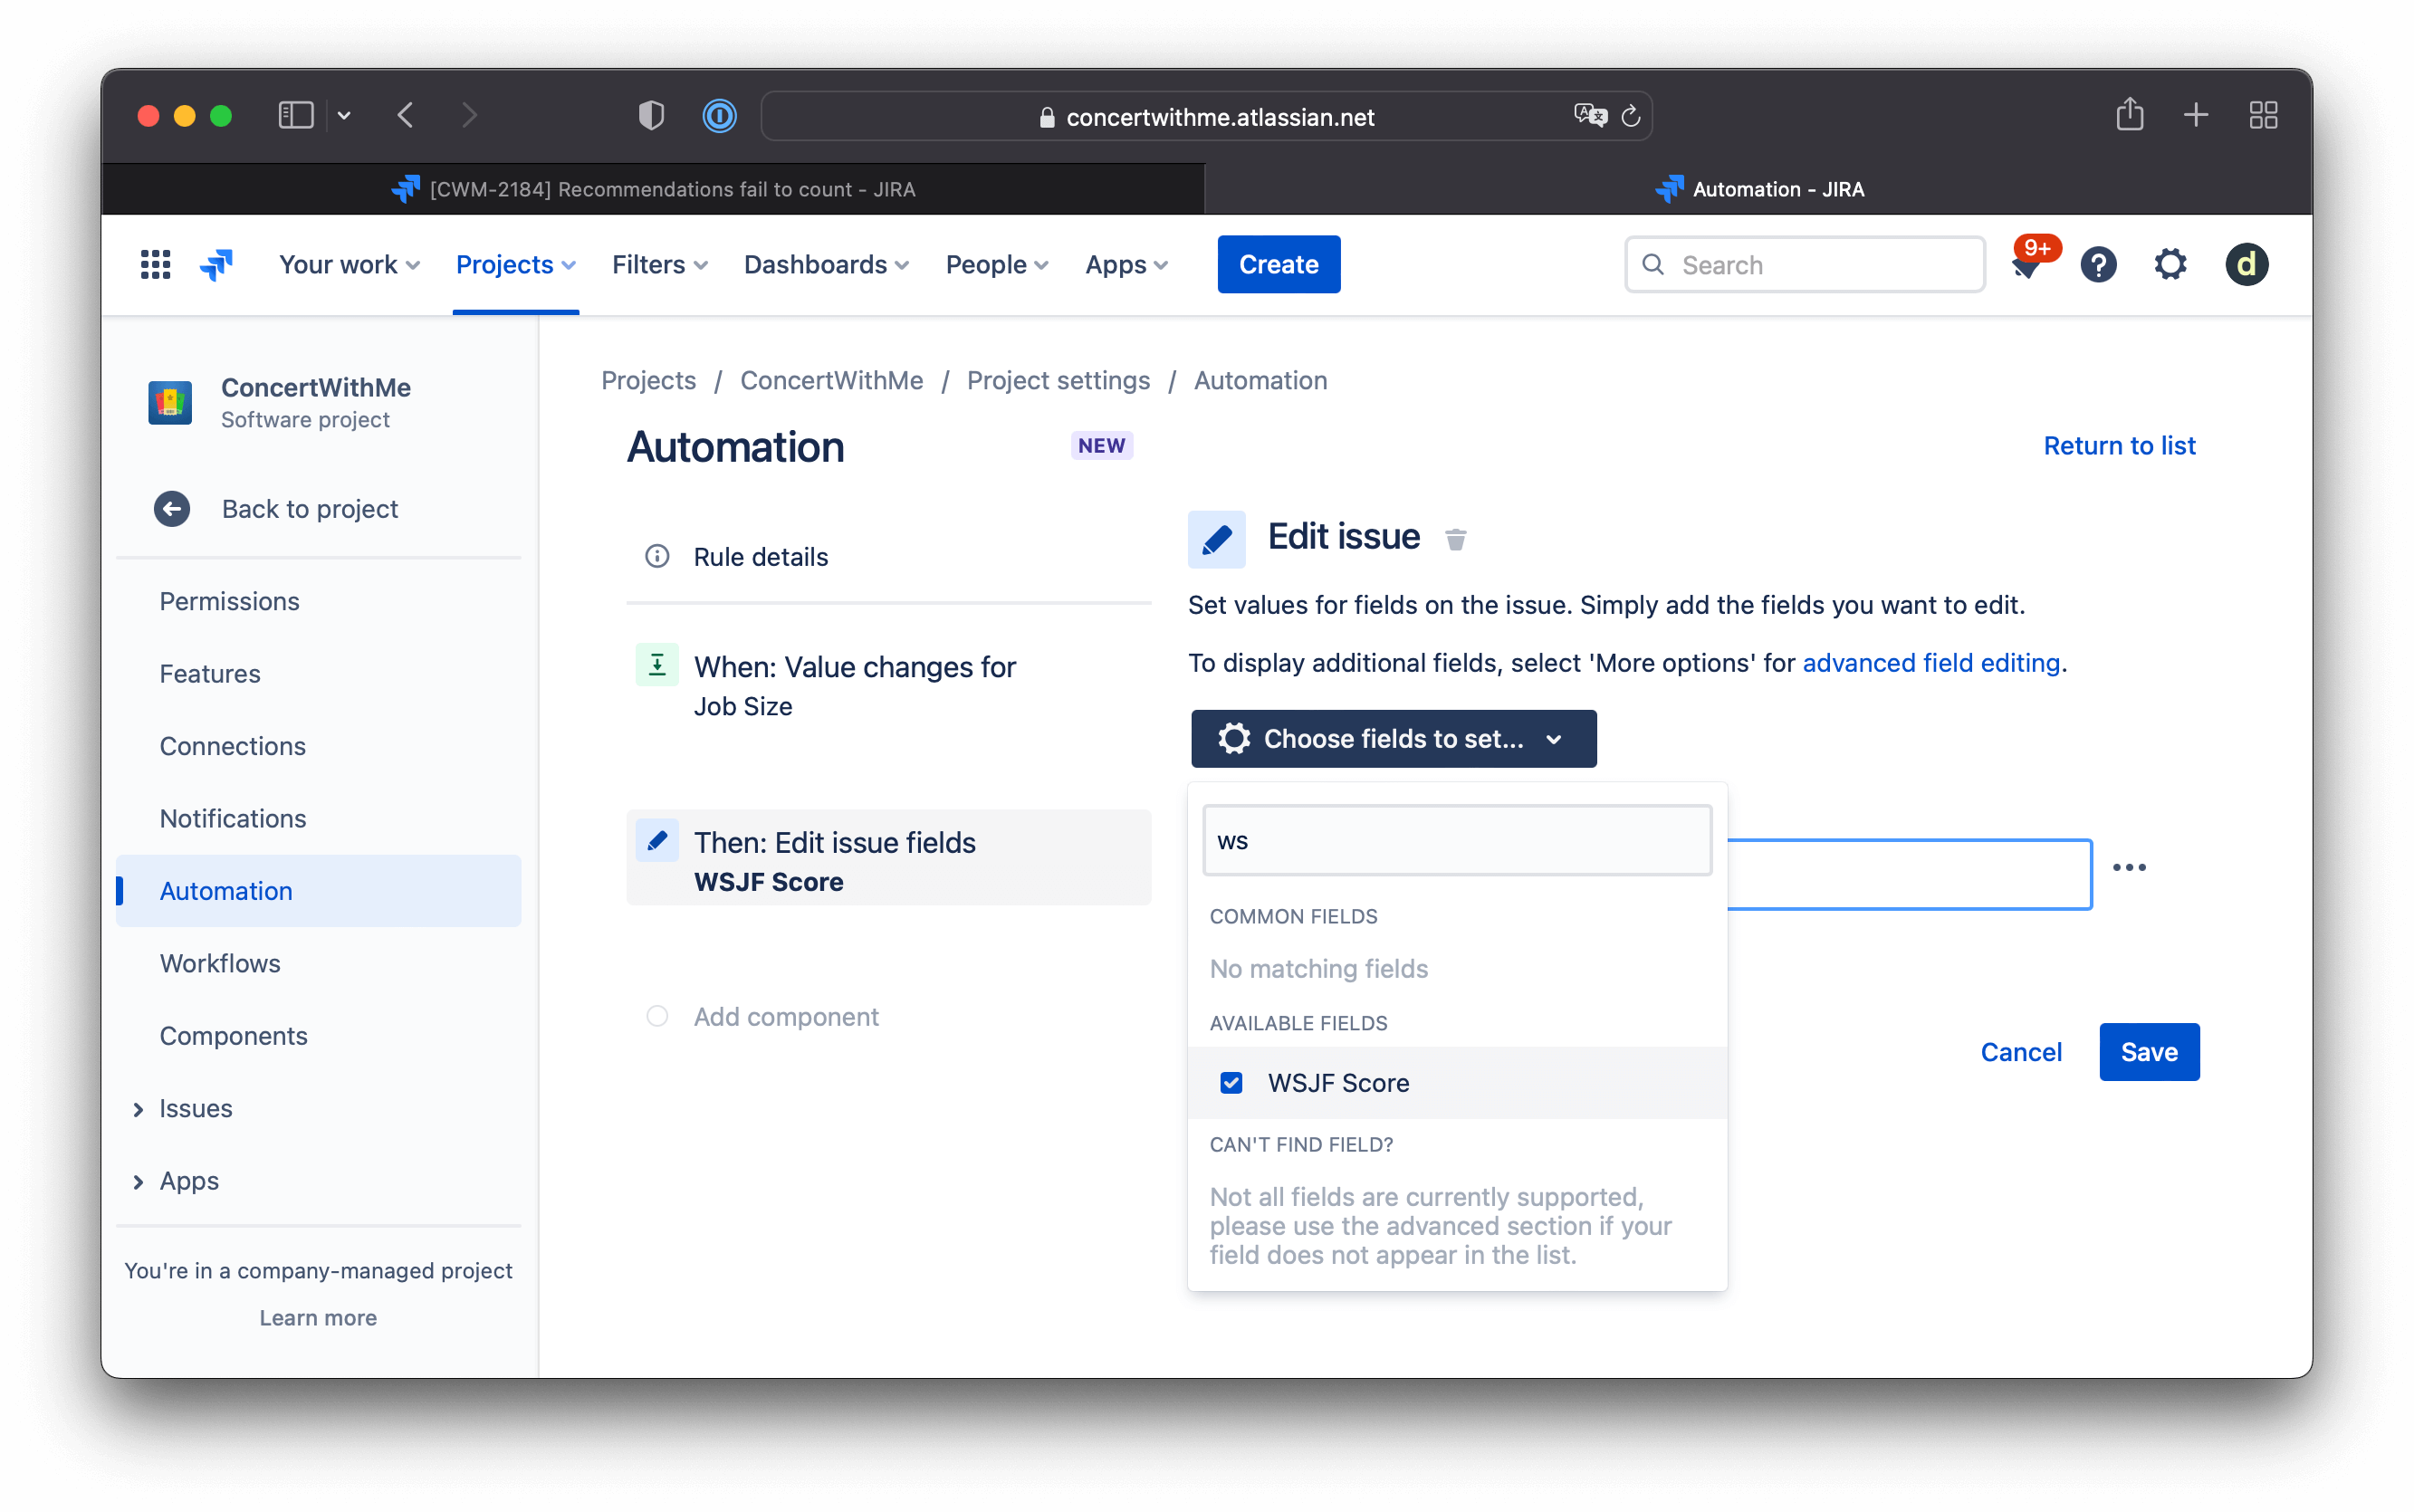
Create a new automation rule for a field the value changed trigger for Job Size update:
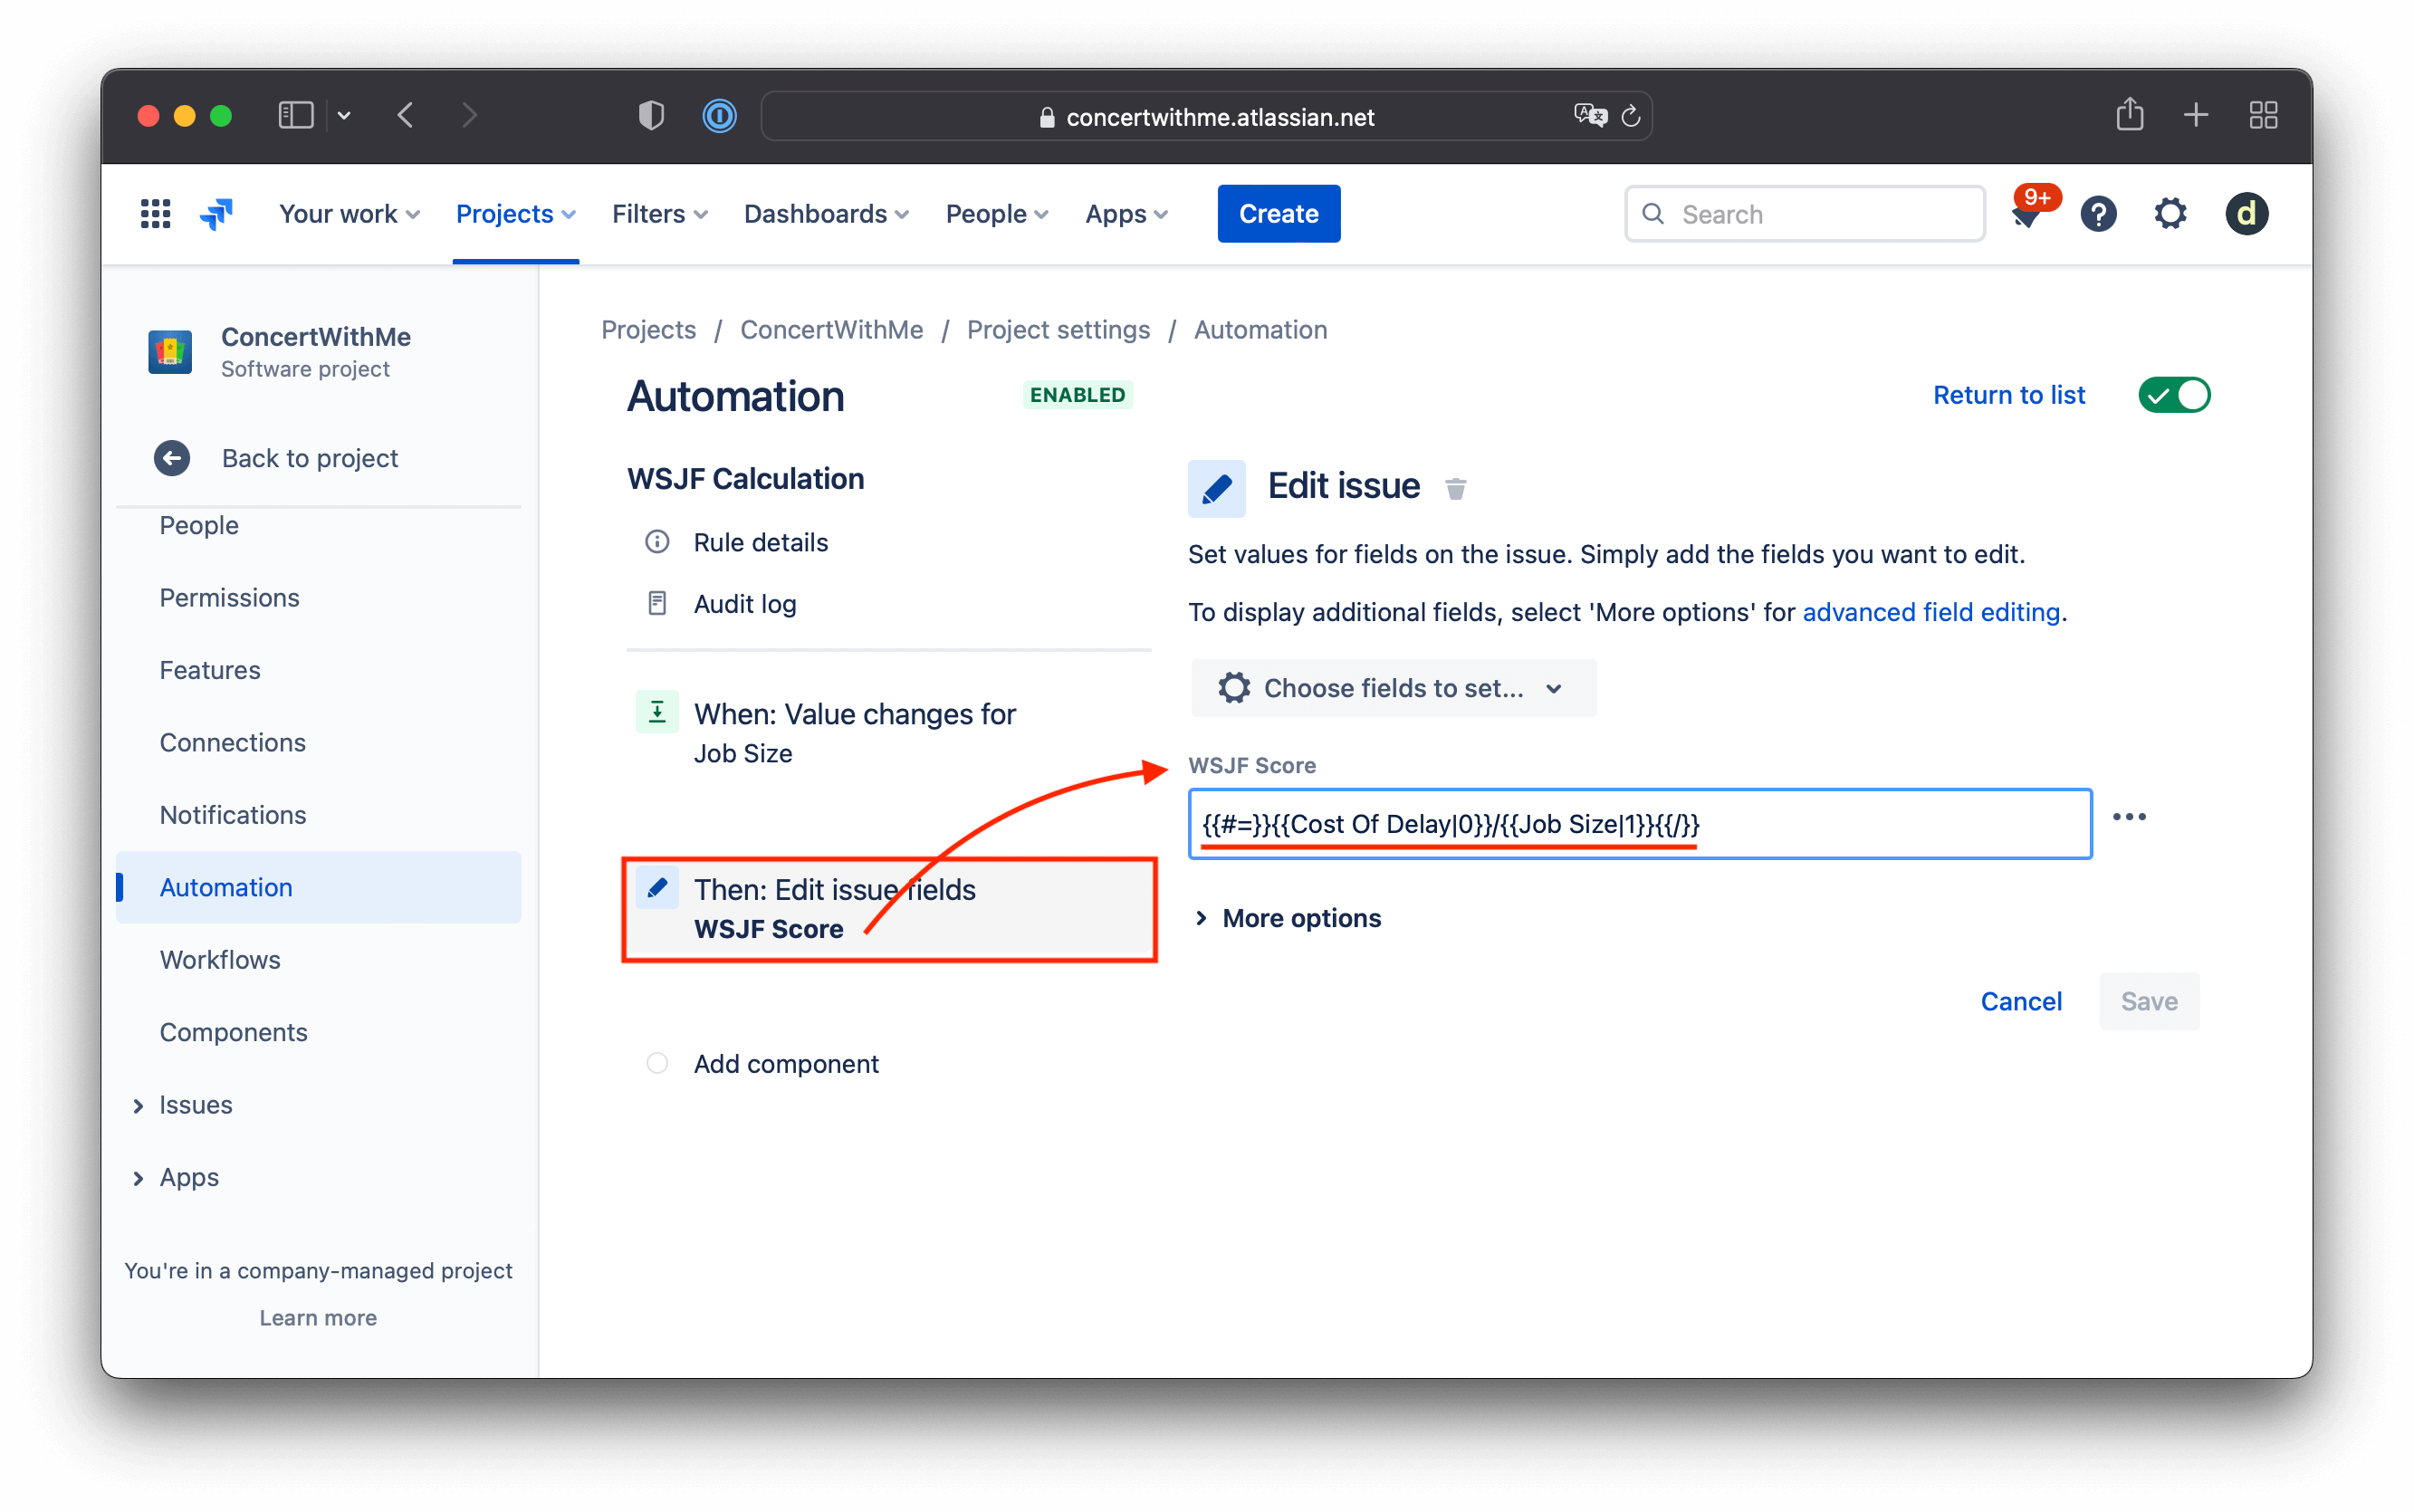
Create an action Edit issue: for our WSJF Score field:
And add a calculation formula:
{{#=}}{{Cost Of Delay|0}}/{{Job Size|1}}{{/}}
This means ‘Cost Of Delay’ divided by ‘Job Size’. If we don’t have any ‘Job Size’ value, use 1.
6. Testing WSJF calculations with Jira Custom Fields
Now let’s test out our automation. First, open an issue and fill in all the necessary fields. Then, after refreshing the window, you can see the result:
Example: WSJF score: (2 + 5 + 21) / 2 = 14