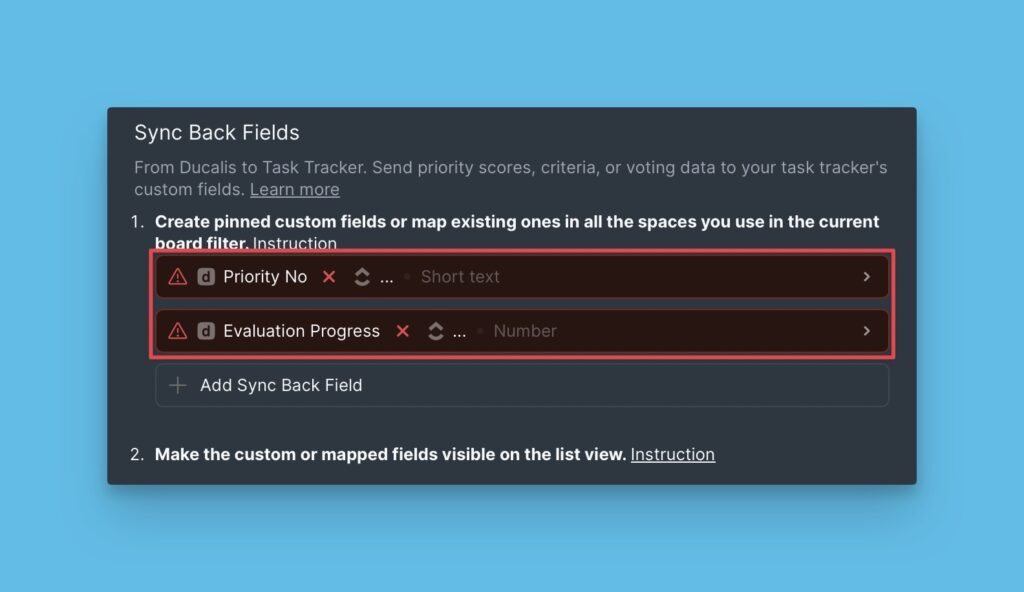
Instead of adding custom fields to an entire workspace, you can add custom fields in an individual space so that the data can be synced and viewed in that particular workspace alone.
Choosing Ducalis Fields to Sync
- Before you start creating Ducalis custom fields in ClickUp, you need to choose the Ducalis fields with the data you would like to sync to ClickUp.
- You will find two default fields–the Priority {emoji} Ducalis and the Alignment {emoji} Ducalis.
- You can delete this field, or any other field that you will add and decide to delete. Just hover over the field you want to delete and click on the trash icon that appears.
Step 1 – Creating Ducalis Custom Fields in ClickUp For an Individual Space
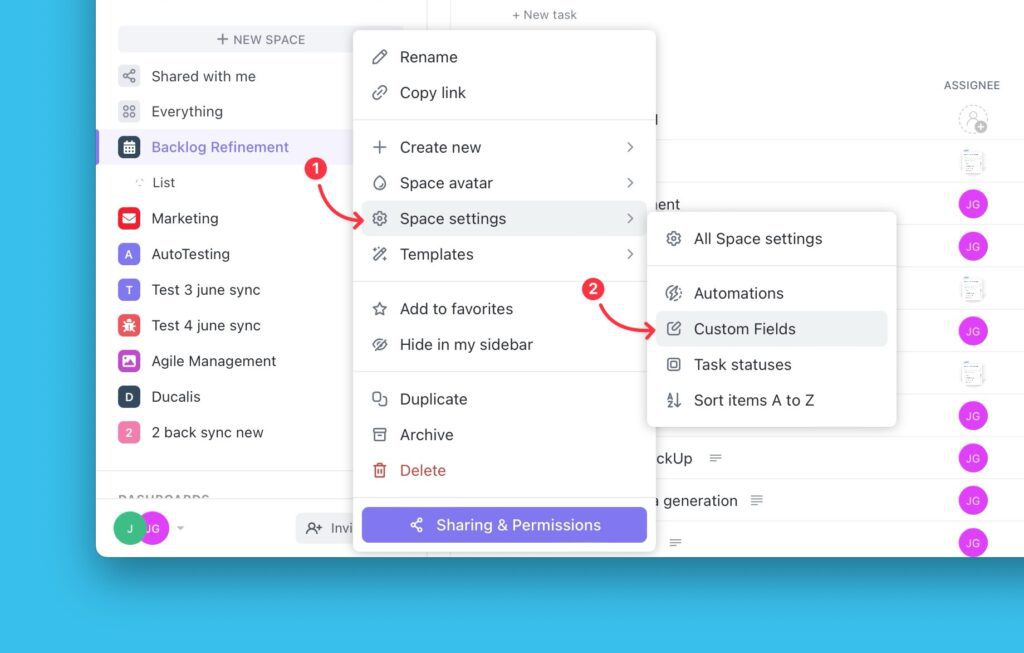
- Click the ellipses next to the space name.
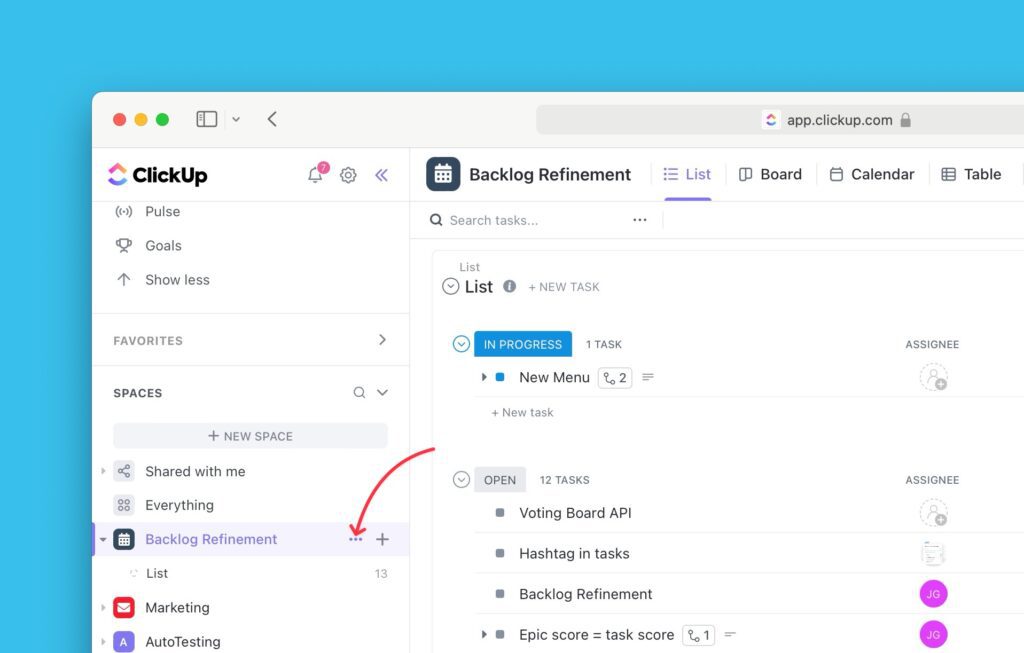
- Then, from the dropdown, click Space Settings.
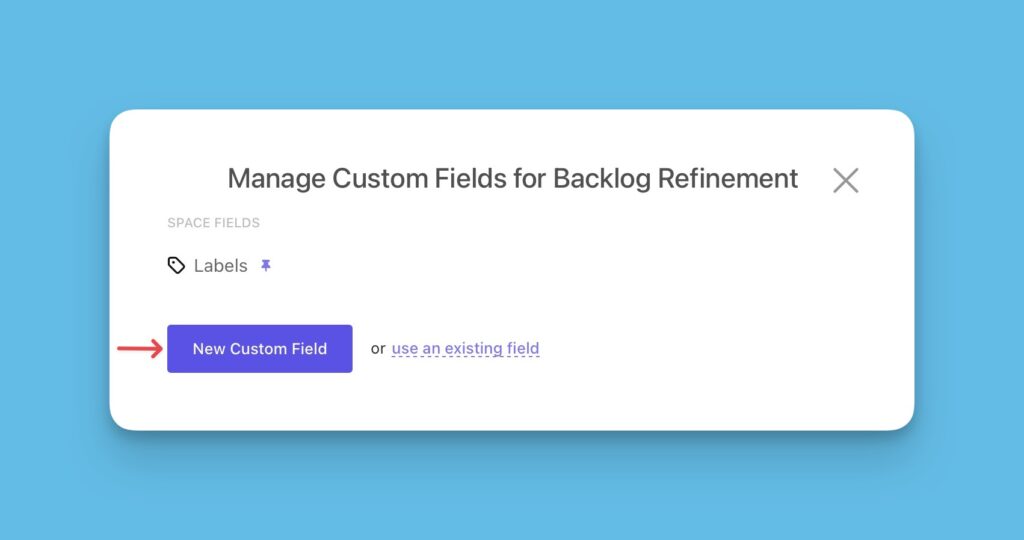
- Select Custom Fields.
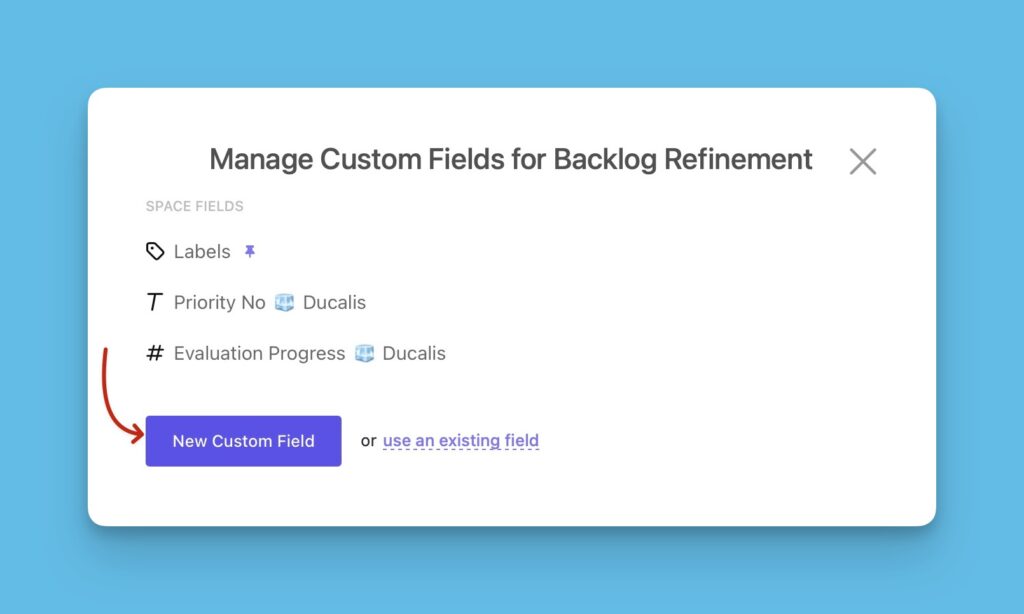
- Click New Custom Field.
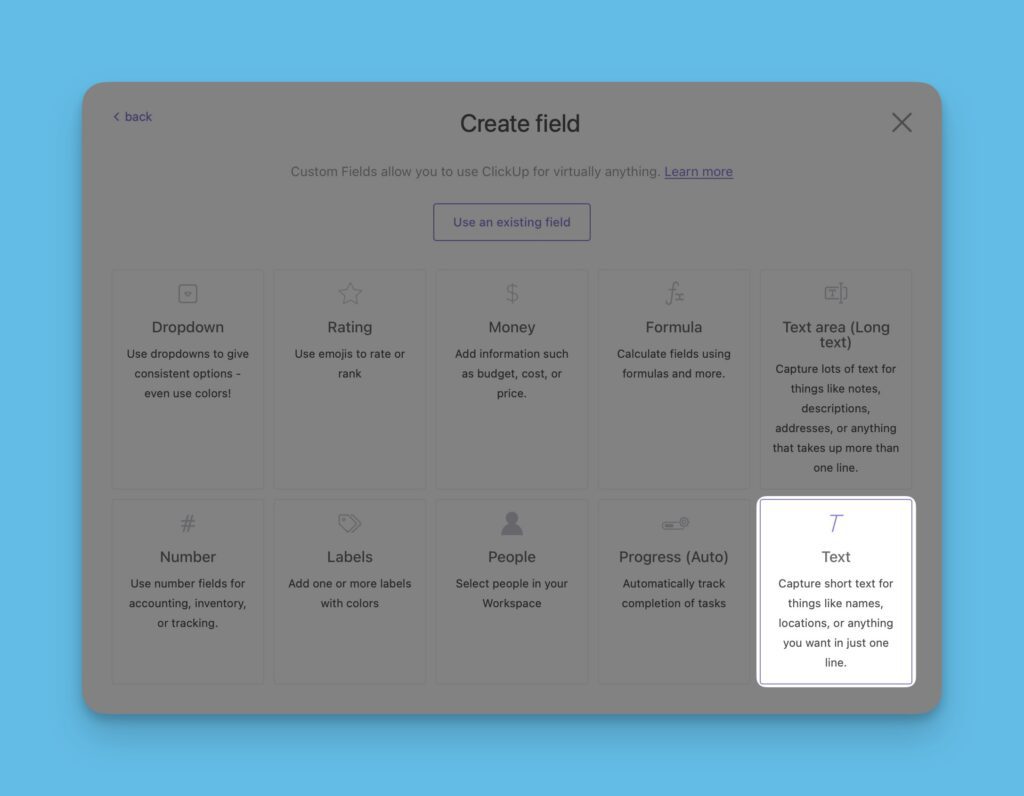
- Select the ‘field type’ that corresponds with the ‘field type’ of the field in Ducalis. In this case, we will choose the ‘filed type’ Text to create a text field.
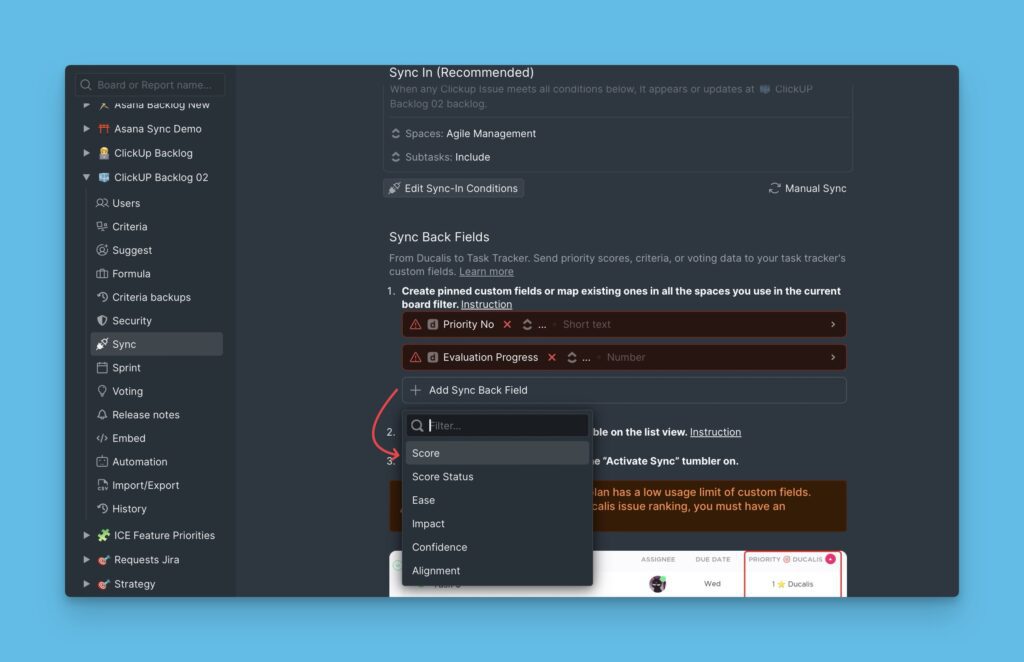
- Copy the name for the field you’re creating from Ducalis under Sync settings.
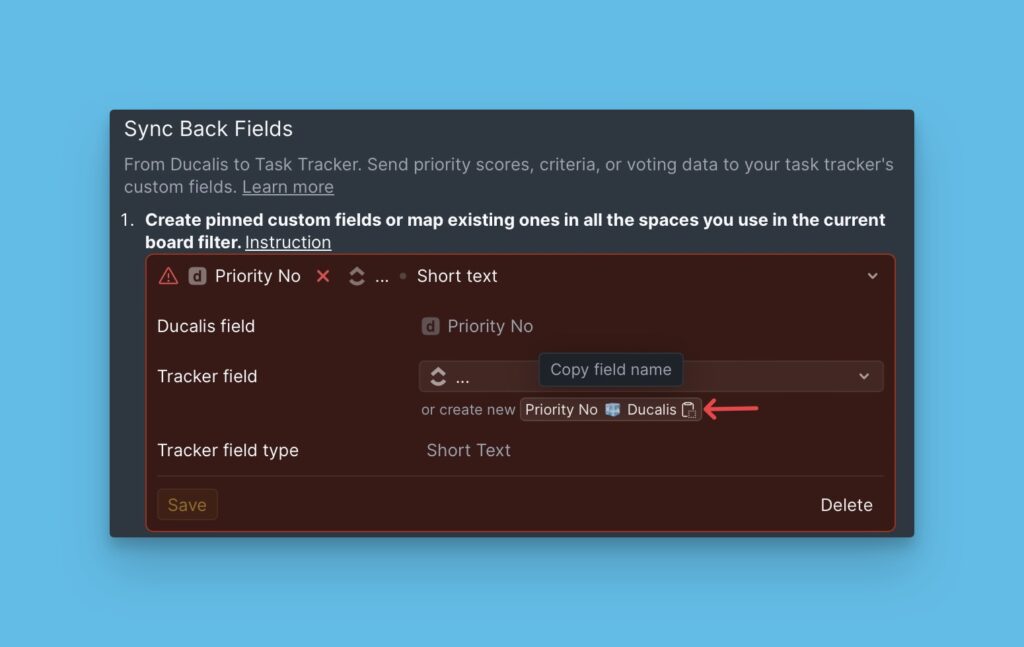
- Paste the name in the ClickUp Custom Field name.
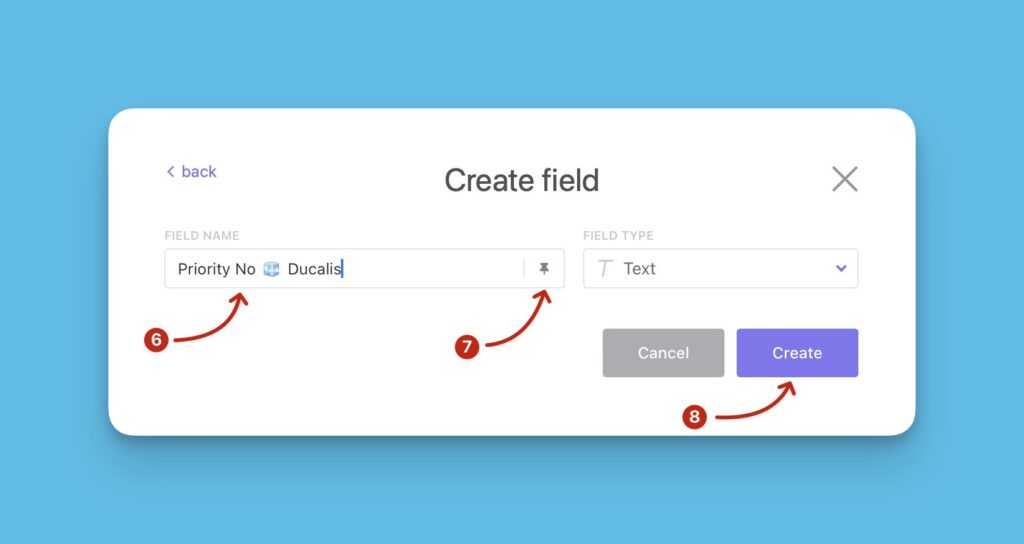
- Click the 📌 Pin icon.
- Click Create.
- To add more fields, click New Custom Field and follow steps 5 to 8 again.
Step 2 – Make the Custom Fields Visible in the List View
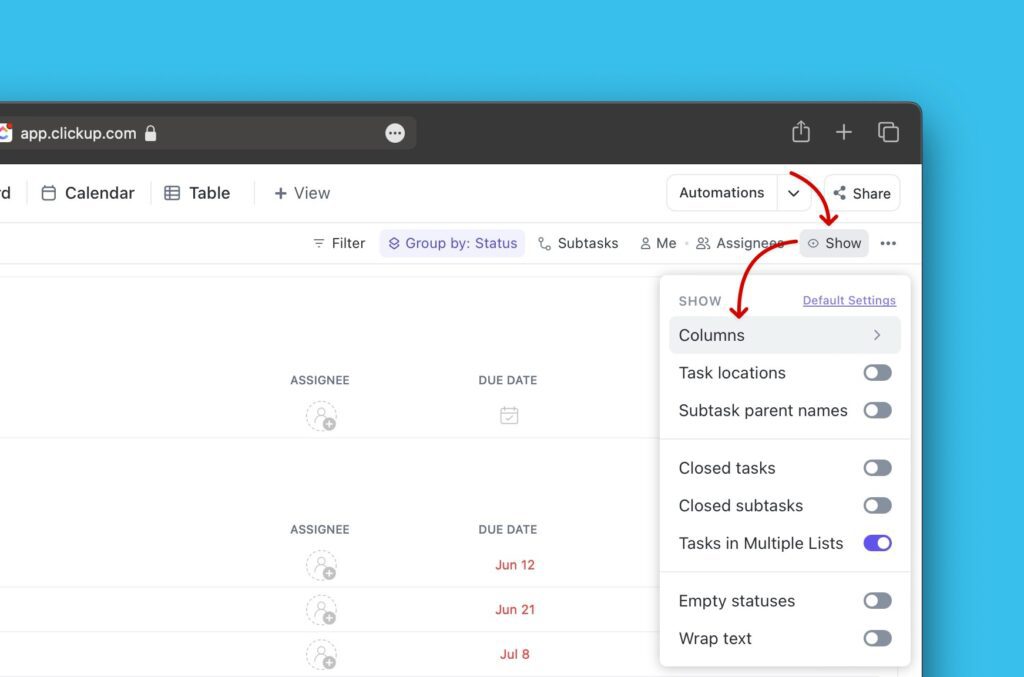
The custom fields you add are not visible in the list view by default, so you need to manually add them to the list view.
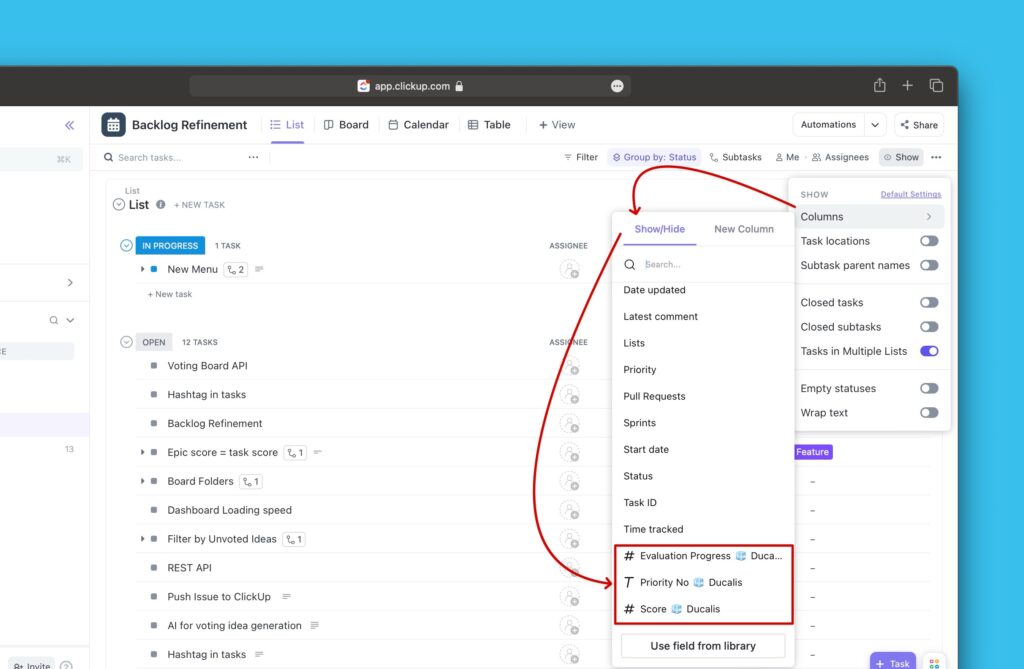
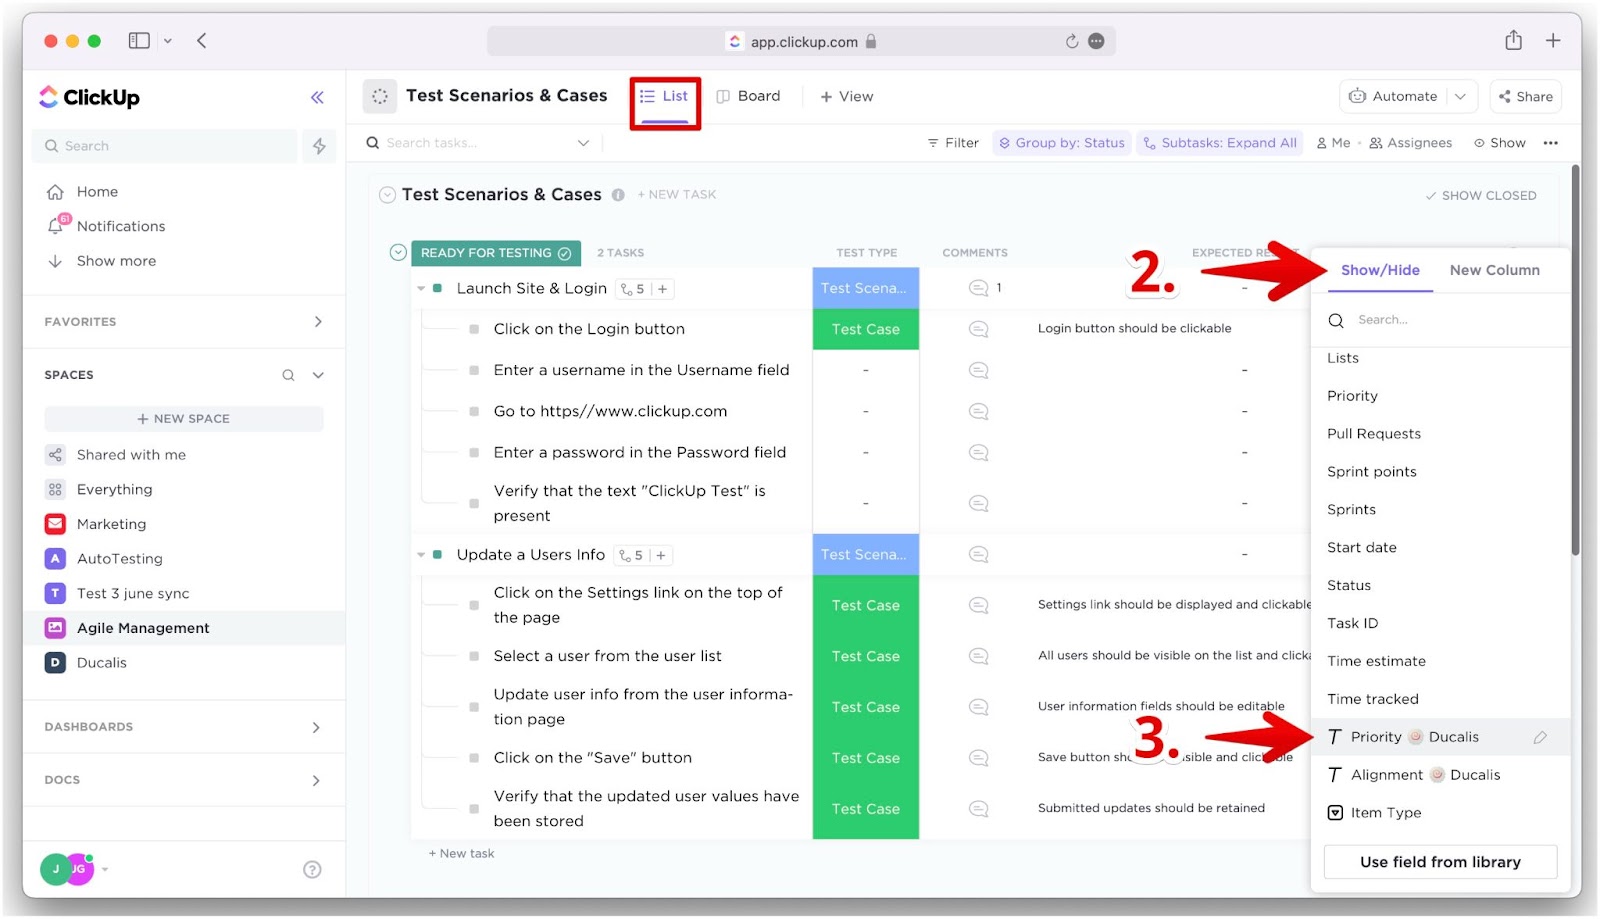
- Click the Show in the upper right corner, then from the dropdown menu, click Columns.
- Under the Show/Hide column, scroll down to the Ducalis custom fields and add them to the list view. Click the field name.
- Ducalis custom fields added to the list view.
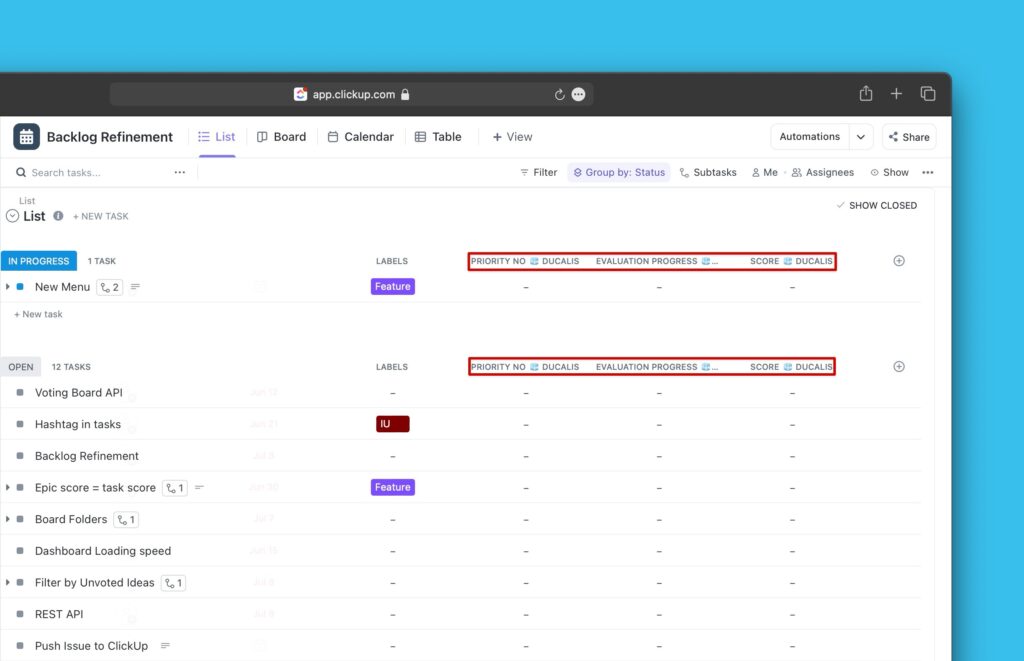
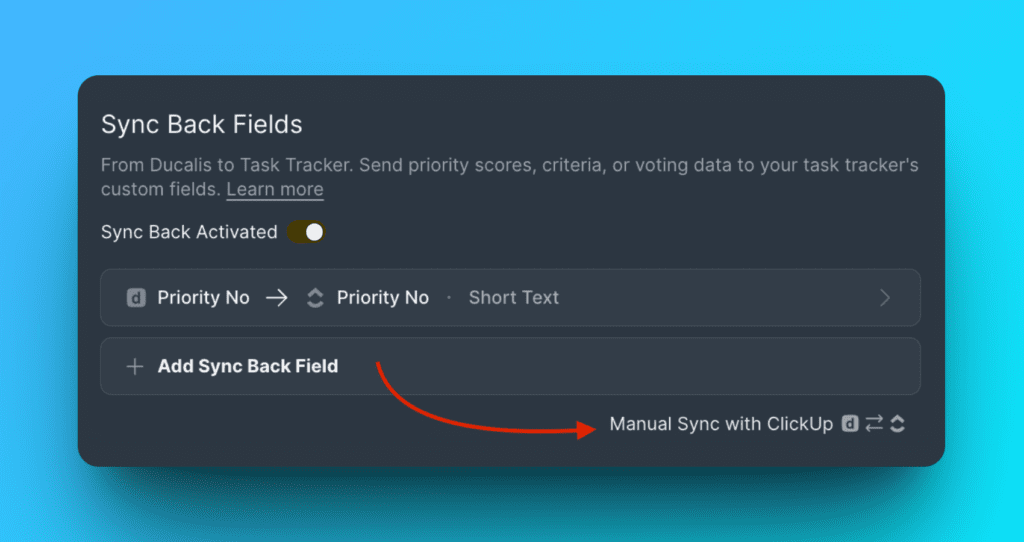
- Click Refresh in Ducalis.
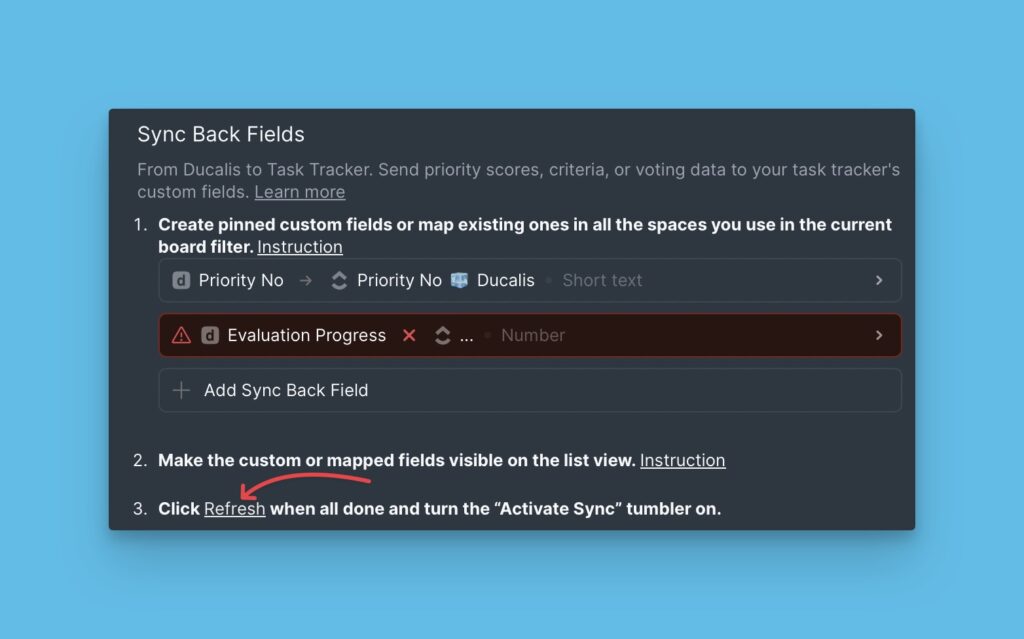
Issue ranking sync is ready to be activated.
Step 3 – Activating back Sync
- After refreshing, a toggle to activate back sync will appear. Switch it on to activate syncing.
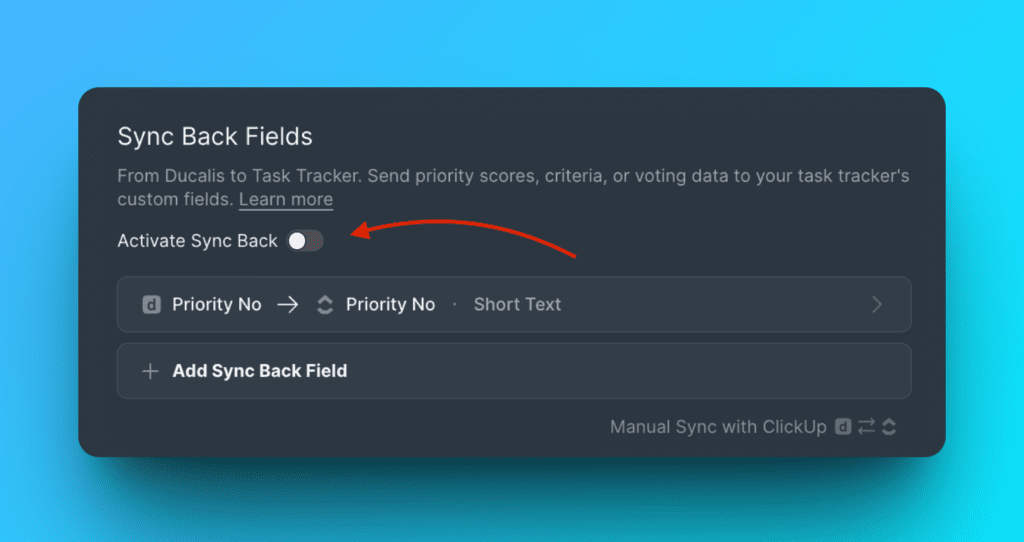
- Choose the day and time you want to sync the issues’ priority rankings to ClickUp. It can, for example, be a day or a few days before your sprint planning meeting. You can change the timezone if it’s not set to the one you want.
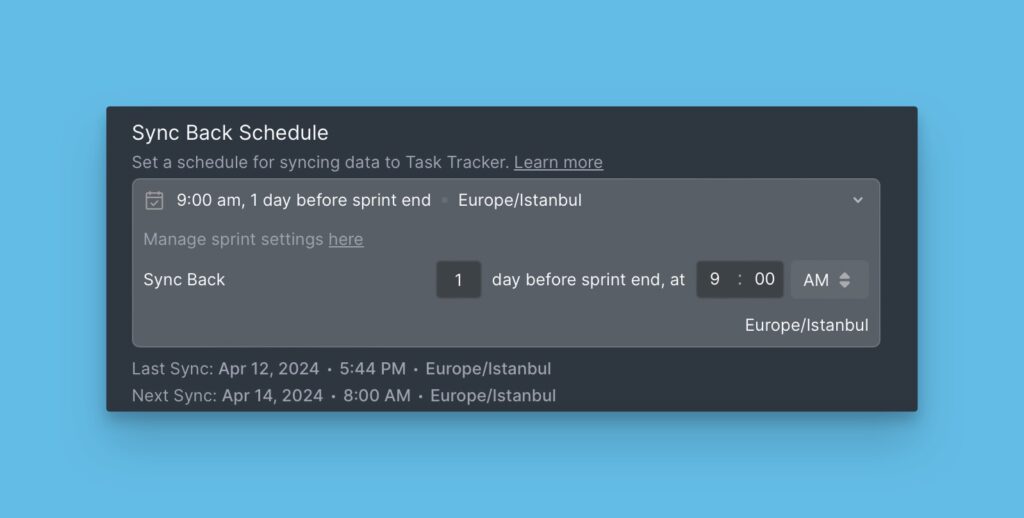
By default, the sync happens automatically every planning day. Read more about Ducalis planning day settings here.
- If you want to sync the priority rankings immediately, you can just click on ‘Manual Sync-Back’.
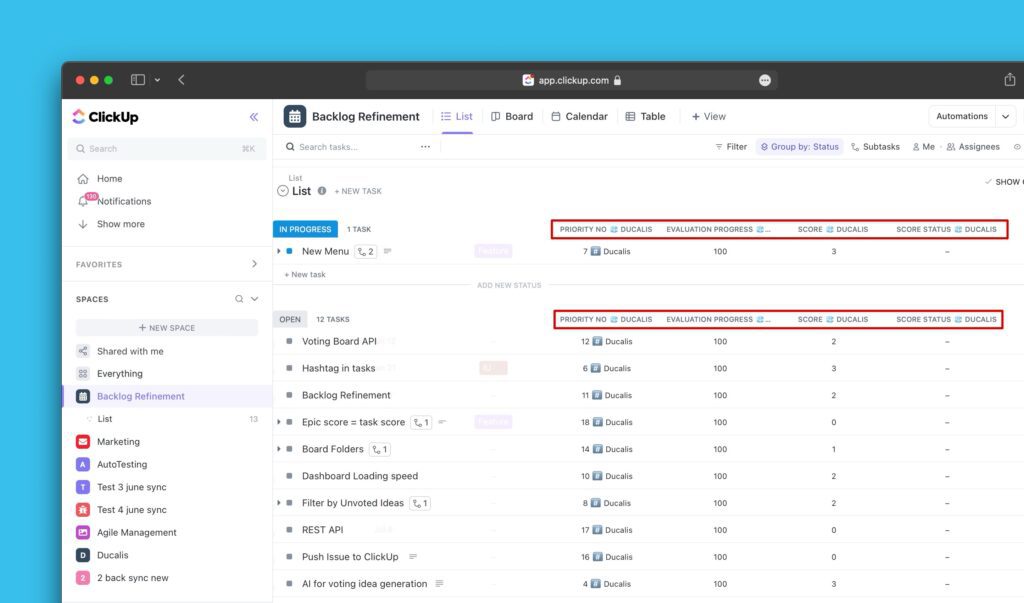
How to Add the Fields to Different Views
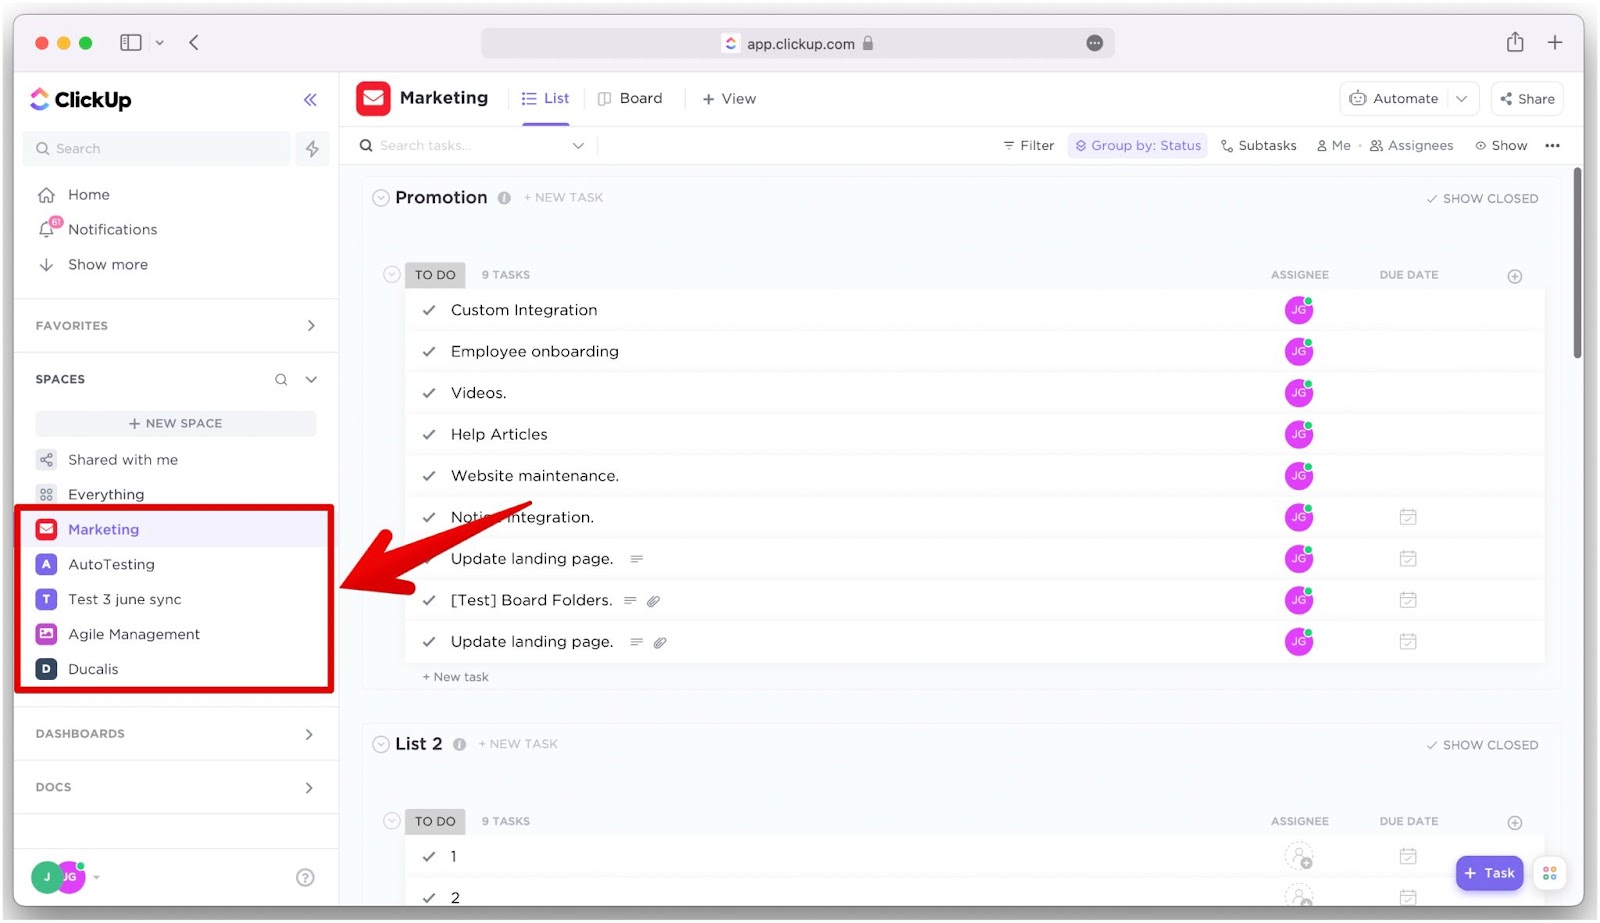
First, choose the needed space or list where you want to see the fields.
List View
- Click the Plus icon in the upper right corner.
- Under the Show/Hide column, scroll down or search for the Priority Ducalis field.
- Click the field name.
- Click the Sort icon in the field name to sort the tasks by priority.

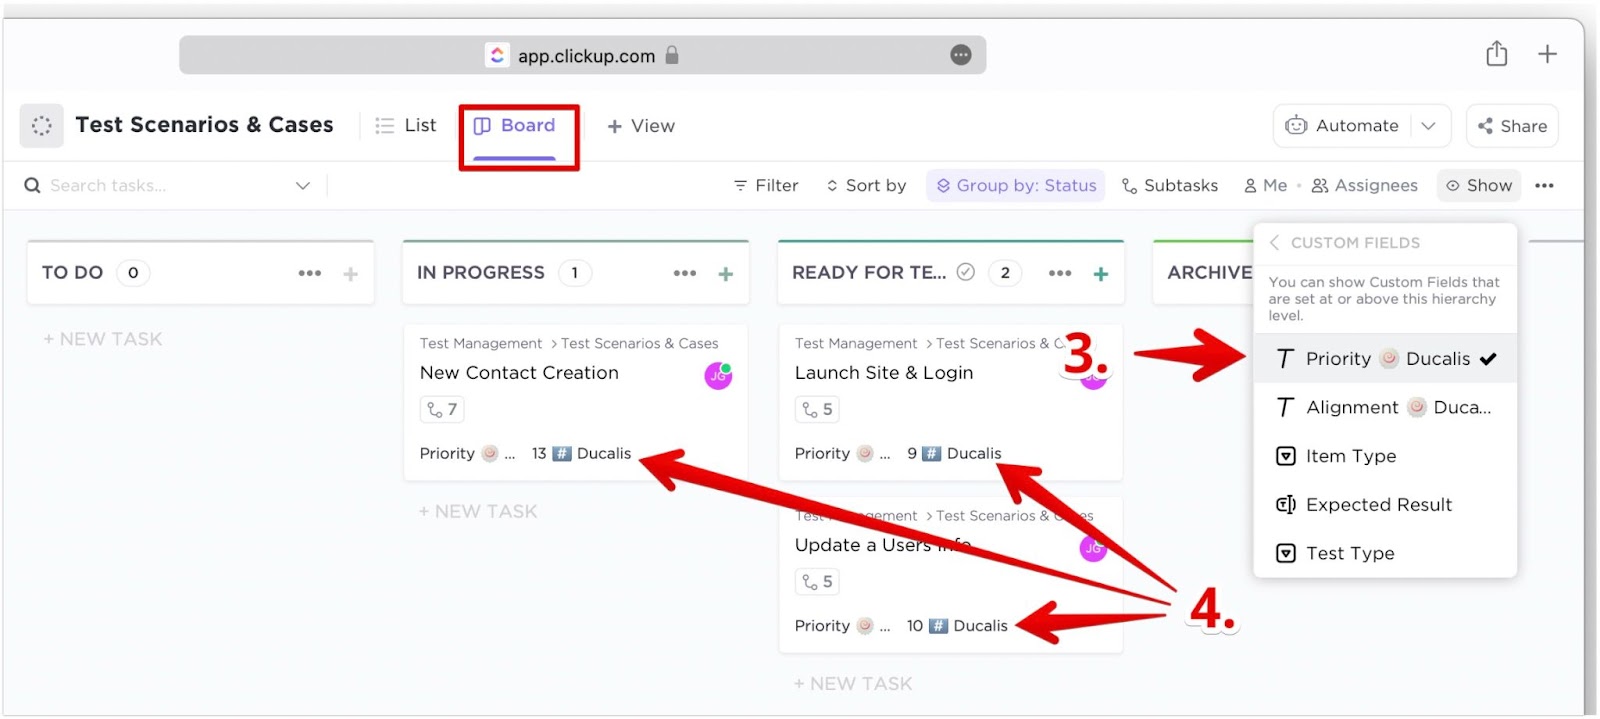
Board View
- Click Show in the upper right corner.
- Click Custom Fields.

- Click on the Priority Ducalis custom field.
- The priority rank will appear on each task card.
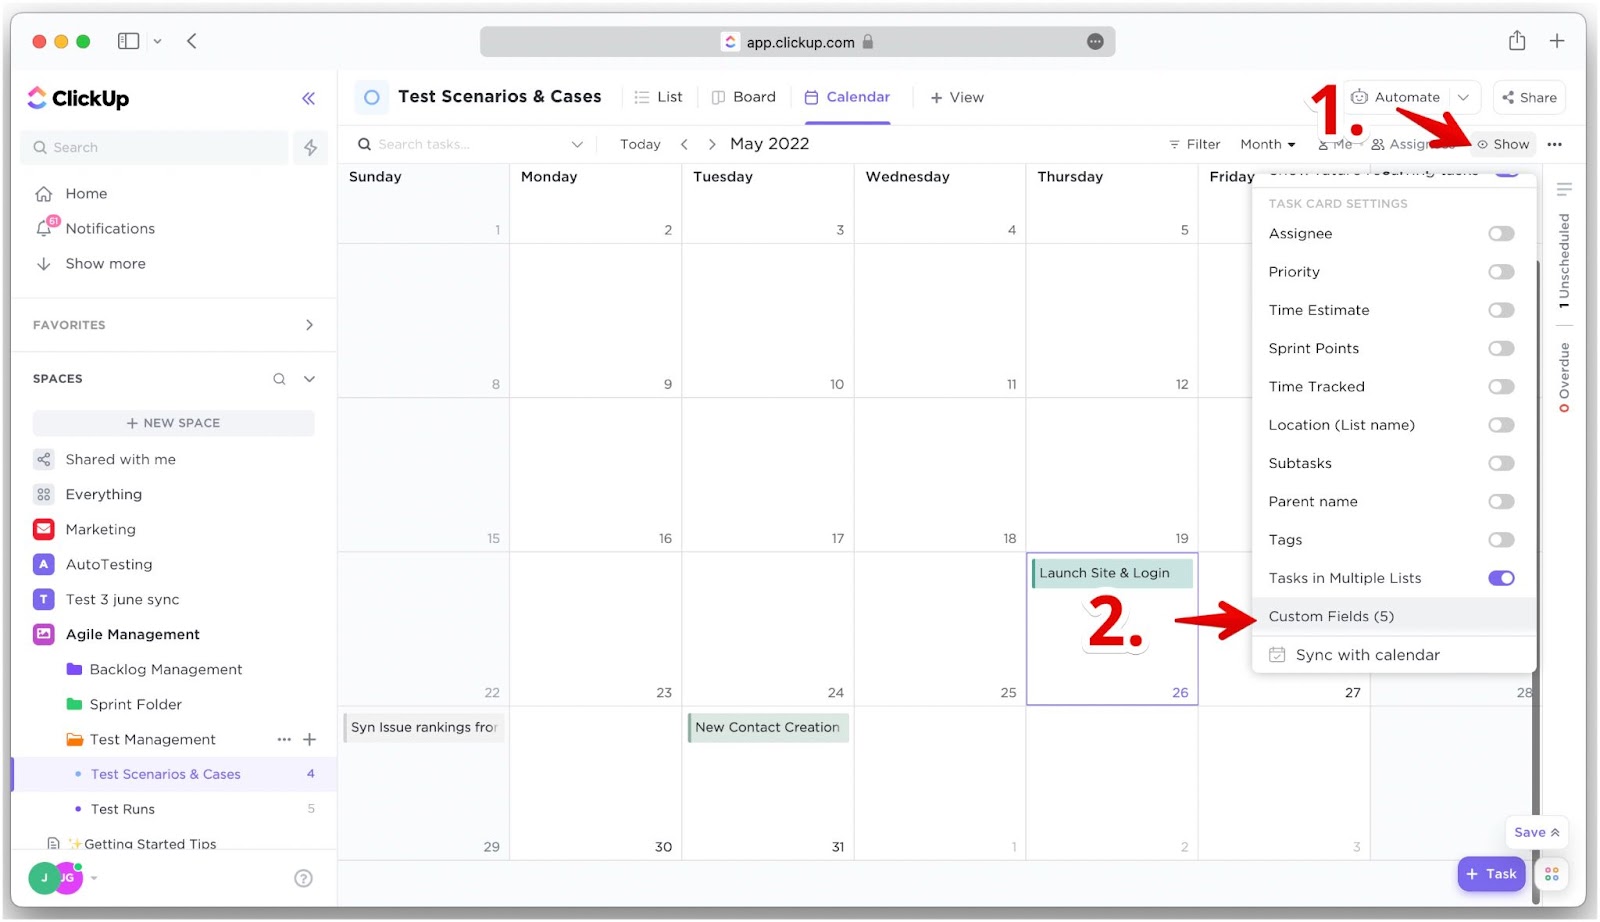
Calendar View
- Click Show in the upper right corner.
- On the dropdown, scroll to the bottom and click Custom fields.
- Click on the Priority Ducalis field. The priority rank will appear on each task card.
- Click Save, if you do not have Autosave switch on.
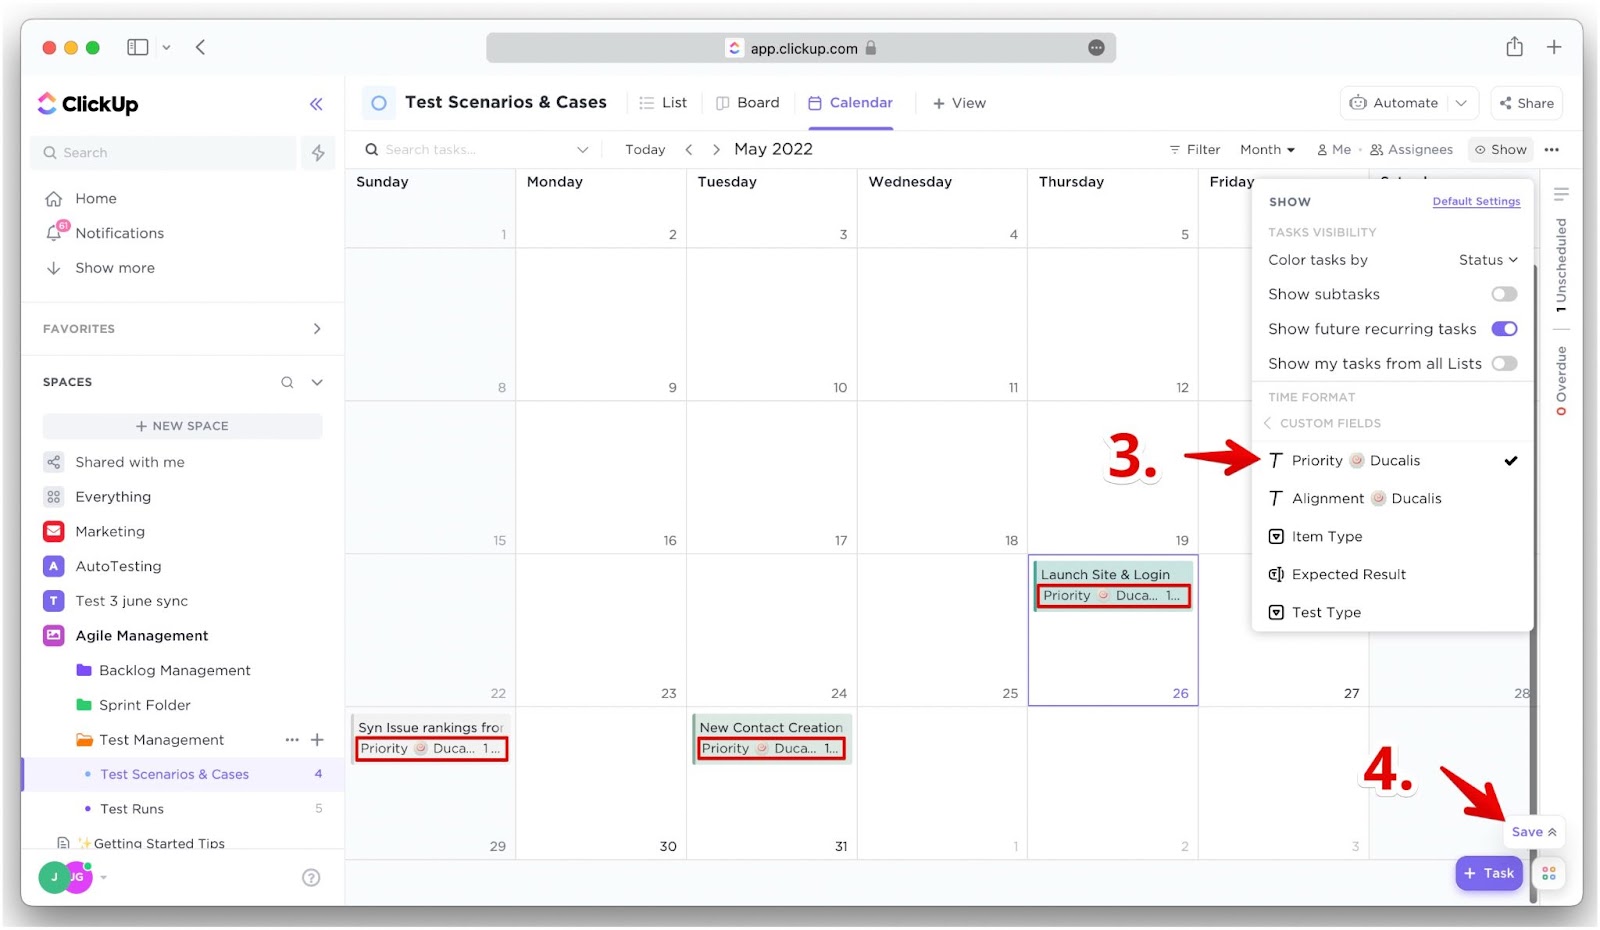
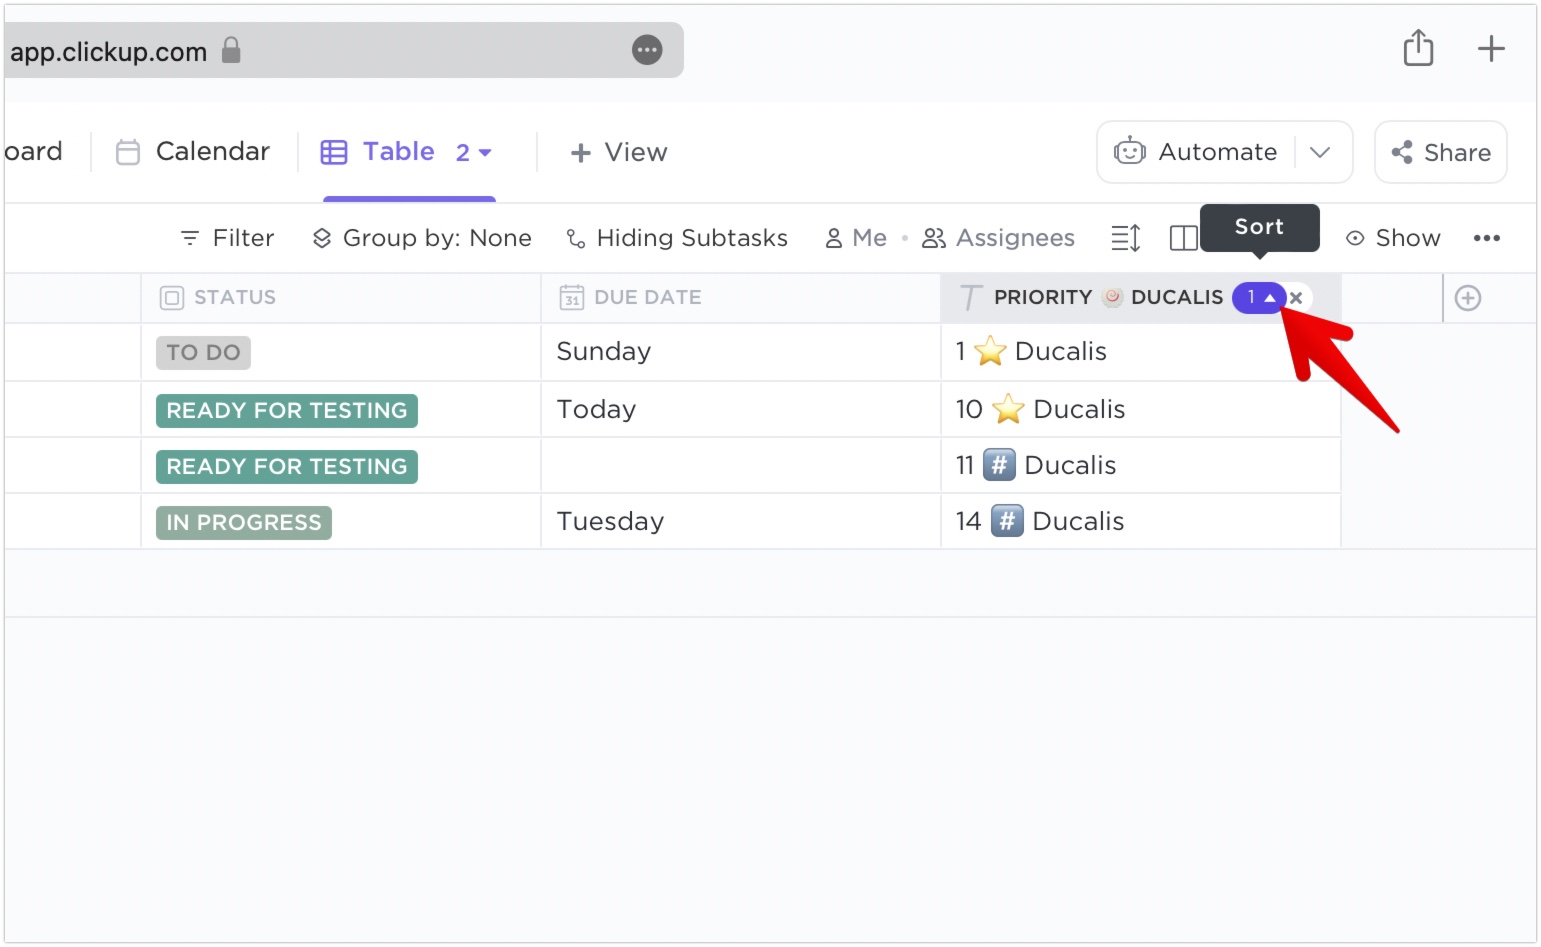
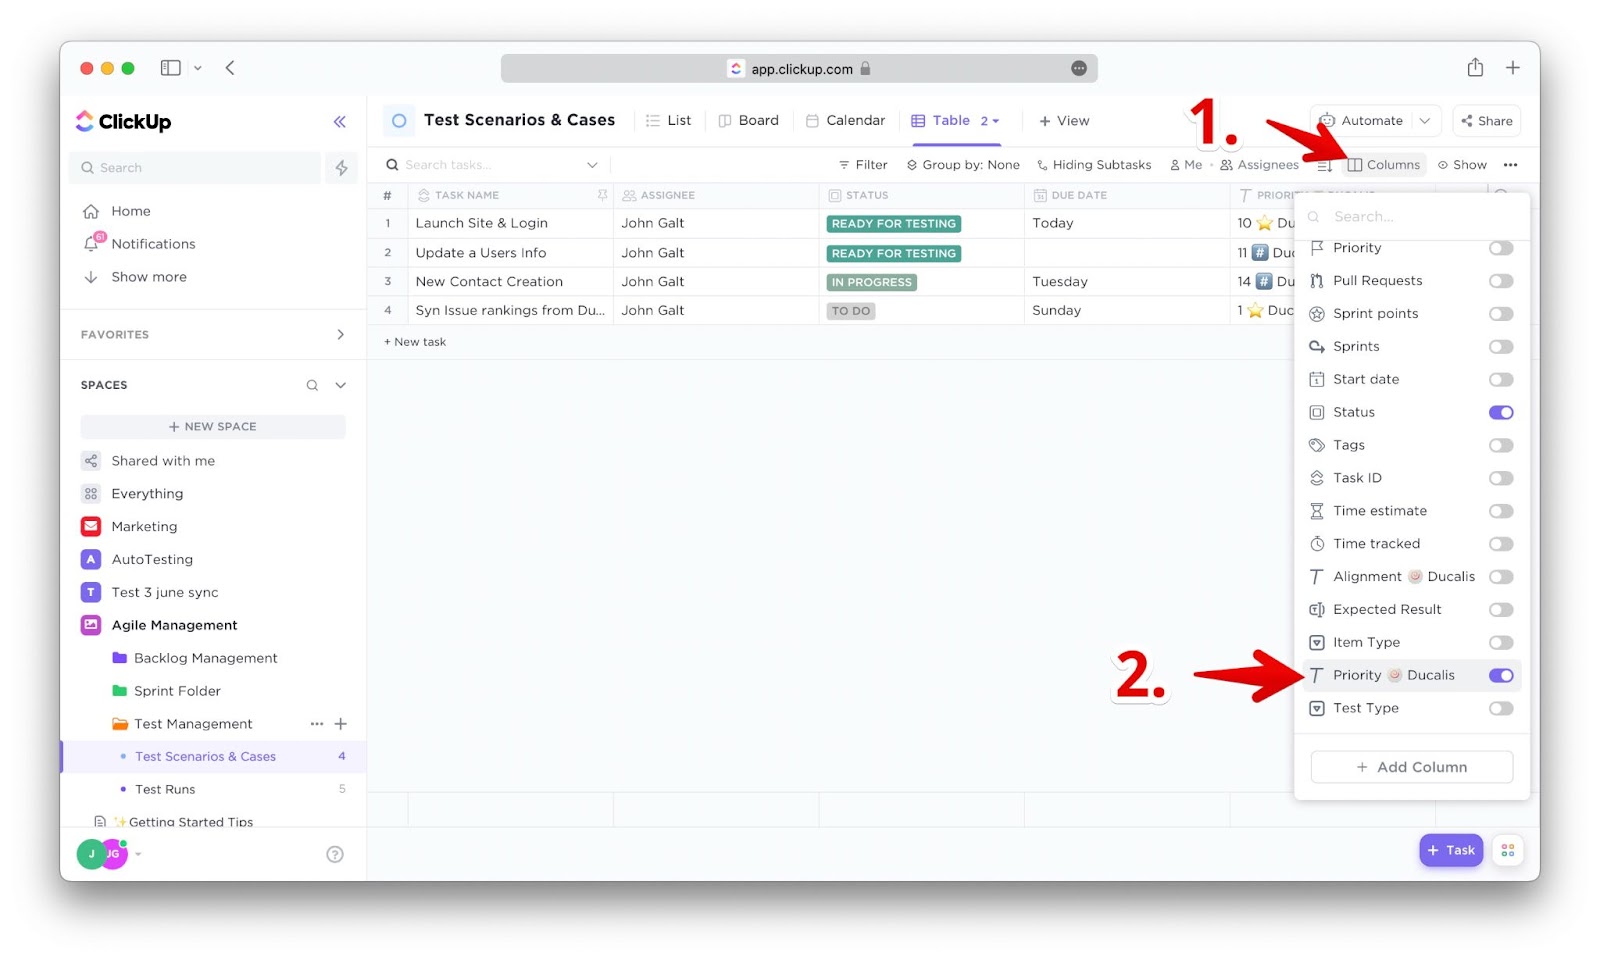
Table View
- Click Columns.
- Scroll down and turn on the Priority Ducalis field.
- Click the Sort icon in the field name to sort the tasks by priority.