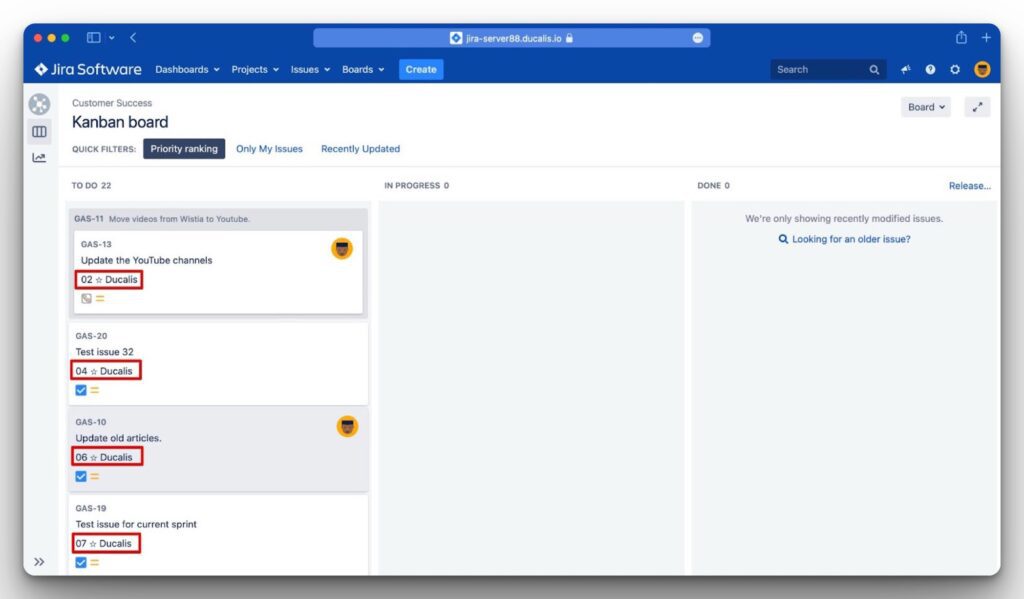
The back sync feature allows you to automatically get your prioritization results to your task tracker. You can sync data like:
- Total scores.
- Priority rankings.
- Criterion scores.
- Scores statuses.
- Scores percentages.
It saves you the time and the manual work of switching back and forth between Jira and Ducalis when you are working in Jira and trying to view your priorities in Ducalis.
Steps involved in setting up back sync:
- Choosing the Ducalis fields that you want to sync.
- Setting up custom fields in Jira that will receive data you sync from Ducalis.
- Adding the fields to the Jira board so that they appear in the backlog ‘view’ and sprint ‘view’.
- Activating sync.
Step 1 – Choosing the Ducalis fields that you want to sync
Before you start creating Ducalis custom fields in the Jira server, you need to choose the Ducalis fields with the data you would like to sync to the Jira server.
- Click Sync to access the Backlog Management settings.
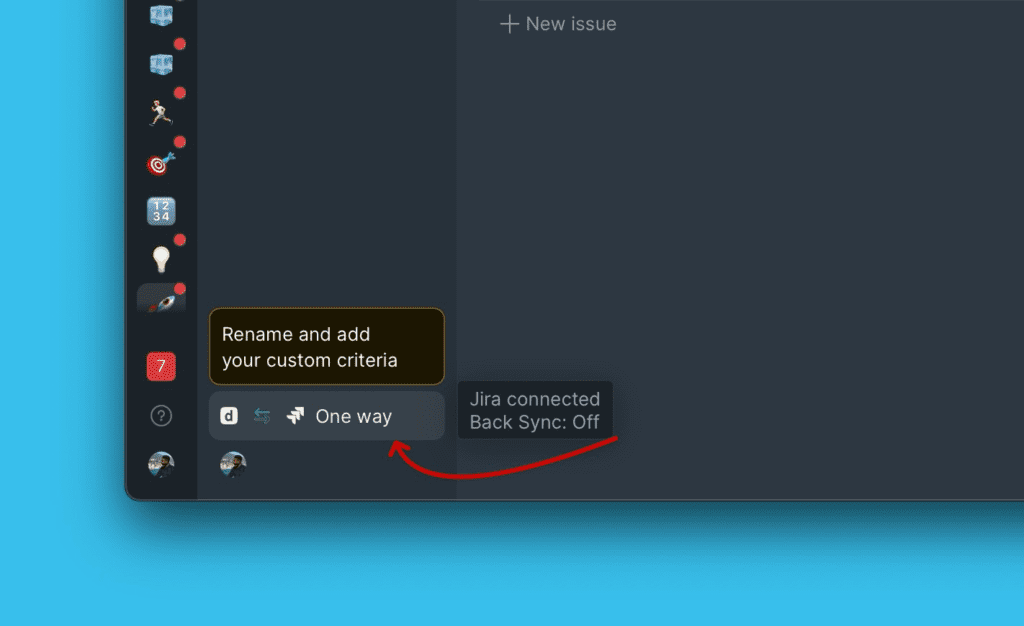
- Under backlog Management settings, scroll down to Sync Back Fields.
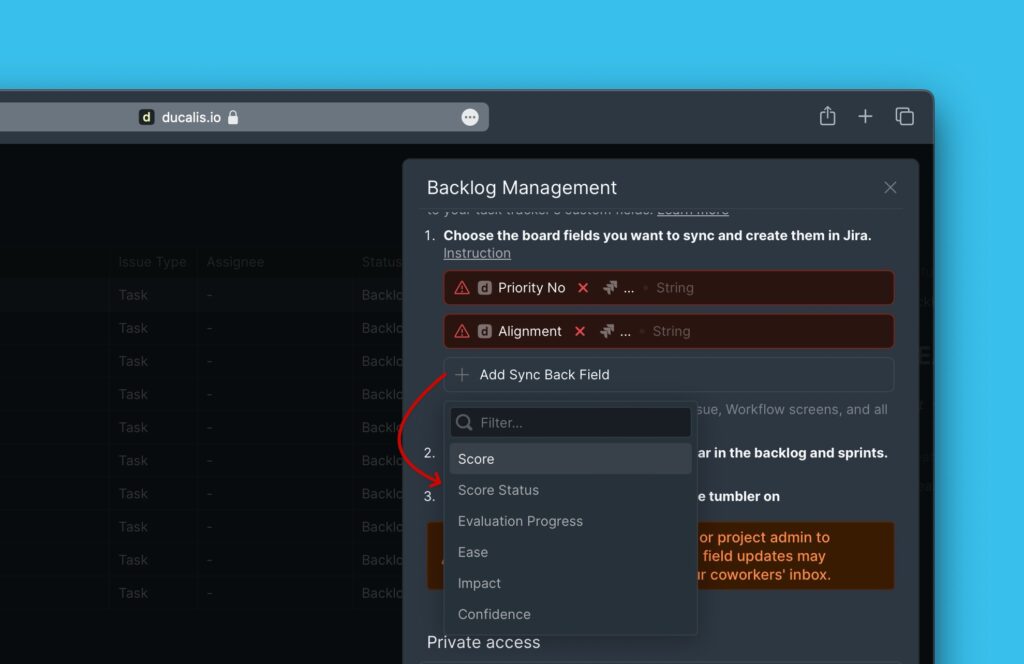
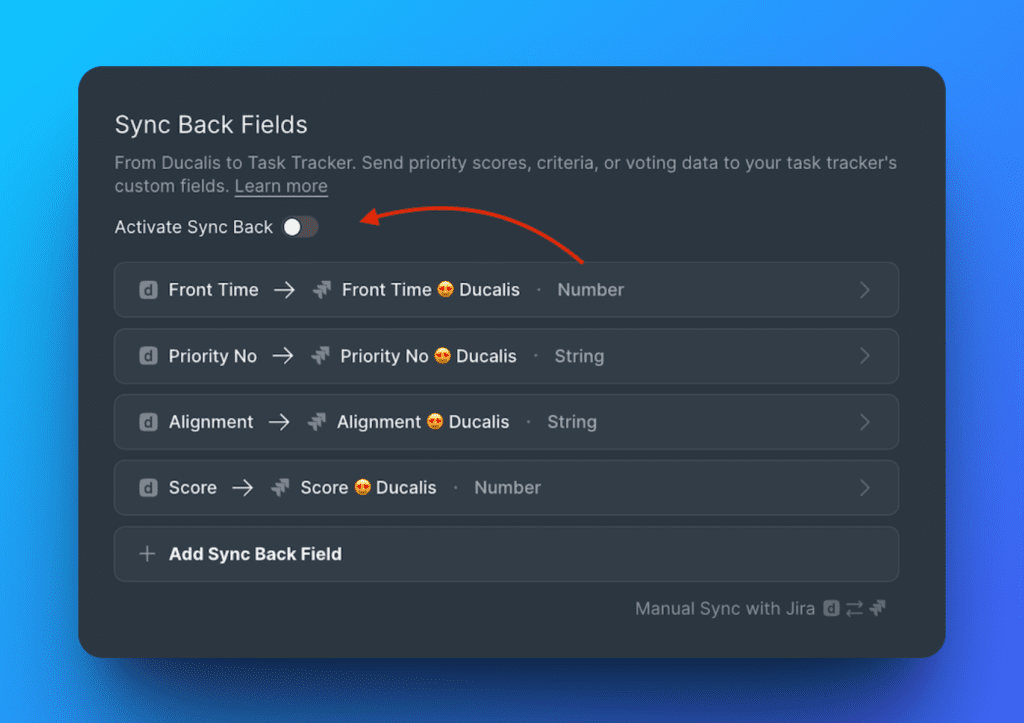
- Here you will find two default fields–the Priority {emoji} Ducalis and the Alignment {emoji} Ducalis.
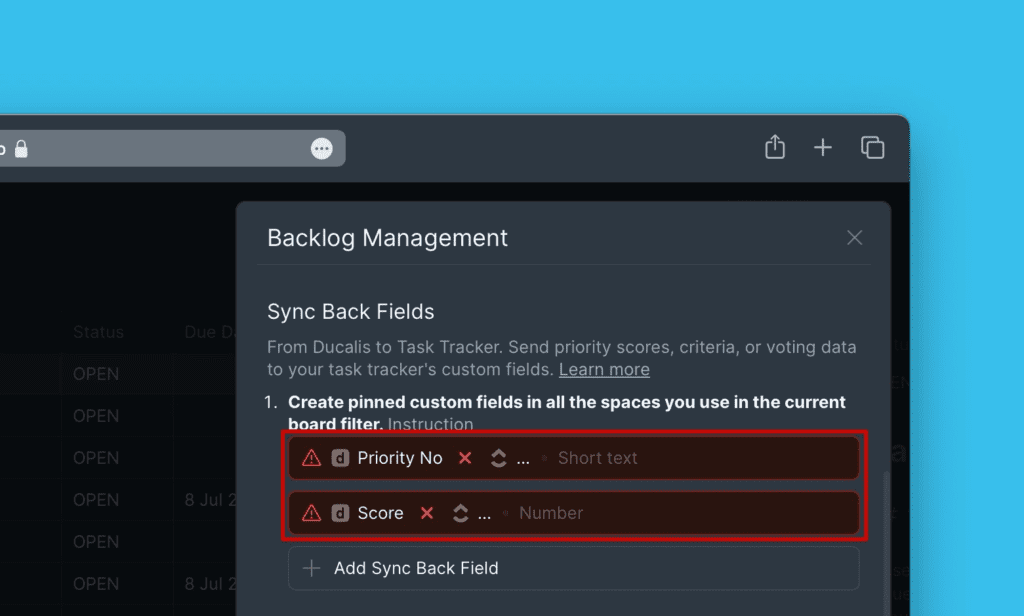
- You can delete these fields, or any other field that you will add and decide to delete.
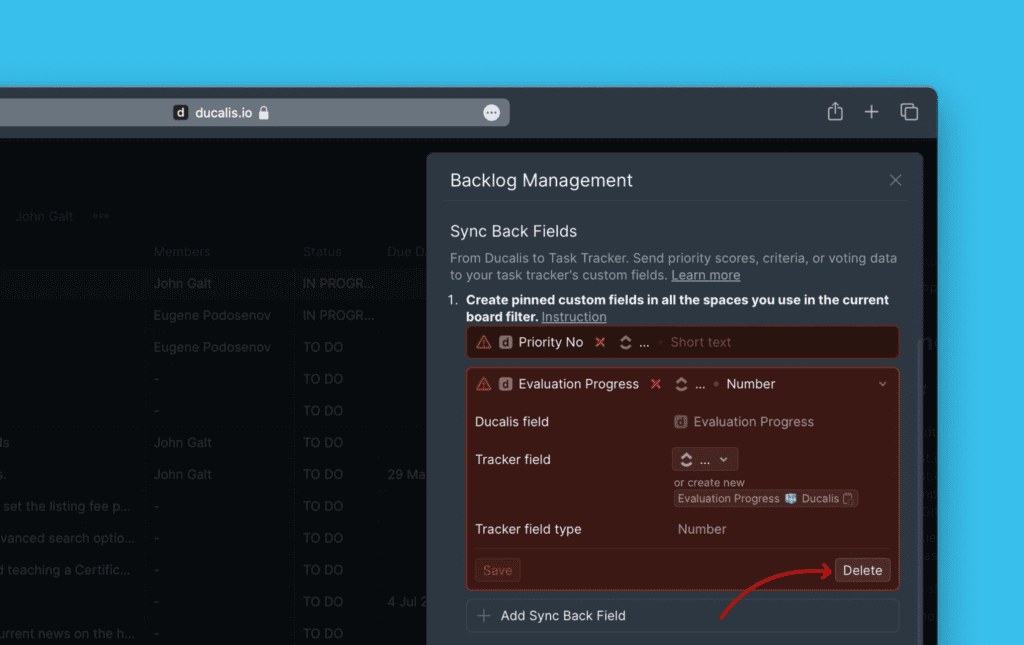
- You also have the option to add more fields, click Add Fields and choose fields from the list
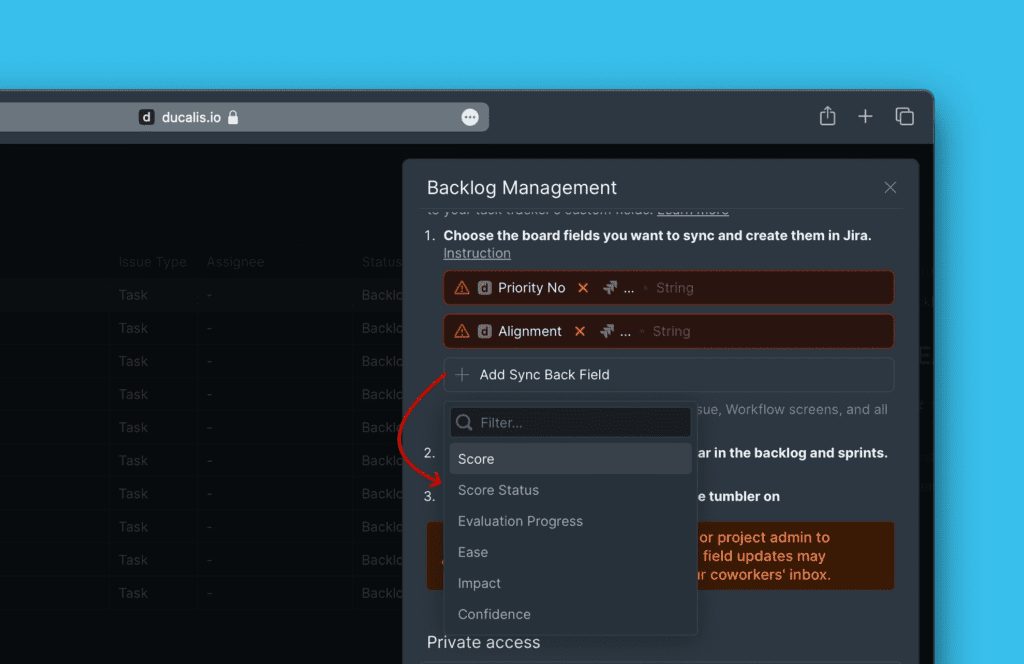
When you have added the fields that you want to sync to the Jira server, you can then go on to set up custom fields in the Jira server that will receive the data.
Step 2 – Setting Up Custom Fields in Jira
Before you activate back sync in Ducalis, you should set up custom fields in your Jira server account that will receive the data you sync from Ducalis.
There are two ways in which you set up the fields:
- Mapping Ducalis fields with the custom fields you already have in your Jira server account. With this method, you don’t have to create new custom fields on your Jira account.
- Creating new custom fields in Jira that will receive the data you sync from Ducalis.
Mapping fields
In a case where you have a lot of custom fields in Jira and you do not want to create more fields, you can just map the Ducalis field with a field that you already have in Jira.
Here, you map the Ducalis field that you will export data from with the task tracker field that will receive the data.
How To Map Fields
In Ducalis, go to the Backlog Management settings
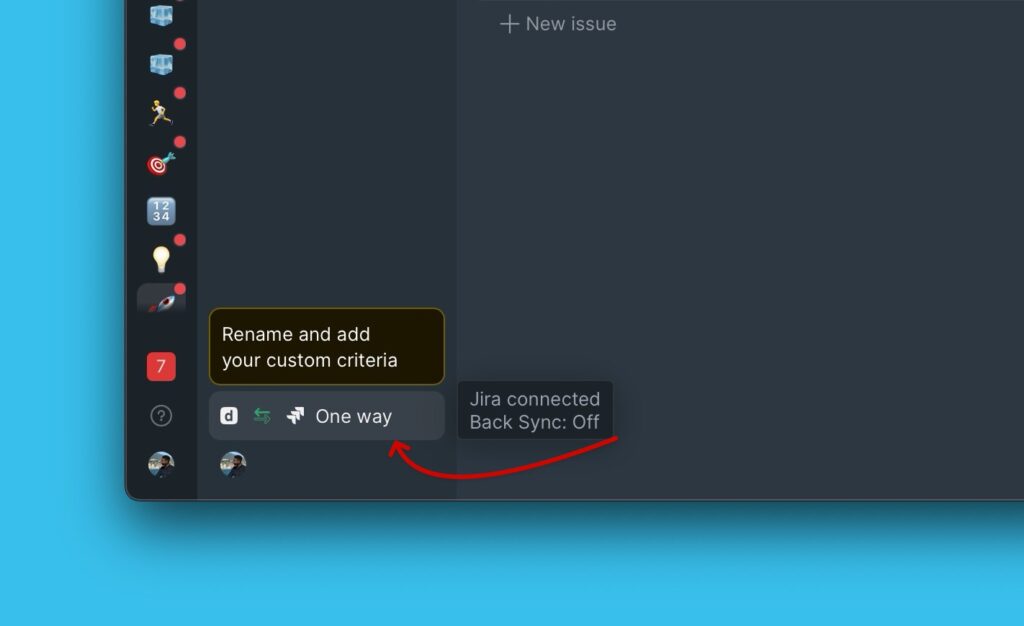
Scroll down to Sync-Back fields and start mapping your fields
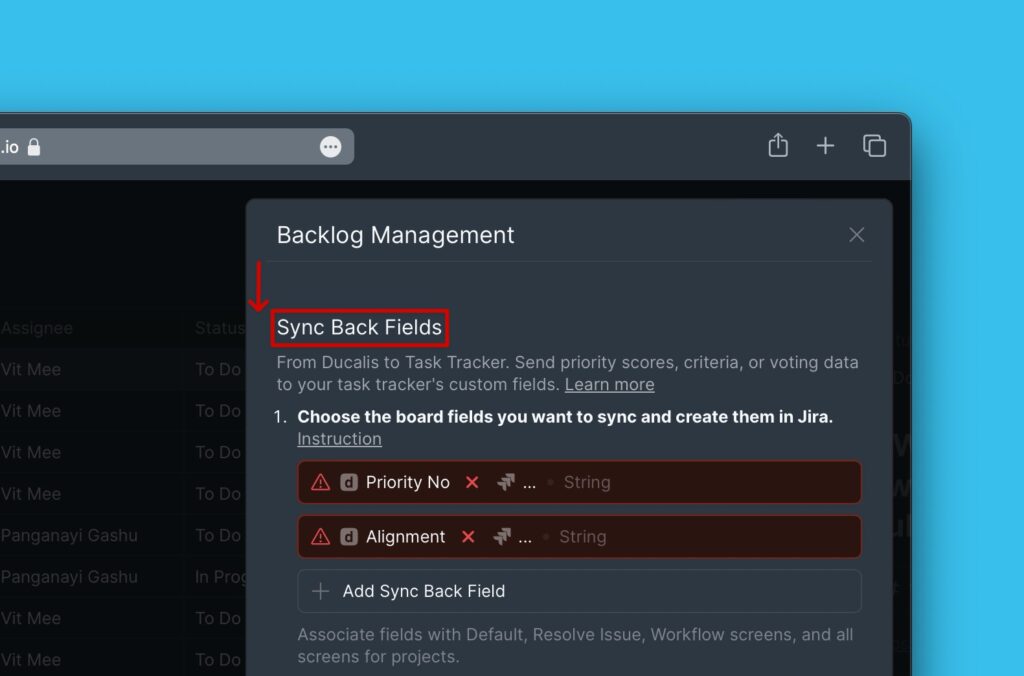
You can use the default Ducalis fields that you find or delete them.
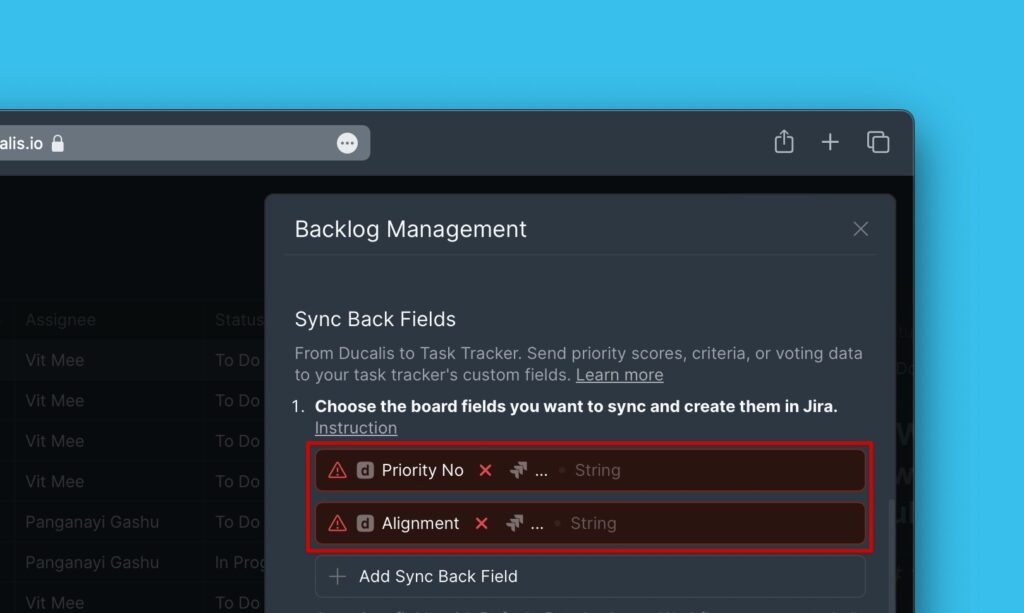
You can also choose another field if the one that you want to sync data from is not among the ones given.
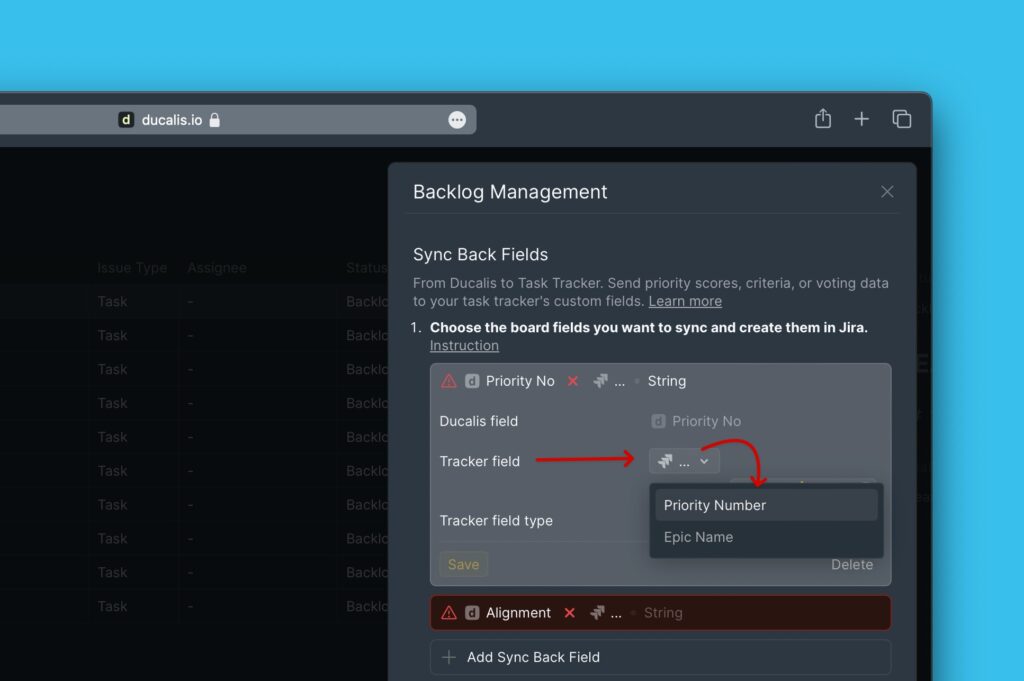
Next to the Tracker field, click to open the dropdown list of fields from your tracker that you can use and choose the field that you want to map with the Ducalis field
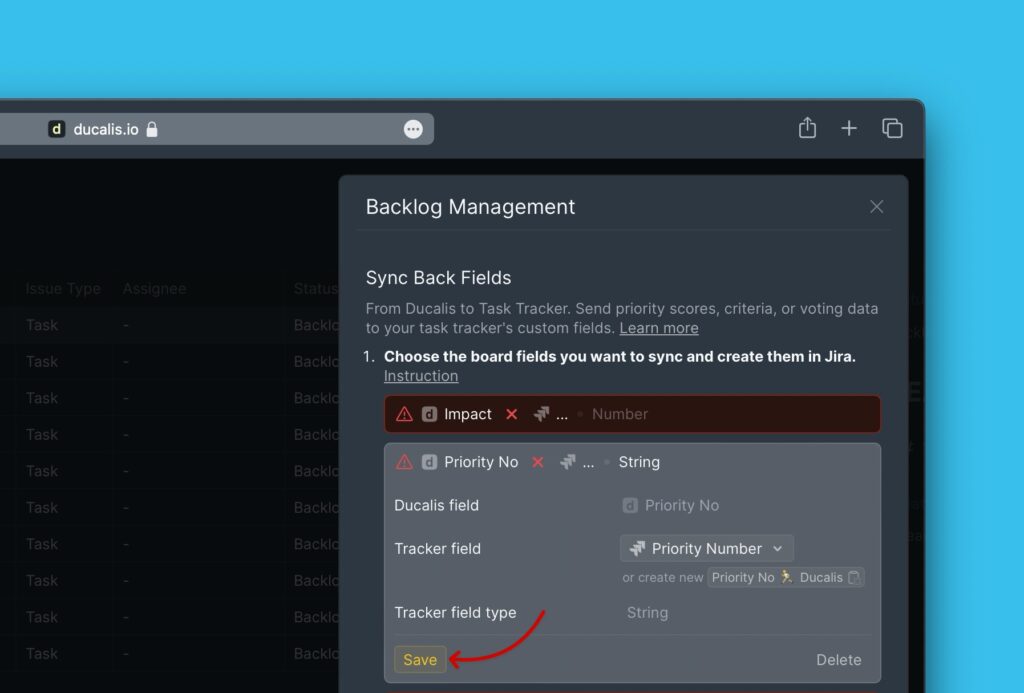
Then click Save.
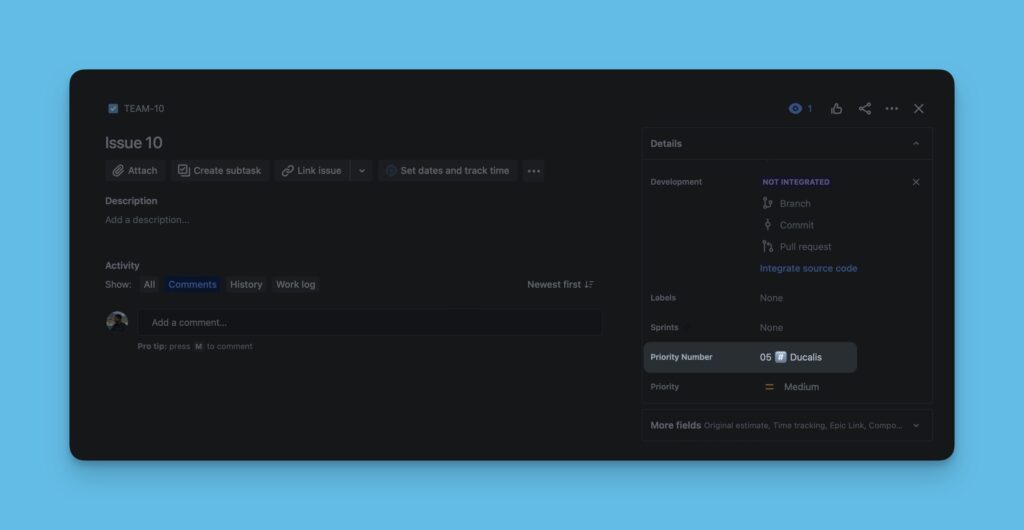
Each time back-sync takes place, data from the Ducalis field will be synced to this field
Creating custom fields
Here, instead of using the existing custom fields you have in Jira, you create custom fields in Jira that will receive the data you sync from Ducalis.
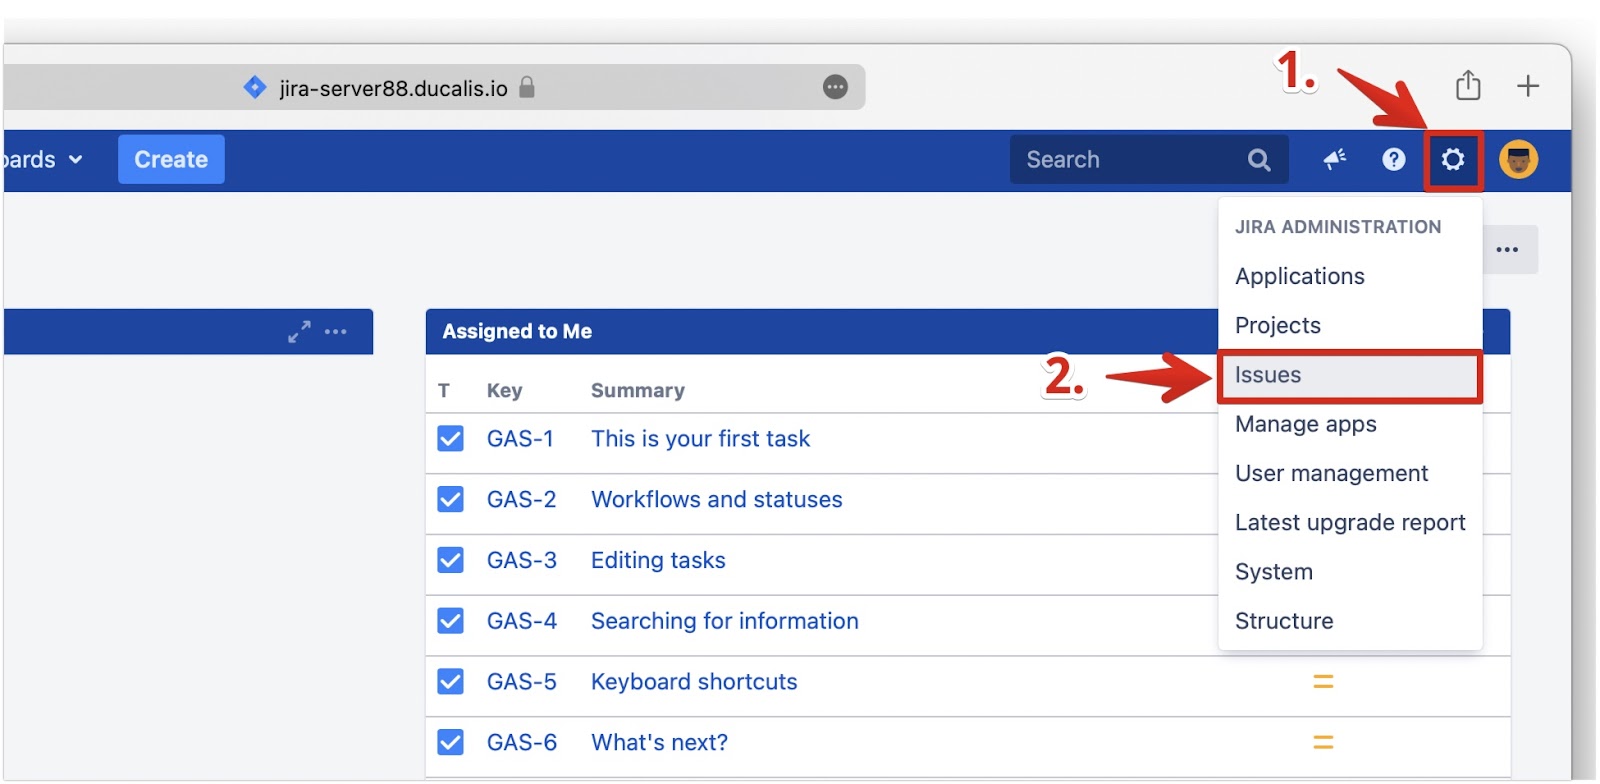
- In your Jira server account, go to Jira Administration.
- From the dropdown menu, click Issues.
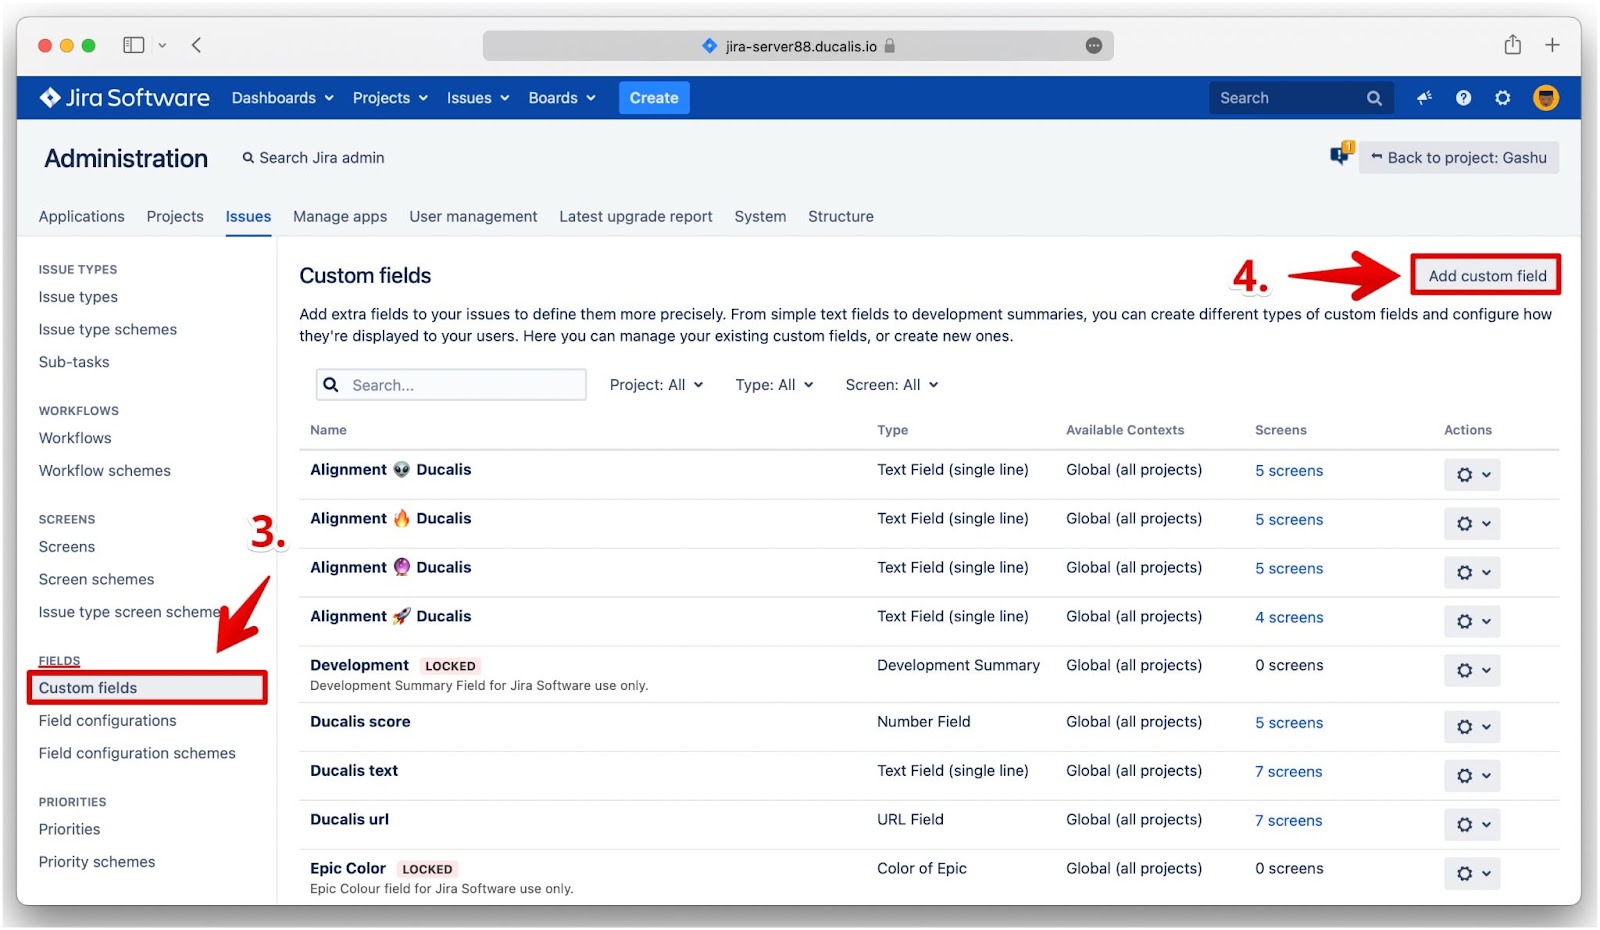
- Under Issues, hover over to the left side menu and on the Fields section, click on Custom Fields.
- Then click Add custom field.
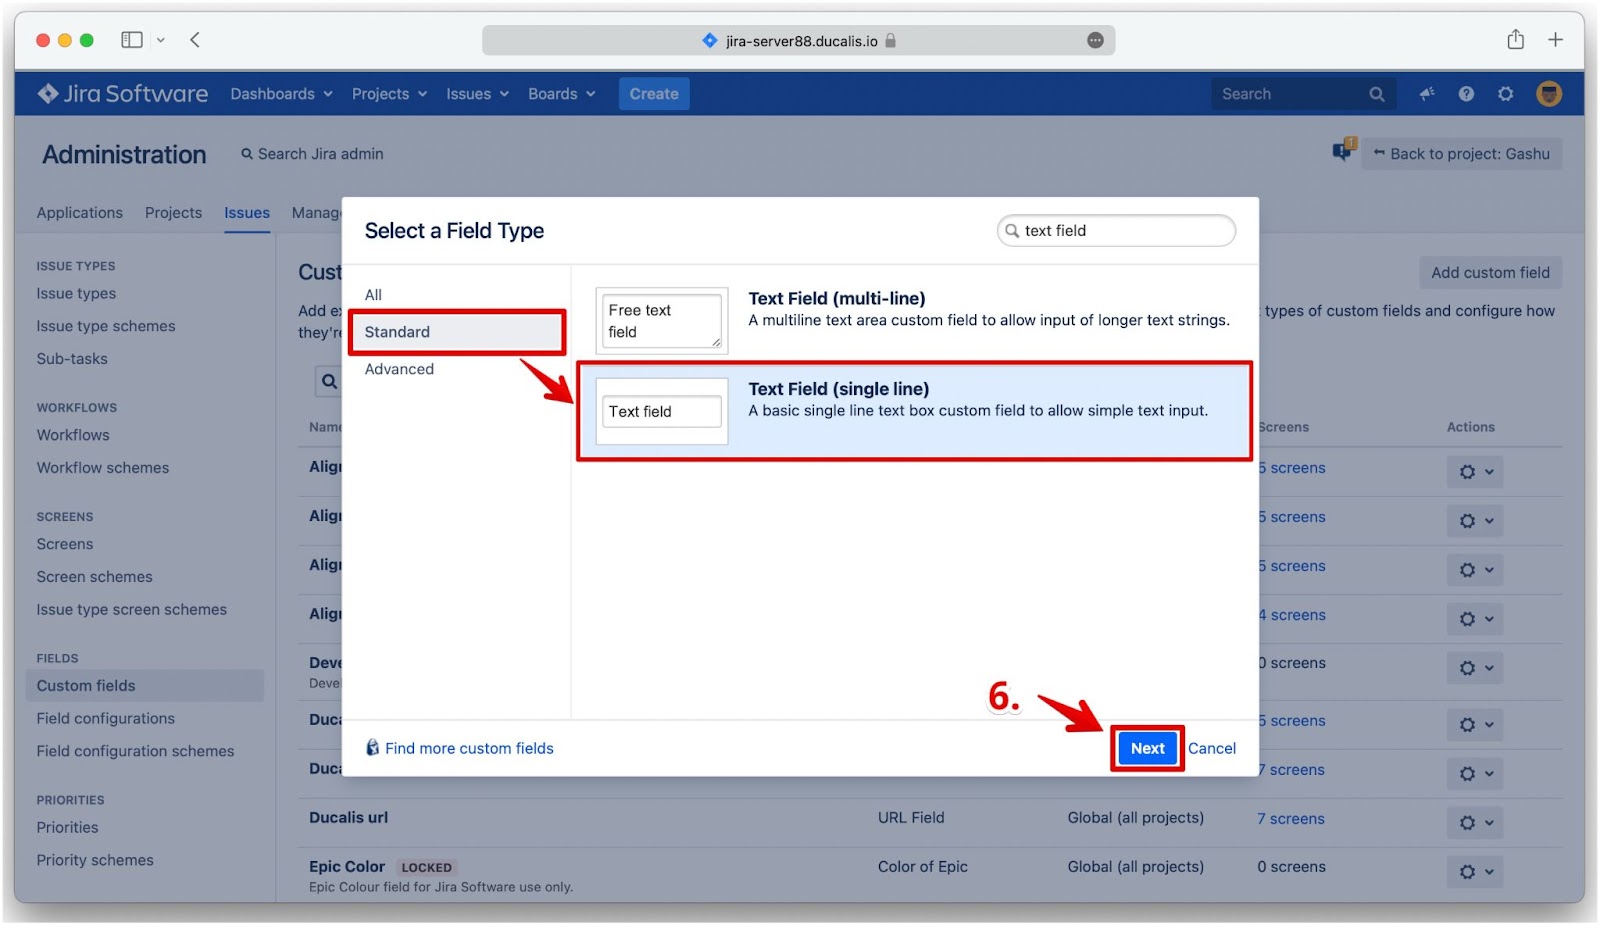
- Select the field type. The ‘field type’ should correspond with the ‘field type’ of the field in Ducalis.
- Ducalis field type ‘String’, then in Jira choose the field type ‘Text field (single line)’, you can find it in the Standard section.
- Ducalis field type ‘Number’, then in Jira choose the field type ‘Number field’.
- Click Next.
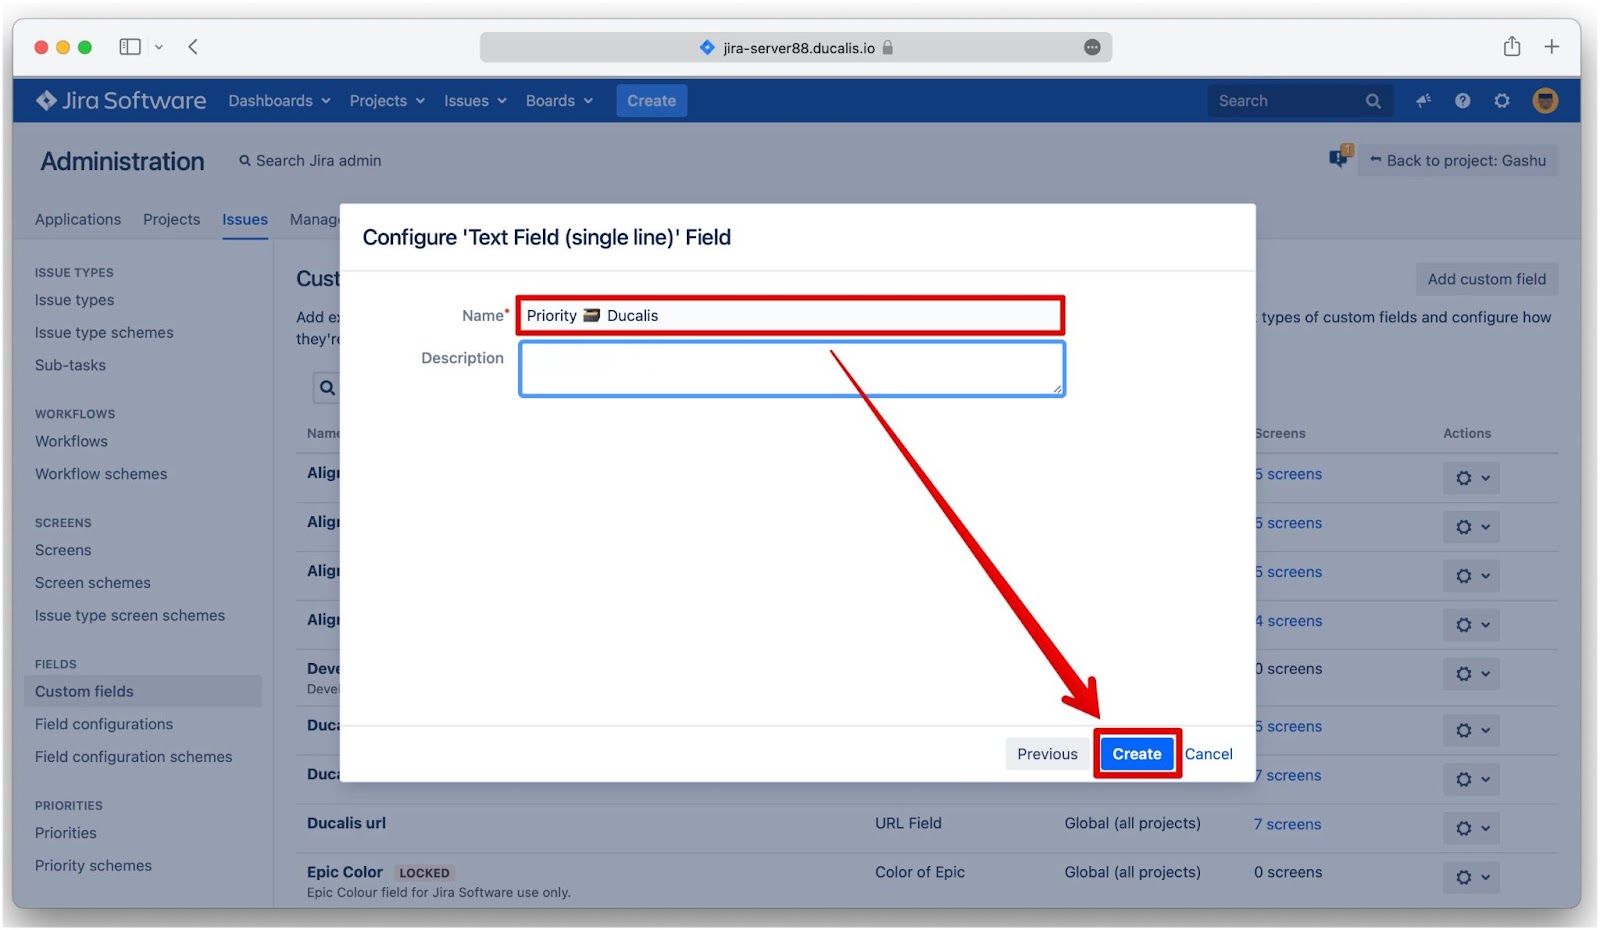
- Configure the field – enter the name:
- Head over to your Ducalis board that you want to set up back sync in and copy the name of the custom field. Your field names depend on your board’s emoji.
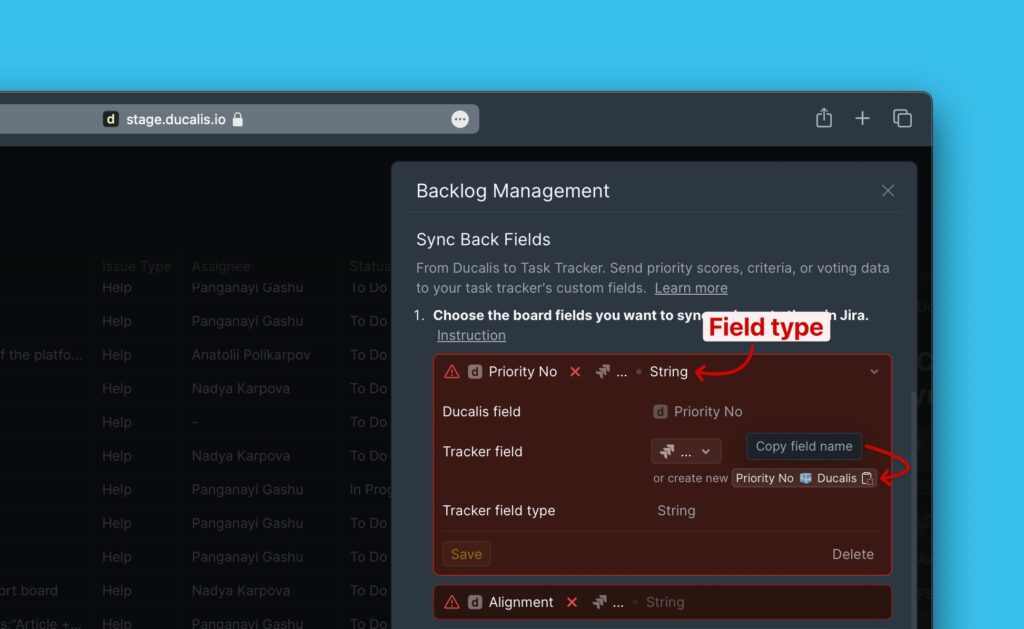
- Head back to Jira and paste it in the text field, then click Create.
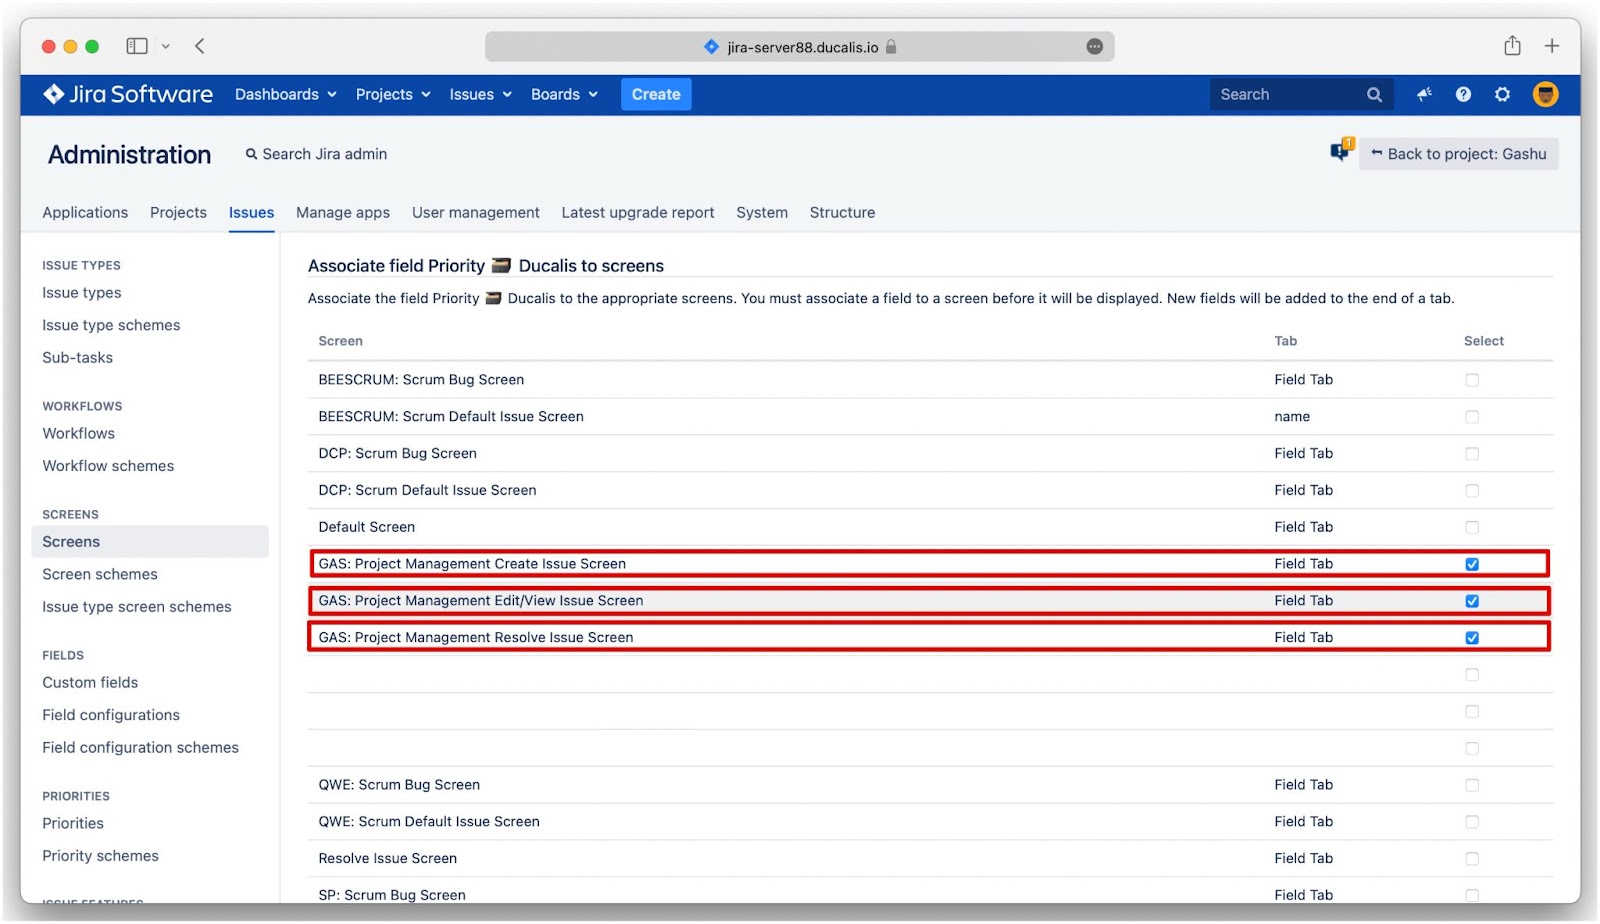
- Next, you should select the checkboxes of the screens where the custom field you just created will be displayed. Select the following screens:
- Screens with the project key(s) of the project(s) you selected when you applied your import filters in Ducalis.
- Default screens – Default screen, Resolve issue screen, Workflow screen
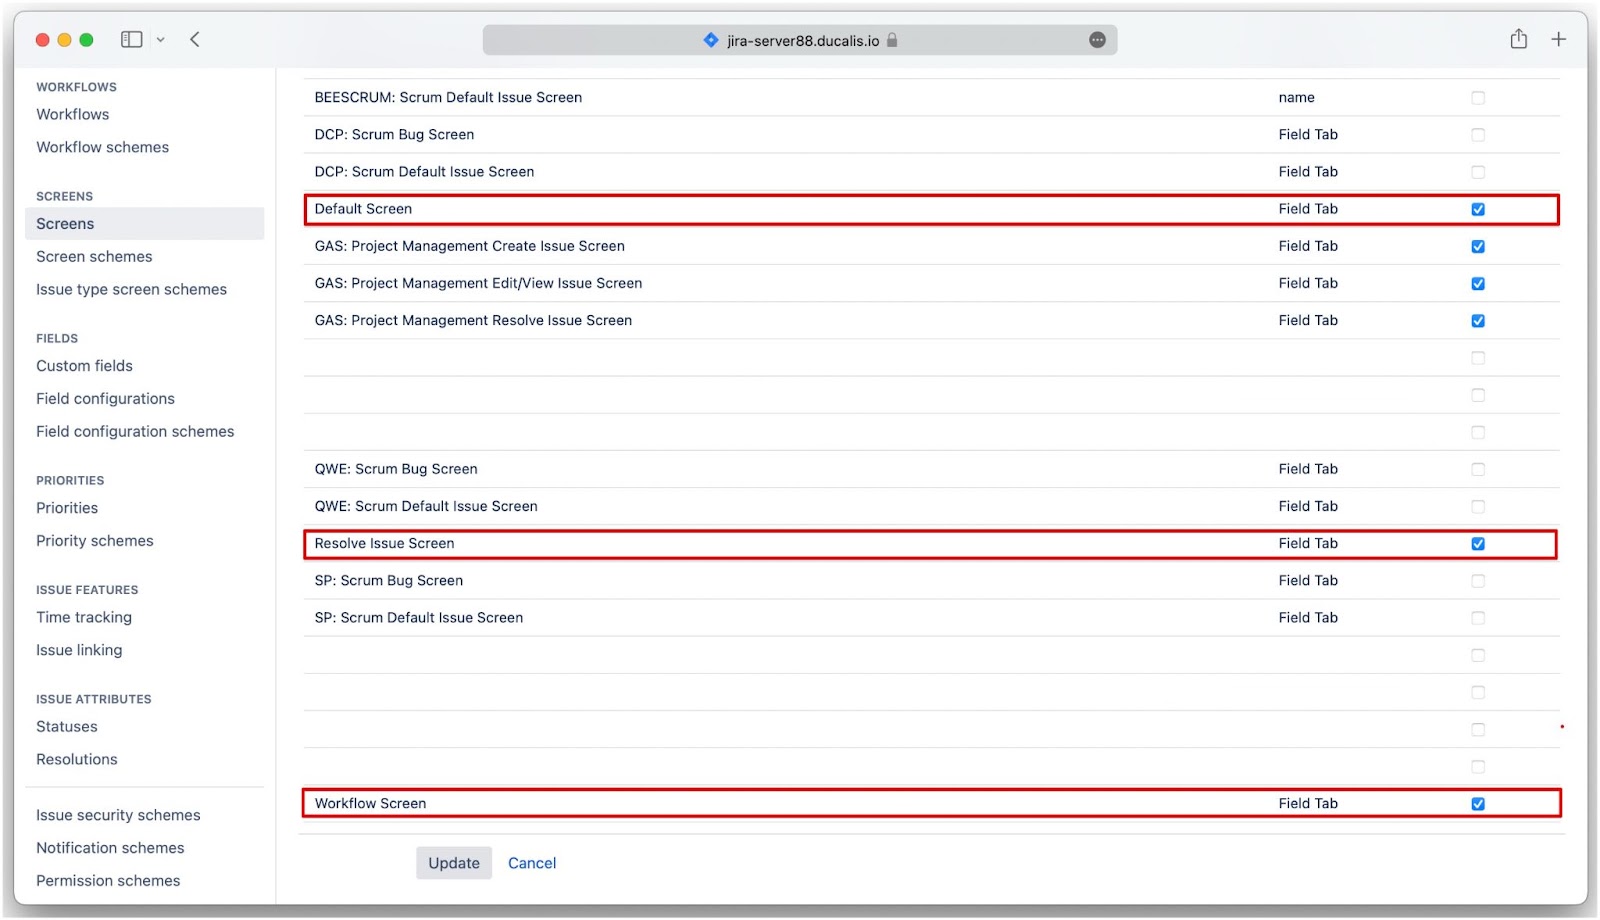
- Then click Update.

Follow these steps to create the rest of the Ducalis custom fields.

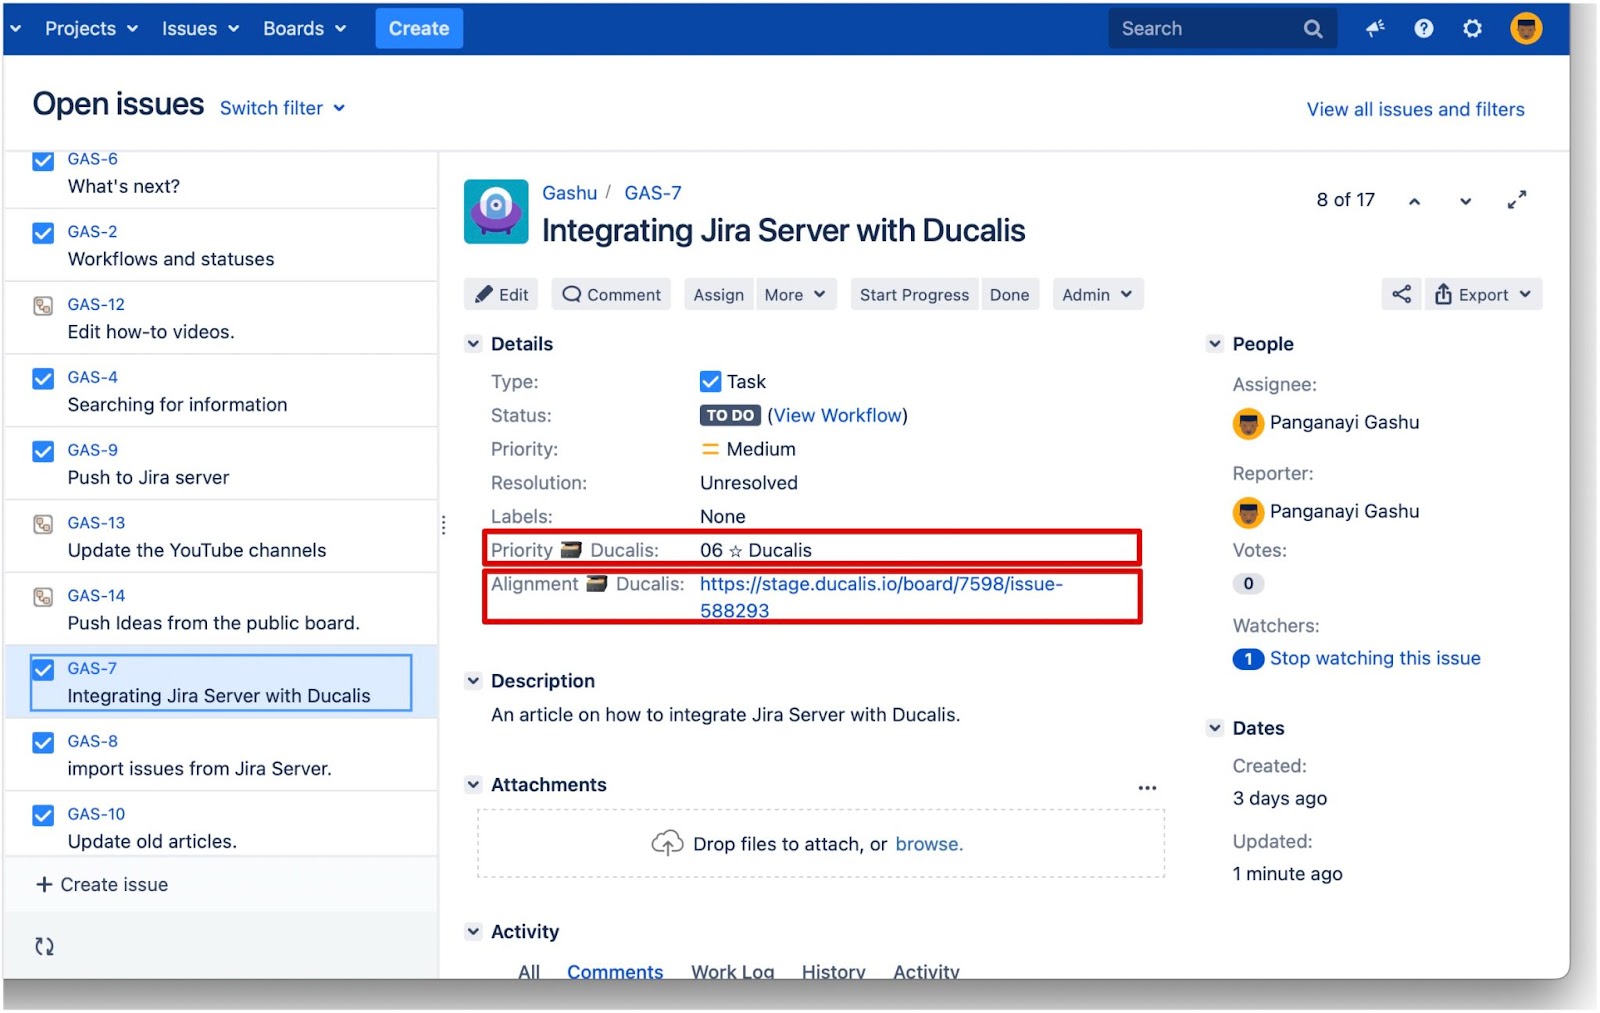
You will see the Ducalis custom fields you created inside an issue card.
Step 3 – Adding Ducalis Custom Fields to the Jira Board
If you have a company-managed project, before you activate sync, we advise that you add the Ducalis custom fields you created in Jira to the Jira board, so that they can appear in the backlog ‘view’ and active sprint ‘view’. This will also allow you to sort the issues’ cards using the data you would have imported from Ducalis.
Step 4 – Activating Sync
After creating custom fields in Jira and adding them to the Jira board, you can go ahead to activate sync in Ducalis
- After you are done with the first three steps, click Refresh.
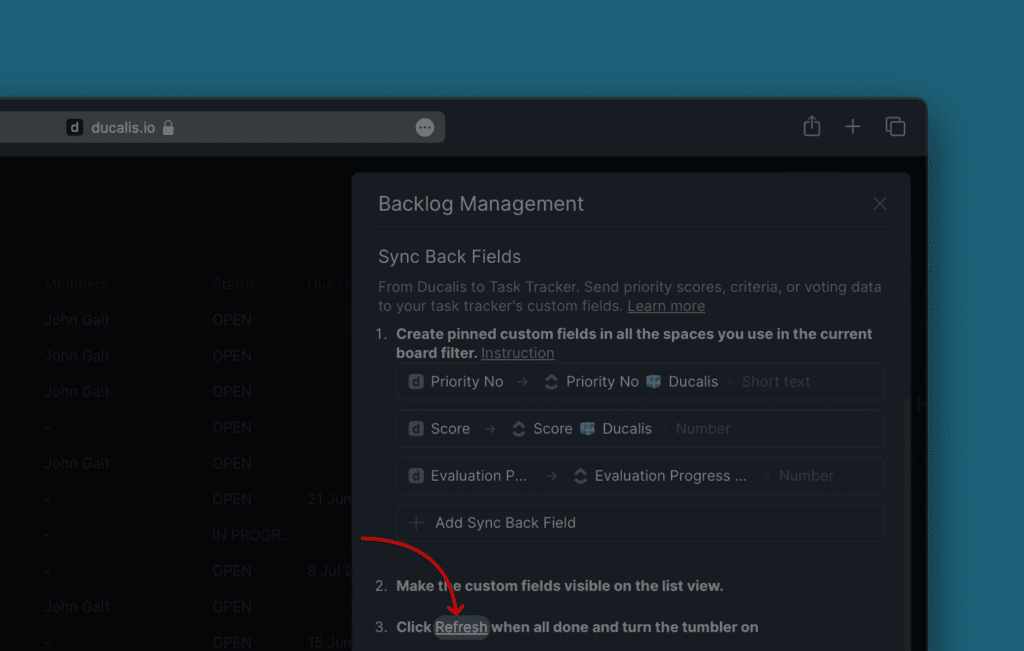
- The toggle to activate sync will appear, which you can switch on to activate sync.
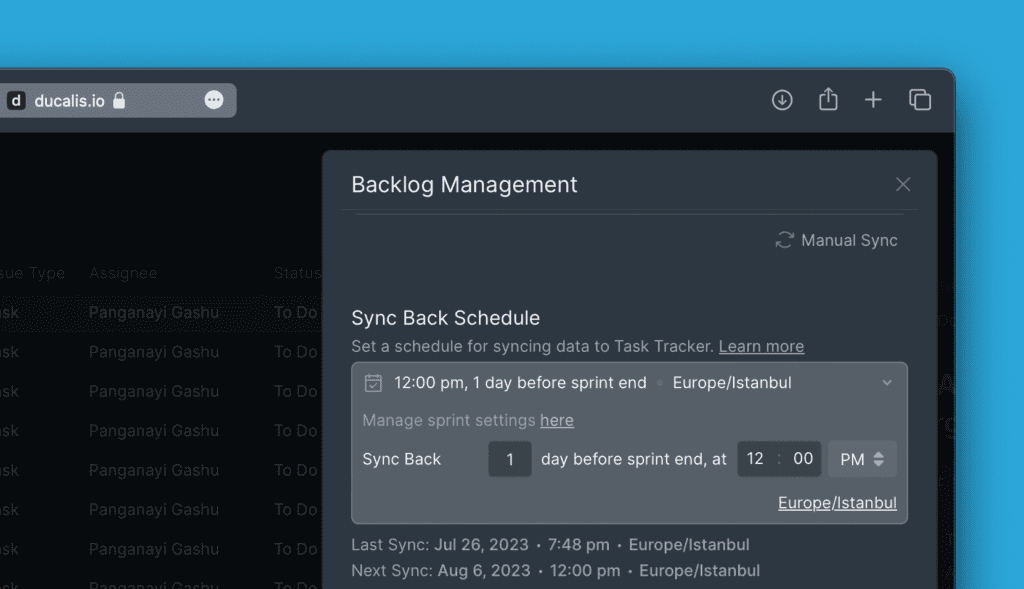
Date And Time Of Sync
- Choose the day and time you want to sync the issues’ priority rankings to Asana. It can, for example, be a day or a few days before your sprint planning meeting. You can change the timezone if it’s not set to the one you want.
- If you want to sync the priority rankings immediately, you can just click on Manual Sync.
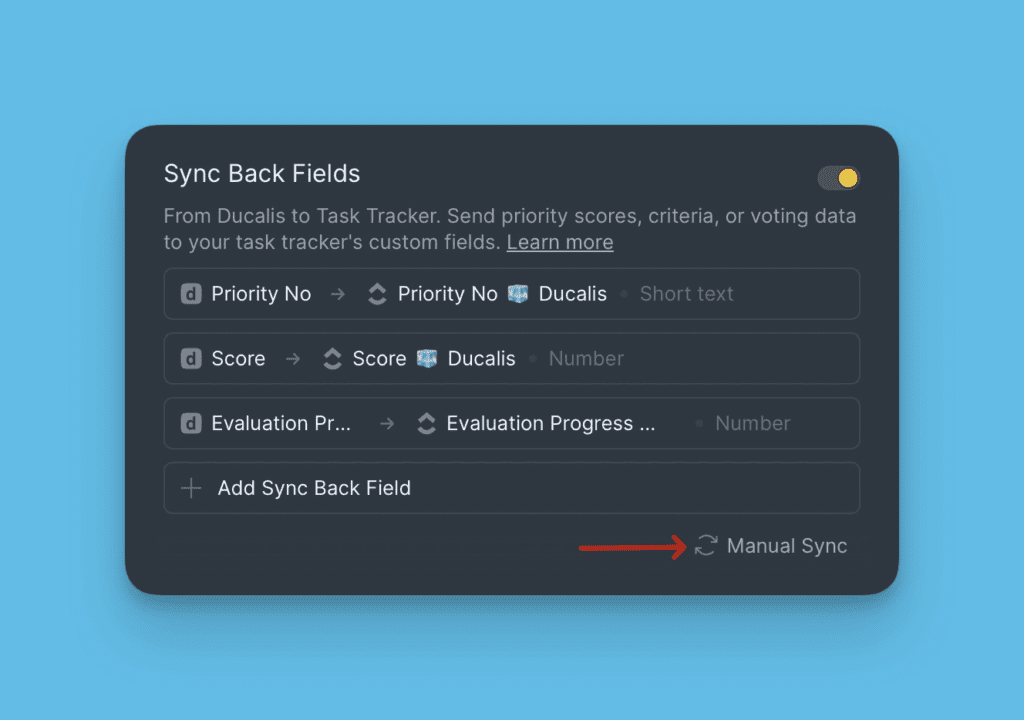
What’s Next?
To easily pick out your top priority issues from your Jira backlog, you can configure the settings to sort the issues in your backlog by order of the priority ranking from Ducalis.
Learn more about how to sort the issues in your Jira backlog by order of priority ranking.
