After successfully integrating Ducalis with Jira Cloud, you can import issues from Jira Cloud for prioritization in Ducalis.
There are three types of filters that you can use to choose the set of issues you want to import:
- Ducalis filters.
- Jira filters.
- JQL filers.
This article will show you how to use JQL filters to select the issues you want to import.
The advanced JQL (Jira Query Language) filters allow you to go deep into your search. Quickly find the issues you want to import from Jira regardless of how they are structured.
When importing issues from Jira Cloud, you can use a saved JQL filter to import specific issues you want to prioritize in Ducalis.
Steps To Follow
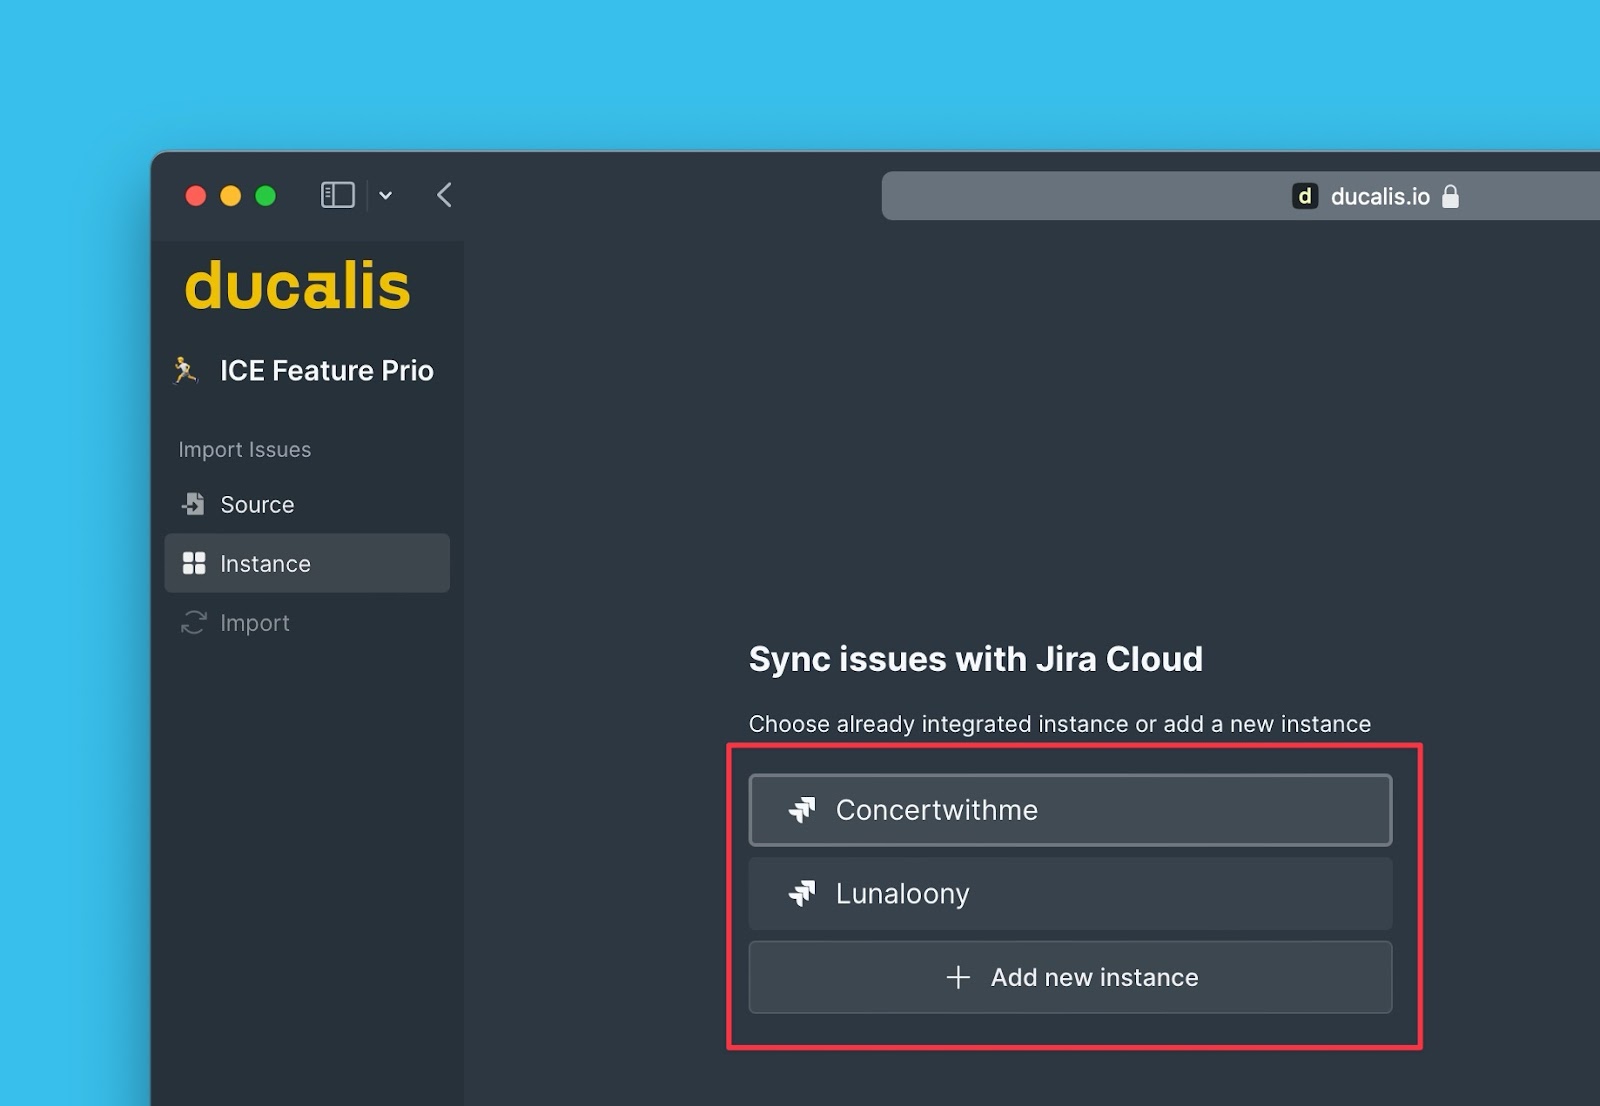
Choose the instance from which you want to import issues. You can:
- Choose from the ones you have already connected.
- Connect a new one. Follow the process of integrating Ducalis with Jira Cloud.
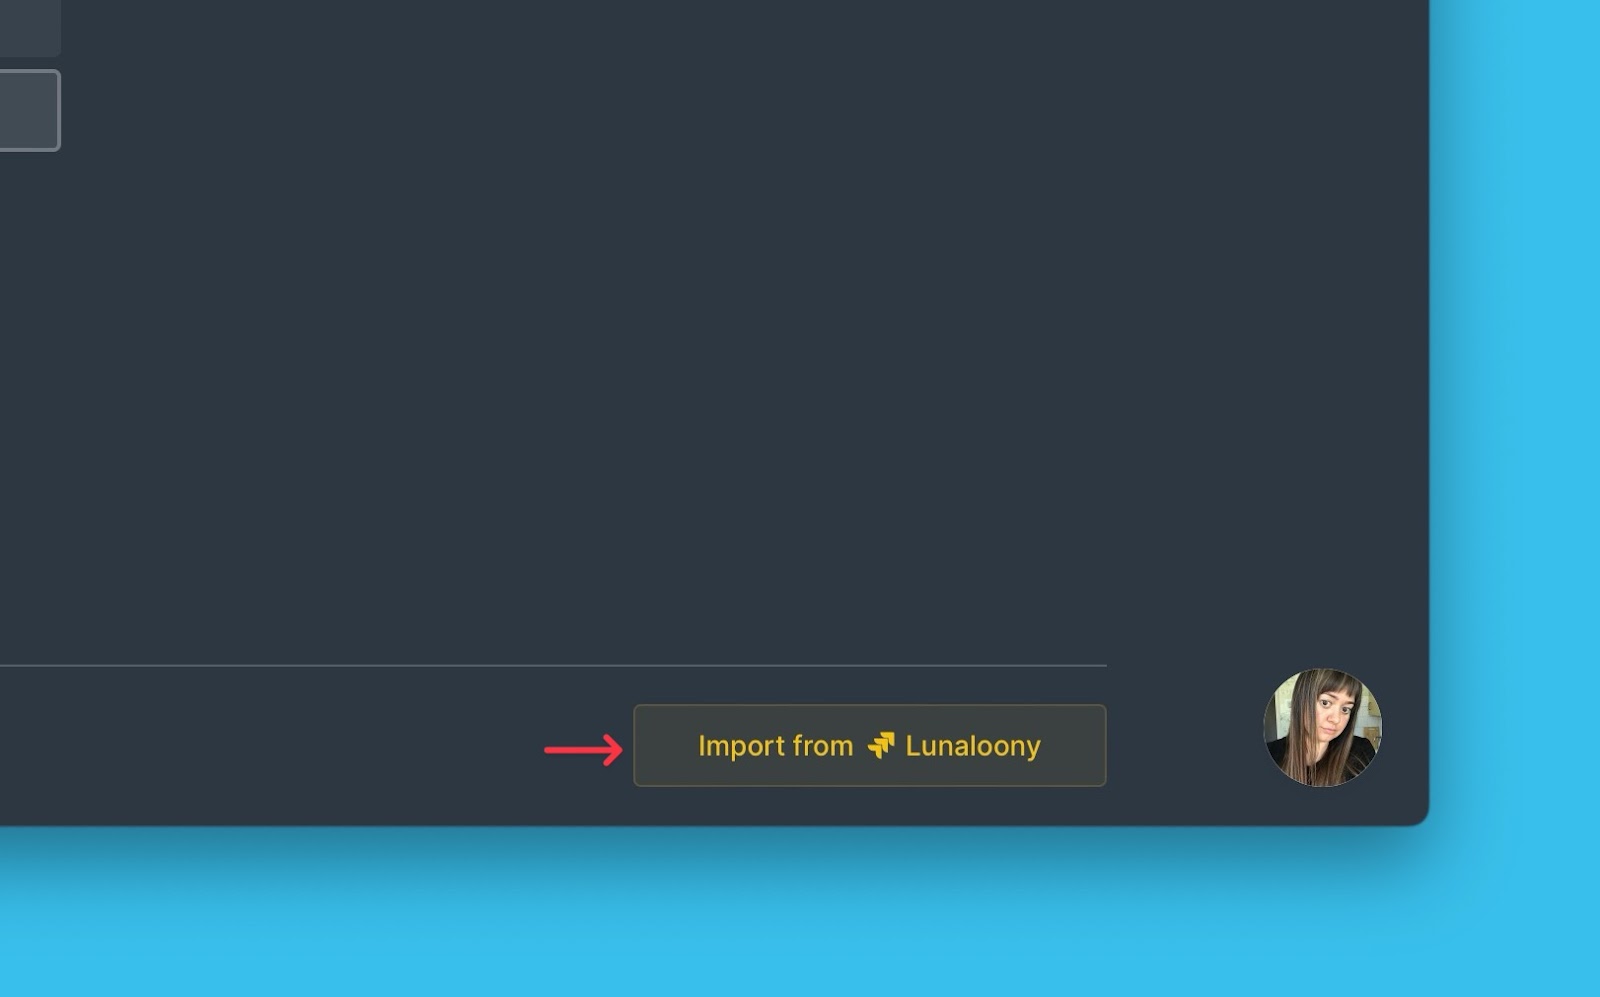
Click Import from [instance] to proceed.
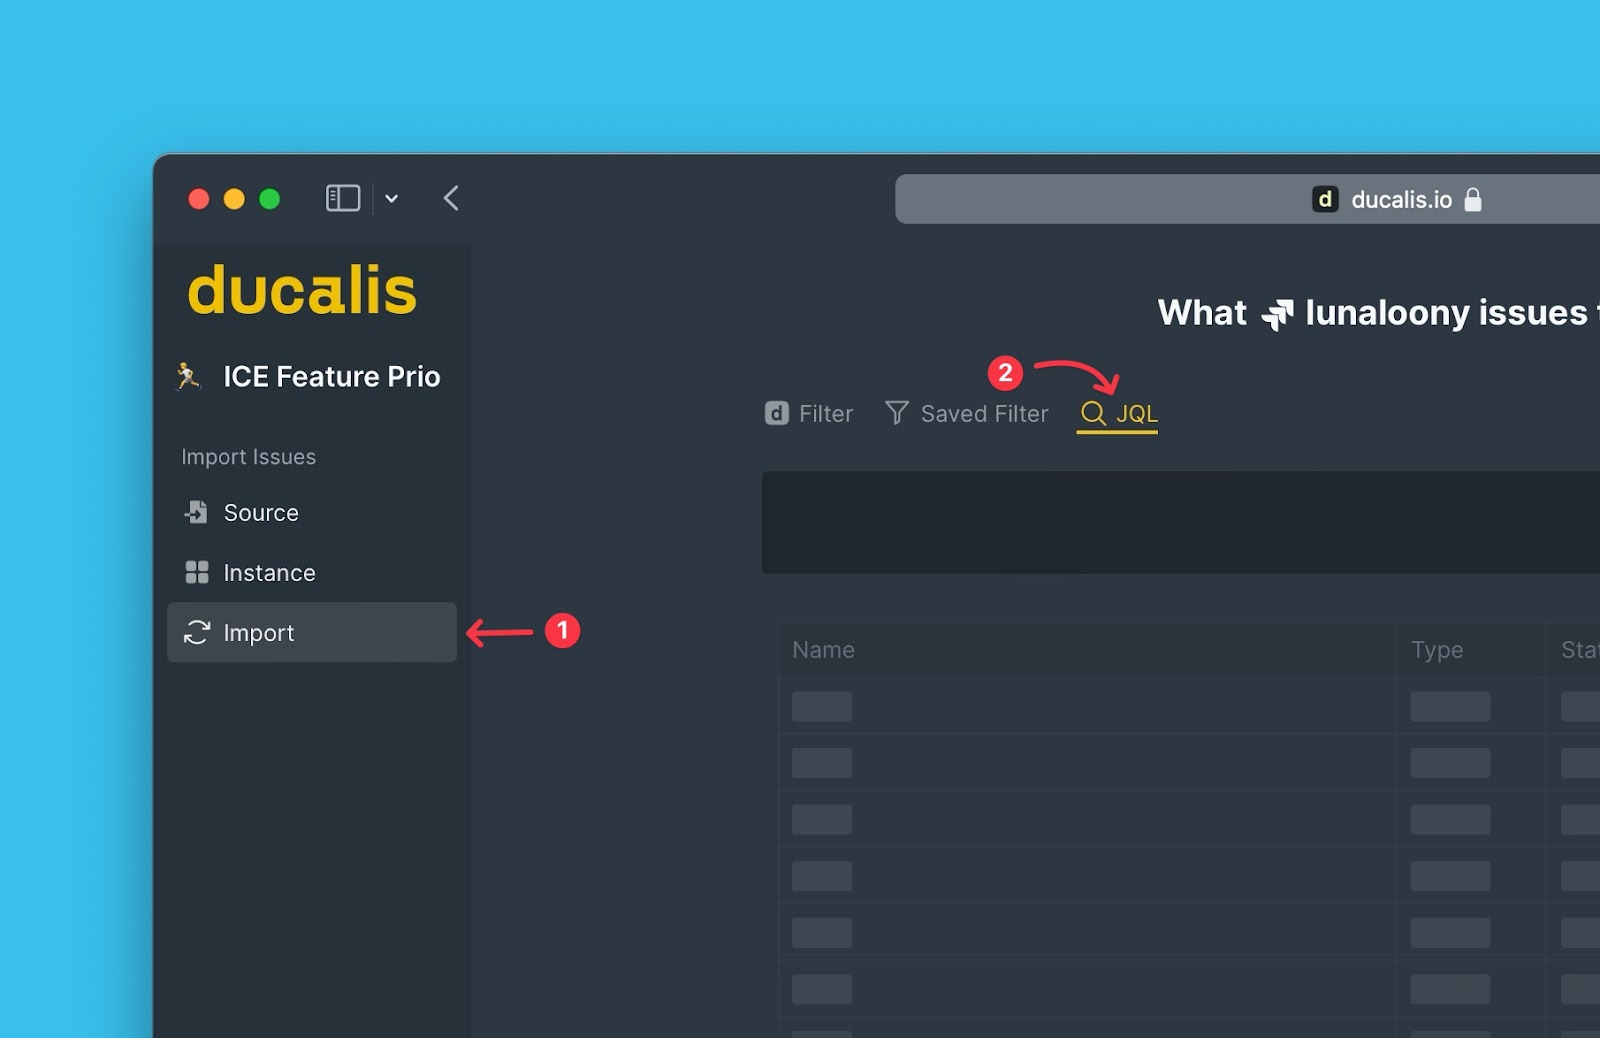
When you reach the Import step, click Select the JQL filters option.
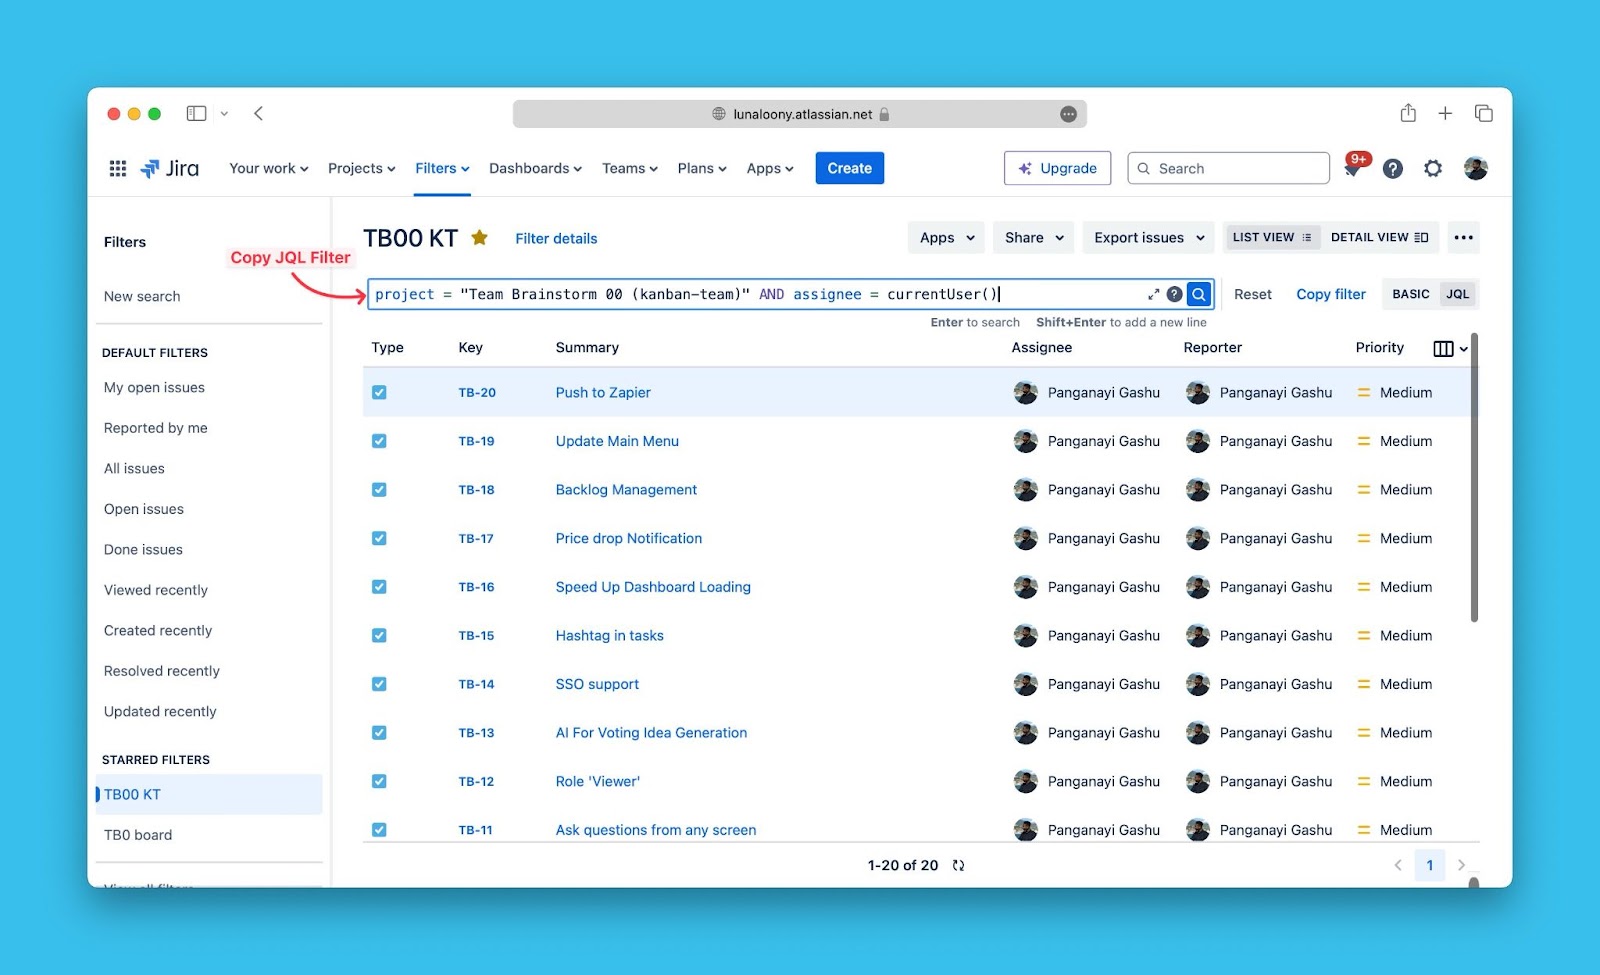
Copy your Custom JQL query from Jira.
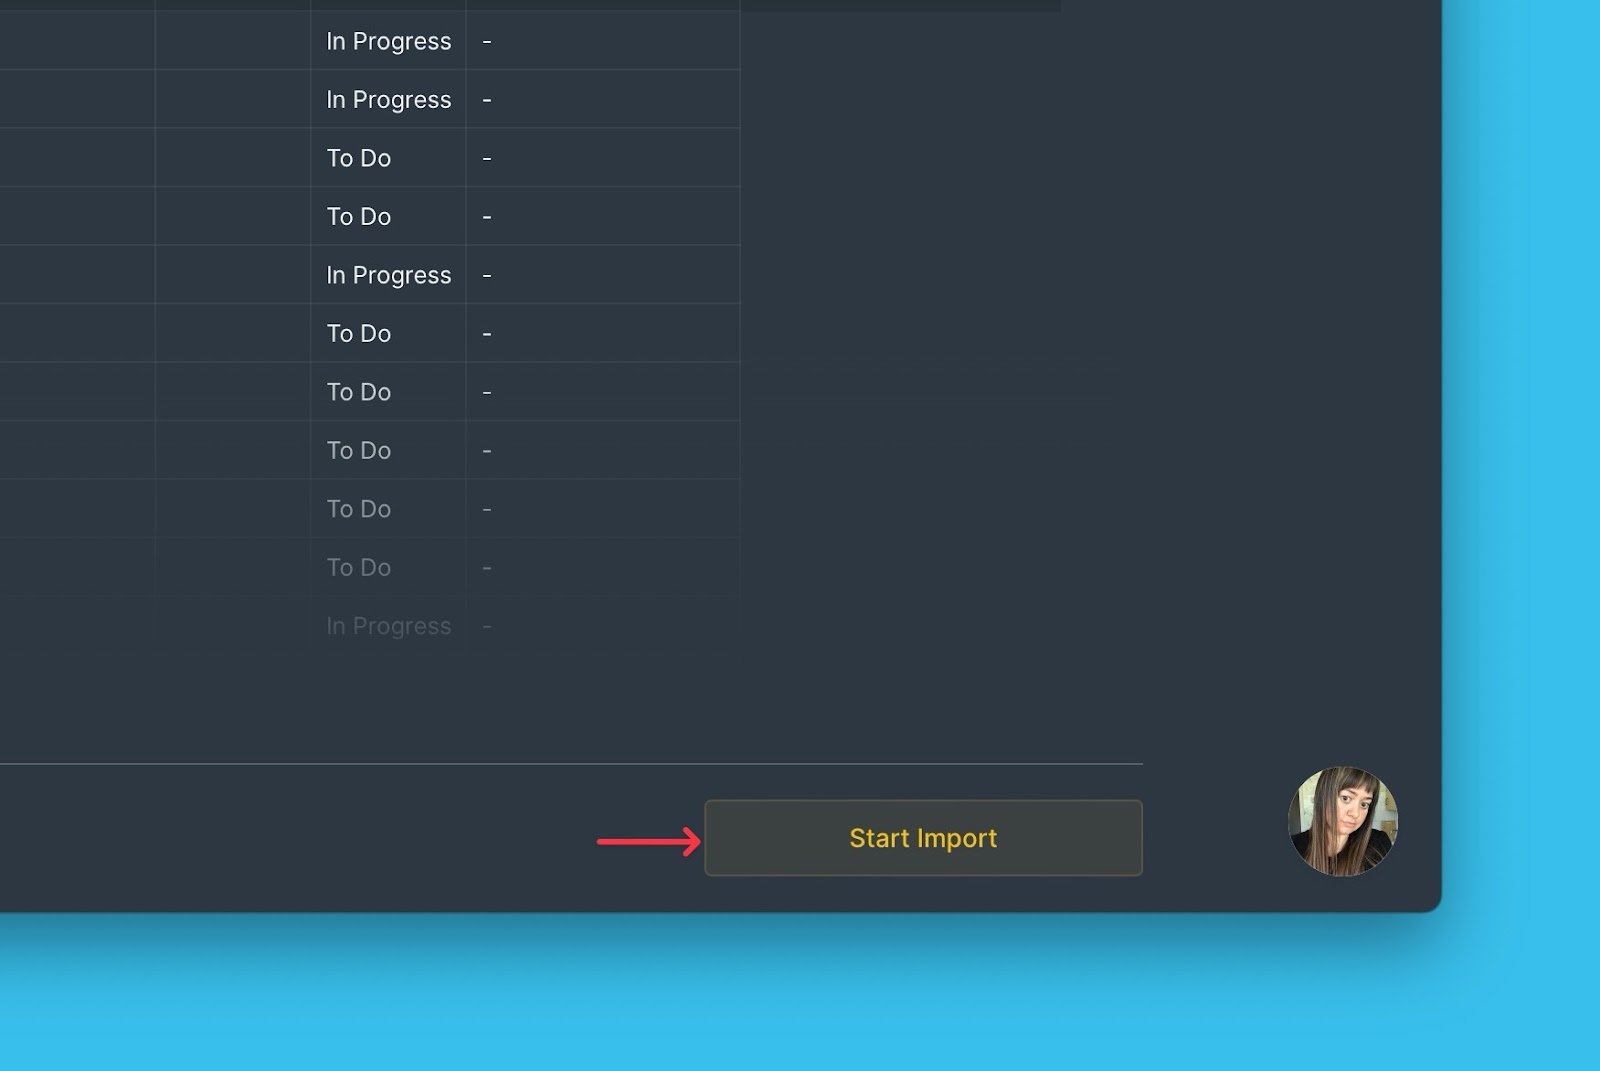
Paste in and Ducalis, then click Get Preview to see the issues under this filter.
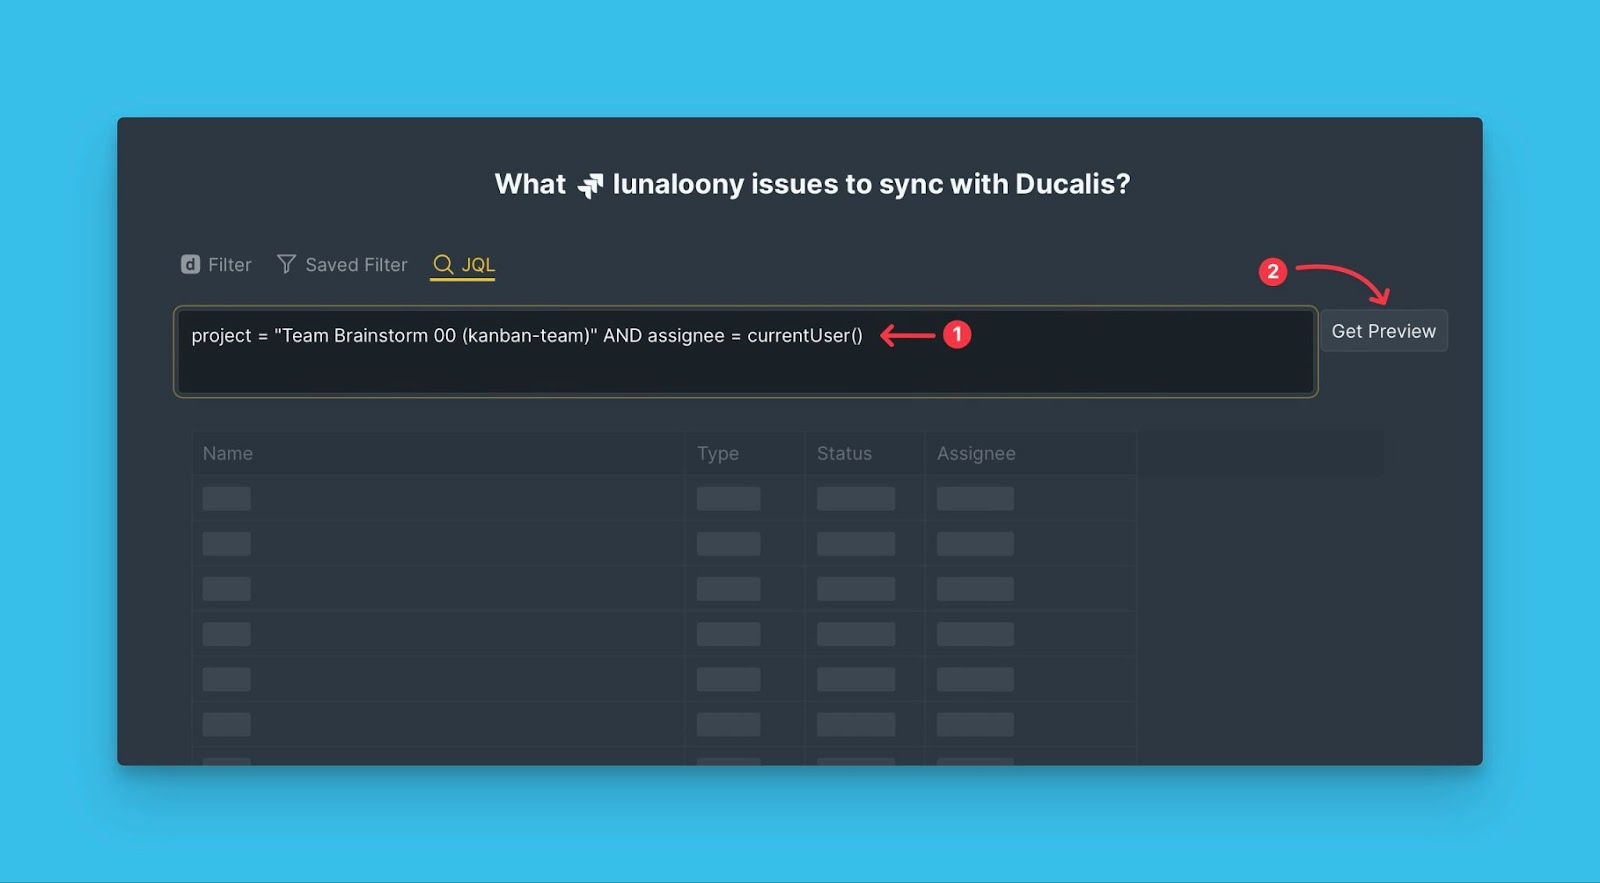
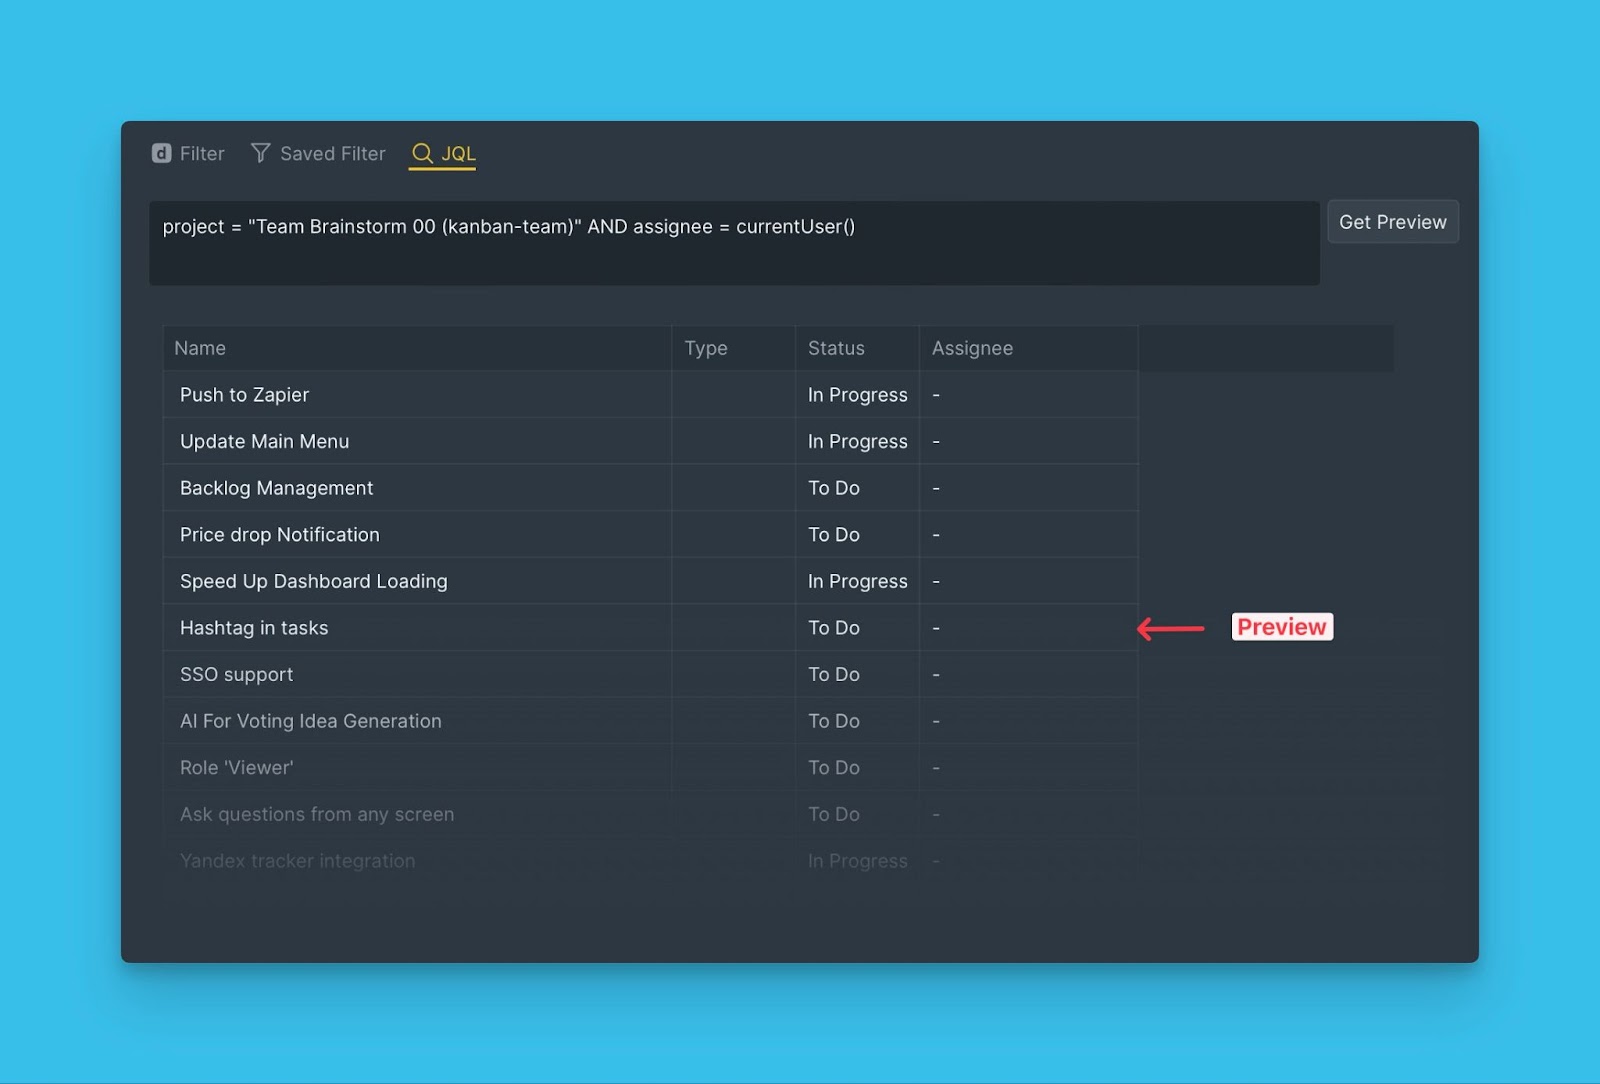
A preview of the issues in the chosen filter.
Then click Start import.
Editing The JQL Filter
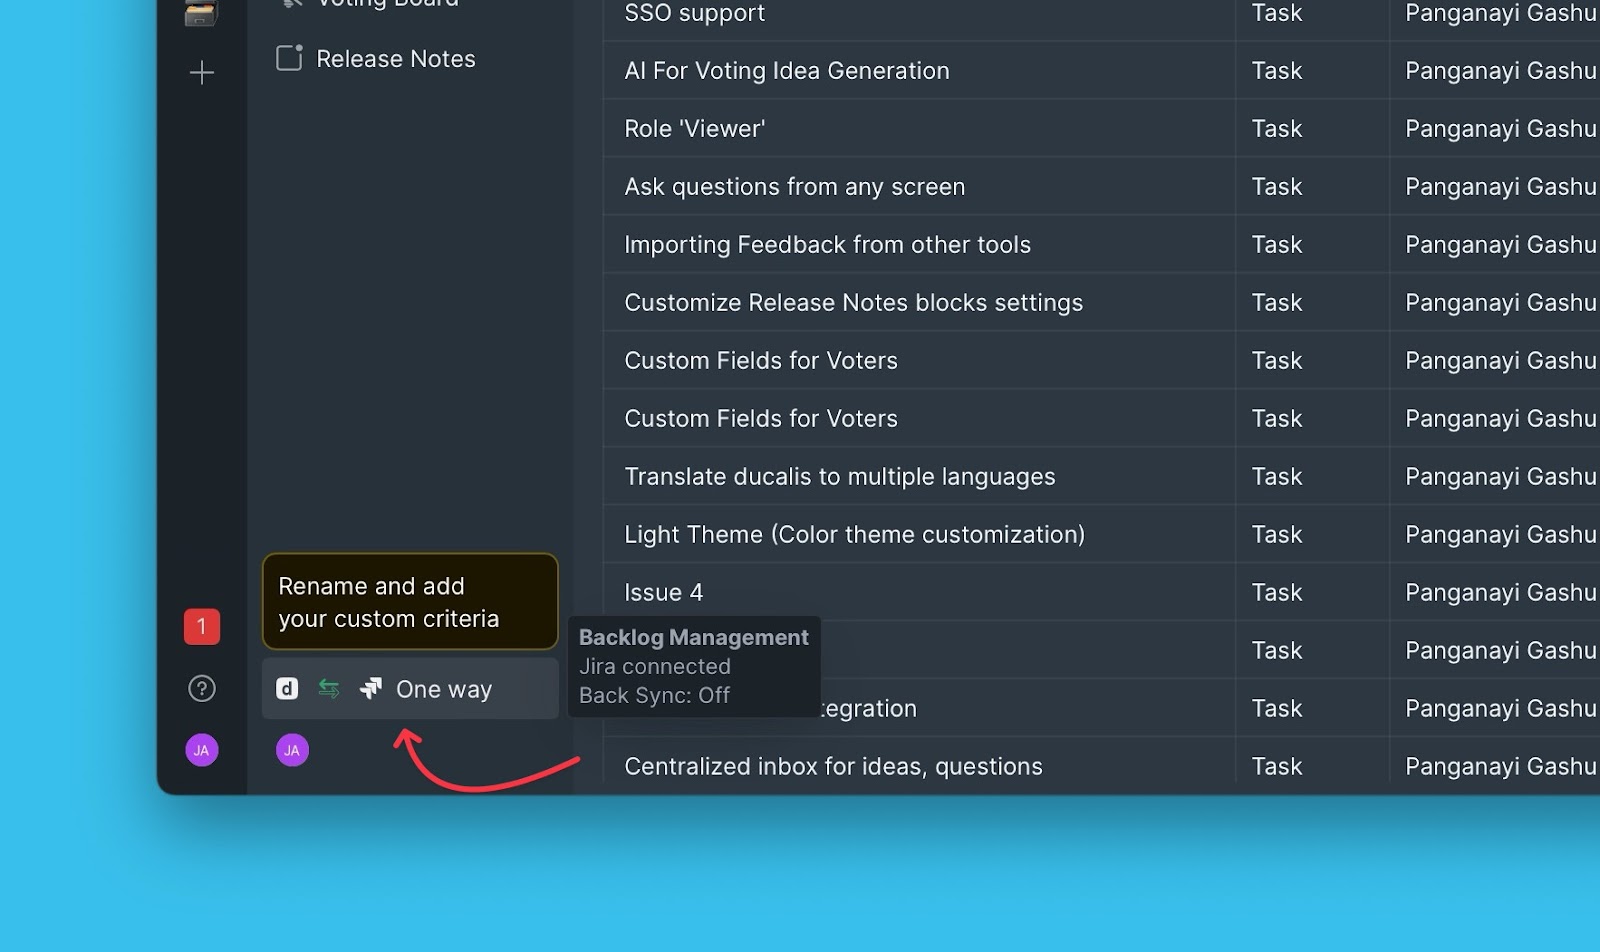
Editing Ducalis import filters helps to:
- Import more issues from Jira to the same board.
- Remove issues from a board without removing the integration.
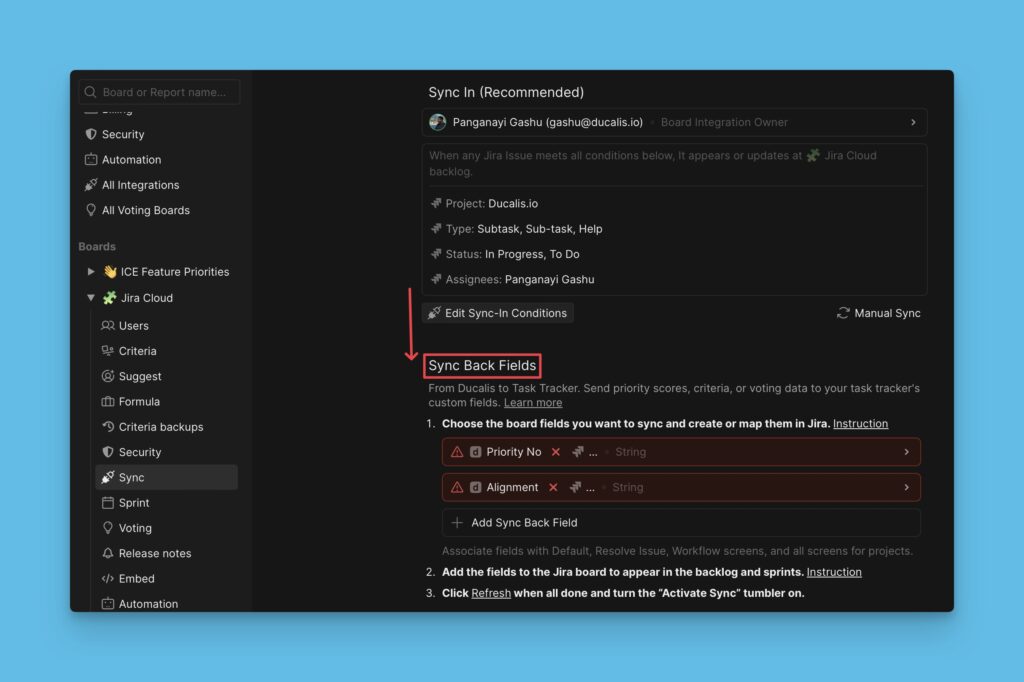
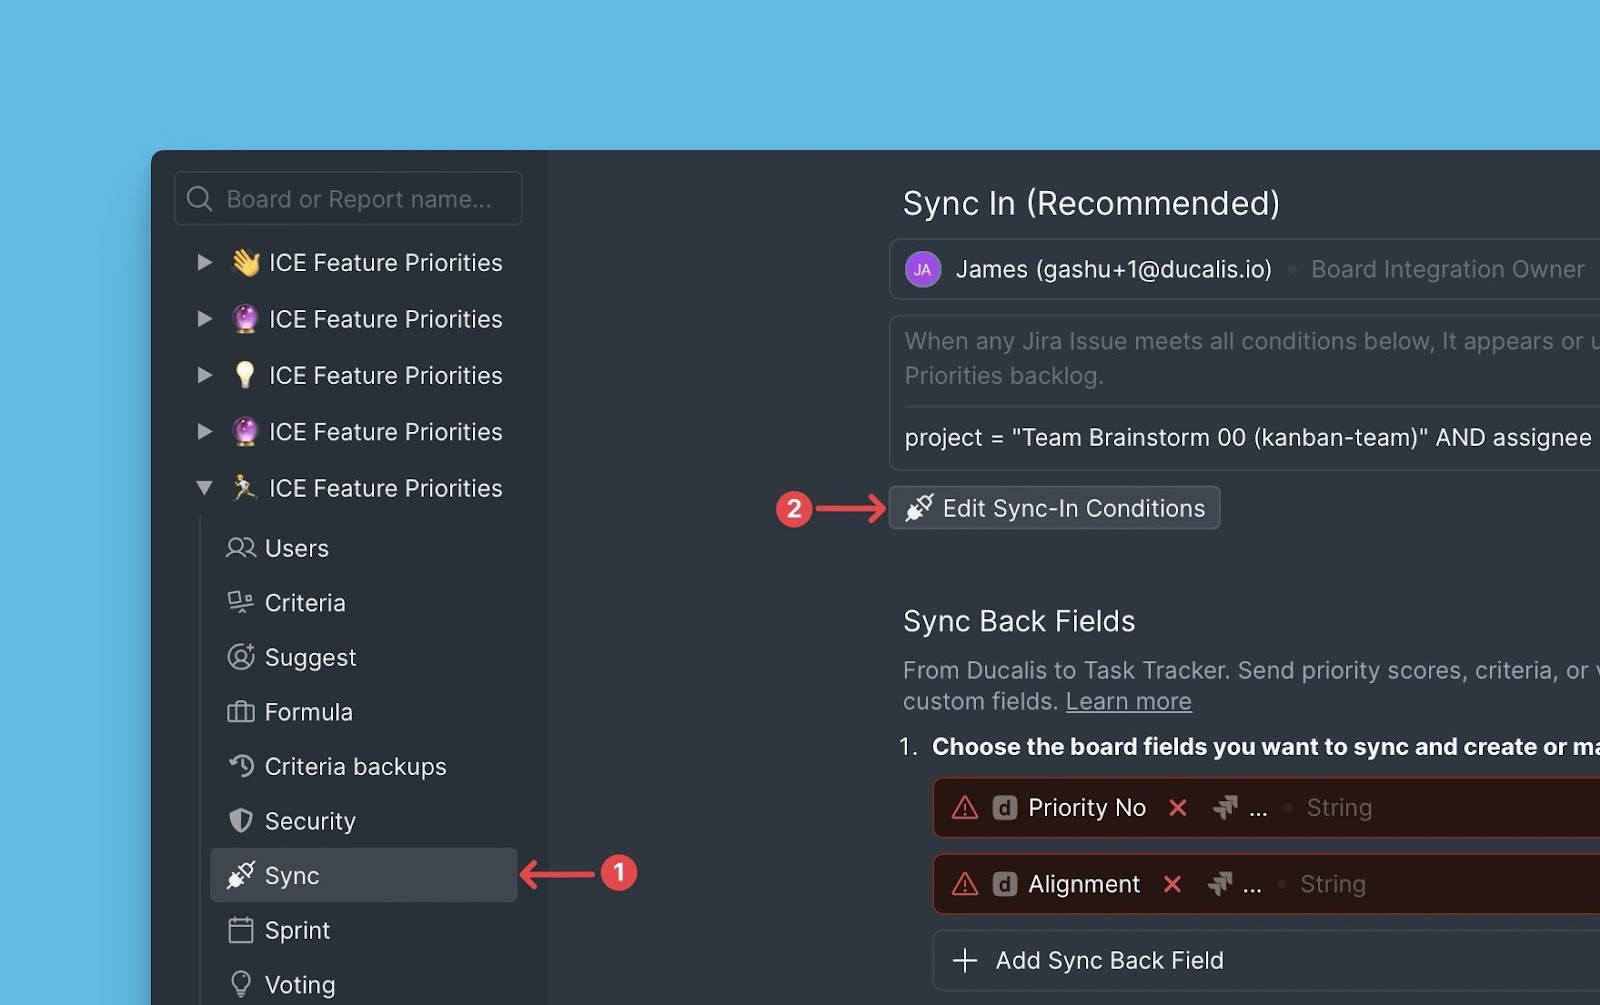
Click here to access the Sync settings.
Under Sync settings, click Edit Sync-In Conditions.
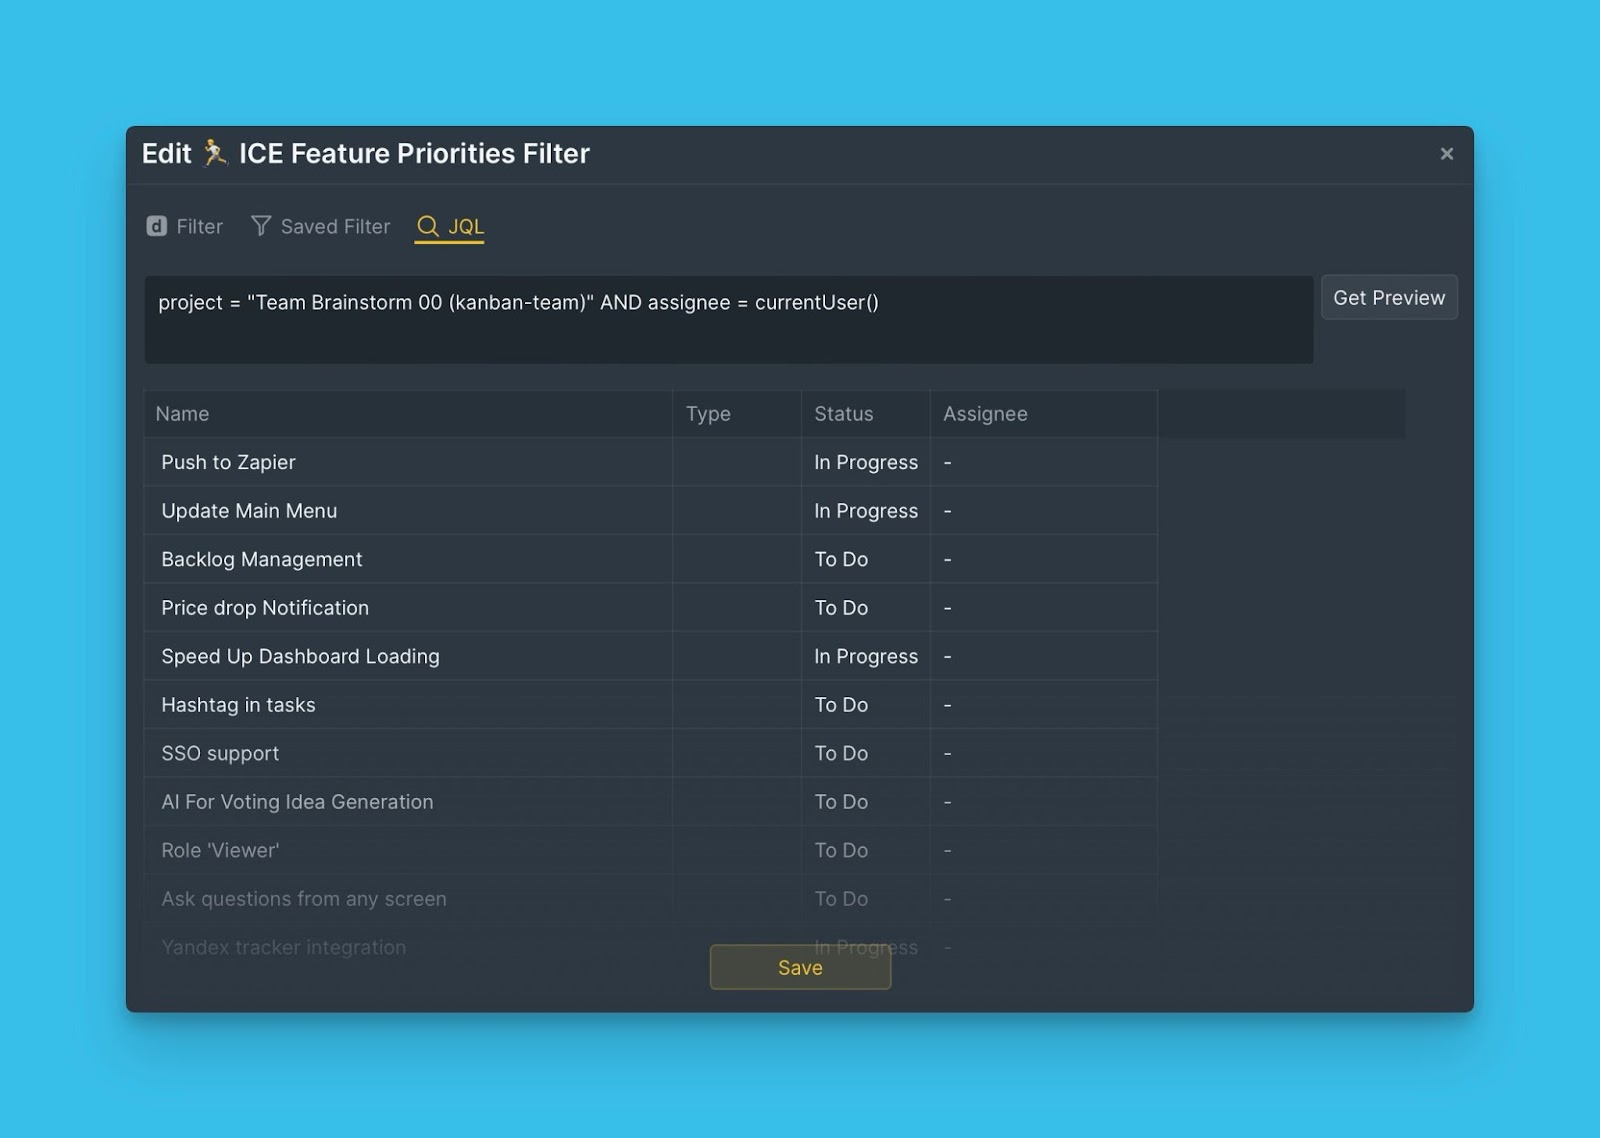
Edit your JQL query and click Save to apply the changes.
What’s Next?
Once you have integrated and imported your issues from Jira Cloud, you can go ahead and enable Back sync so that you can sync back your prioritization results to your Jira Cloud account.
Learn more about how to enable Back sync with Jira Cloud.