Sync Back
Sync Back sendet deine Priorisierungsergebnisse von Ducalis an Yandex.Tracker. Dein Team sieht Prioritätsrankings direkt in seinem Tracker, ohne zwischen Tools wechseln zu müssen.
Schließe zuerst die Yandex.Tracker verbinden-Einrichtung ab.
Ducalis verwendet Feld-Zuordnung. Du wählst existierende Felder in Yandex.Tracker aus, die Ducalis-Daten erhalten. So hast du volle Kontrolle über die Feldstruktur deines Trackers.
Felder einrichten
-
Feld-Zuordnung – Verwende existierende Yandex-Tracker-Felder. Keine neuen Felder nötig.
-
Benutzerdefinierte Felder erstellen – Erstelle neue Felder in Yandex Tracker speziell für Ducalis-Daten.
Wähle den Ansatz, der am besten zu deiner Einrichtung passt:
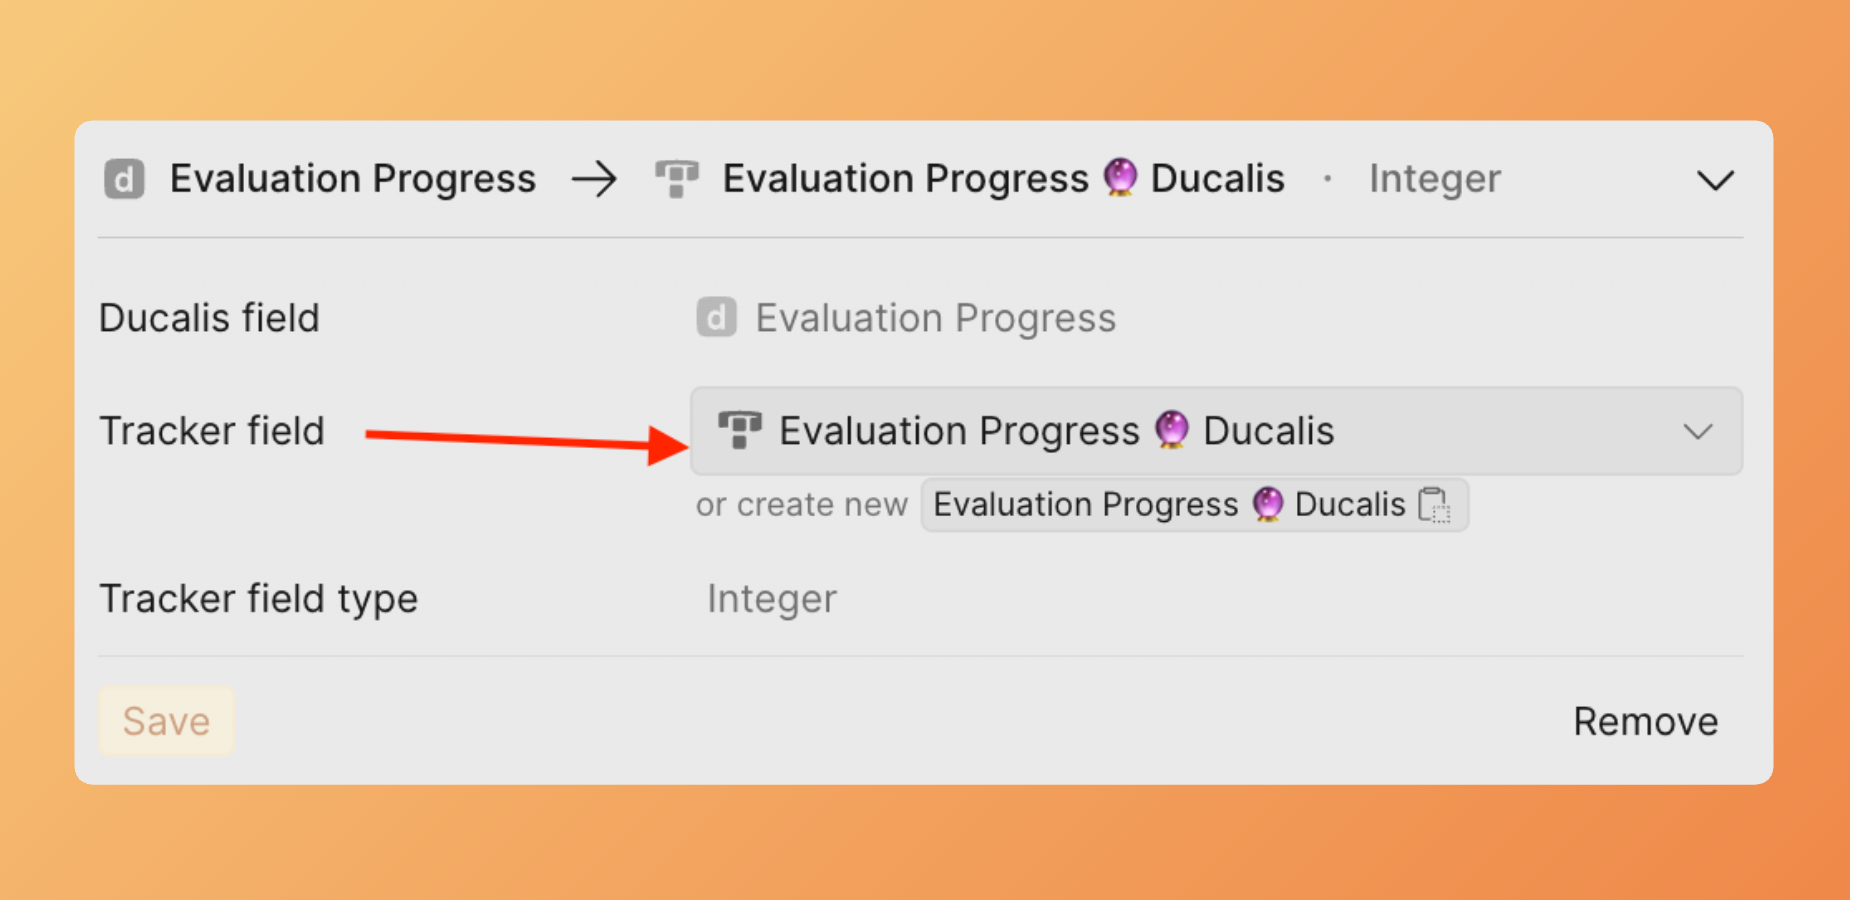
Feld-Zuordnung
Wenn du bereits benutzerdefinierte Felder in Yandex Tracker hast und keine weiteren erstellen möchtest, kannst du Ducalis-Felder auf deine existierenden Felder zuordnen.
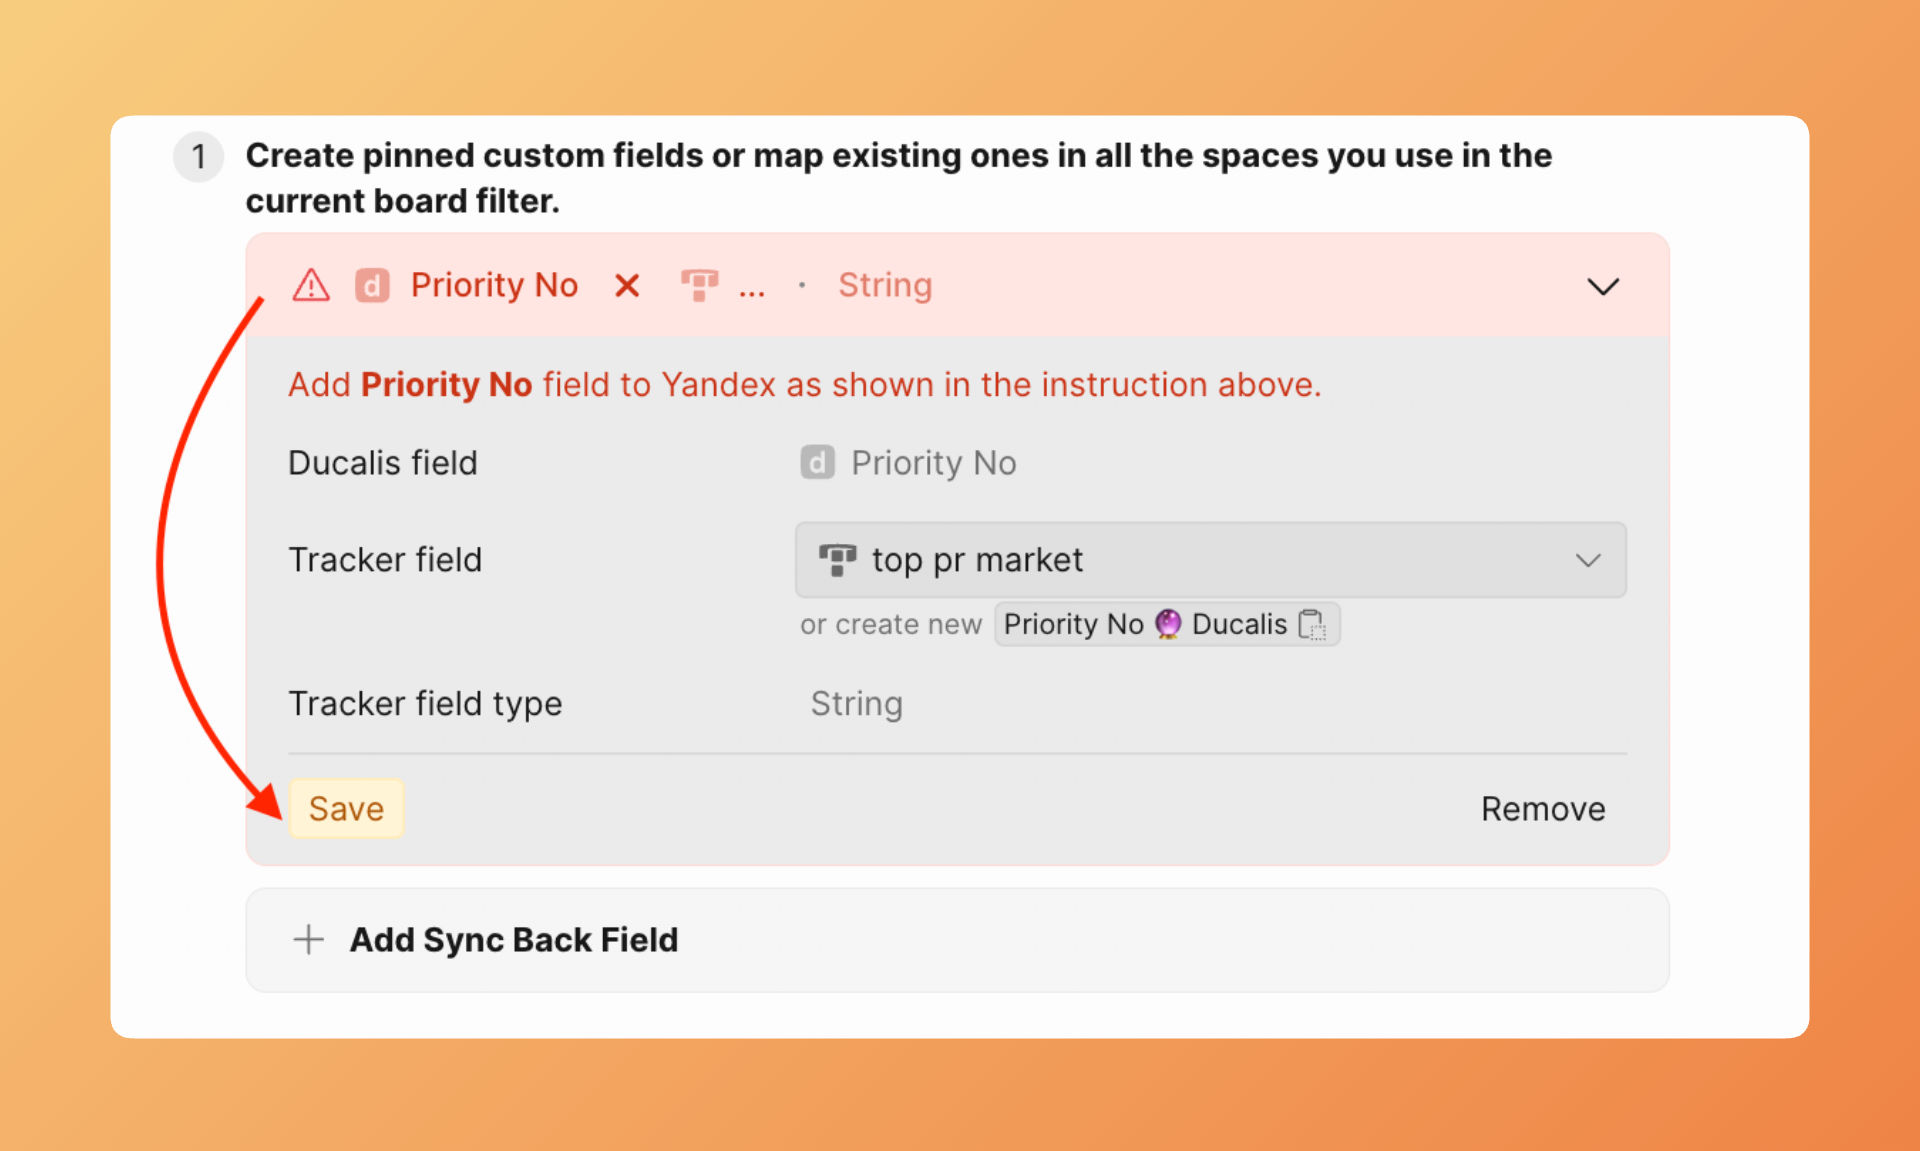
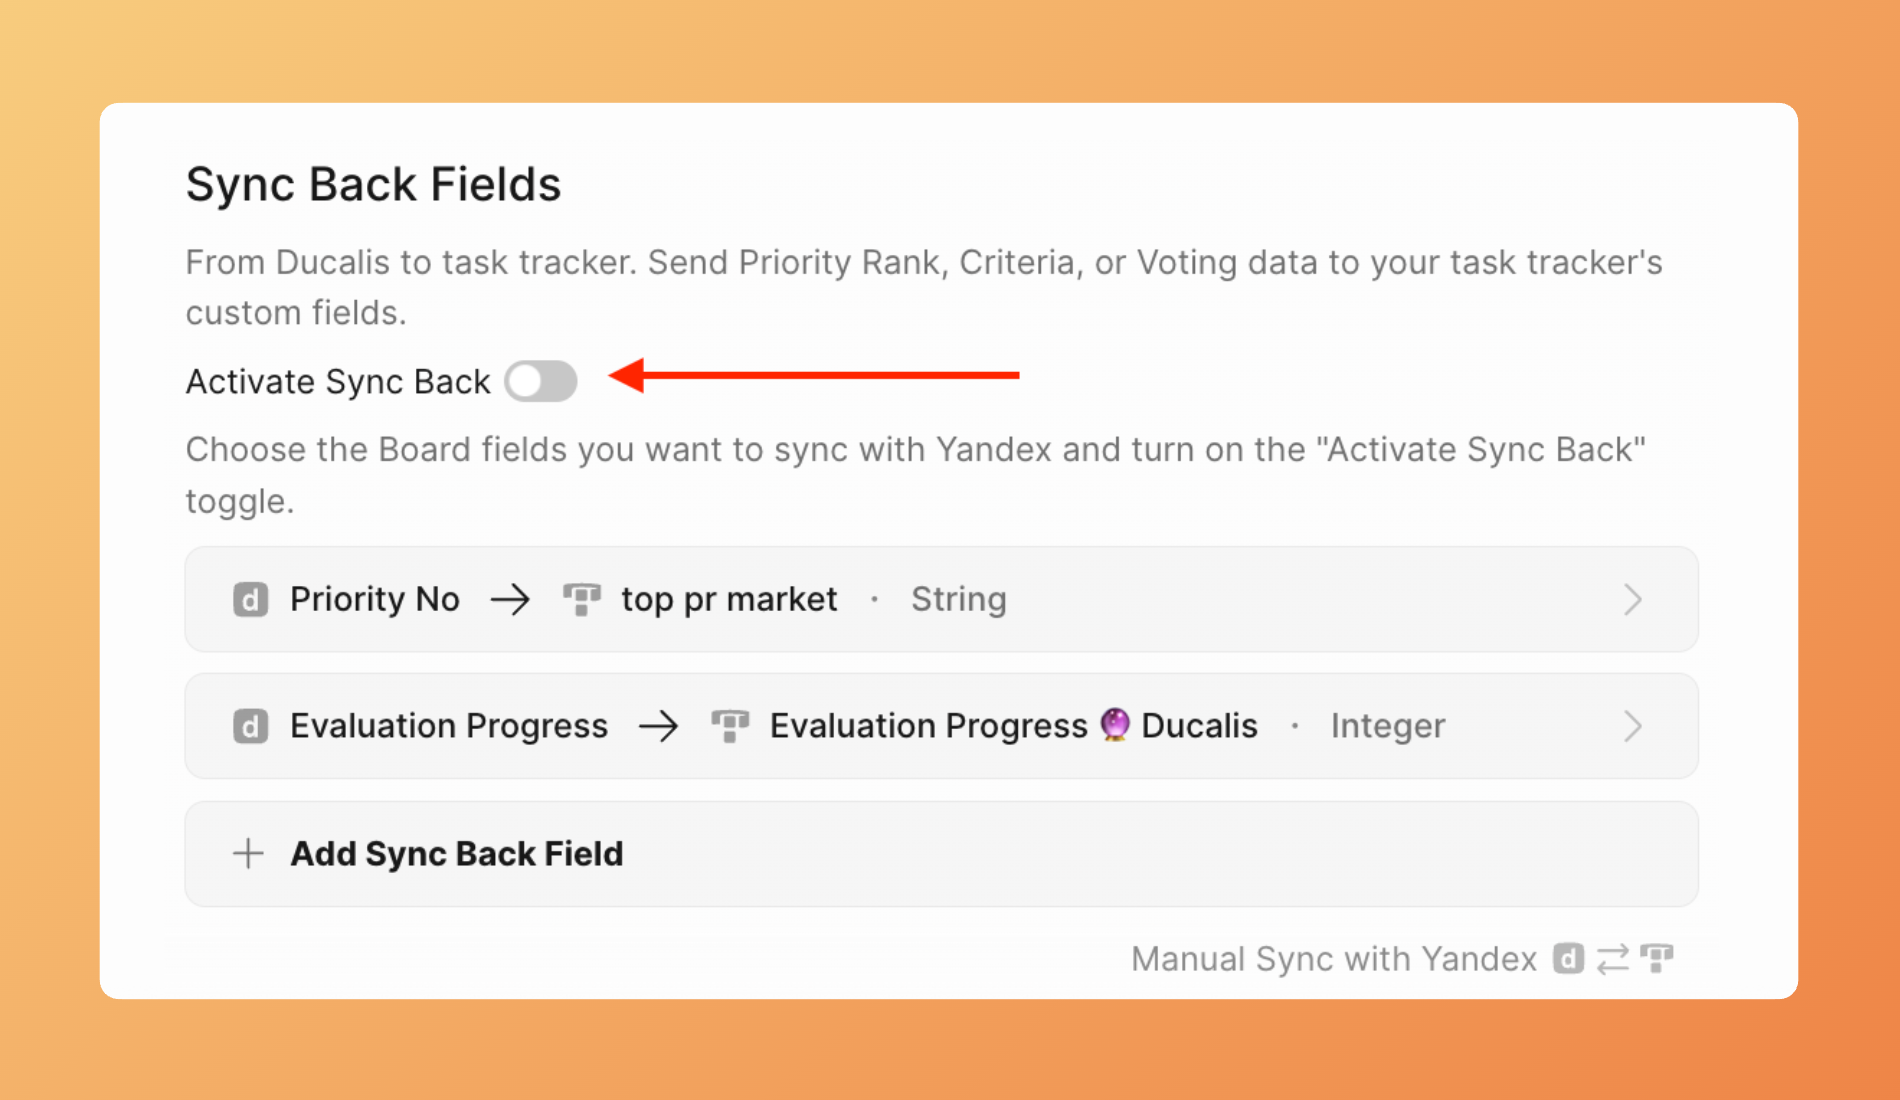
- Gehe zu den Sync-Einstellungen und scrolle zu Sync-Back-Feldern.
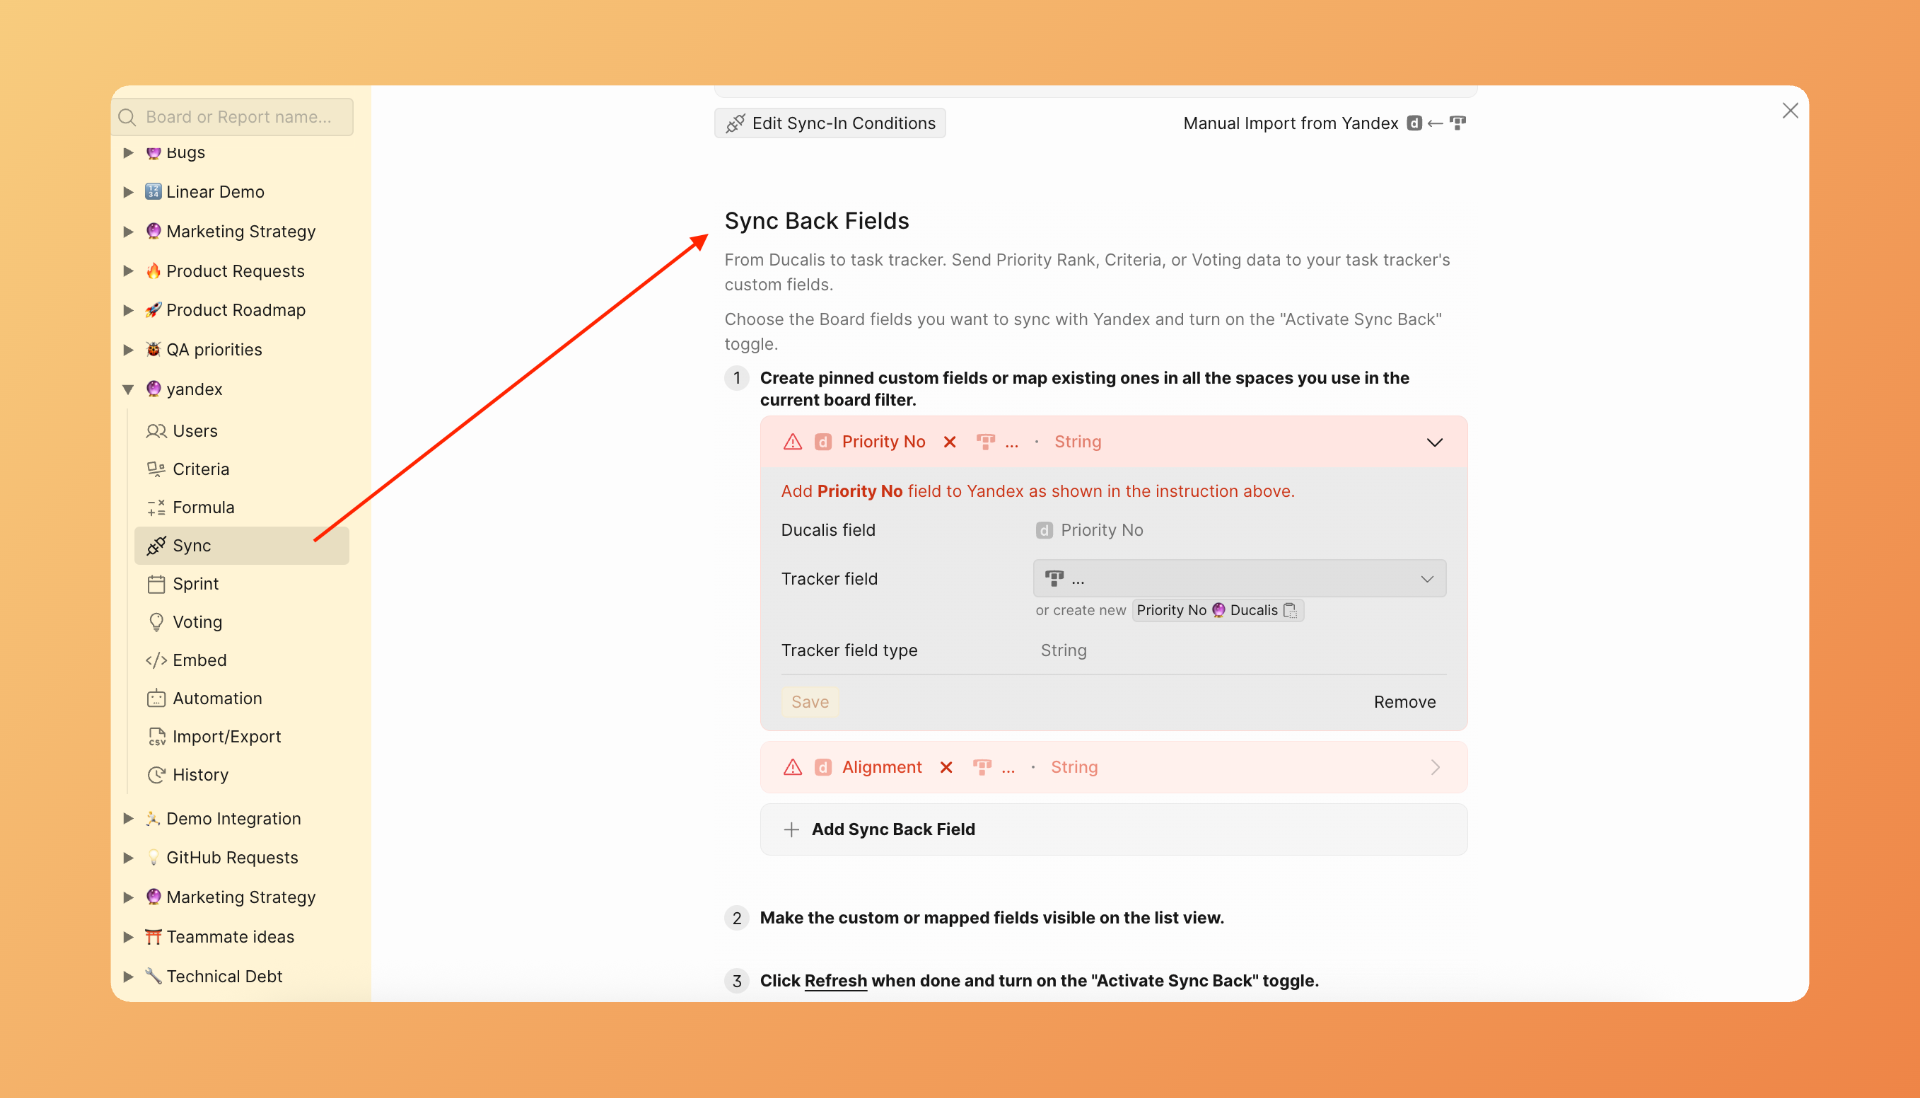
- Überprüfe die Standard-Ducalis-Felder. Du kannst sie behalten oder löschen.
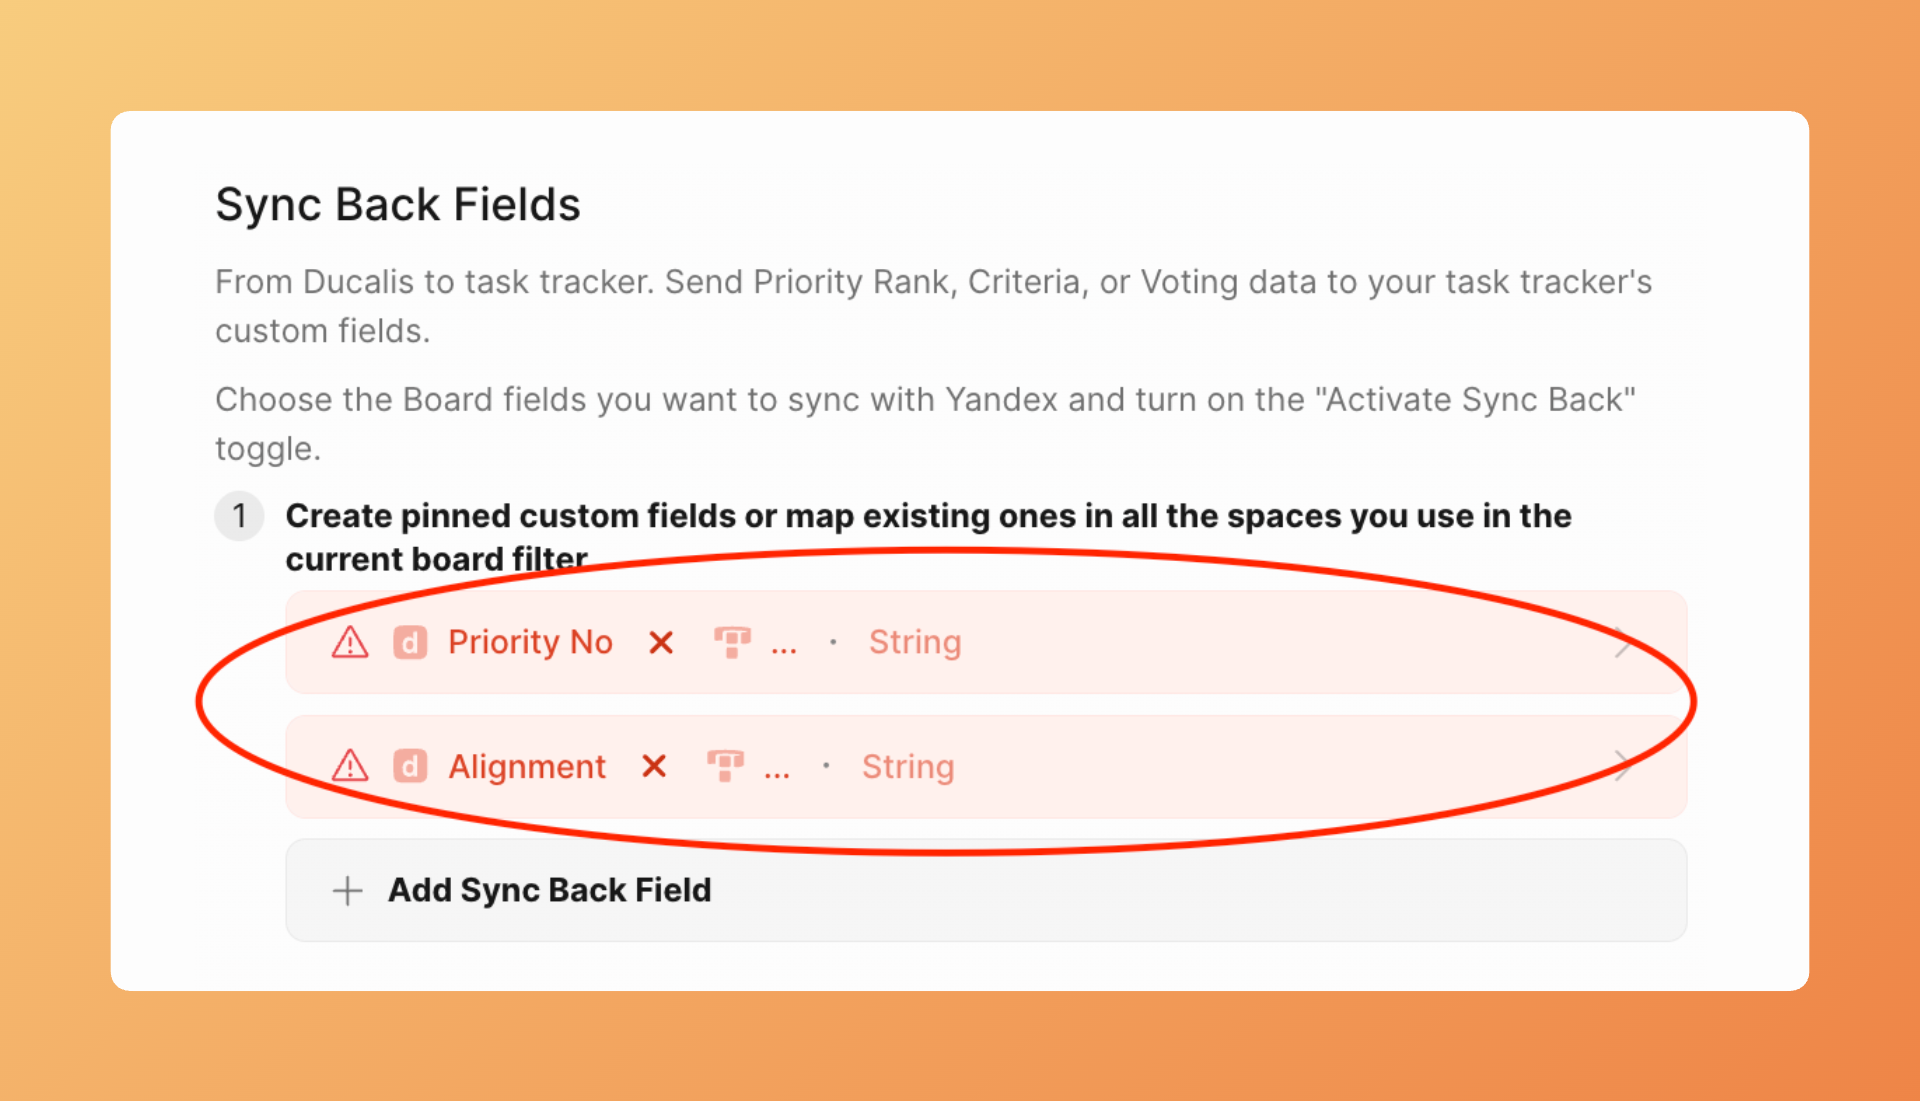
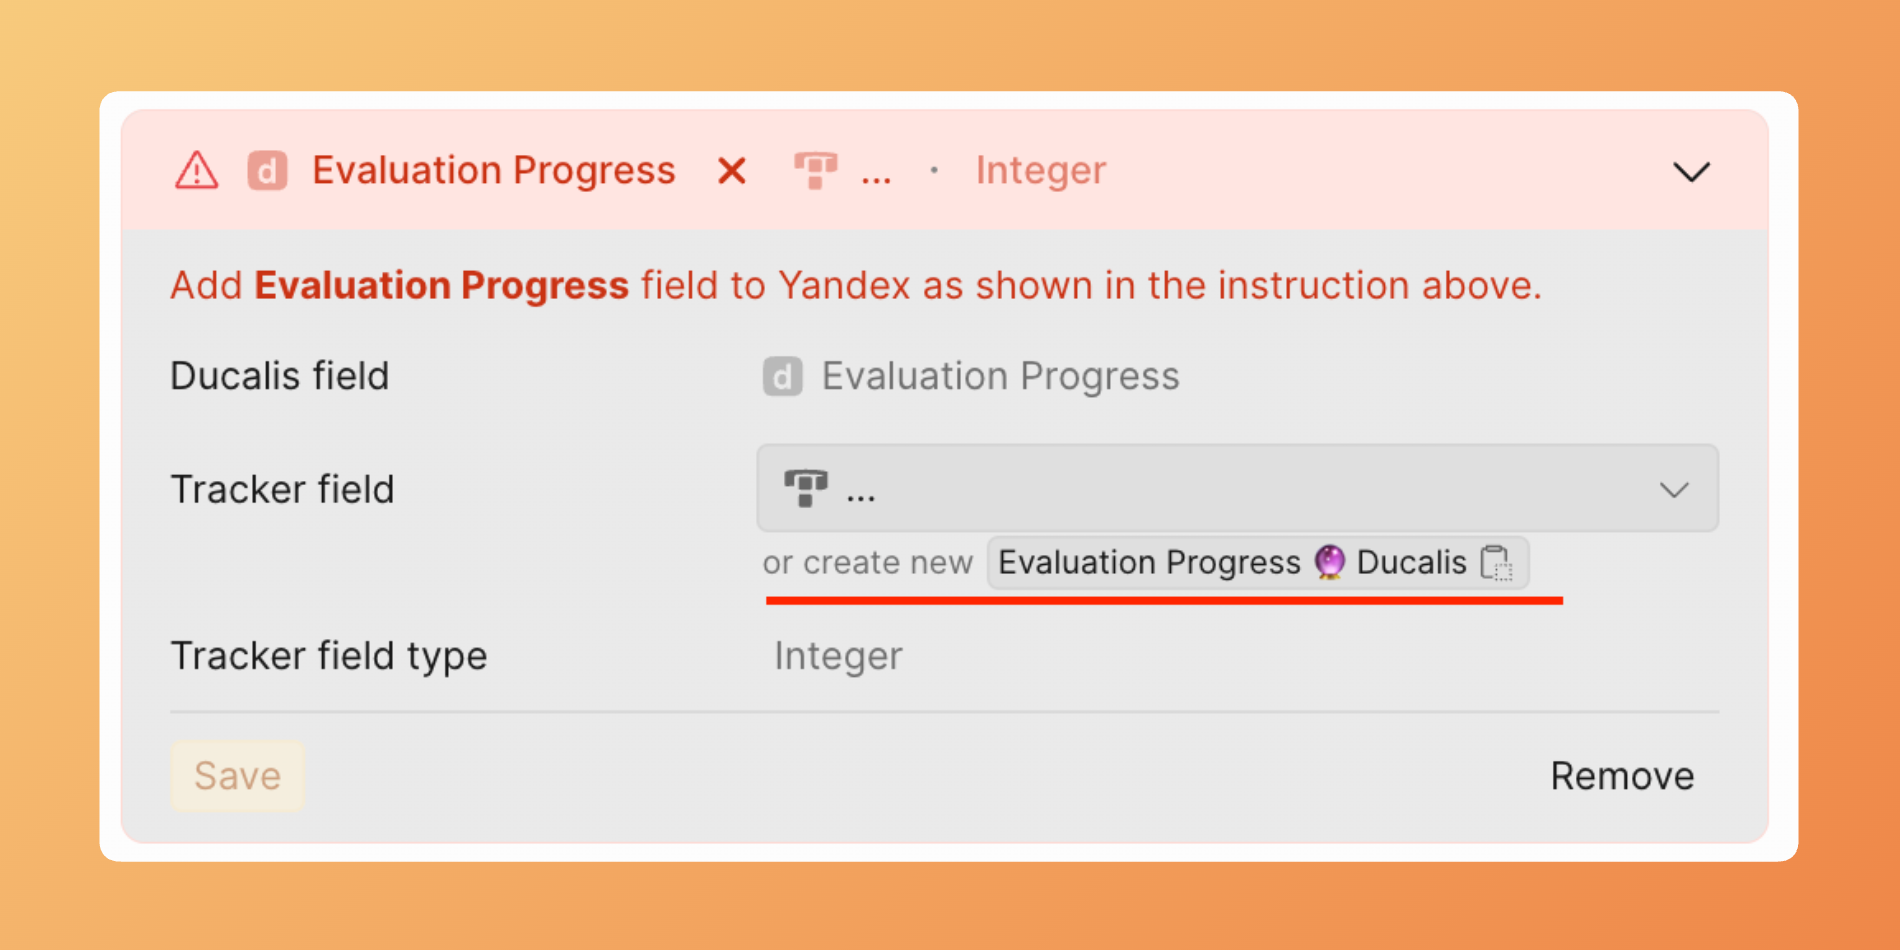
- Um ein anderes Feld hinzuzufügen, klicke auf Add Sync Back field (Sync-Back-Feld hinzufügen) und wähle das Ducalis-Feld, das du synchronisieren möchtest.
- Klicke neben Tracker field (Tracker-Feld) auf das Dropdown-Menü und wähle das existierende Yandex-Tracker-Feld für die Zuordnung aus.

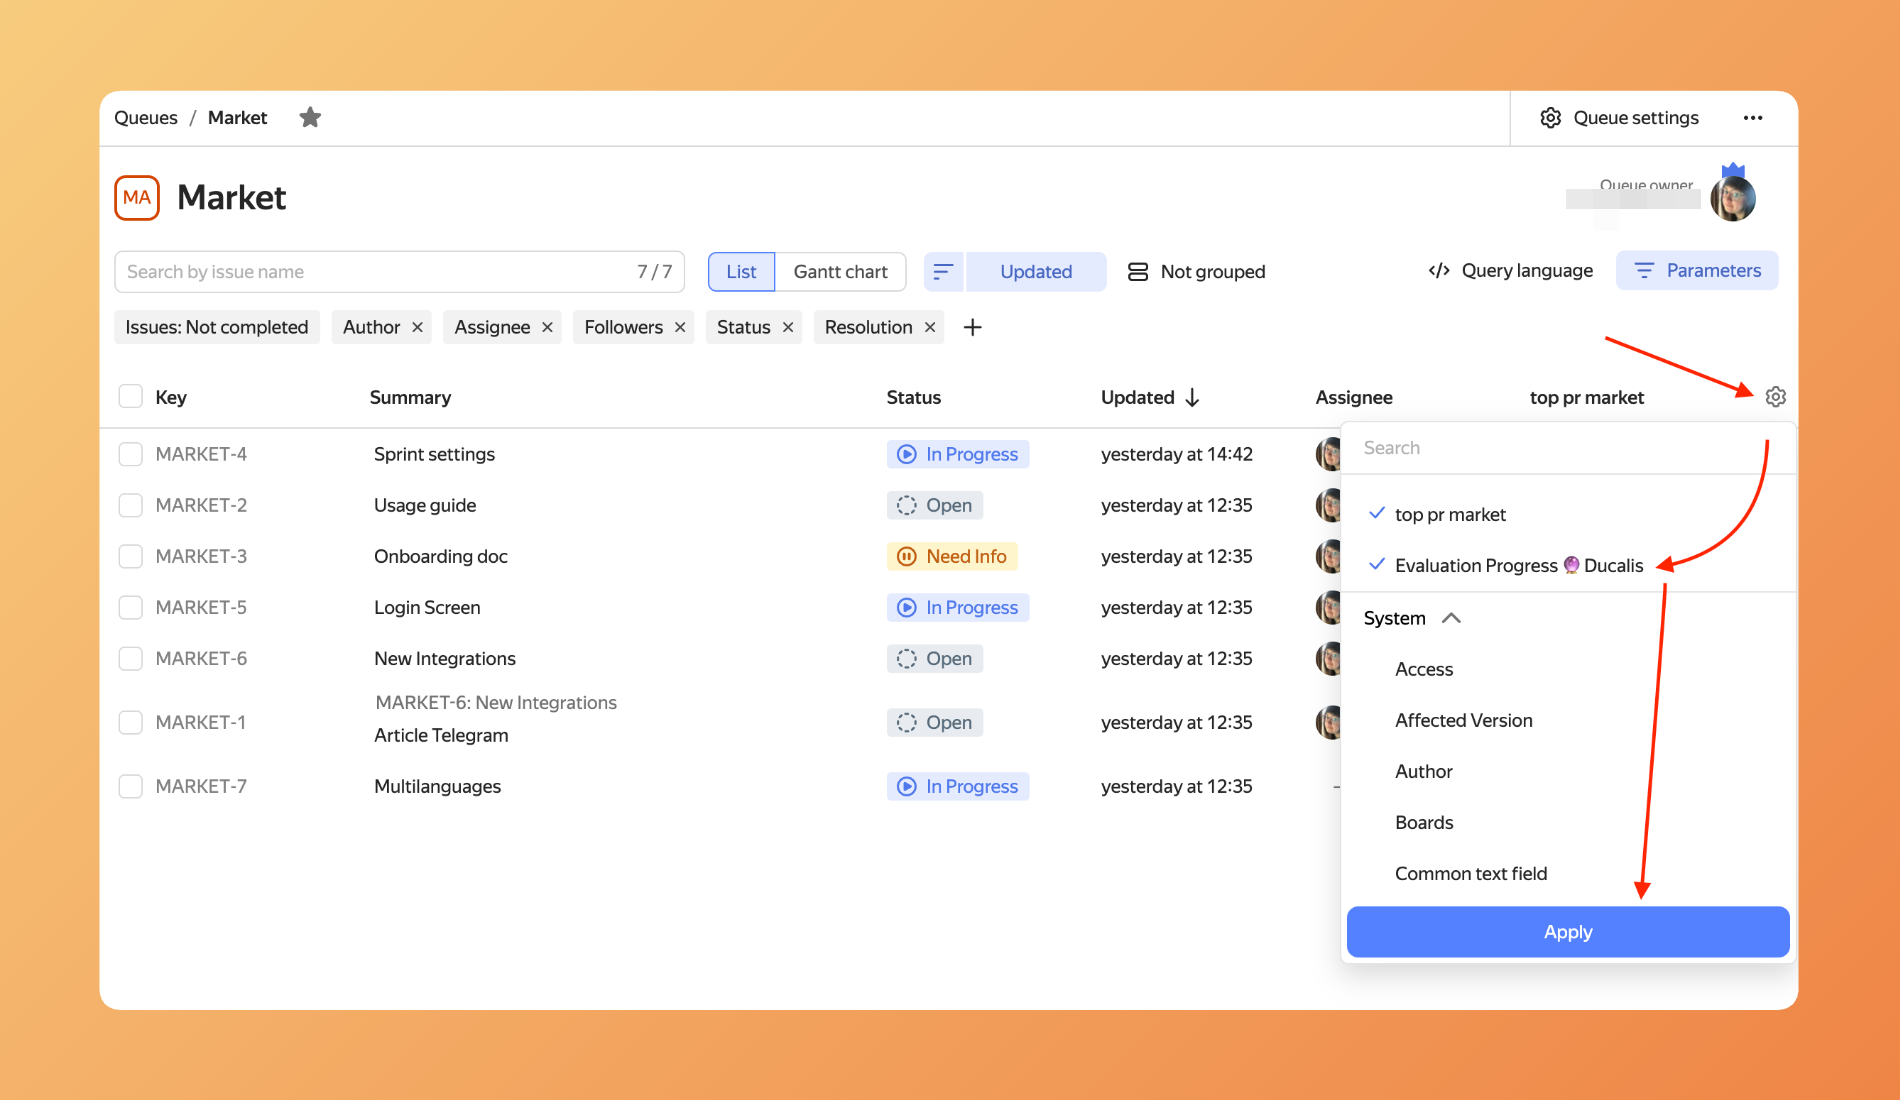
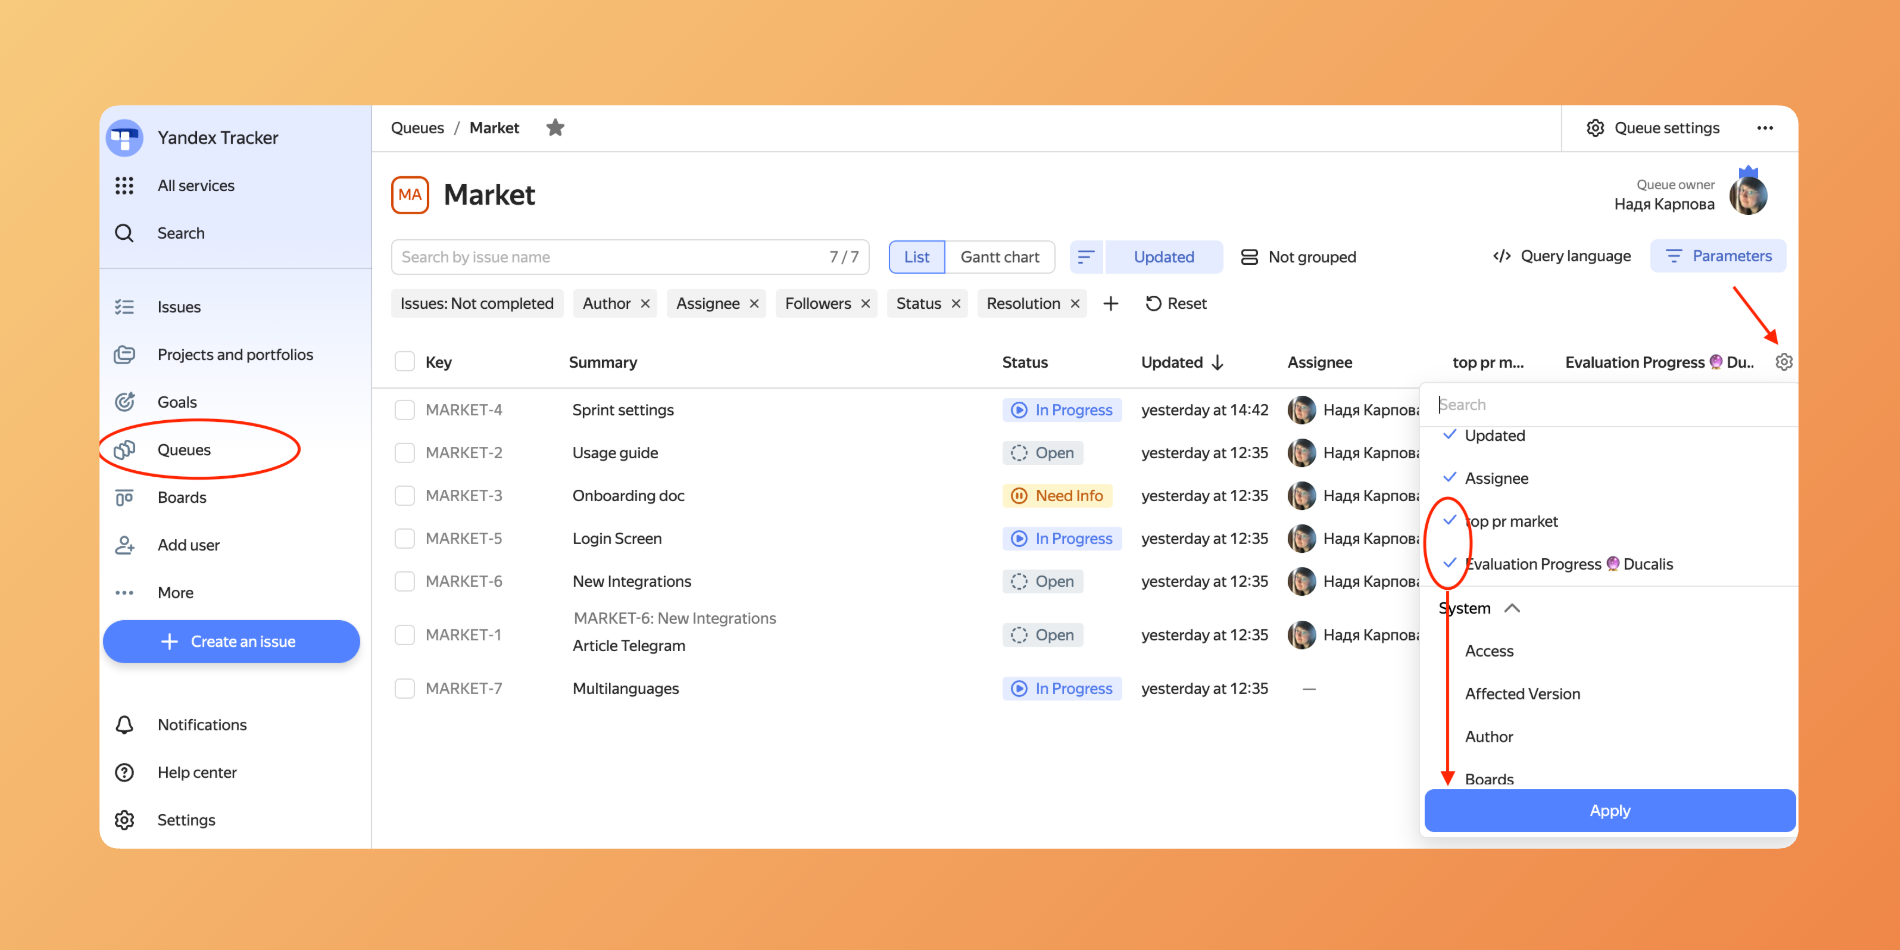
Um existierende Felder zu sehen, müssen sie in den Queues sichtbar sein.
Feldtypen müssen übereinstimmen. Der existierende Feldtyp muss mit dem Zielfeld in Ducalis identisch sein.
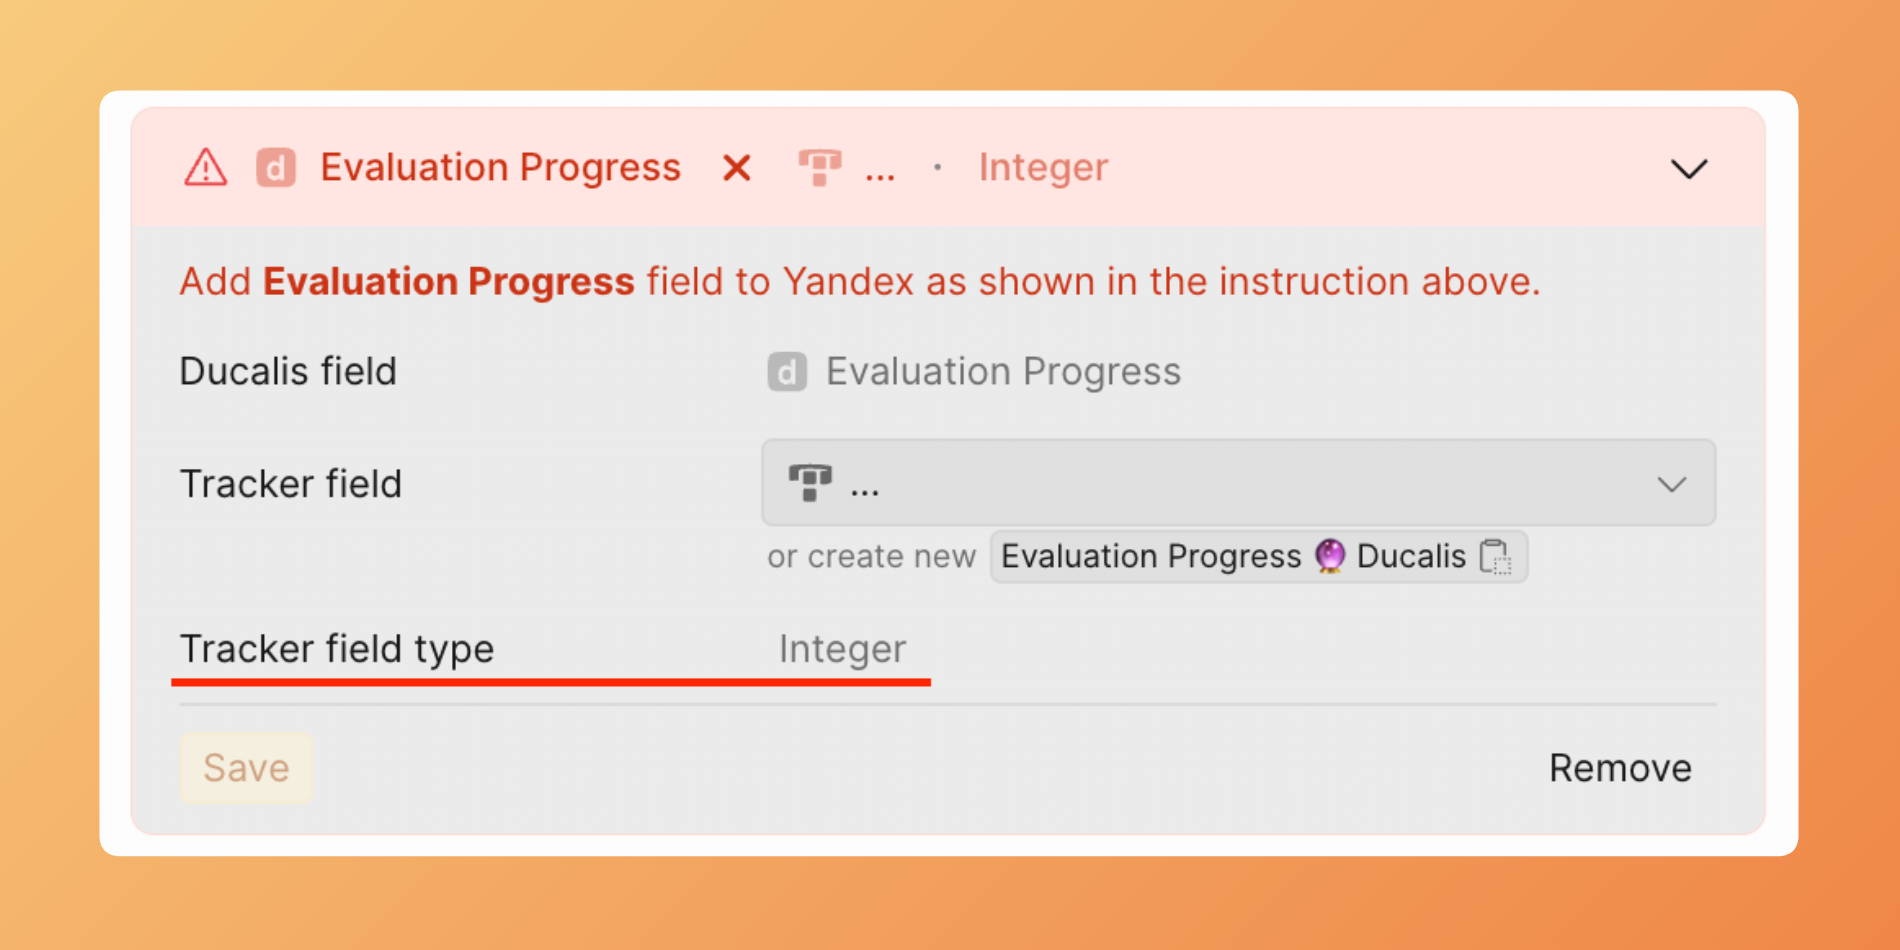
- Klicke auf Save (Speichern).
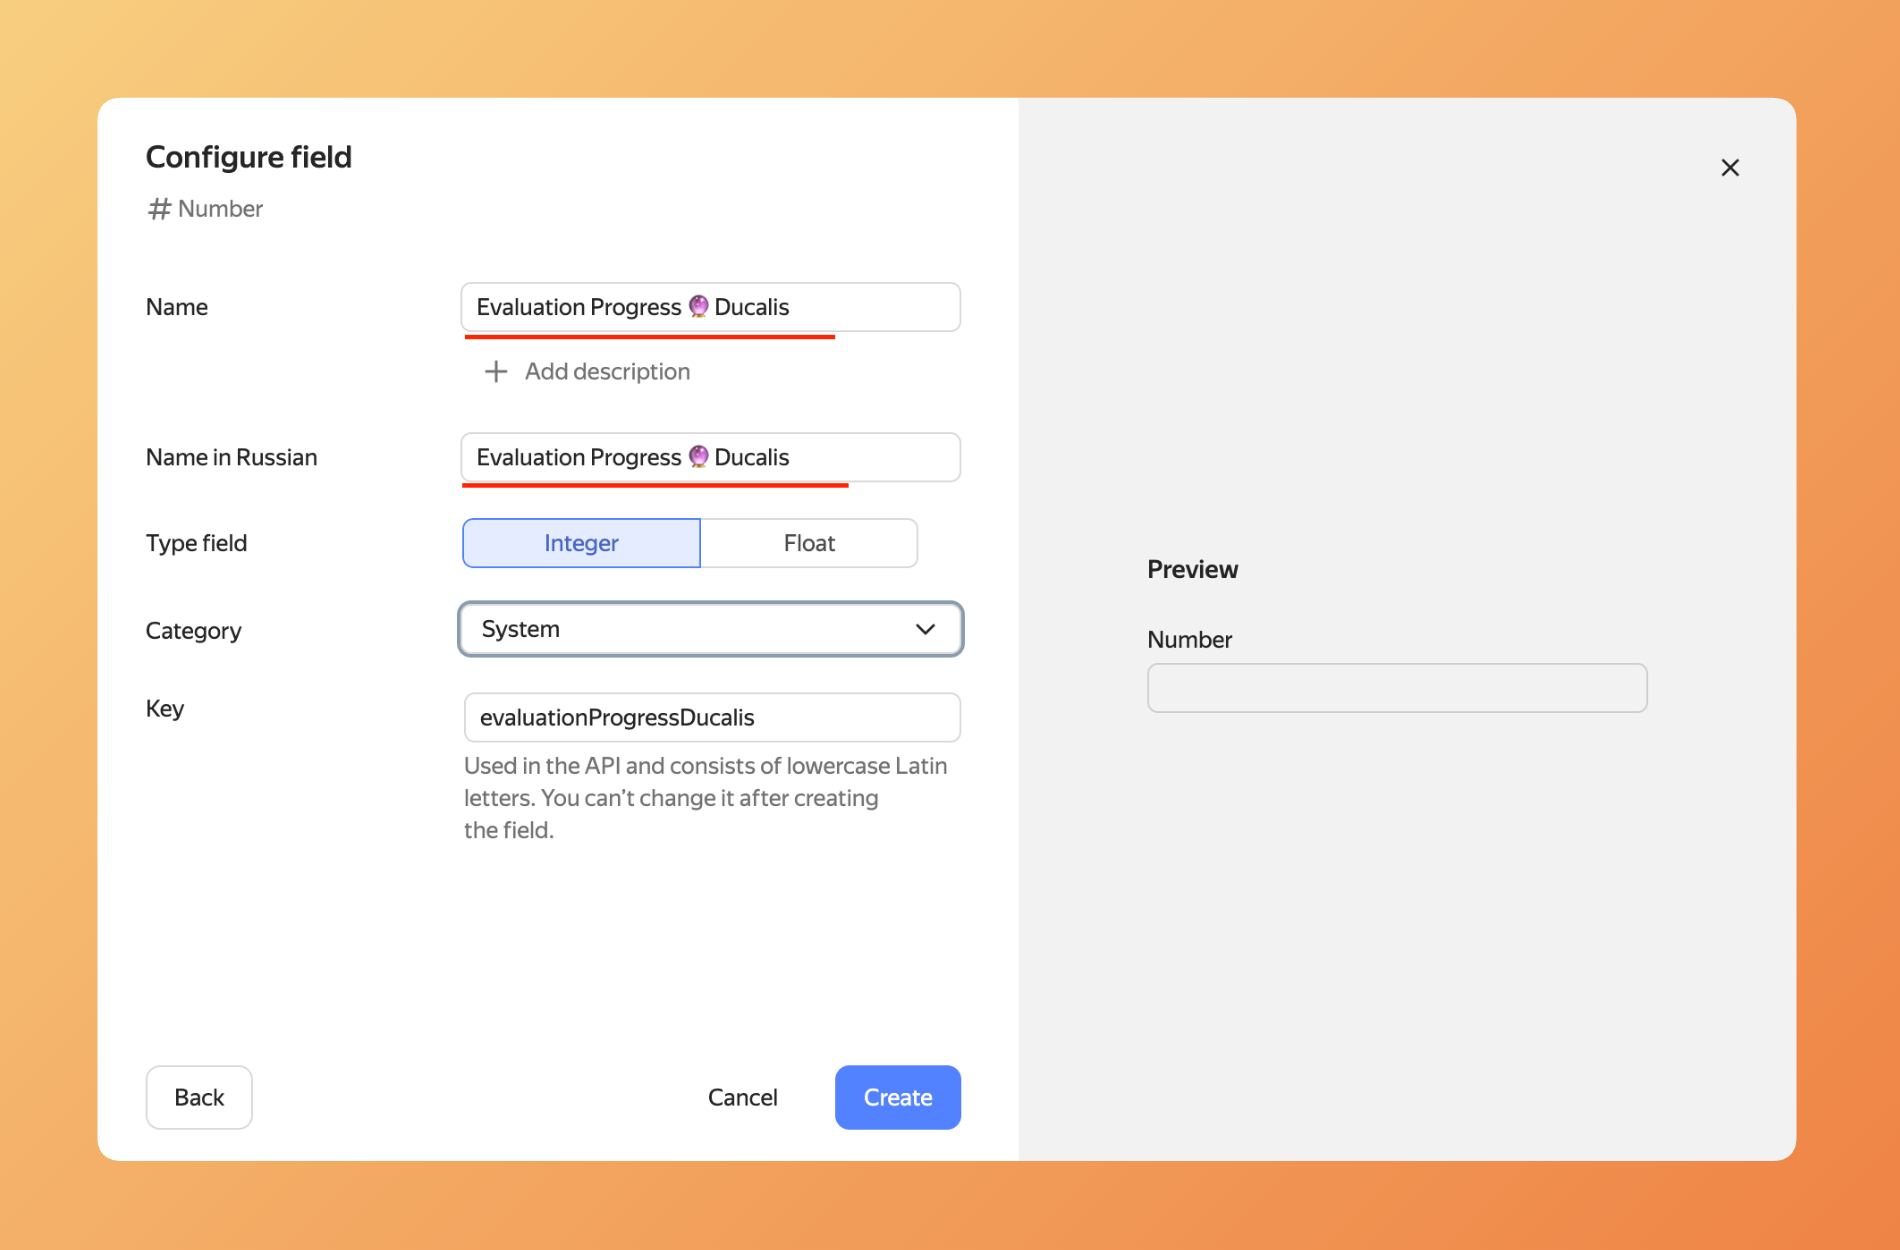
Felder in Yandex.Tracker erstellen
Anstatt auf existierende Felder zuzuordnen, kannst du neue benutzerdefinierte Felder in Yandex Tracker speziell für Ducalis-Daten erstellen.
Wenn du eine Queue im Ducalis-Board-Filter hast, erstelle entweder globale oder lokale Felder. Wenn du zwei oder mehr Queues im Ducalis-Board-Filter hast, erstelle NUR globale Felder.
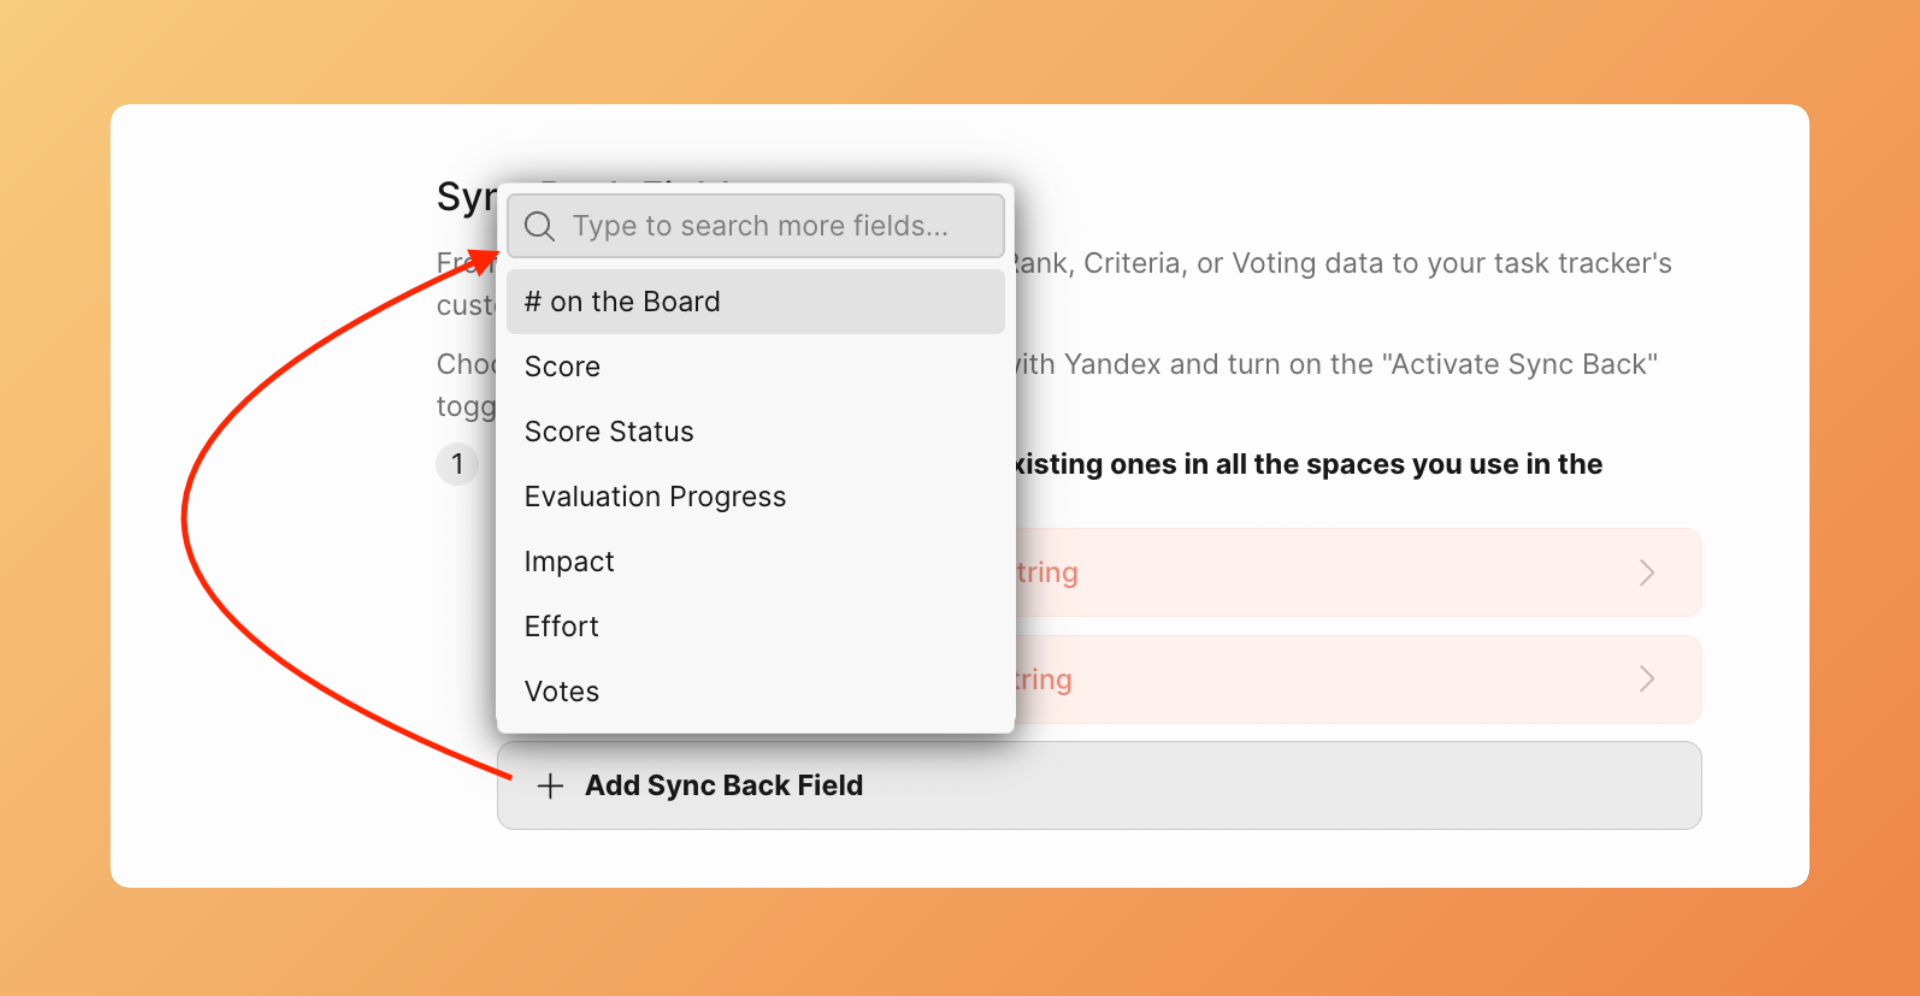
- Gehe in Yandex.Tracker zu Administration > Fields (Felder). Klicke auf Create Field (Feld erstellen).
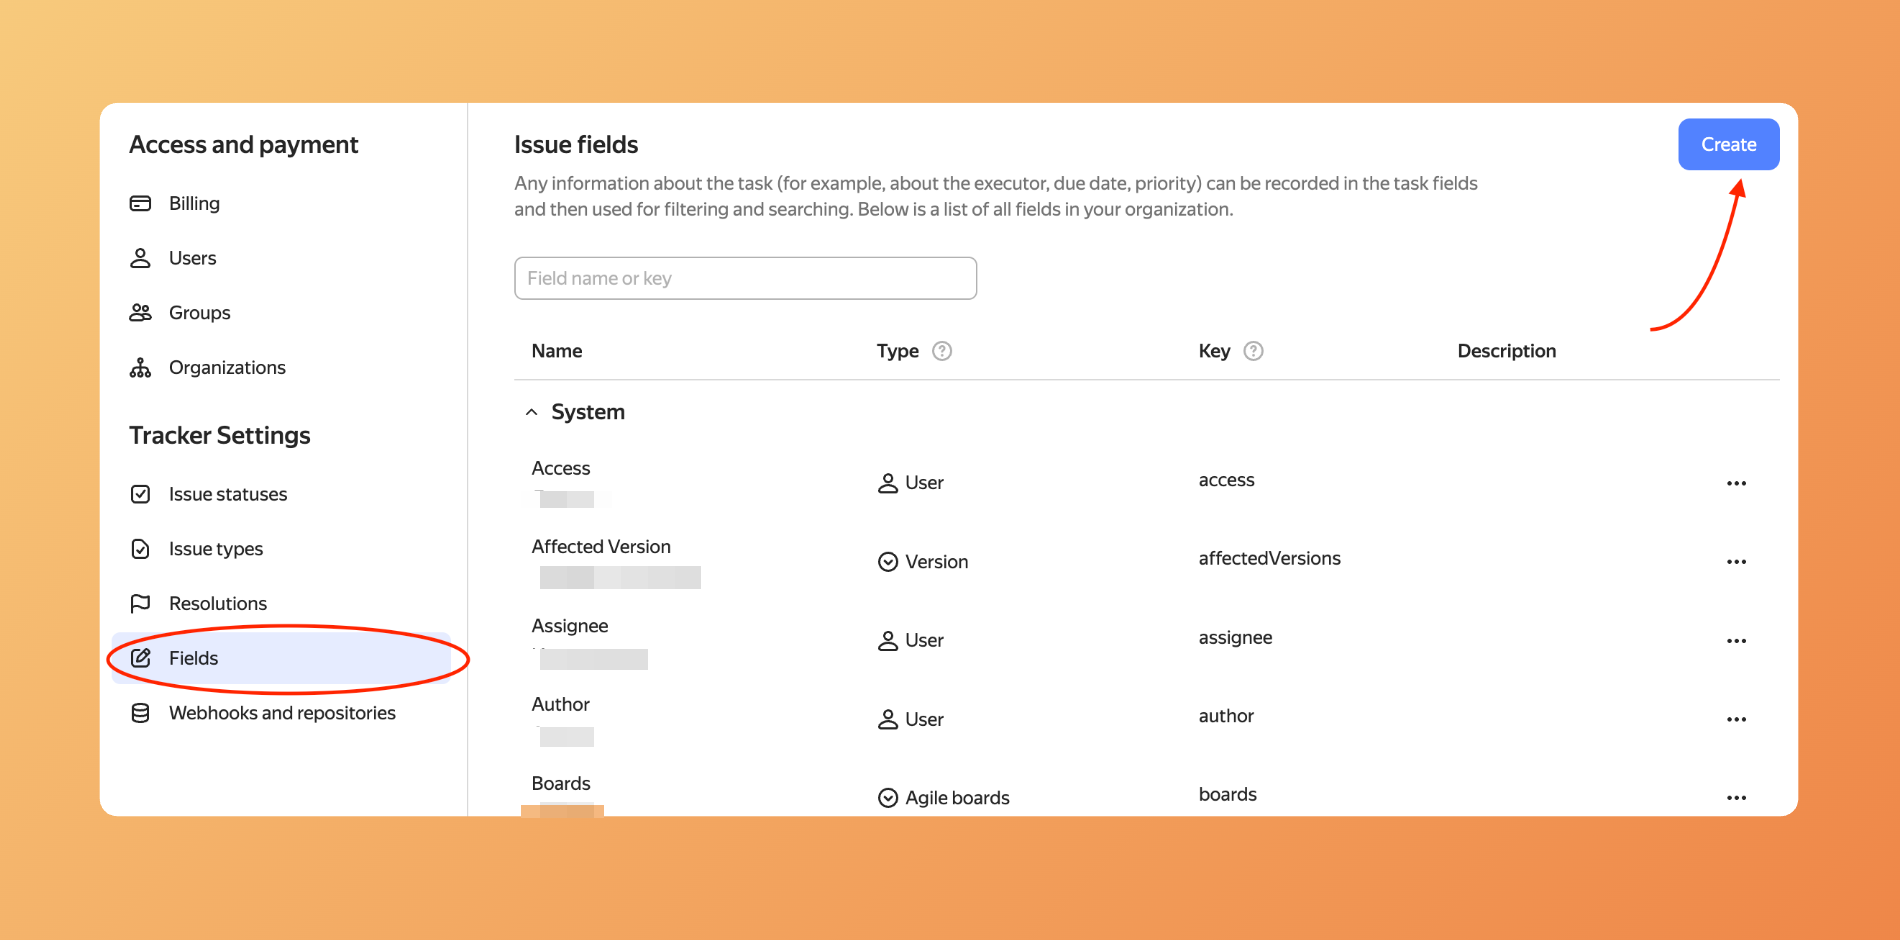
- Wähle den Feldtyp während der Erstellung in Yandex Tracker. Beachte, dass der Feldtyp mit dem Zielfeld in Ducalis übereinstimmen muss.
- Kopiere den Feldnamen aus Ducalis und füge ihn in das Feld-Erstellungsformular in Yandex Tracker ein.
- Mache die Felder für die Queues verfügbar, die du mit Ducalis synchronisierst.
- Das Feld erscheint in Ducalis.
Felder sichtbar machen
Um sowohl zugeordnete als auch neu erstellte Felder in Ducalis zu sehen, musst du sie in den Queues sichtbar machen, die im Board-Filter verwendet werden.
Gehe zu Queues, wähle die Queues aus und mache die Felder in jeder Queue sichtbar, die im Ducalis-Board verwendet wird.
Sync Back aktivieren
Nachdem du Felder erstellt oder zugeordnet hast, aktiviere die Synchronisierung.

- Schalte im Abschnitt Sync-Back Fields (Sync-Back-Felder) den Toggle Activate Sync Back (Sync Back aktivieren) ein.
- Sync Back ist jetzt aktiv.
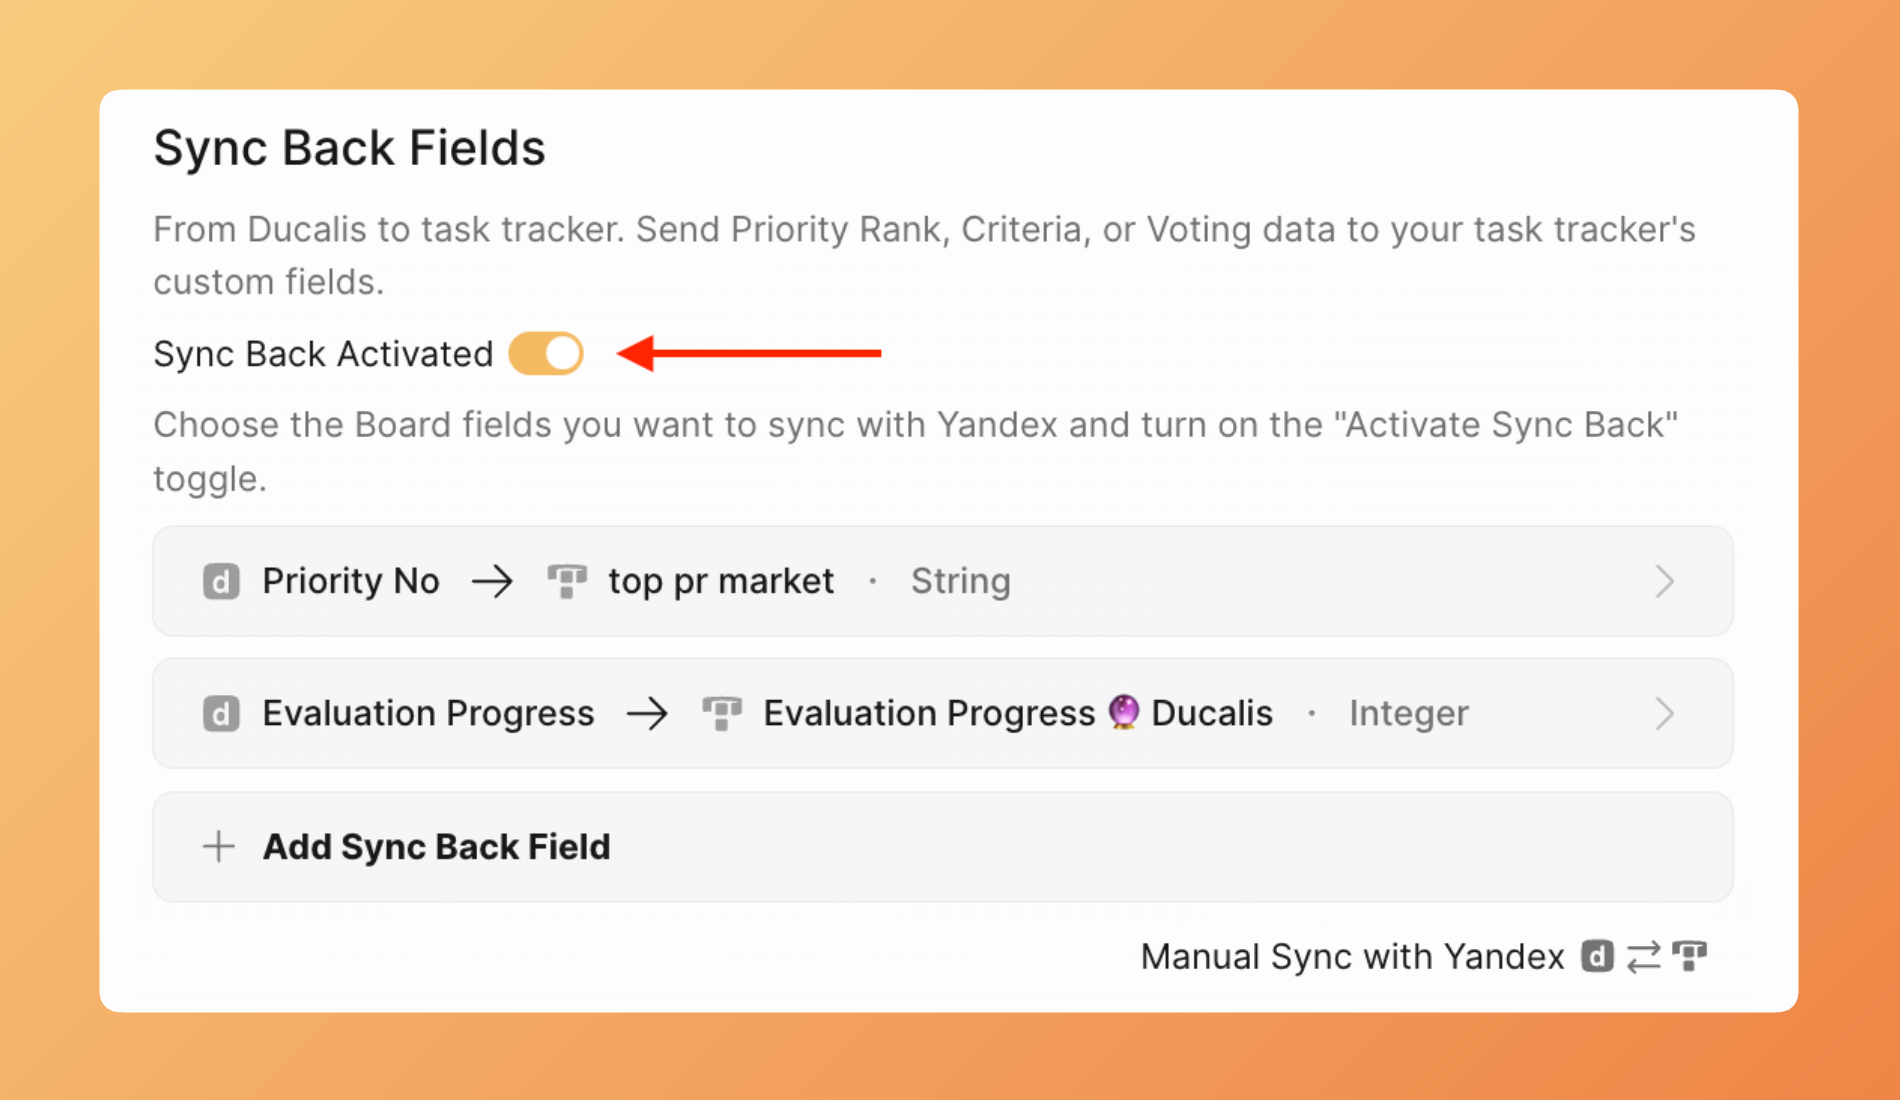
- Ducalis synchronisiert sofort die aktuellen Priorisierungsdaten mit Yandex Tracker.
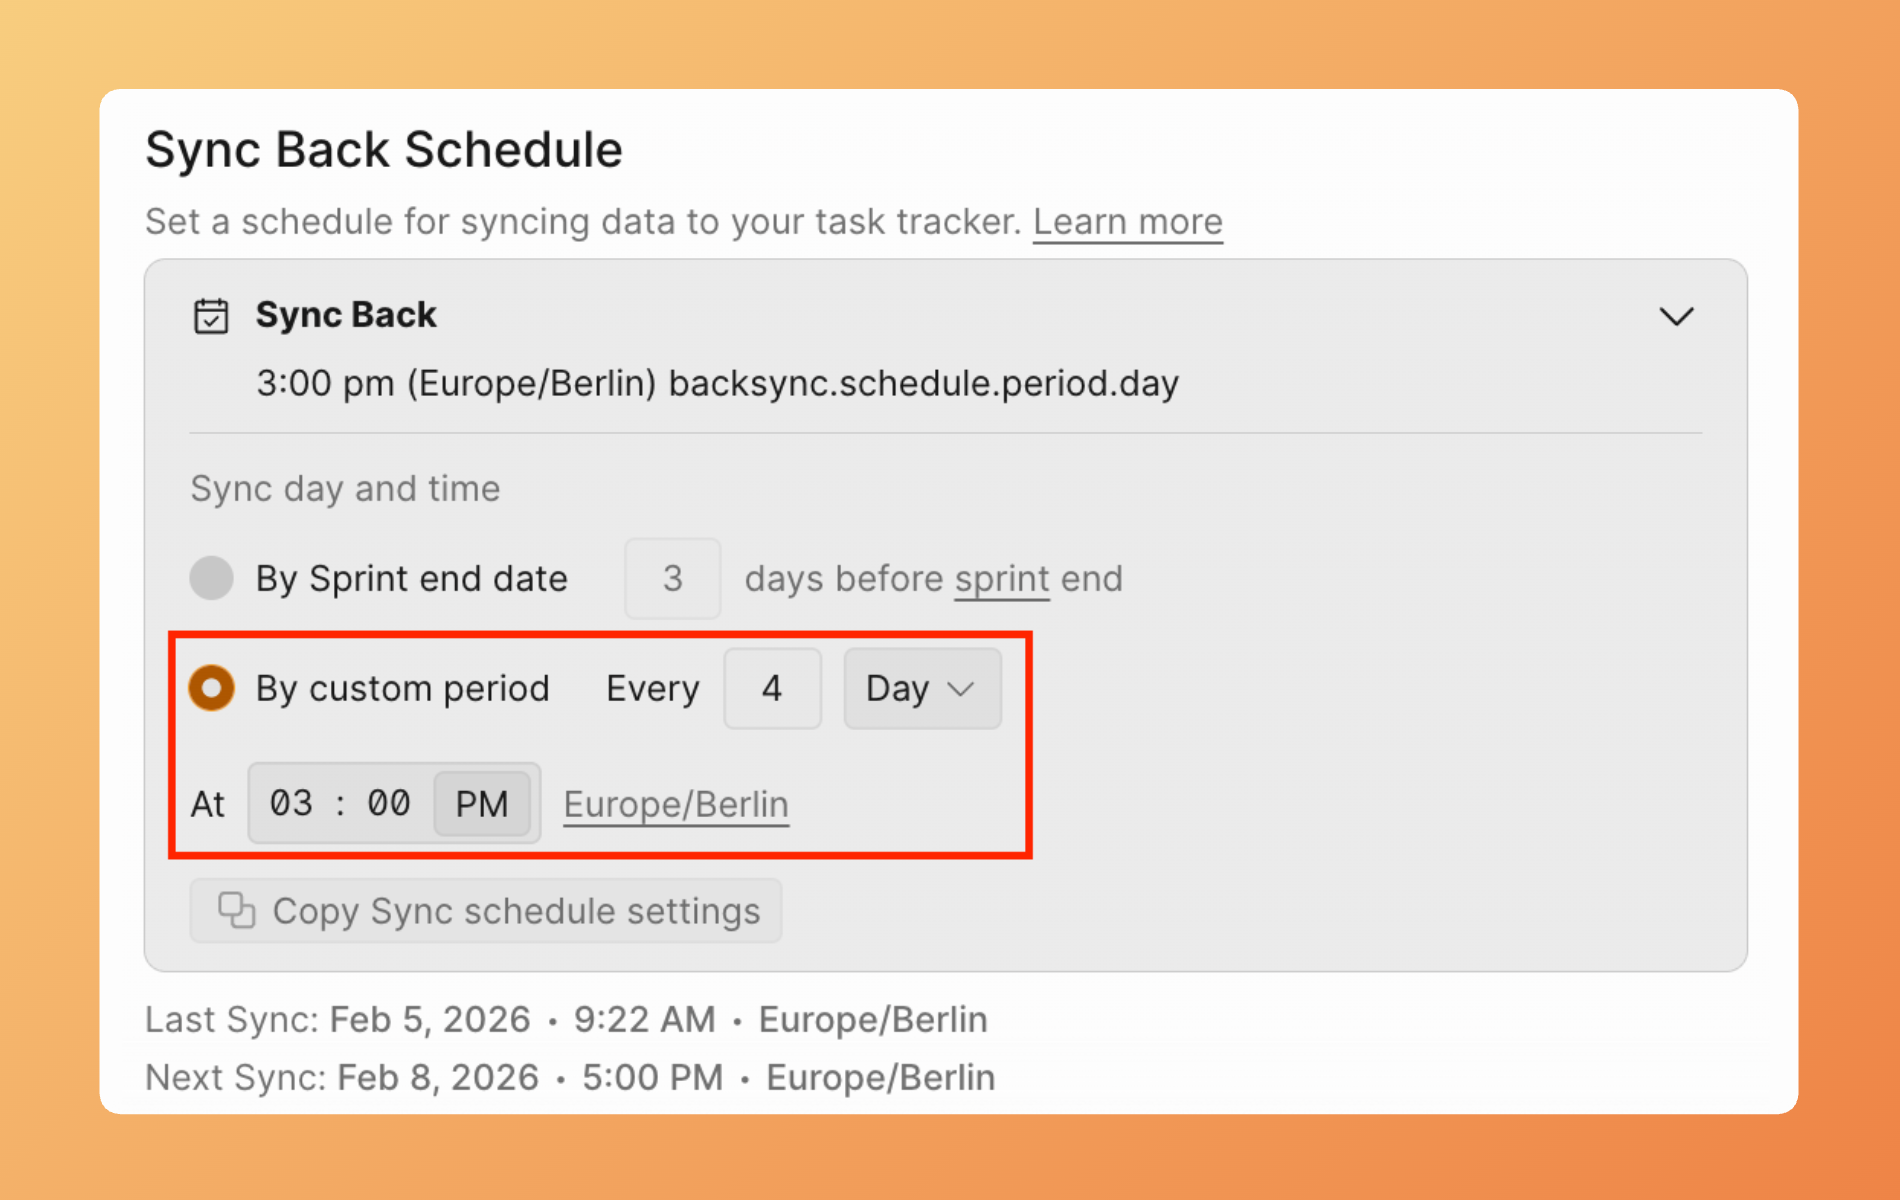
Automatische Synchronisierung planen
Konfiguriere, wann Ducalis aktualisierte Priorisierungsdaten an Yandex Tracker sendet.
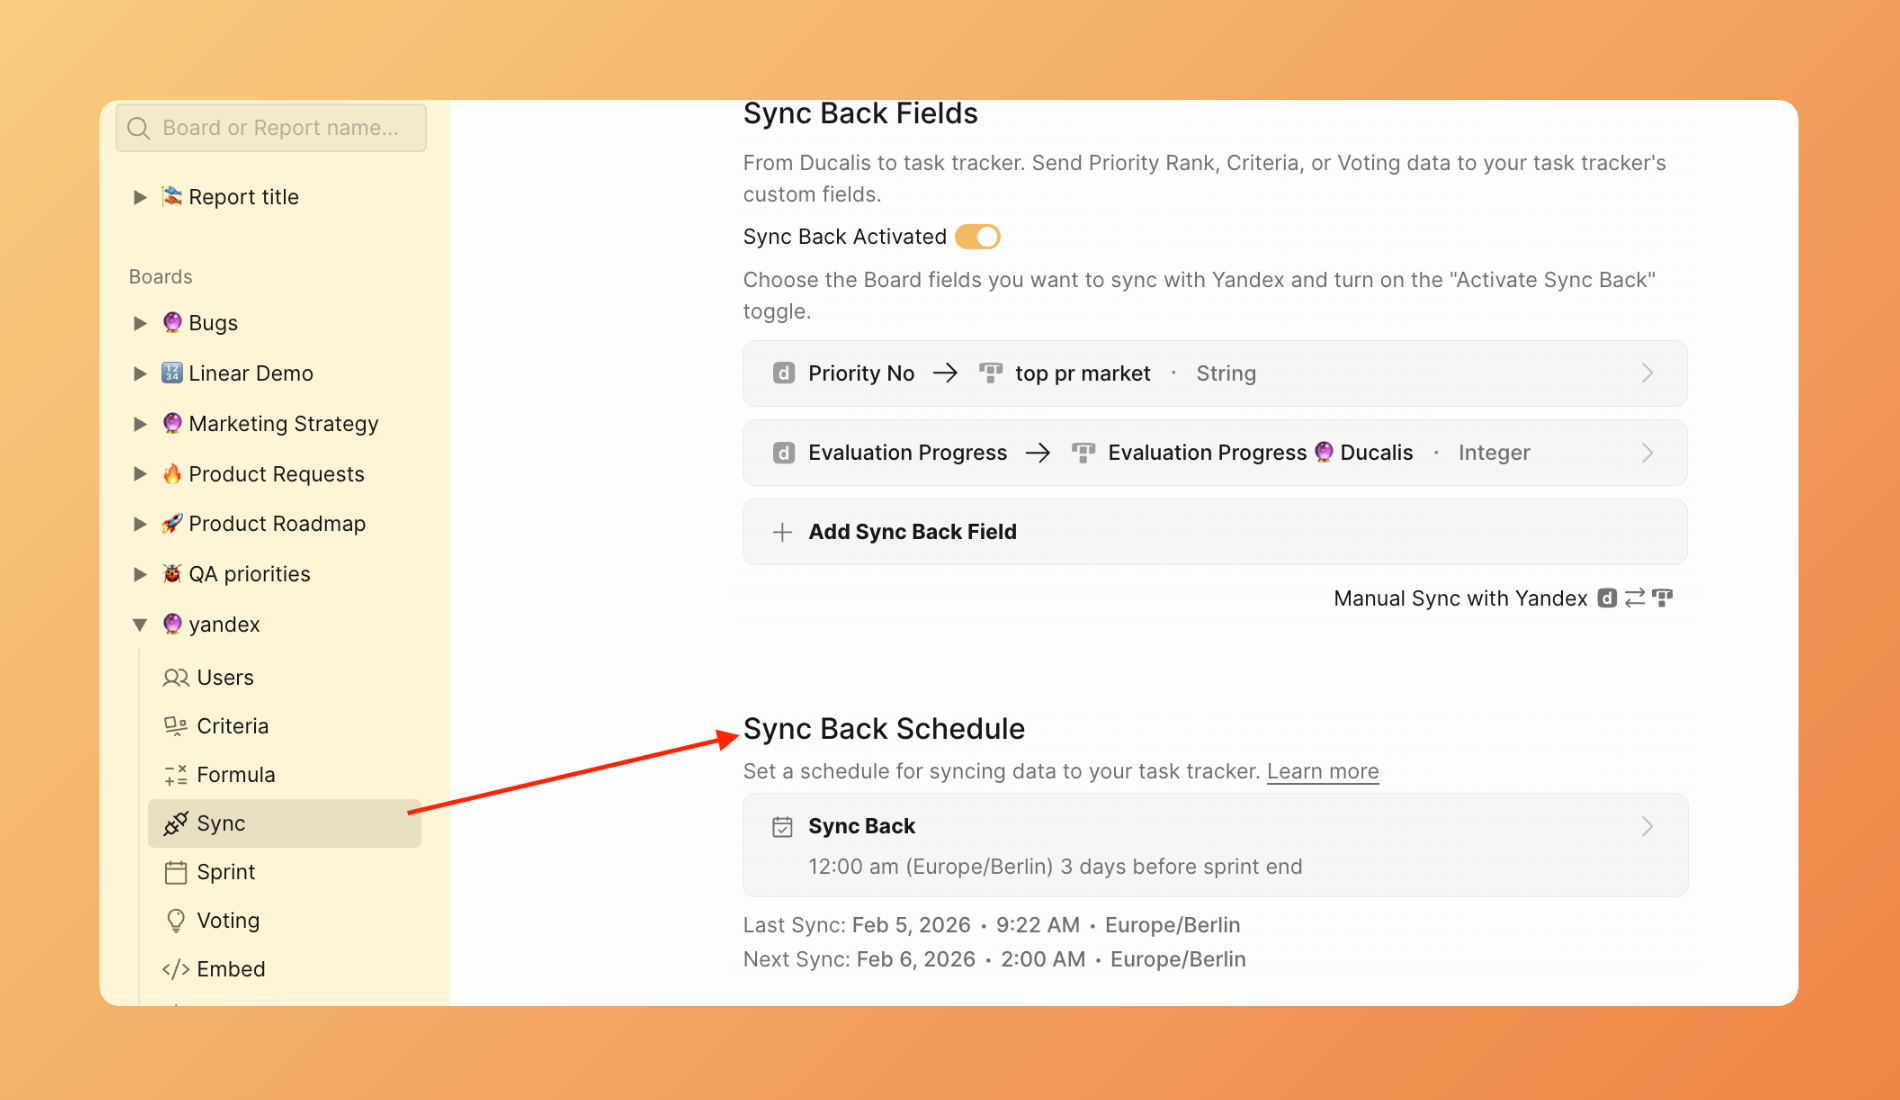
- Finde im Abschnitt Sync settings (Sync-Einstellungen) den Abschnitt Sync Back Schedule (Sync-Back-Zeitplan).
-
Wähle dein Sync-Timing:
By sprint end date (Nach Sprint-Enddatum) — Synchronisiert, wenn dein Sprint endet. Nützlich, wenn du nur finale Prioritäten nach der Bewertung senden möchtest.
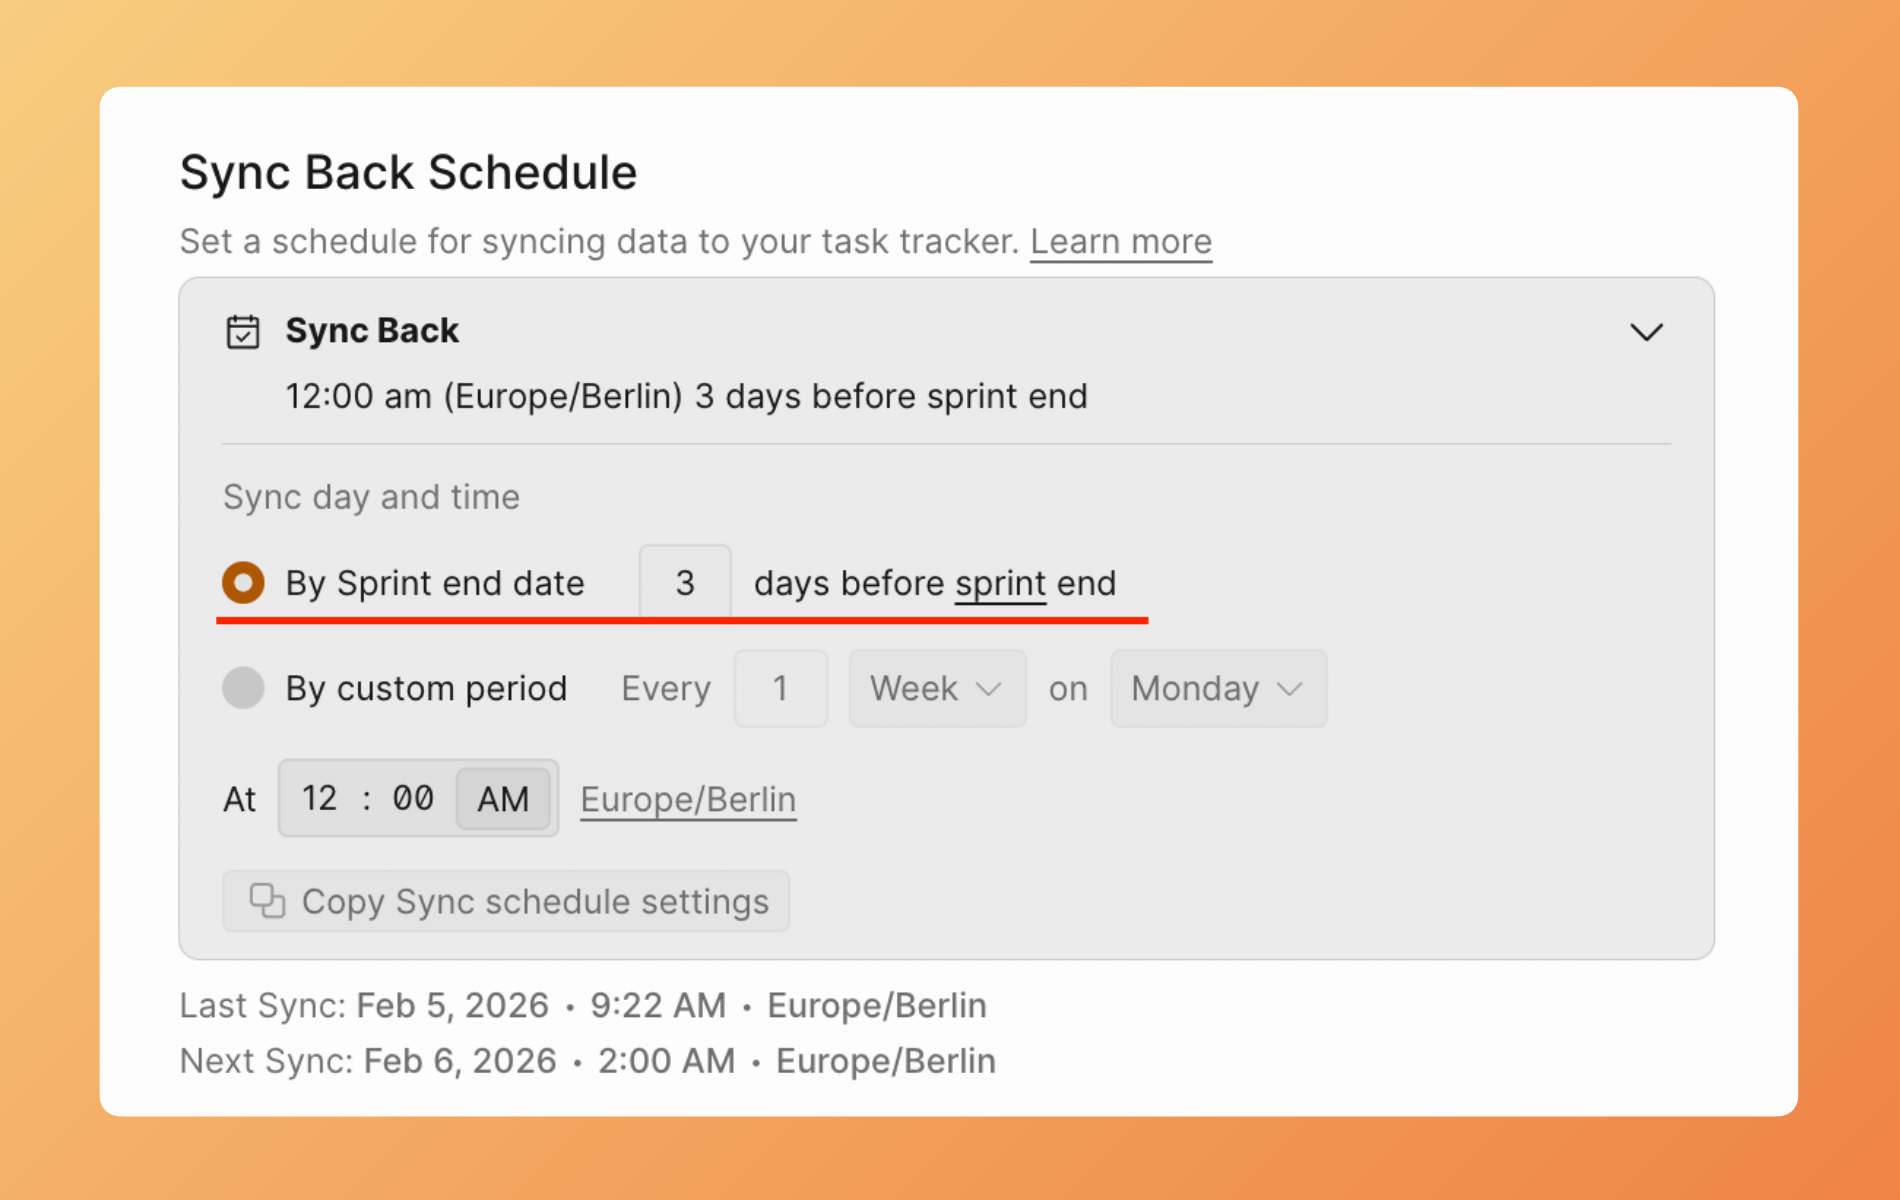
By custom period (Nach benutzerdefiniertem Zeitraum) — Lege ein bestimmtes Intervall (täglich, wöchentlich usw.) für automatische Synchronisierungen fest.
Manueller Sync Back
Löse jederzeit eine Synchronisierung aus, ohne auf den Zeitplan zu warten.
-
Gehe zu Sync settings (Sync-Einstellungen).
-
Klicke auf Manual Sync with Yandex (Manuelle Synchronisierung mit Yandex).
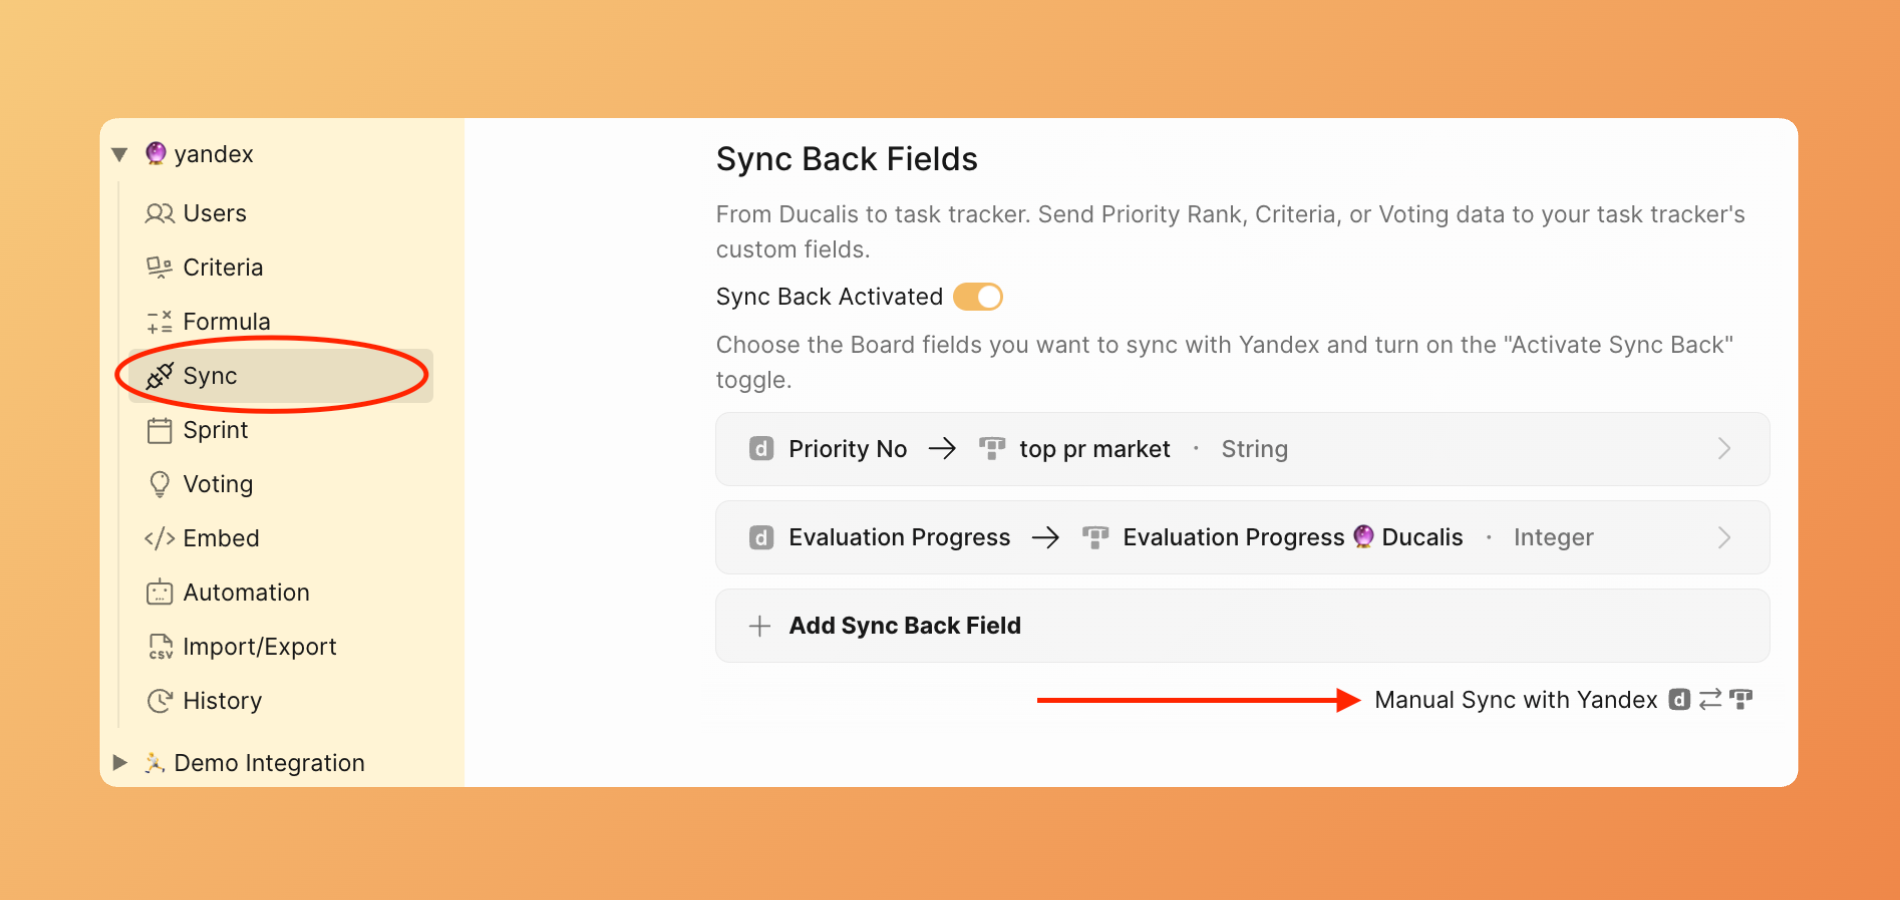
- Ducalis sendet aktuelle Priorisierungsdaten sofort an Yandex.Tracker.
Sync Back deaktivieren
So stoppst du die Synchronisierung von Priorisierungsdaten zu Yandex.Tracker:
-
Gehe zu Sync settings (Sync-Einstellungen).
-
Schalte Activate Sync Back (Sync Back aktivieren) aus.
-
Existierende Daten in Yandex.Tracker-Feldern bleiben erhalten. Keine weiteren Updates werden gesendet.