Adım 3. Sürüm Notuna Duyuru Ekleme
Duyurular, yayınlanan özelliklerinizi açıklar. Sürüm Notu e-postalarında, Changelog sayfasında ve Changelog widget'ında görünür.
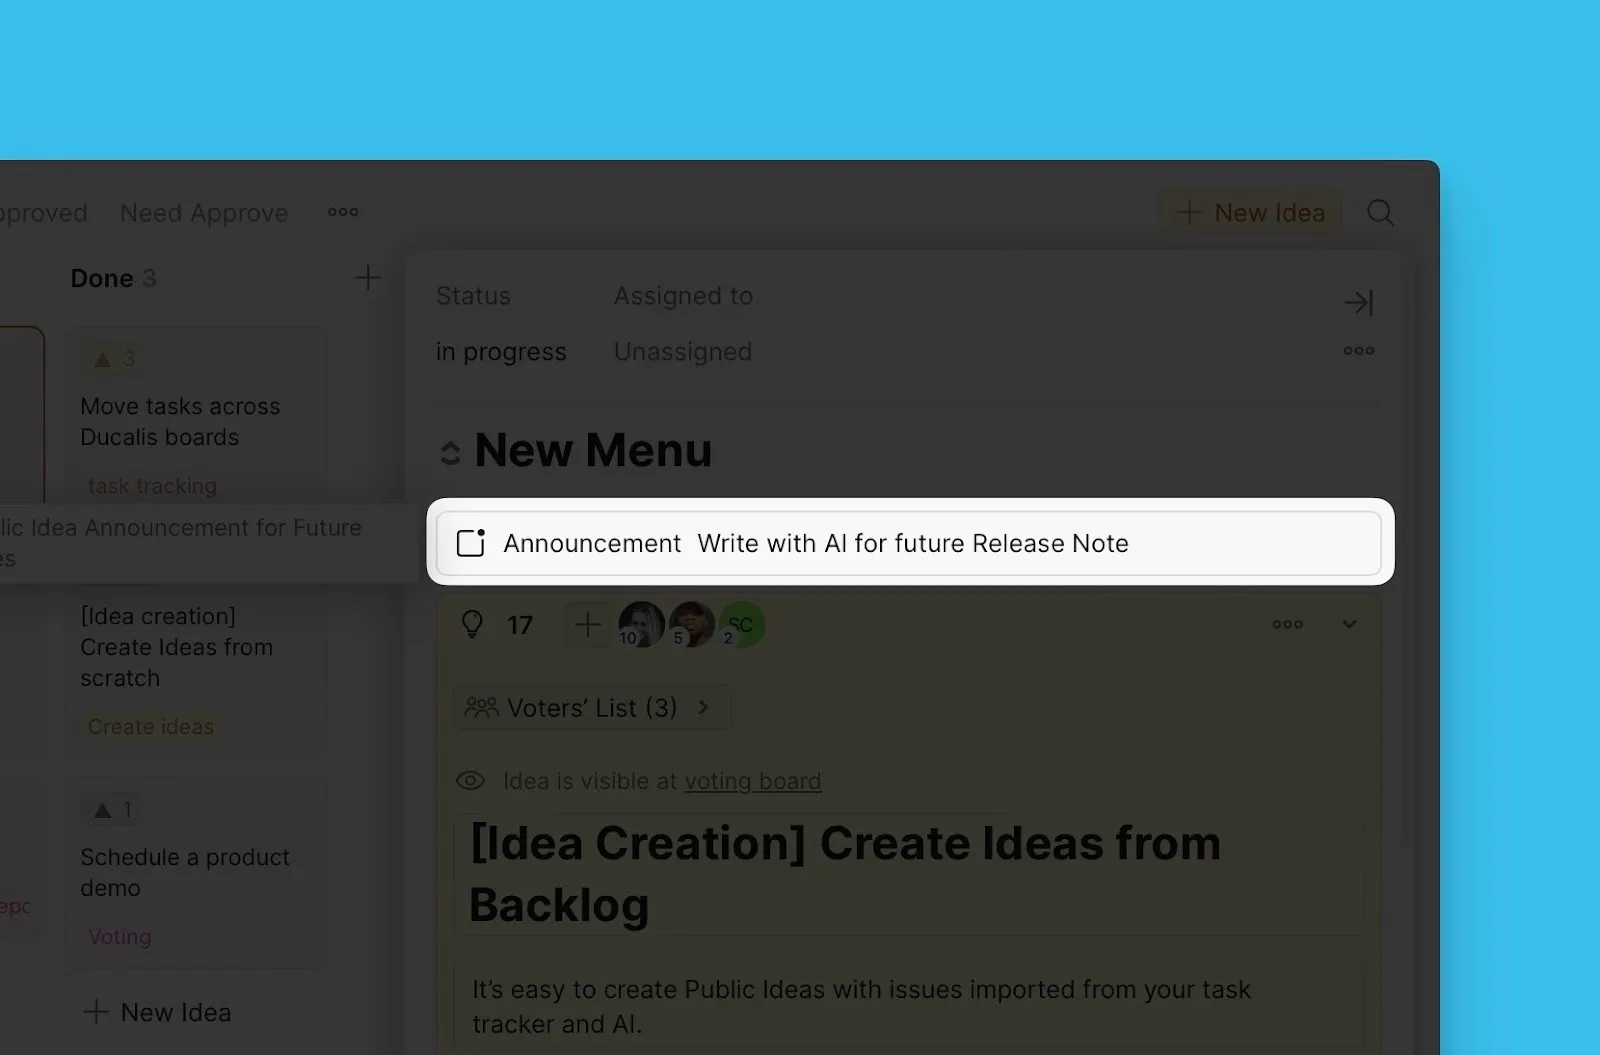
AI kullanarak veya manuel olarak Duyuru oluşturun.
AI kullanarak Duyuru oluşturma
Ducalis AI'yi kullanarak Duyuruları otomatik olarak oluşturun.
-
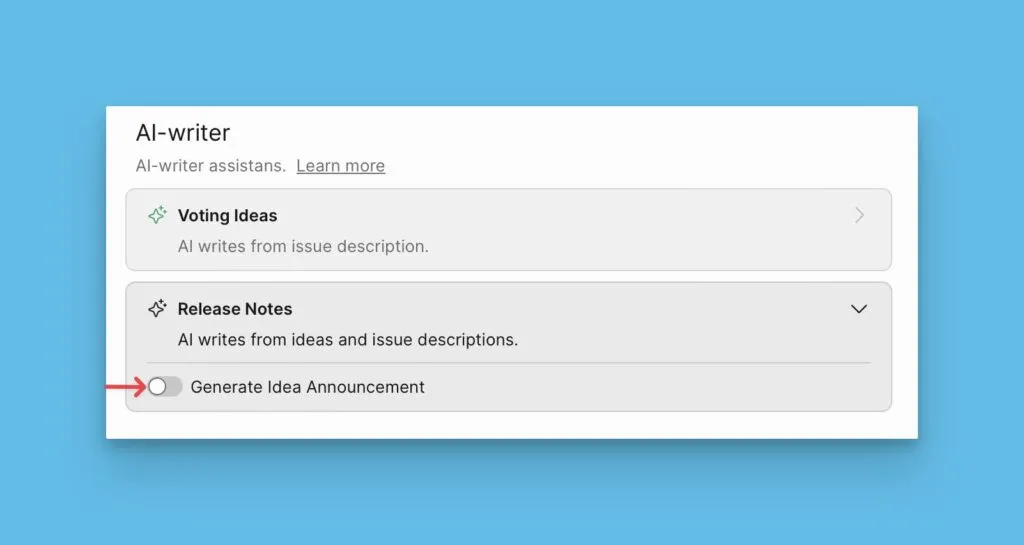
Voting Board Settings (Oylama Panosu Ayarları) → Automation (Otomasyon) bölümüne gidin.
-
Ducalis AI bölümüne ilerleyin.
-
Auto-Generate Announcement by Idea (Fikre Göre Otomatik Duyuru Oluştur) altında, ayarı etkinleştirin.
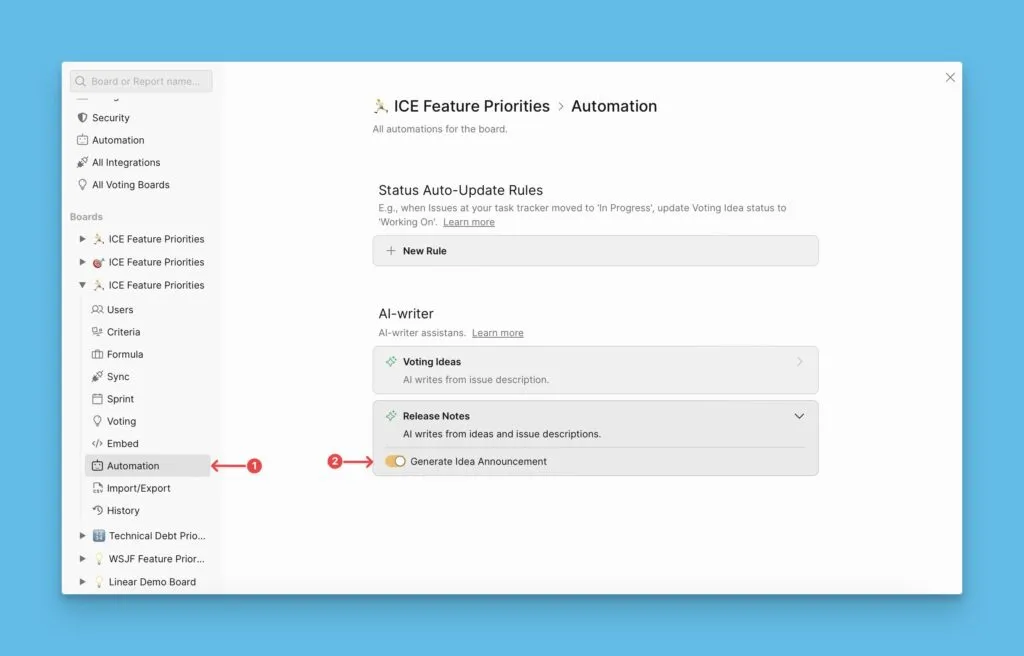
Bu özellik etkinleştirildiğinde, Ducalis AI bir Fikir Done (Tamamlandı) durumuna ulaştığında otomatik olarak bir Duyuru oluşturur.
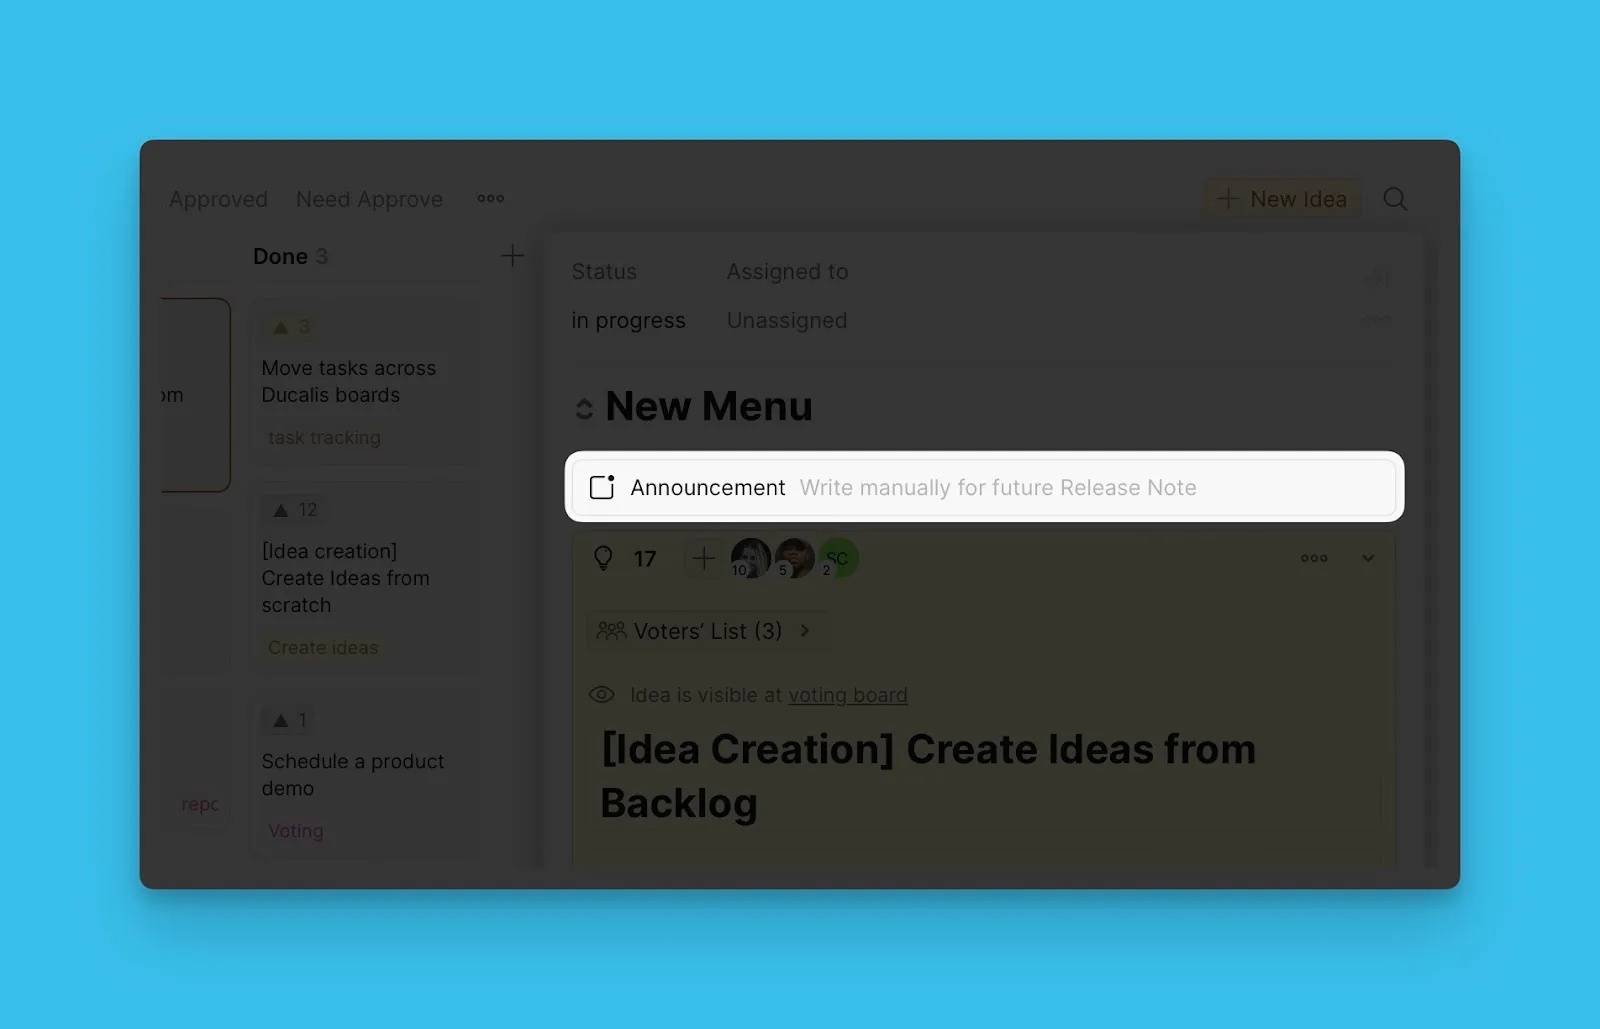
Manuel olarak Duyuru oluşturma
Özel içerik tercih ediyorsanız Duyuruları manuel olarak yazın.
-
Voting Board Settings (Oylama Panosu Ayarları) → Automation (Otomasyon) bölümüne gidin.
-
Ducalis AI bölümüne ilerleyin.
-
Auto-Generate Announcement by Idea (Fikre Göre Otomatik Duyuru Oluştur) altında, ayarı devre dışı bırakın.
-
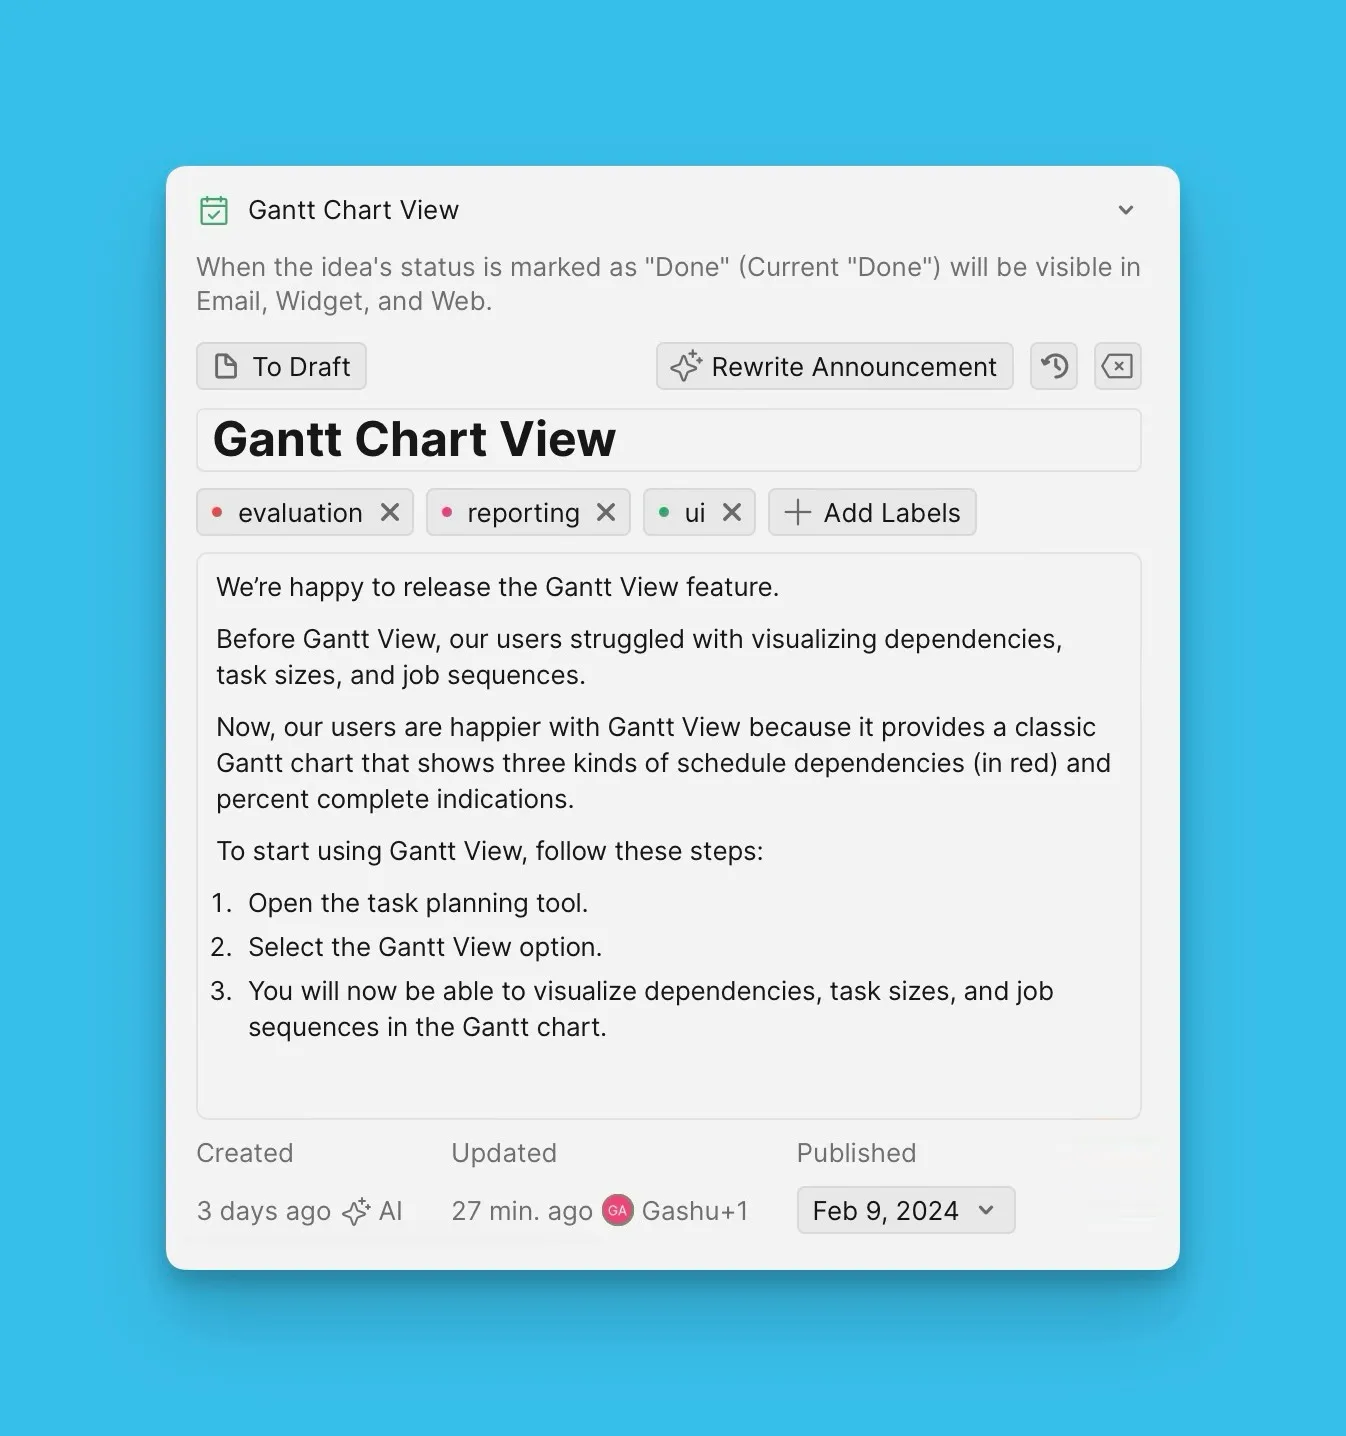
Sürüm Notları bölümünden manuel olarak Duyuru oluşturun.
Duyuru oluşturma hakkında daha fazla bilgi edinin.
Önceden Duyuru oluşturma
Fikirleri Done (Tamamlandı) durumuna taşıdığınızda hazır olmaları için özellikleri yayınlamadan önce Duyuru oluşturun.
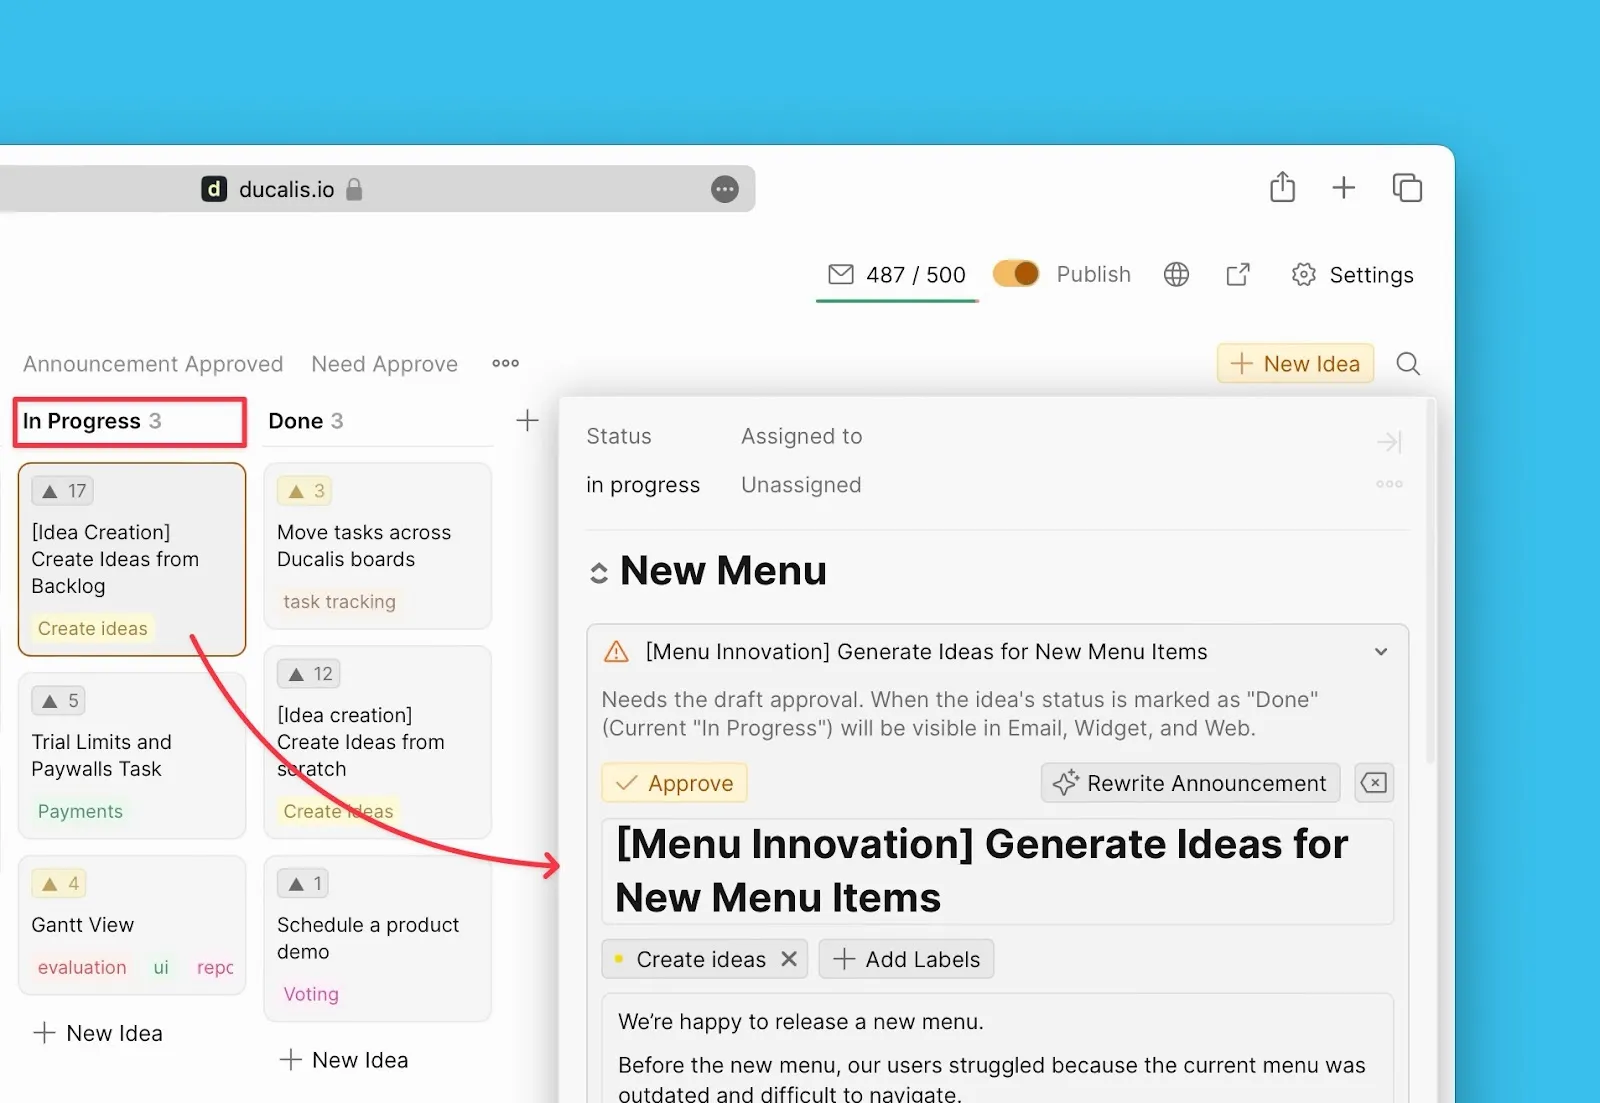
Bir Duyuru oluşturduktan sonra (AI veya manuel olarak), Sürüm Notu e-postalarına eklenmeden önce onaylayın.
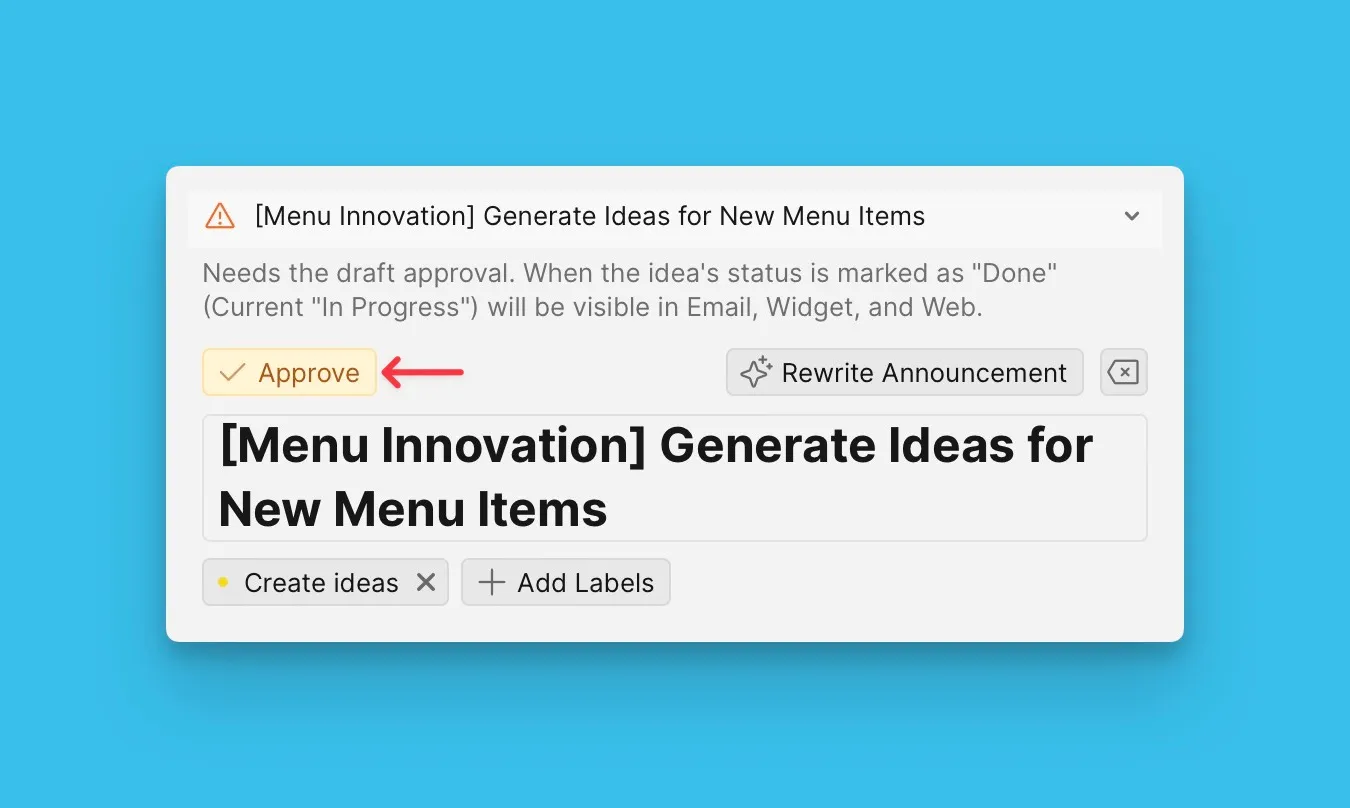
- Oylama Panonuzdaki Release Notes (Sürüm Notları) bölümüne gidin.
- Oluşturulan veya manuel Duyuruyu gözden geçirin.
- Sürüm Notu e-postaları için kullanılabilir hale getirmek için Approve (Onayla) düğmesine tıklayın.
Özellik yayınlandıktan sonra Duyuru oluşturma
Özellikleri yayınladıktan sonra Sürüm Notu e-postanızı hazırlarken Duyuru oluşturun.
Duyurular, Sürüm Notu e-postanızın Ana özellik bloğunda görünür.
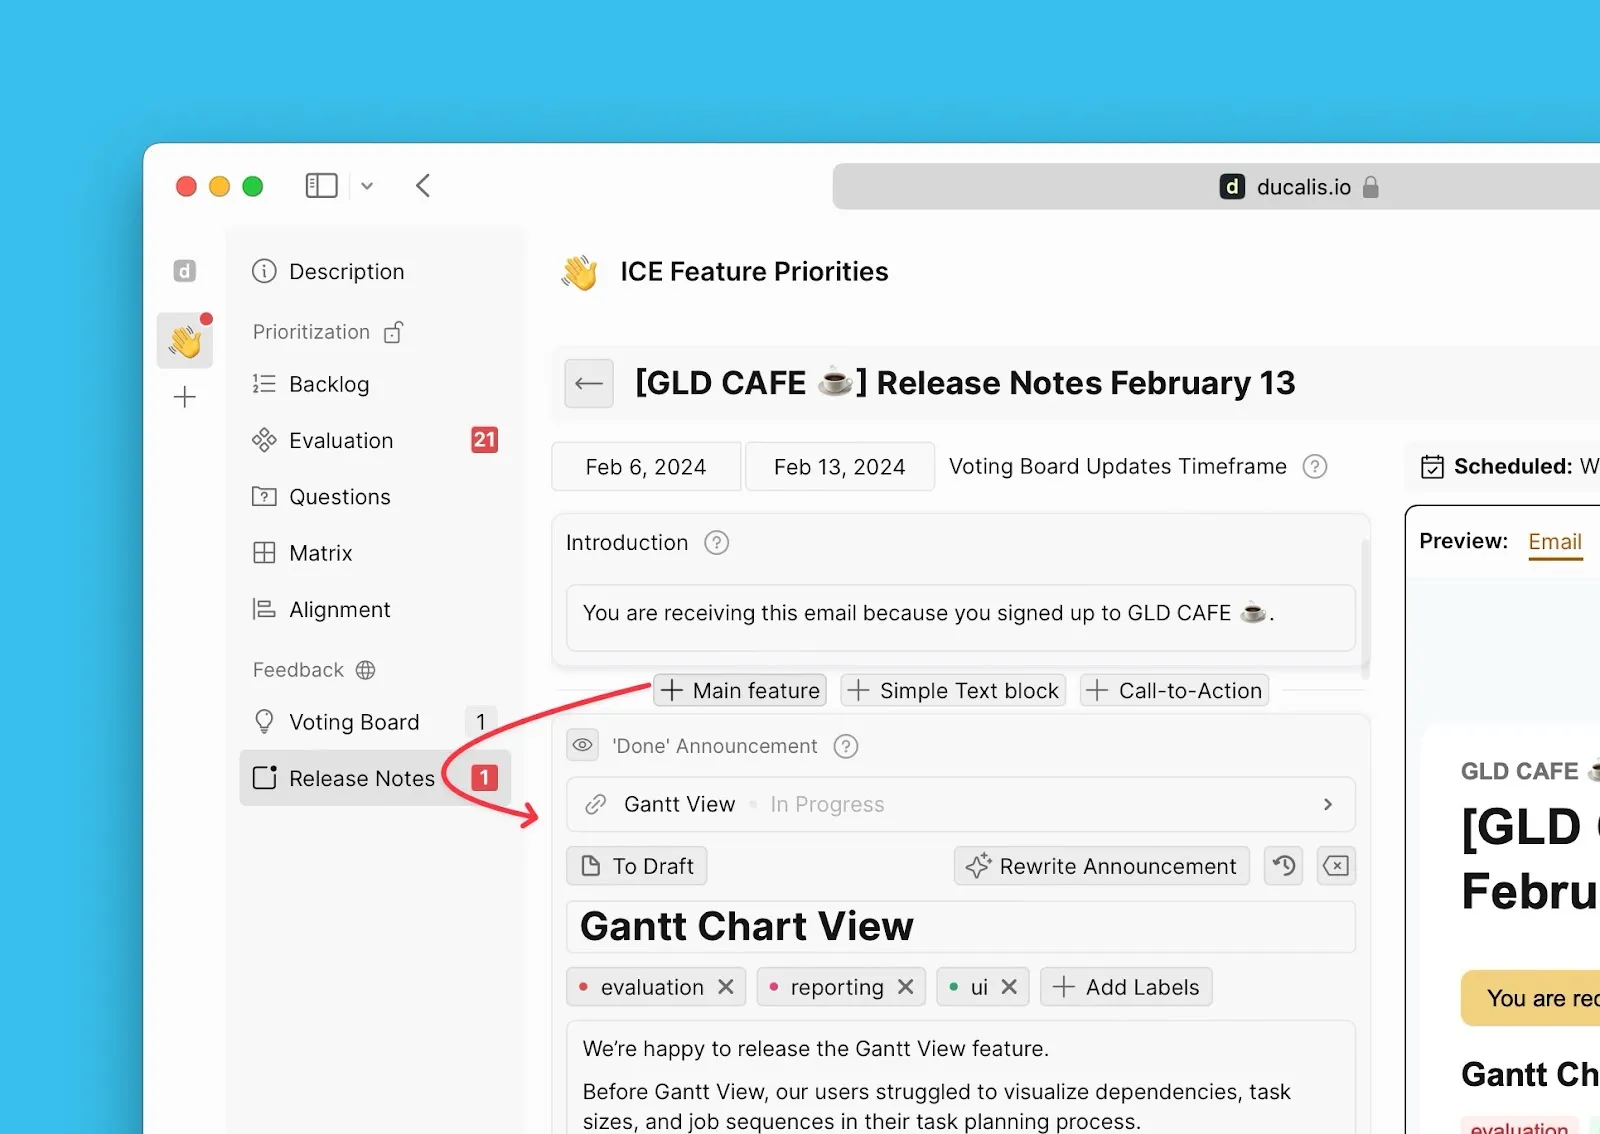
- Oylama Panonuzdaki Release Notes (Sürüm Notları) bölümüne gidin.
- Hazırladığınız Sürüm Notunu seçin.
- Yayınladığınız özellikler için Duyuru ekleyin veya düzenleyin.
- E-postaya dahil etmek için her Duyuruyu onaylayın.
Sırada ne var?
E-postalarınızı kolayca tanınabilir hale getirmek için Adım 4: E-posta adresi için özel alan adı yapılandırma adımına geçin.