Conectar
Conecte o Yandex.Tracker ao Ducalis para importar itens das suas filas para priorização. Uma vez conectado, os dados sincronizam continuamente entre ambos os sistemas.
Antes de começar
O Yandex.Tracker pode ser usado com duas plataformas Yandex diferentes. Antes de conectar, determine qual delas sua organização usa:
- Yandex.360 for Business — Sua organização e usuários são gerenciados através do Yandex.360
- Yandex.Cloud — Seu tracker roda na infraestrutura Yandex Cloud
O processo de conexão é o mesmo para ambas, mas você precisará selecionar a opção correta durante a configuração.
Conectar Yandex.Tracker
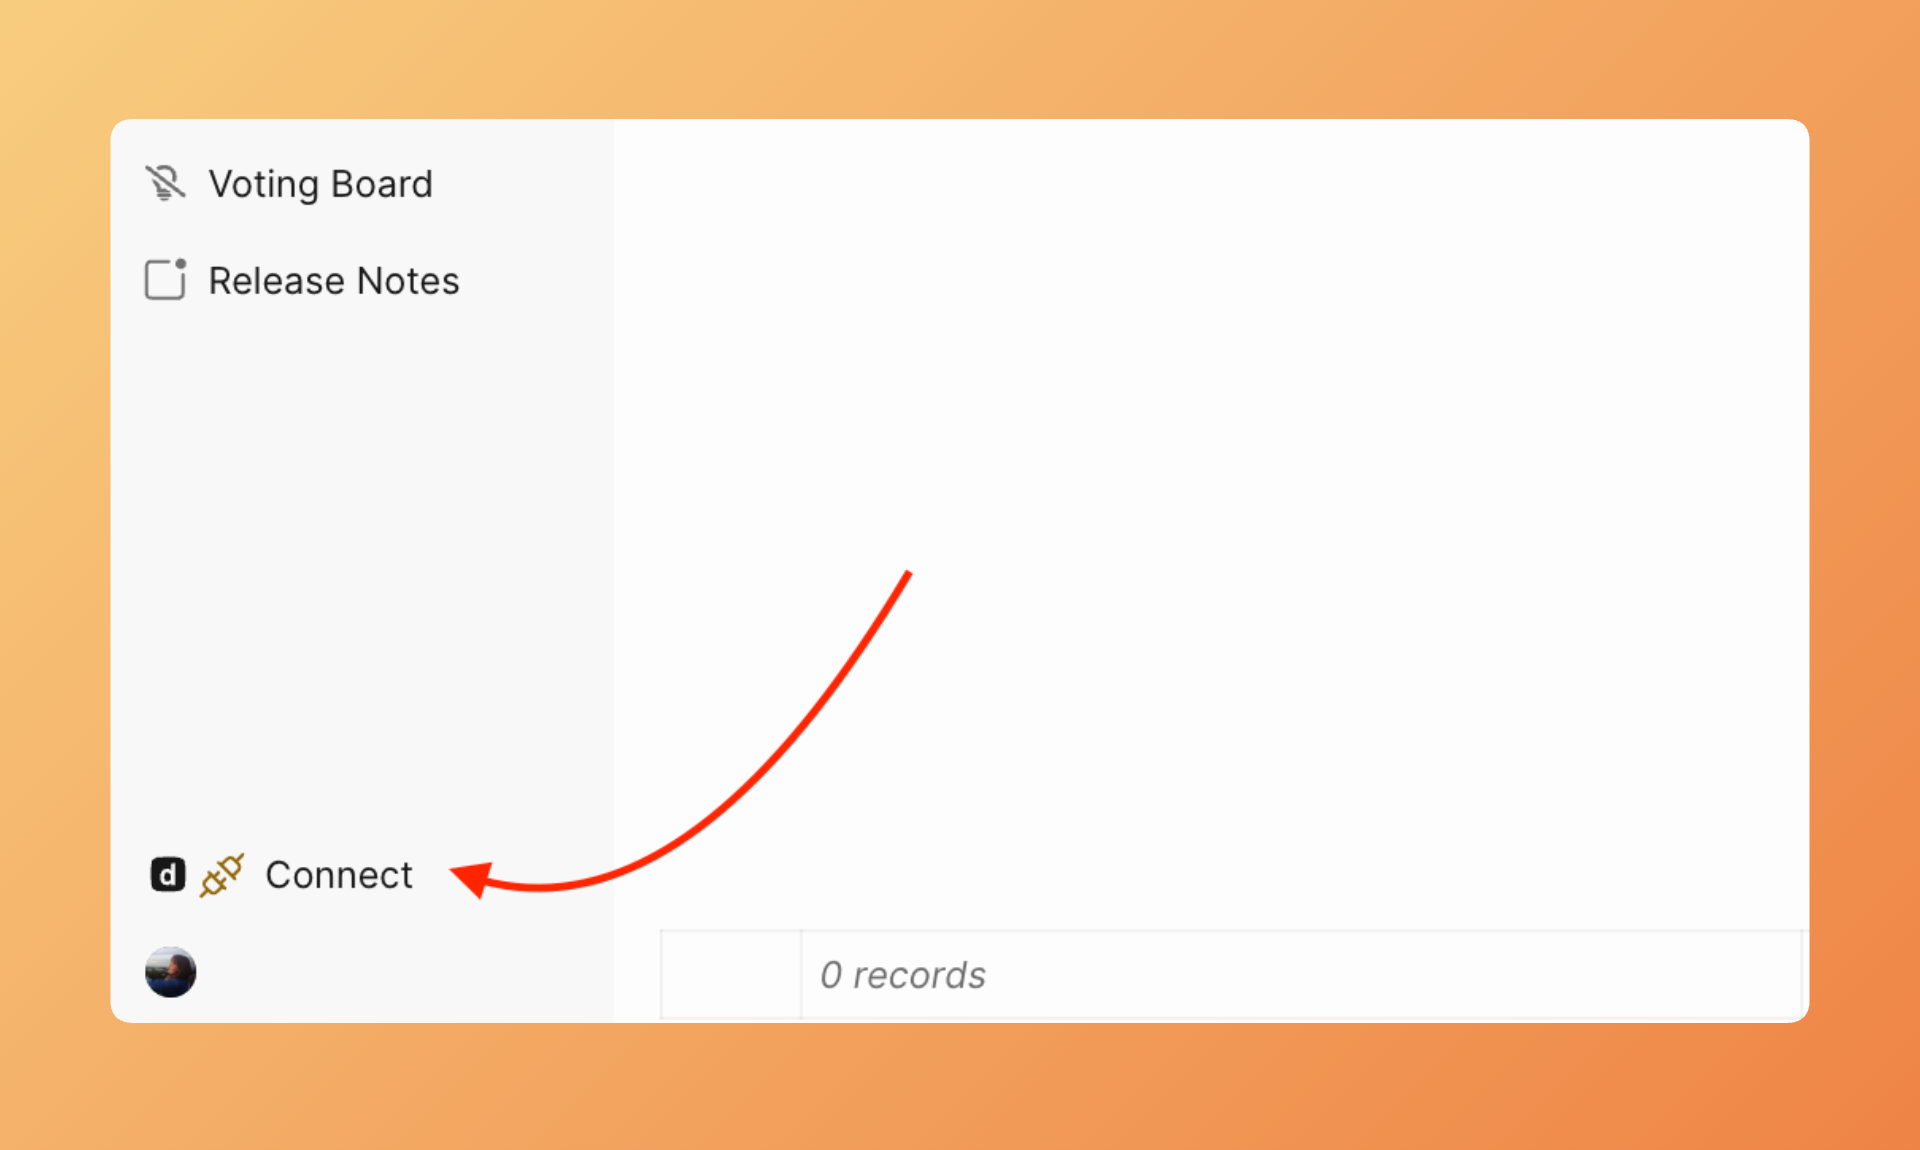
- Acesse Sync settings (Configurações de sincronização) clicando no botão Connect (Conectar) no canto inferior esquerdo do seu quadro.
- Clique em Connect Issue Tracker (Conectar rastreador de itens).
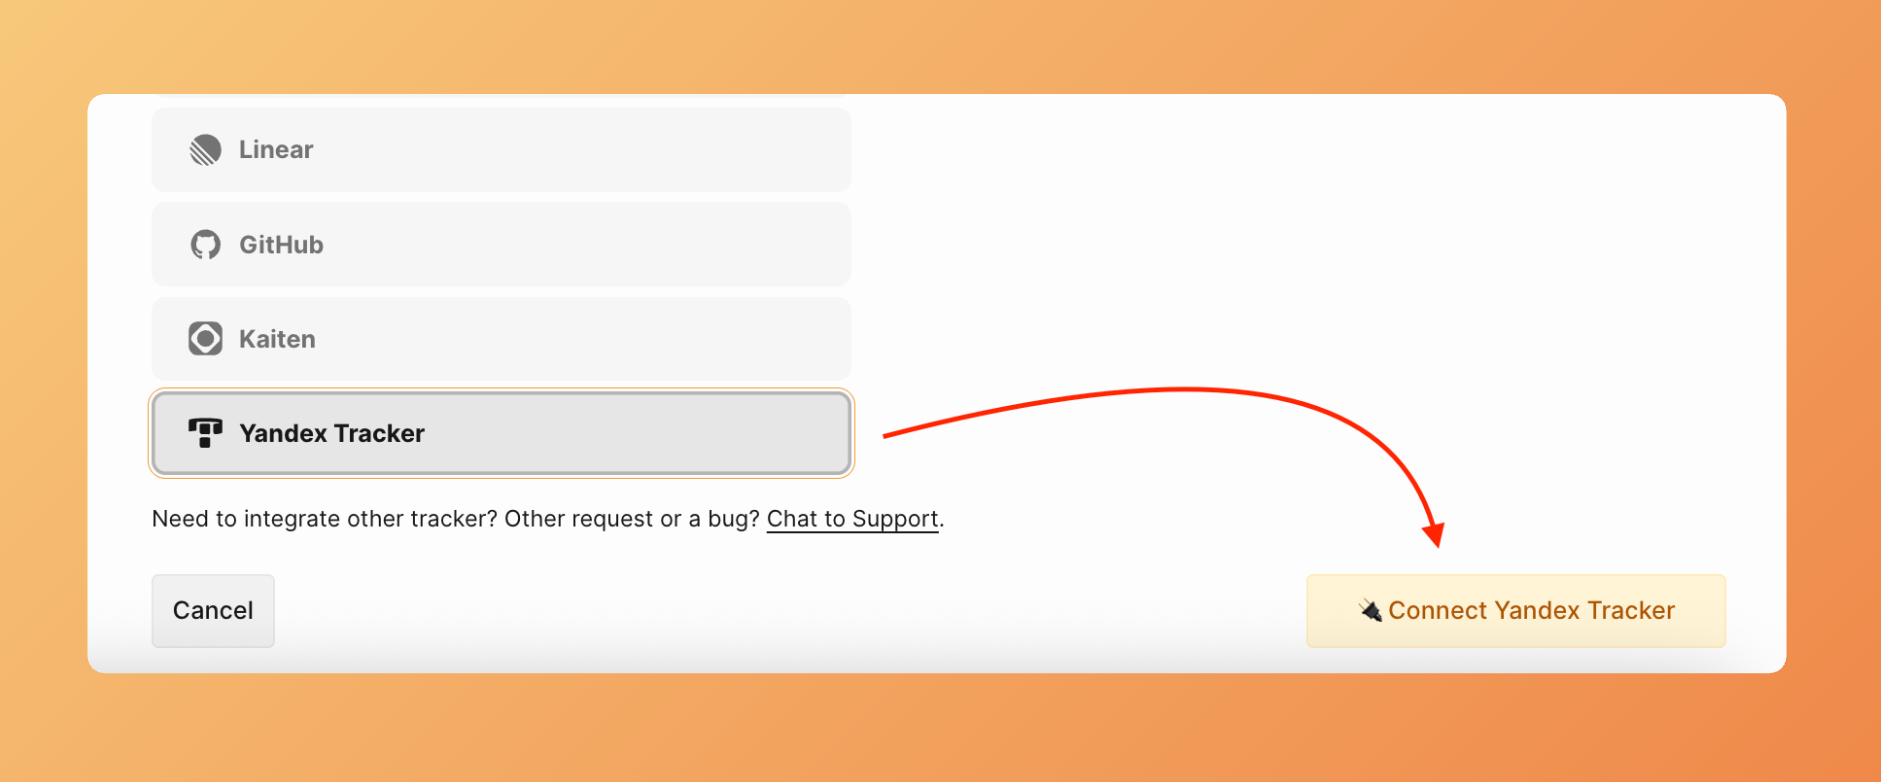
- Em Source (Origem), selecione Yandex.Tracker da lista.

- Clique em Connect Yandex.Tracker (Conectar Yandex.Tracker).
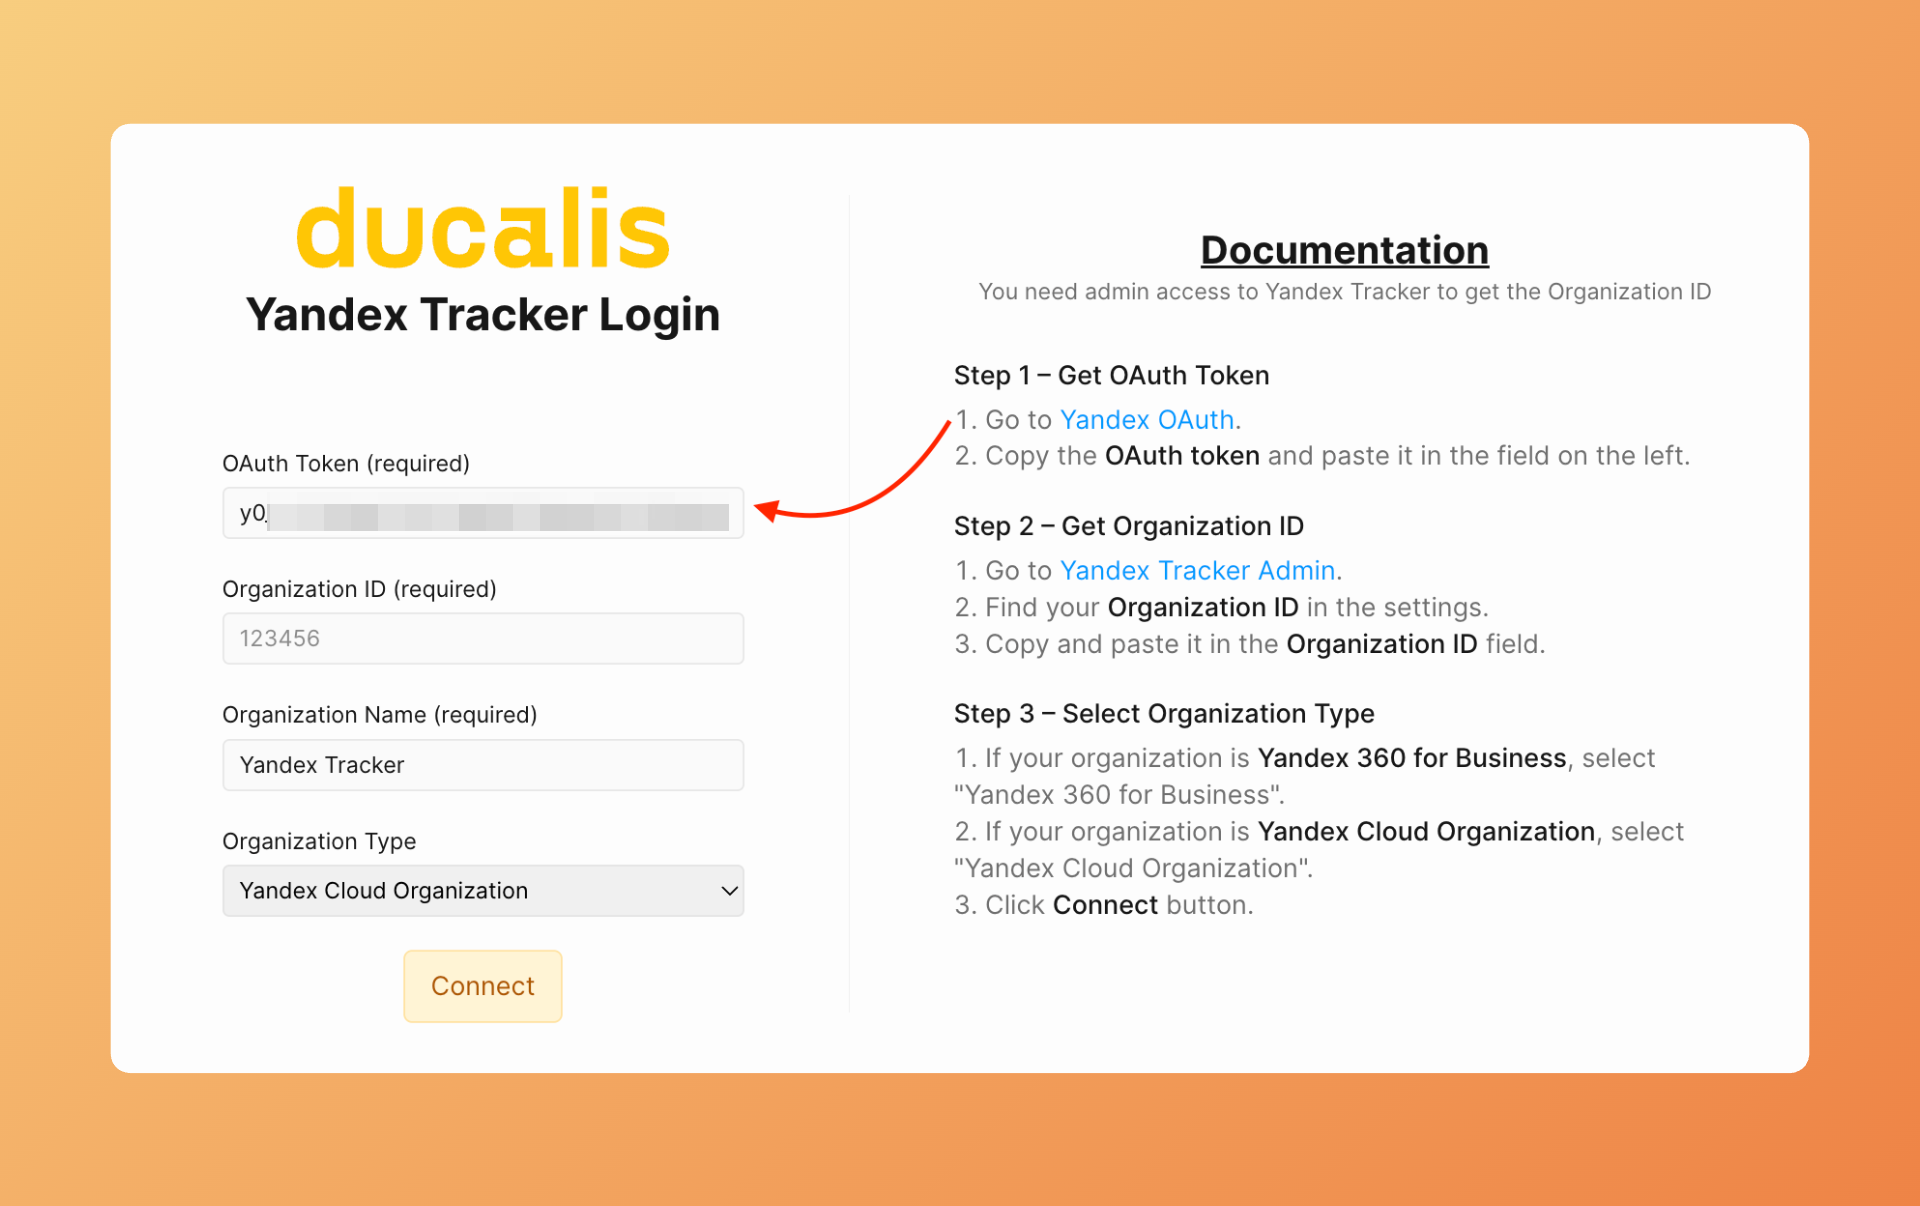
- O formulário de conexão aparece. Siga as instruções na tela, ou leia abaixo:
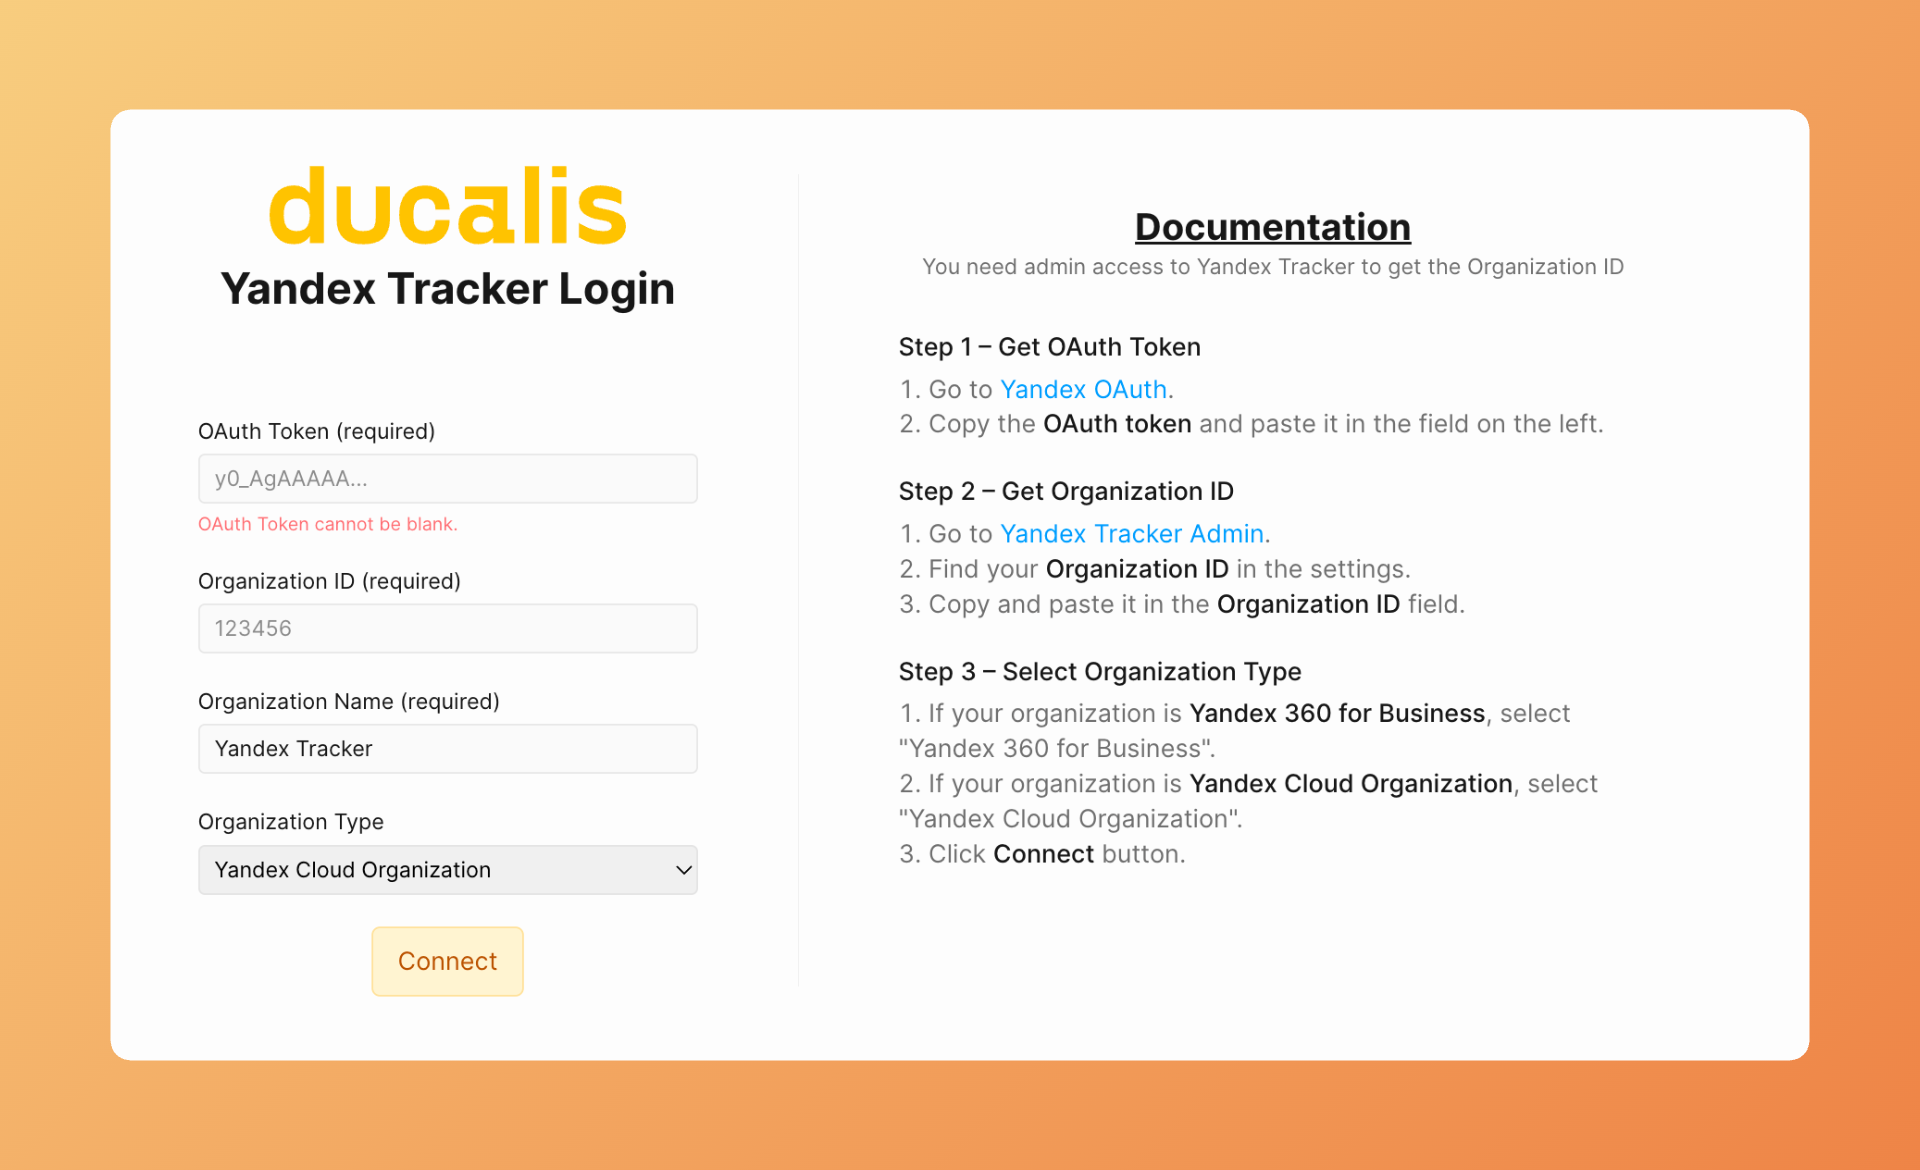
Obtenha seu token OAuth
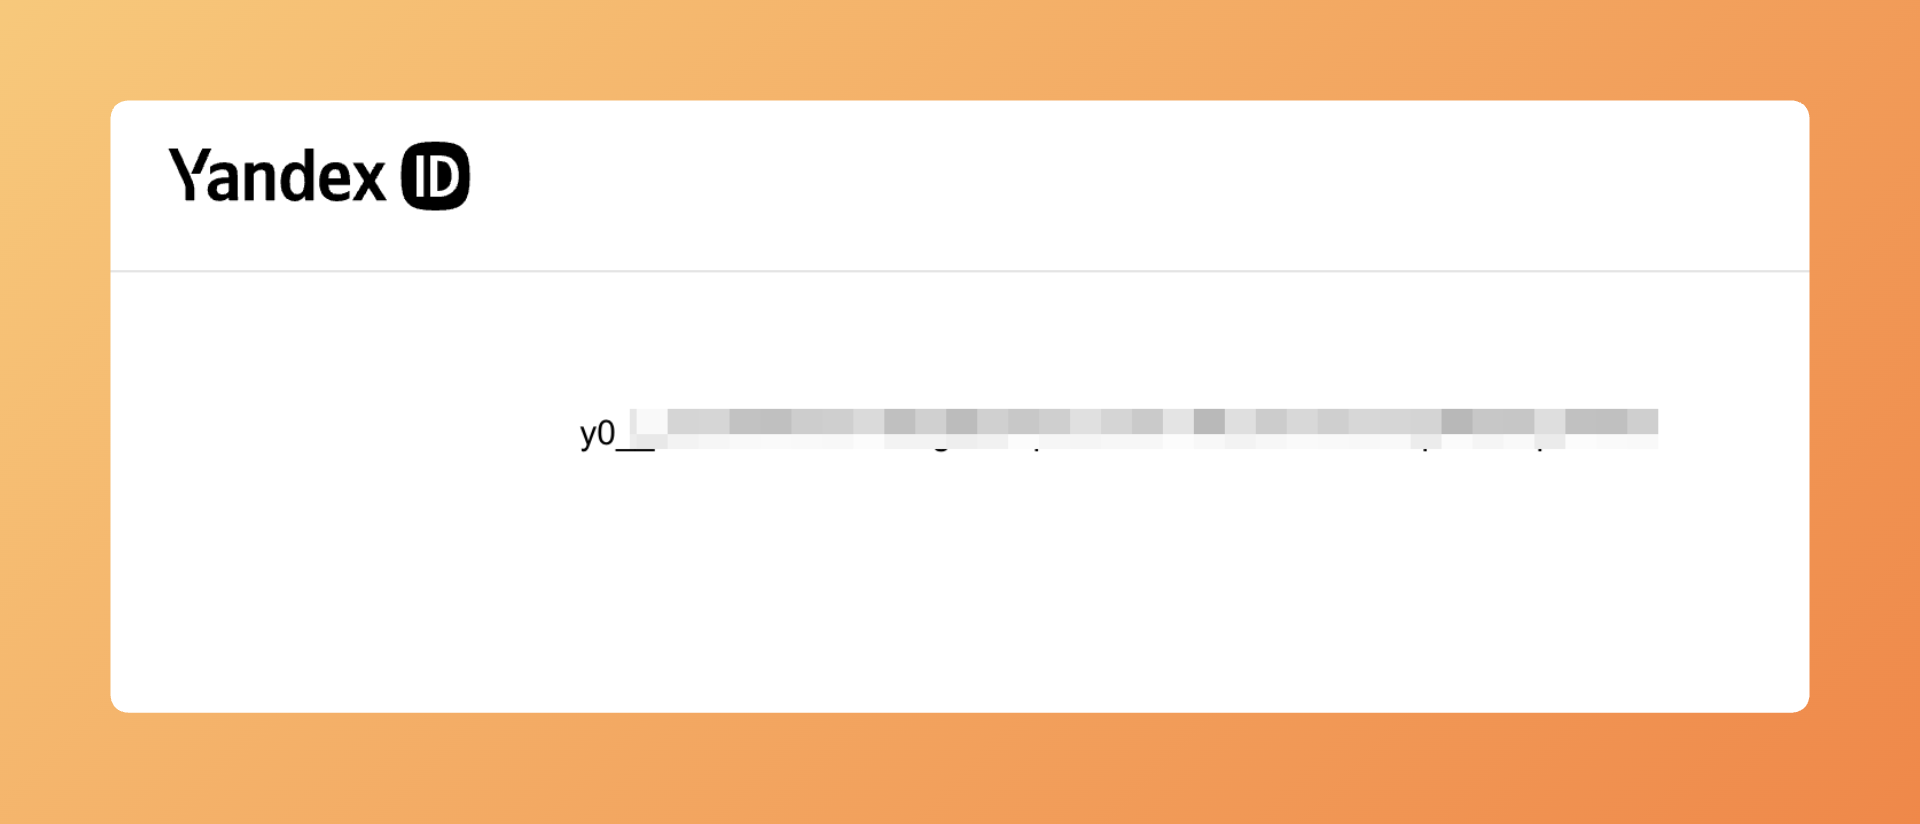
- Clique no link no formulário de conexão para abrir a página OAuth do Yandex.
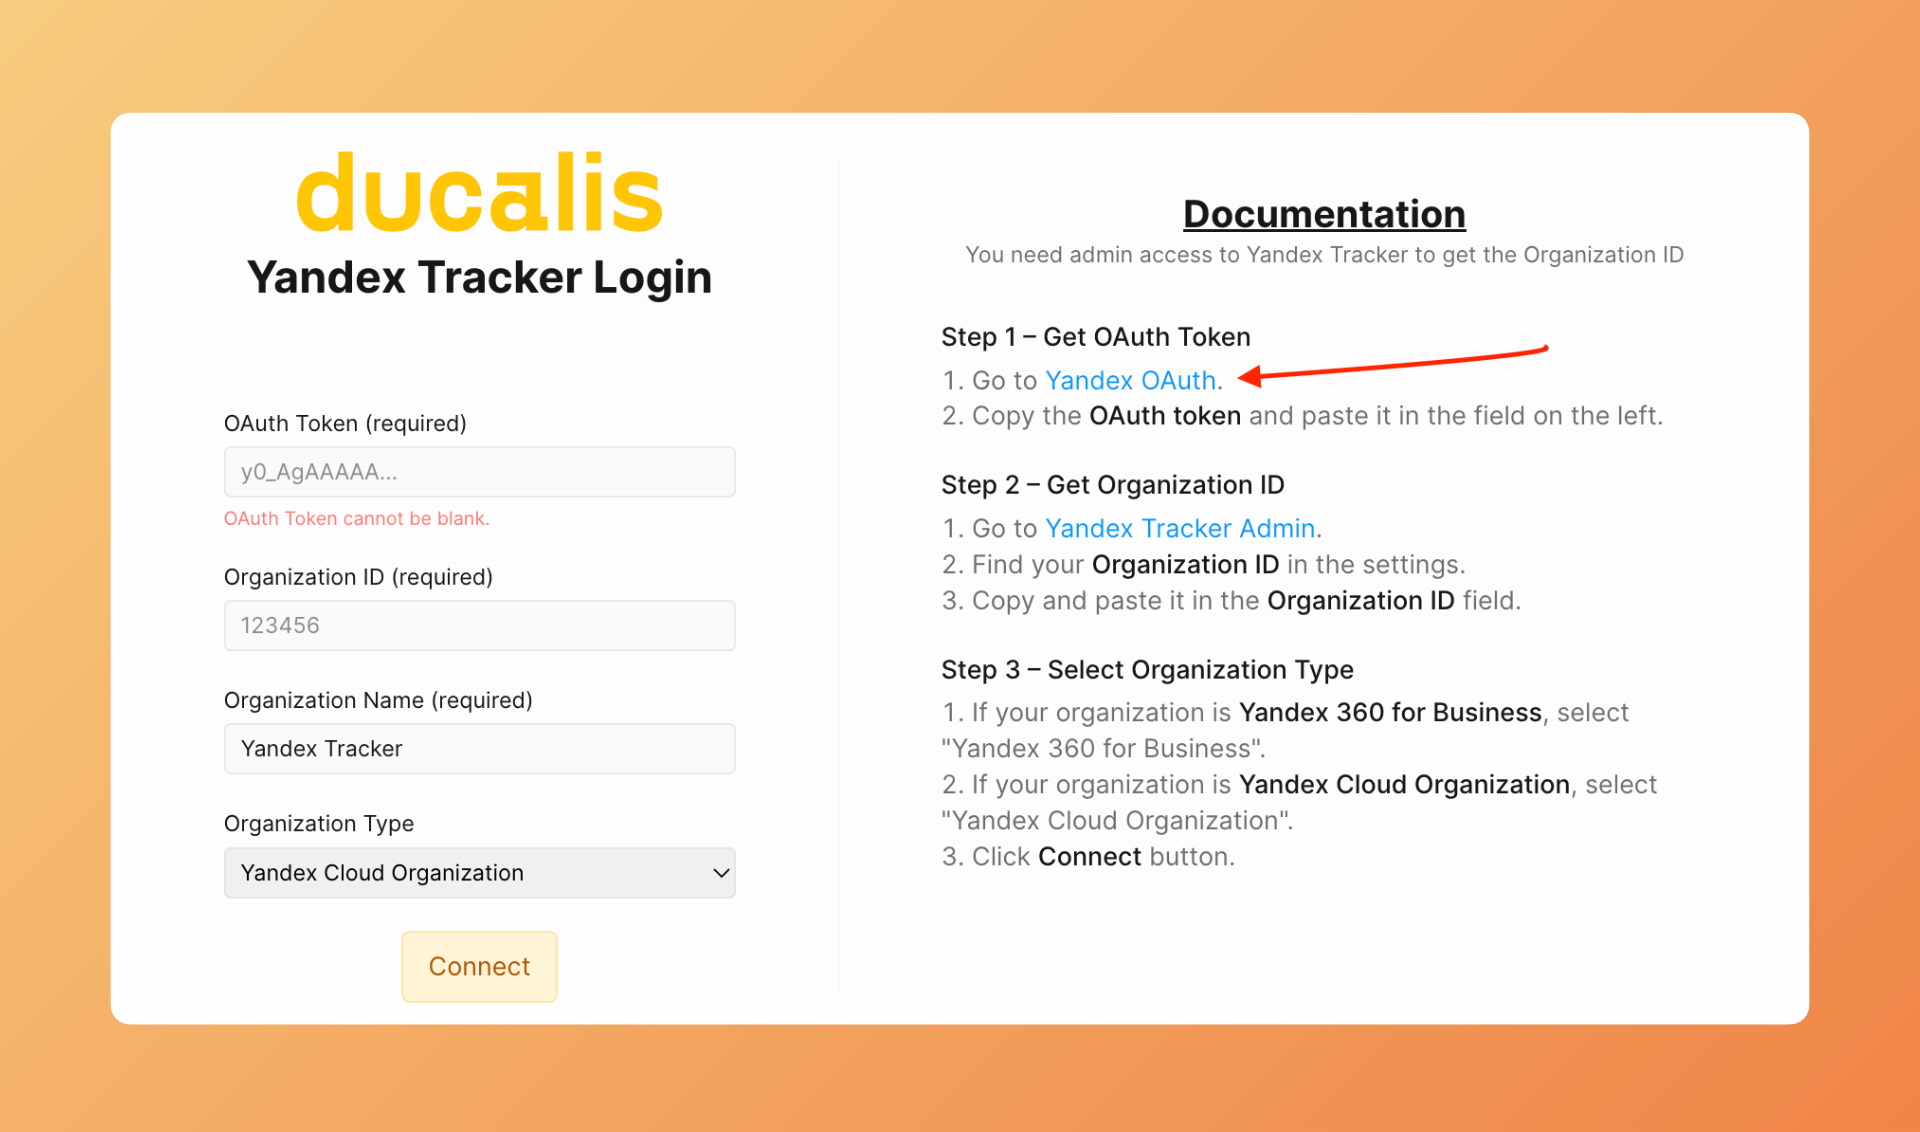
- O Yandex exibe seu token OAuth. Copie o token.
- Retorne ao Ducalis e cole o token no campo OAuth Token (Token OAuth).
Digite seu Organization ID
- Clique no link e acesse as configurações de administração do Yandex.Tracker. Encontre o Organization ID (ID da organização) na página de administração. Clique para copiá-lo.
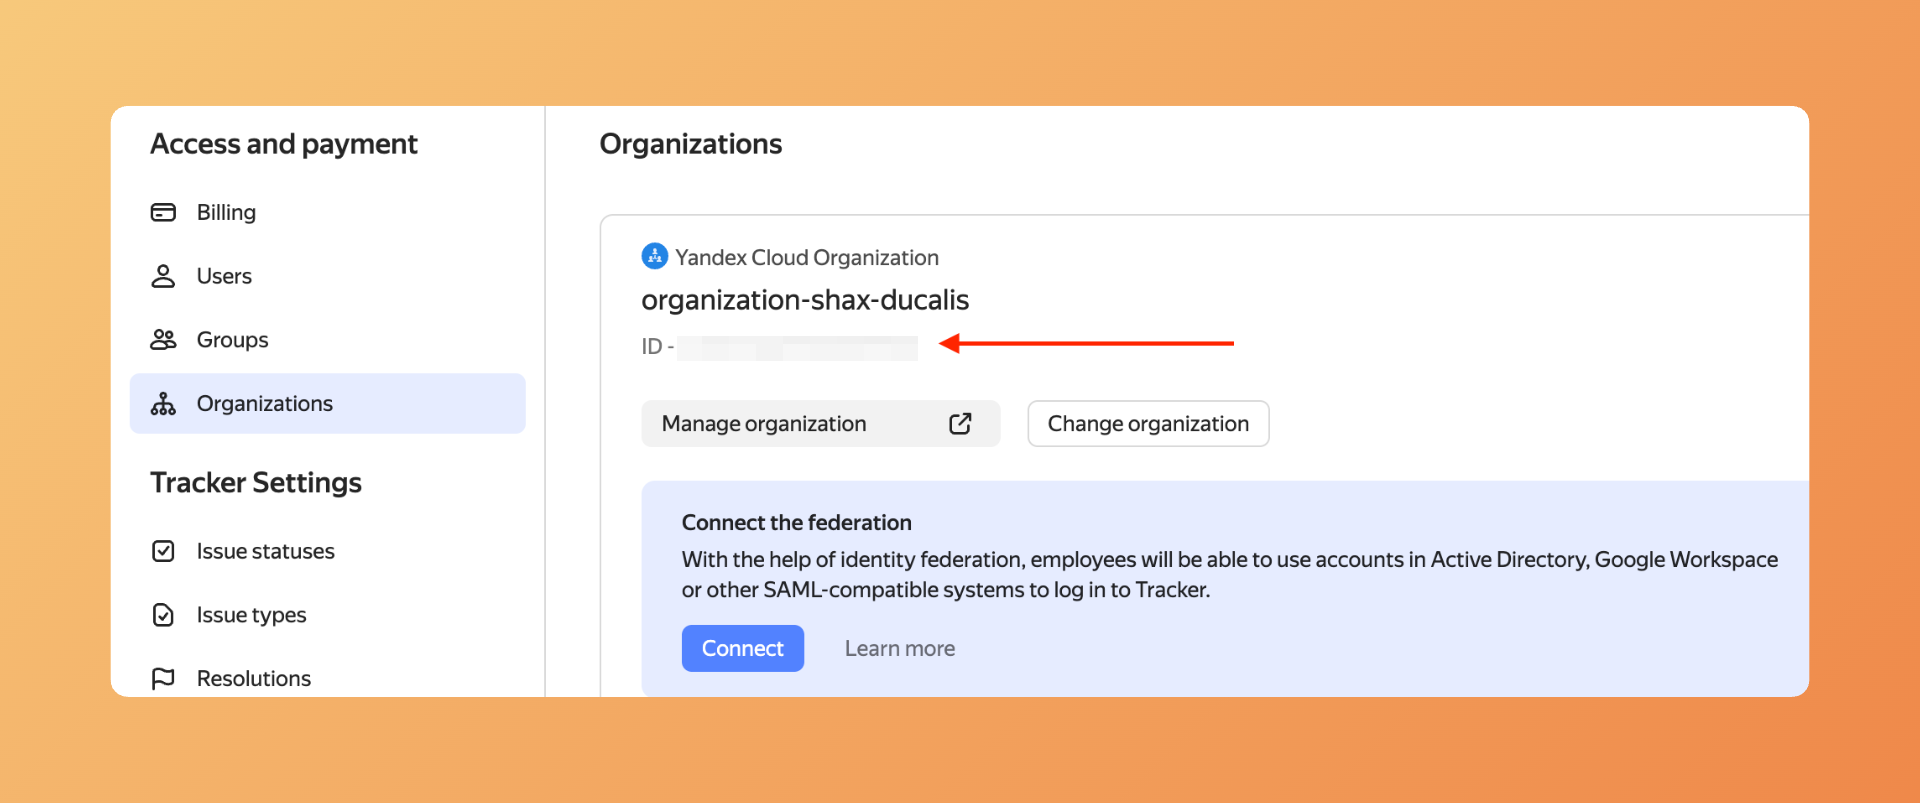
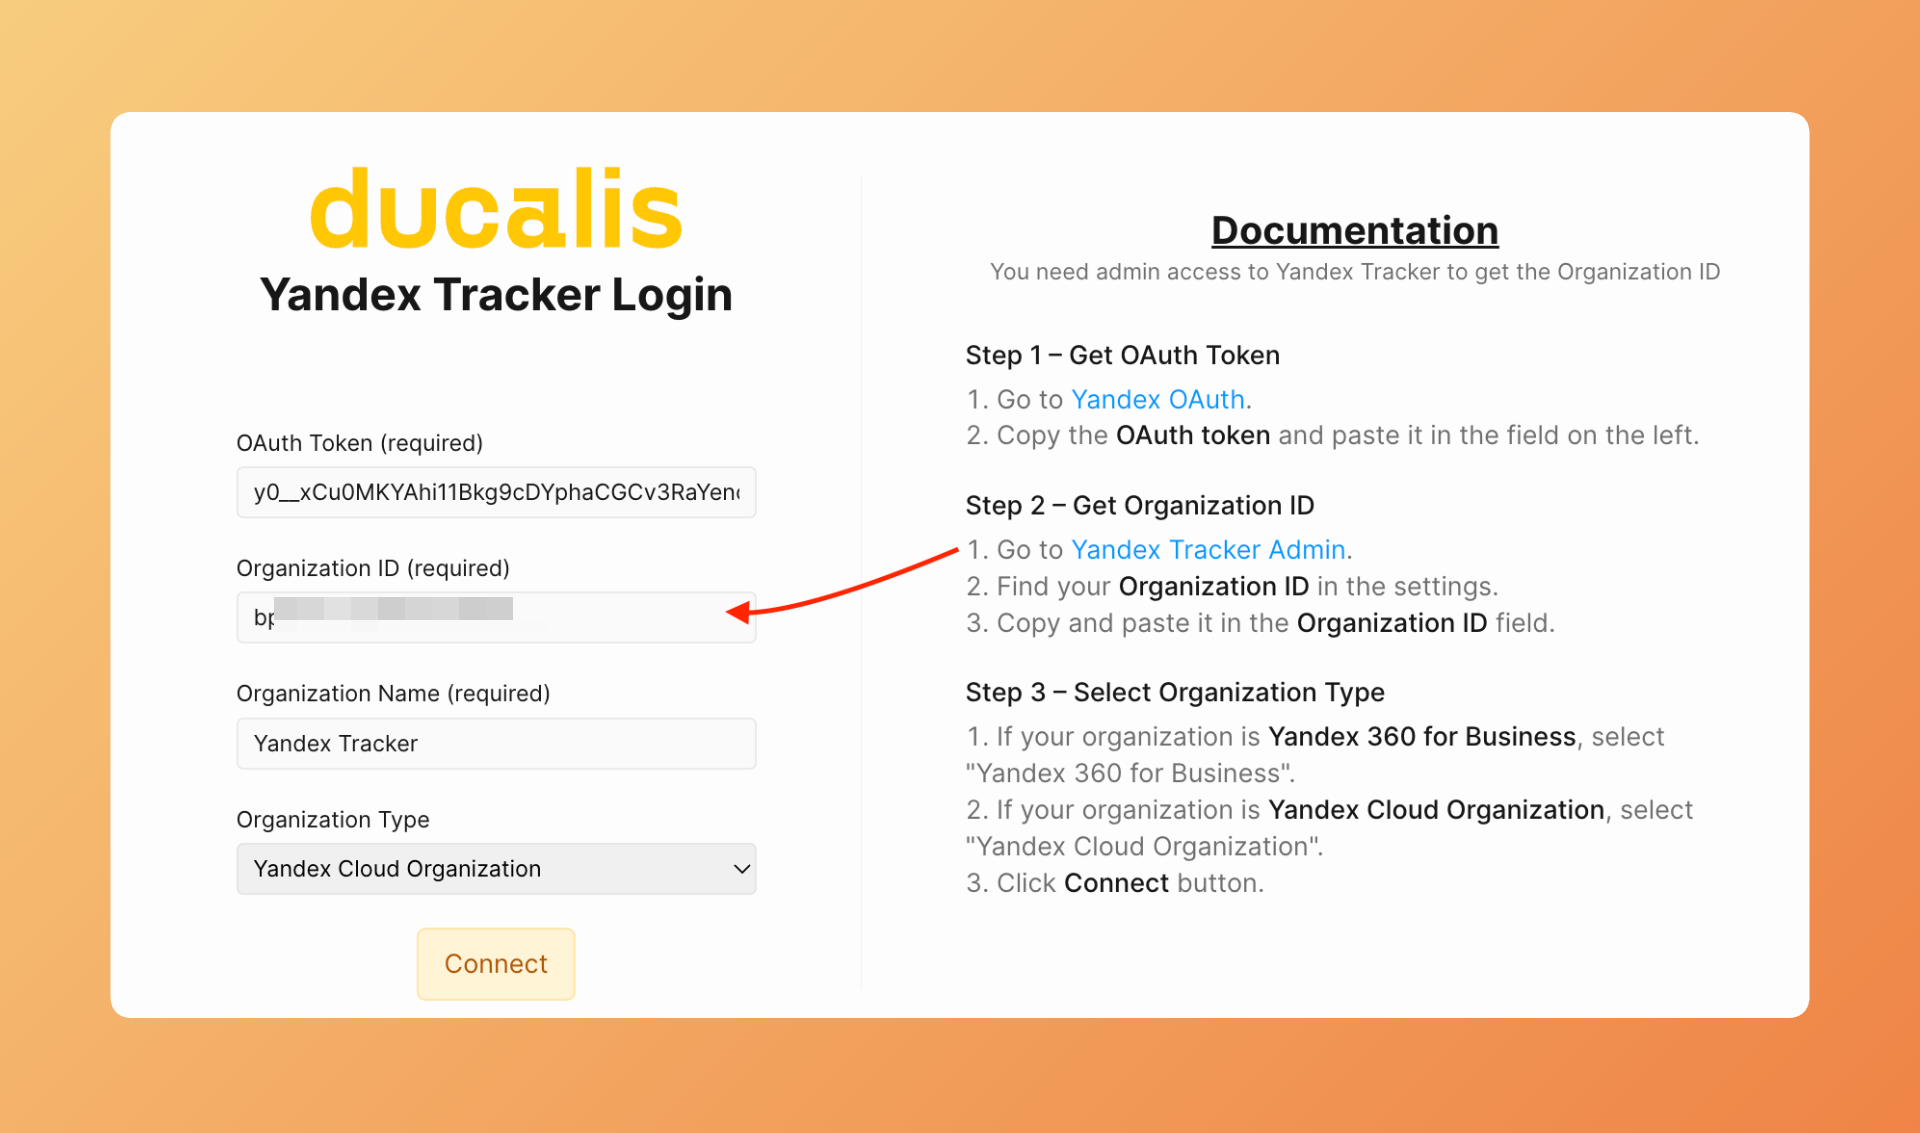
- Retorne ao Ducalis e cole o Organization ID no campo Organization ID (ID da organização).
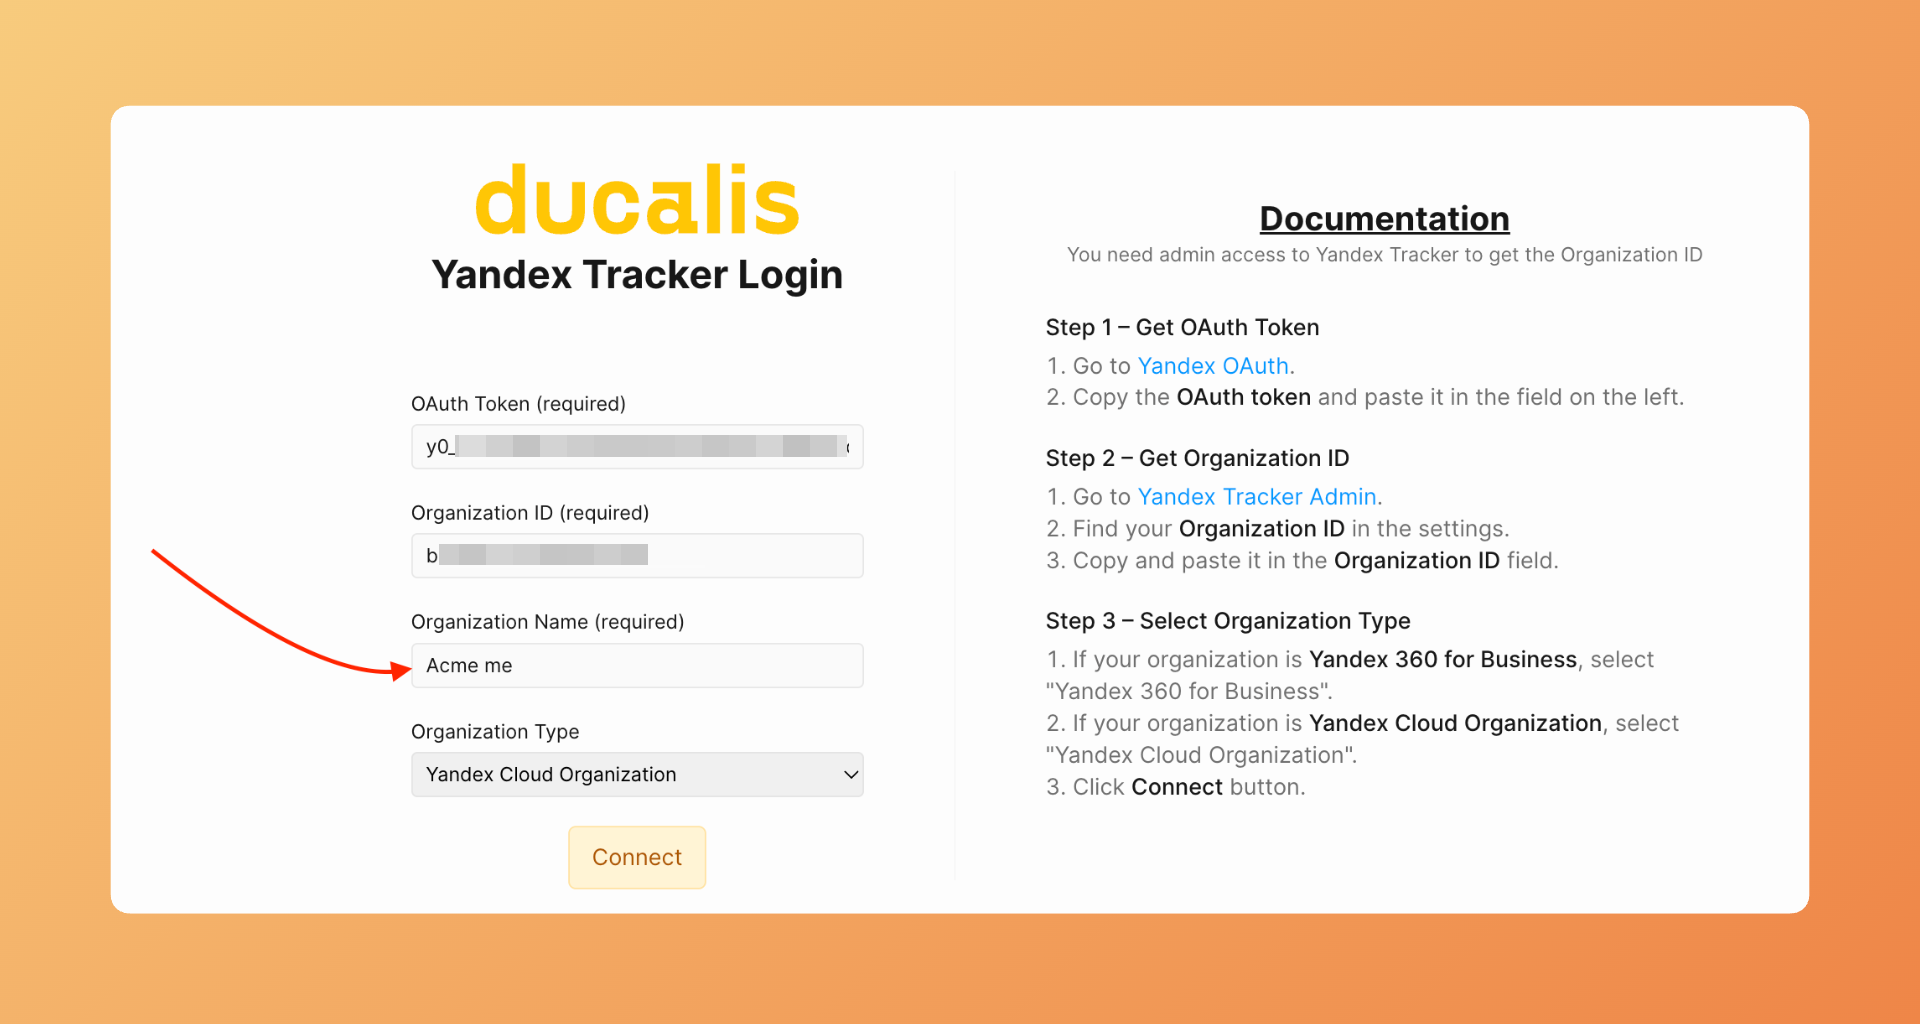
Digite seu Organization Name
Digite o nome da organização. Você pode escolher qualquer nome que quiser. Este é para sua referência interna no Ducalis.
Selecione sua plataforma Yandex
- Em Yandex Tracker Type (Tipo do Yandex Tracker), selecione qual plataforma sua organização usa:
- Yandex.360 — Se sua organização usa Yandex.360 for Business
- Yandex.Cloud — Se seu tracker roda no Yandex Cloud
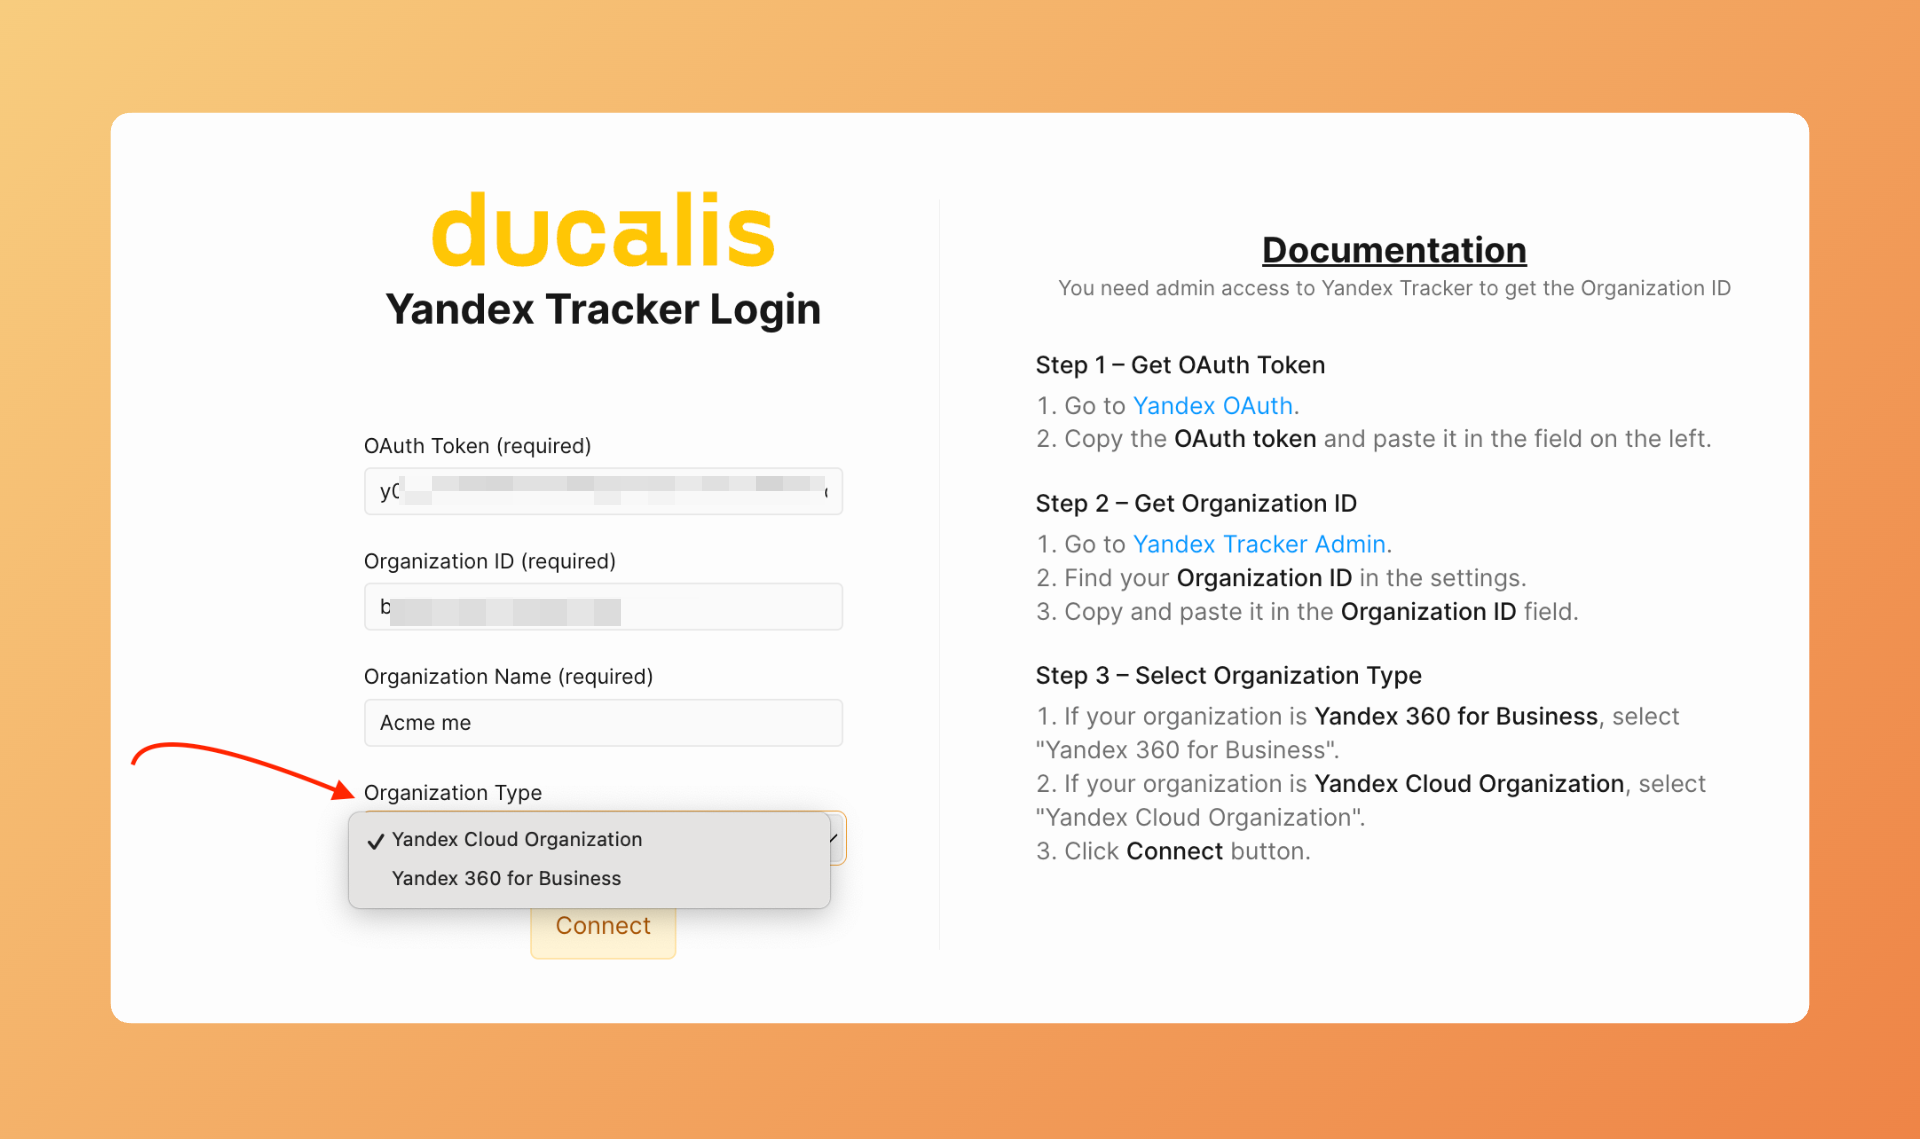
Selecionar o tipo de plataforma errado causará falha na conexão. Verifique qual plataforma sua organização usa antes de prosseguir.
- Clique em Connect (Conectar).
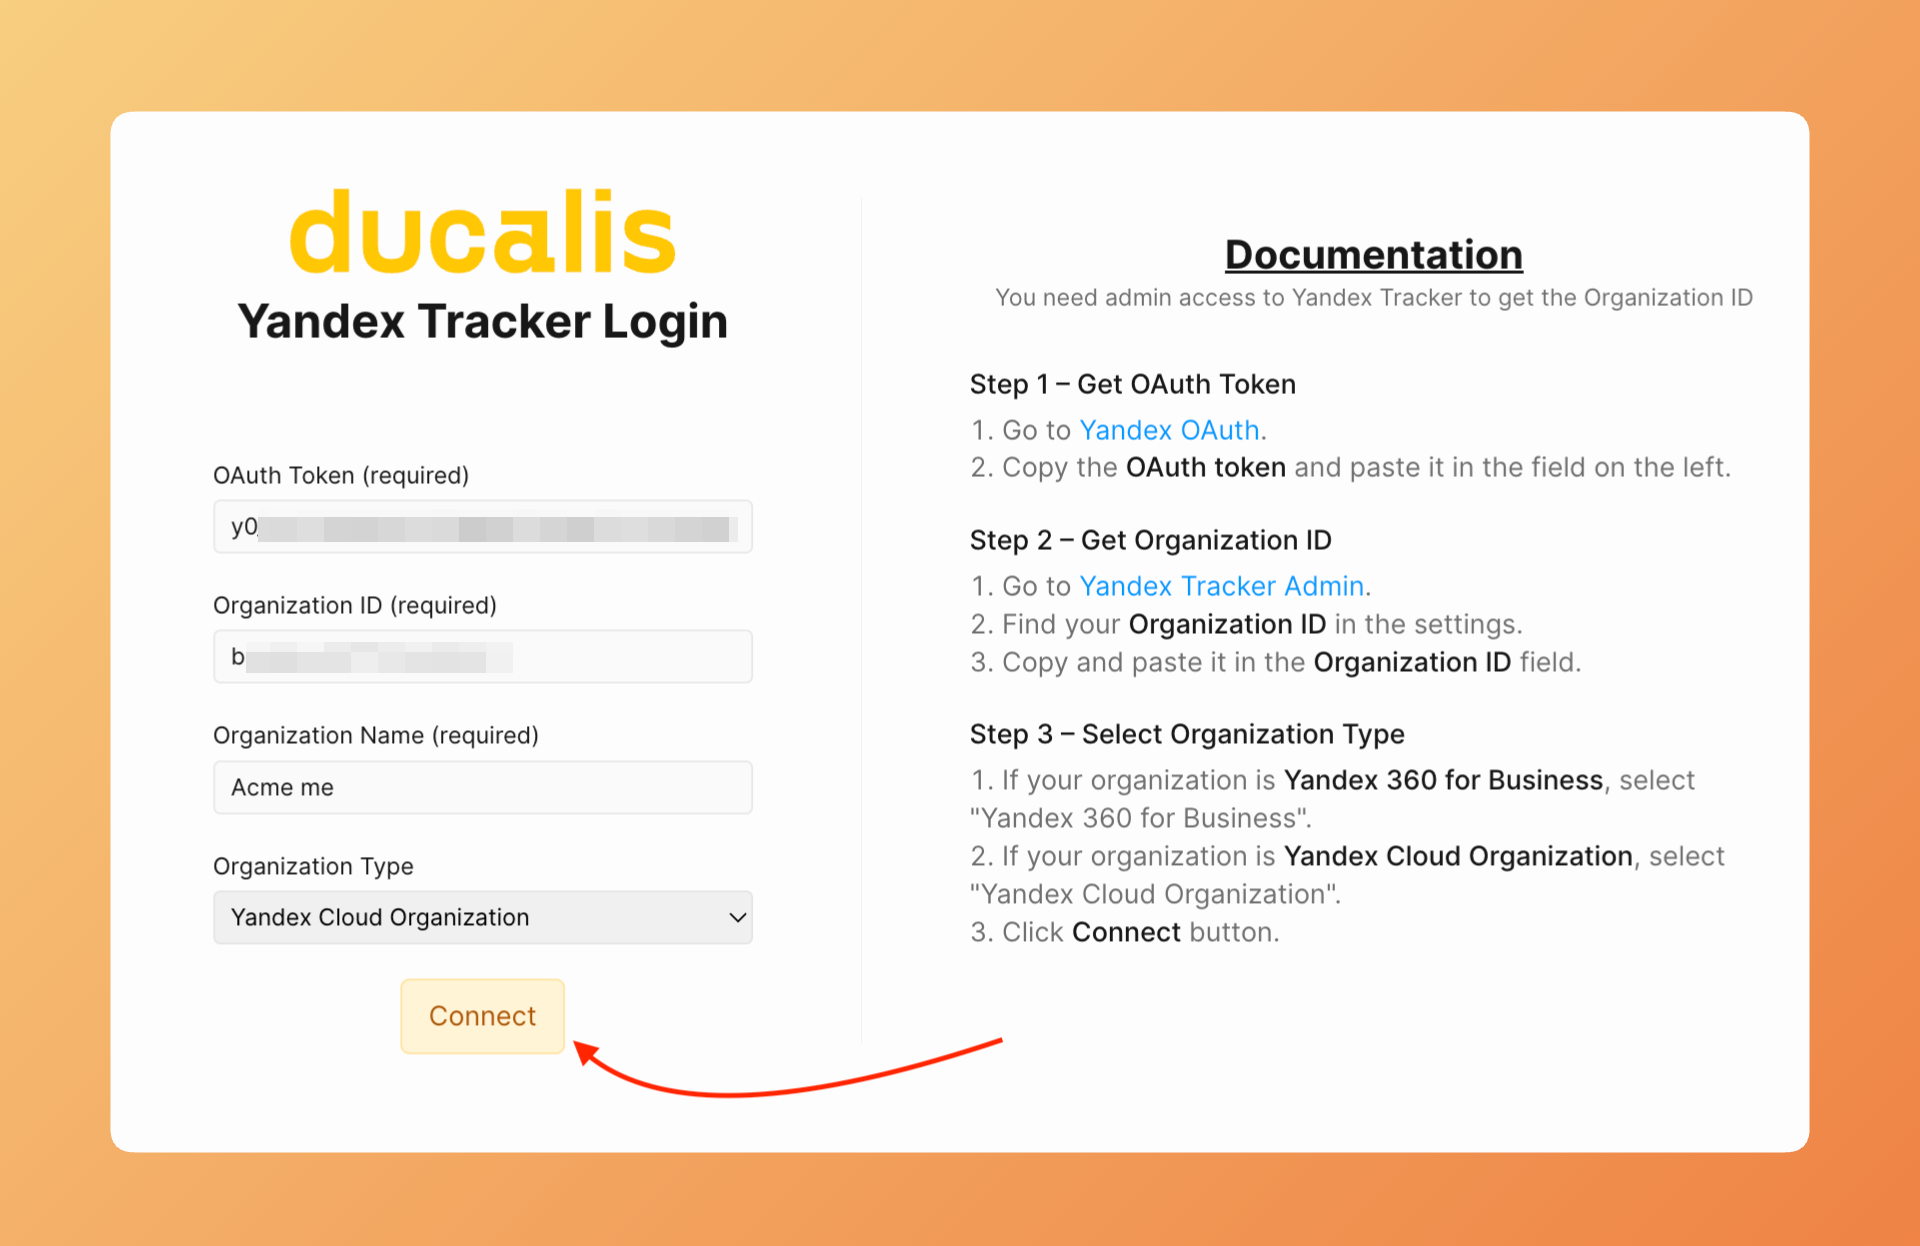
- O Ducalis valida suas credenciais e estabelece a conexão. Aguarde a confirmação.
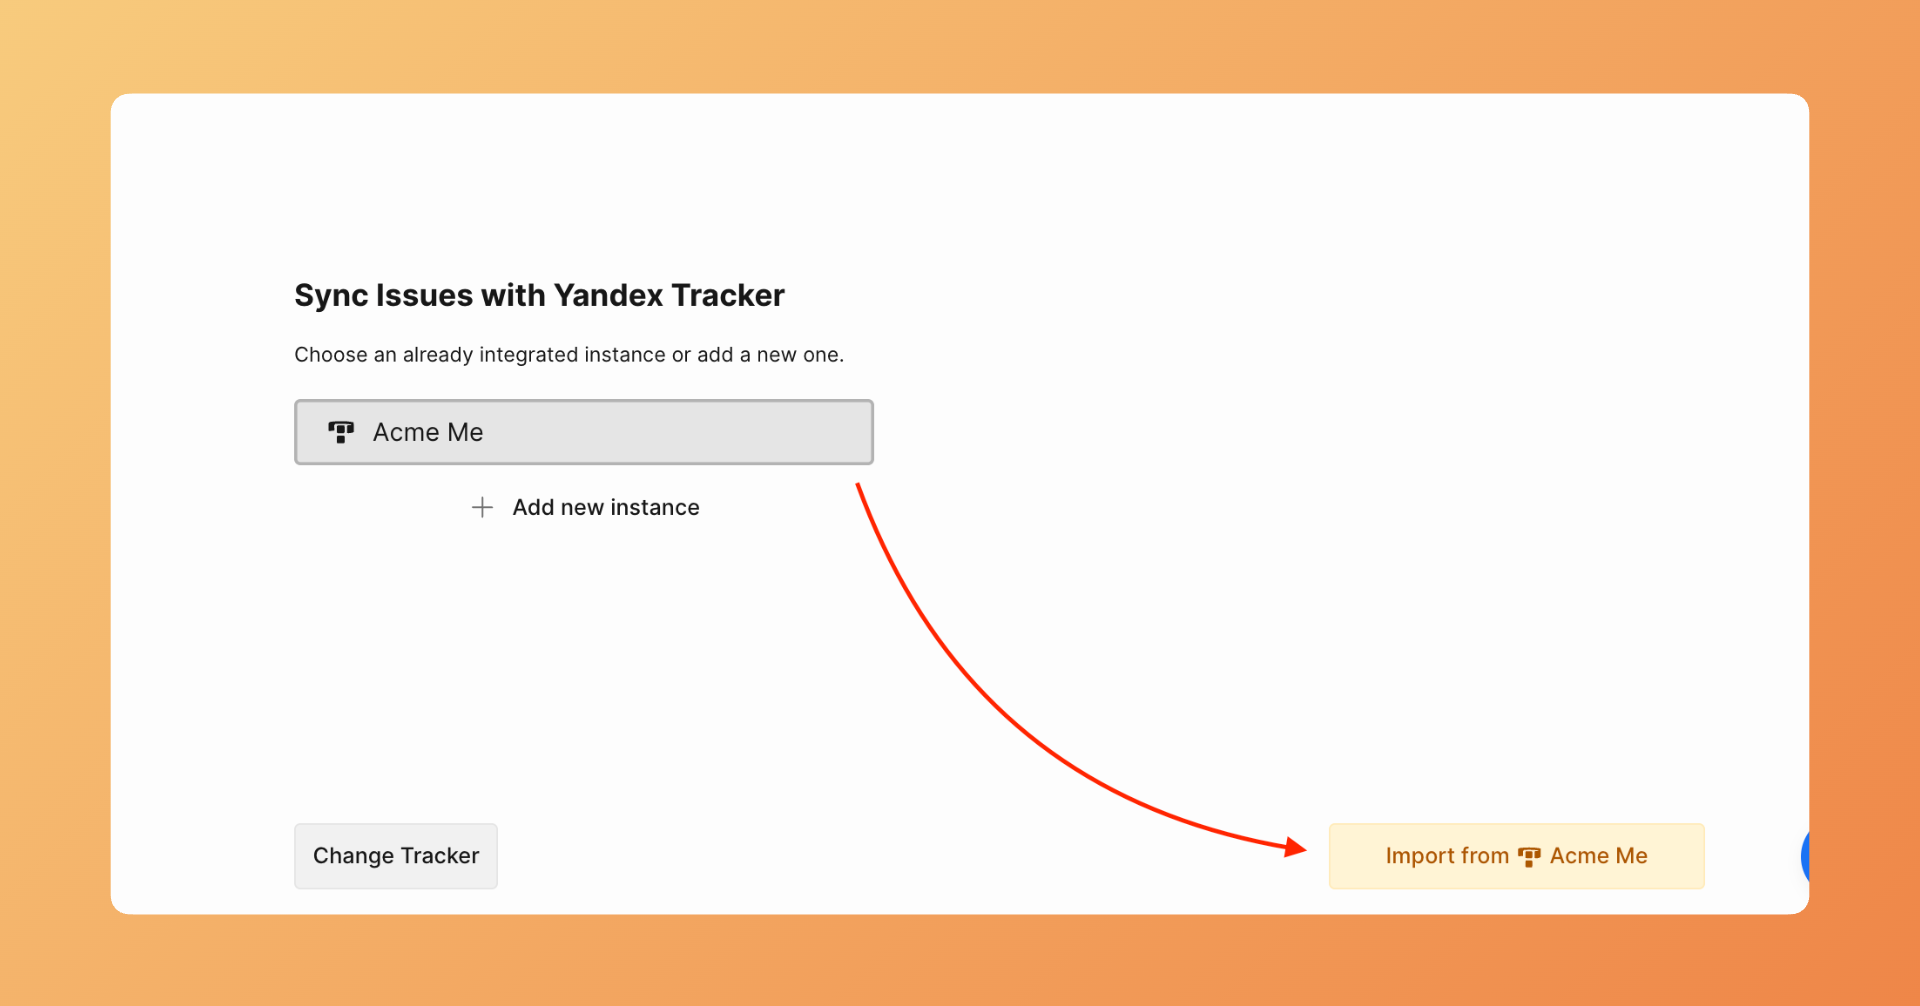
Importar itens
Após conectar, configure quais itens importar do Yandex.Tracker.
- Clique em Import from (Importar de) para iniciar a importação de itens.
- Aplique filtros para escolher quais itens importar.

- Clique em Start Import (Iniciar importação).
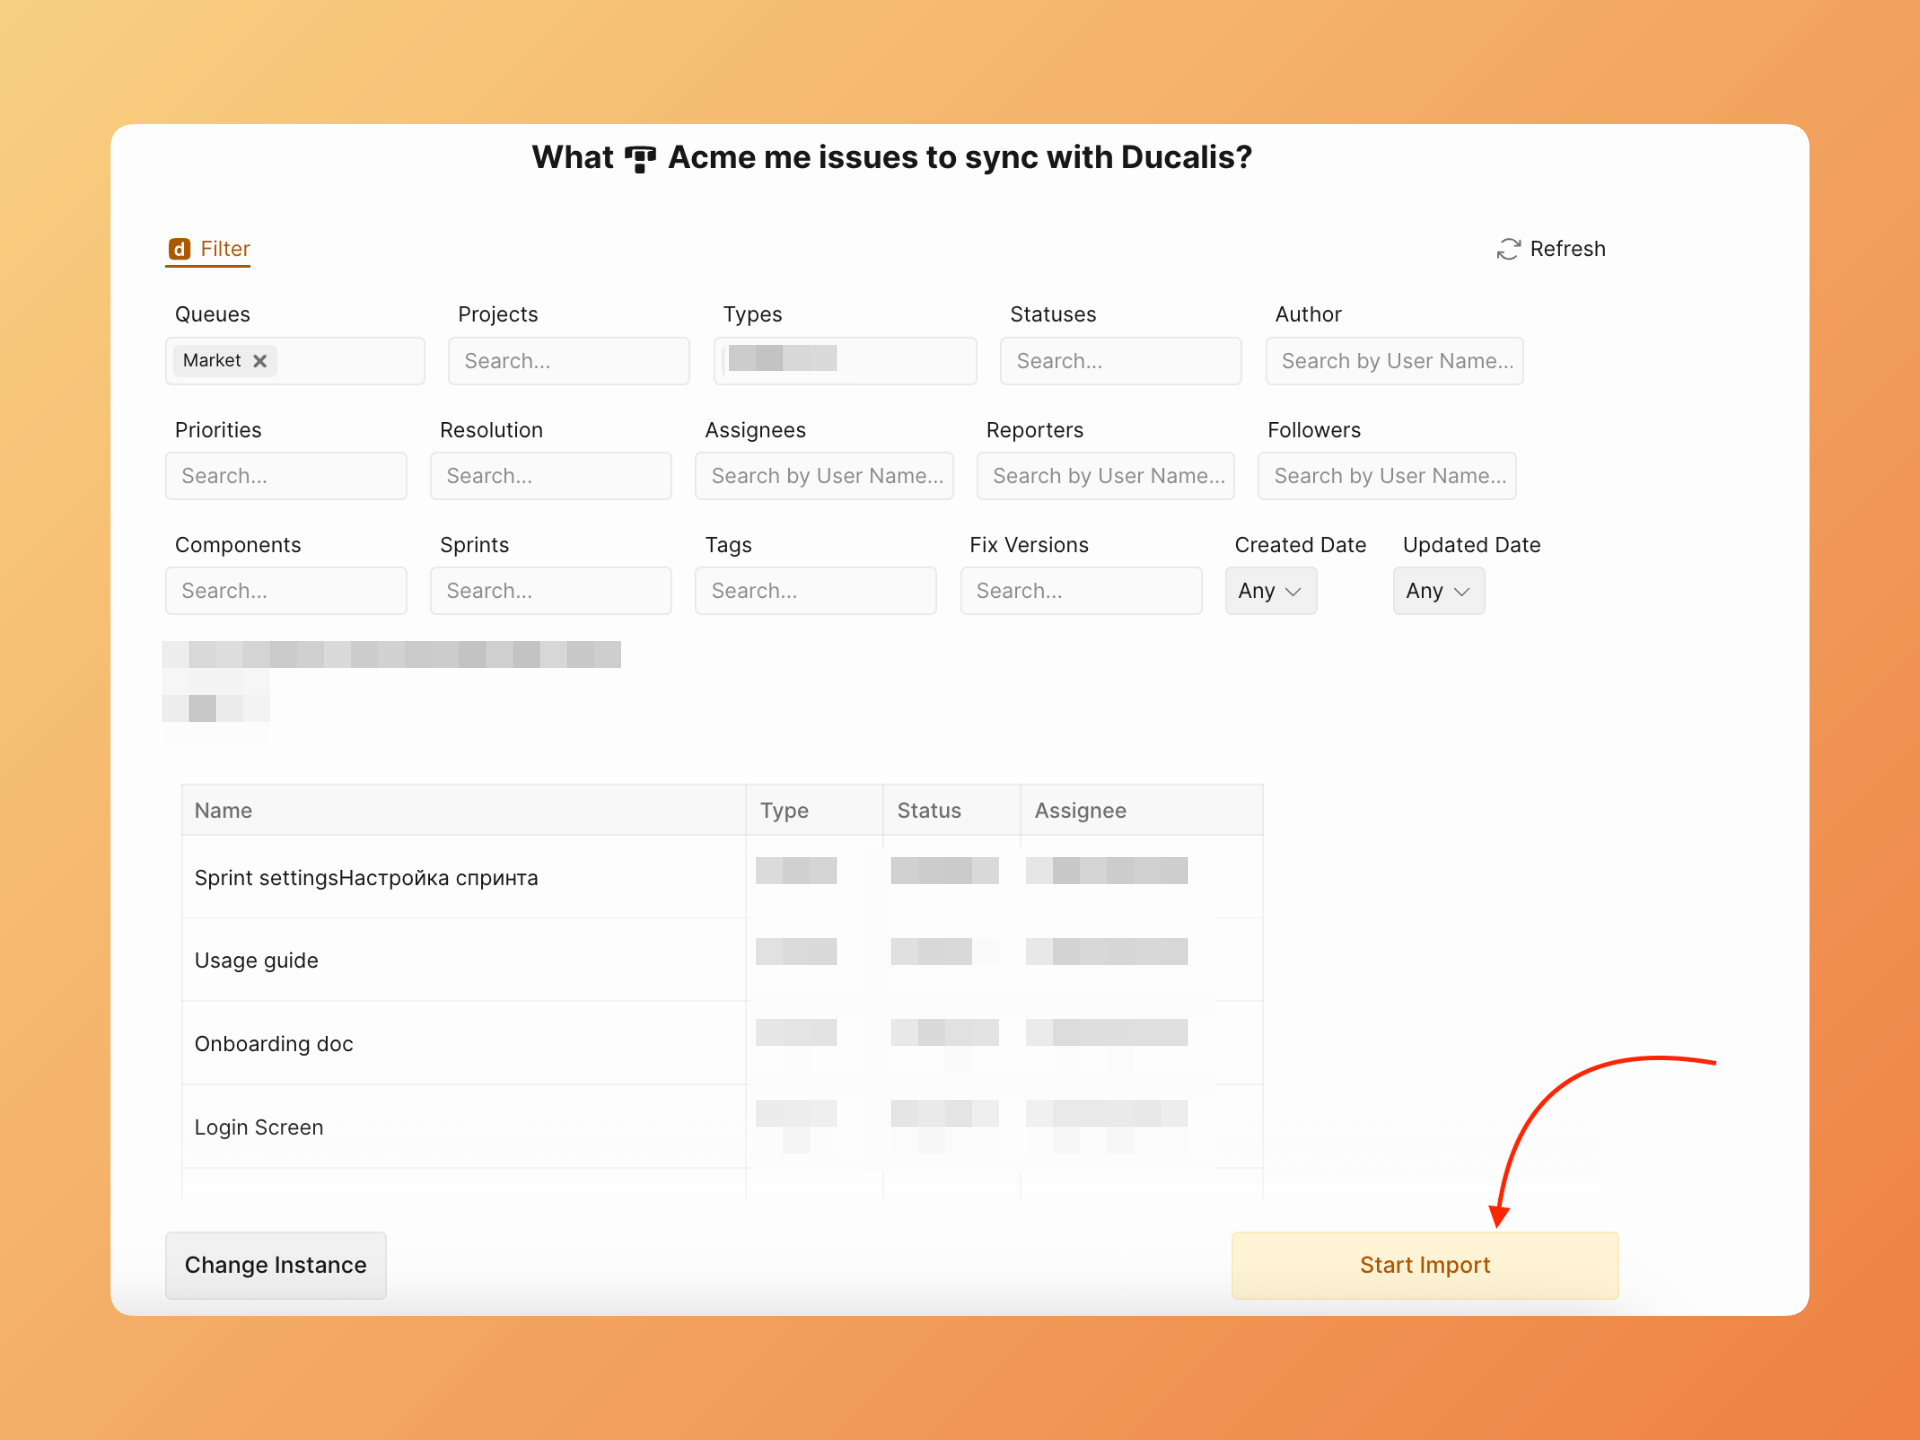
- O Ducalis começa a importar itens que correspondem aos seus filtros. O progresso da importação é exibido na tela.
Sua integração com Yandex.Tracker está pronta. Os itens aparecem no seu quadro Ducalis para priorização.
Editar Sync-In Conditions
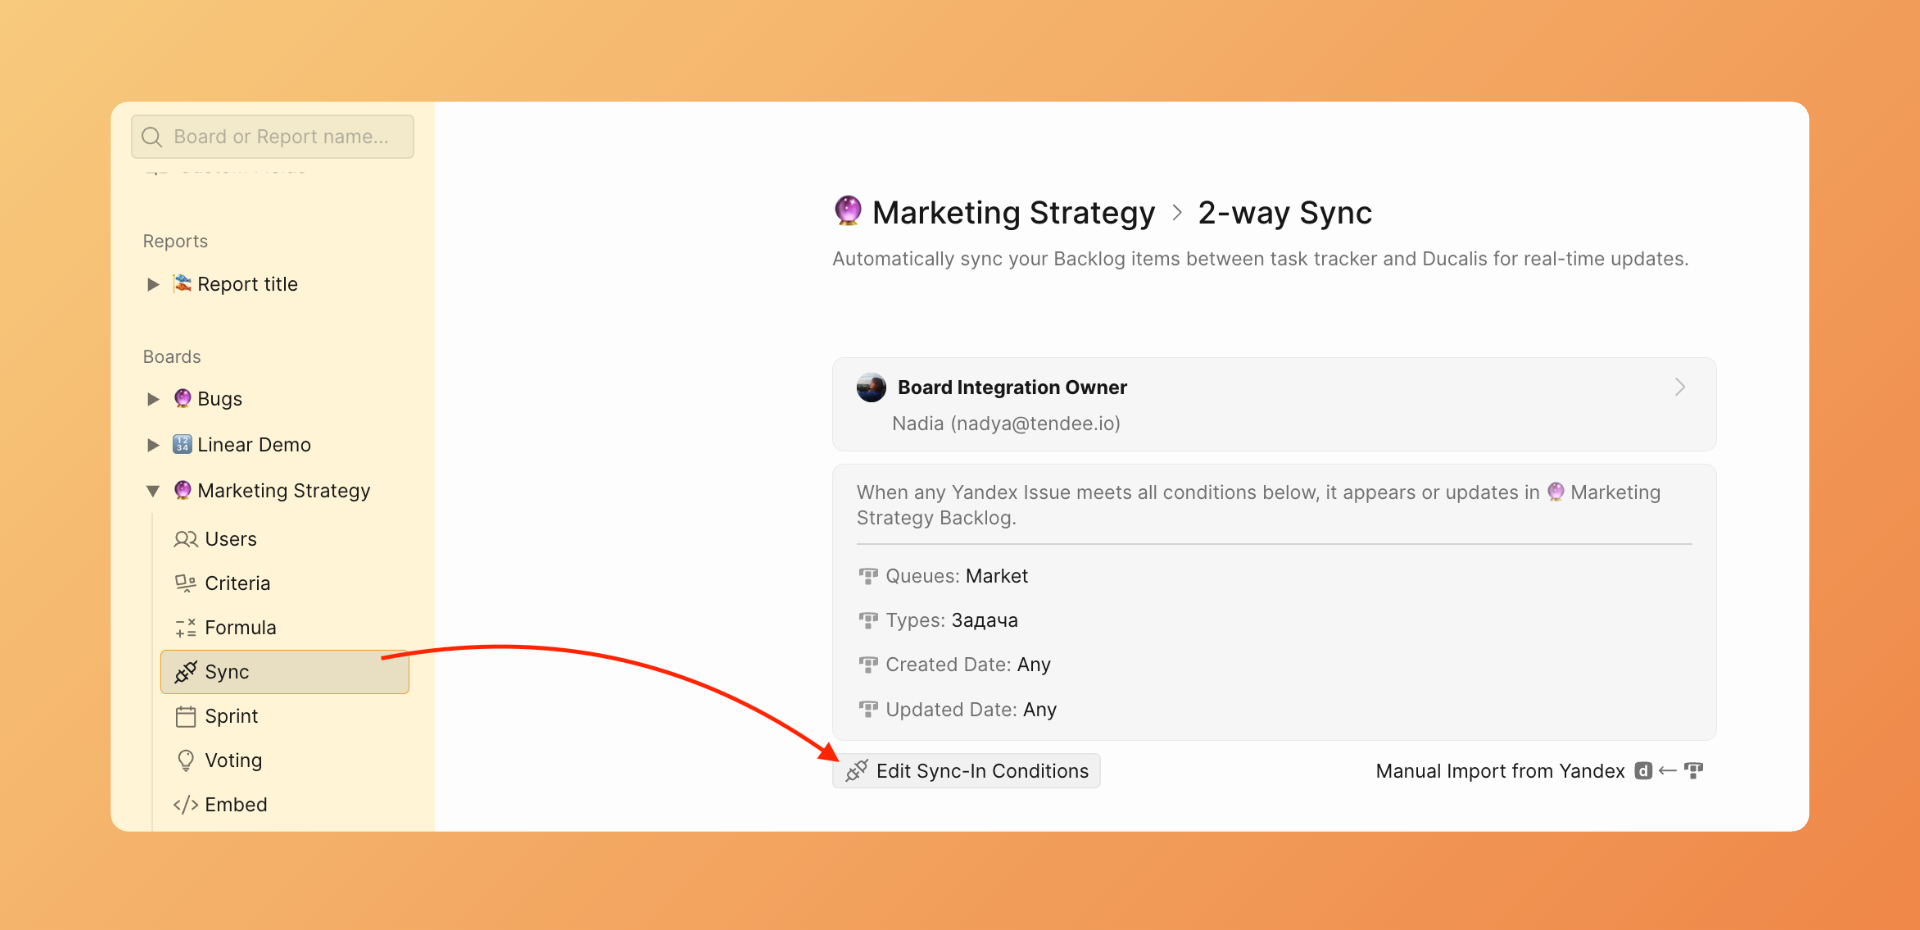
Após a importação inicial, modifique seus filtros a qualquer momento.
- Acesse Sync settings (Configurações de sincronização) e clique em Edit Sync-In Conditions (Editar condições de sincronização de entrada).
-
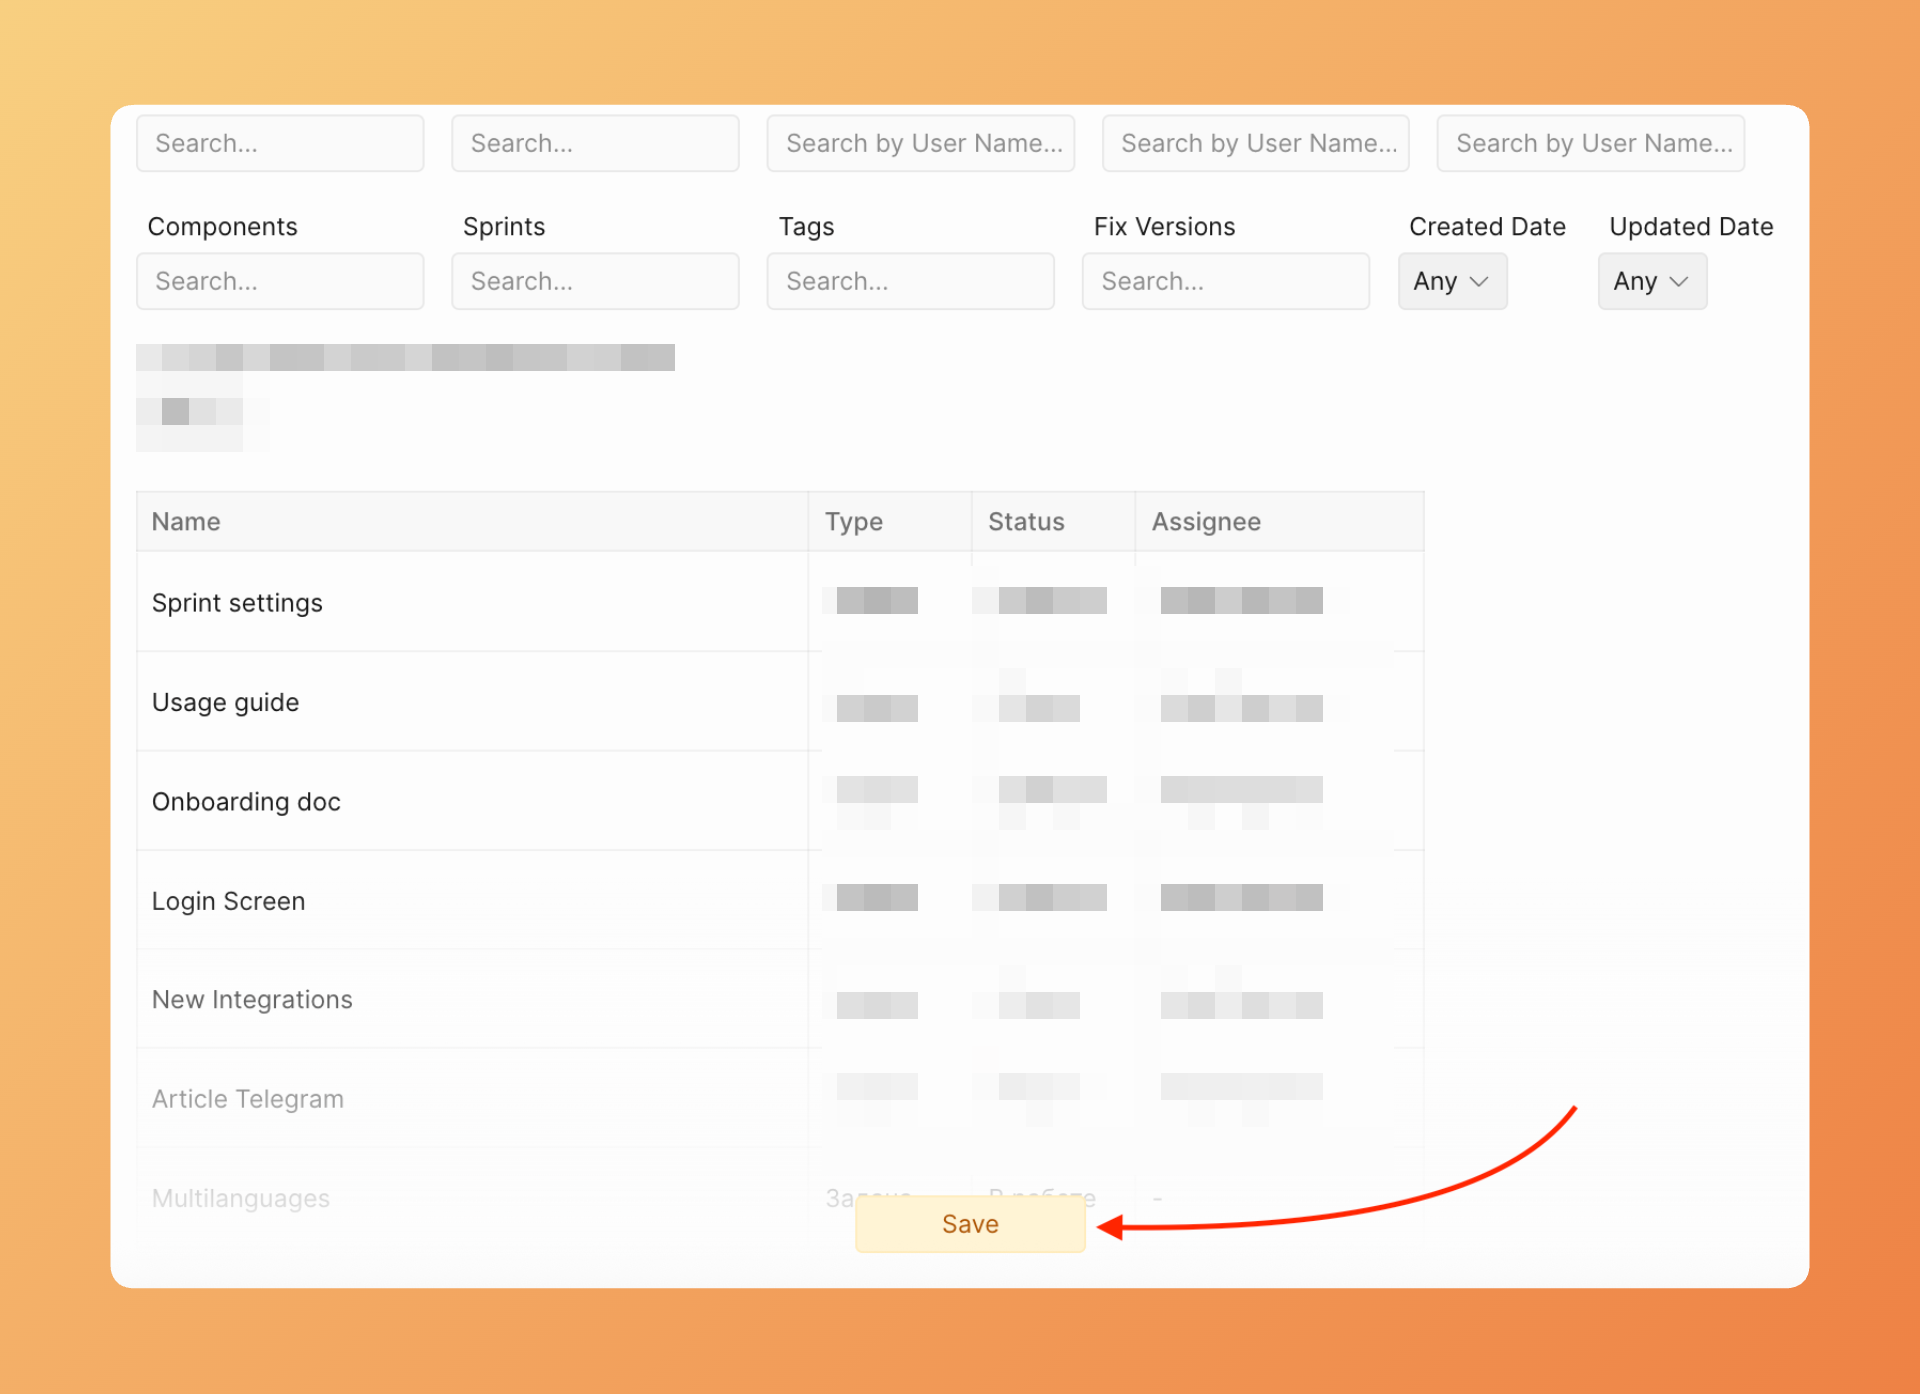
Ajuste sua seleção de filas ou filtros.
-
Clique em Save (Salvar) para aplicar as alterações.
Novos itens que correspondem aos seus filtros atualizados sincronizam automaticamente. Itens que não correspondem mais aos filtros permanecem no Ducalis, mas param de receber atualizações.
Entendendo filas vs projetos
O Yandex.Tracker usa terminologia diferente de outros trackers:
- Filas — O contêiner primário para itens, similar aos projetos do Jira. Cada fila tem seu próprio prefixo de chave para identificadores de itens.
- Projetos — Um agrupamento secundário que pode incluir itens de múltiplas filas, similar a épicos ou iniciativas.
Próximos passos
Após conectar e importar itens, configure a sincronização bidirecional para enviar os resultados de priorização de volta ao Yandex.Tracker: