Jira'da Örneklerle WSJF Puan Formülü Hesaplama
Özel alanlar ve Jira Otomasyon kullanarak Gecikme Maliyeti hesaplamaları ve otomatik WSJF puanlamasıyla Jira'da WSJF önceliklendirmesini kurun.
hi.ducalis.io ile Jira İş Listesine WSJF Puanı Ekleyin
Jira iş listeniz için WSJF puanlamasını 2 dakikanın altında uygulayın.
-
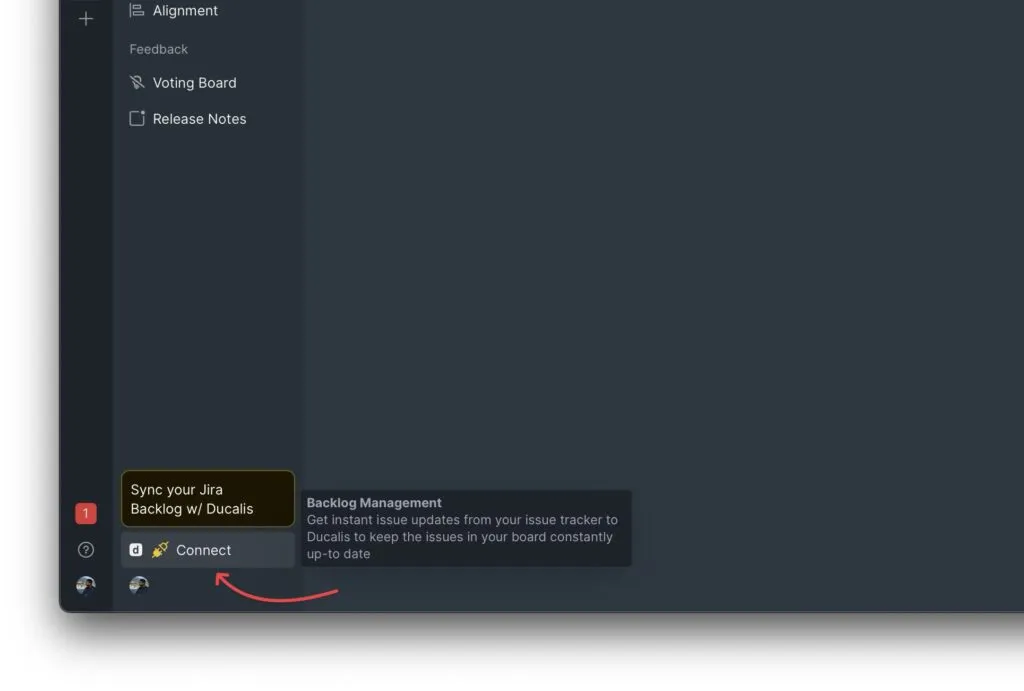
Kütüphanemizden WSJF çerçevesini uygulayın. WSJF Kılavuzu'nda açıklanan tüm önceden tanımlanmış ayarları içerir.
-
İş listenizi senkronize etmek için Jira'yı bağlayın.
-
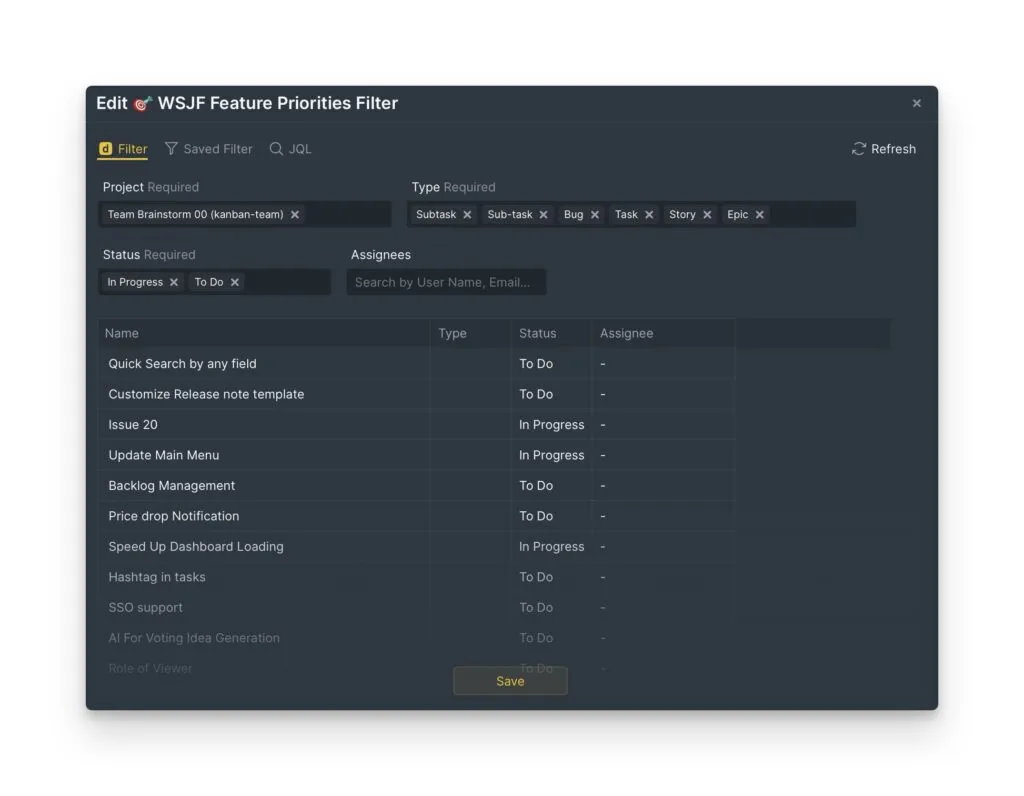
İş listenizin hangi bölümünü değerlendireceğinizi seçmek için senkronizasyon filtresini düzenleyin. Filtreyle eşleşen konular Ducalis içinde hemen görünür.
-
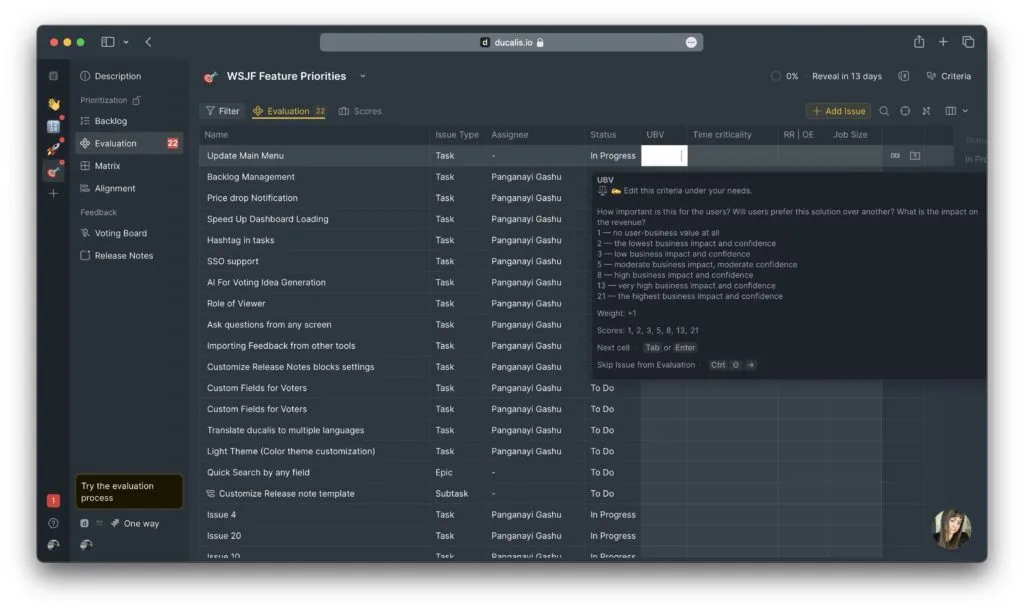
İş listenizi değerlendirin.
2 Dakikanın Altında Sonuçlar
Jira iş listesi için WSJF puan önceliklendirme kurulumunu 1 dakika 58 saniyede gösteren videoyu izleyin (düzenlenmemiş):
Ek yapılandırma:
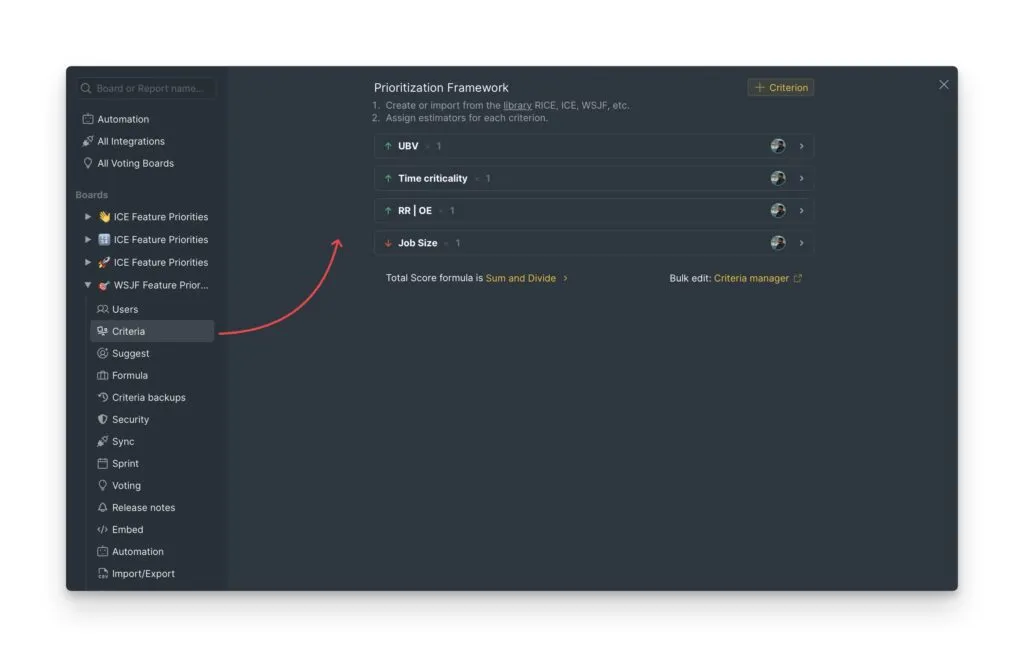
Kriter açıklamalarını, formüllerini veya diğer parametrelerini düzenlemek için kriter ayarlarını kontrol edin:
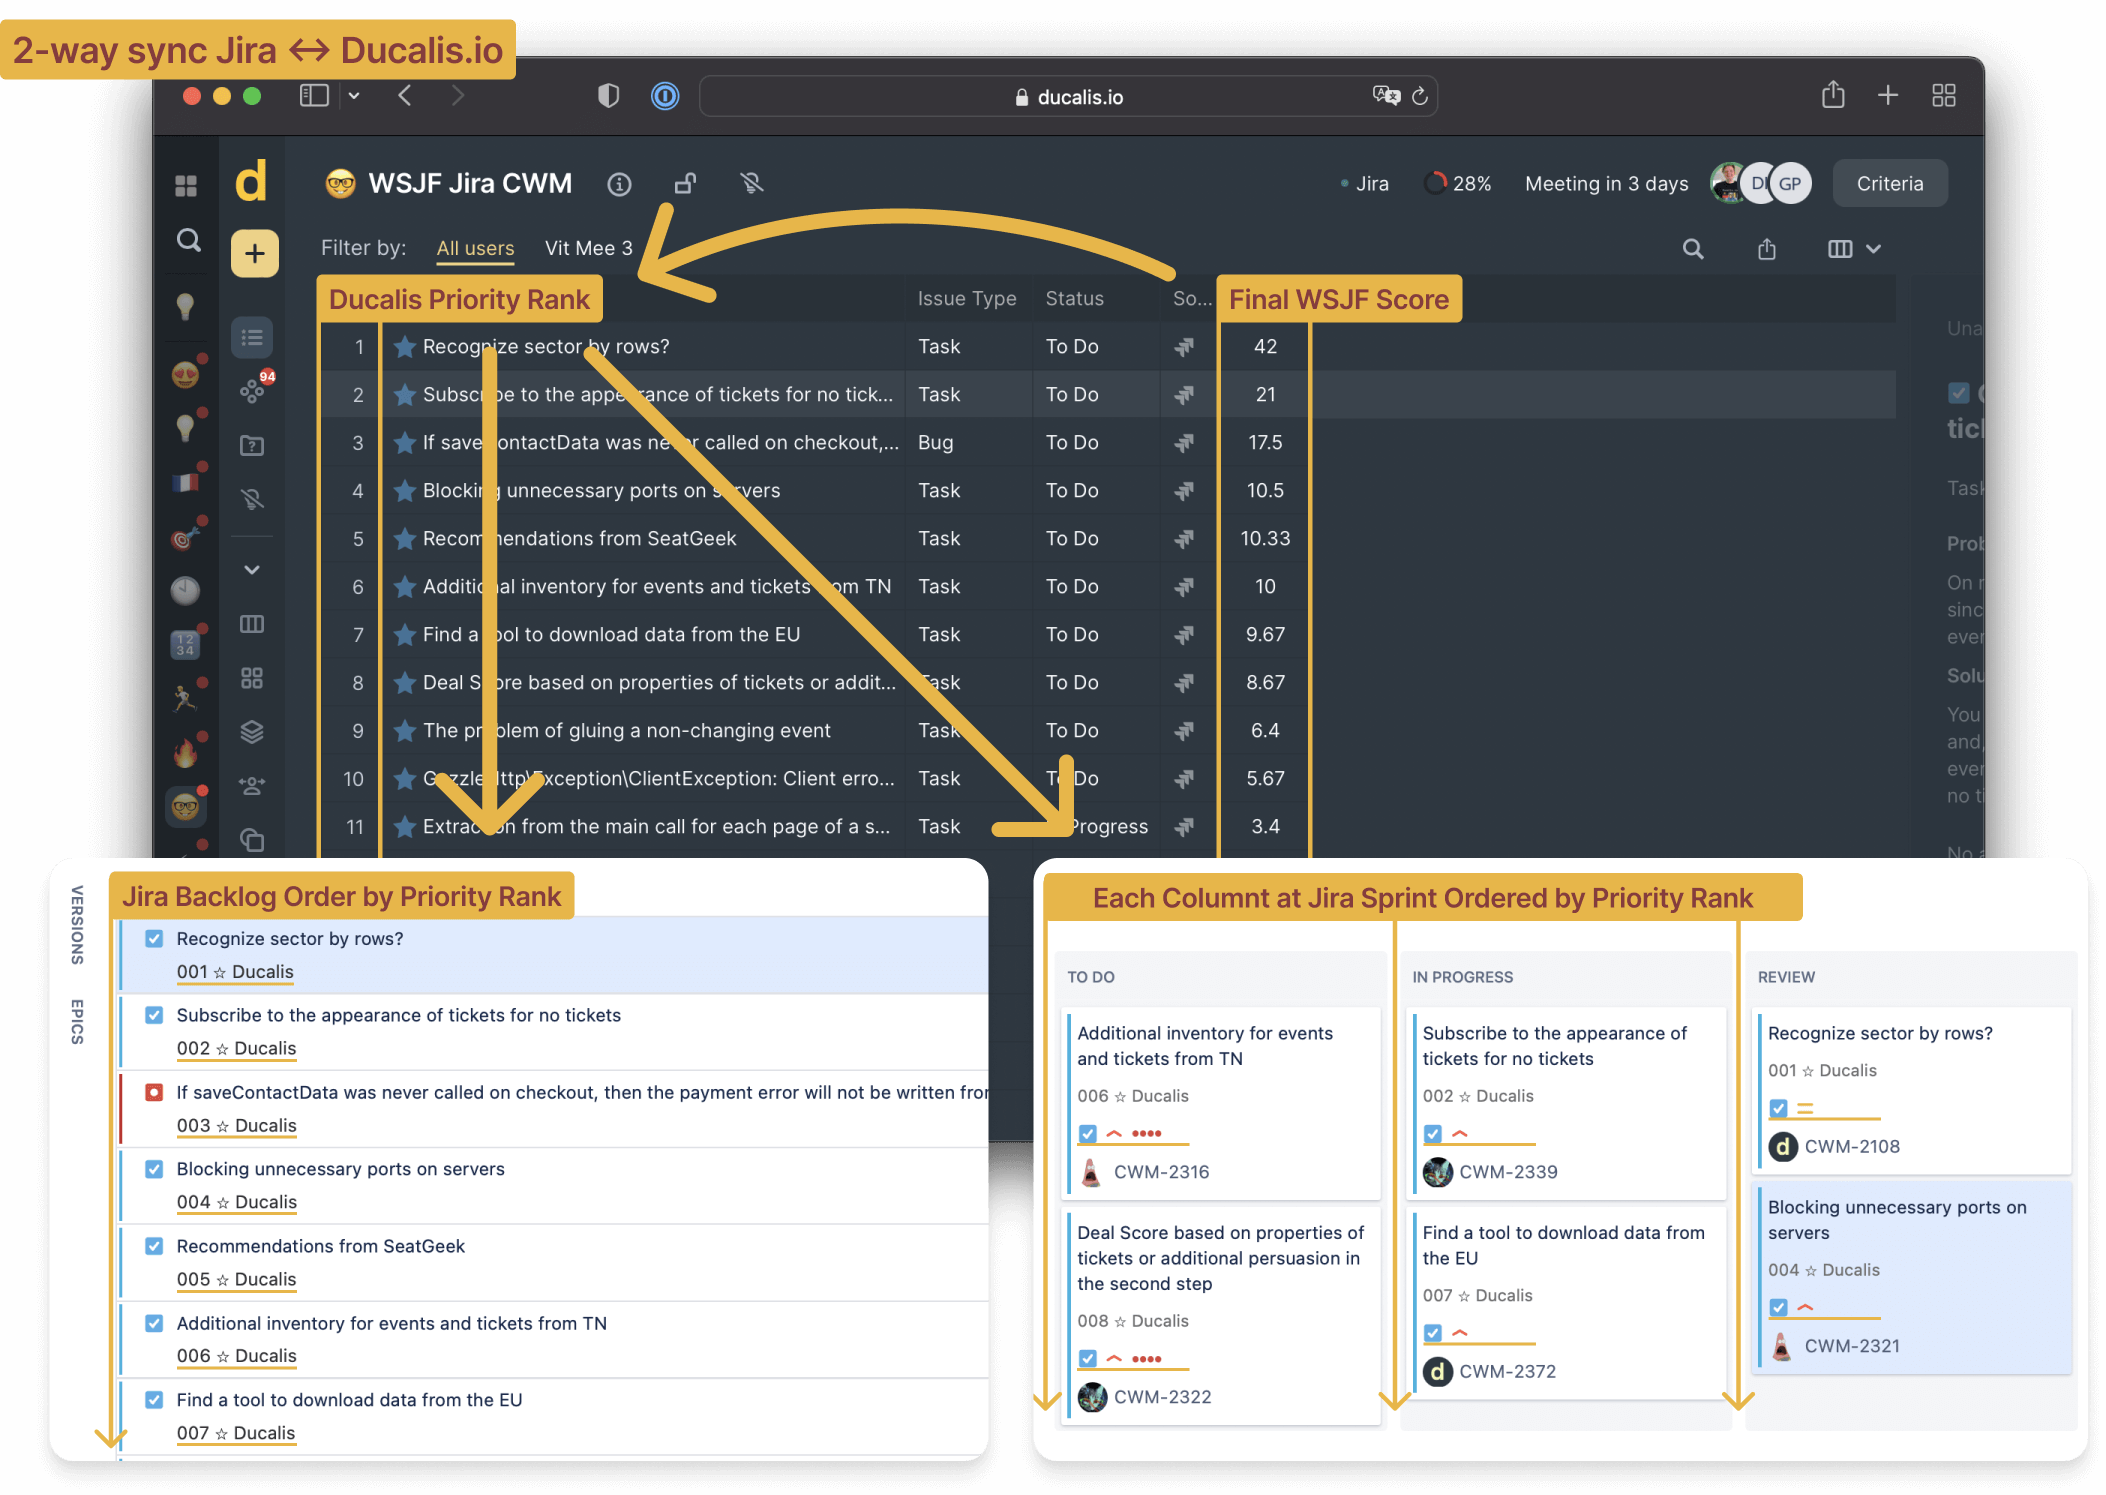
Öncelik puanlarını Ducalis içinden Jira'ya geri göndermek için 2 yönlü senkronizasyon kurun:
Yerleşik Araçlarla Jira İş Listesine WSJF Puanı Ekleyin
Öncelik puanlarını hesaplamak için Jira hesaplanmış özel alanları ve otomasyon kuralları kurun.
Yaklaşık uygulama süresi: 1 saat
Artılar:
- Yerleşik Jira araçları (ek maliyet yok)
Eksiler:
- Kurması ve bakımı karmaşık
- Manuel formül hesaplama (tam bir önceliklendirme süreci değil)
- Kırılgan yapılandırma
Daha fazla bilgi: Önceliğe Göre Jira İş Listesi Sırasını İyileştirmenin 8 Yolu
Kılavuz Hedefleri
- WSJF Puanını Jira sağ panelinde görüntüleme
- İş listesi ve sprint görünümlerine WSJF Puanı ekleme
- İş listesi öğelerini WSJF Puanına göre sıralama
WSJF Hesaplamasını Anlama
WSJF puanı iki adım gerektirir:
Gecikme Maliyeti (CoD):
CoD = İş Değeri + Zaman Kritikliği + Risk Azaltma
WSJF Puanı:
WSJF Puanı = CoD / İş Boyutu
WSJF Kriterleri için Özel Alanlar Oluşturun
6 özel alan oluşturun:
Düzenlenebilir alanlar:
- Zaman Kritikliği
- İş Değeri
- Risk Azaltma
- İş Boyutu
Hesaplanmış alanlar:
- Gecikme Maliyeti
- WSJF Puanı
Düzenlenebilir Özel Alanlar Oluşturun
Kazara düzenlemeyi önlemek için önceden tanımlanmış değerlerle Fibonacci Dizisi kullanın.
-
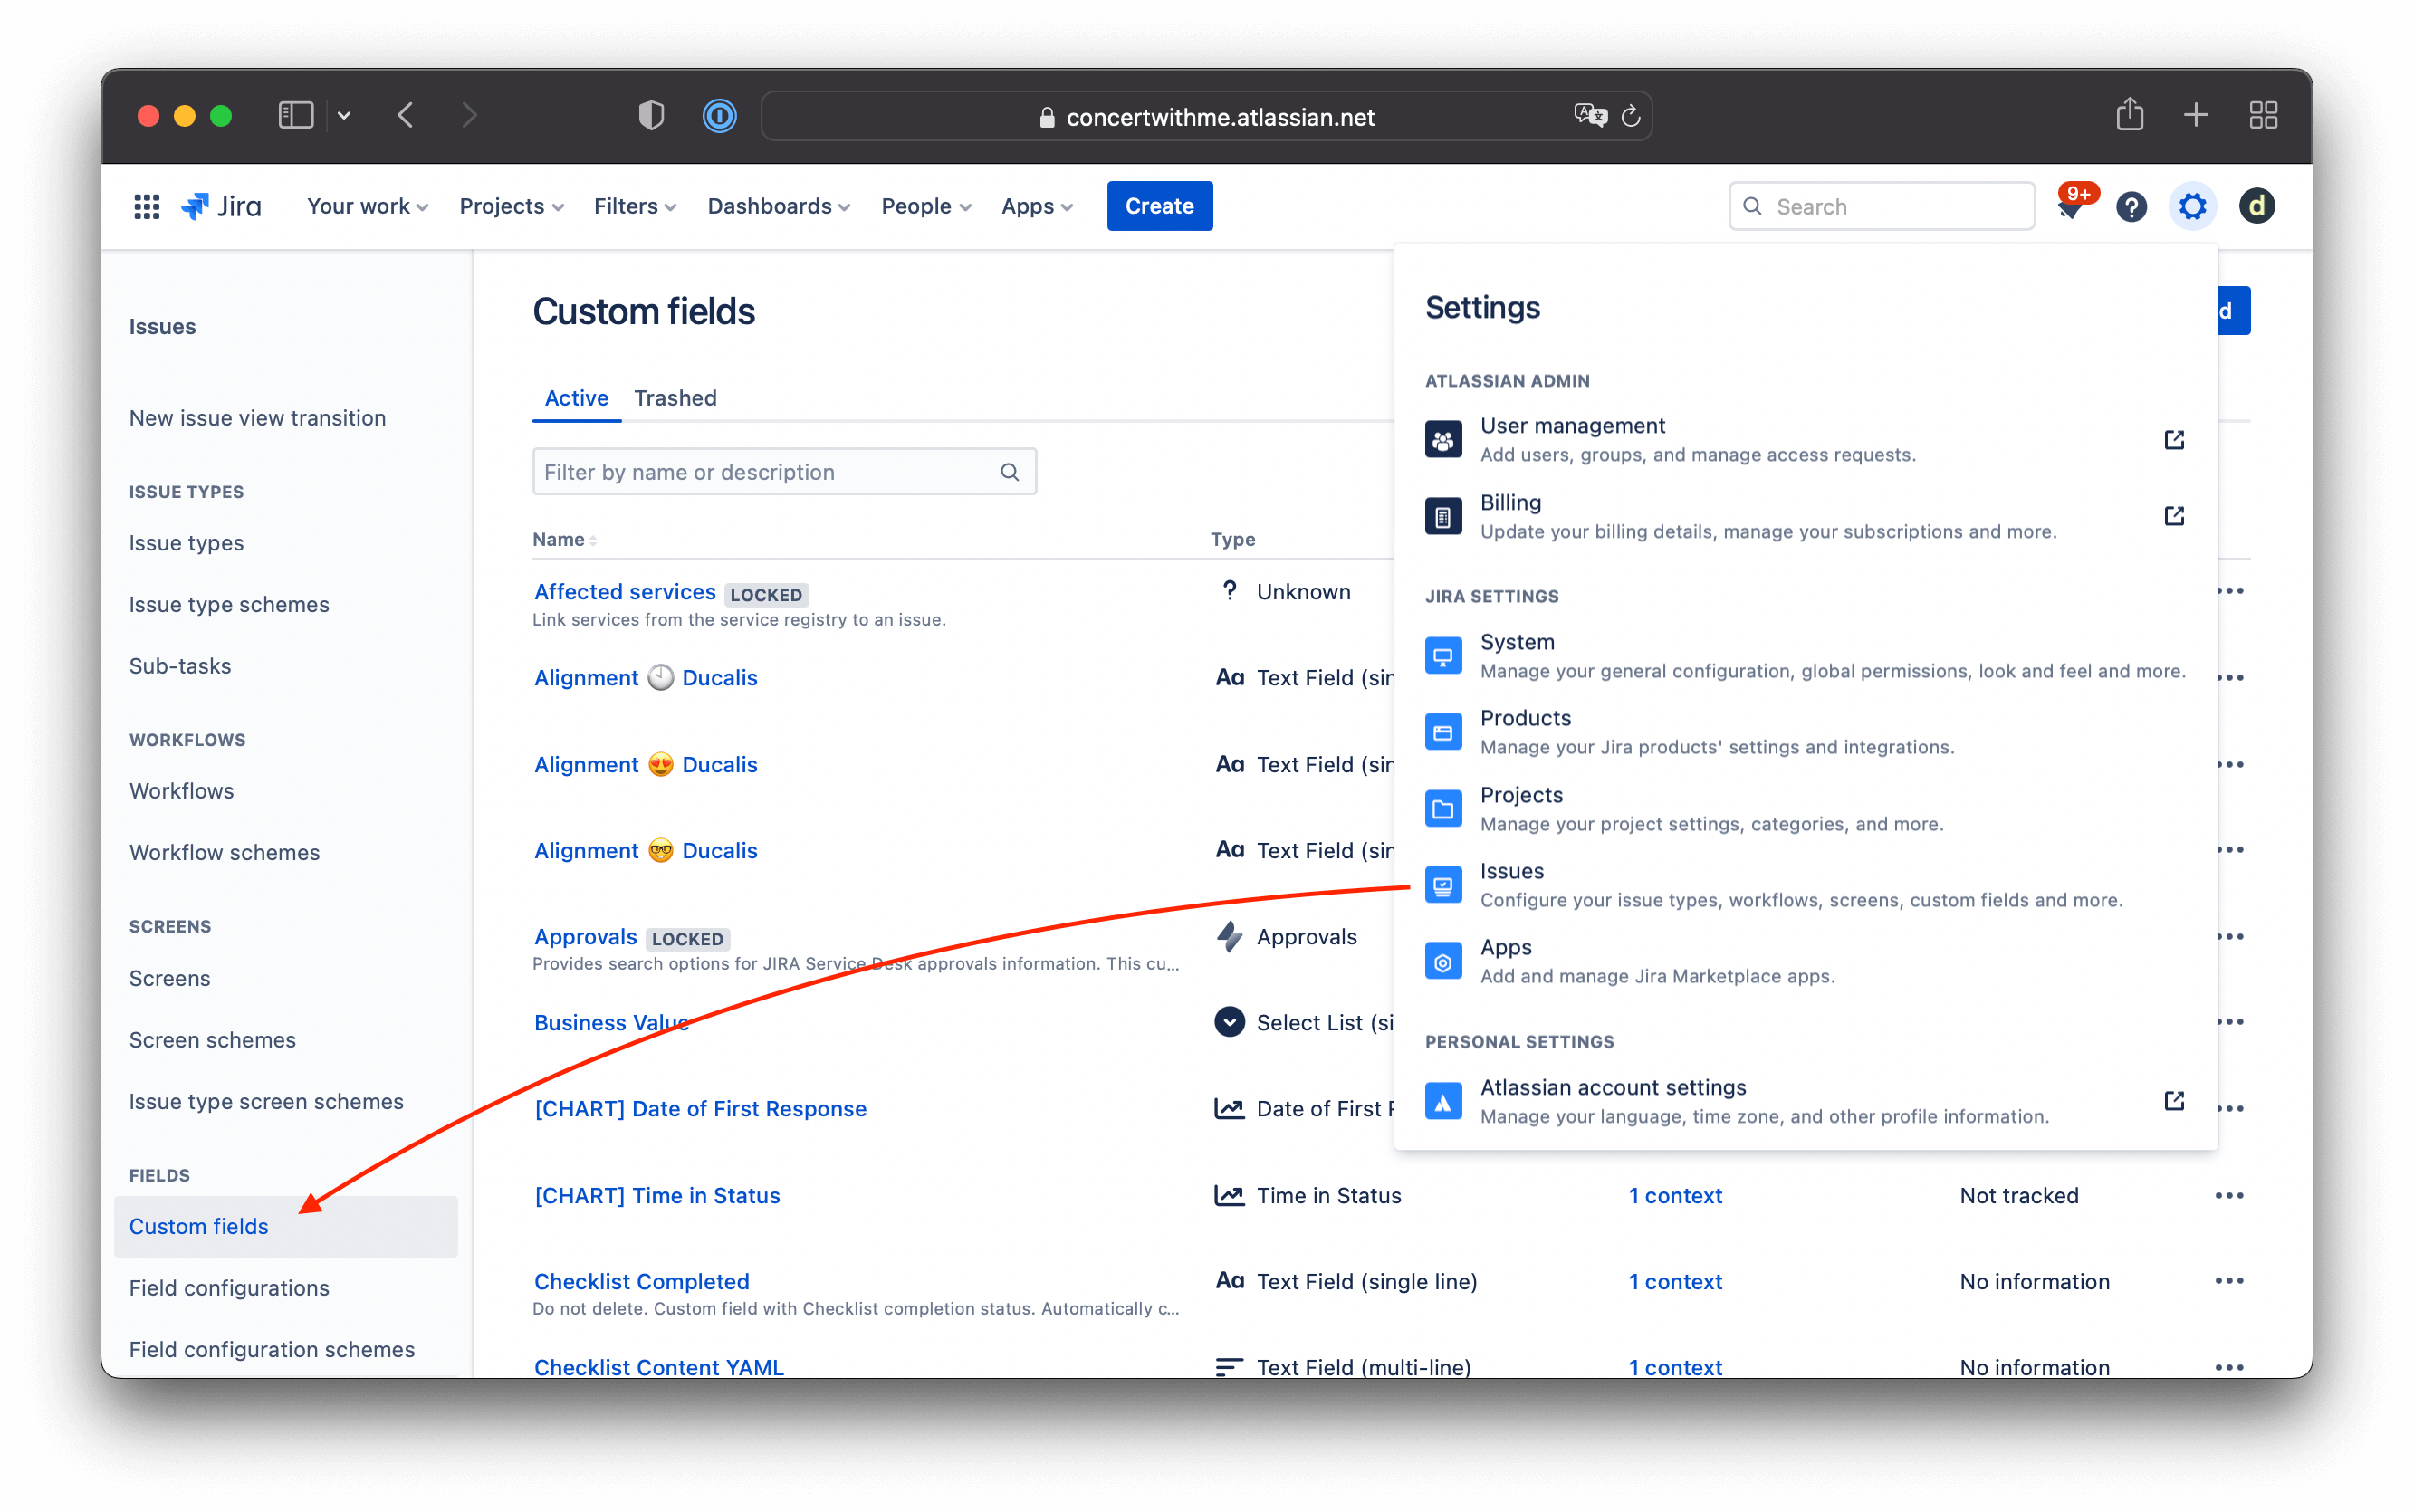
Custom fields settings (Özel alan ayarları) bölümüne gidin.
-
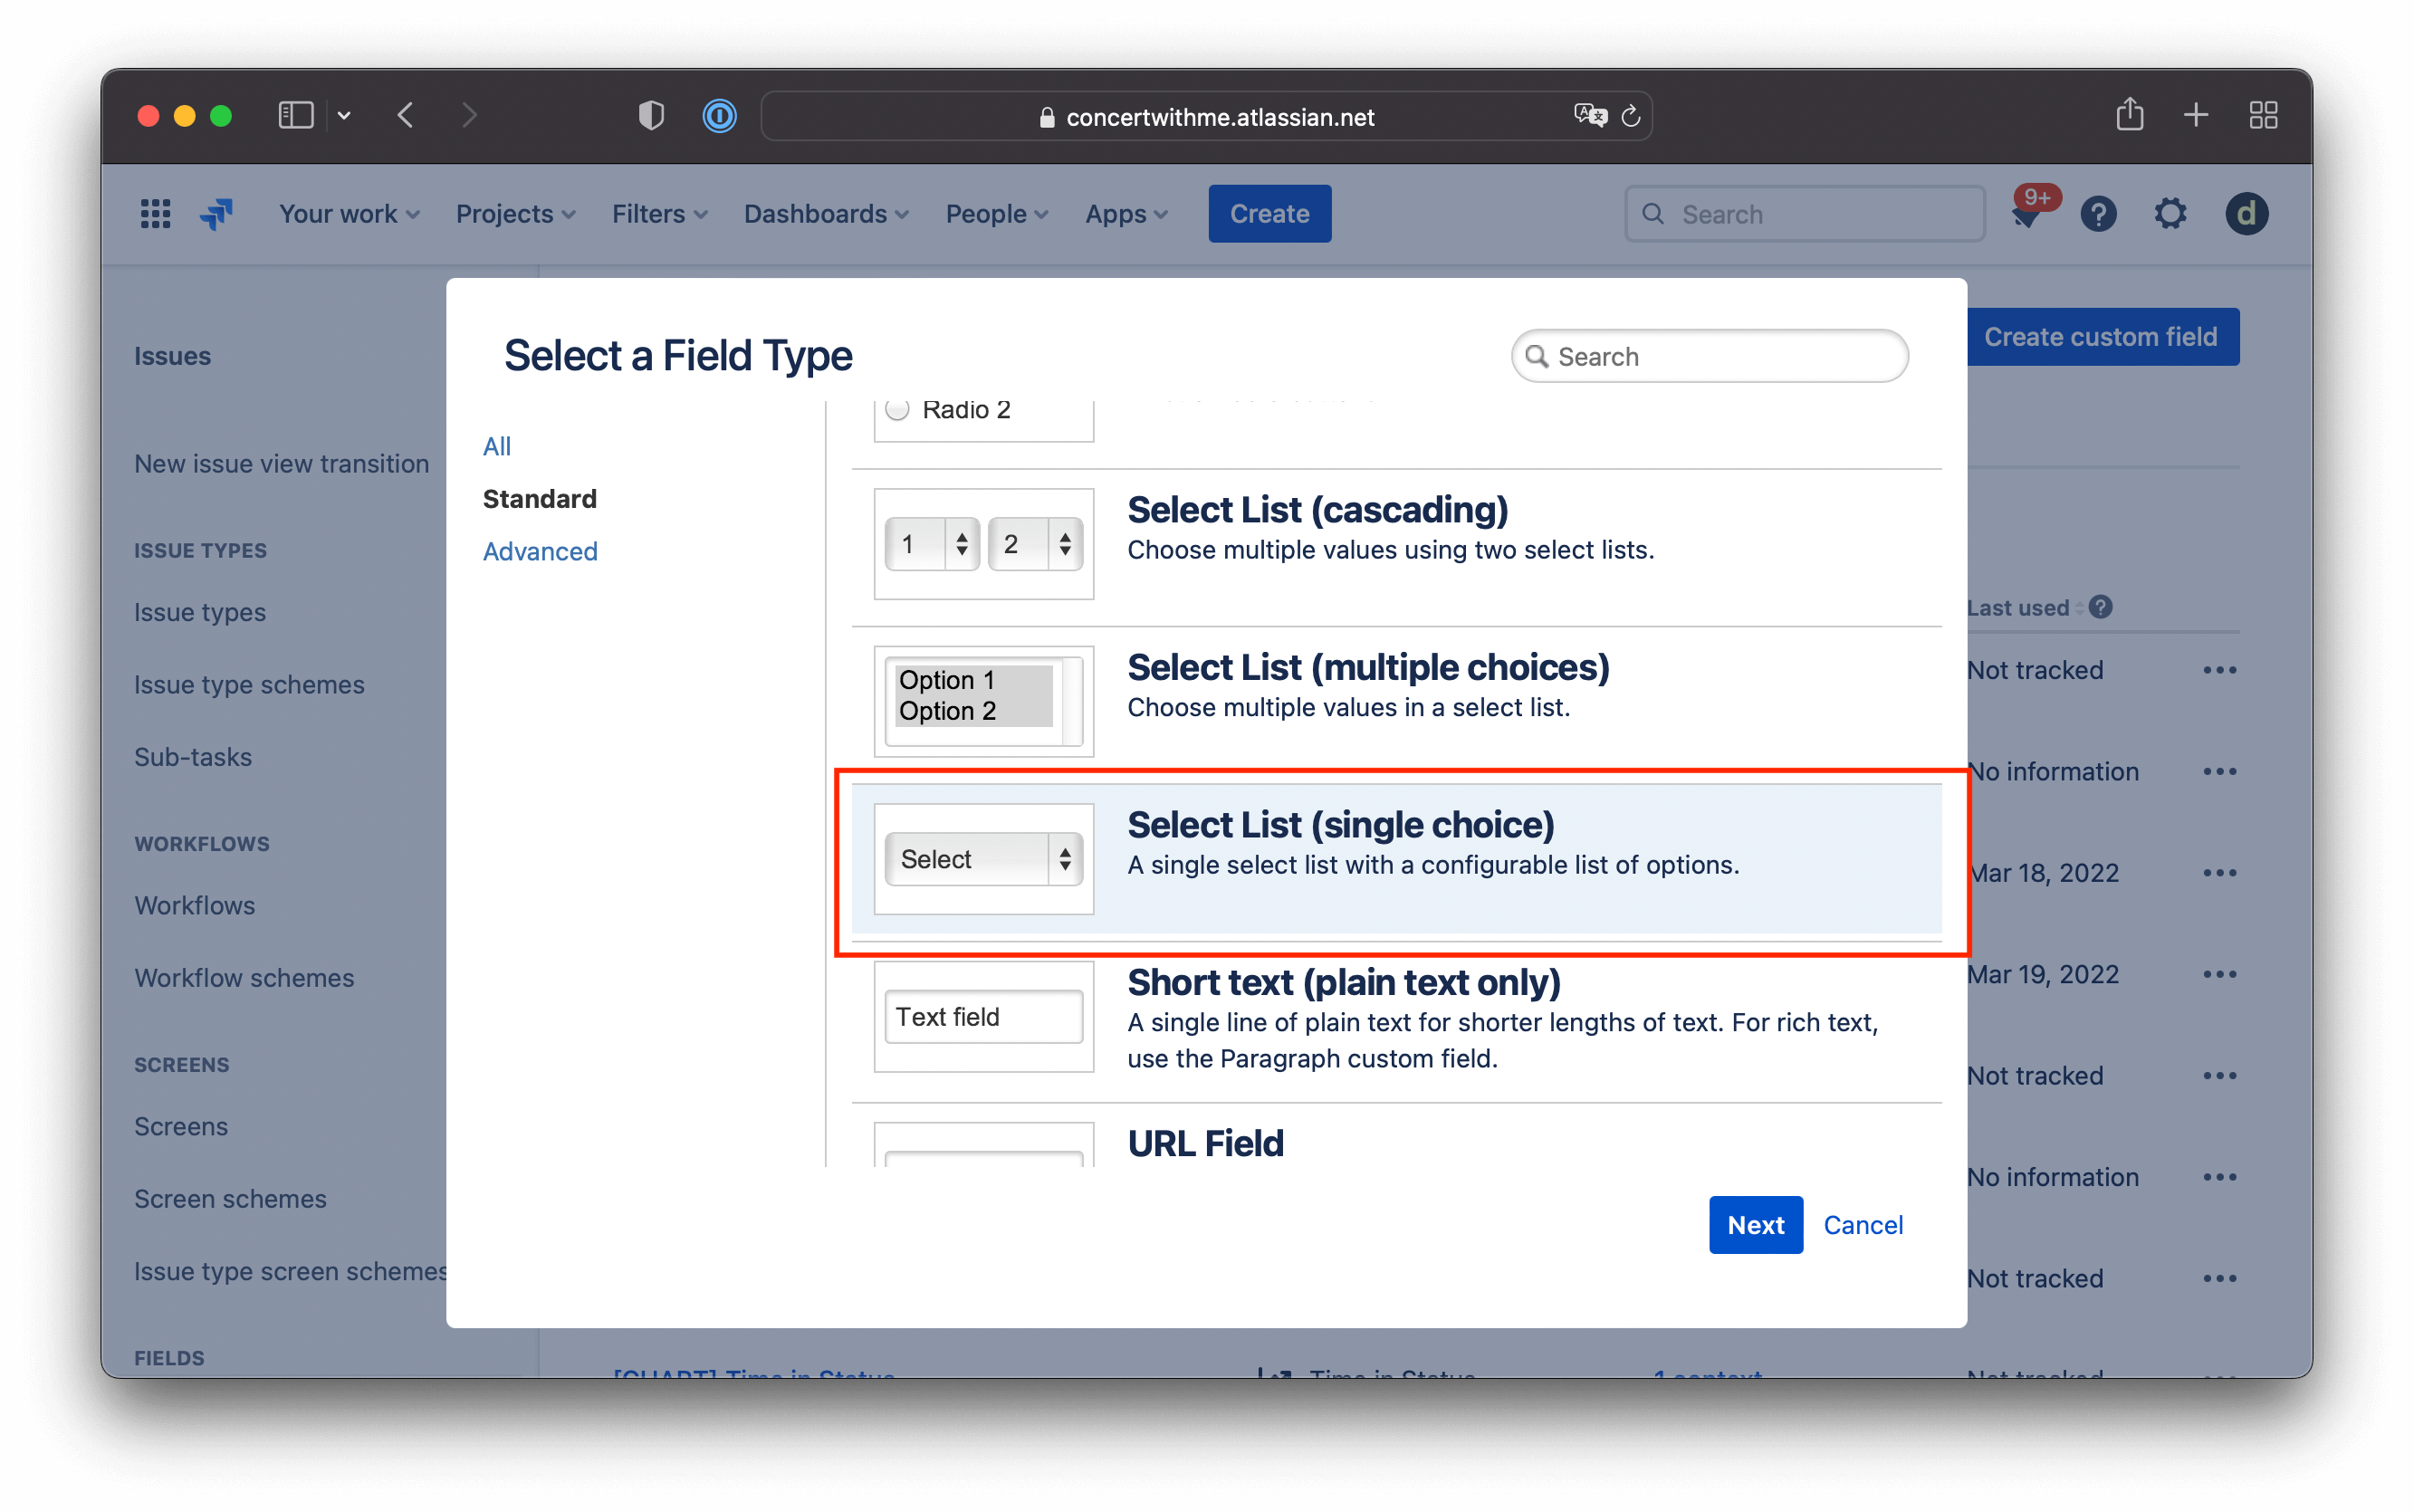
Alan türü olarak Select List (single choice) (Liste Seç (tek seçim)) seçin.
-
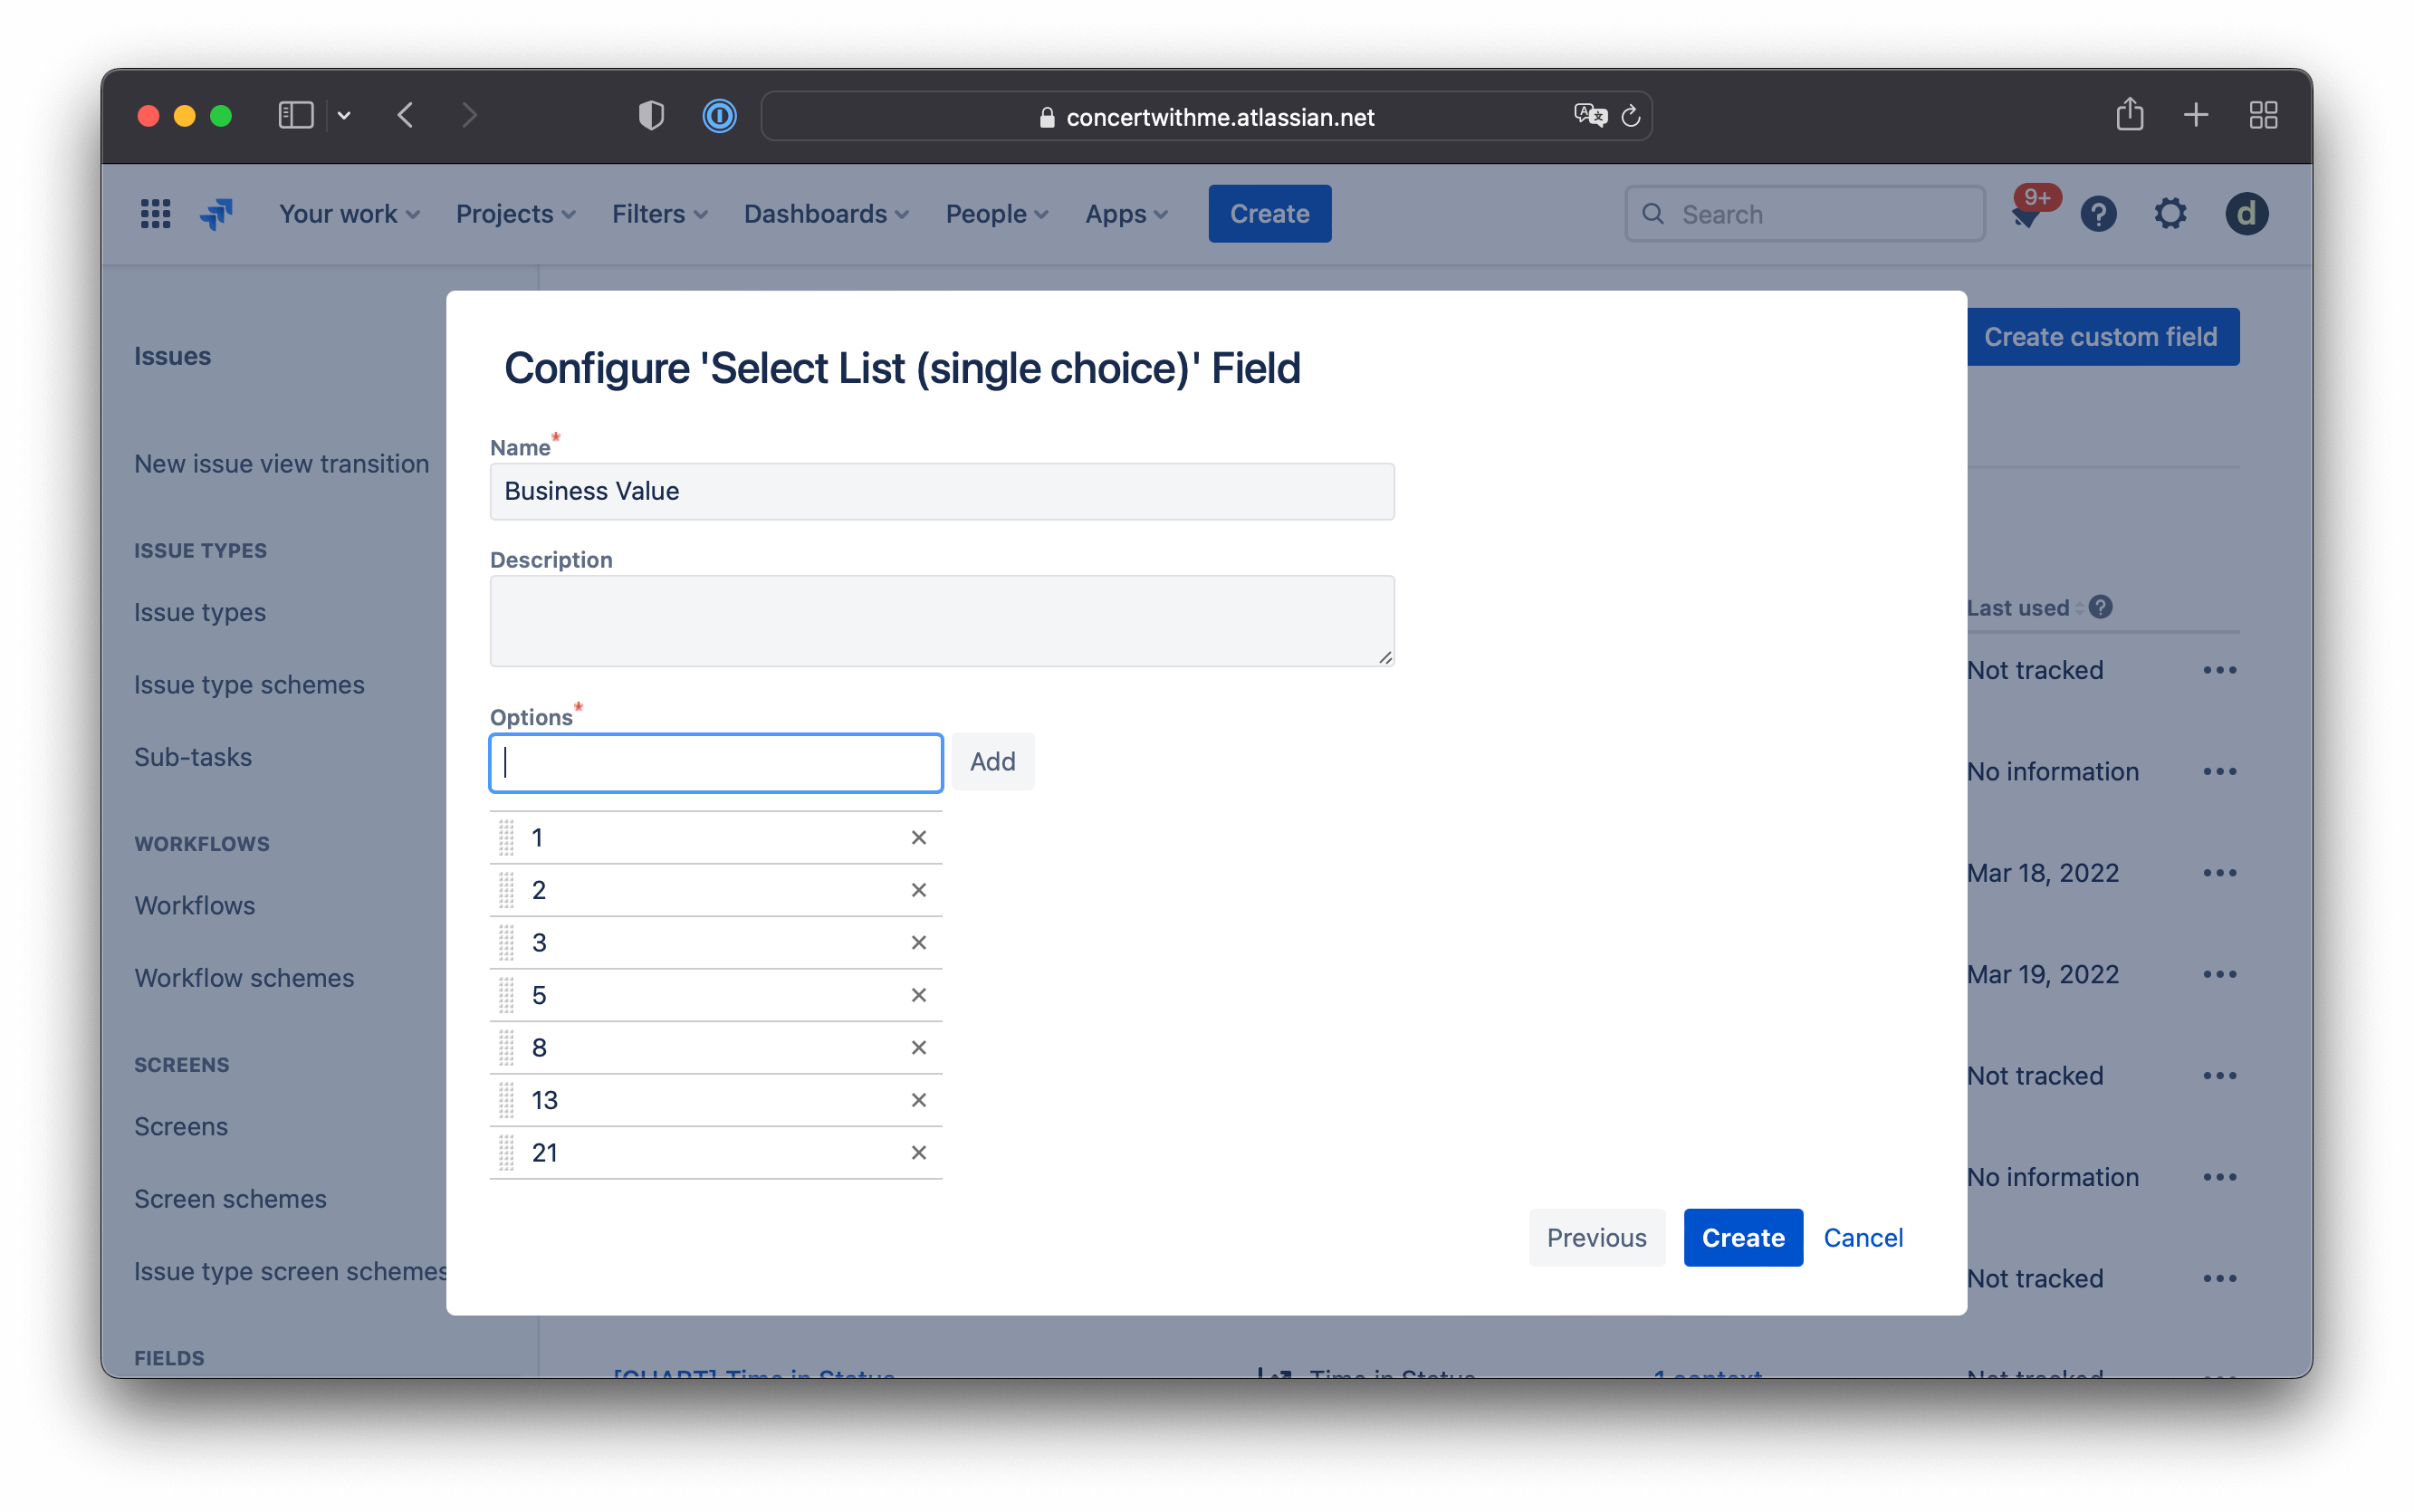
Alan adını ayarlayın ve değerlendirme için Fibonacci Dizisi değerleri ekleyin.
-
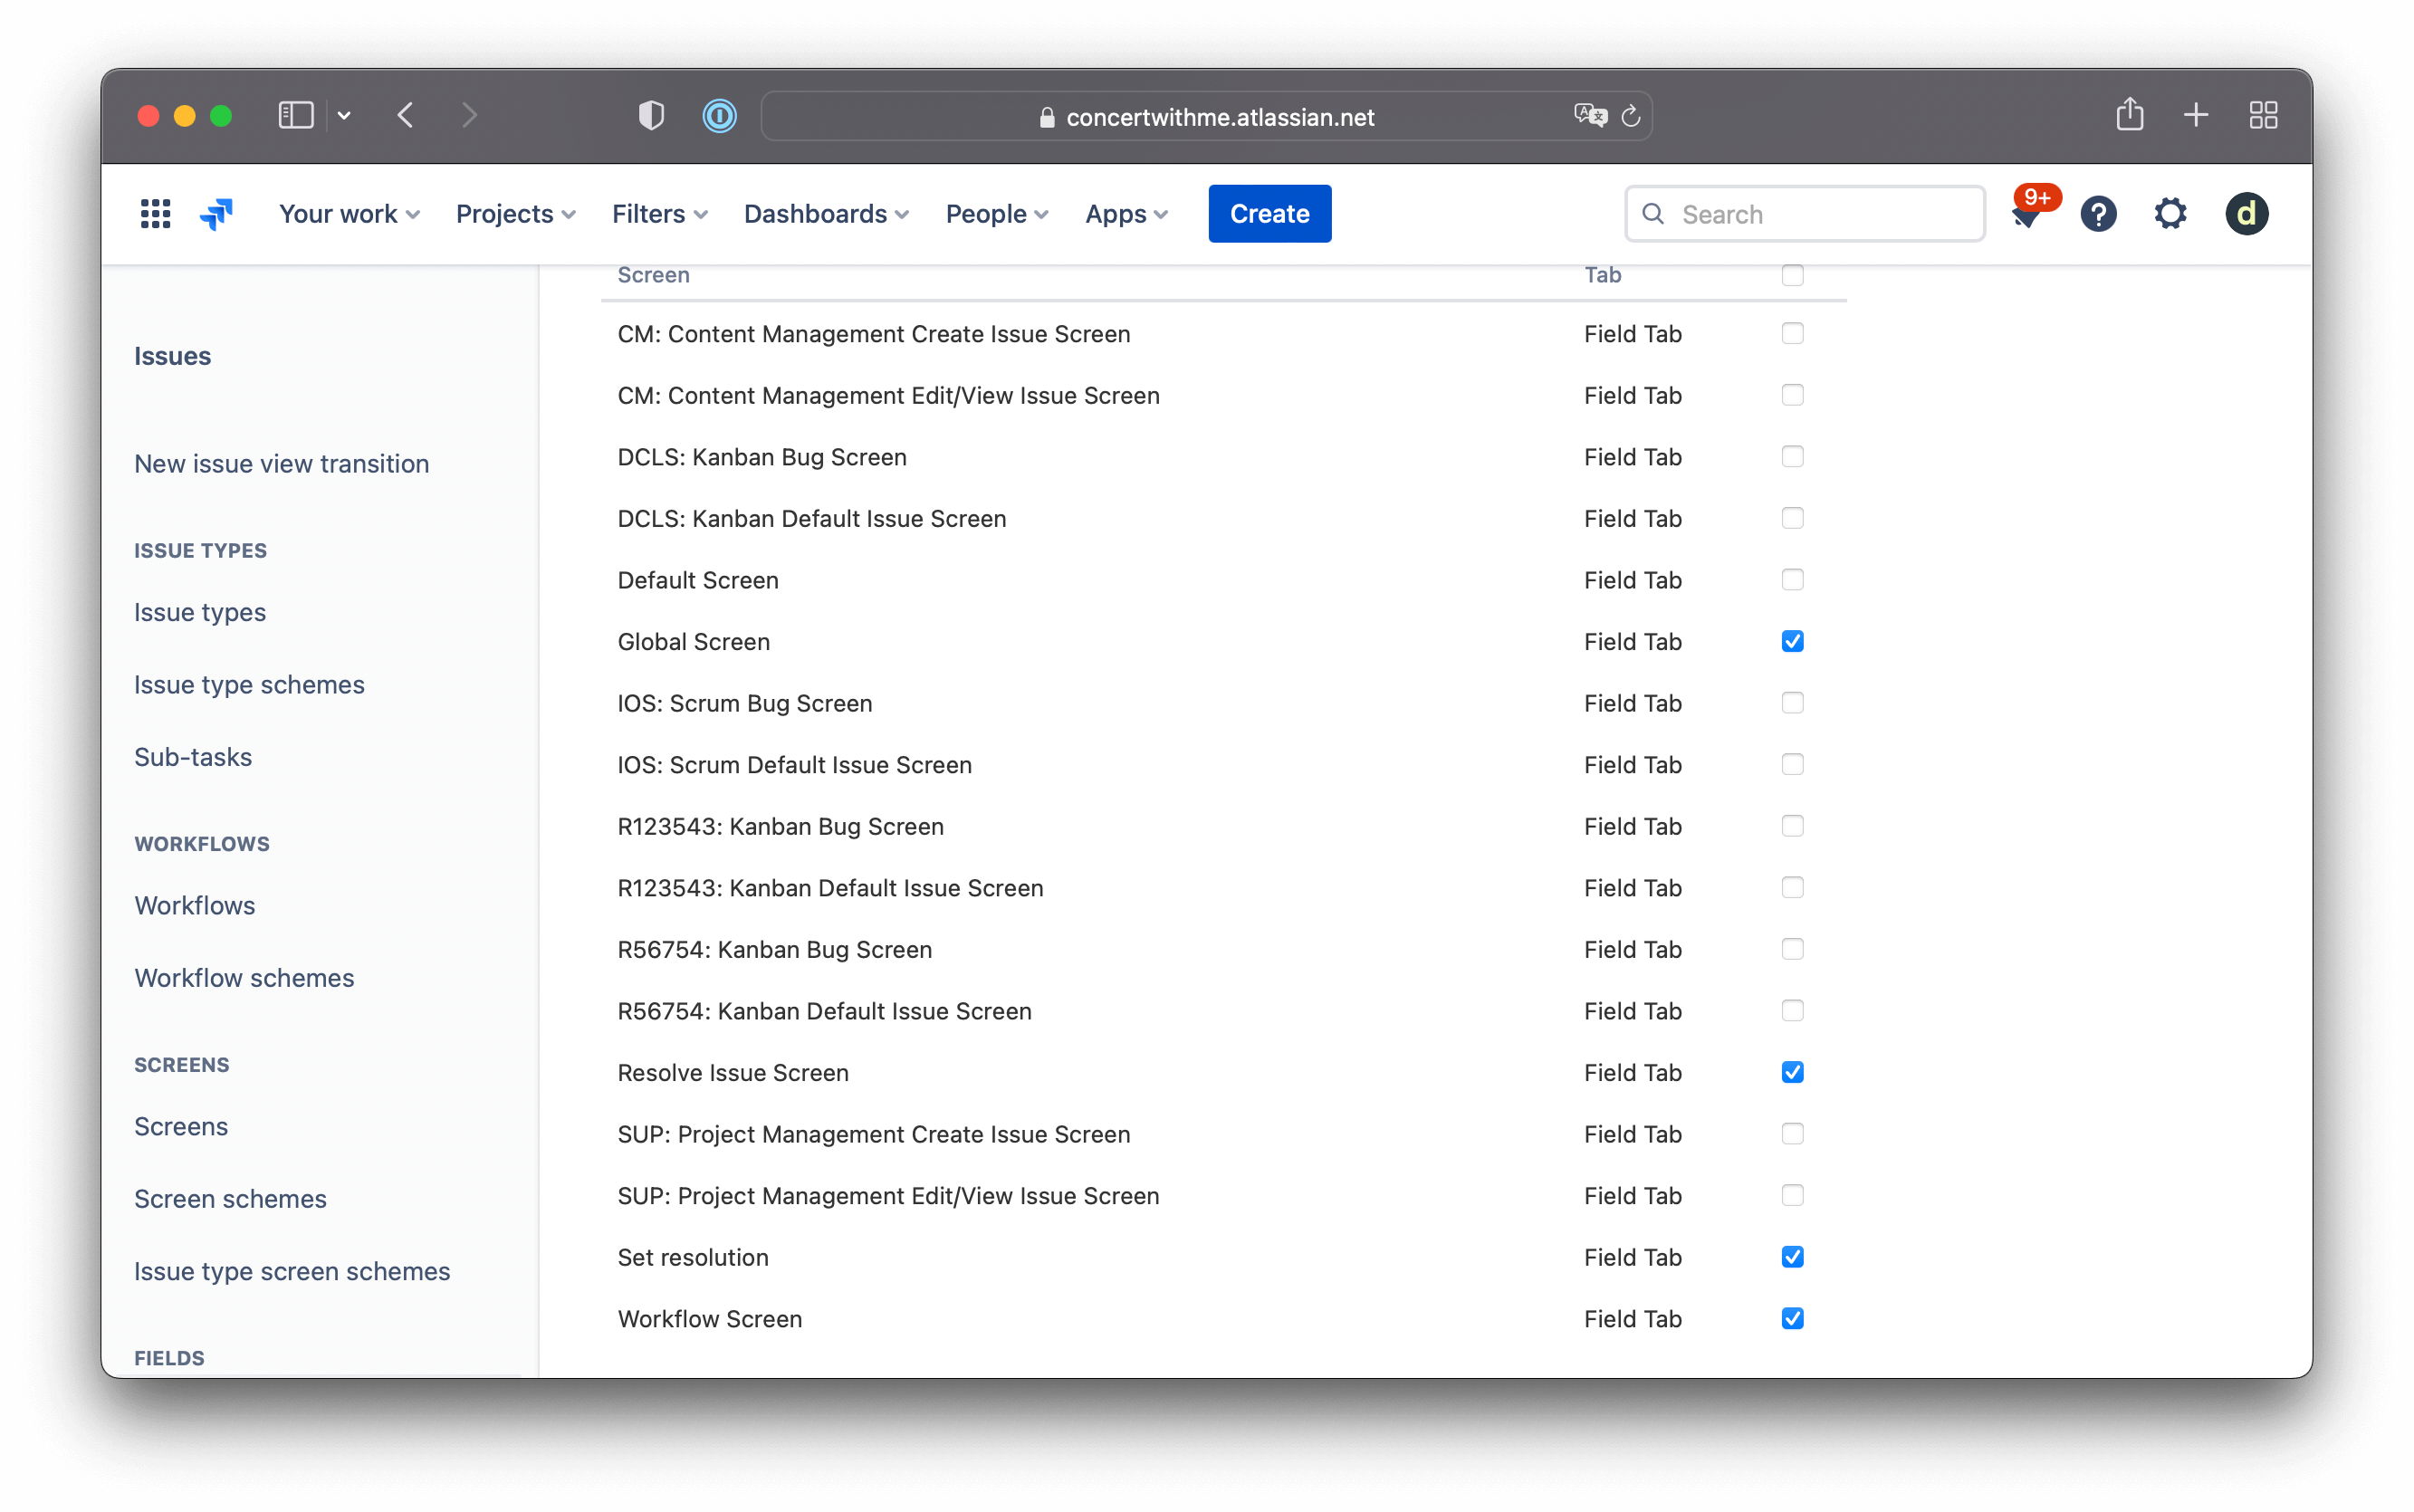
Alanları Jira Ekranlarınıza ekleyin. Yaygın ekranlar şunları içerir:
- Default Screen (Varsayılan Ekran)
- Workflow Screen (İş Akışı Ekranı)
- Pano filtrenizden proje anahtarlarına sahip tüm ekranlar
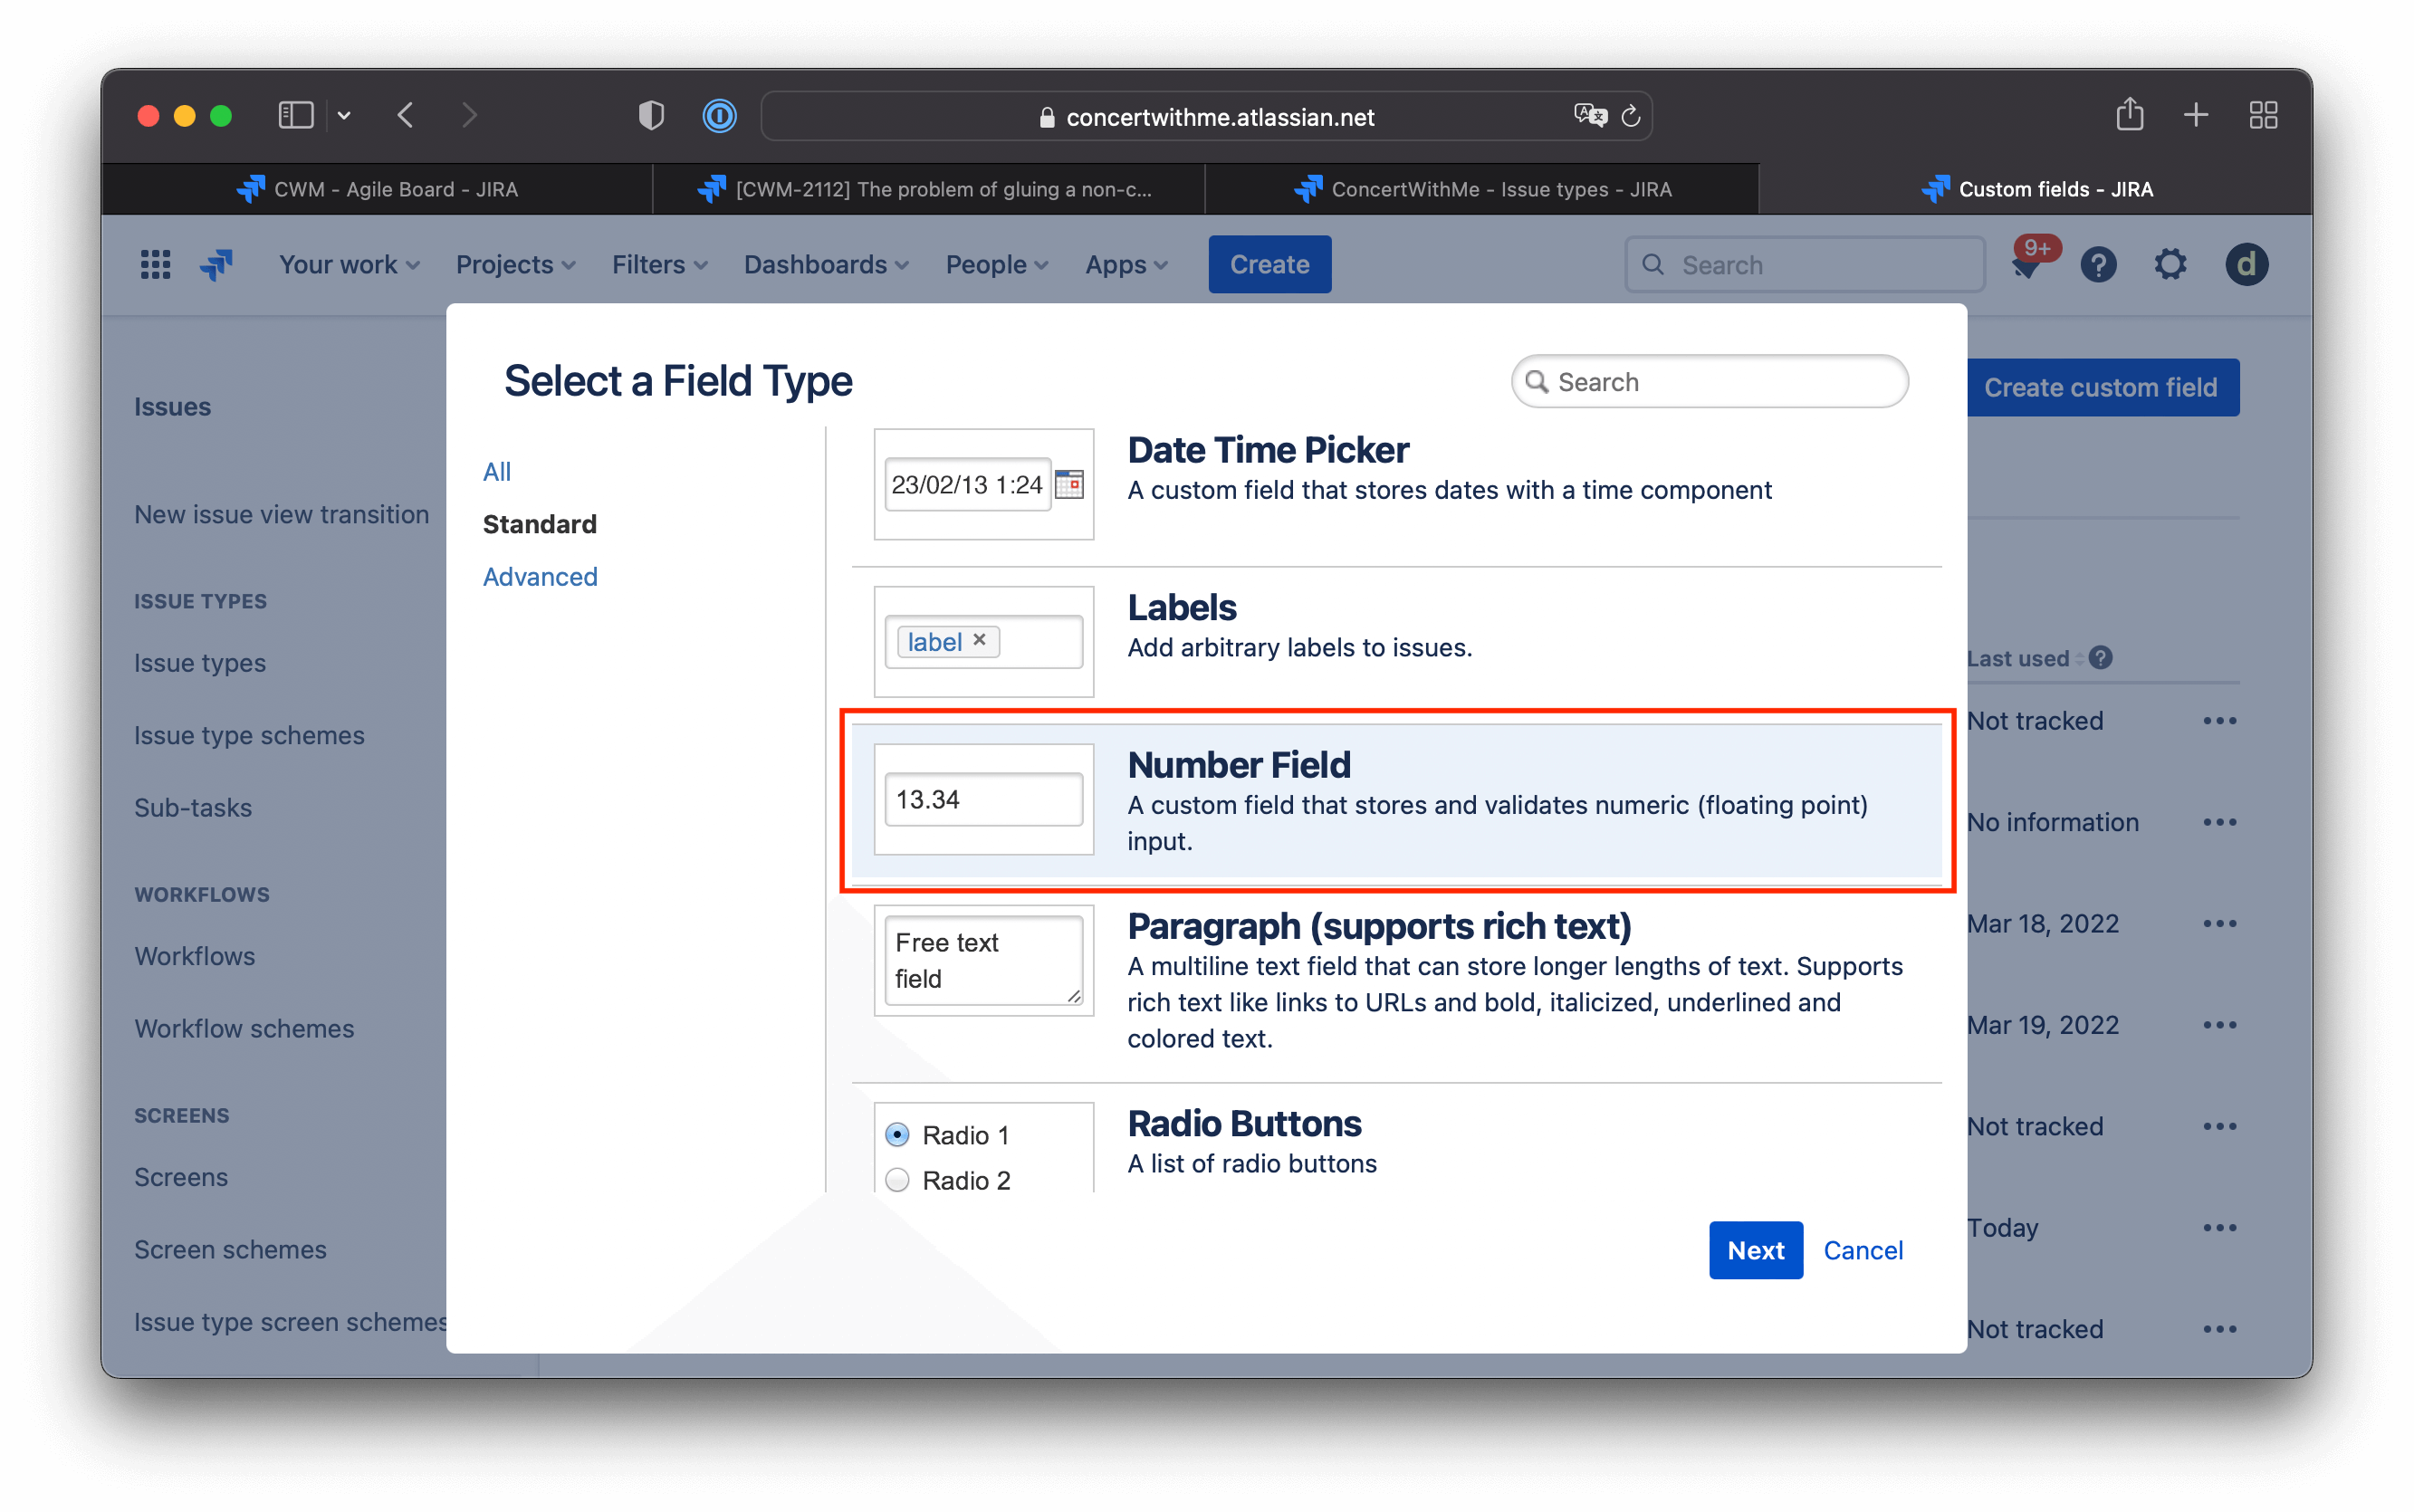
Hesaplanmış Özel Alanlar Oluşturun
Gecikme Maliyeti ve WSJF Puanı için hesaplanmış değerleri saklamak üzere sayı alanları oluşturun.
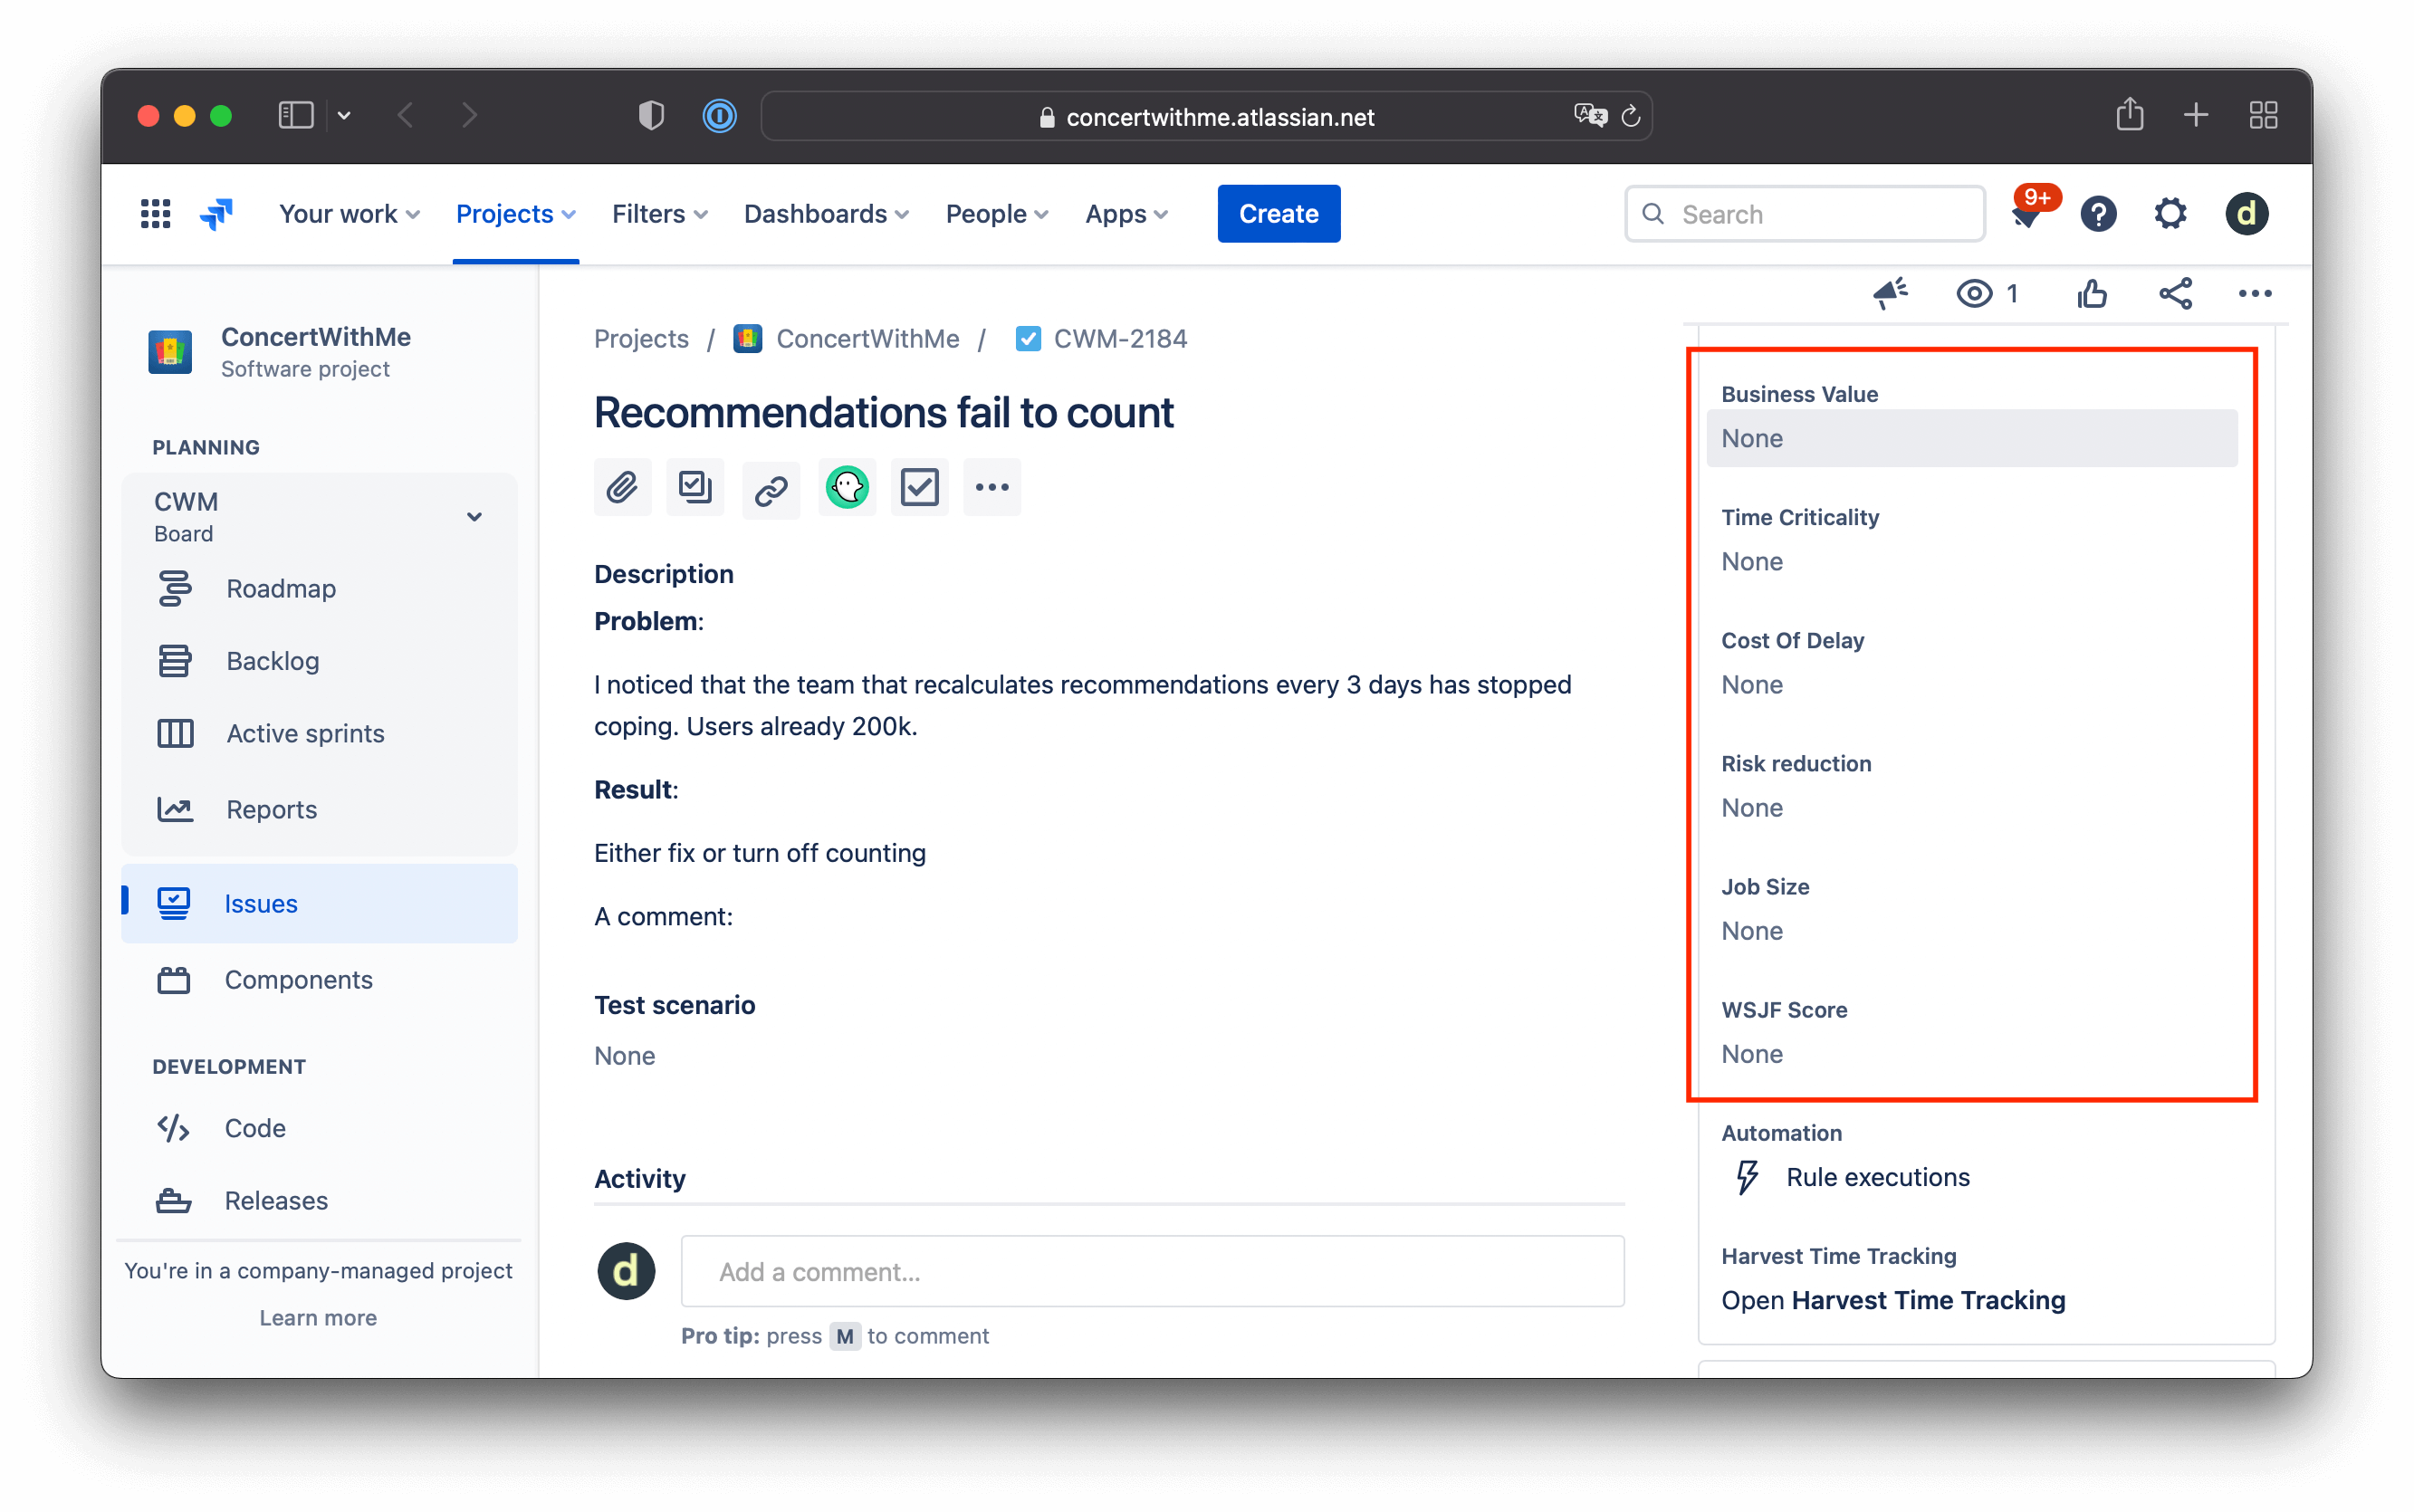
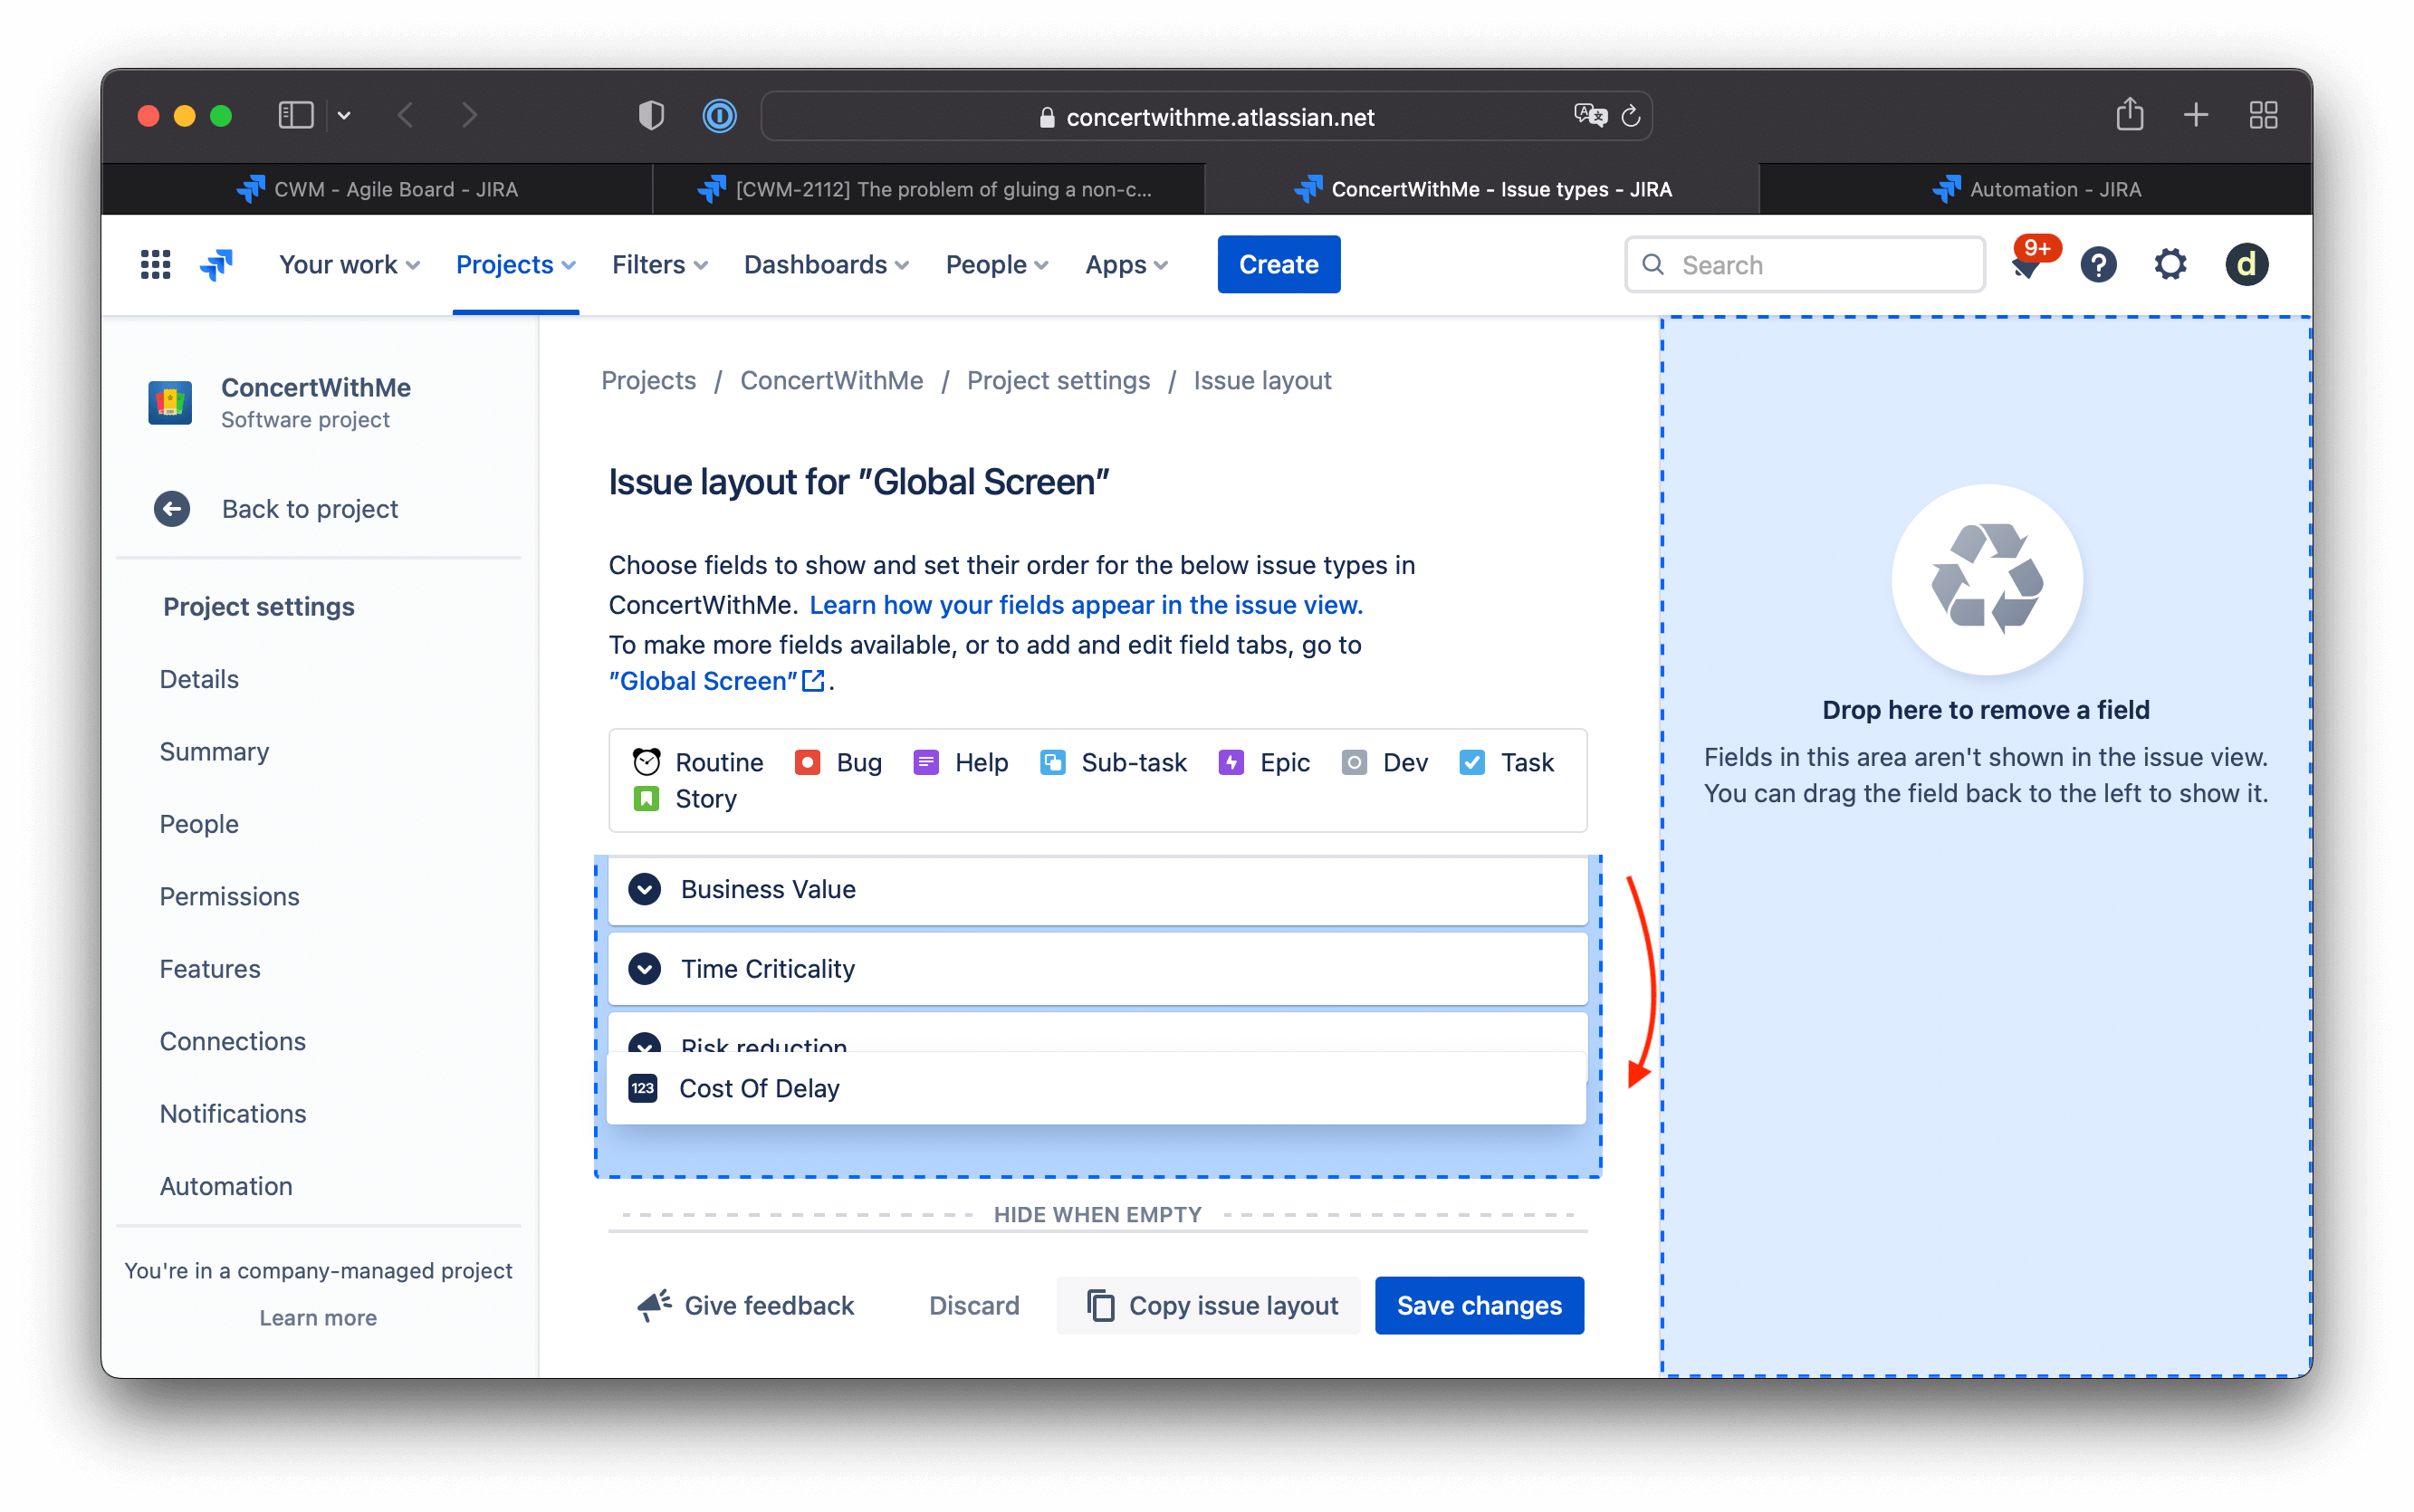
Alanların konunun sağ panelinde göründğünü doğrulayın:
Alan sırasını ayarlayın:
-
Sırayı değiştirmek için Configure Fields (Alanları Yapılandır) öğesine tıklayın.
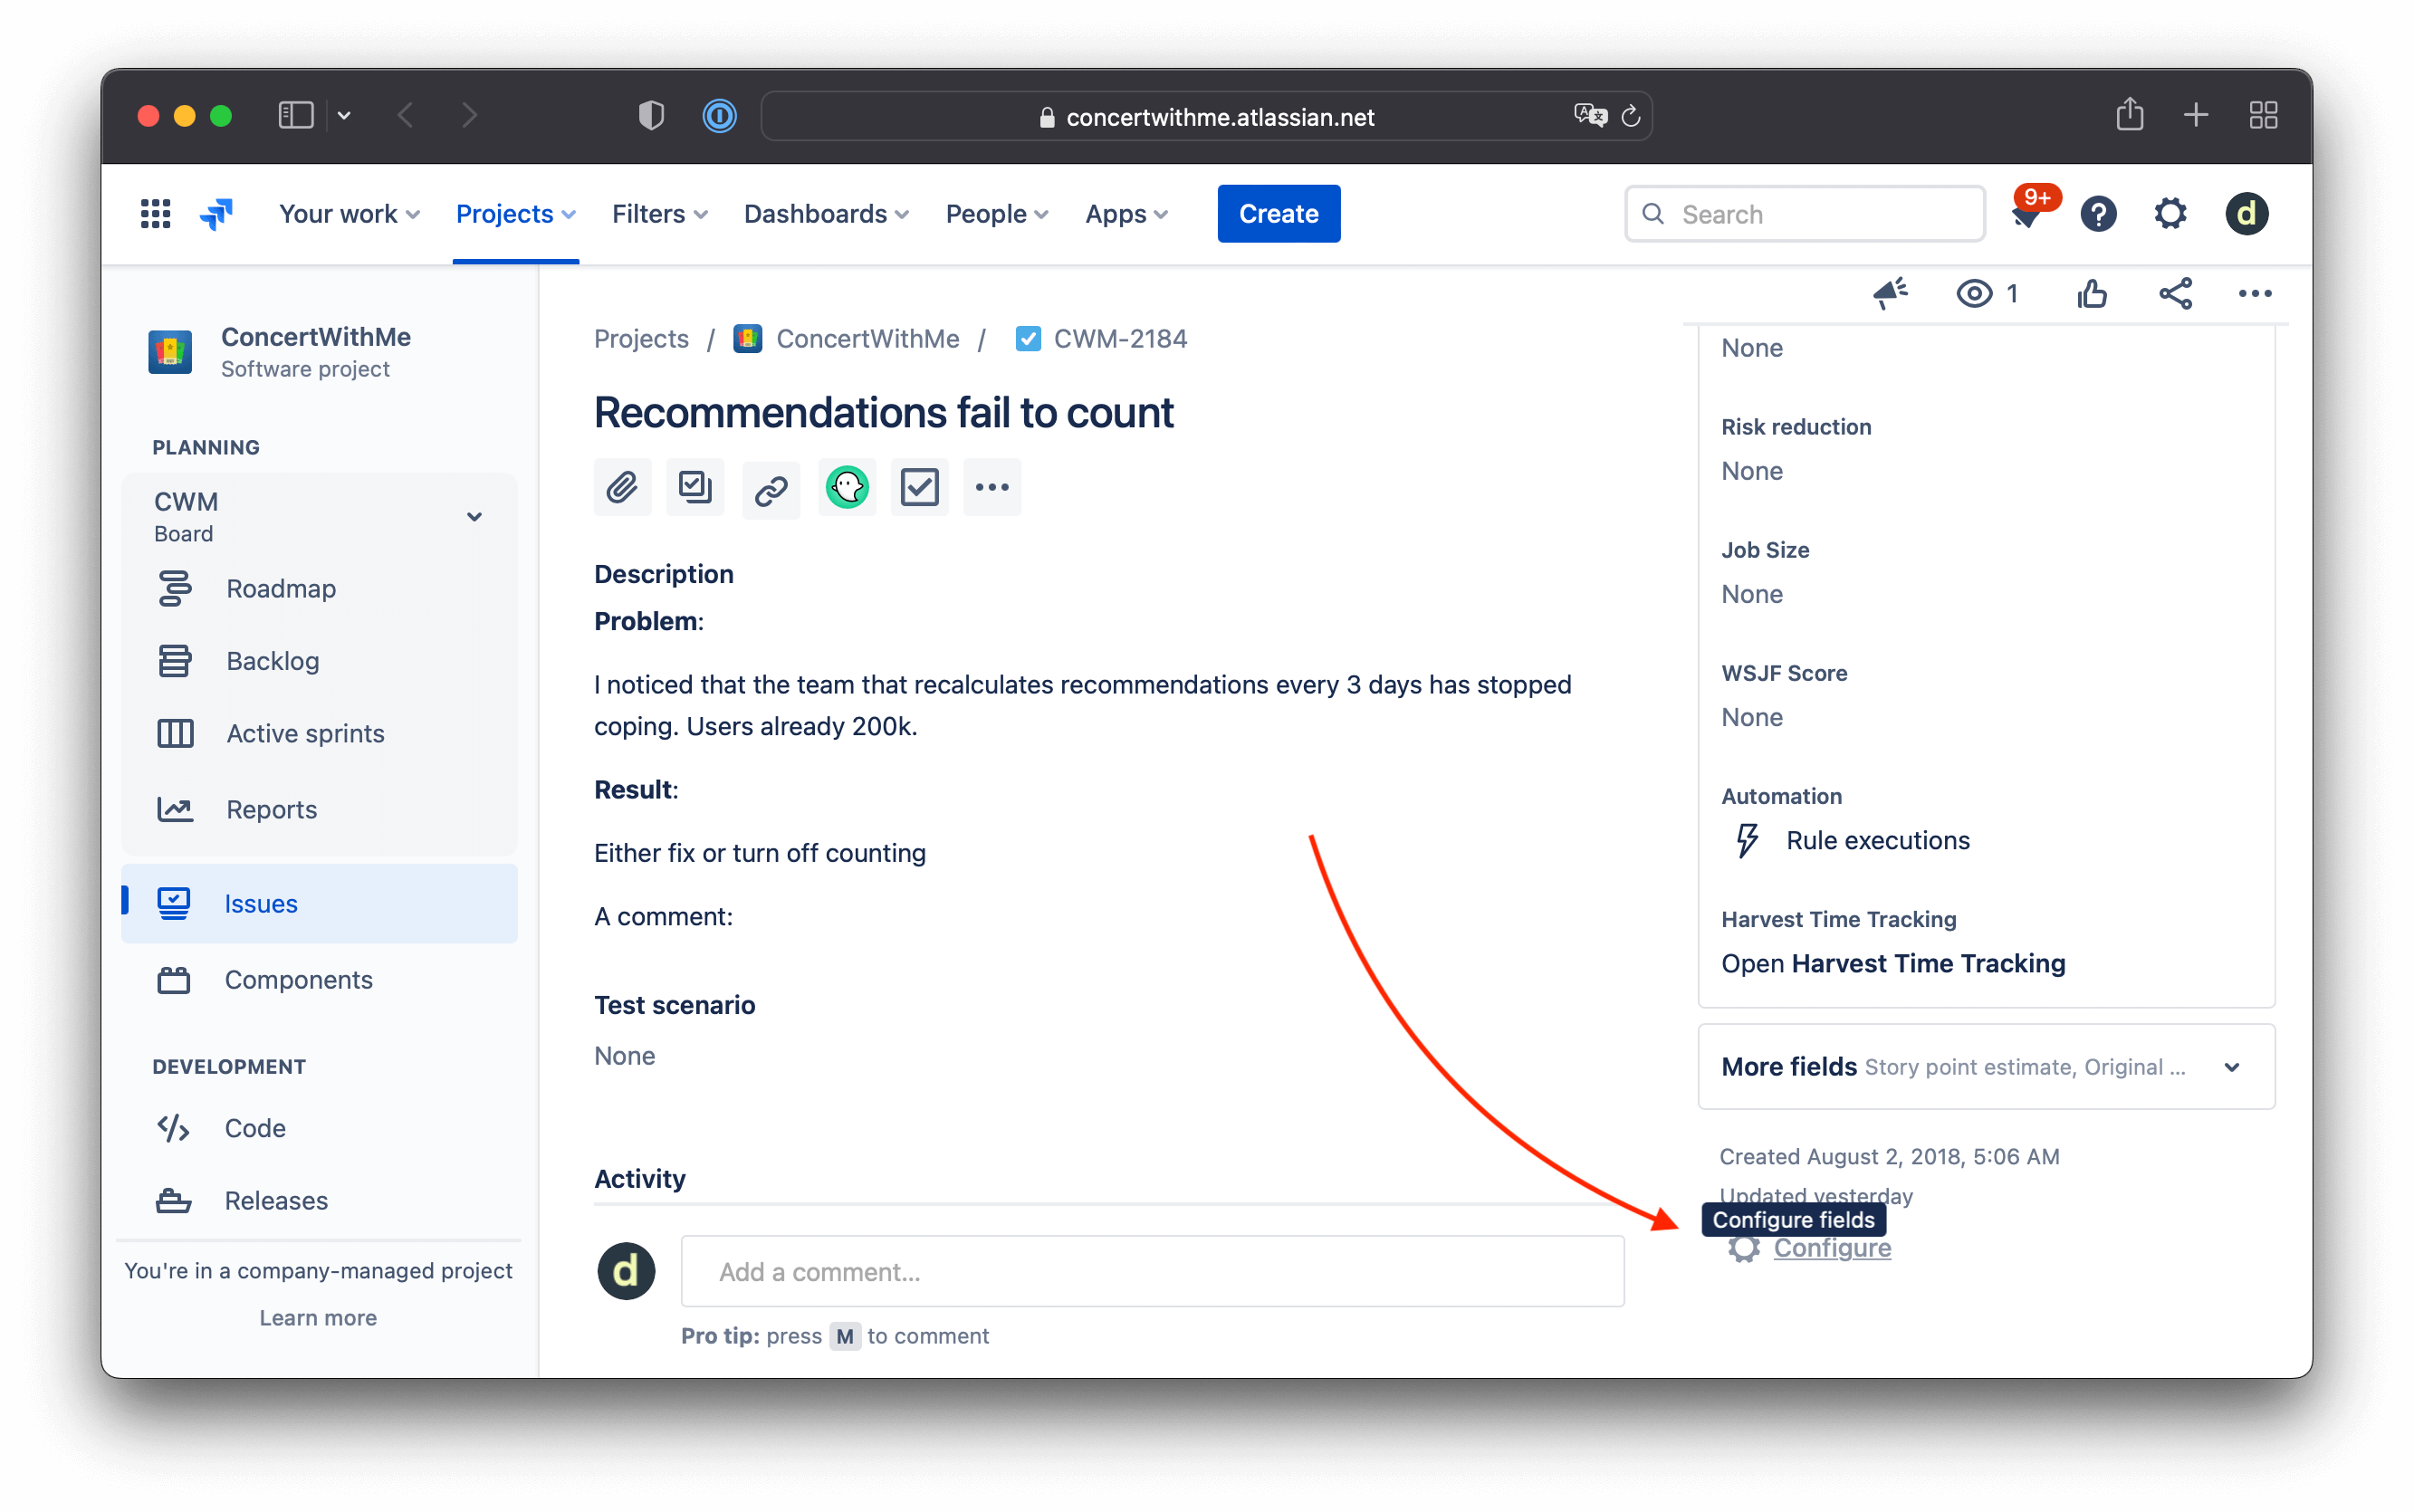
-
Alanları gerektiği gibi yeniden sıralayın.
Jira Otomasyon ile Gecikme Maliyetini Hesaplayın
Gecikme Maliyetini otomatik olarak hesaplamak için Jira Otomasyon kullanın.
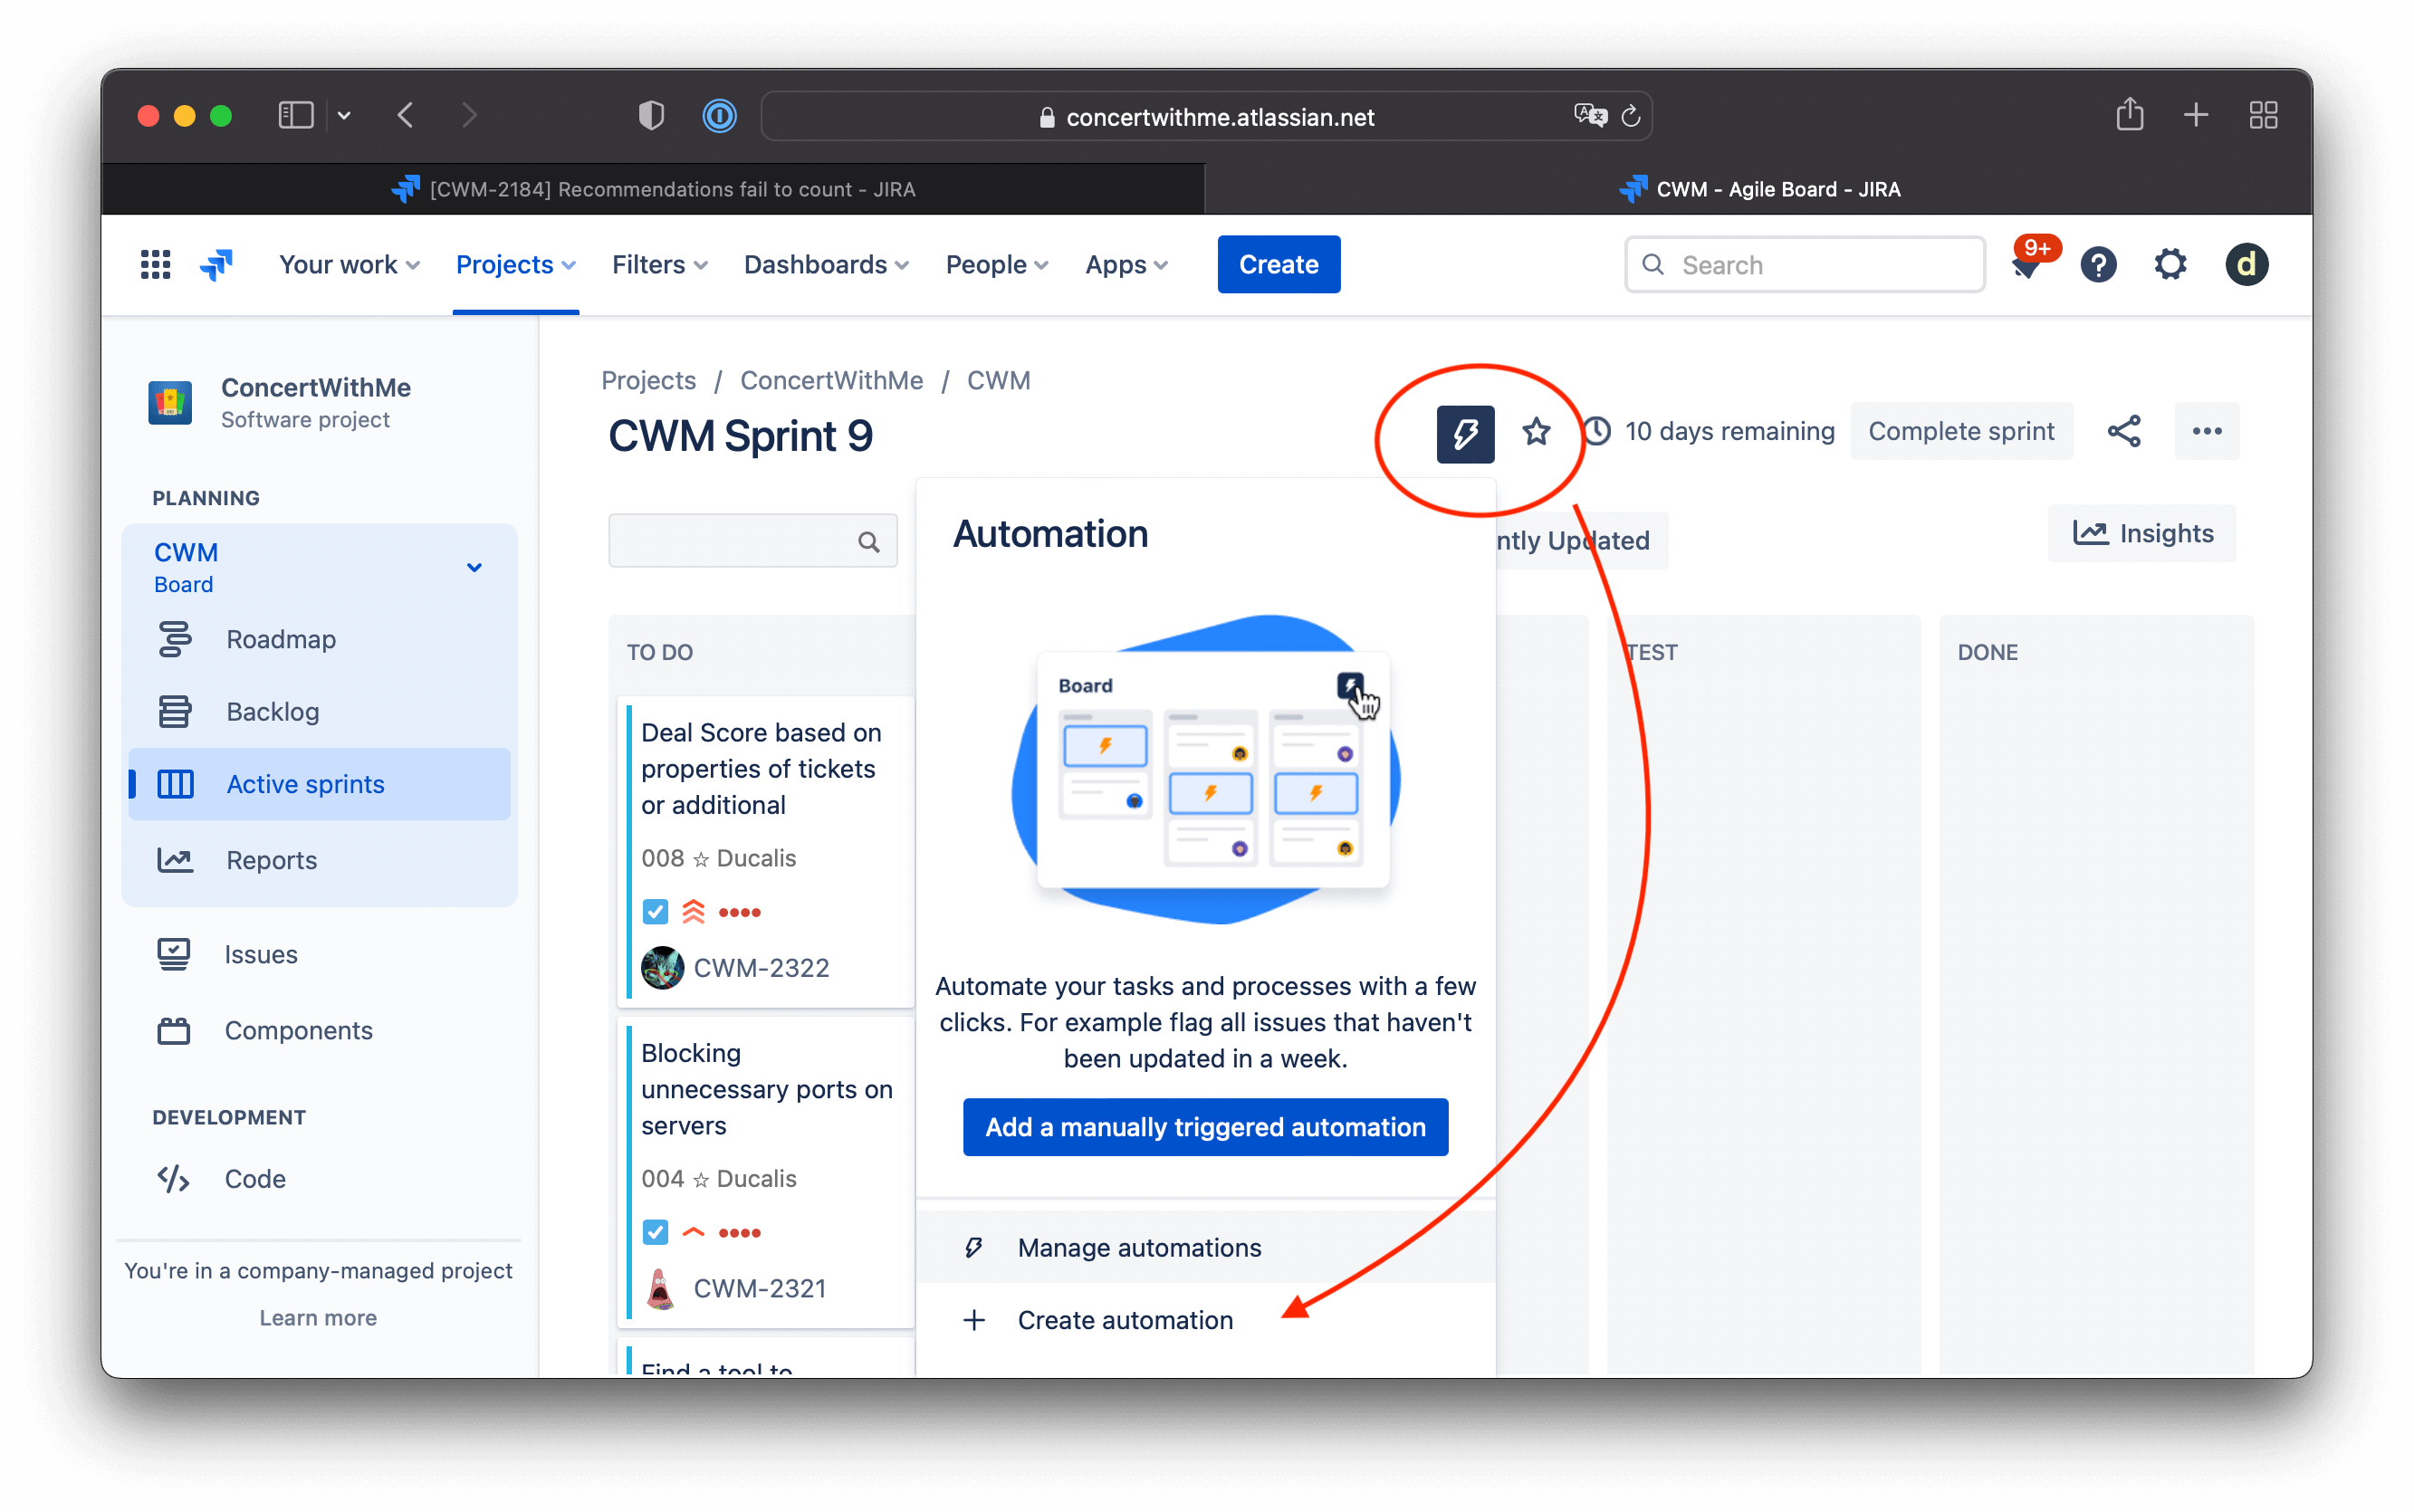
-
Yeni bir Otomasyon Kuralı oluşturun.
-
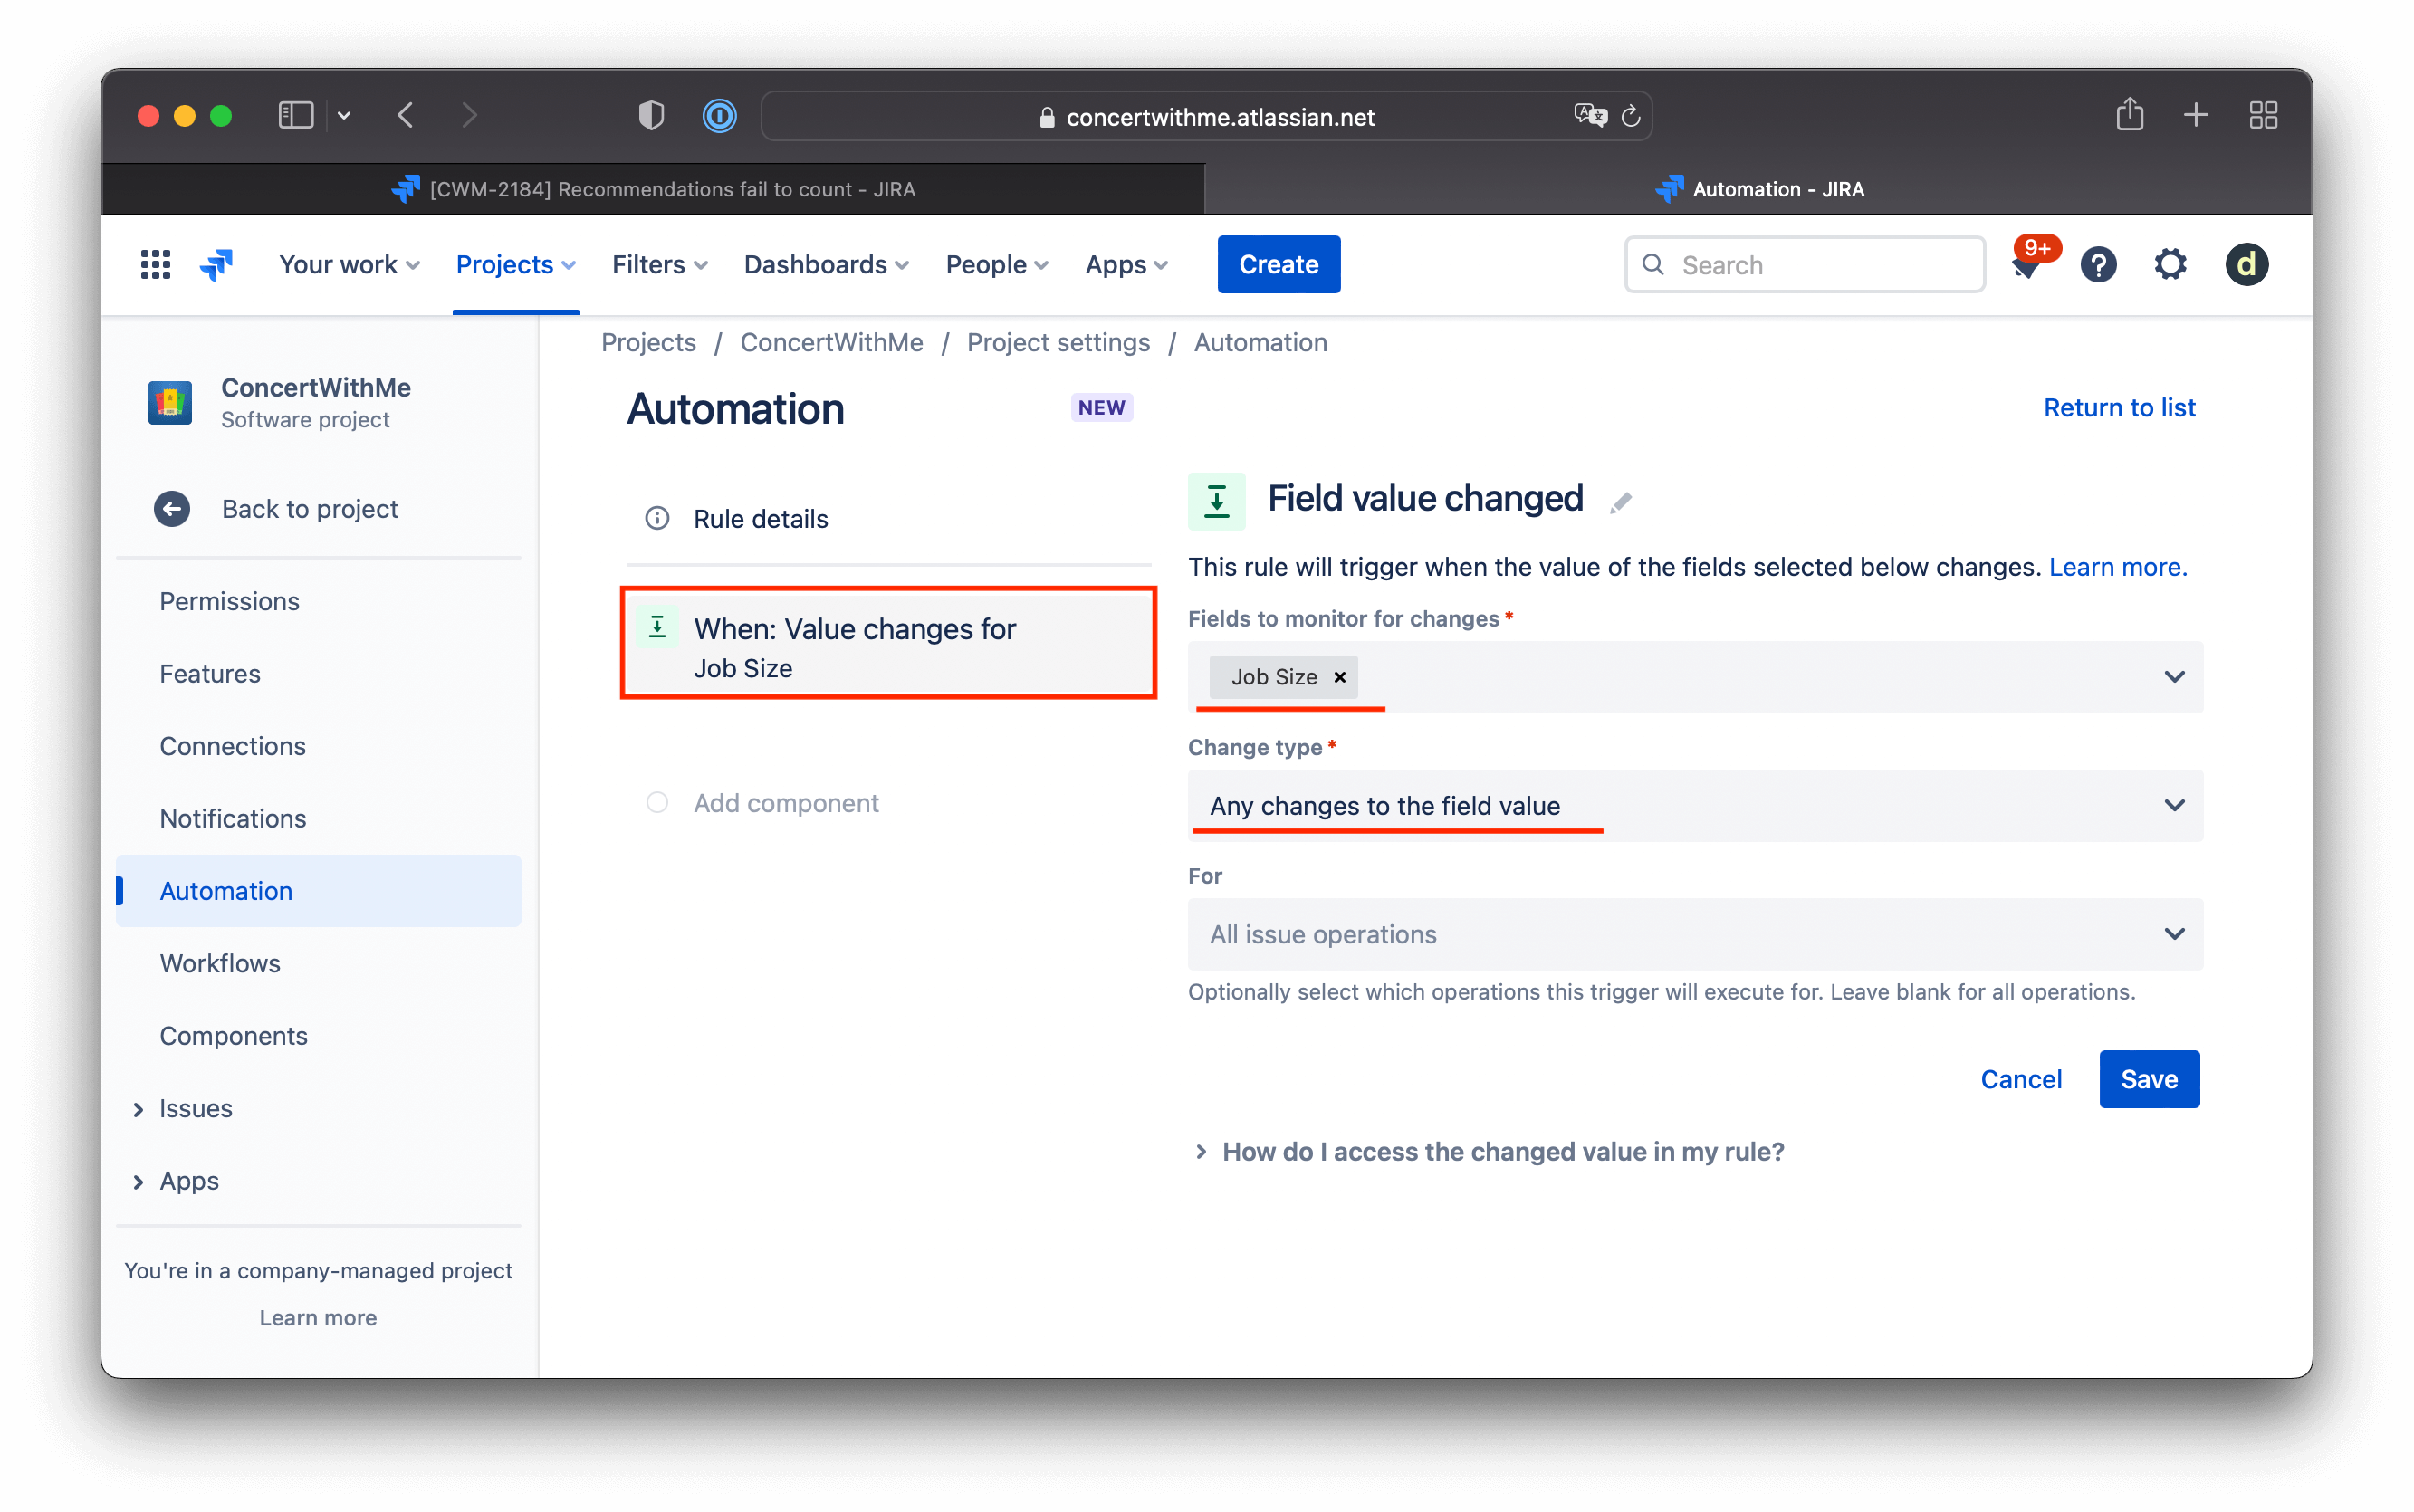
Bir tetikleyici oluşturun:
- Fields to monitor (İzlenecek alanlar): İş Değeri, Zaman Kritikliği, Risk Azaltma
- Change type (Değişiklik türü): Alan değerinde herhangi bir değişiklik
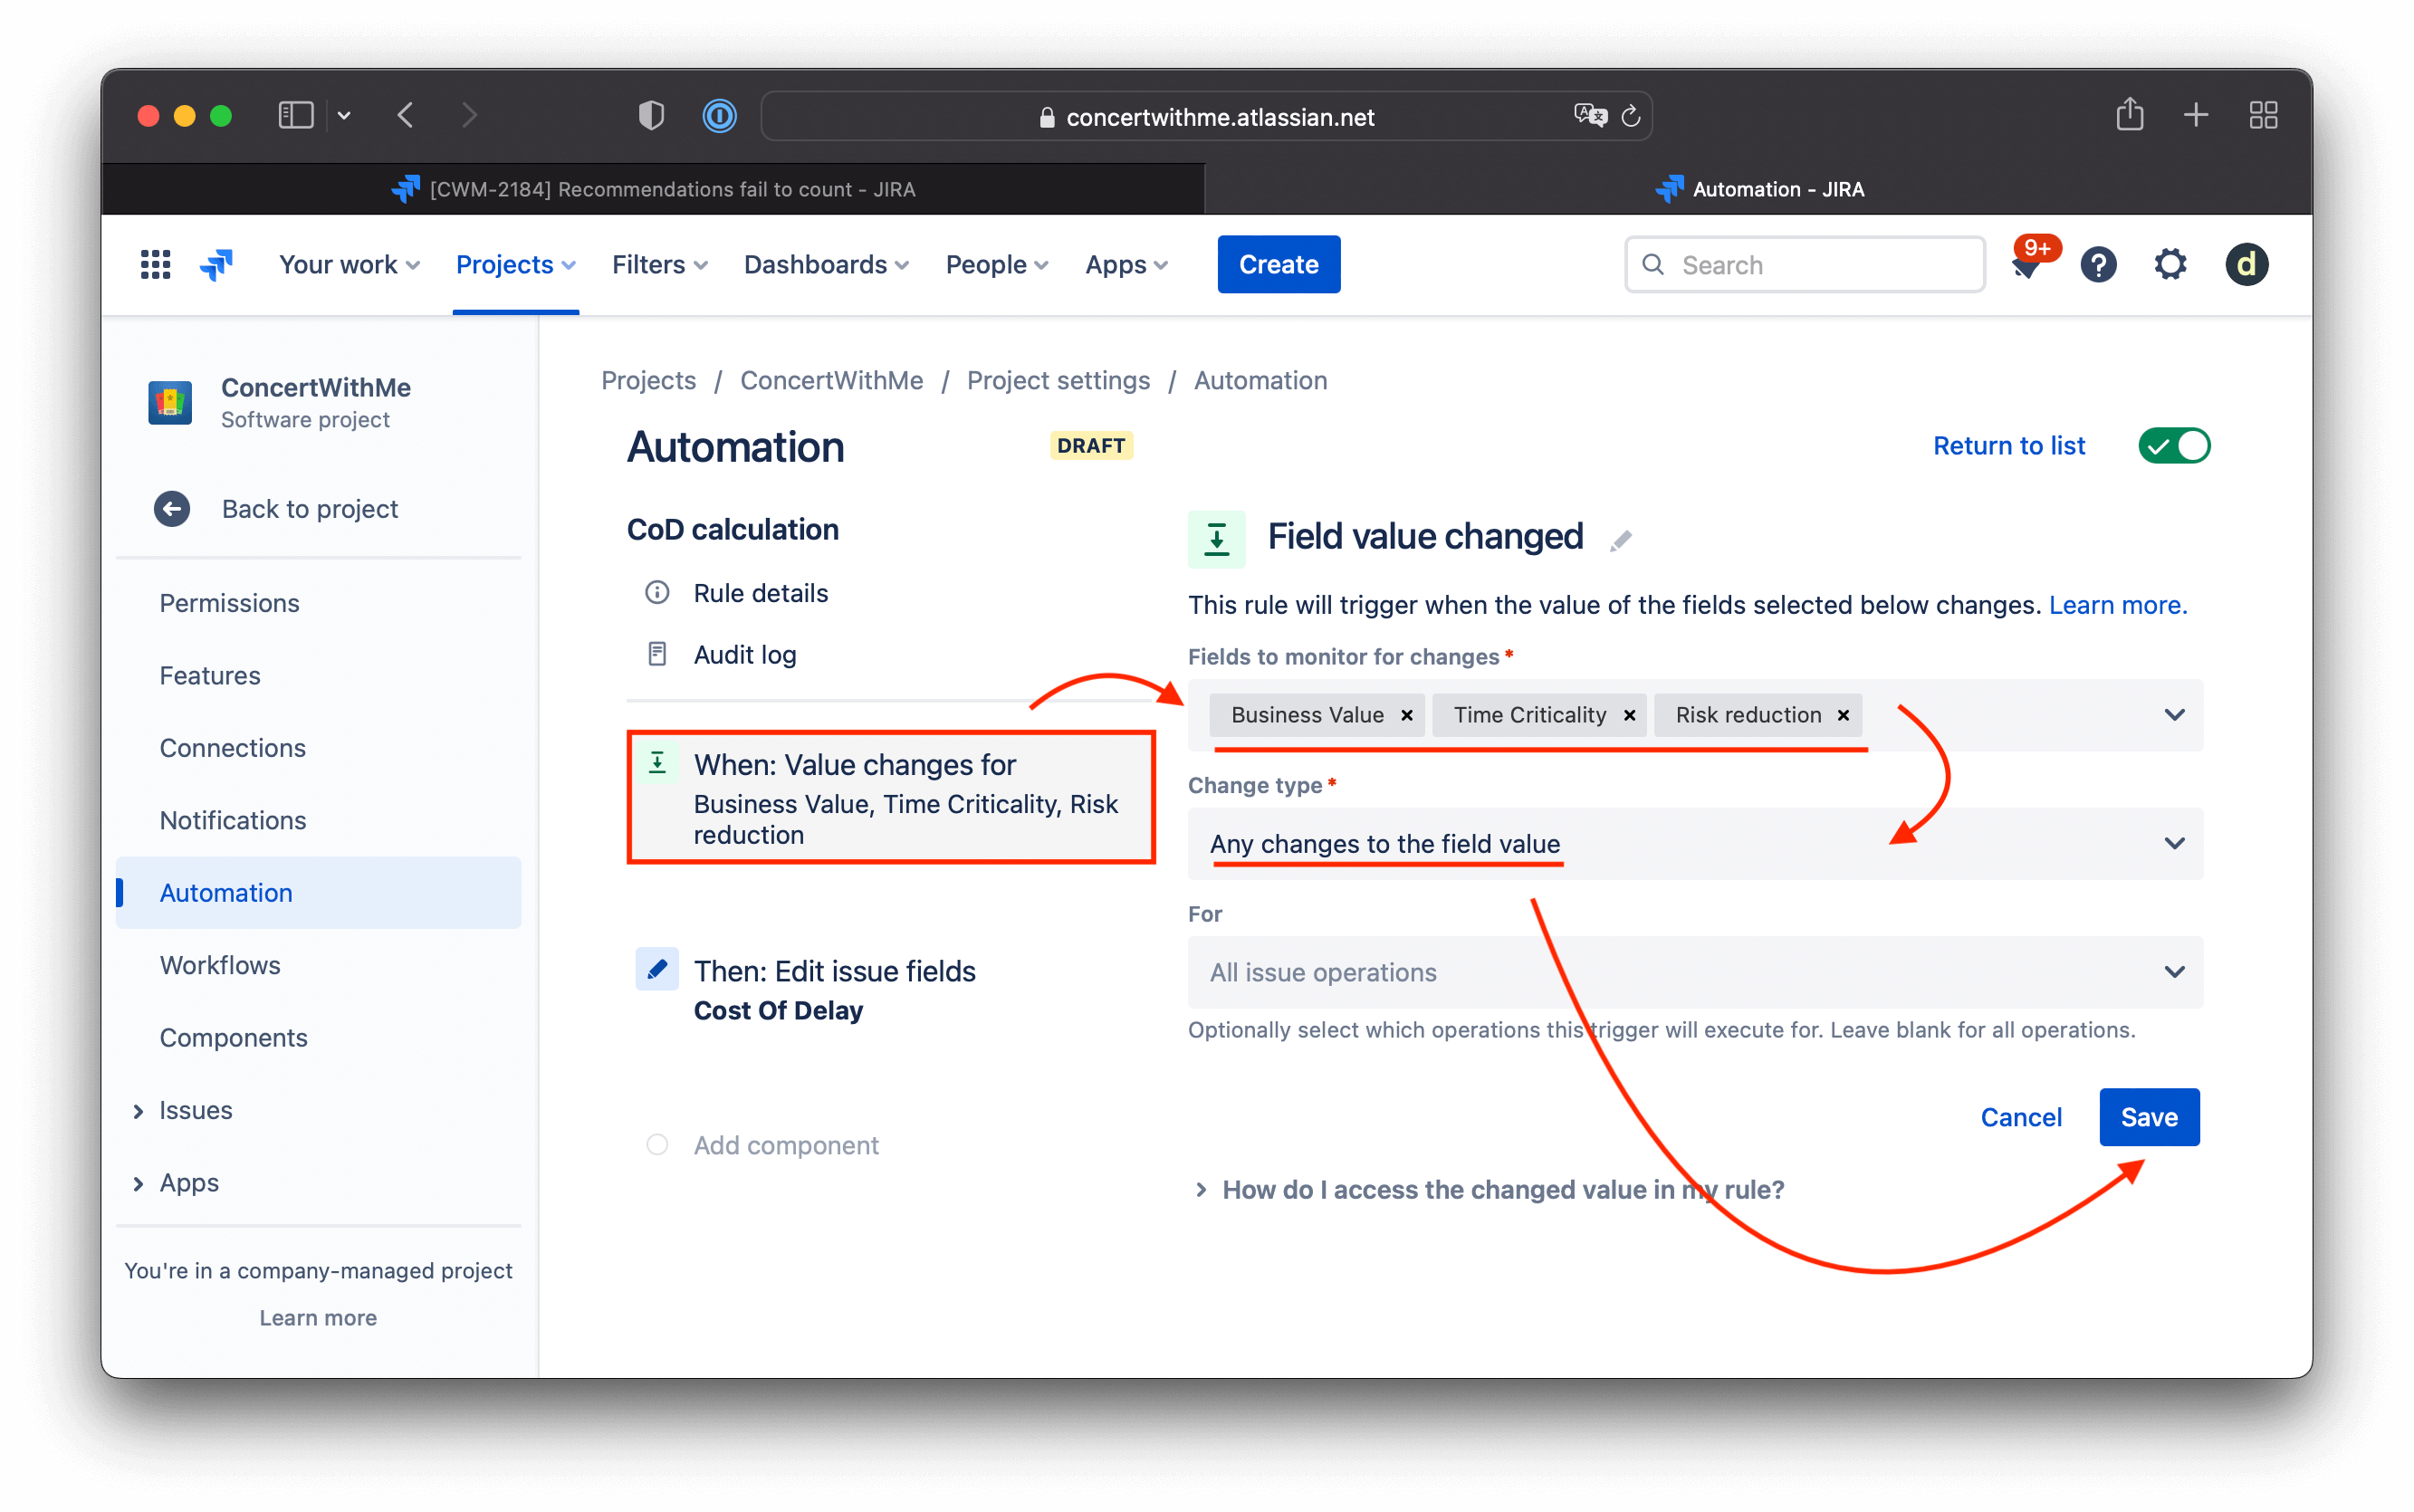
-
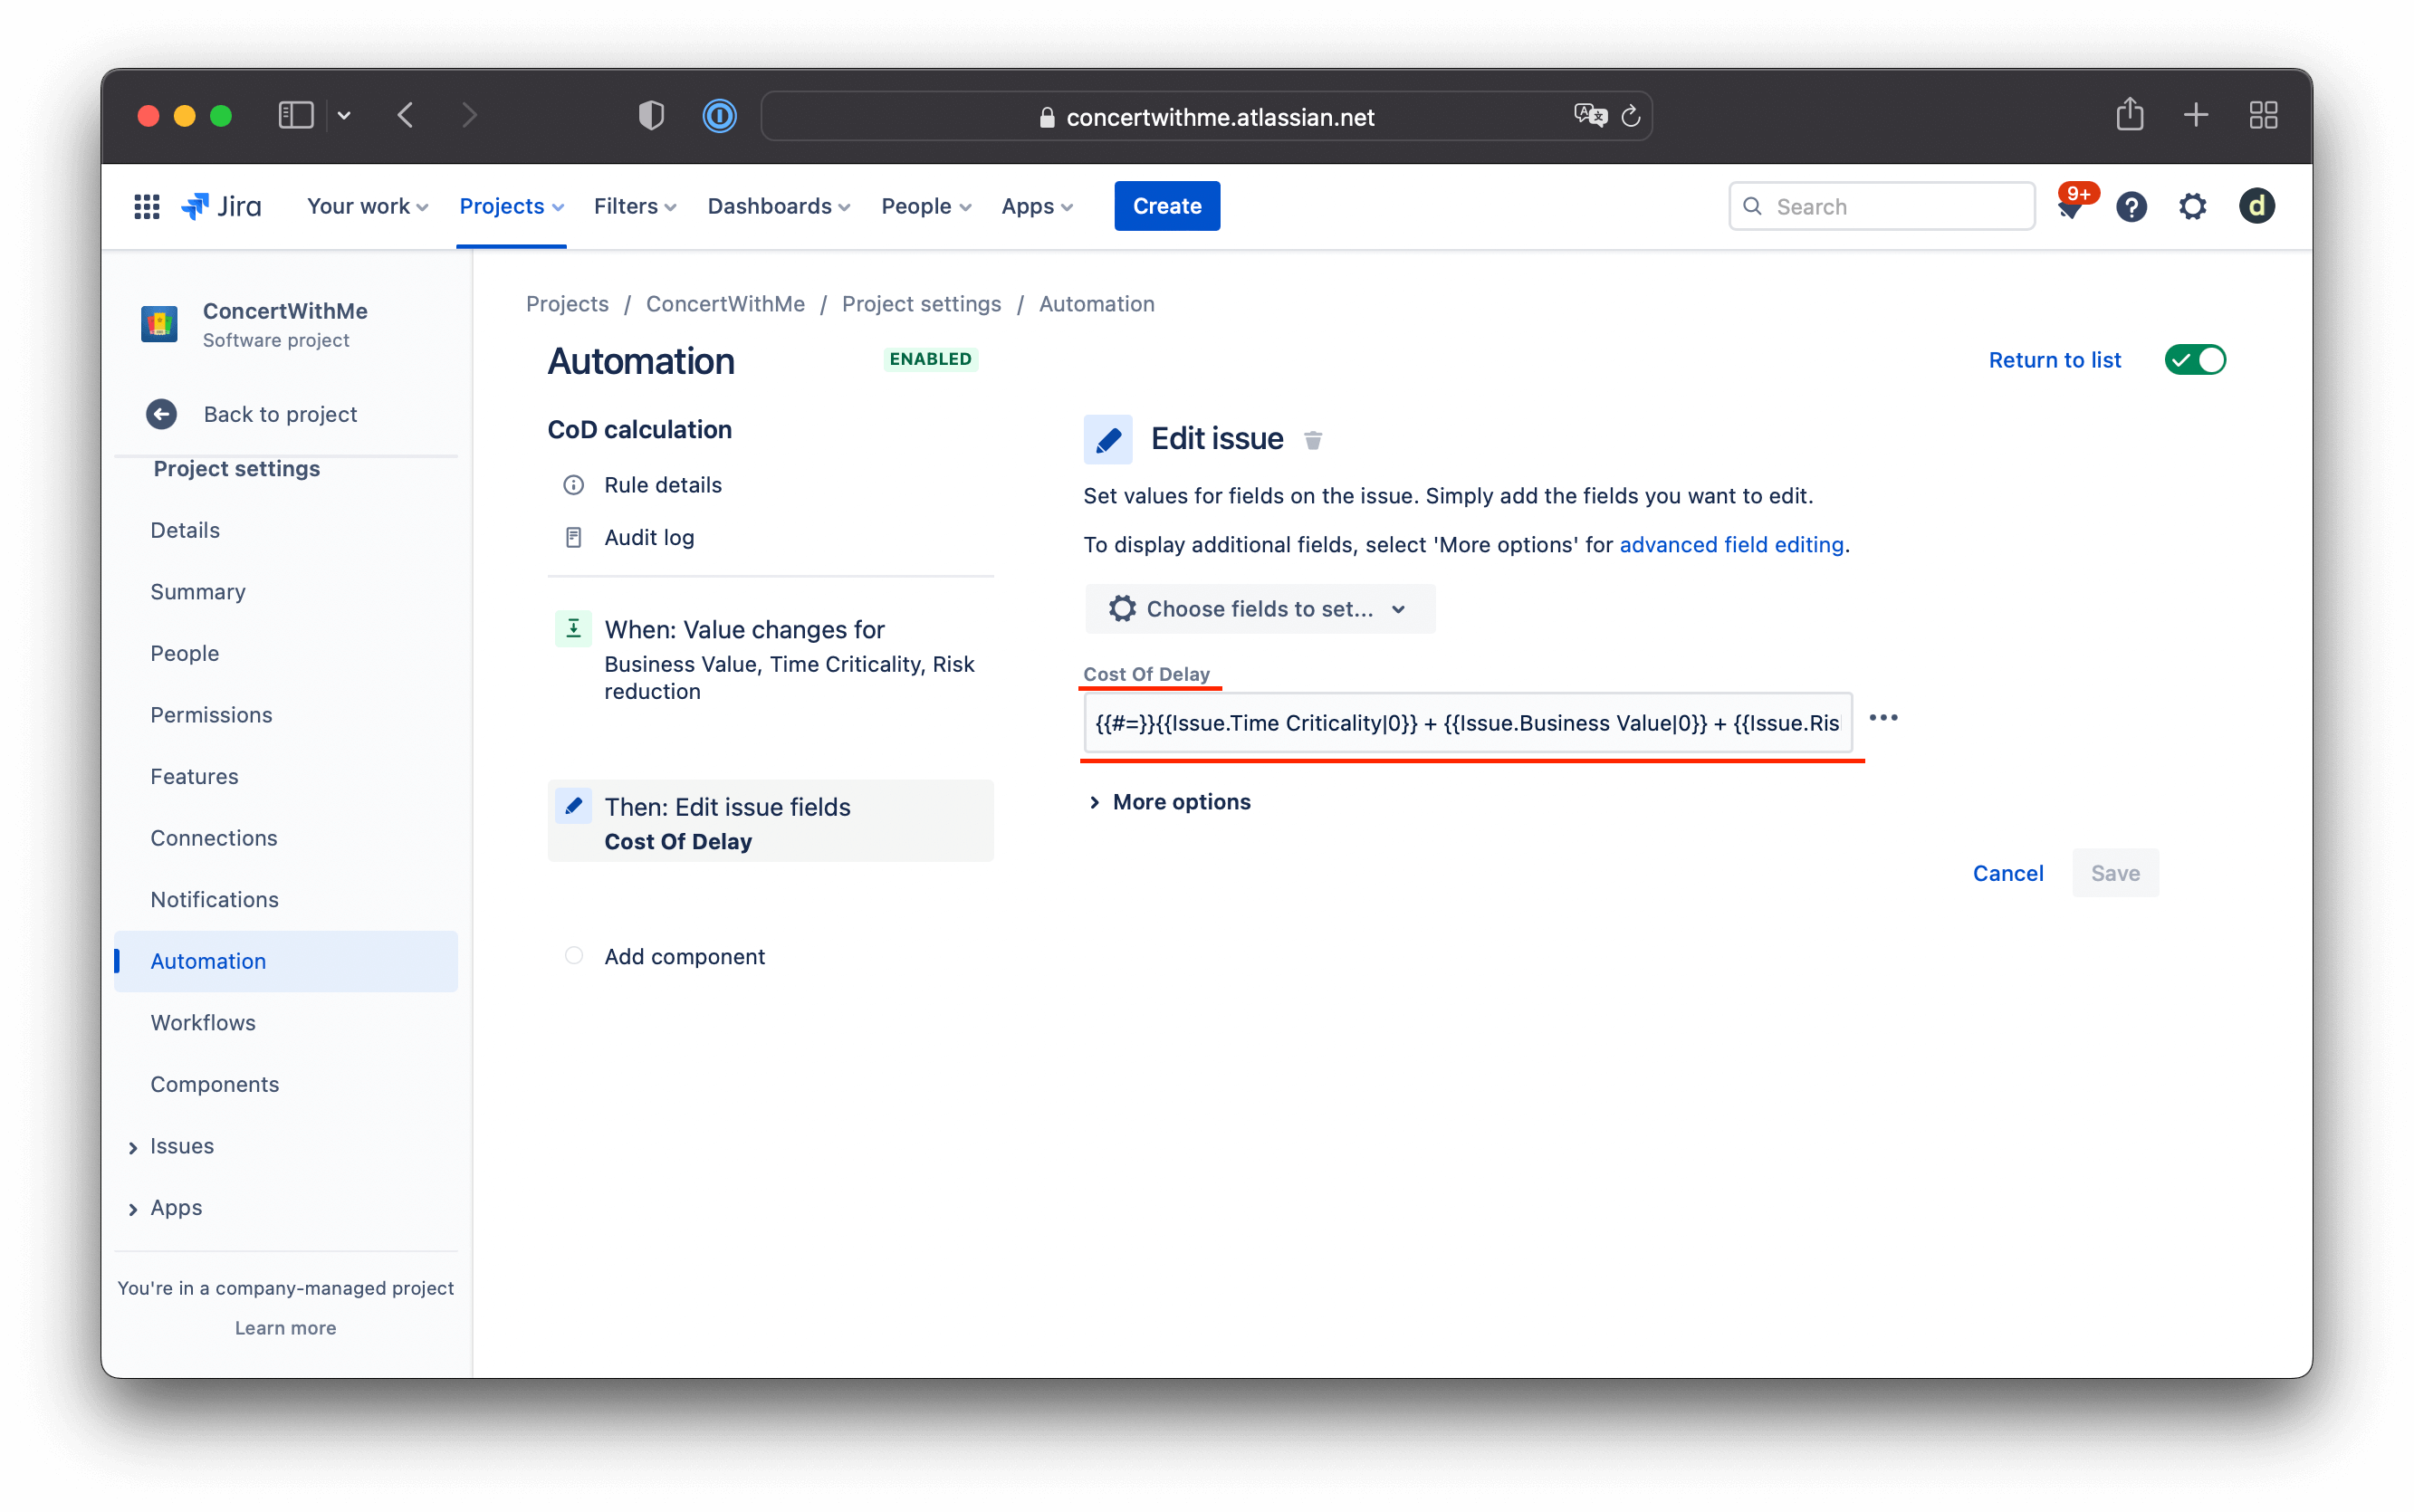
Bir eylem ekleyin: Edit issue (Konuyu düzenle).
- Choose fields to set (Ayarlanacak alanları seçin): Gecikme Maliyeti
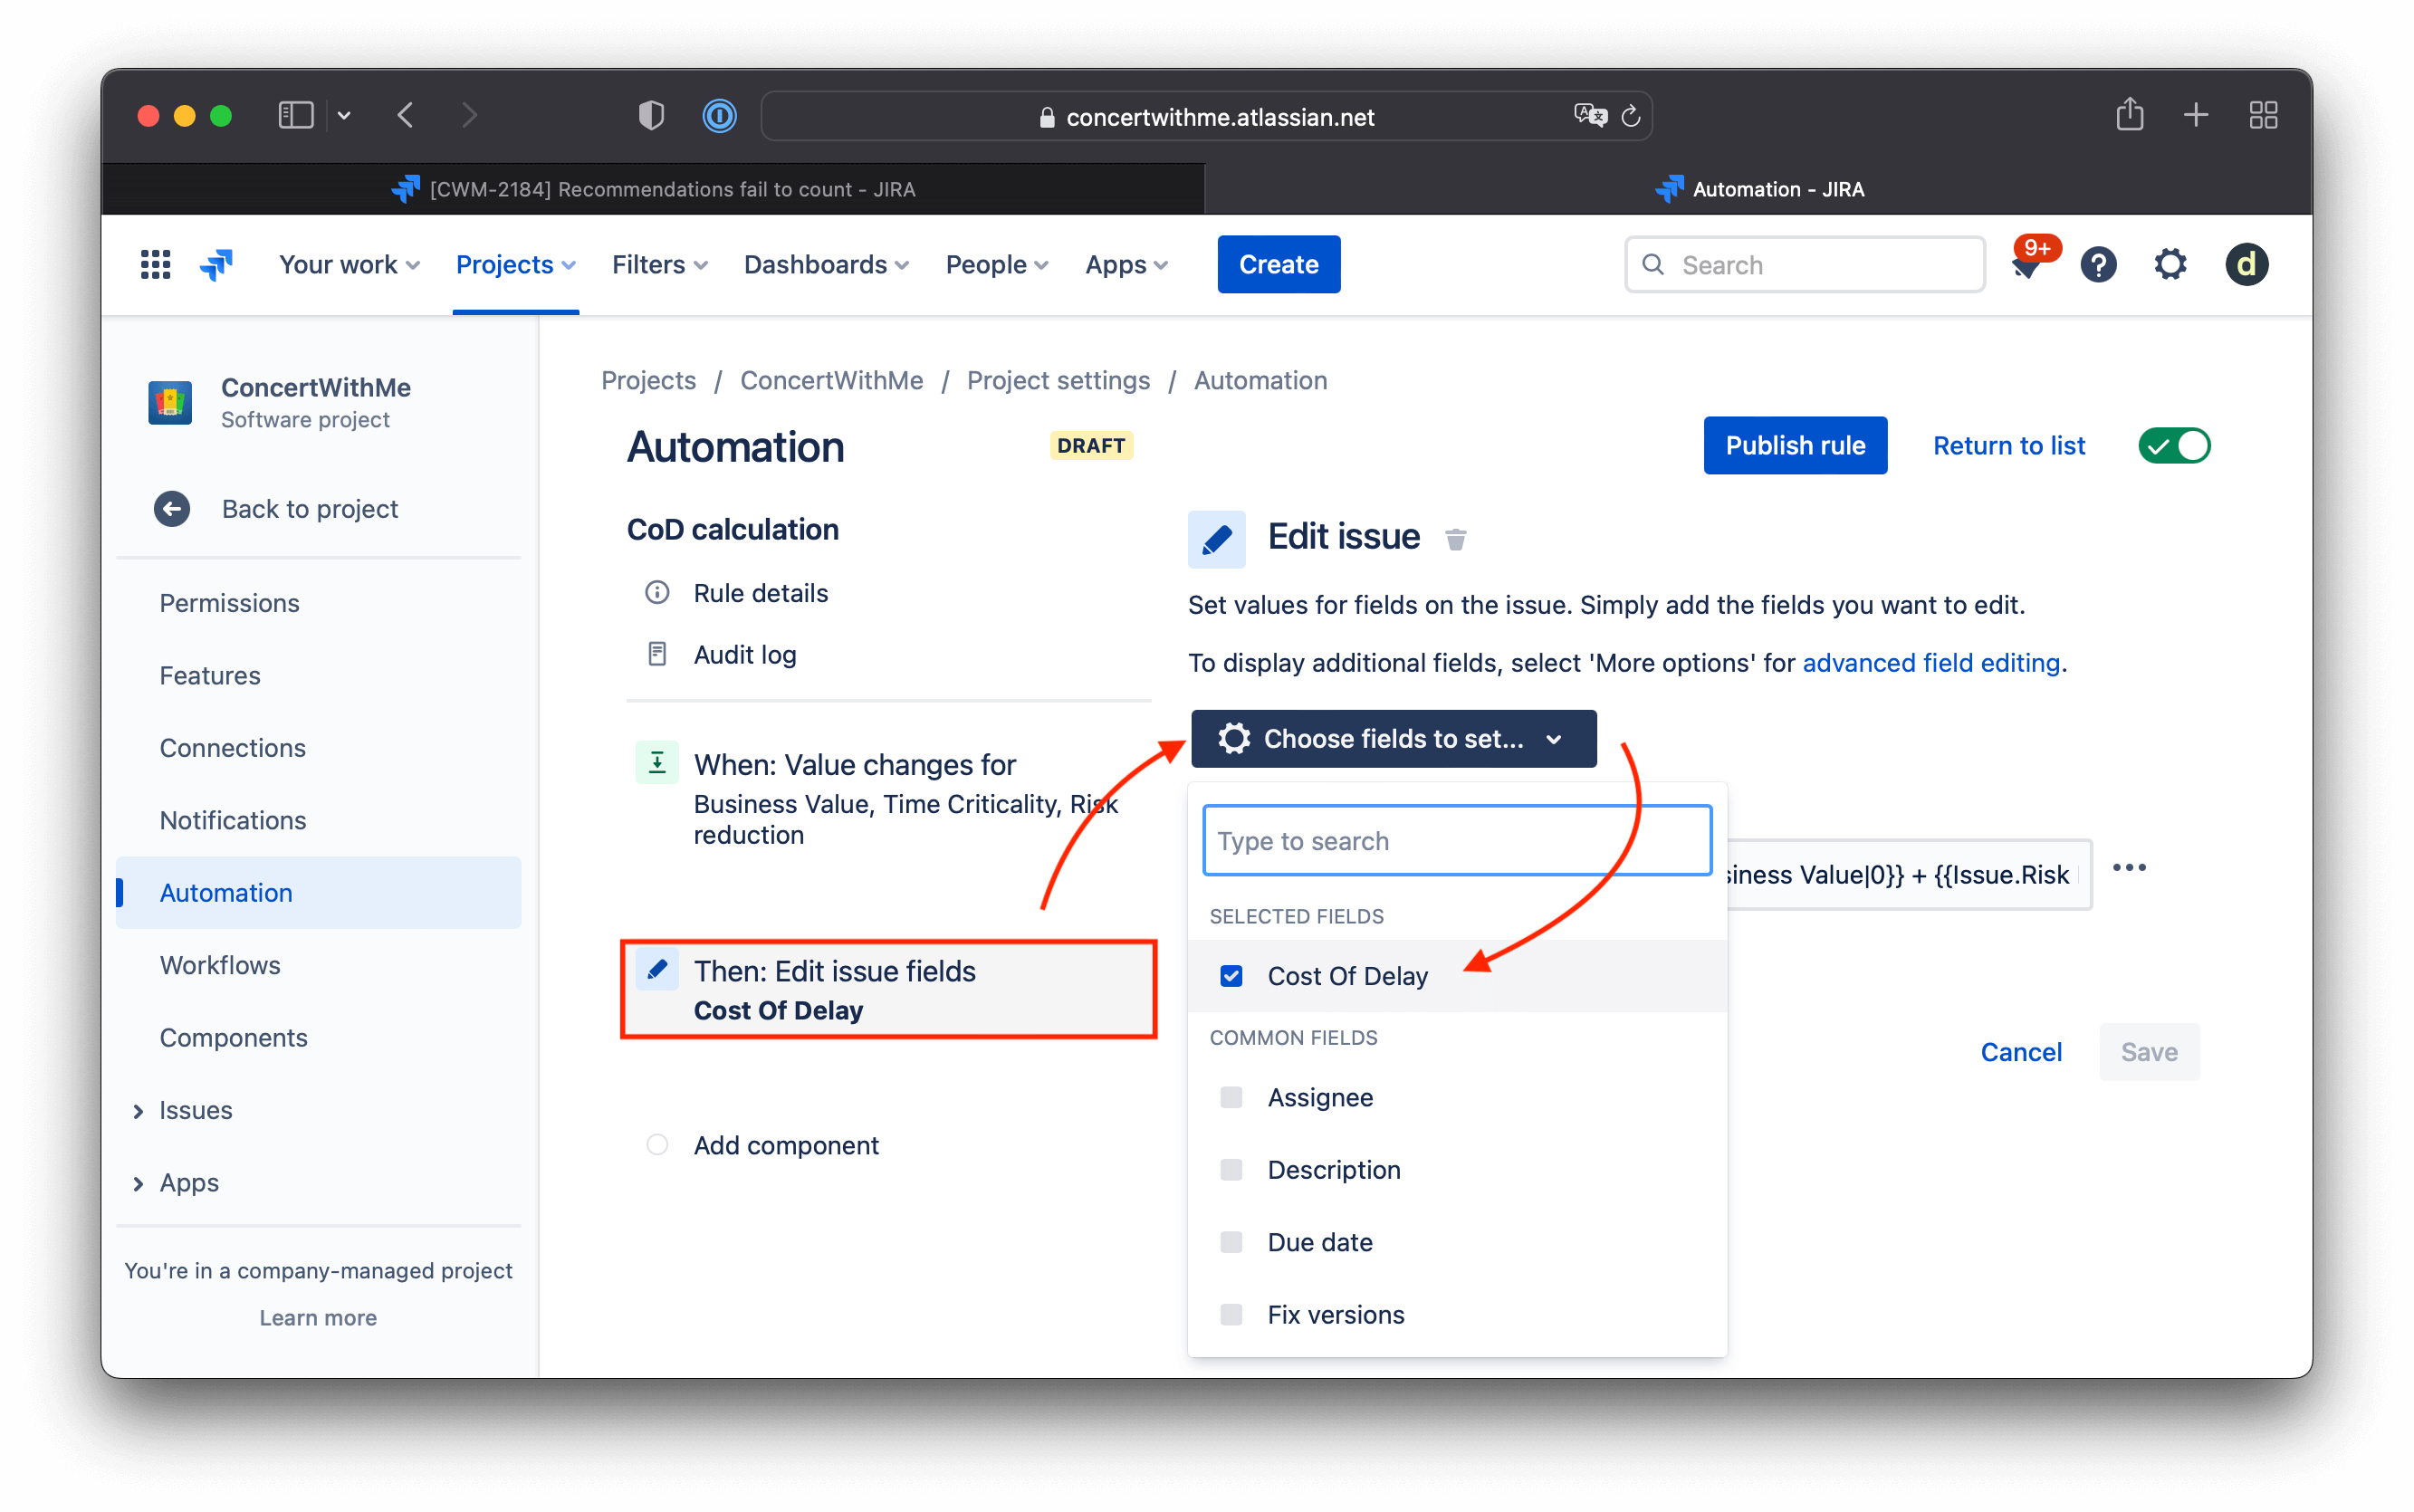
-
Formülü ekleyin:
{{#=}}{{Issue.Time Criticality|0}} + {{Issue.Business Value|0}} + {{Issue.Risk Reduction|0}}{{/}}Bu, üç değerin toplamını hesaplar. Herhangi bir değer boşsa, sıfır olarak sayılır.
-
Publish rule (Kuralı yayınla) öğesine tıklayın.
Jira Otomasyon ile WSJF Puanını Hesaplayın
Nihai WSJF puanını hesaplamak için işlemi tekrarlayın.
-
Job Size (İş Boyutu) alan değişiklikleri tarafından tetiklenen yeni bir otomasyon kuralı oluşturun.
-
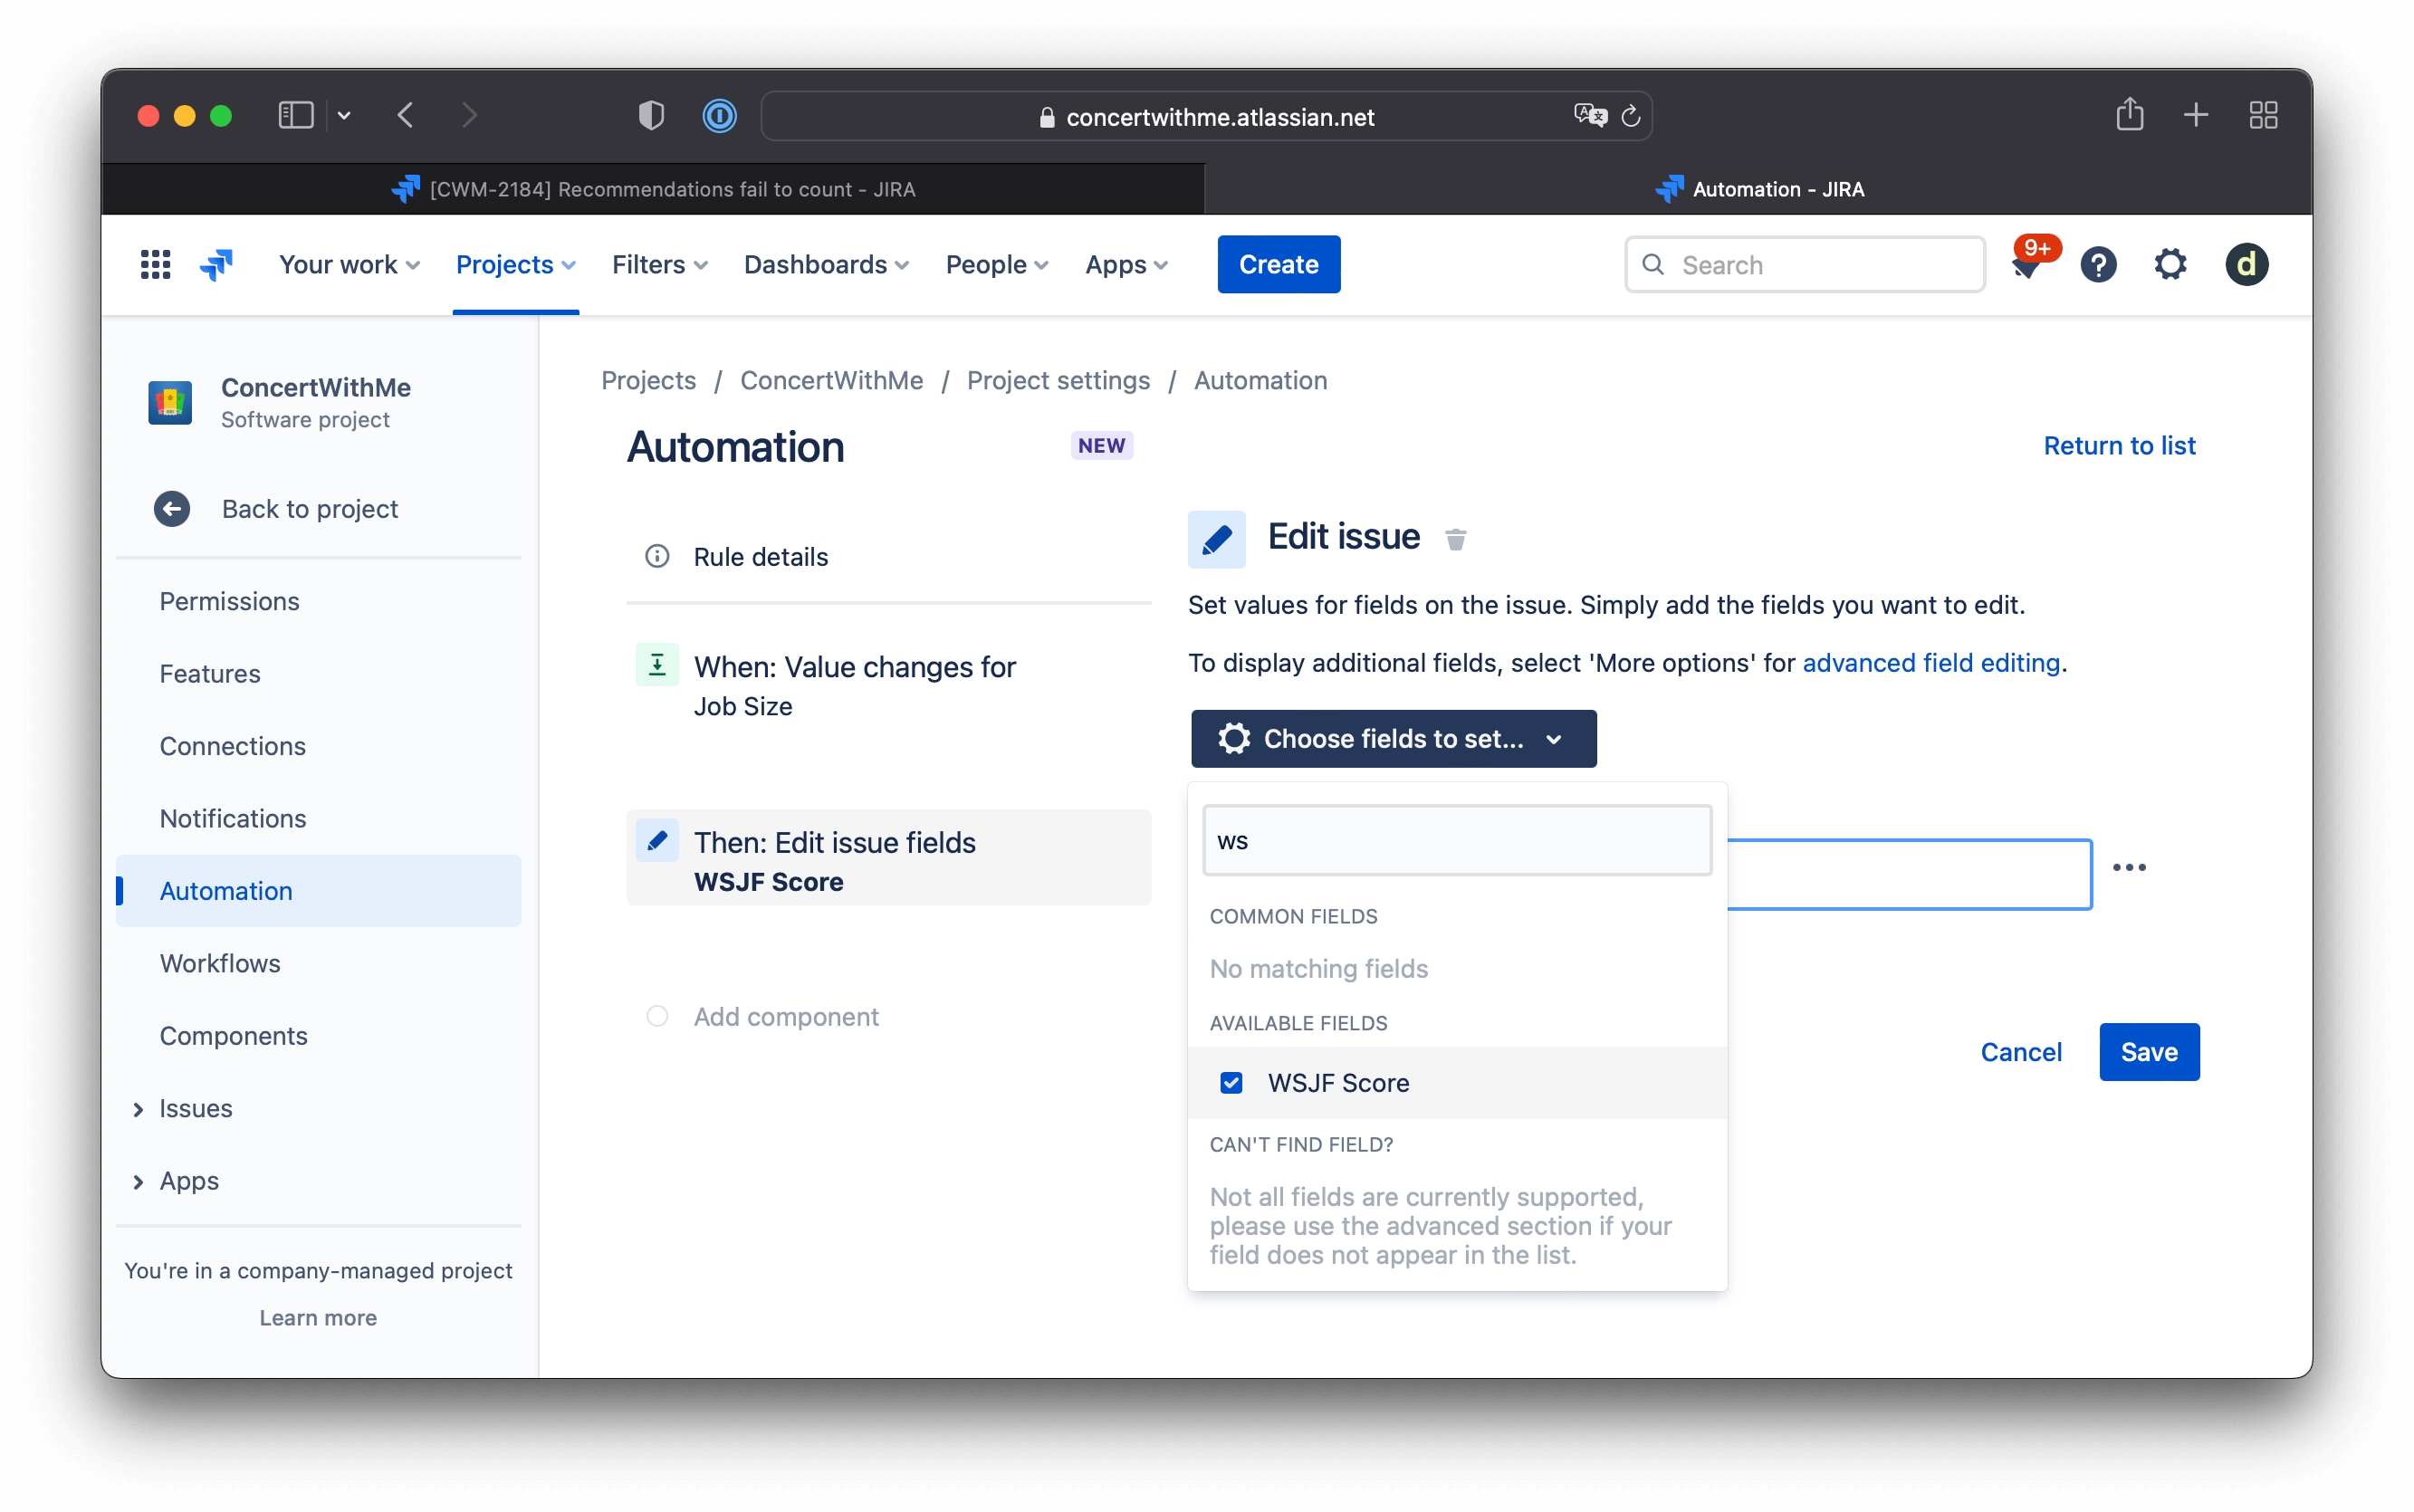
Bir eylem oluşturun: WSJF Puanı alanı için Edit issue (Konuyu düzenle).
-
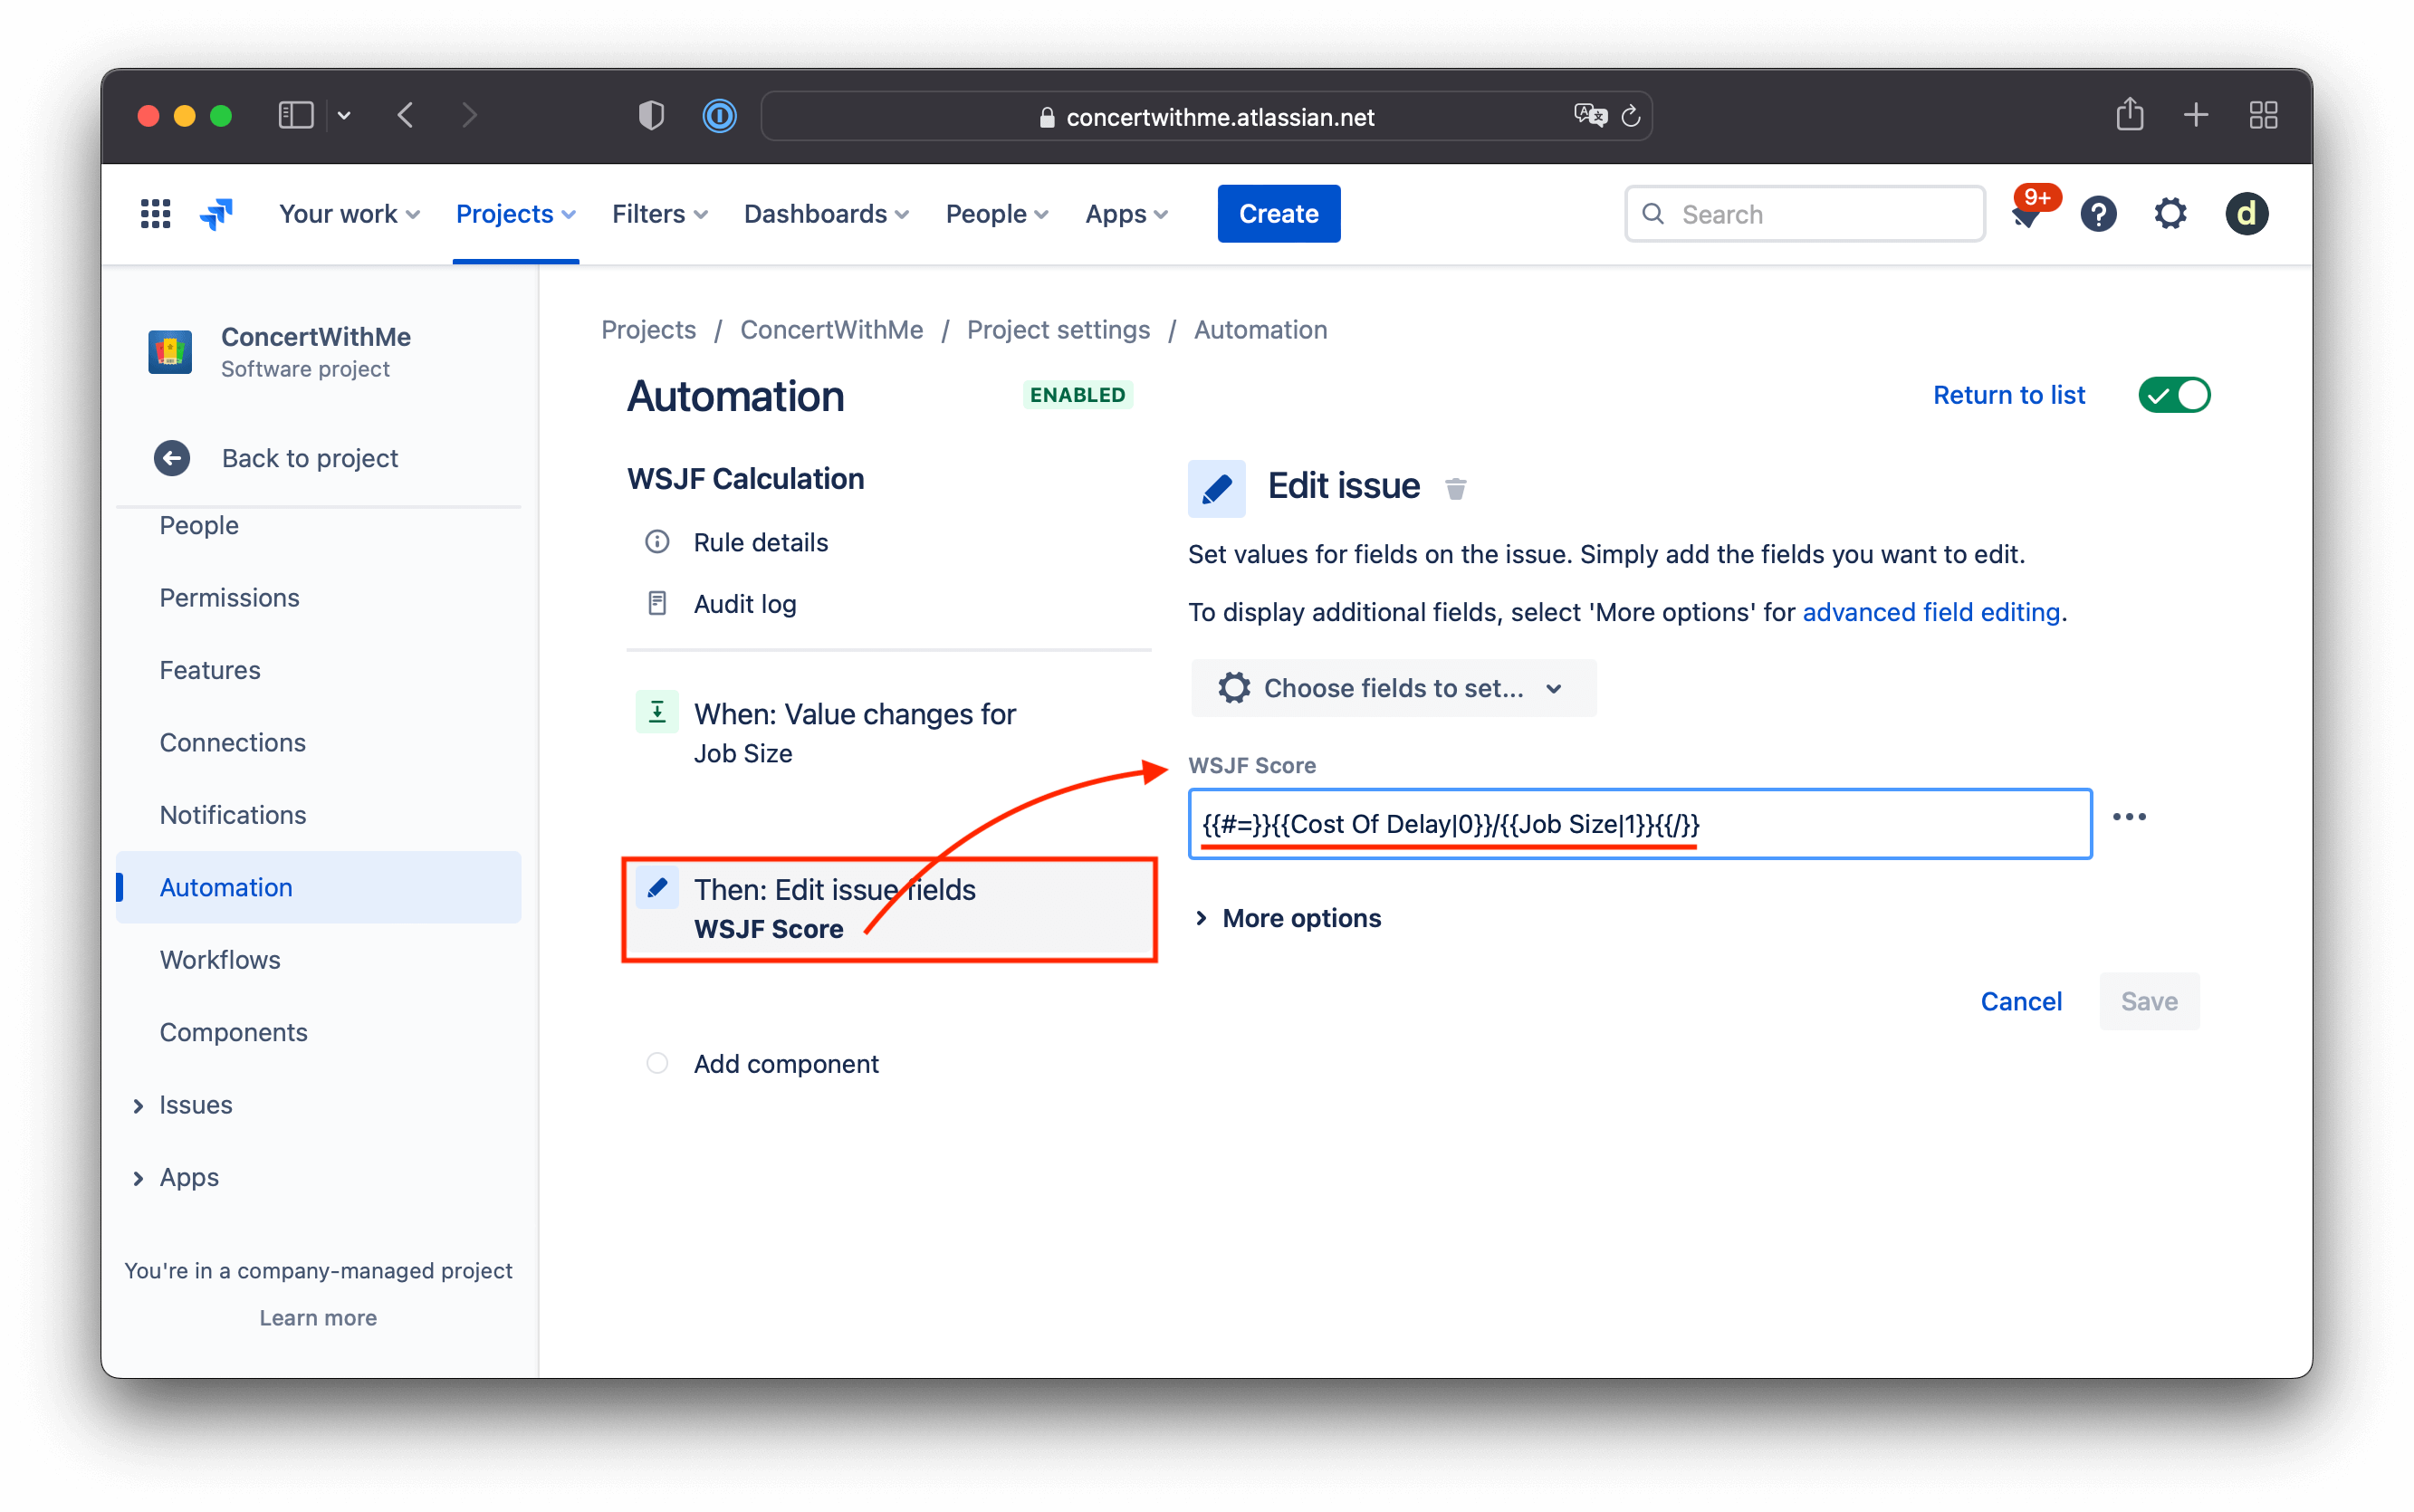
Hesaplama formülünü ekleyin:
{{#=}}{{Cost Of Delay|0}}/{{Job Size|1}}{{/}}Bu, Gecikme Maliyetini İş Boyutuna böler. İş Boyutu boşsa, 1 kullanır.
WSJF Hesaplamalarını Test Edin
Bir konudaki kriter alanlarını doldurarak otomasyonu test edin. Pencereyi yeniledikten sonra hesaplanmış sonucu göreceksiniz.
Örnek: WSJF puanı: (2 + 5 + 21) / 2 = 14