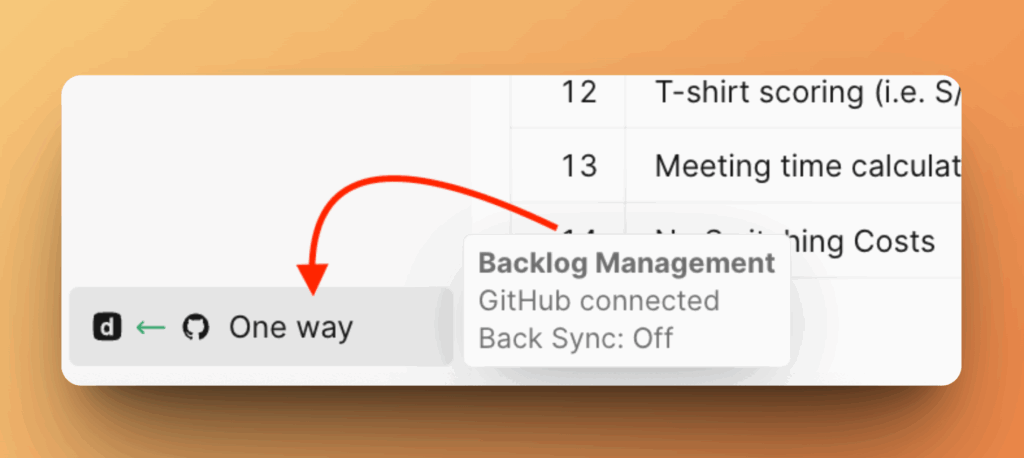
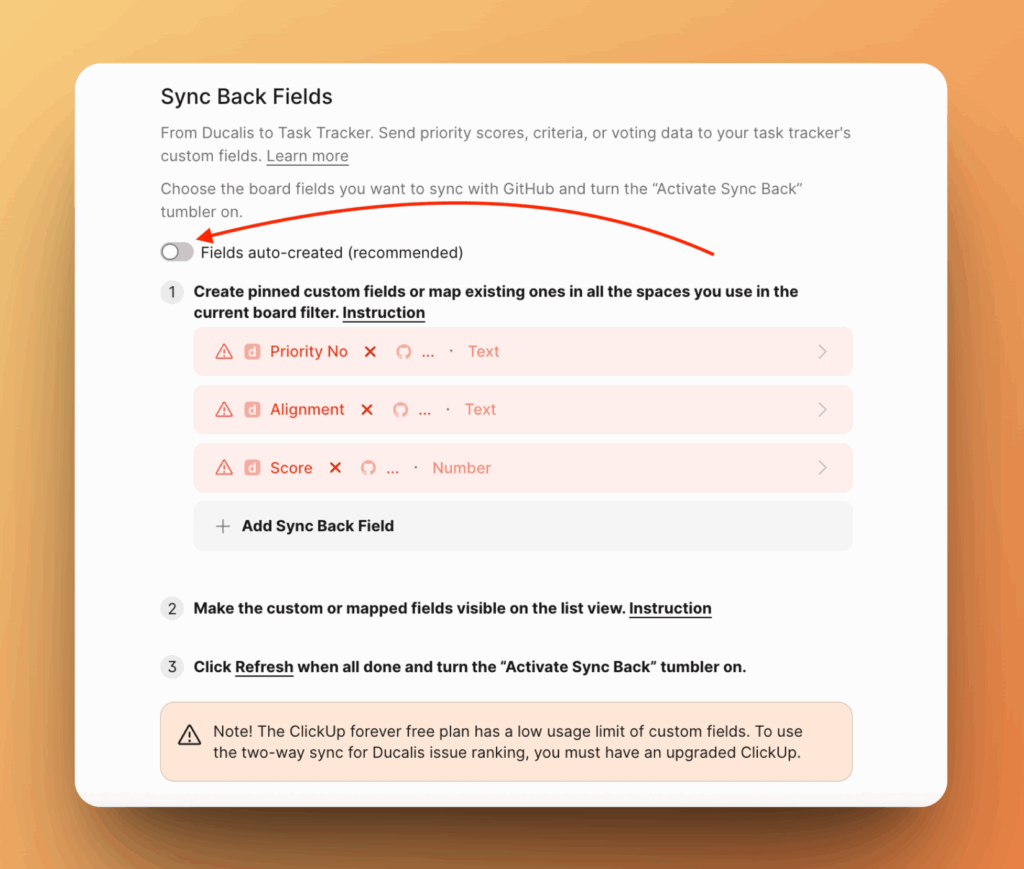
Sync Back
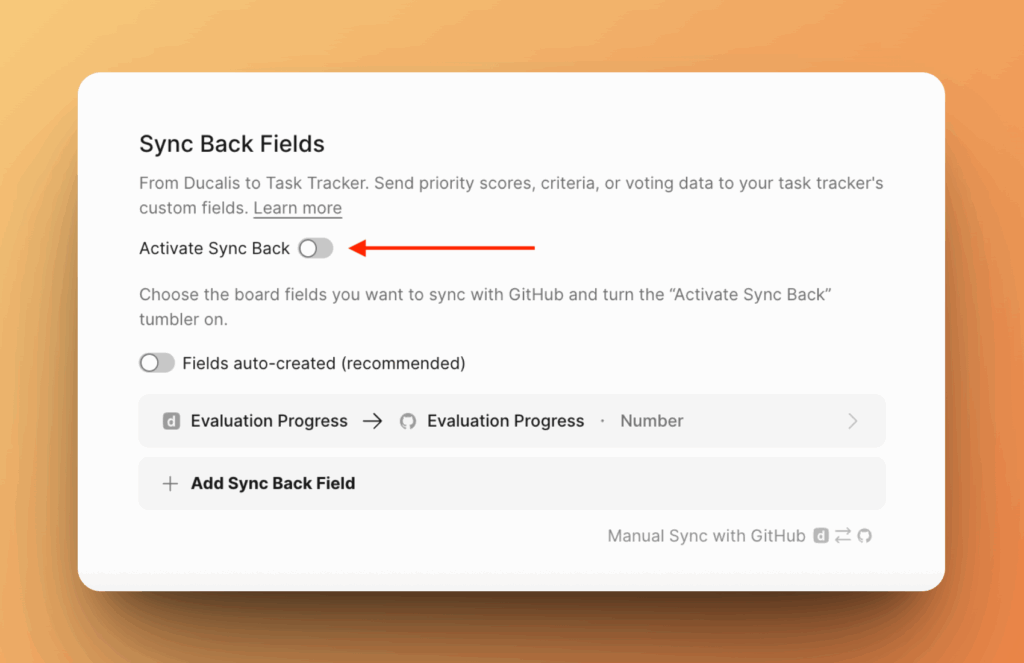
Sync Back sends your prioritization scores and voting results from Ducalis to GitHub custom fields. This keeps your GitHub projects updated with the latest priority rankings.
There are two ways to create fields in GitHub:
- Automatically (recommended). Just turn on the back sync, and fields will be created automatically in GitHub. No manual creation is needed.
- Manually. Create fields in GitHub, add them to all projects, and map them in Ducalis.
Use automatic field creation. Ducalis creates the necessary custom fields in GitHub for you—no manual setup required.
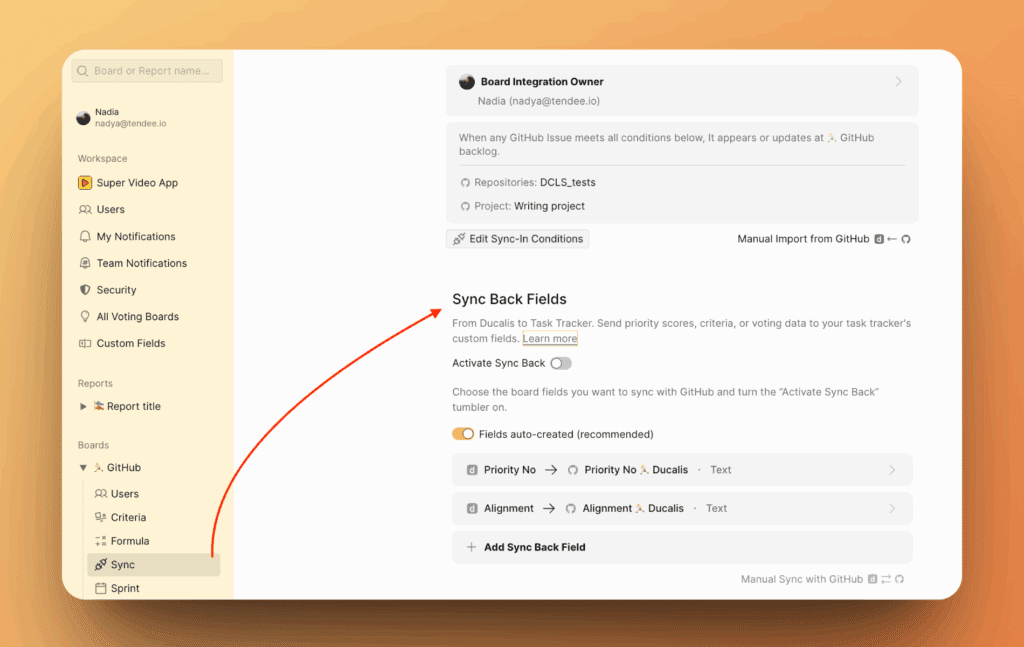
Access Sync Back settings
-
Go to Backlog Management section.
-
Scroll down to Sync Back Fields.
Method 1: Automatic field creation
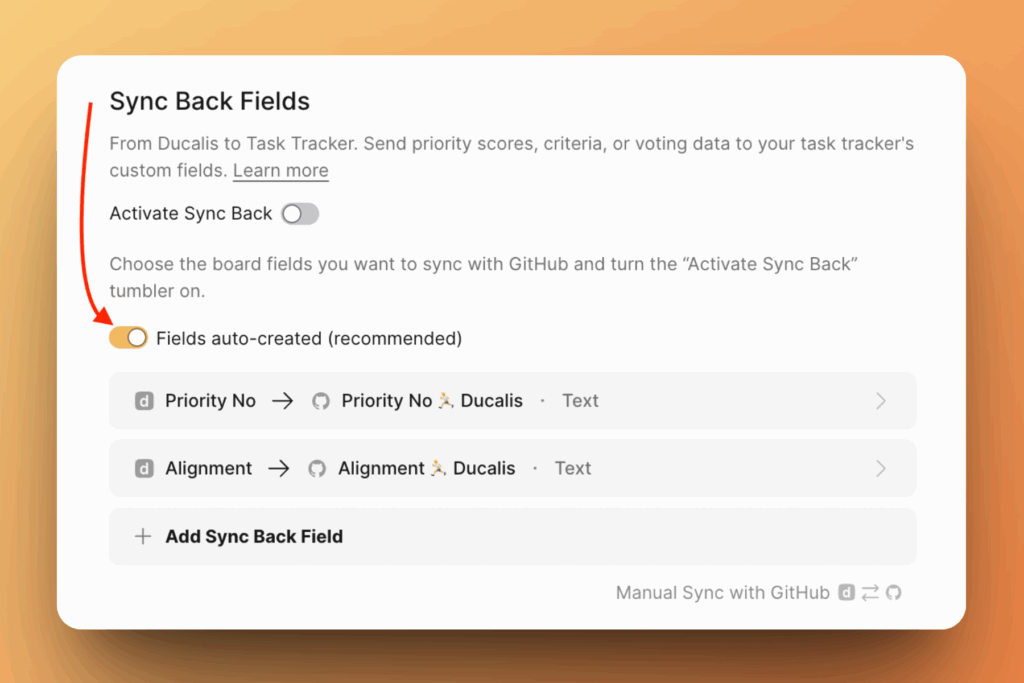
Automatic field creation is enabled by default.
Your GitHub issues must be added to a GitHub project. Projects have custom fields that Ducalis uses to sync data.
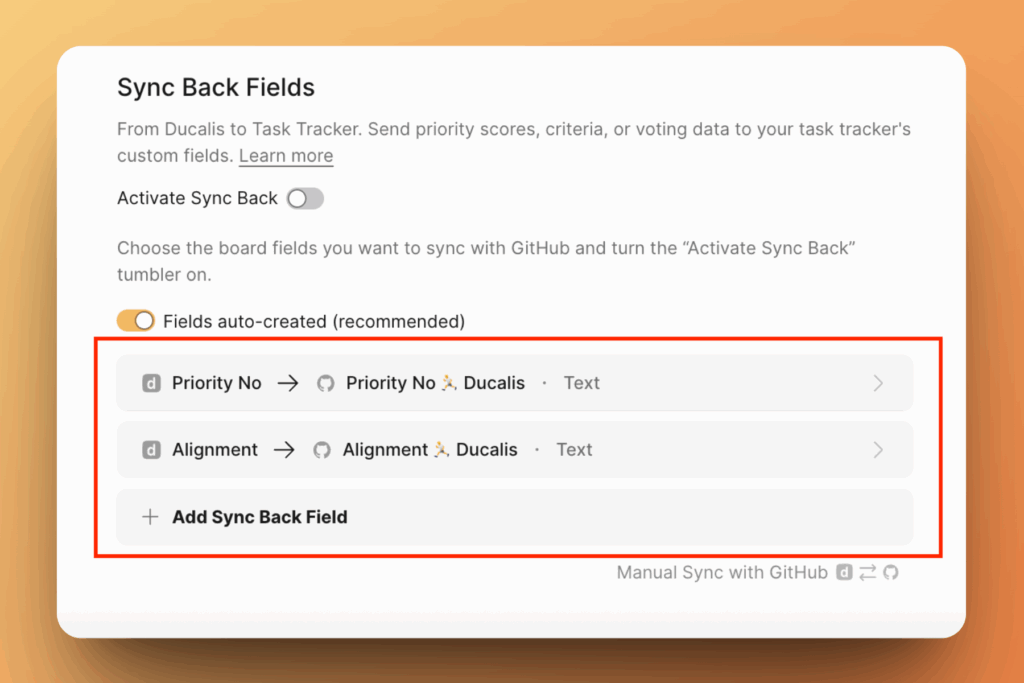
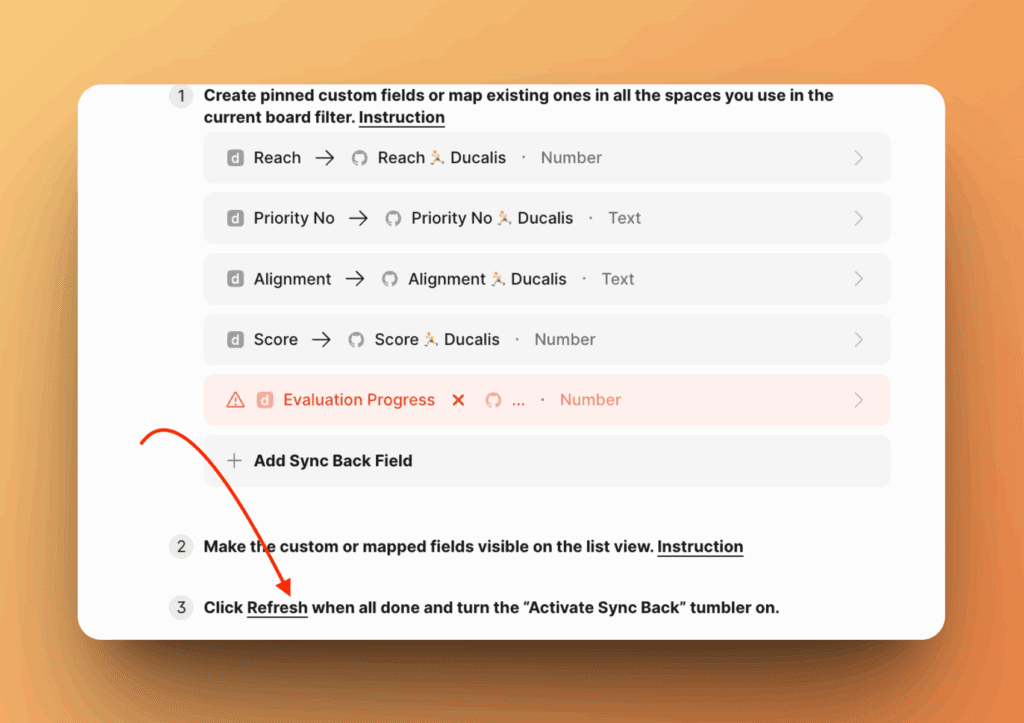
Choose fields to sync
-
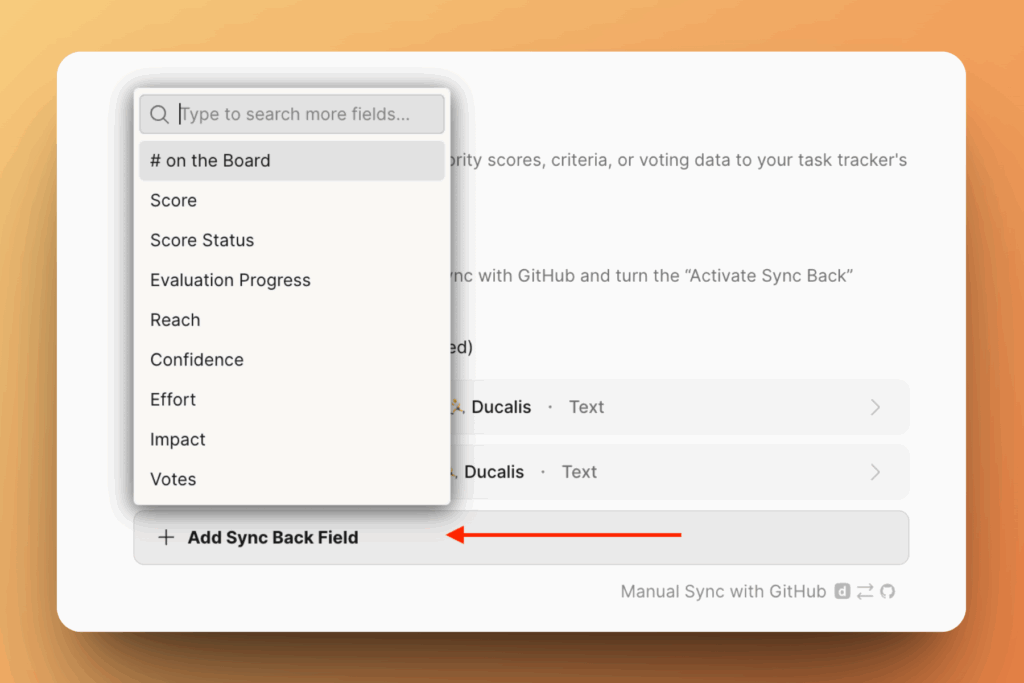
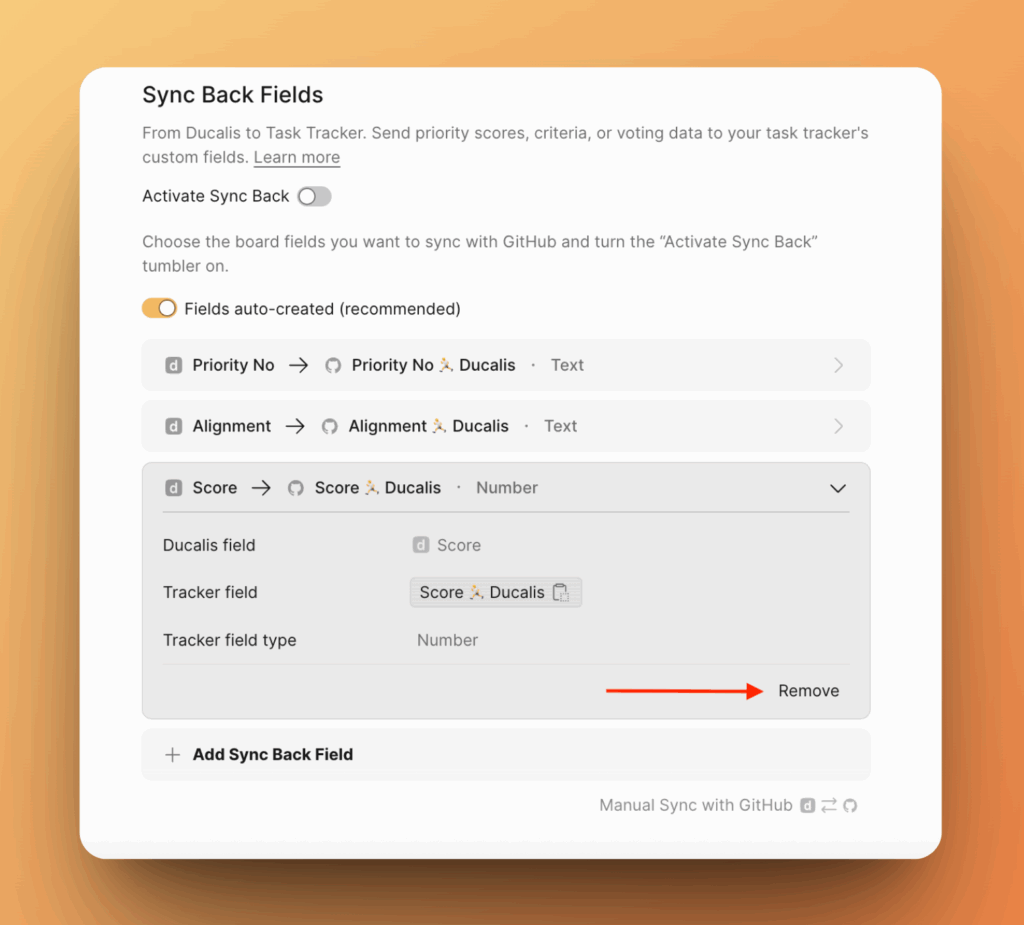
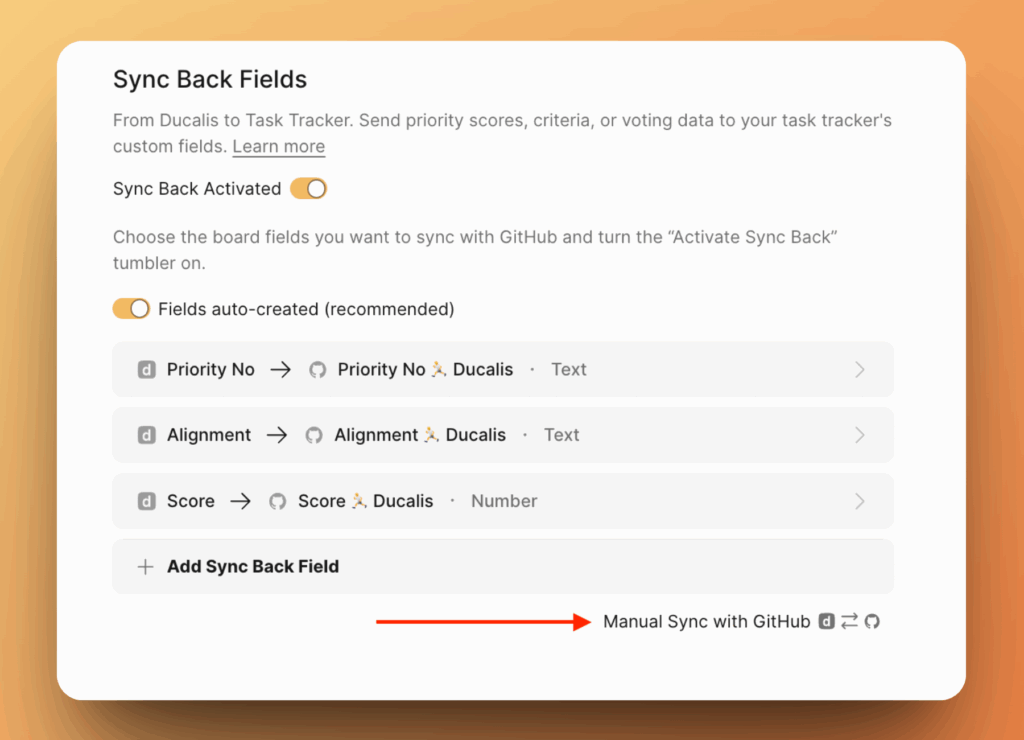
Select which Ducalis fields you want to sync to GitHub.
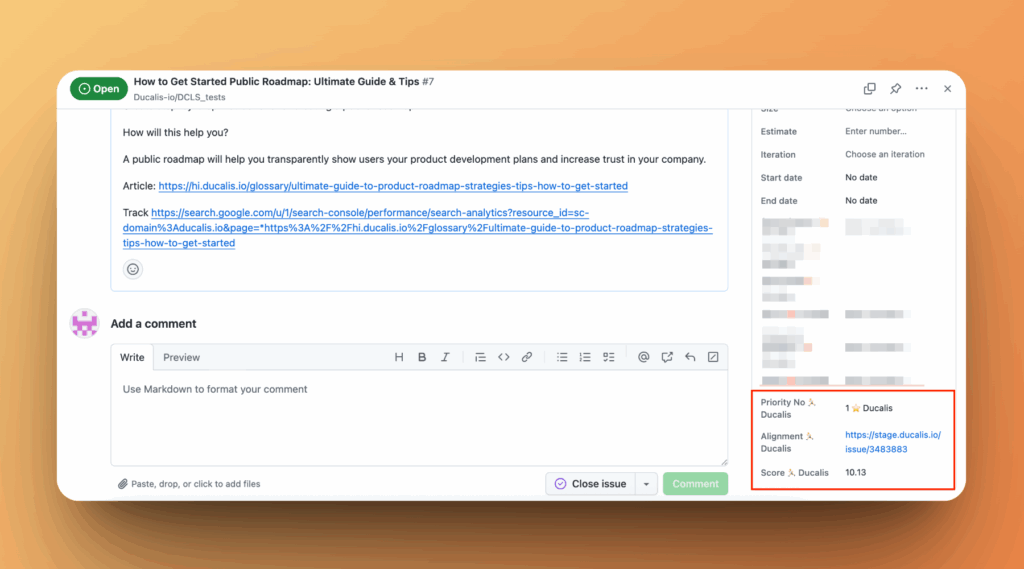
By default, you'll see two fields: Priority {emoji} Ducalis and Alignment {emoji} Ducalis.
-
Click Add Sync Back Field to sync additional data from Ducalis to GitHub.
-
To remove a field, hover over it and click the Remove button.
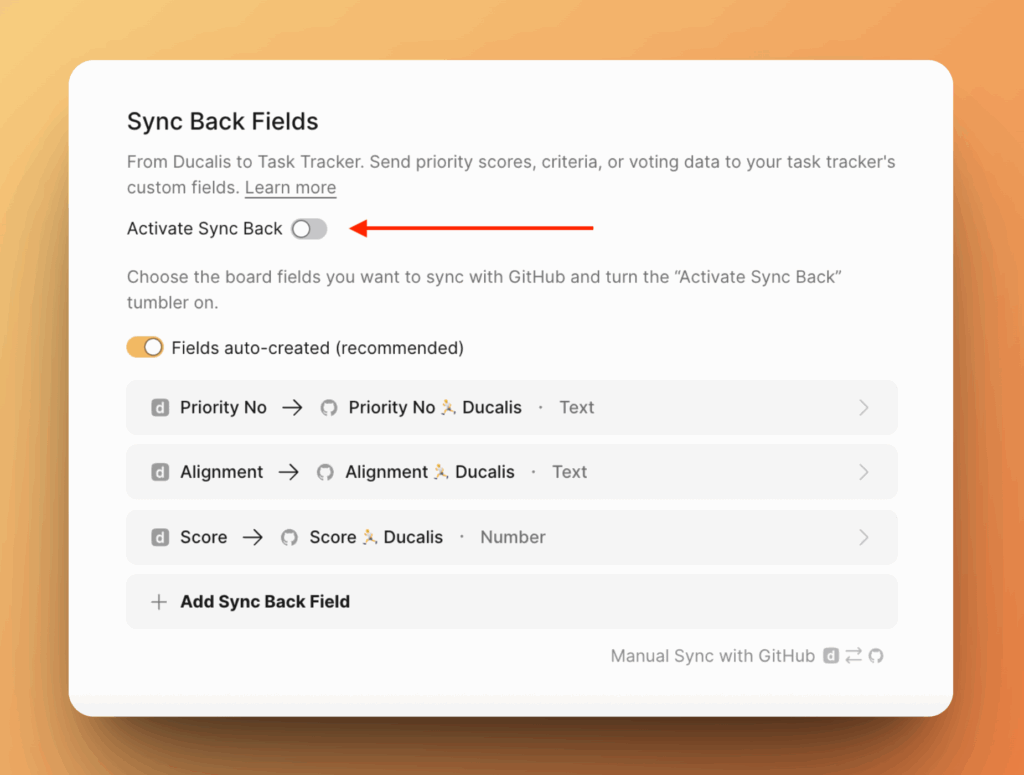
Activate Sync Back
-
Switch on the toggle to activate sync.
-
Custom fields are automatically created in the GitHub project you selected during import configuration.
-
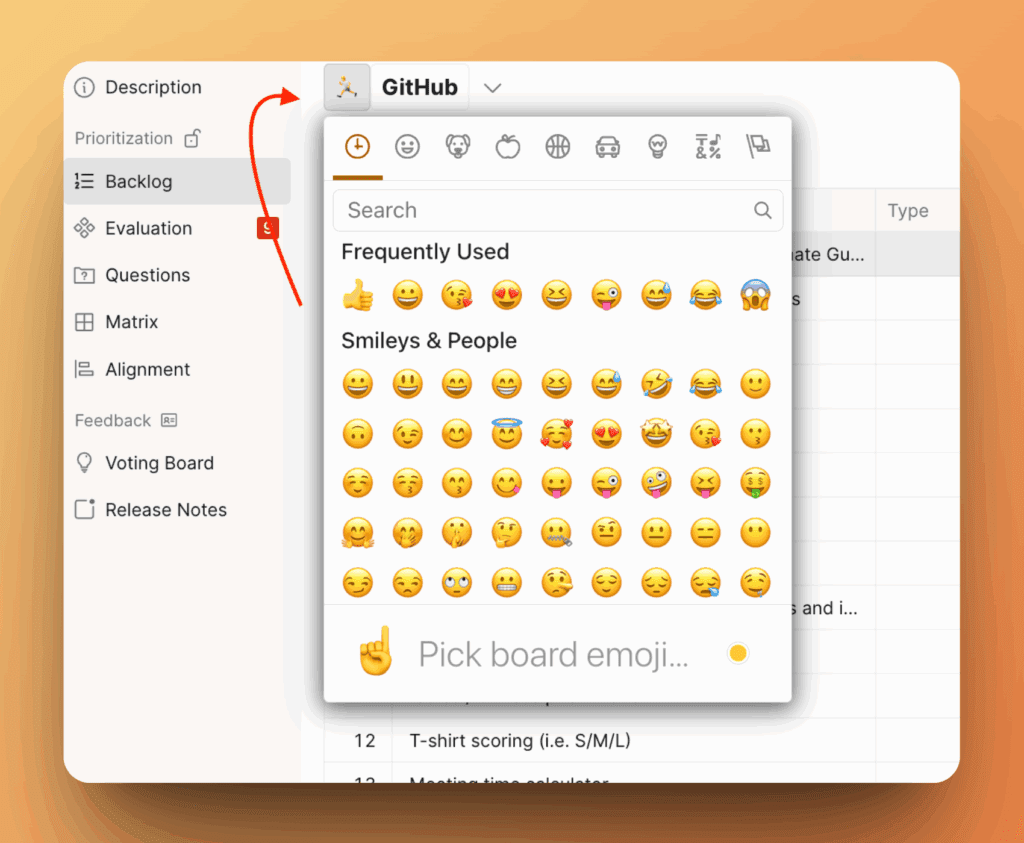
The emoji in custom field names represents your Ducalis Board ID. You can change it in your board settings. After changing the emoji, turn sync off and on again to apply the change.
After activating sync, you can't add more fields. To add fields, turn sync off first, add your fields, then turn it back on.
Method 2: Manual field creation
Turn off automatic field creation to use manual mapping.
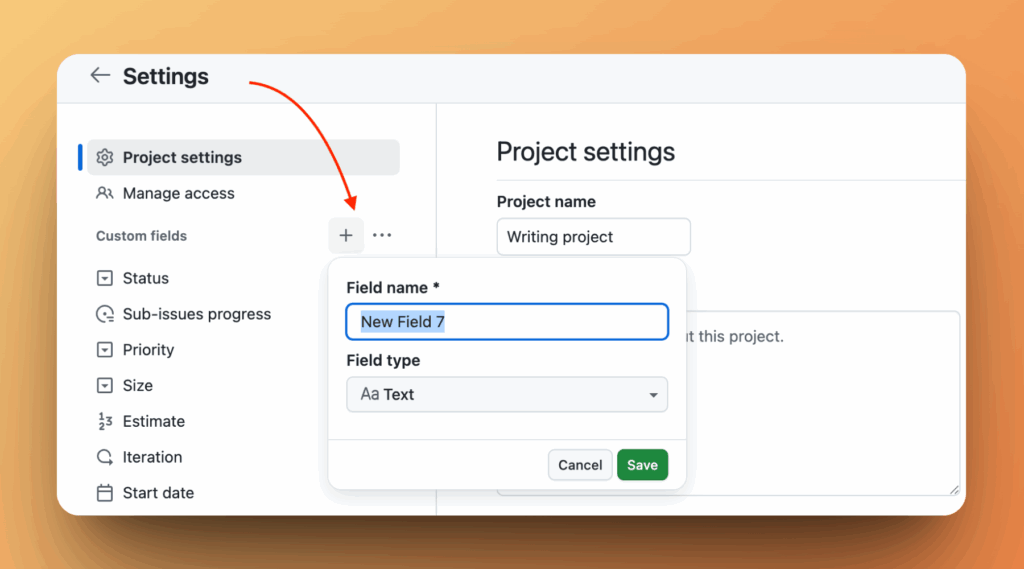
Create custom fields in GitHub
-
In your GitHub project, go to Settings and choose Custom Fields.
-
Create the custom fields you need.
-
Configure the field:
- Enter a field name.
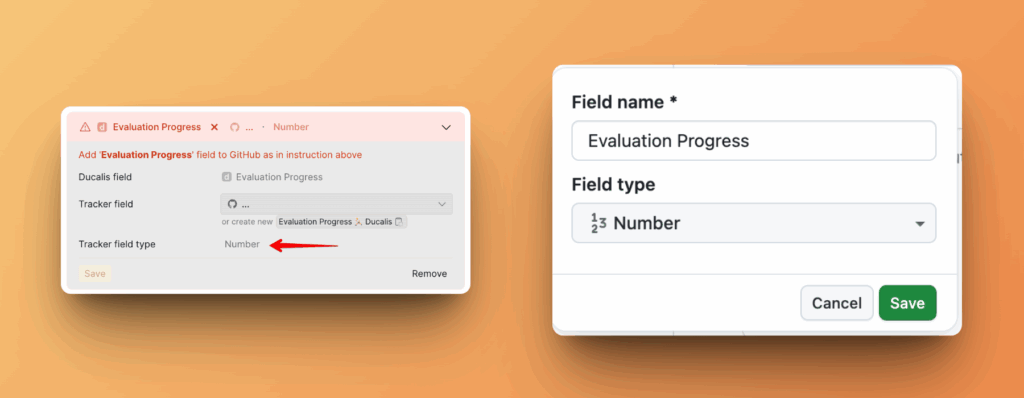
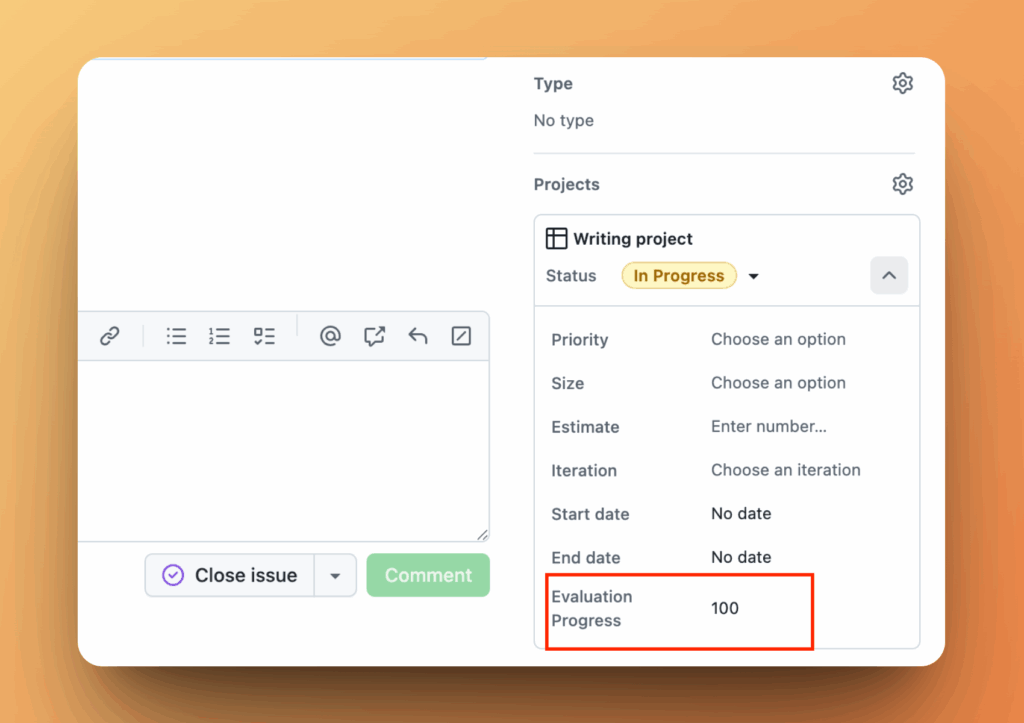
- Choose the field type. Check the field type in Ducalis first to ensure they match. For example, if you want to map the Ducalis field "Evaluation Progress" to GitHub, check its type in Ducalis and select the same type in GitHub.
-
Return to Ducalis and click Refresh.
-
The field appears in the dropdown. Select it and click Save.

Activate Sync Back
Ensure there are no unmapped fields (shown in red) before activating sync. Delete any unmapped fields you don't need.
Switch on the toggle to activate sync.
The field and its data now appear in GitHub.
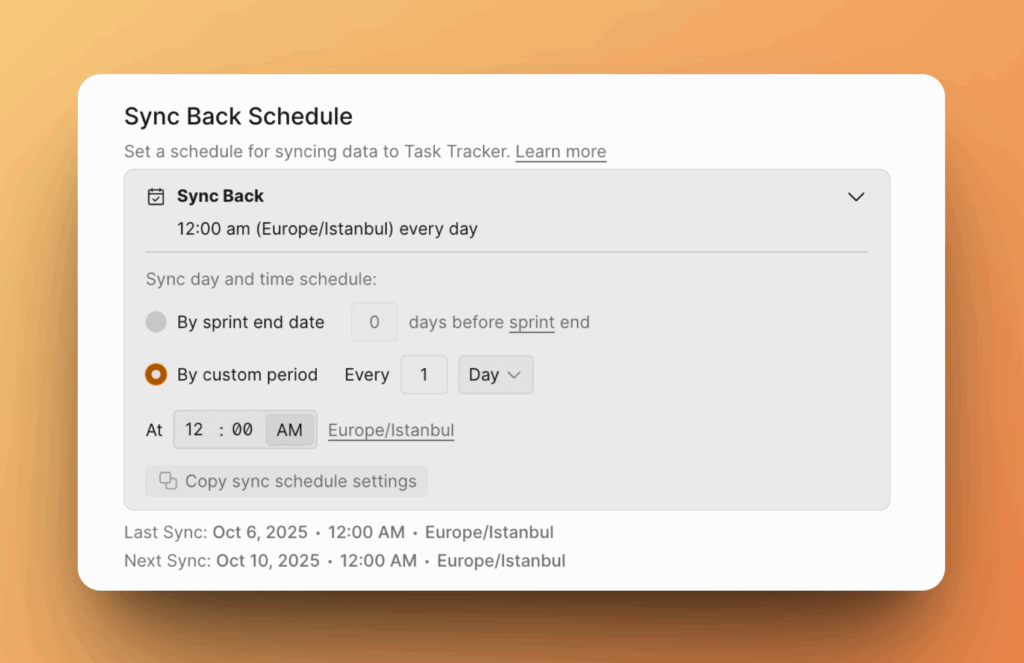
Sync schedule
Sync Back runs automatically once a week or on your custom schedule.
-
Choose the day and time to sync data to GitHub. For example, schedule it a few days before your sprint planning meeting.
-
To sync immediately, click Manual Sync with GitHub.
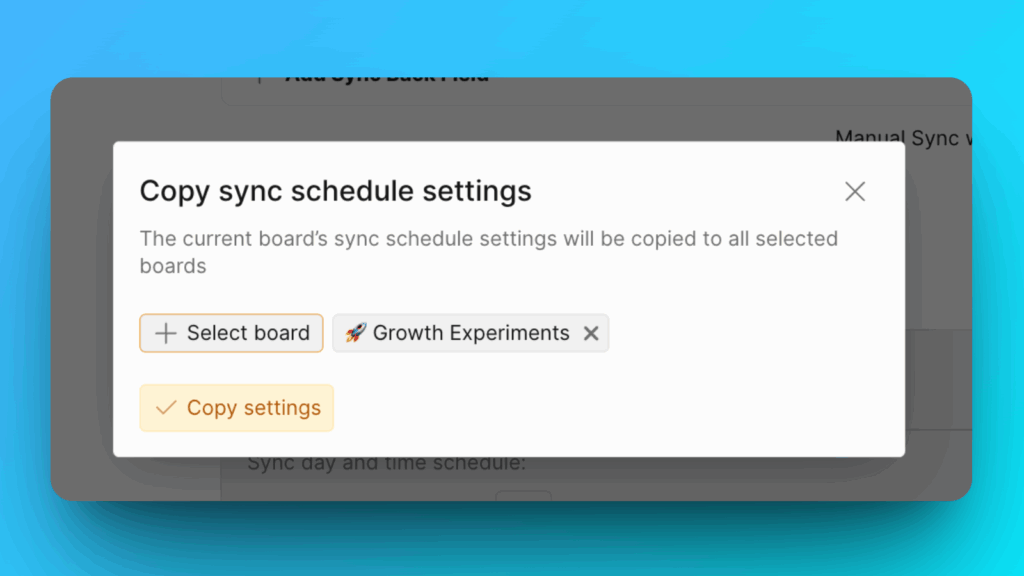
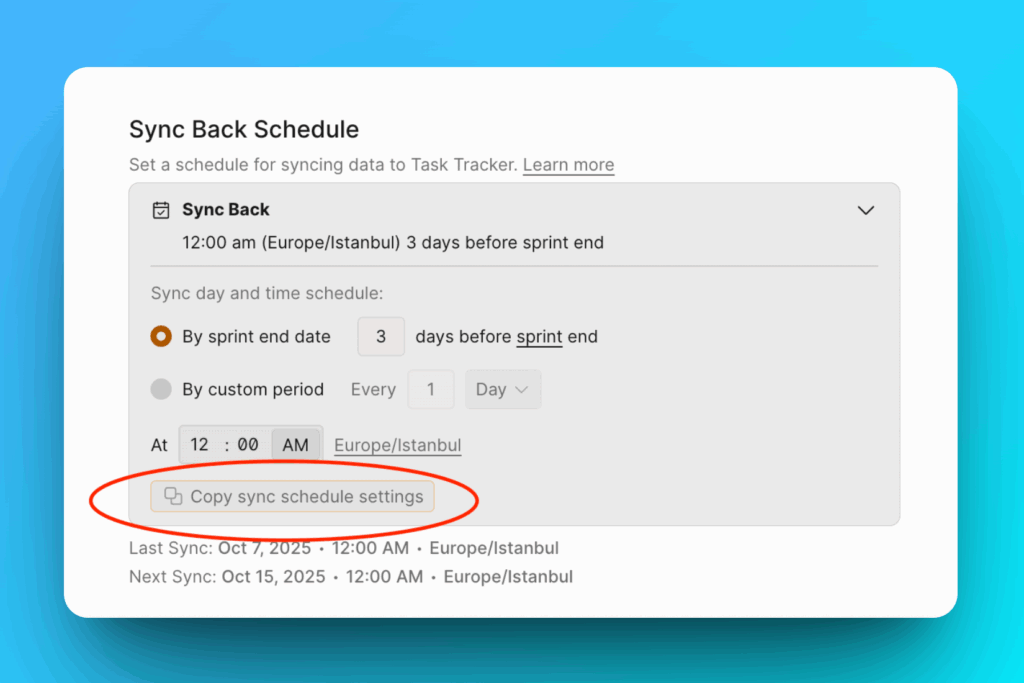
Copy schedule to other boards
You can copy sync schedule settings to multiple boards at once.
-
Click Copy sync schedule settings.
-
Select the boards you want to copy settings to.
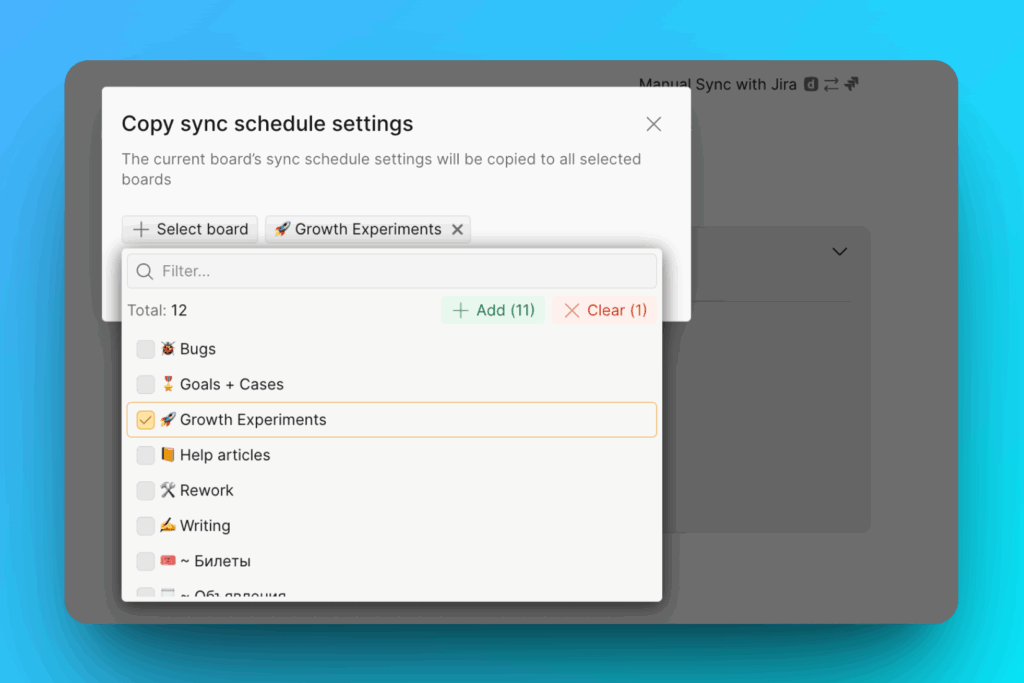
-
Click Copy Settings.