Step 1: Custom fields
To sync data back to Jira Cloud, you need fields in Jira that can receive the data from Ducalis. There are two options for getting data to Jira Cloud.
Choose option for setting up fields
Field Mapping (1) – Use existing Jira fields. No new fields needed.
Custom Fields Creation (2) – Create new fields in Jira specifically for Ducalis data.
Choose the approach that works best for your setup.
Fields Mapping
If you already have custom fields in Jira and don't want to create more, you can map Ducalis fields to your existing Jira fields.
Map fields to existing Jira fields
-
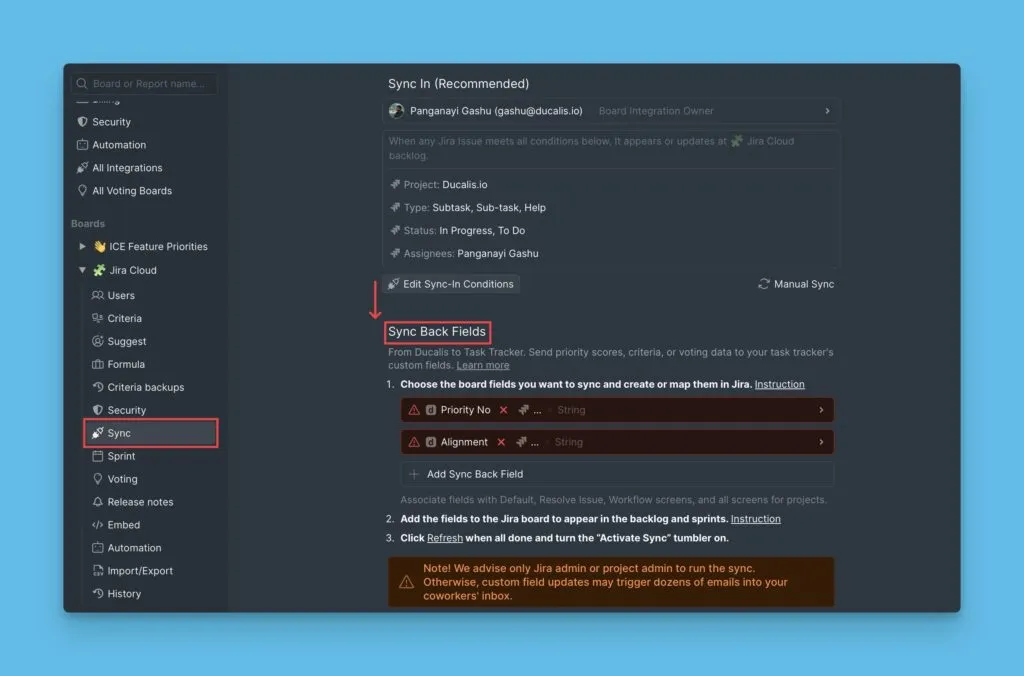
In Ducalis, go to the Sync settings.
-
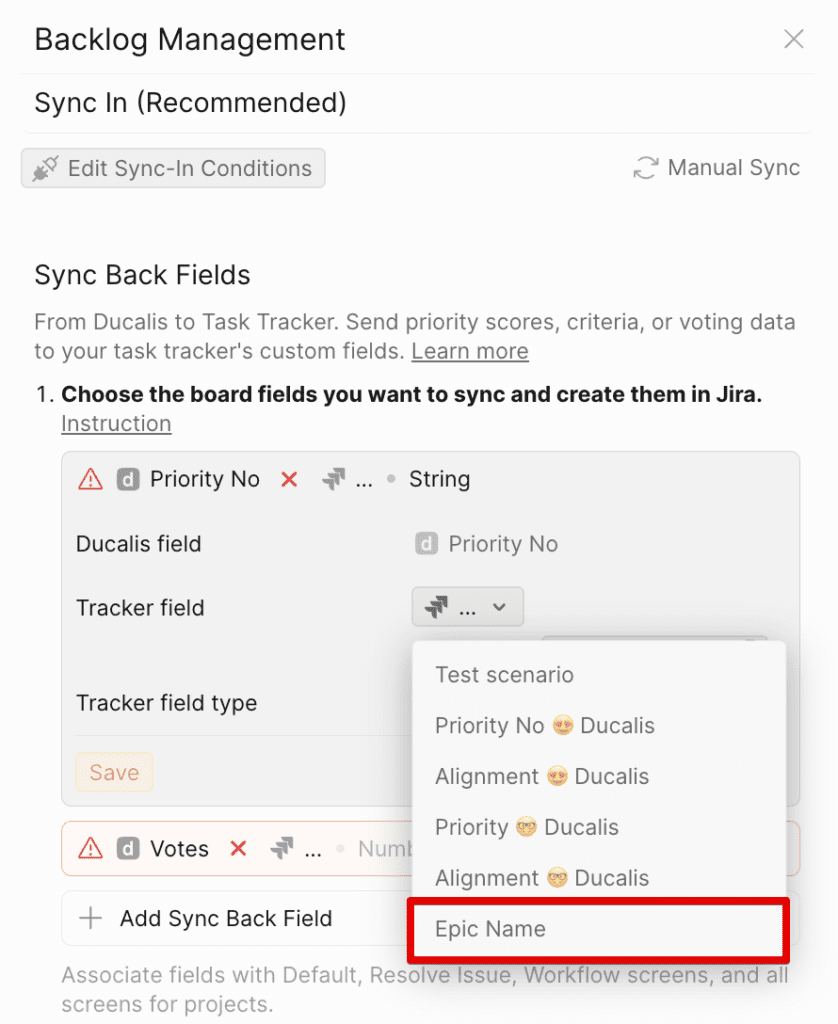
Scroll down to Sync-Back fields.
-
Review the default Ducalis fields. You can keep or delete them.

-
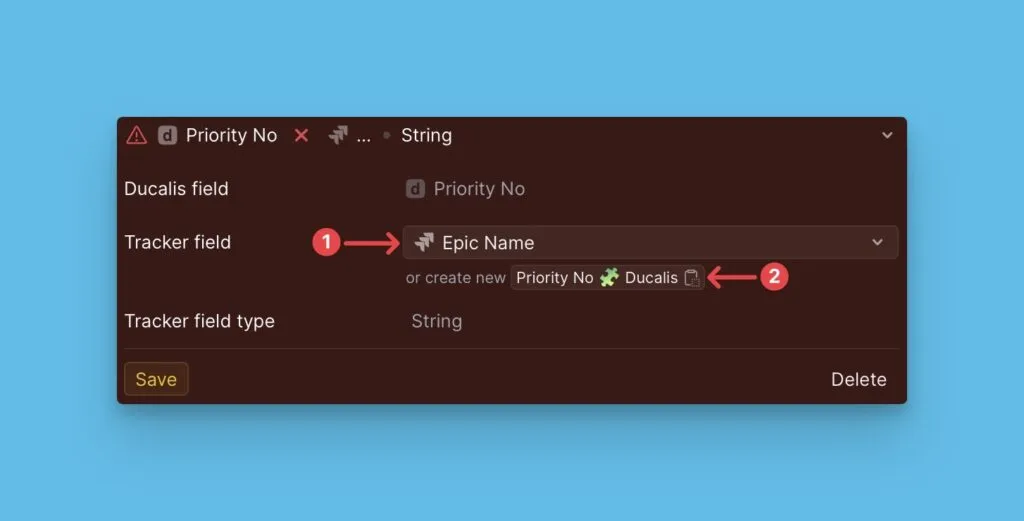
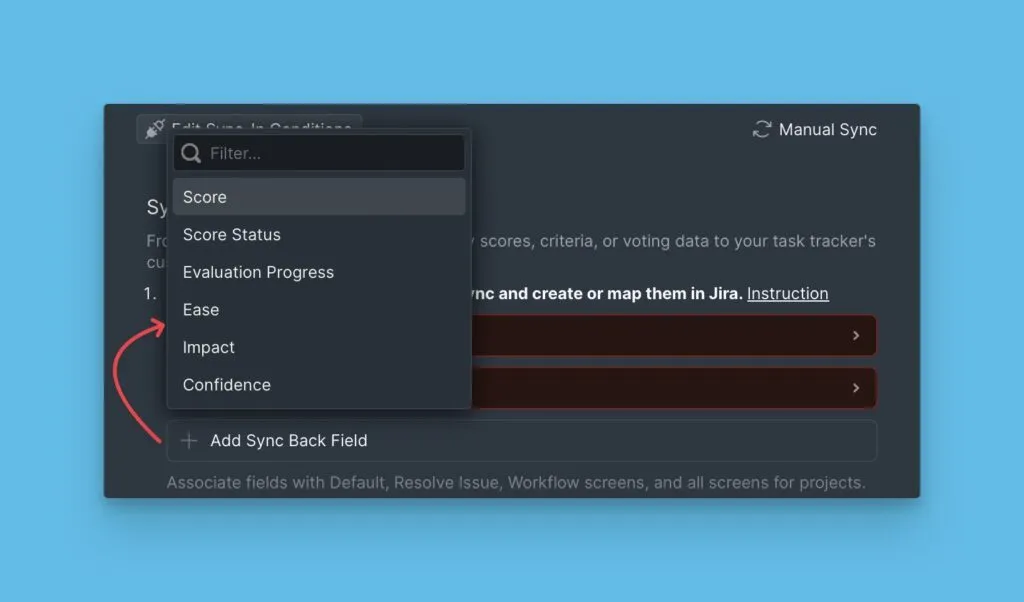
To add a different field, click Add Sync Back field and select the Ducalis field you want to sync.
-
Next to Tracker field, click the dropdown and select the existing Jira field to map to.
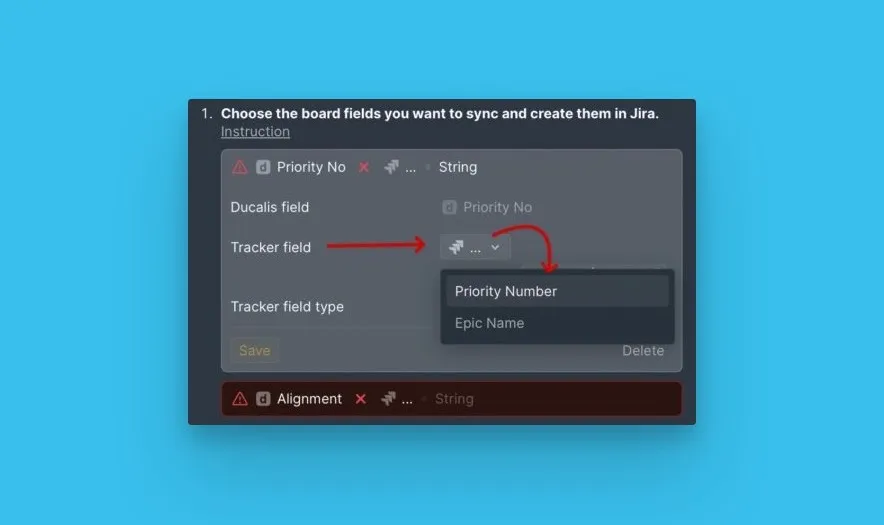
-
Click Save.
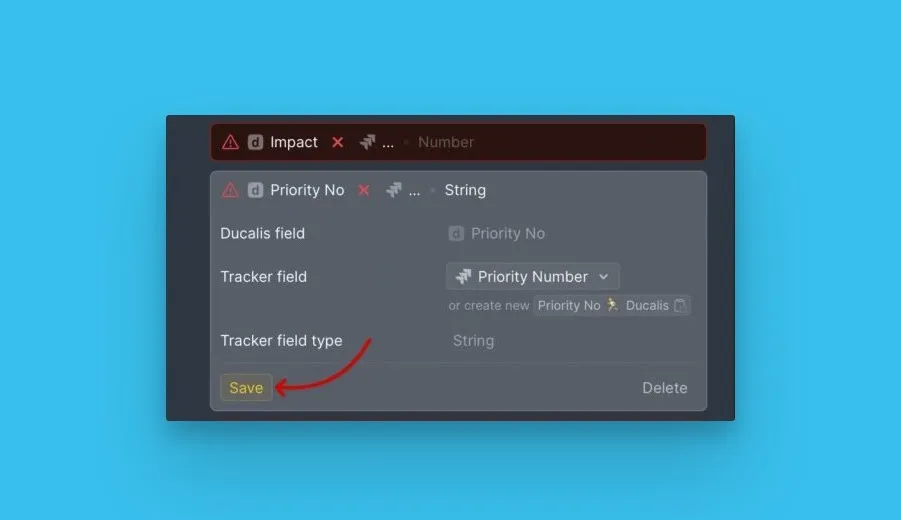
Each time Sync Back runs, data from the Ducalis field will sync to the mapped Jira field.
Custom Fields Creation
Instead of mapping to existing fields, you can create new custom fields in Jira specifically for Ducalis data.
Project types in Jira Cloud
Jira Cloud has two project types:
-
Company-managed software – Custom fields are created at the Jira instance level.
-
Team-managed software – Custom fields are created per project.
Don't combine Team-managed projects with any other project type in a single Ducalis board filter—the sync will not work.
We recommend only Jira Admins or Project Admins run the sync, otherwise custom field updates may trigger dozens of notification emails to your coworkers.
Check your project type
-
In Jira Cloud, go to Projects and click View all projects.
-
Check the Type column to see your project type.
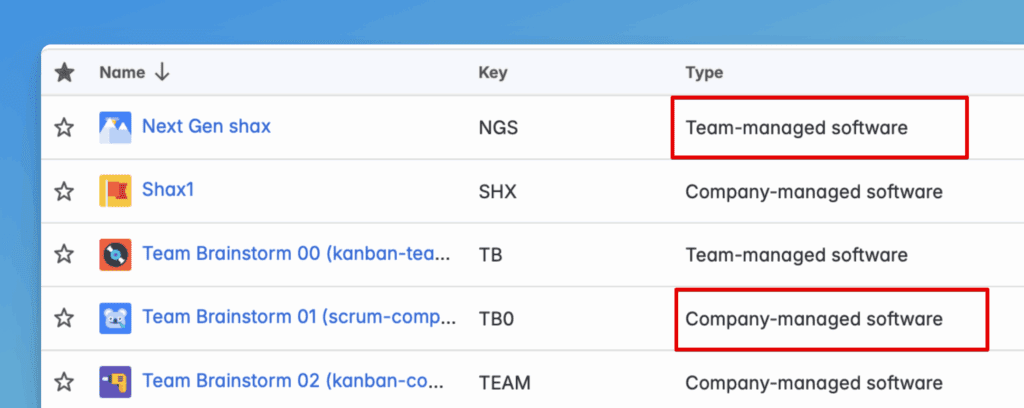
-
Follow the instructions below for your project type.
Custom fields in a Company-managed project
-
Go to Settings (cog icon next to your avatar, top right corner).
-
Go to Work Items in Settings.
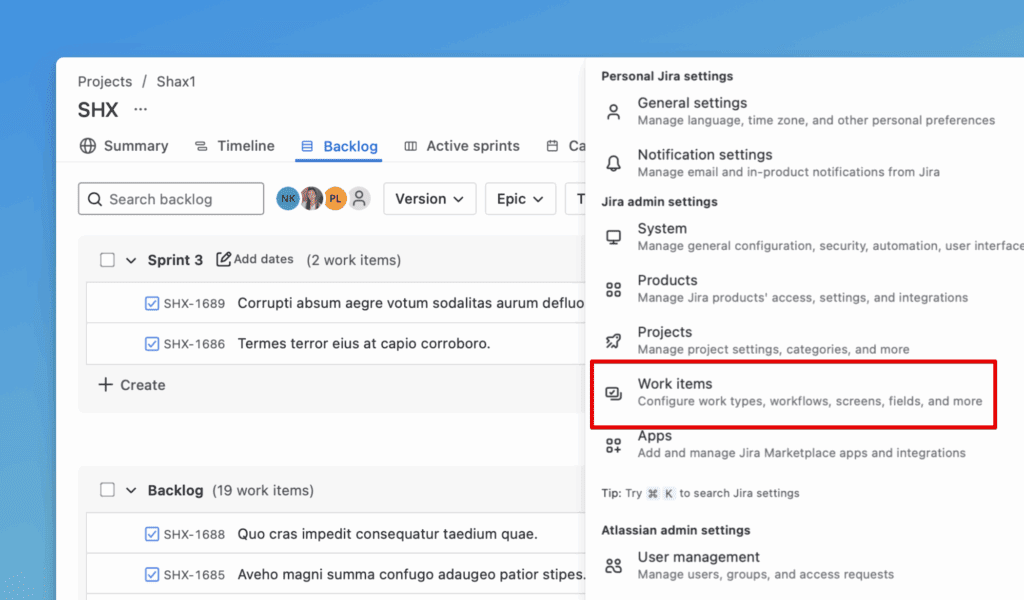
-
Go to Custom Fields in the left menu.
-
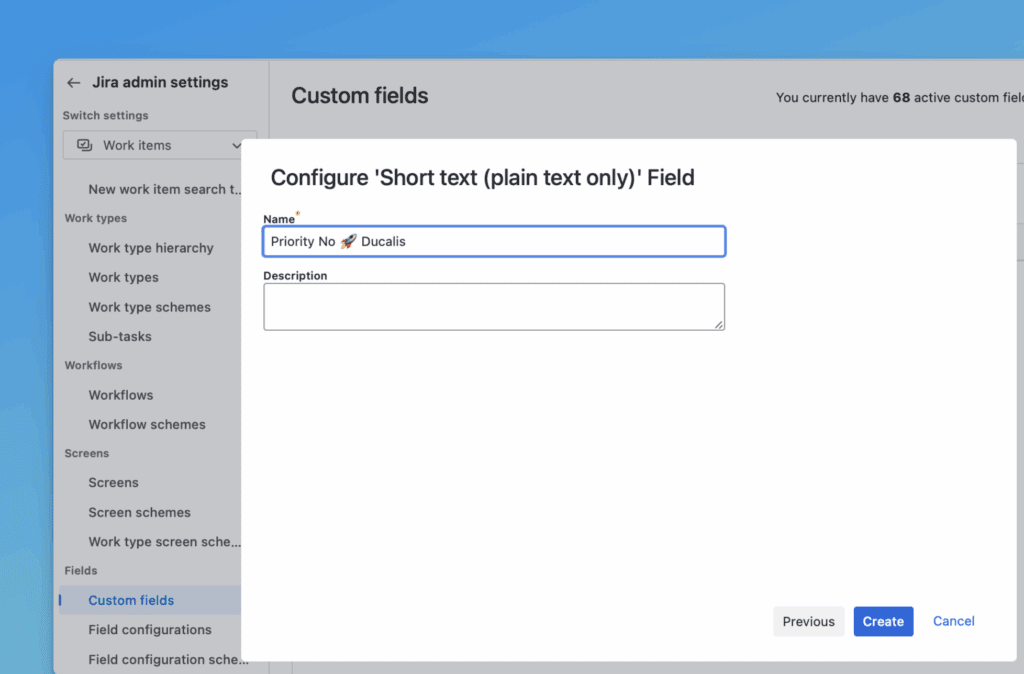
Click Create custom field in the top right corner.
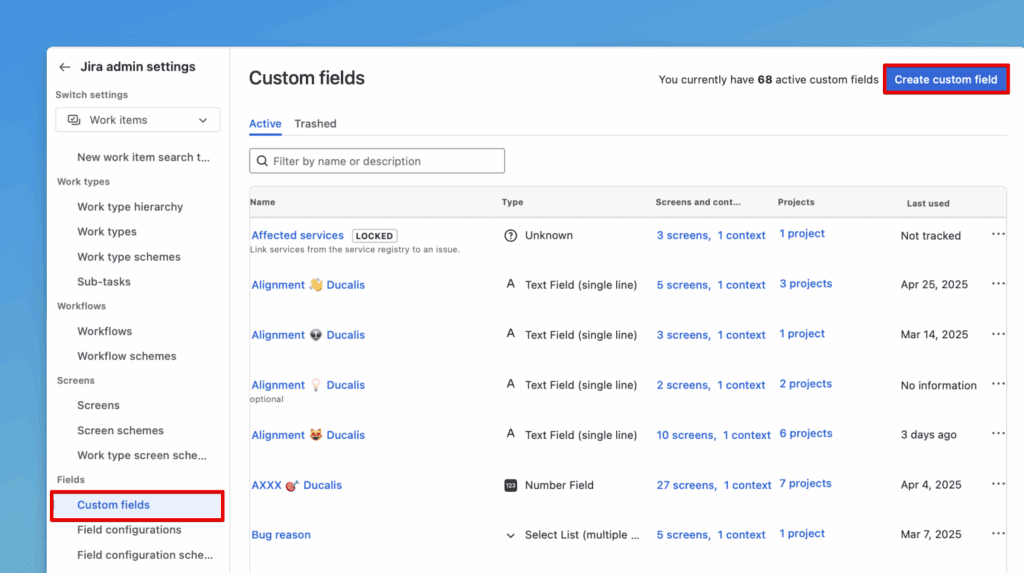
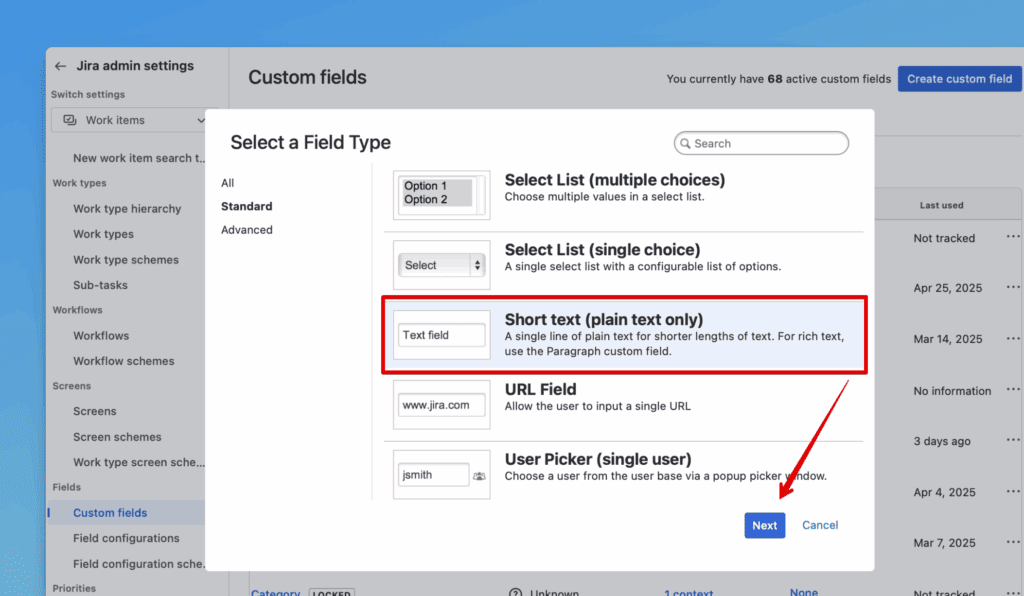
-
Choose Text Field (single line).
-
Click Next.
-
Copy the field name from Ducalis sync settings:
- Go to Sync settings, then Sync Back Fields.
- Click the copy icon to copy the field name. Your field names depend on your board's emoji.
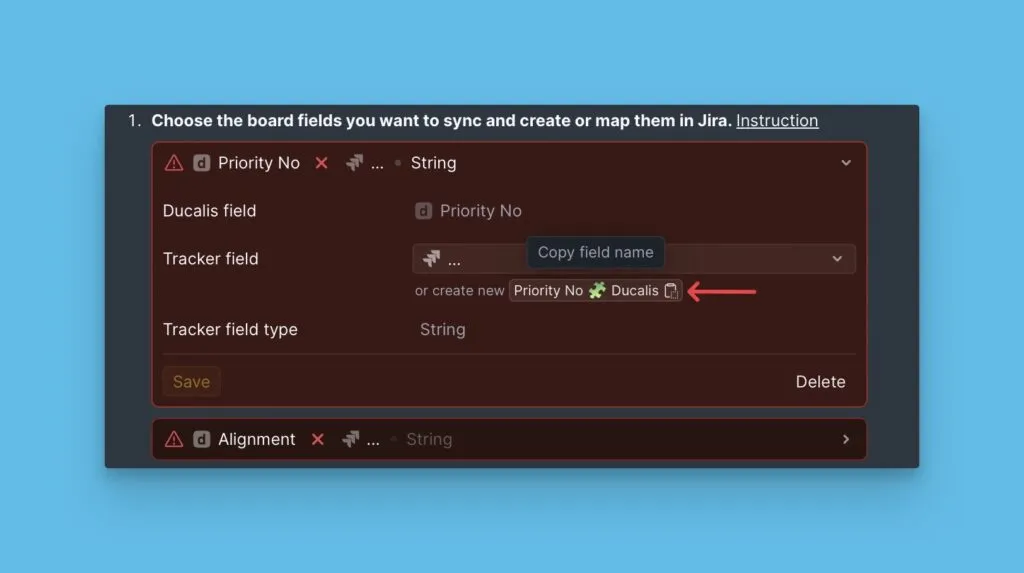
-
Paste the field name in Jira and click Create.
-
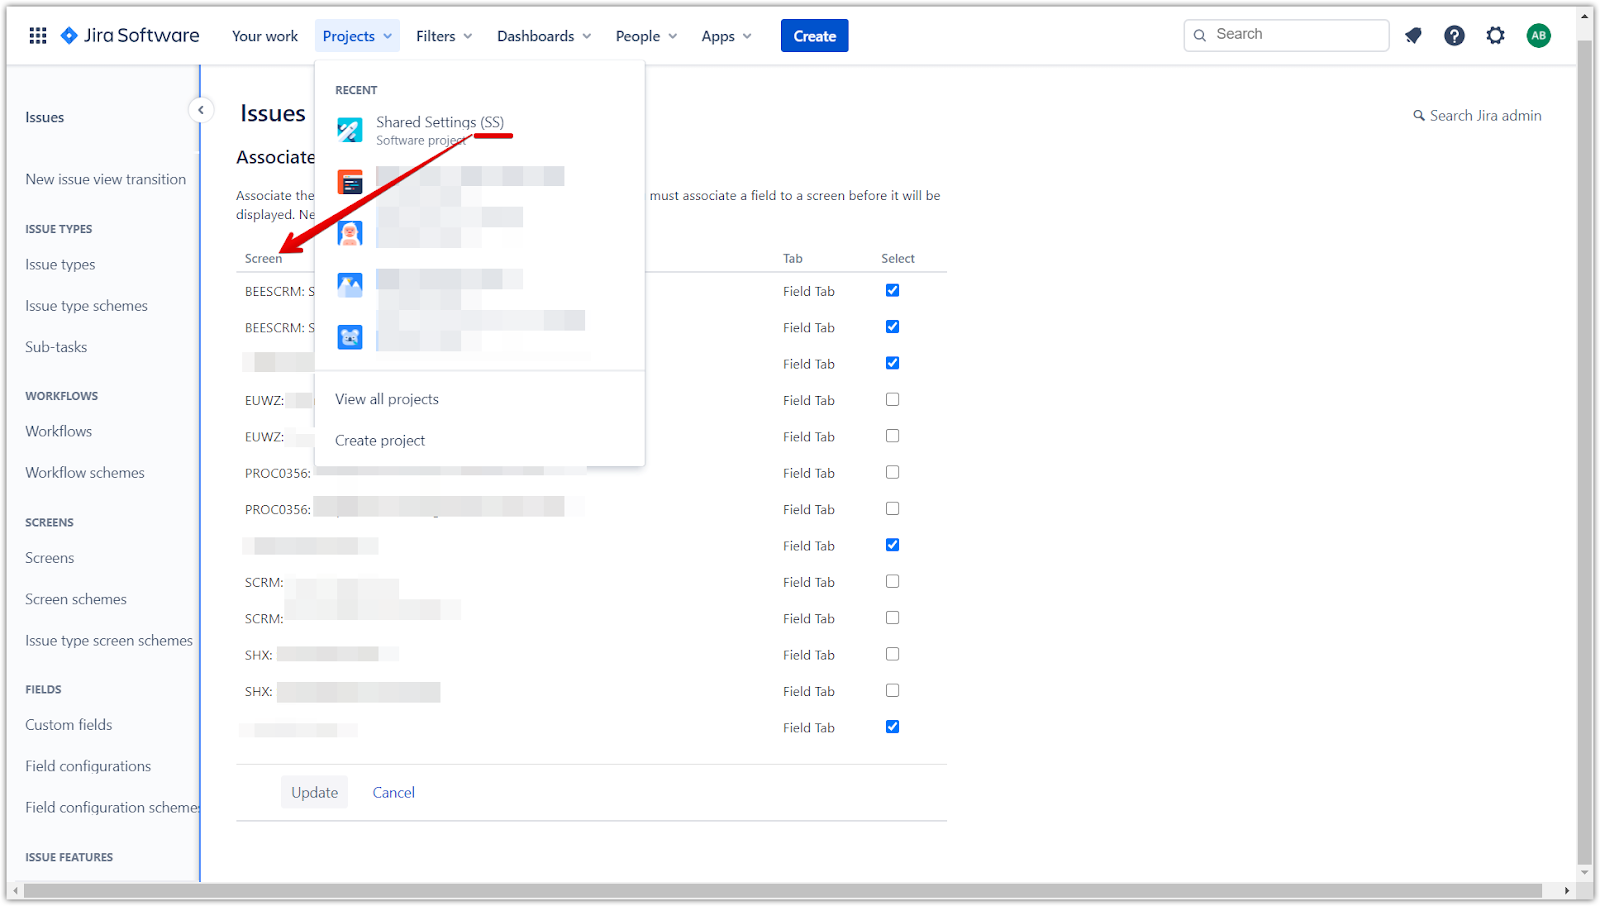
Associate the field with these screens and click Update:
- Default Screen
- Resolve Issue screen
- Workflow Screen
- All screens with the project keys for projects in your Ducalis board filter
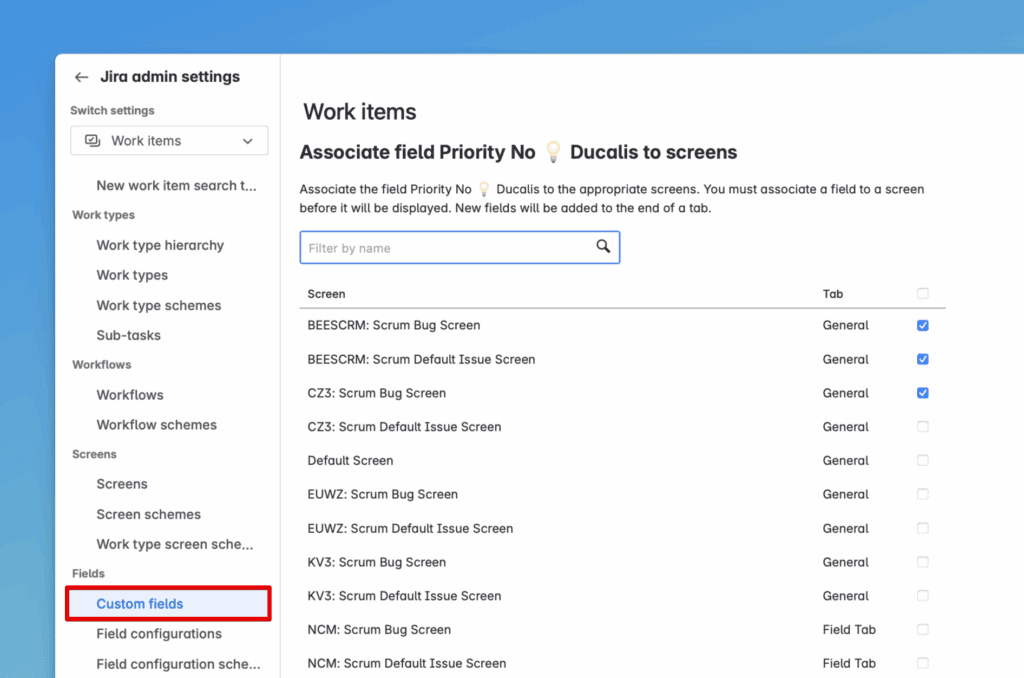
-
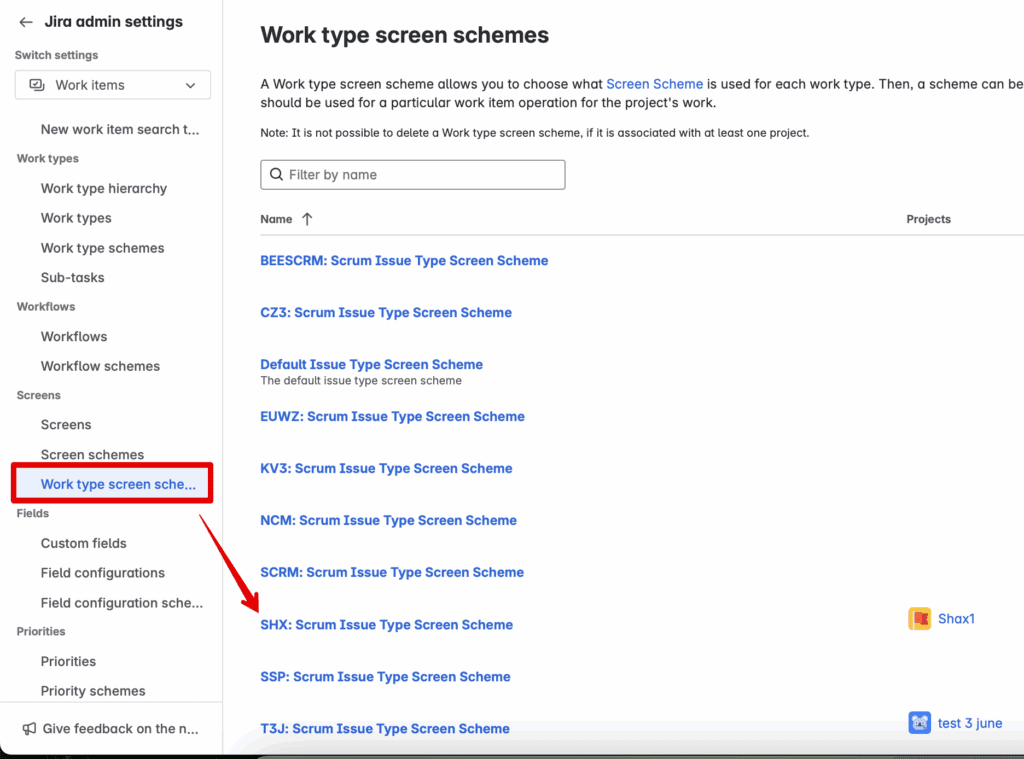
If you don't see your project key, it may mean your project shares settings with another project.
-
Open Work type screen schemes in a new tab to see which project key relates to yours.
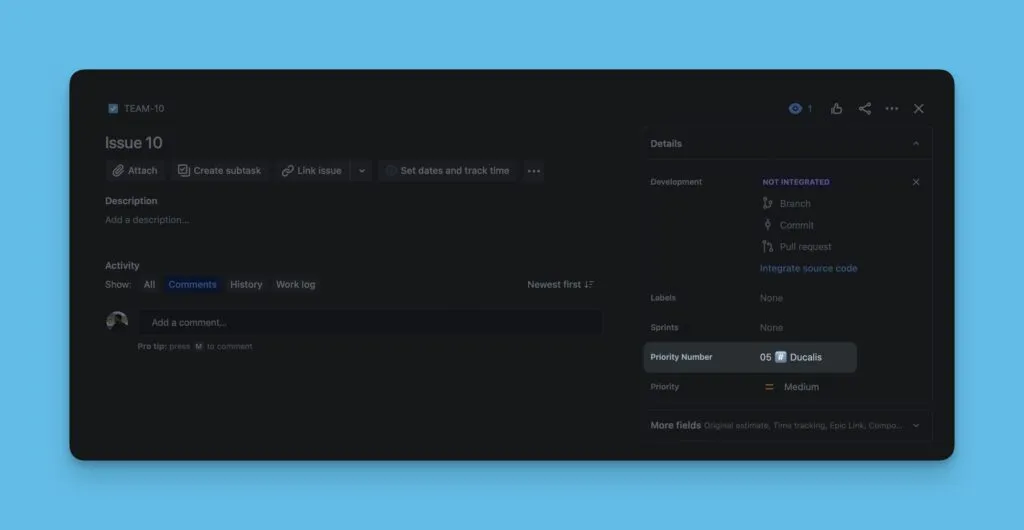
The first field is ready.
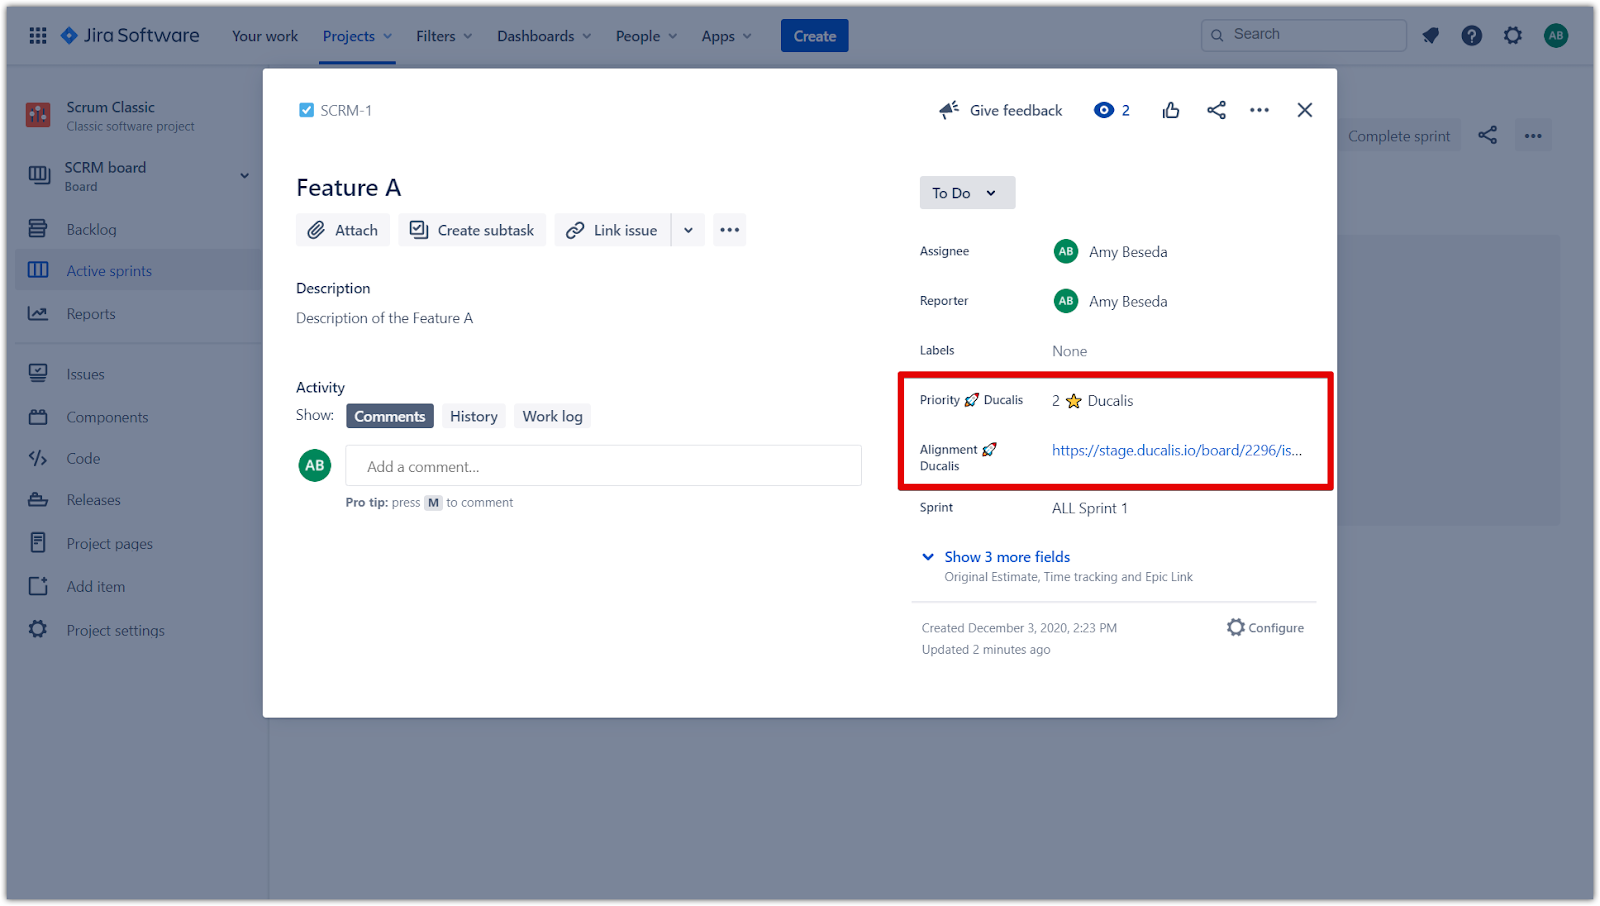
After setup, you'll see the ranking and alignment analysis links inside the issues.
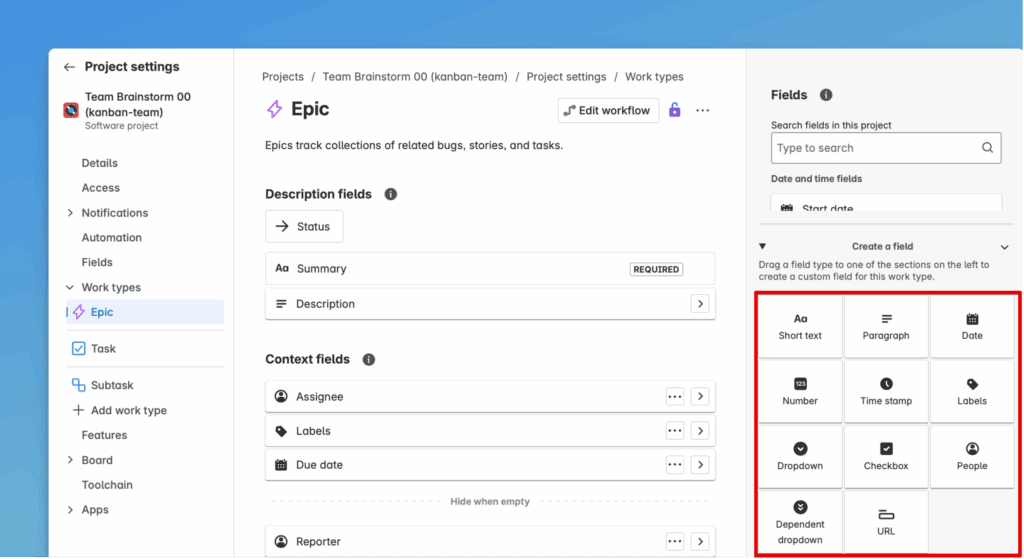
Custom fields in a Team-managed project
-
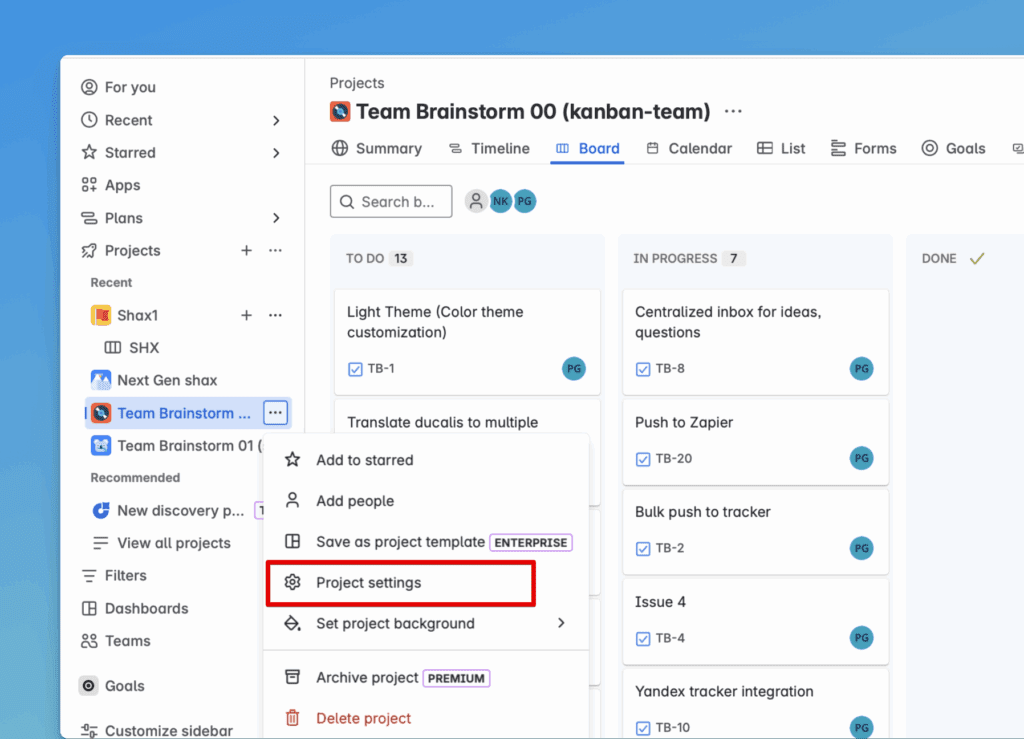
Click Projects (left menu), choose your project, click the three-dots menu, and select Project Settings.
-
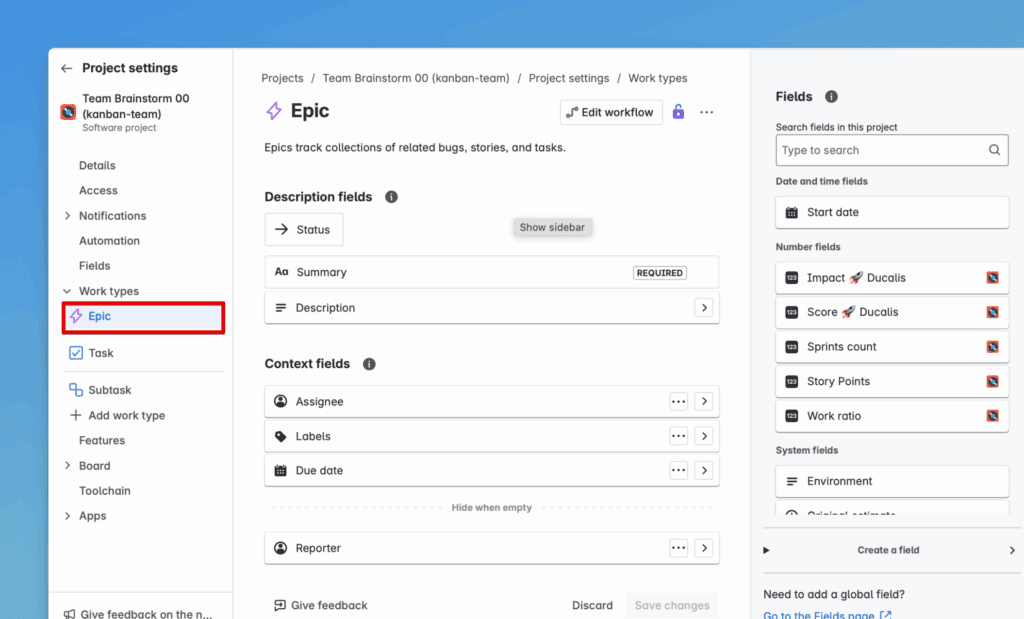
Choose any work type you're prioritizing in Ducalis.
-
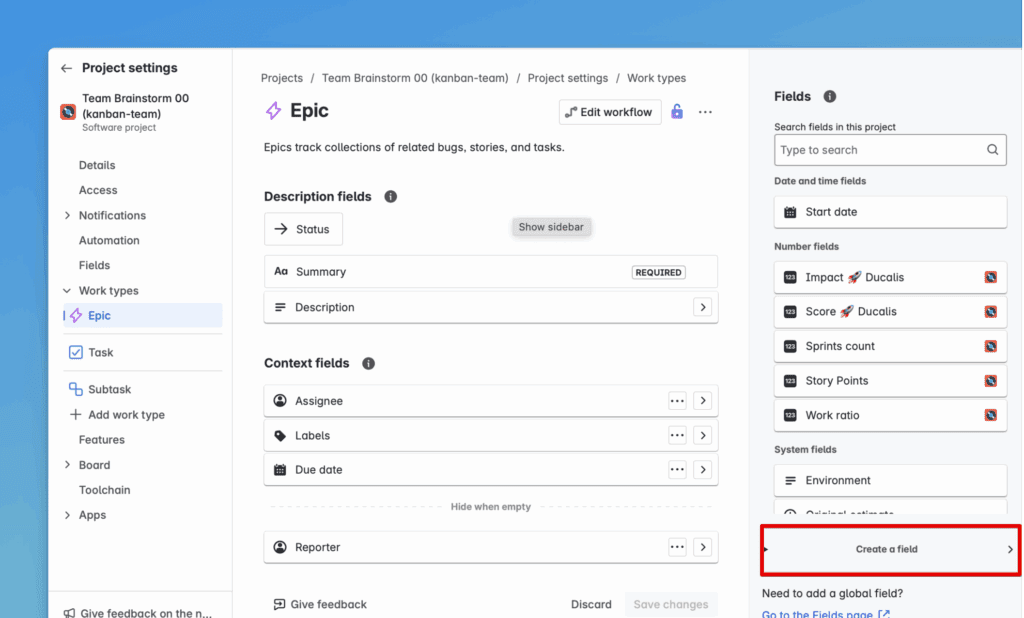
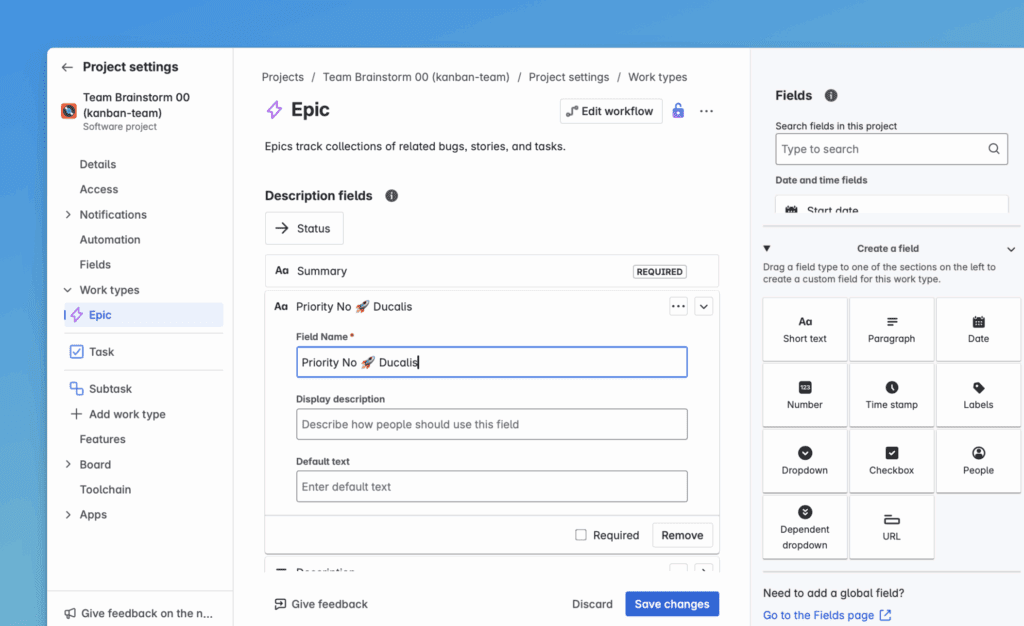
Click Create a field.
-
Select the field type. It depends on what data you want to sync.
-
Enter the field name and click Update.
-
Add this field to all issue types in all projects used in your Ducalis board.
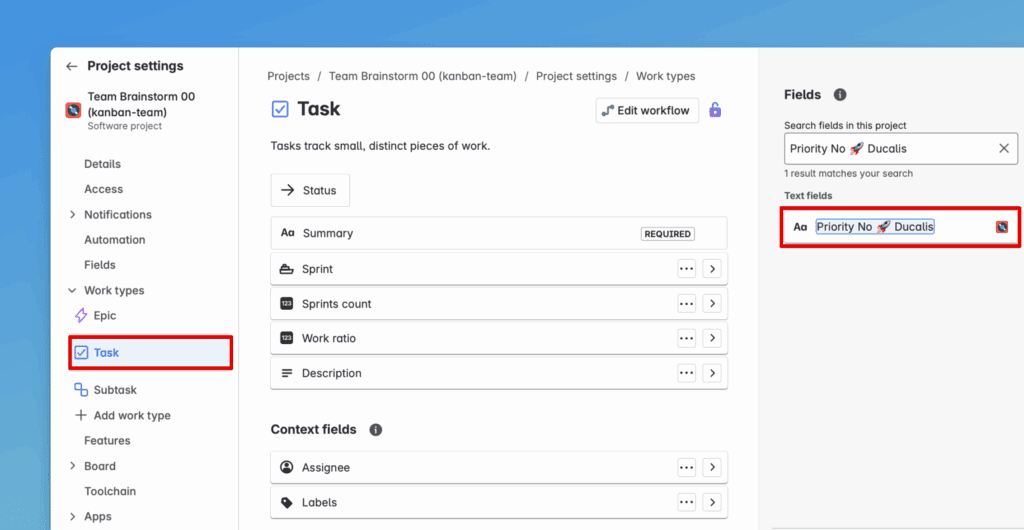
For example, if you use Project 1 with issue types (Epic, Task, Bug) and Project 2 with issue types (Epic, Sub-Task), add the field to all of them.
-
Drag and drop the field into Context fields.
-
Click Save Changes for each issue type.
The field now appears in Ducalis and you can match fields.
What's next
Continue to Step 2: Configure your Jira board to enable sorting by the custom fields you created.