Sync Back
Sync Back sends your prioritization results from Ducalis to Yandex.Tracker. Your team sees priority rankings directly in their tracker without switching tools.
Complete the Connect Yandex.Tracker setup first.
Ducalis uses field mapping. You select existing fields in Yandex.Tracker to receive Ducalis data. This gives you full control over your tracker's field structure.
Setting up fields
-
Field Mapping – Use existing Yandex tracker fields. No new fields needed.
-
Custom Fields Creation – Create new fields in Yandex tracker specifically for Ducalis data.
Choose the approach that works best for your setup:
Fields Mapping
If you already have custom fields in Yandex tracker and don't want to create more, you can map Ducalis fields to your existing fields.
- Go to the Sync settings and scroll down to Sync-Back fields.
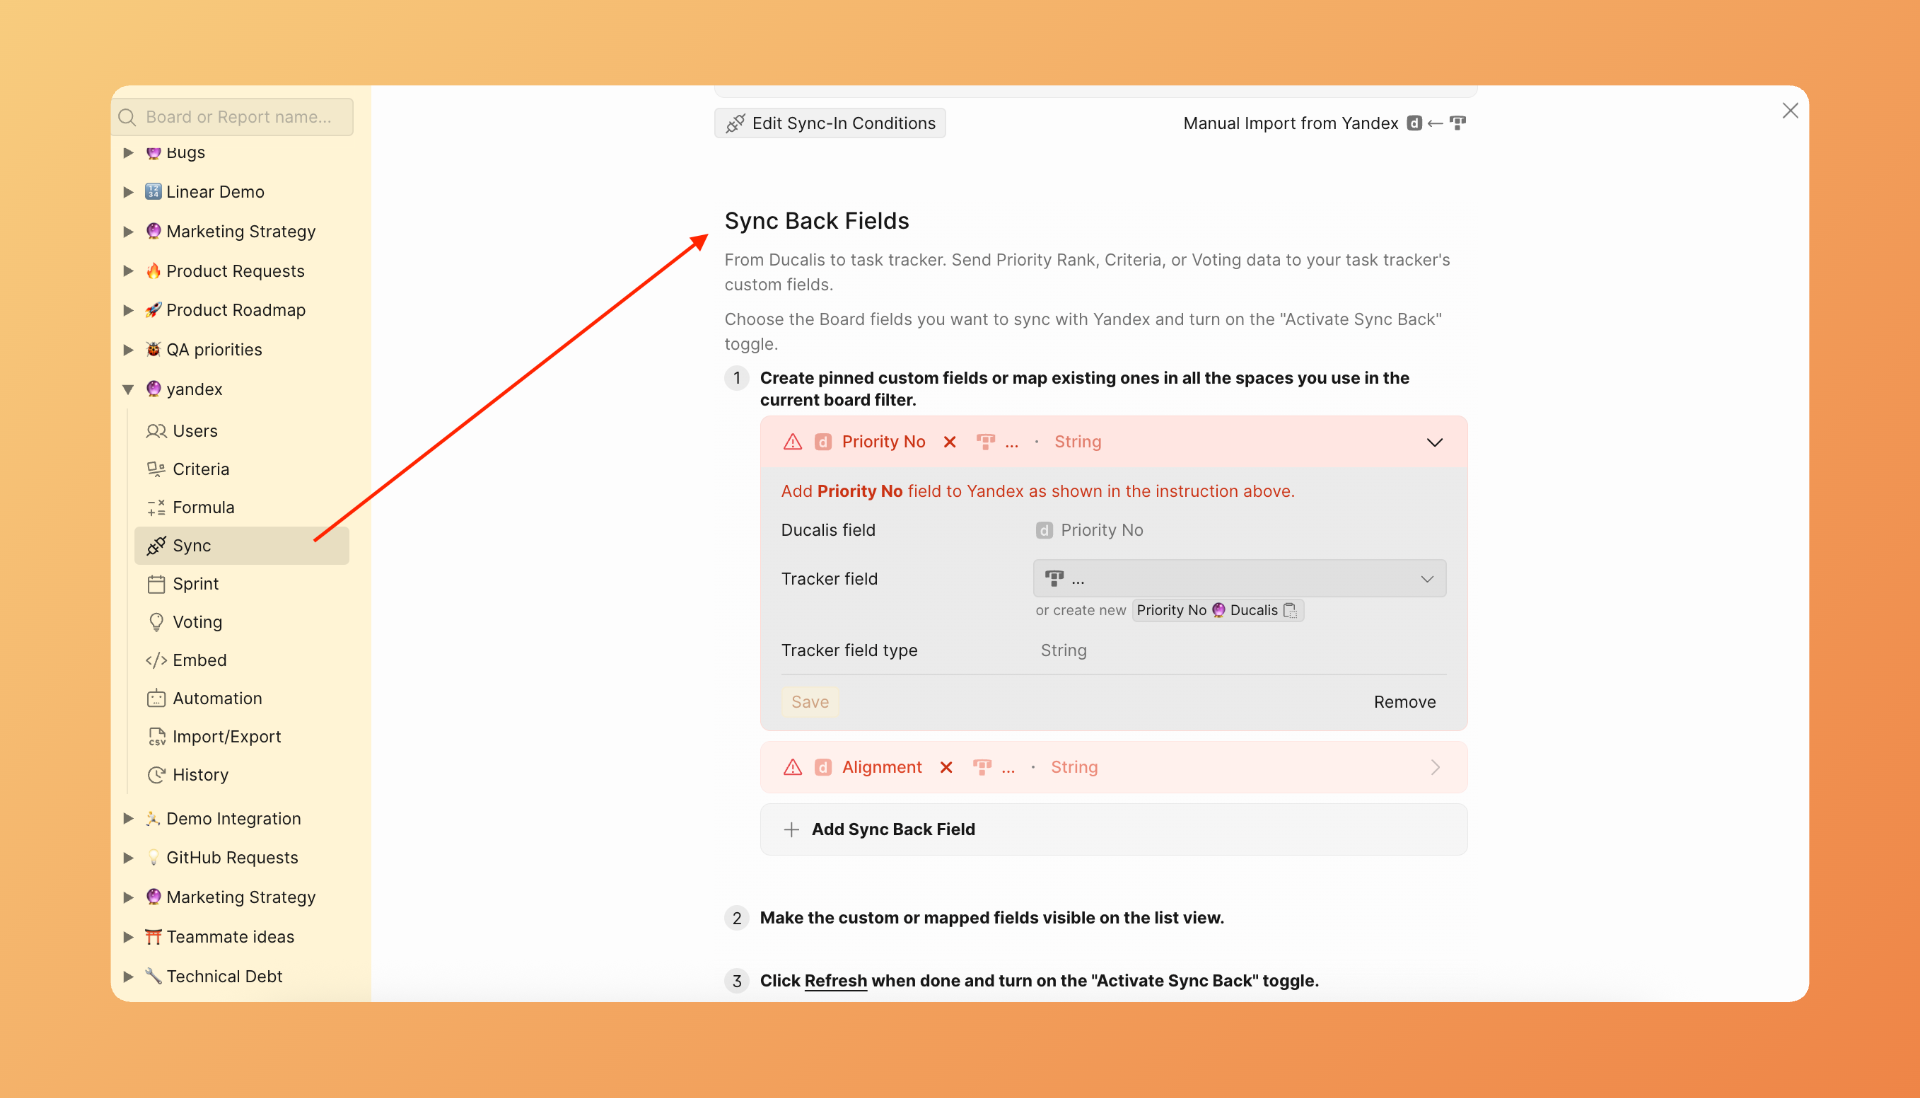
- Review the default Ducalis fields. You can keep or delete them.
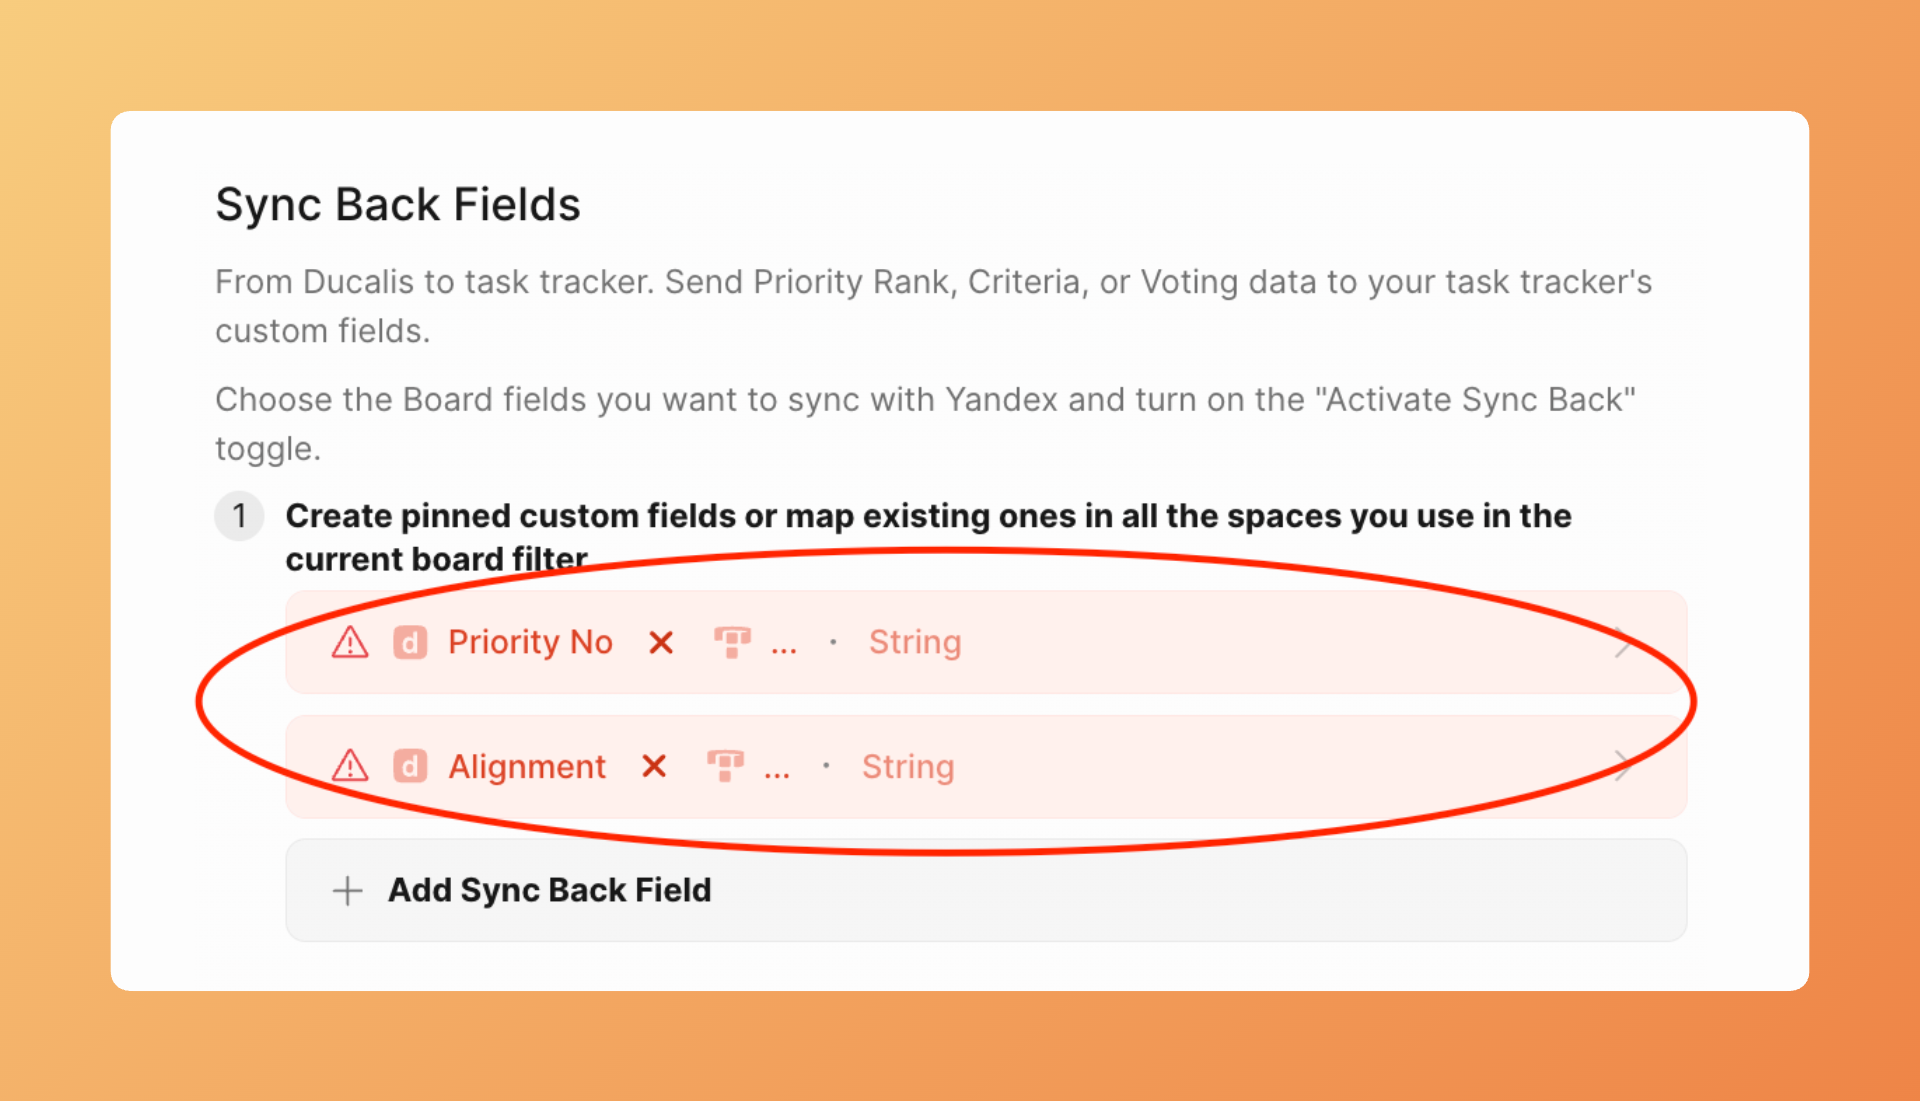
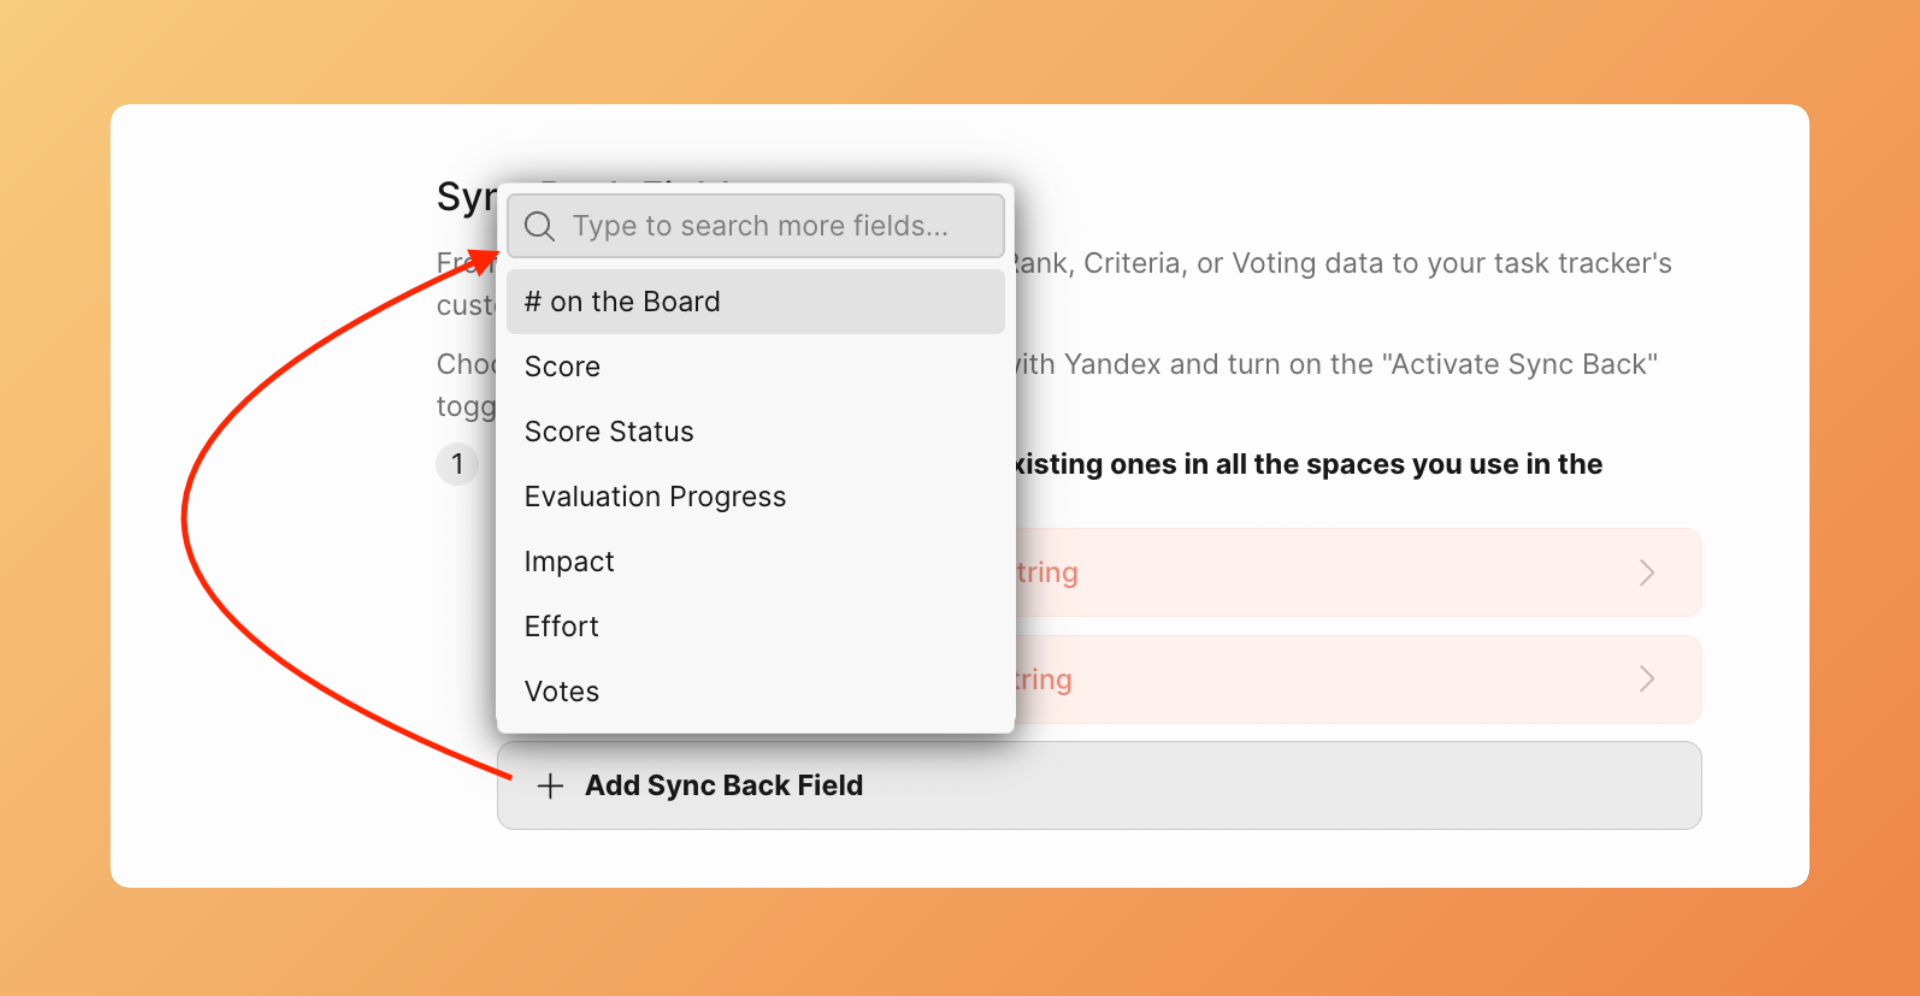
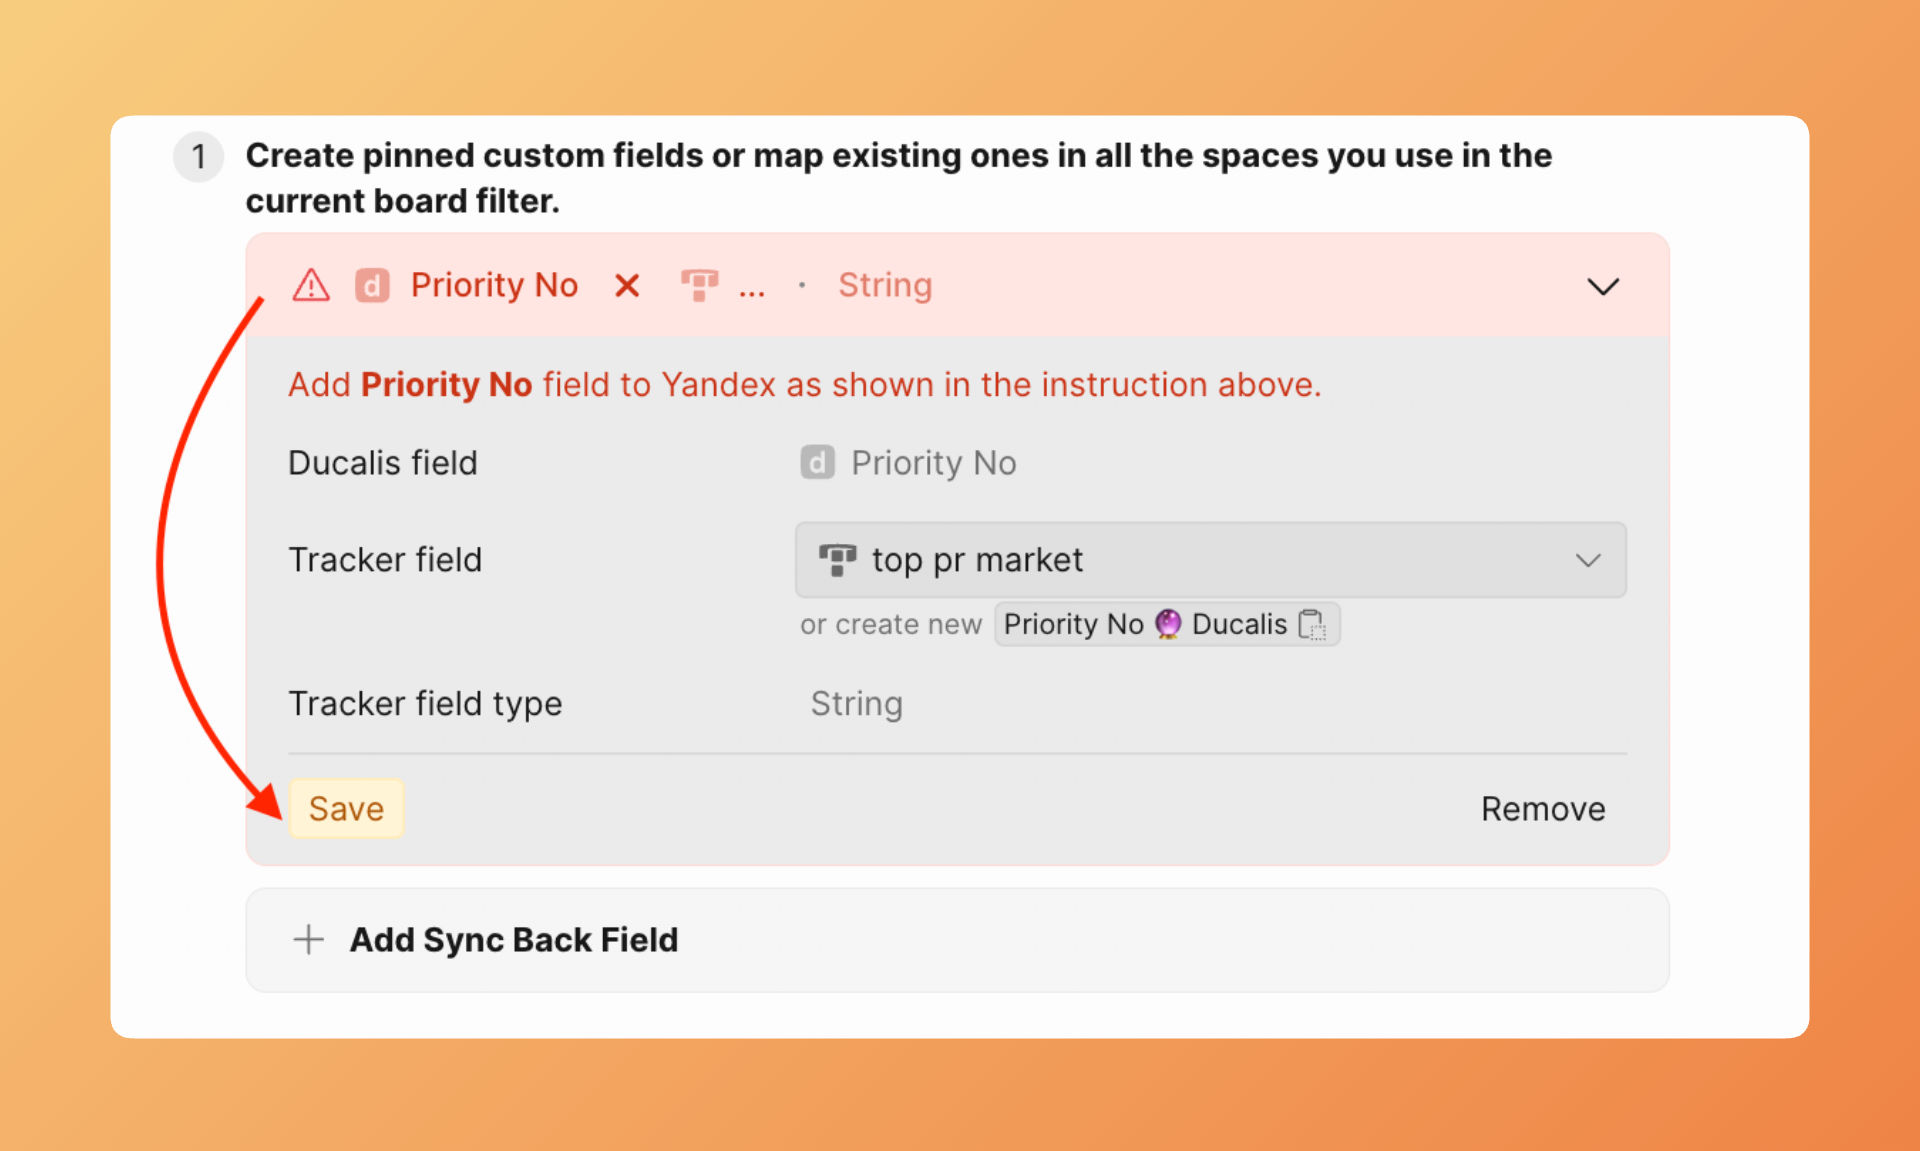
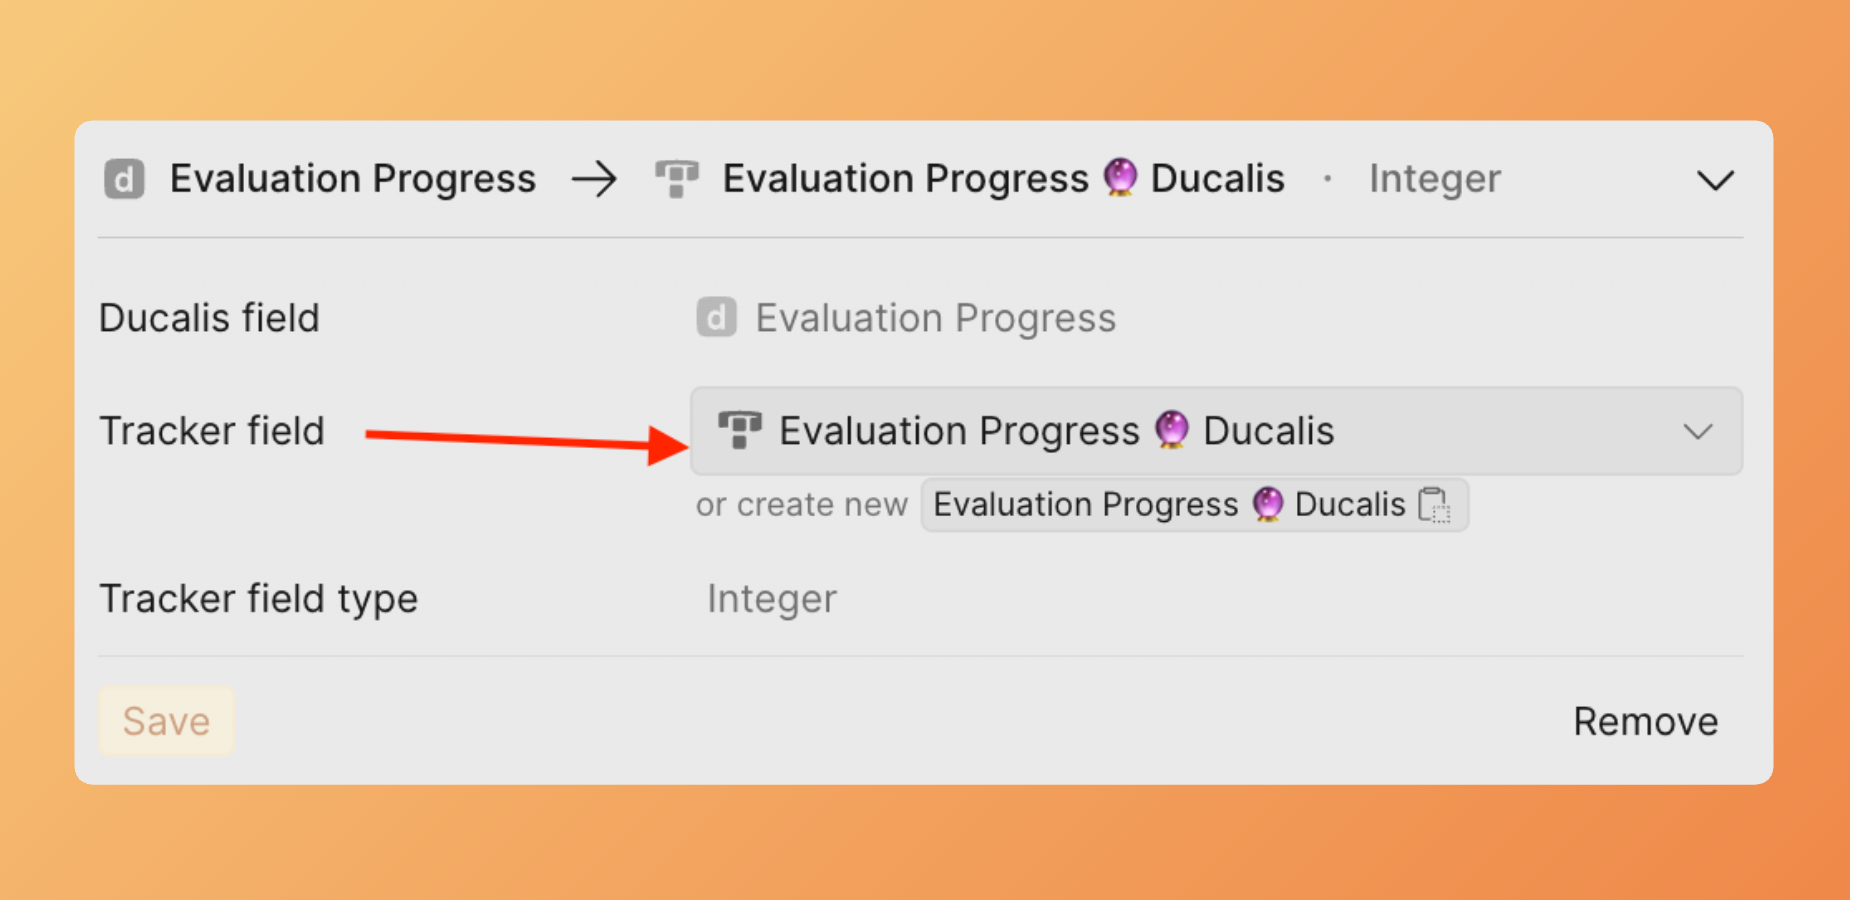
- To add a different field, click Add Sync Back field and select the Ducalis field you want to sync.
- Next to Tracker field, click the dropdown and select the existing Yandex tracker field to map to.

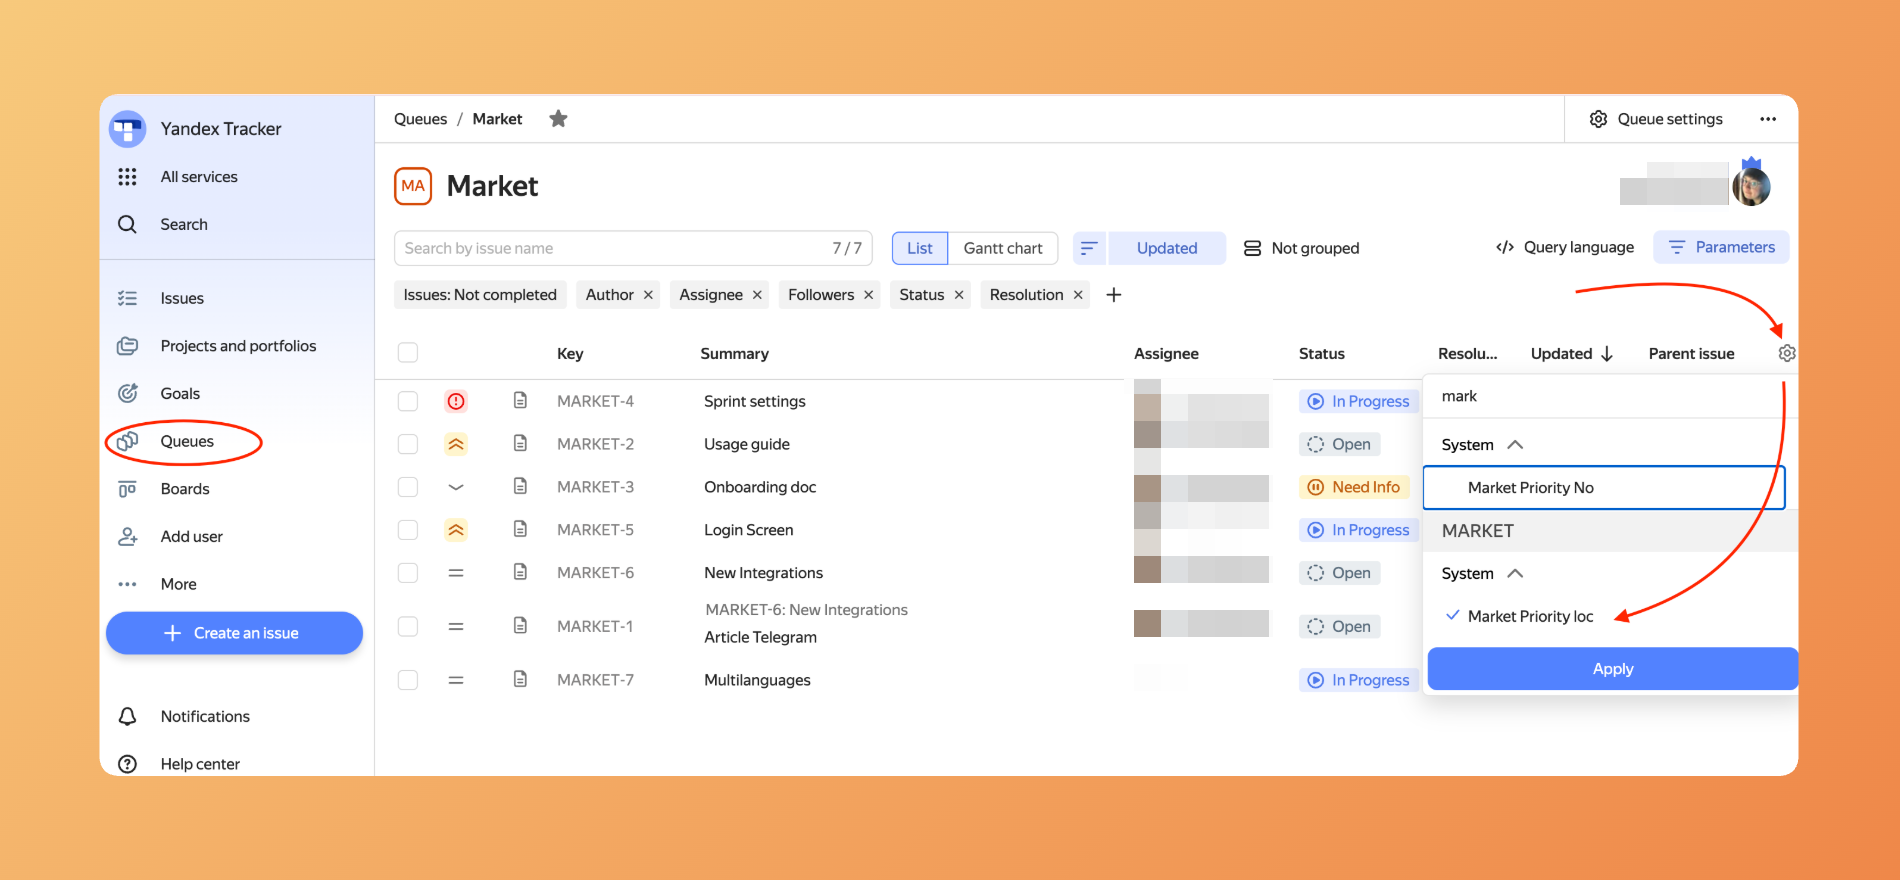
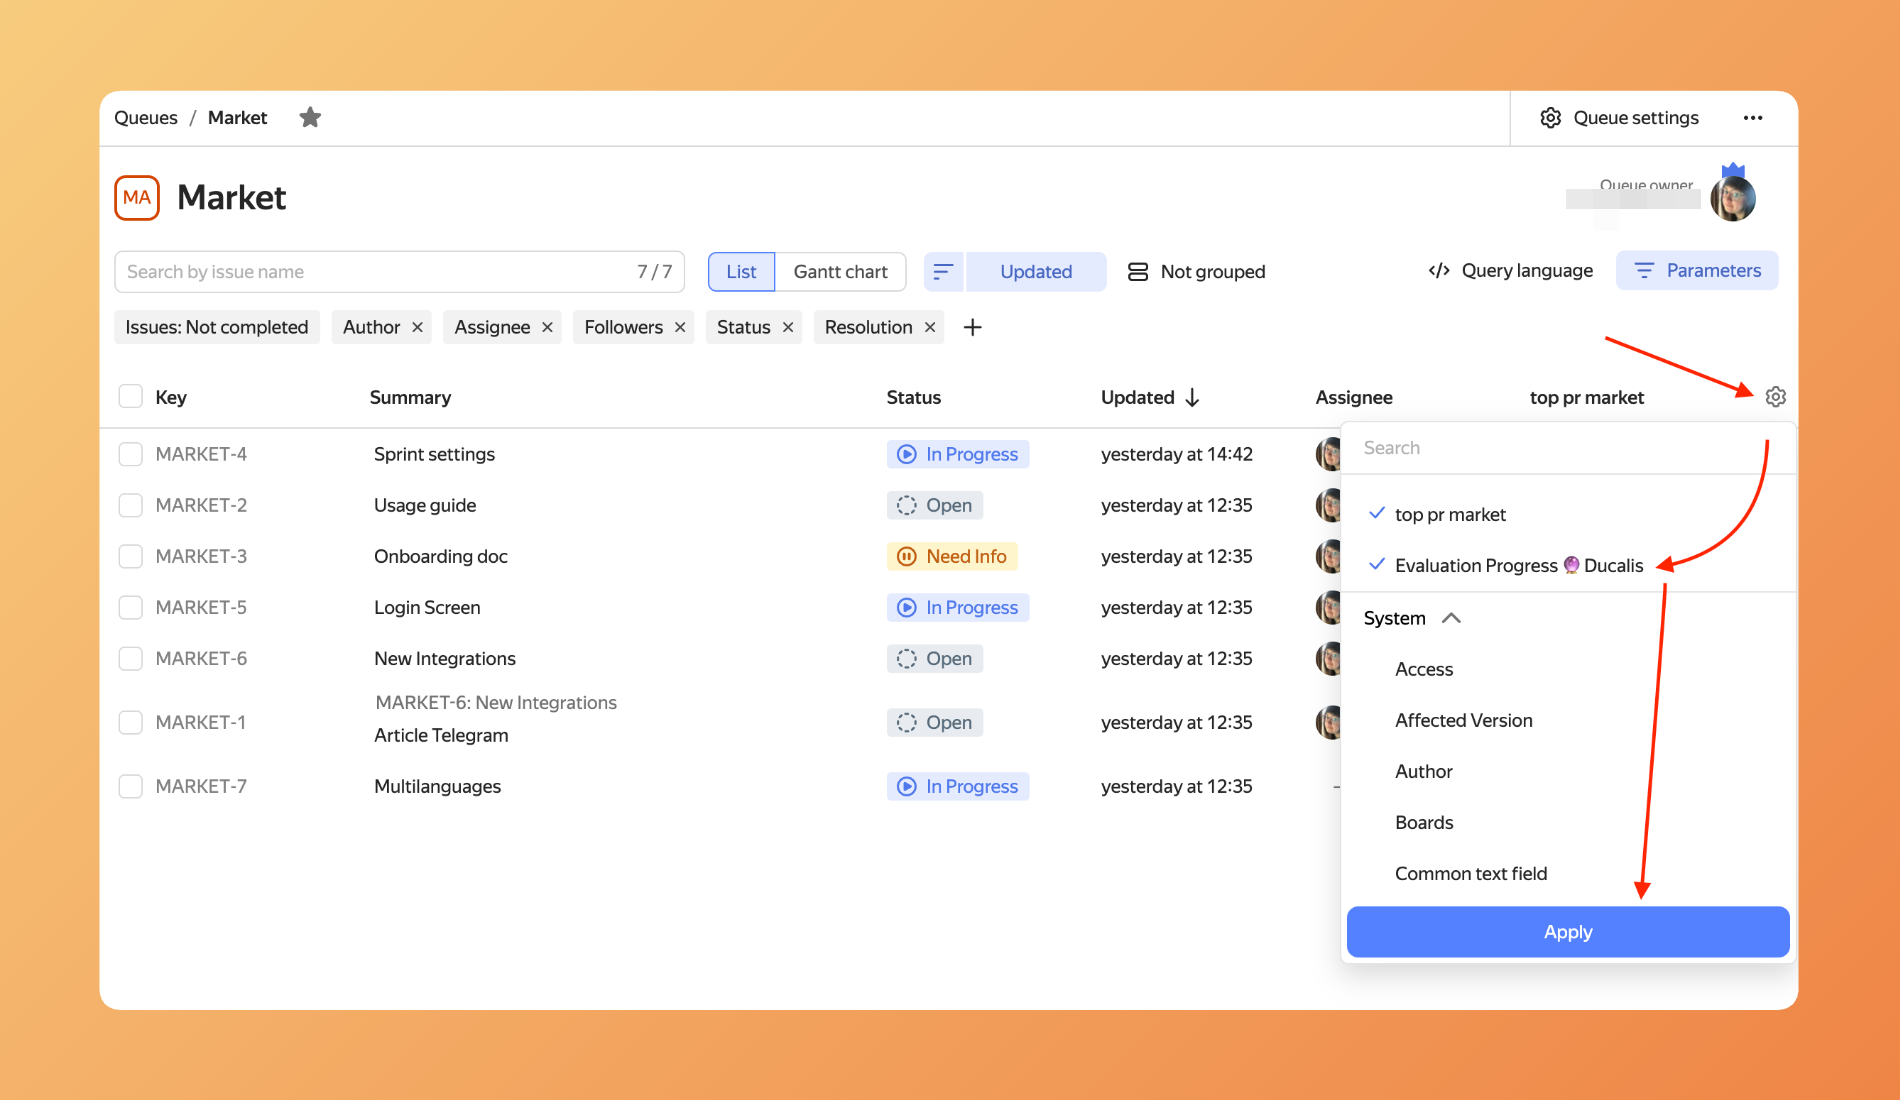
To see existed fields they have to be visible in the Queues.
Field types must match. The existed field type must be the same as the destination field in Ducalis.
- Click Save.
Create fields in Yandex.Tracker
Instead of mapping to existing fields, you can create new custom fields in Yandex tracker specifically for Ducalis data.
If you have one Queue in Ducalis board filter, create either global or local fields. If you have two and more Queues in Ducalis board filter create ONLY global fields.
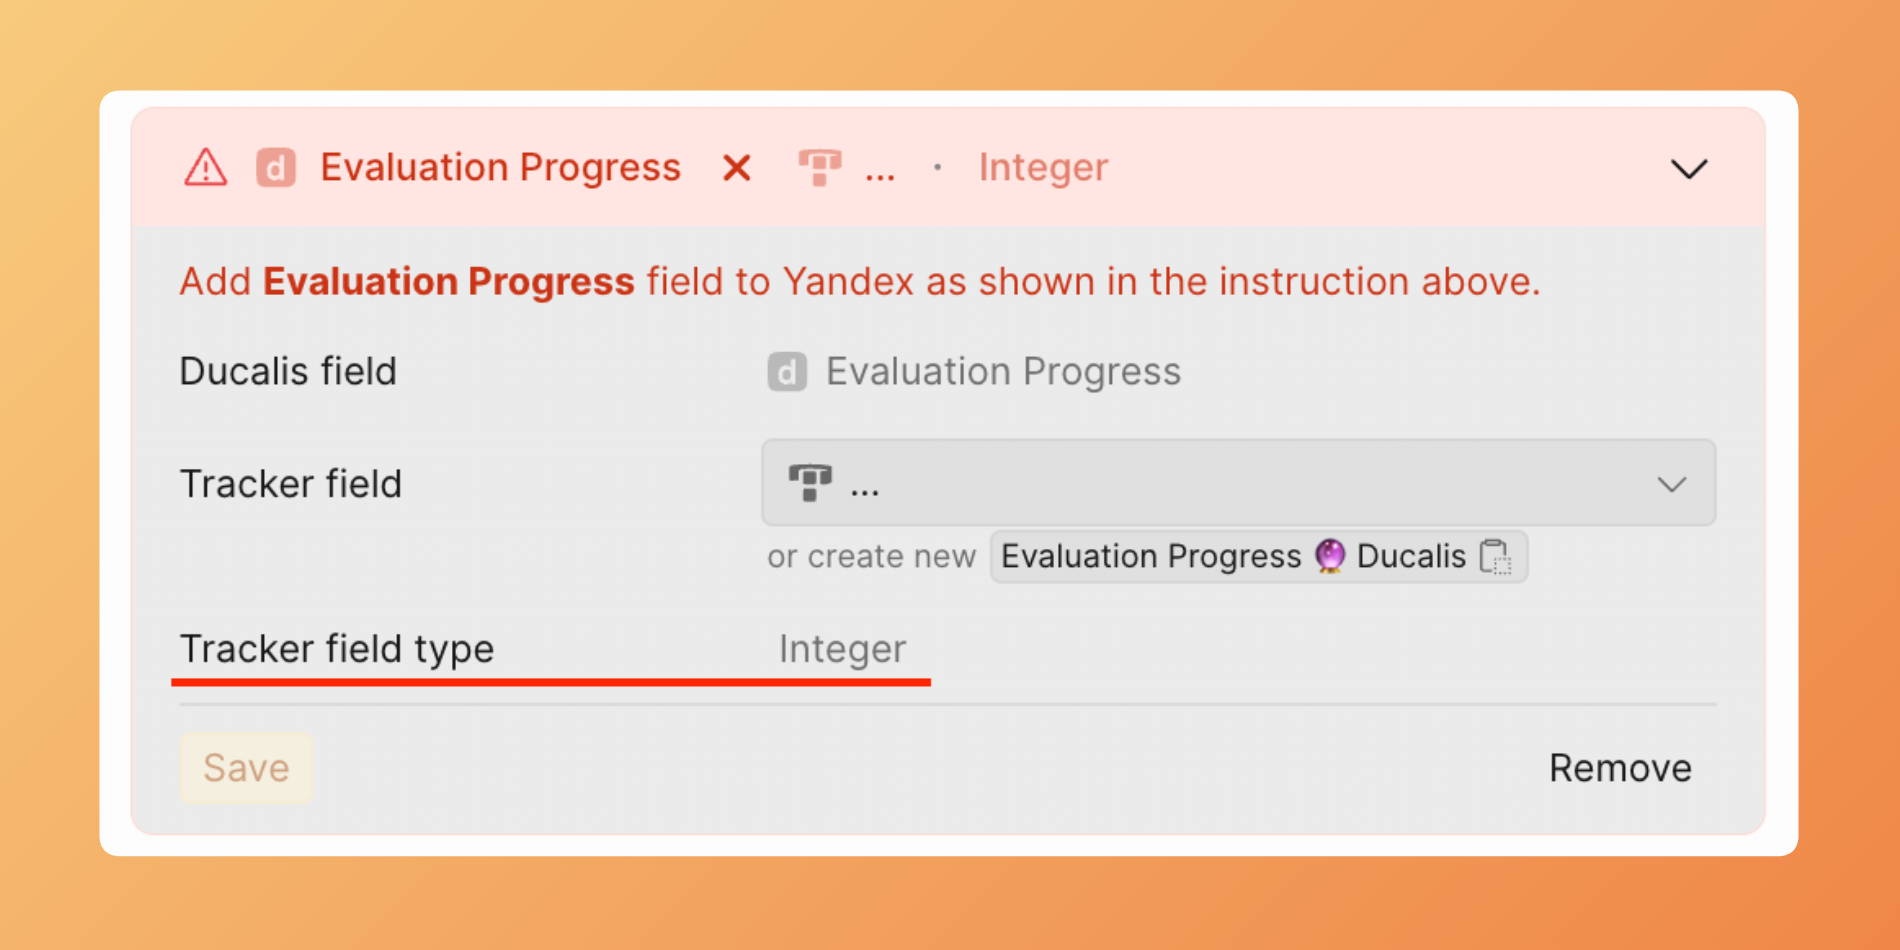
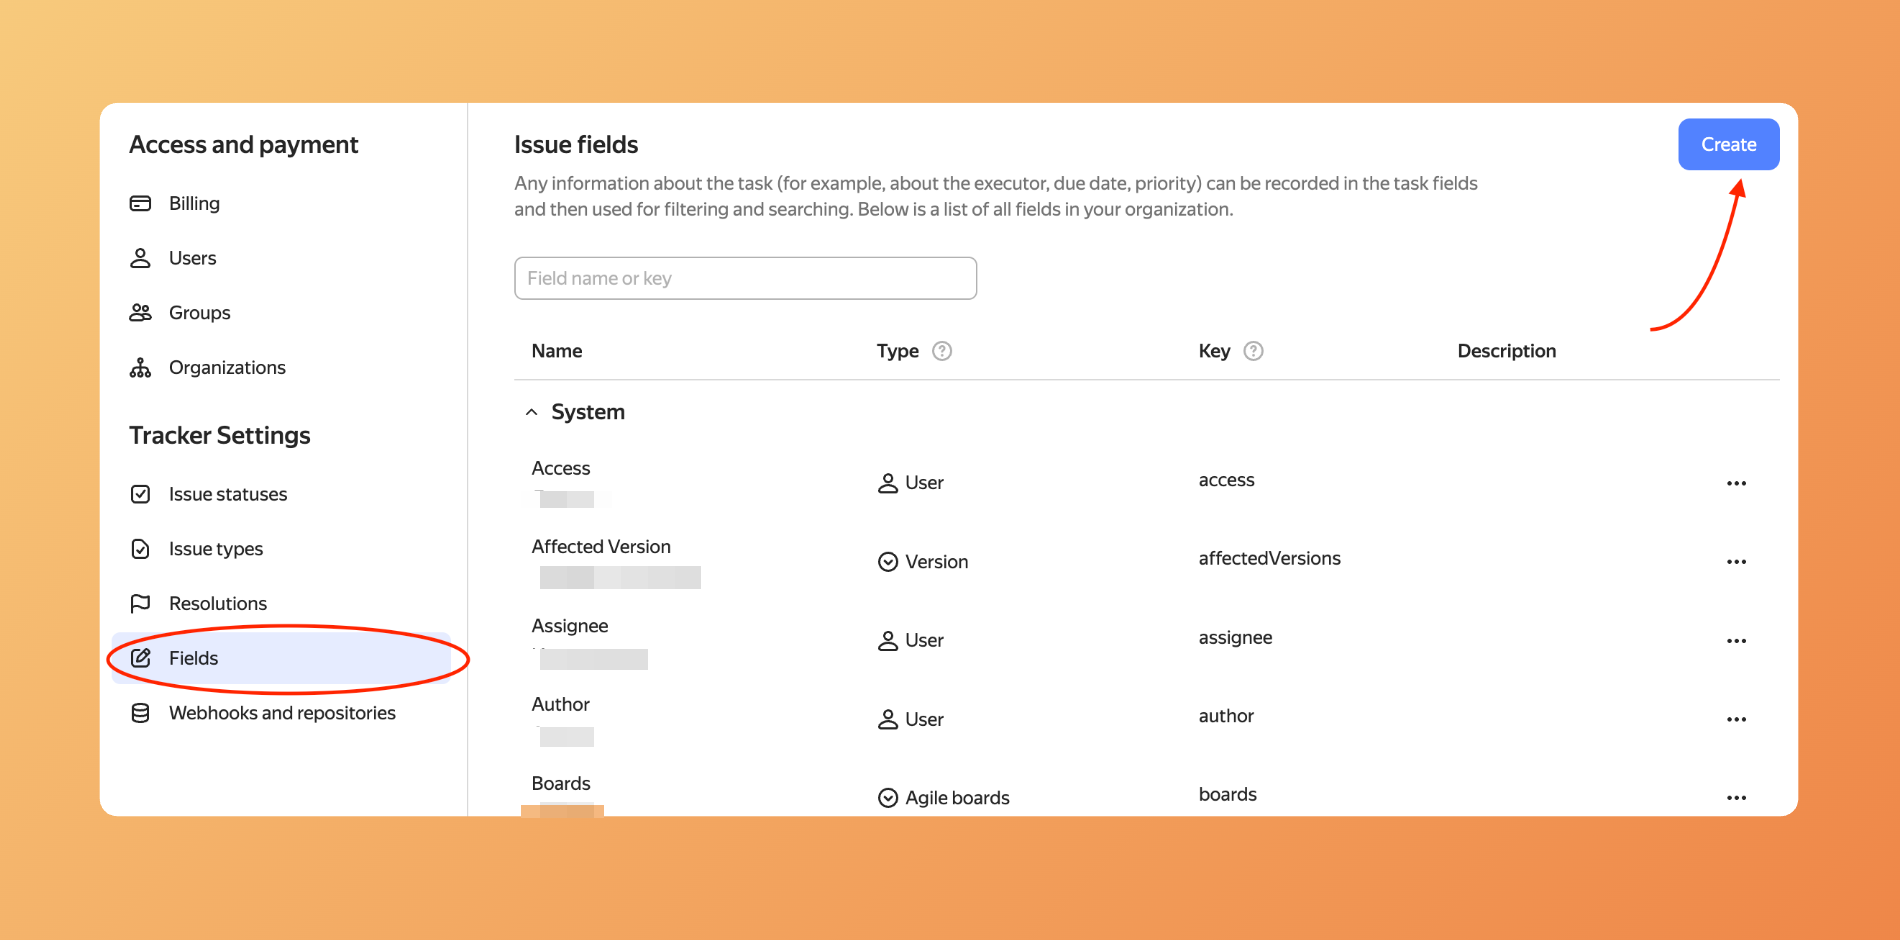
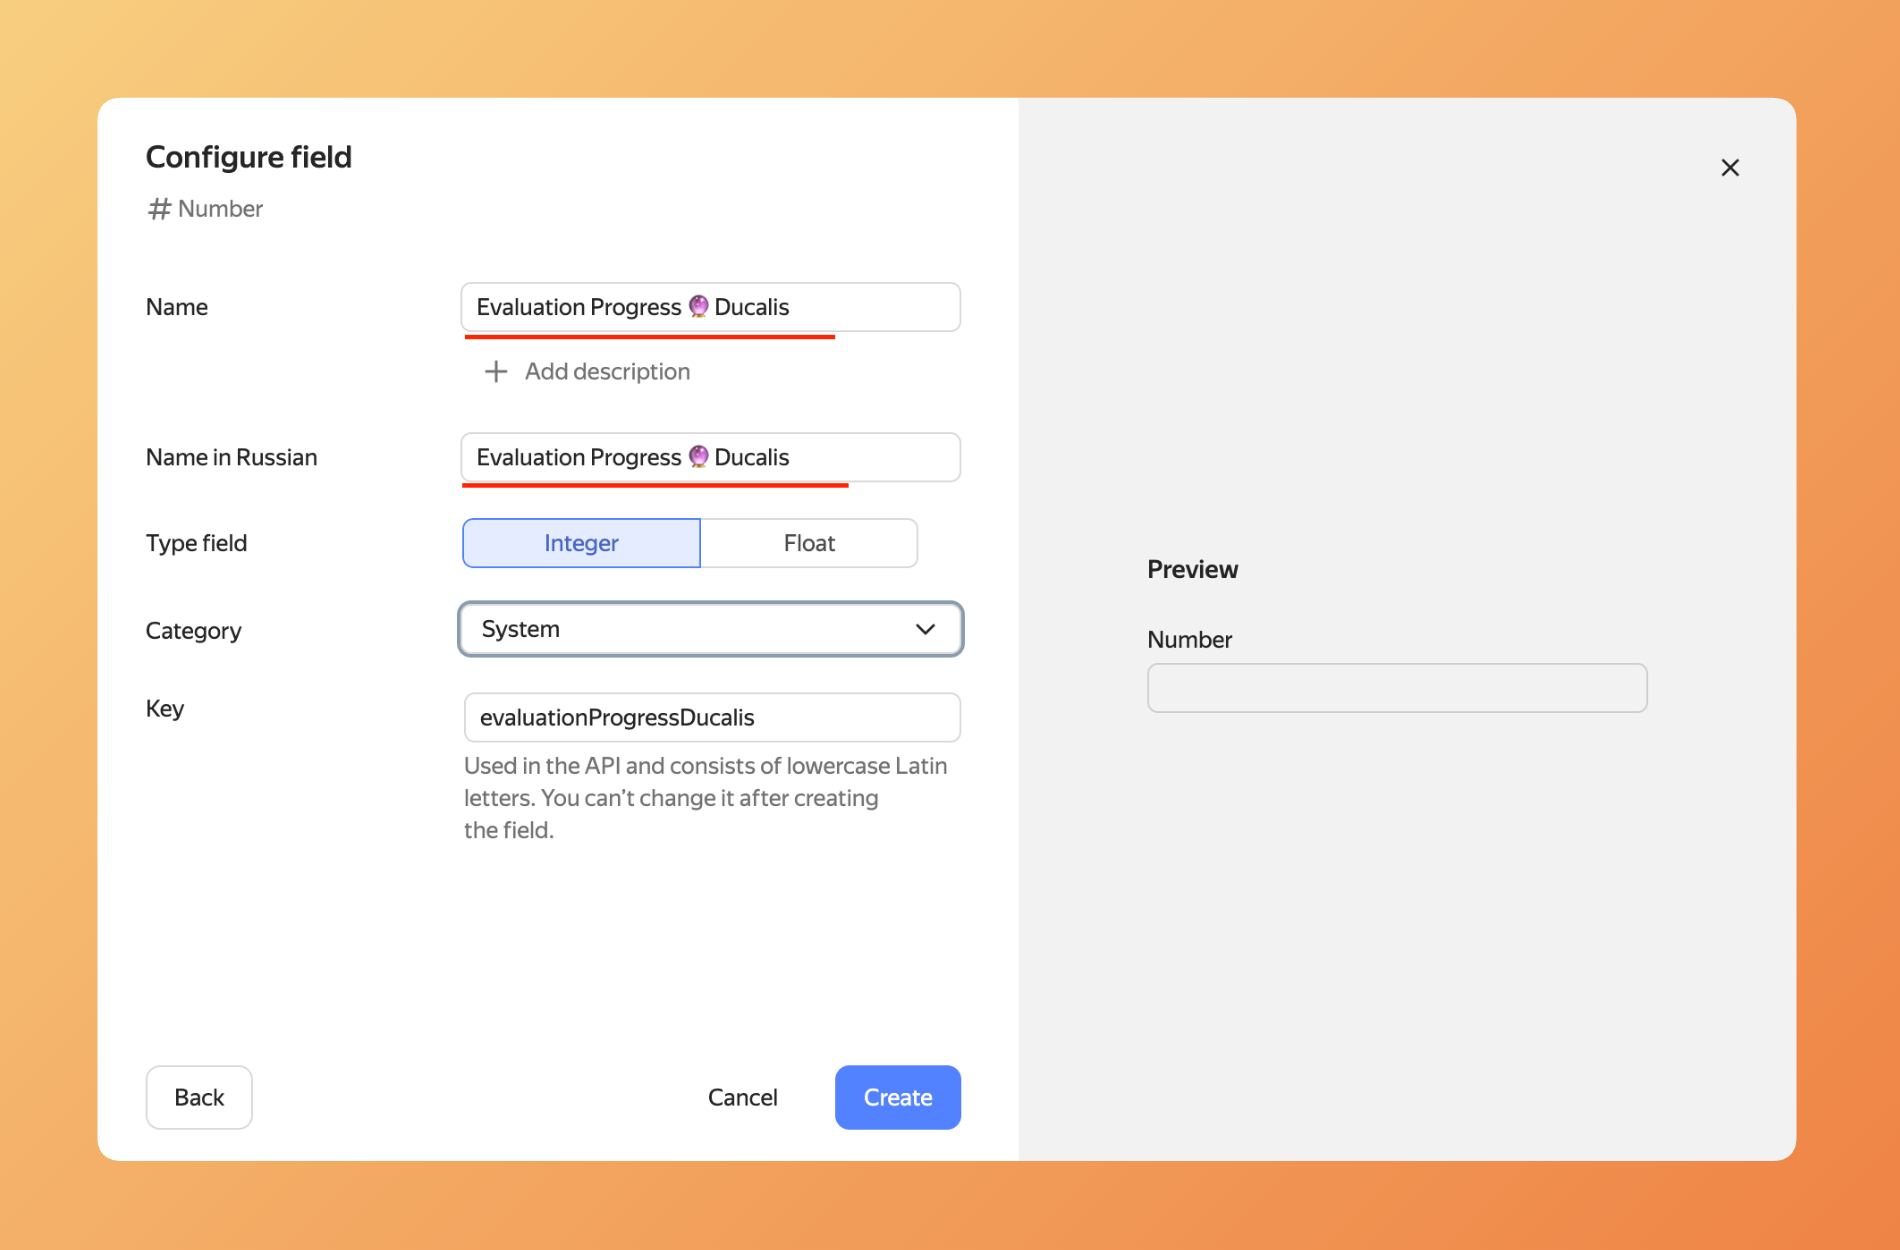
- In Yandex.Tracker, go to Administration > Fields. Click Create Field.
- Choose the field type during creation in Yandex tracker. Note that the field type must be the same as the destination field in Ducalis.
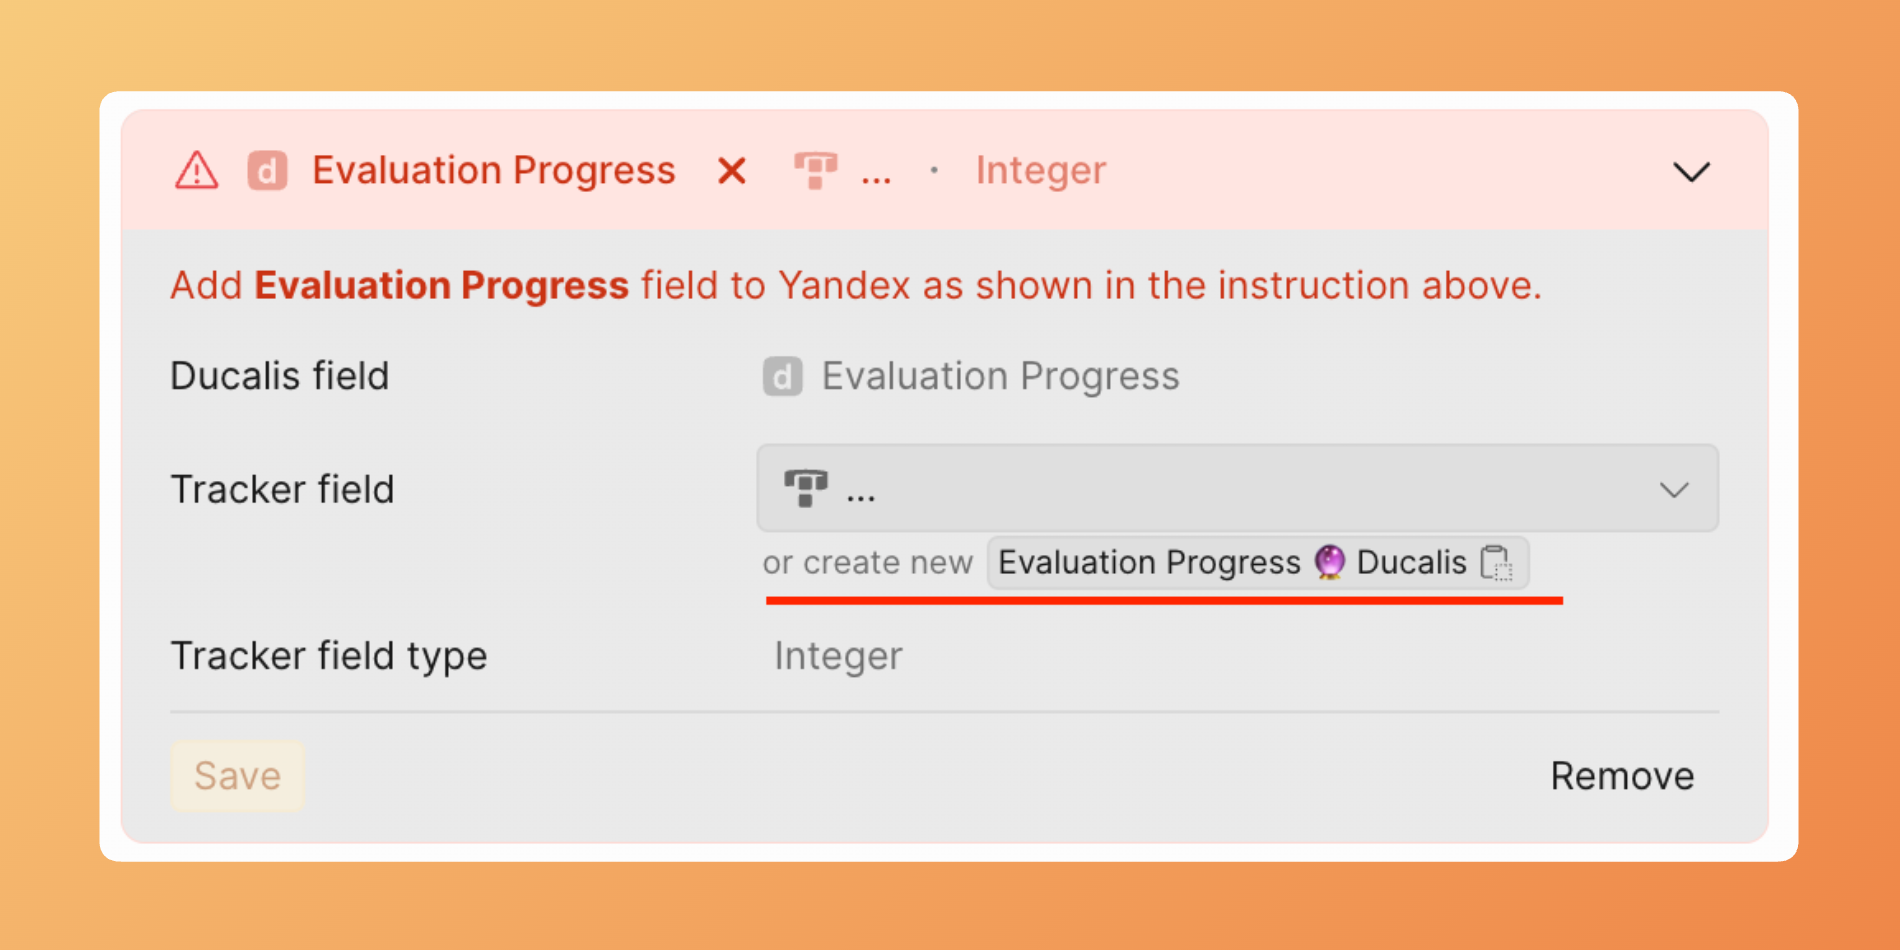
- Cope the field name from Ducalis and paste it in field creation form in Yandex tracker.
- Make fields available to the Queues you're syncing with Ducalis.
- The field appears in Ducalis.
Make fields visible
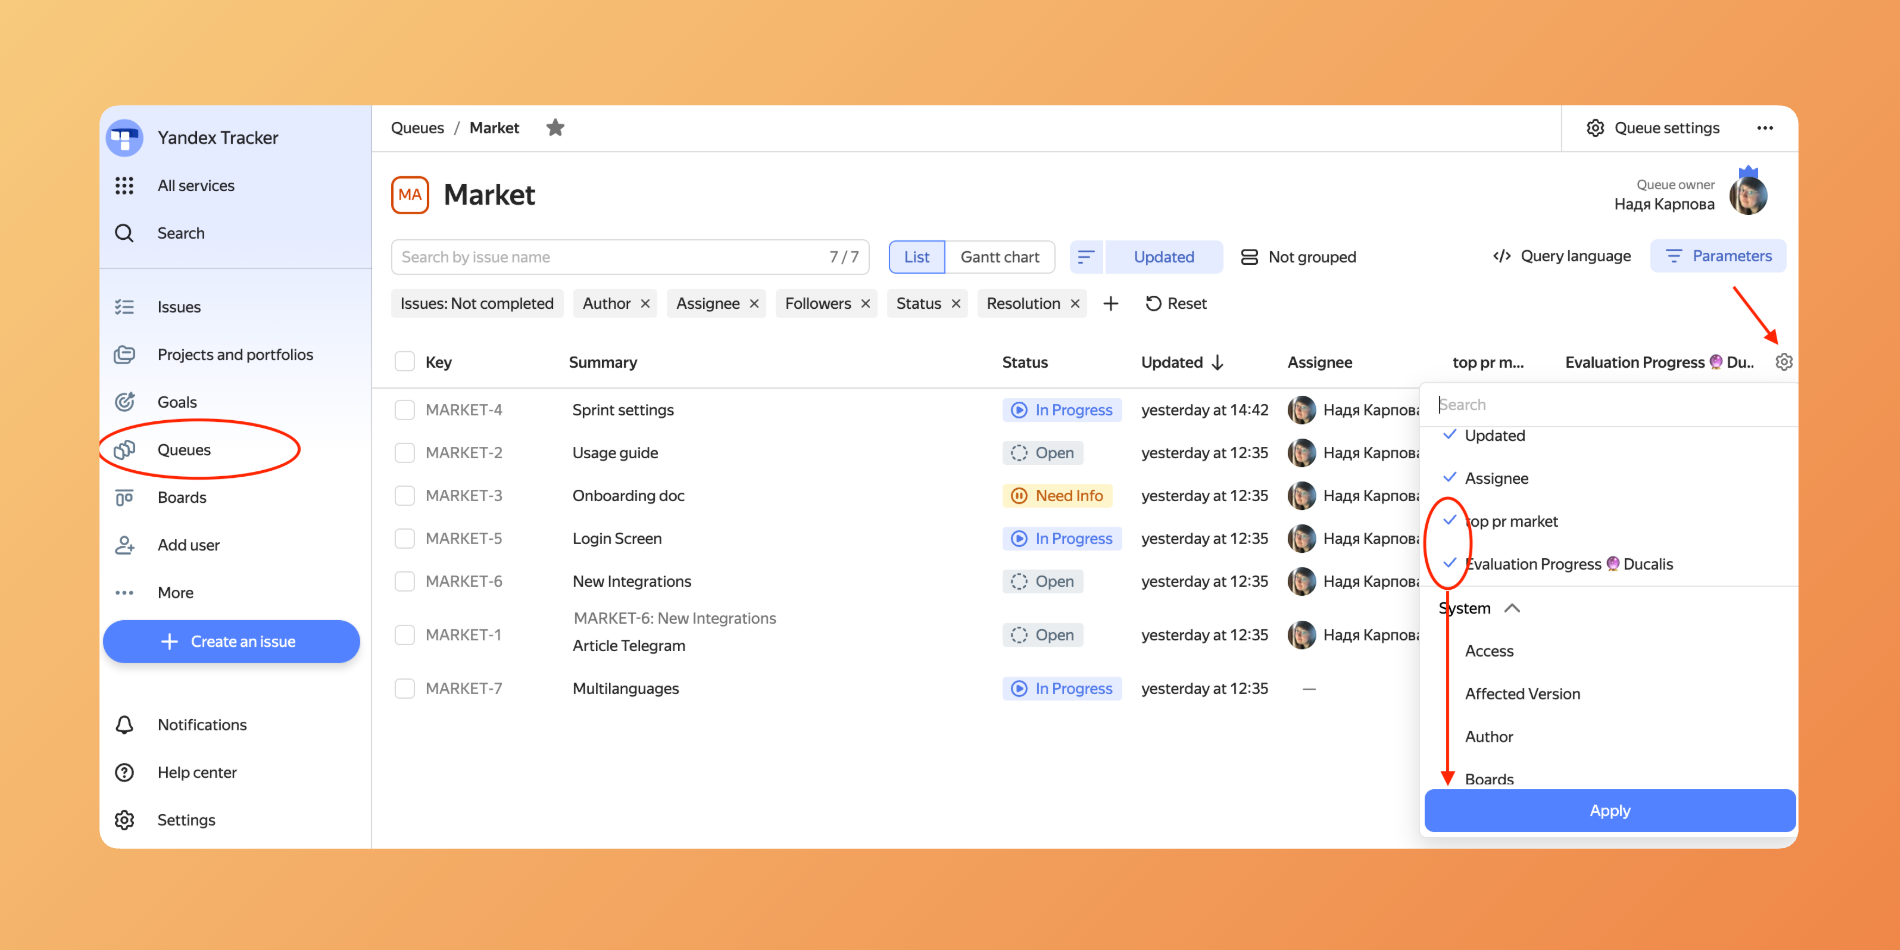
To see both mapped and newly created fields in Ducalis, you need to make them visible in the queues used in the board filter.
Go to Queues, select the queues, and make the fields visible in each queue used in the Ducalis board.
Activate Sync Back
After you create or map fields, activate the sync.

- In the Sync-Back Fields section, toggle Activate Sync Back to on.
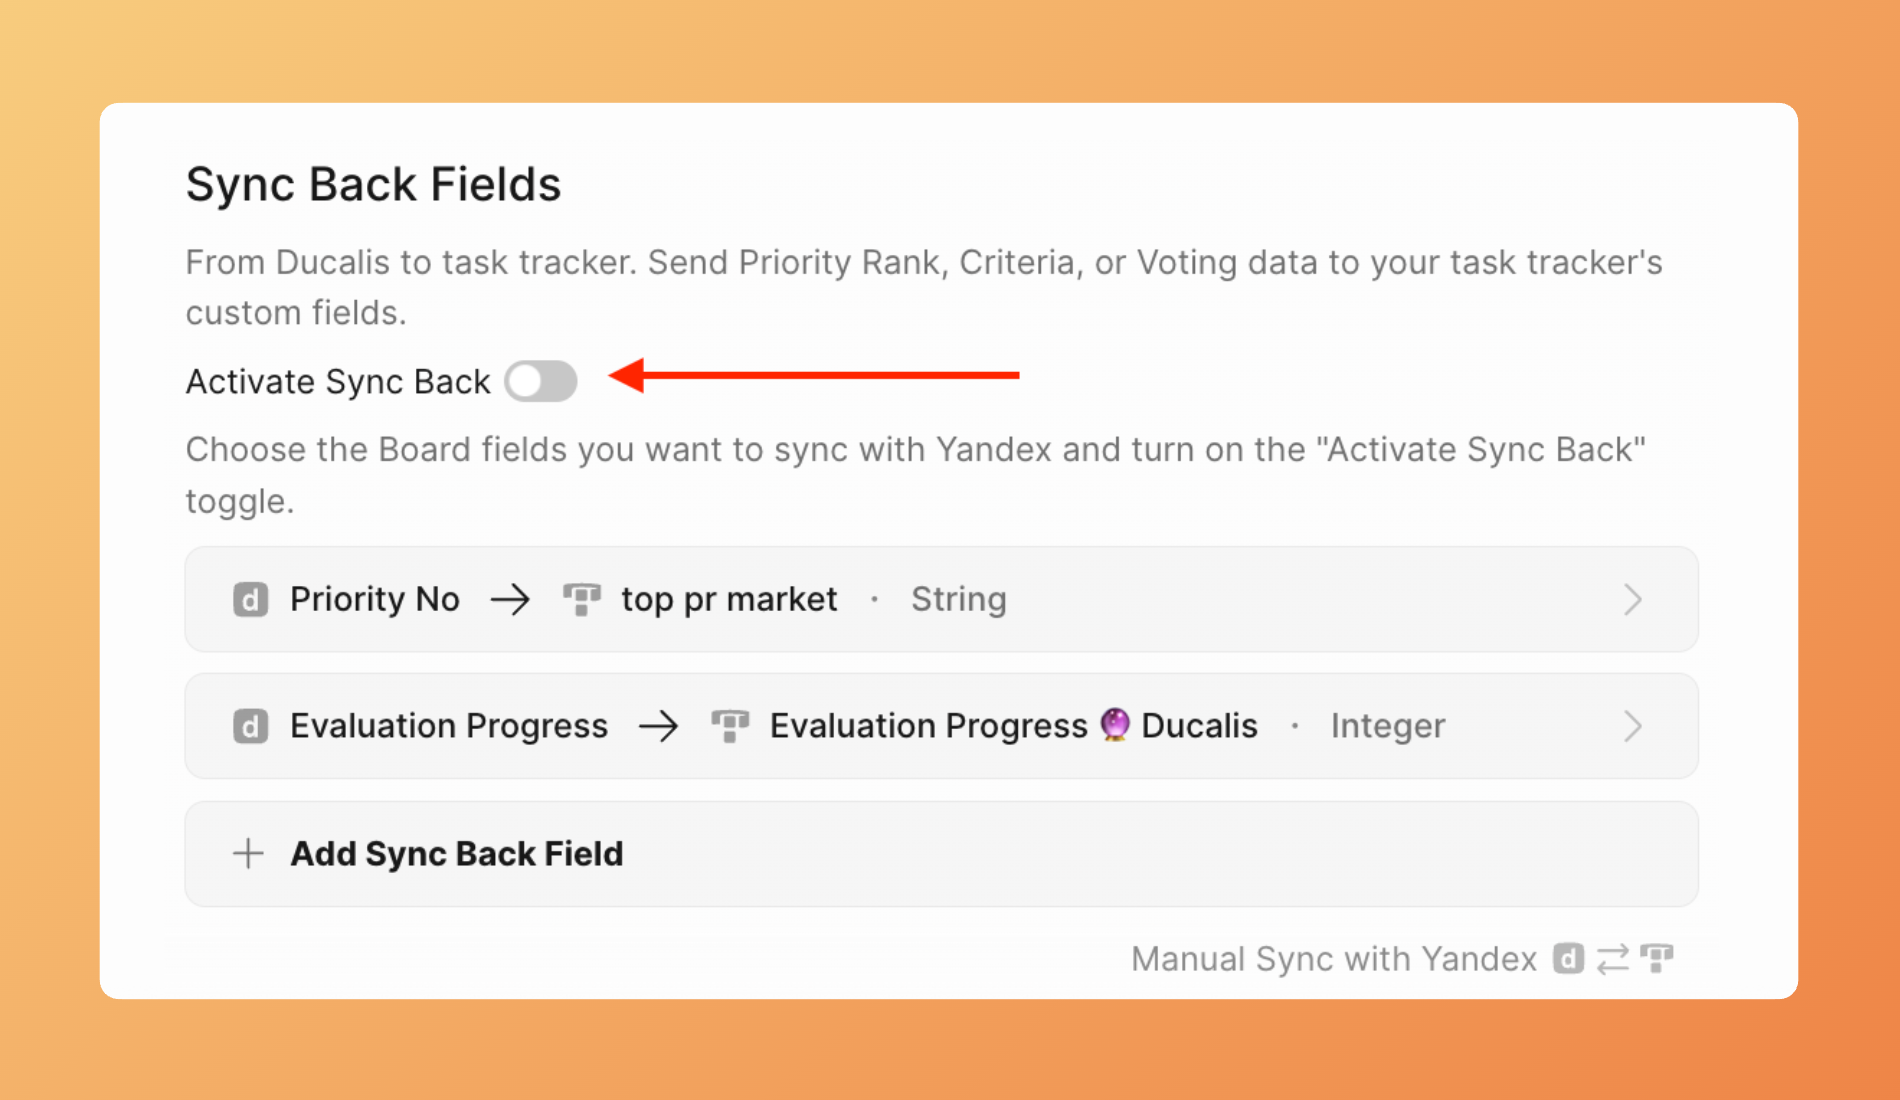
- Sync back is active now.
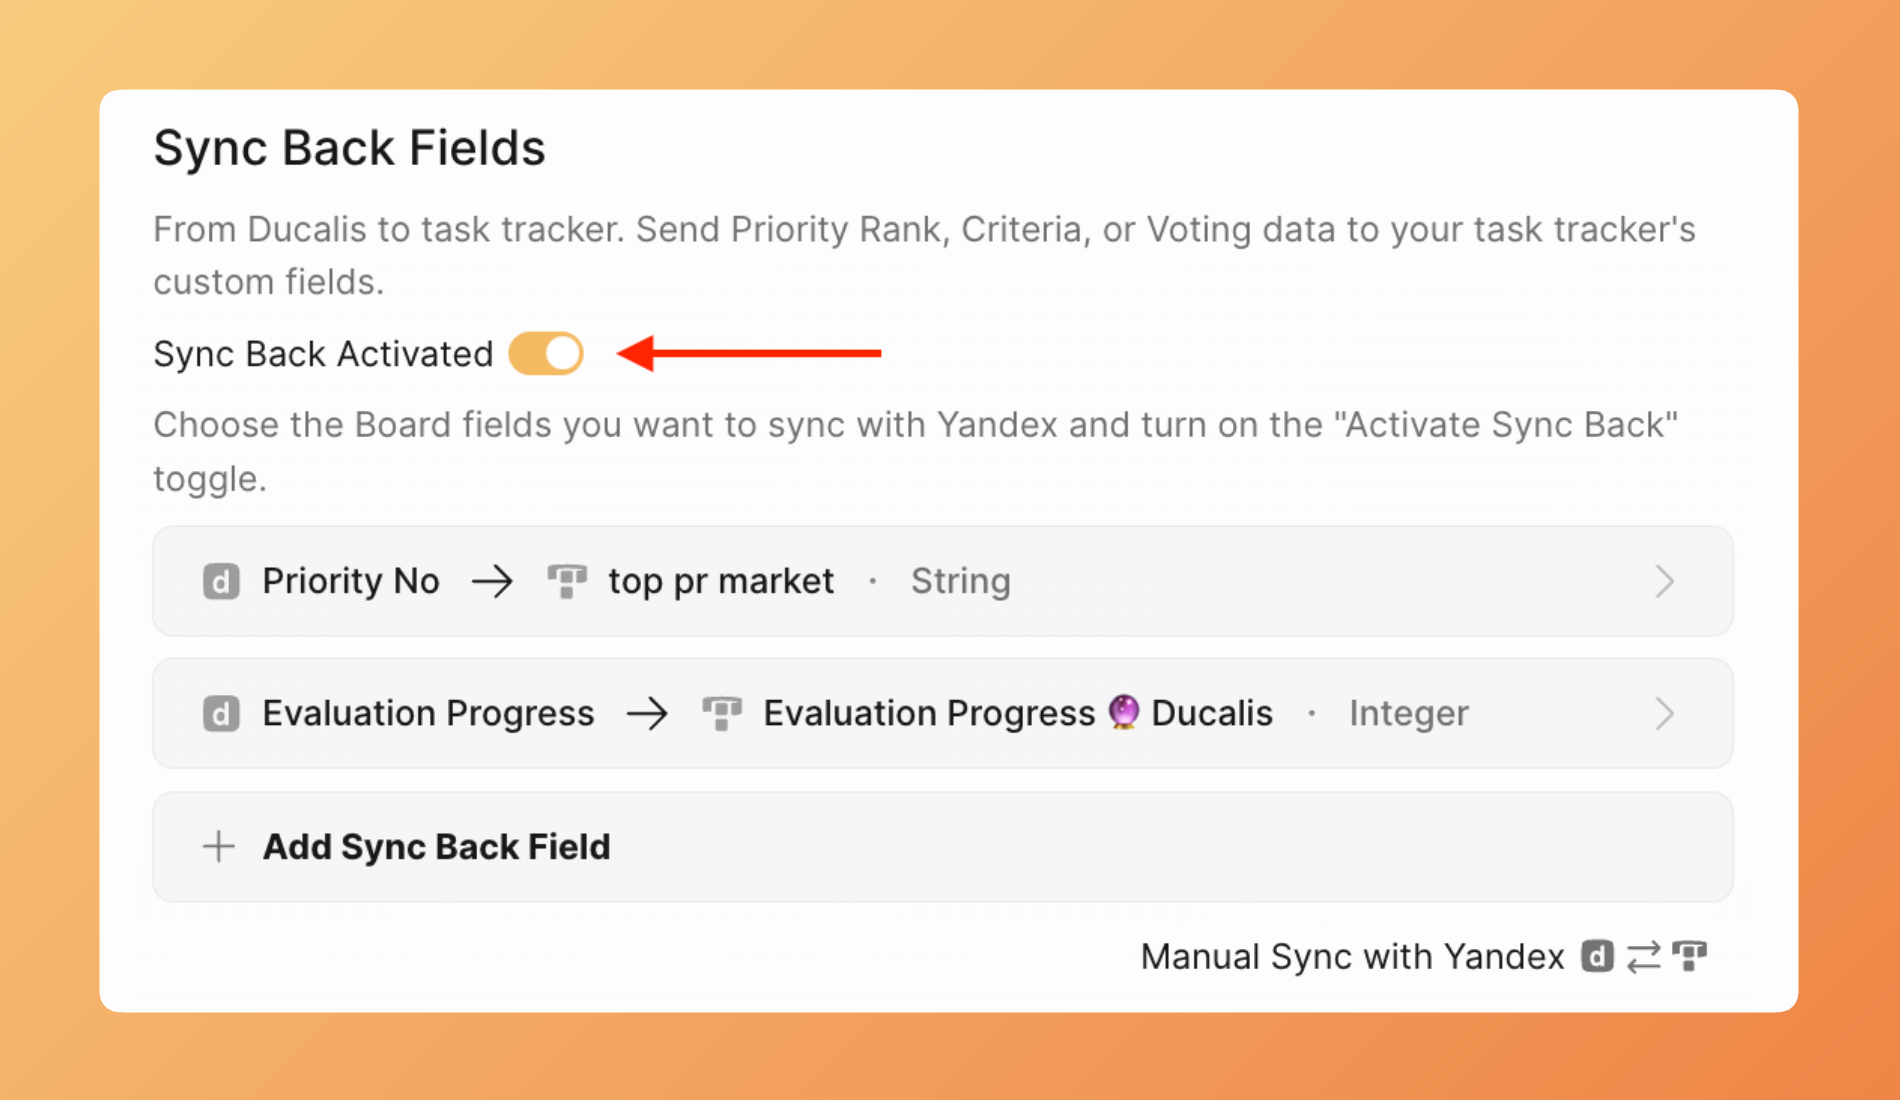
- Ducalis immediately syncs current prioritization data to Yandex Tracker.
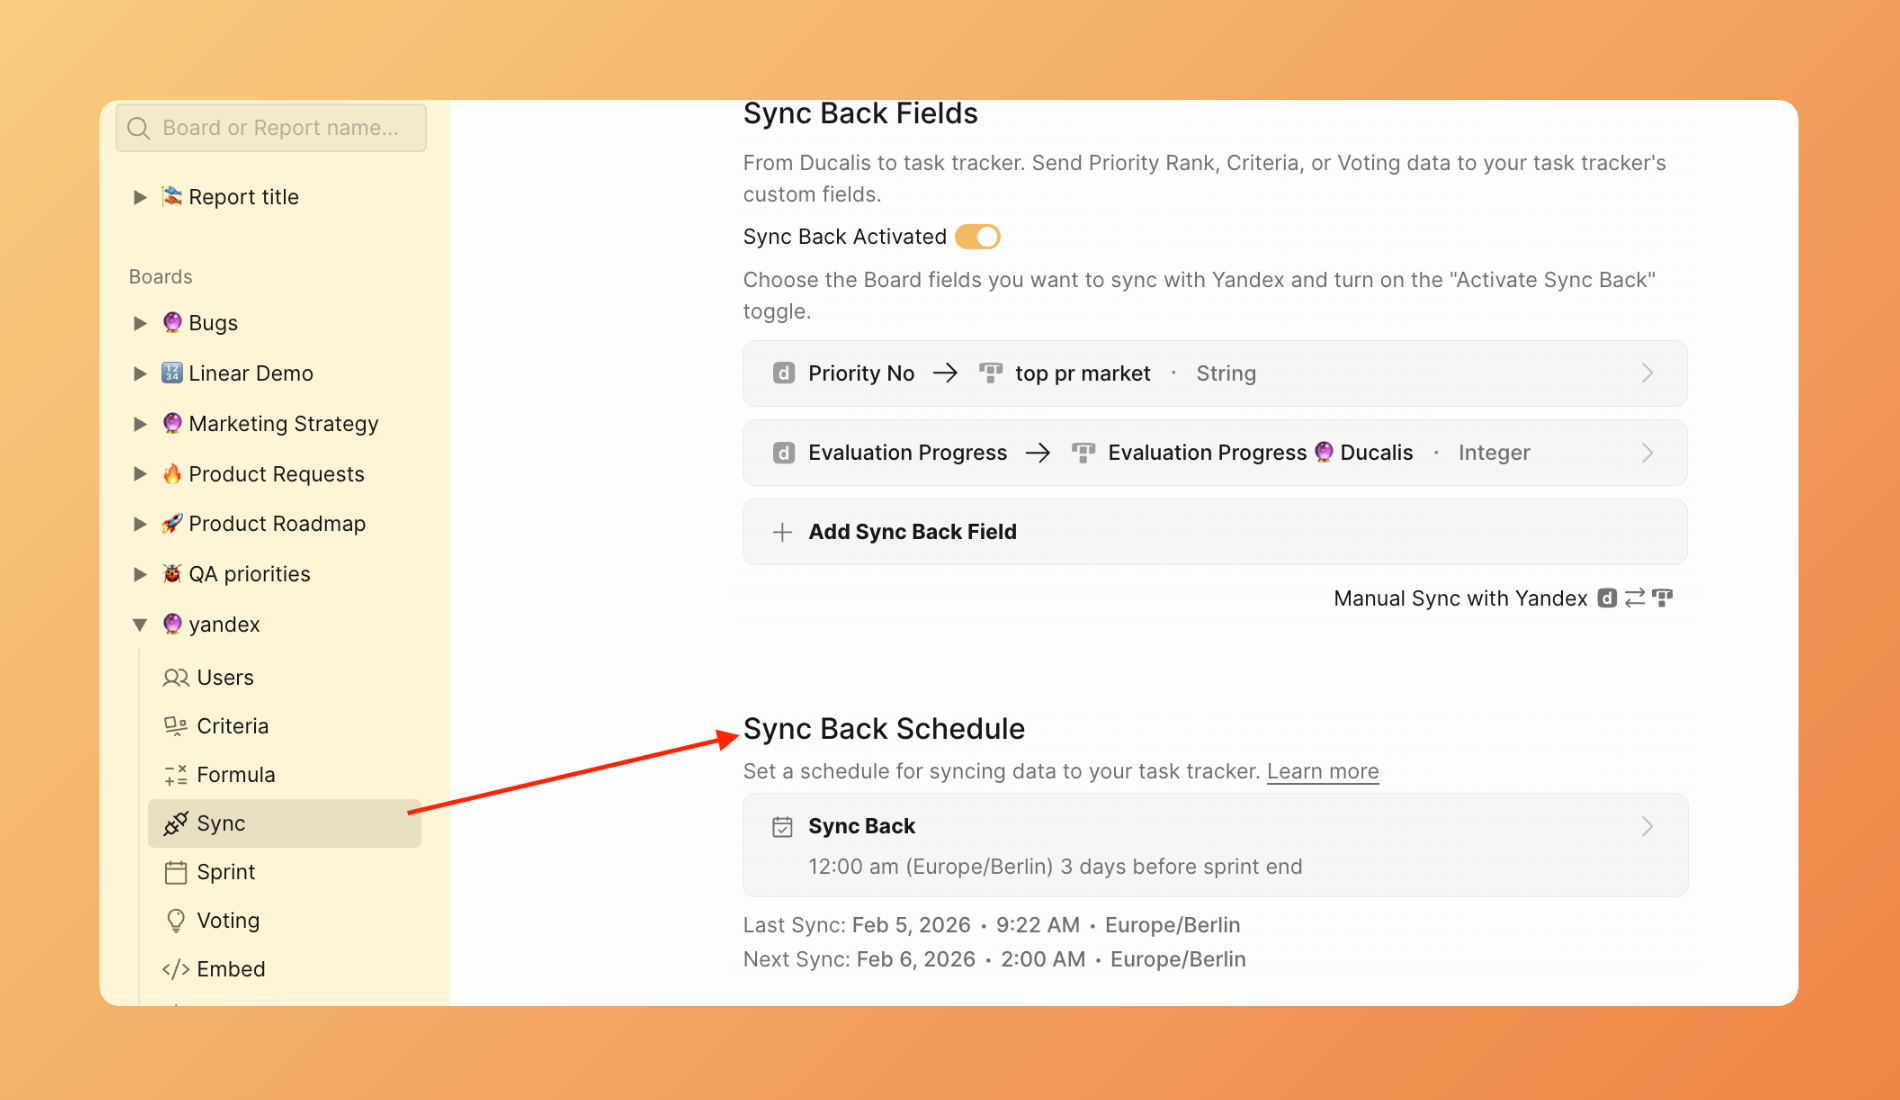
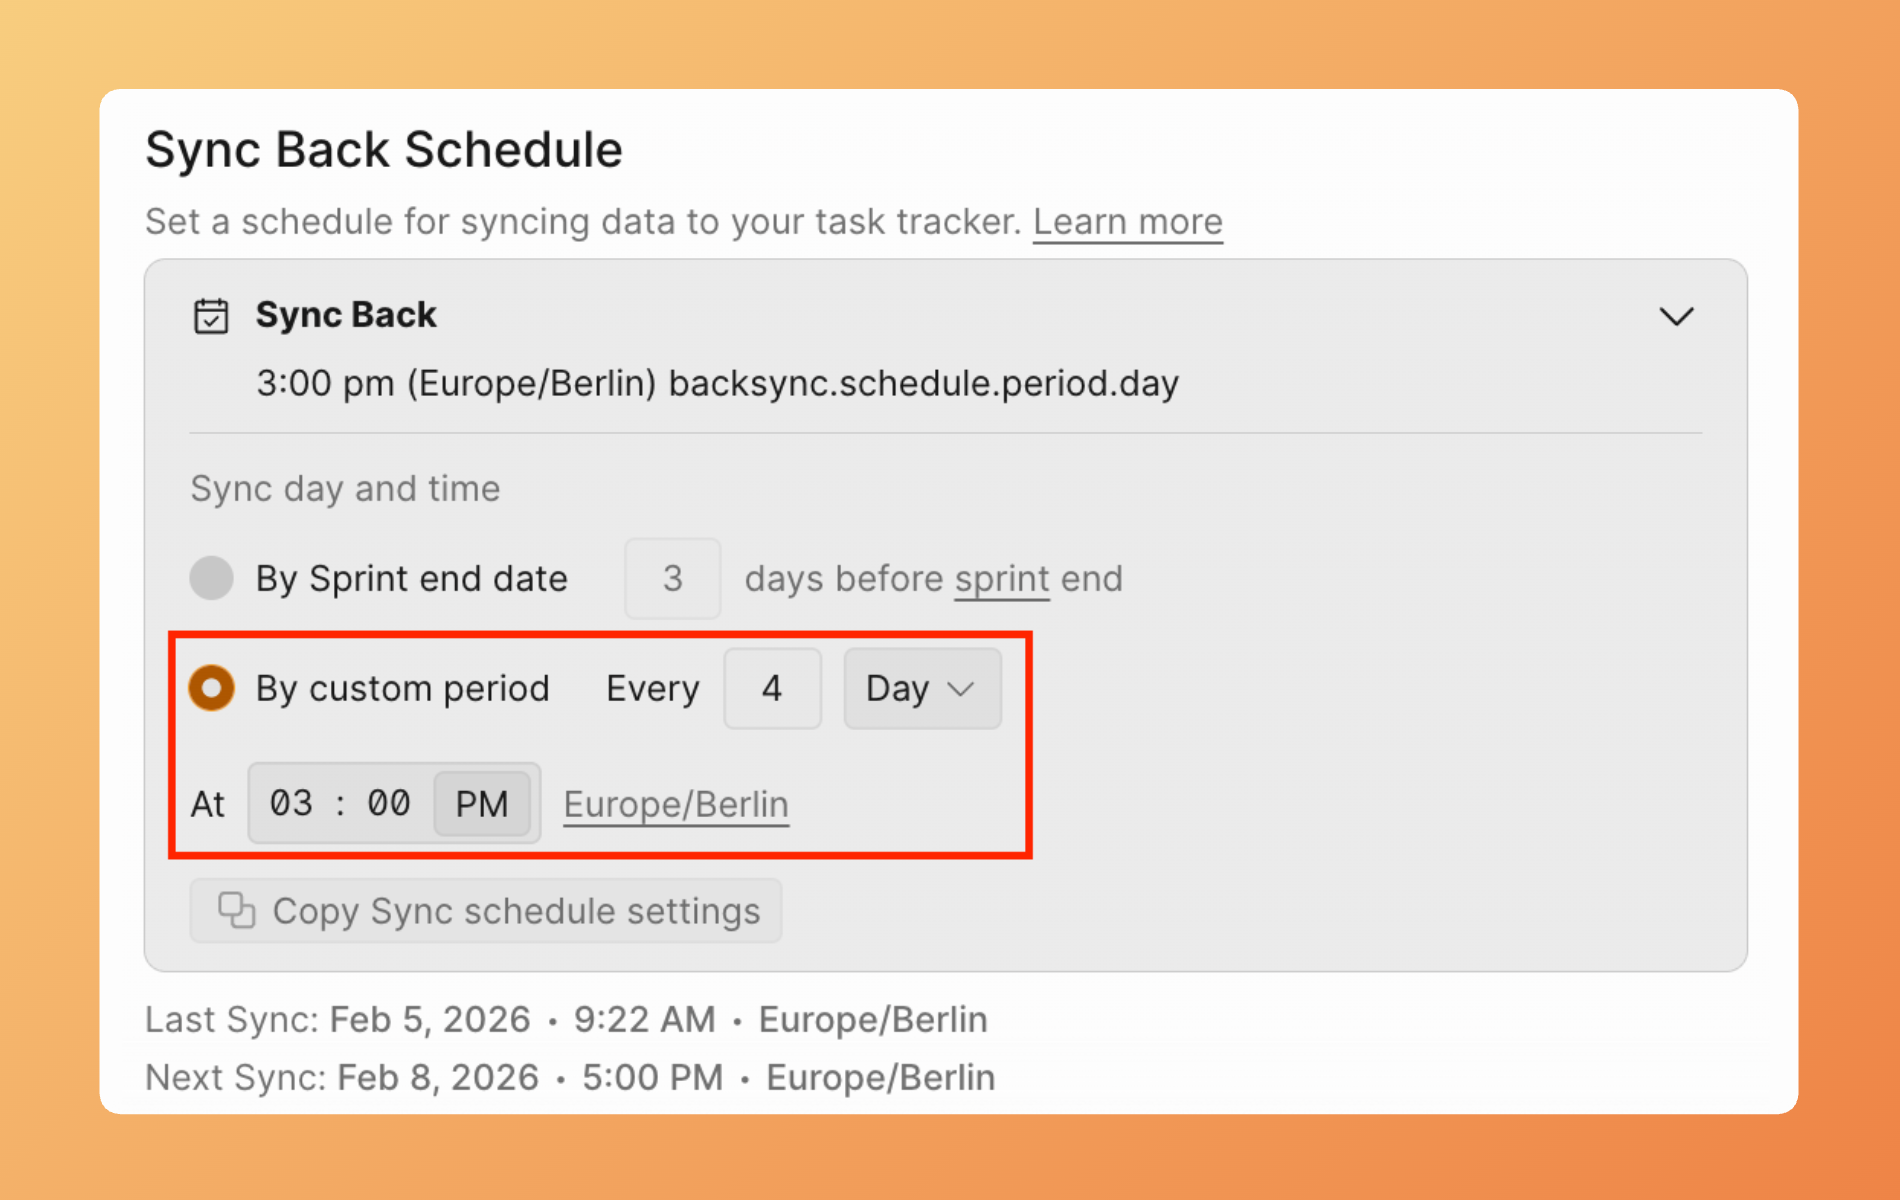
Schedule automatic sync
Configure when Ducalis sends updated prioritization data to Yandex Tracker.
- In Sync settings, find the Sync Back Schedule section.
-
Choose your sync timing:
By sprint end date — Syncs when your sprint concludes. Useful if you only want final priorities sent after evaluation.
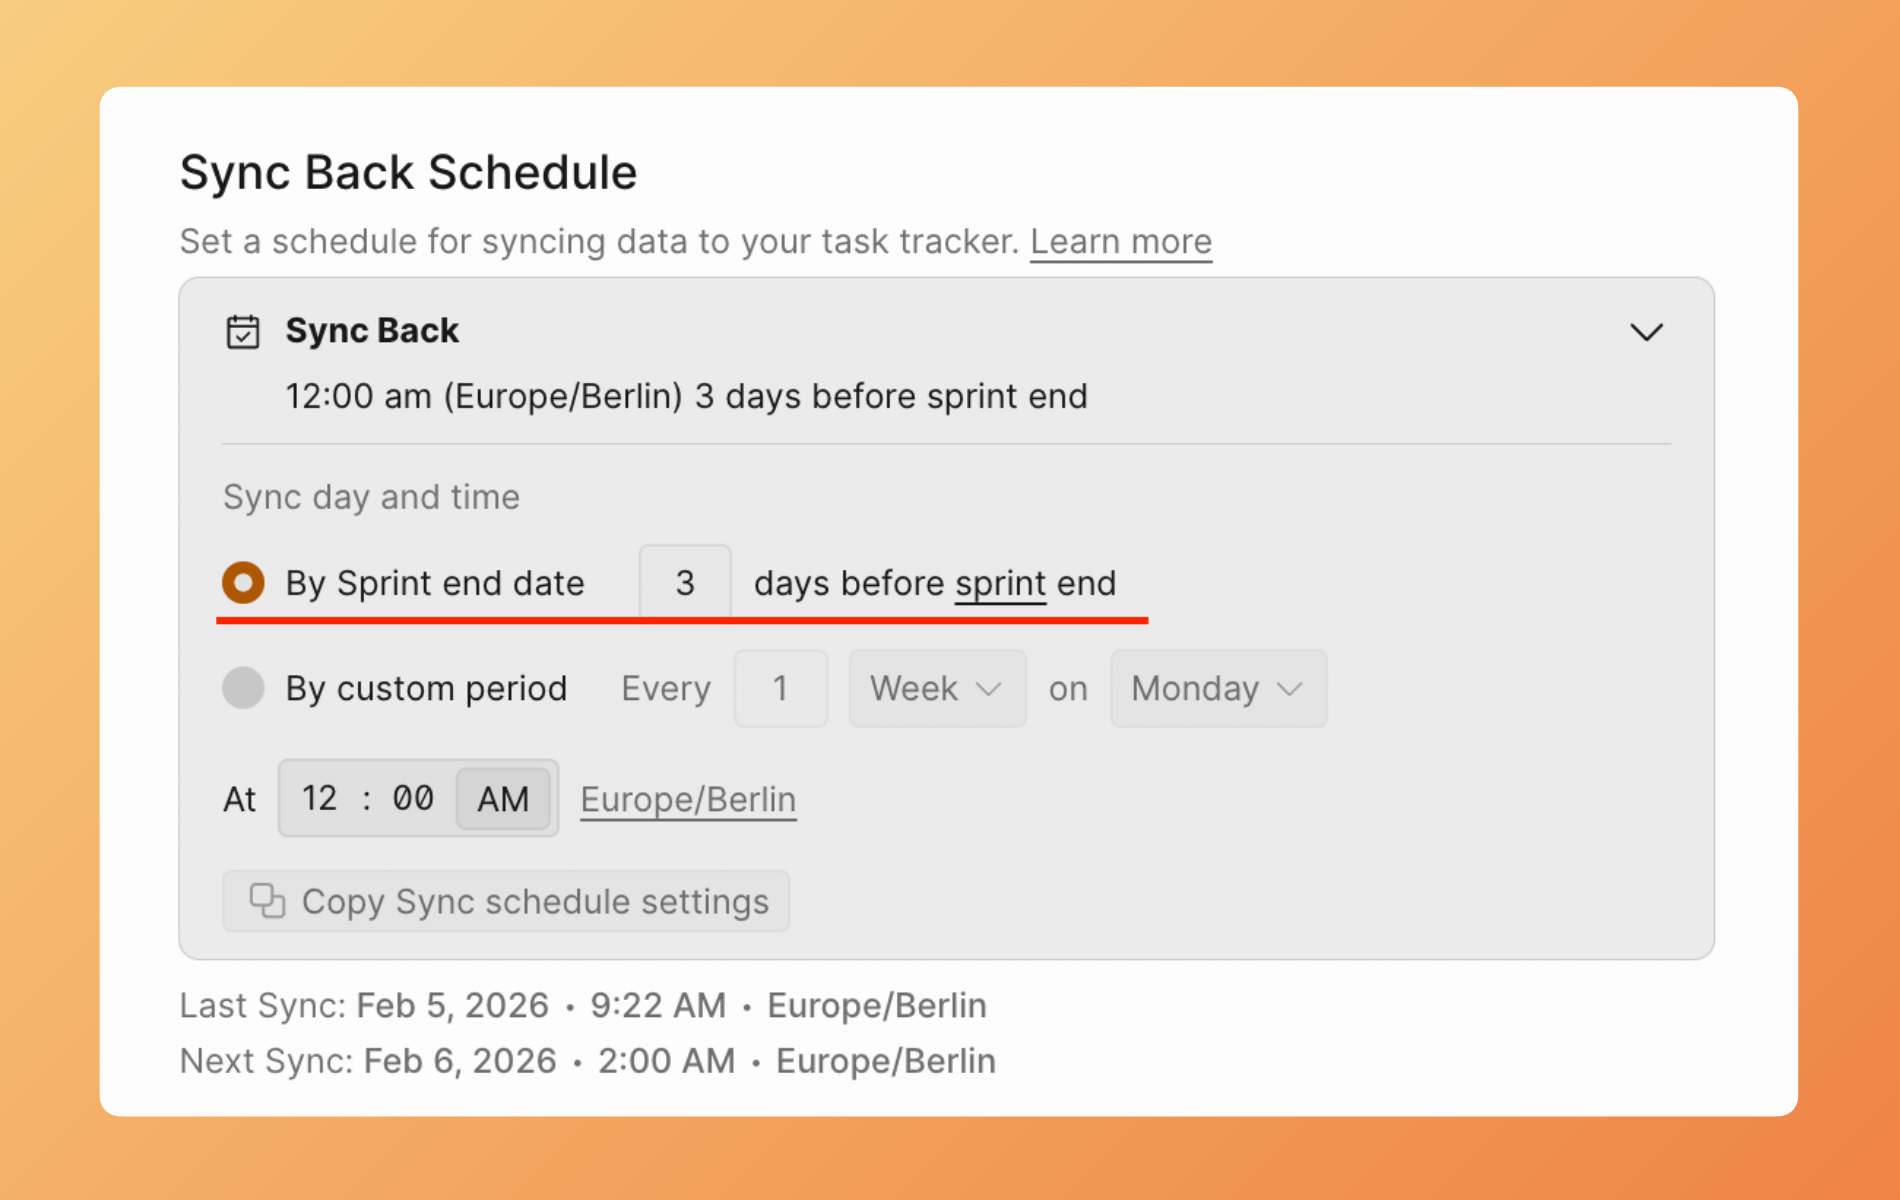
By custom period — Set a specific interval (daily, weekly, etc.) for automatic syncs.
Manual Sync Back
Trigger a sync anytime without waiting for the schedule.
-
Go to Sync settings.
-
Click Manual Sync with Yandex.
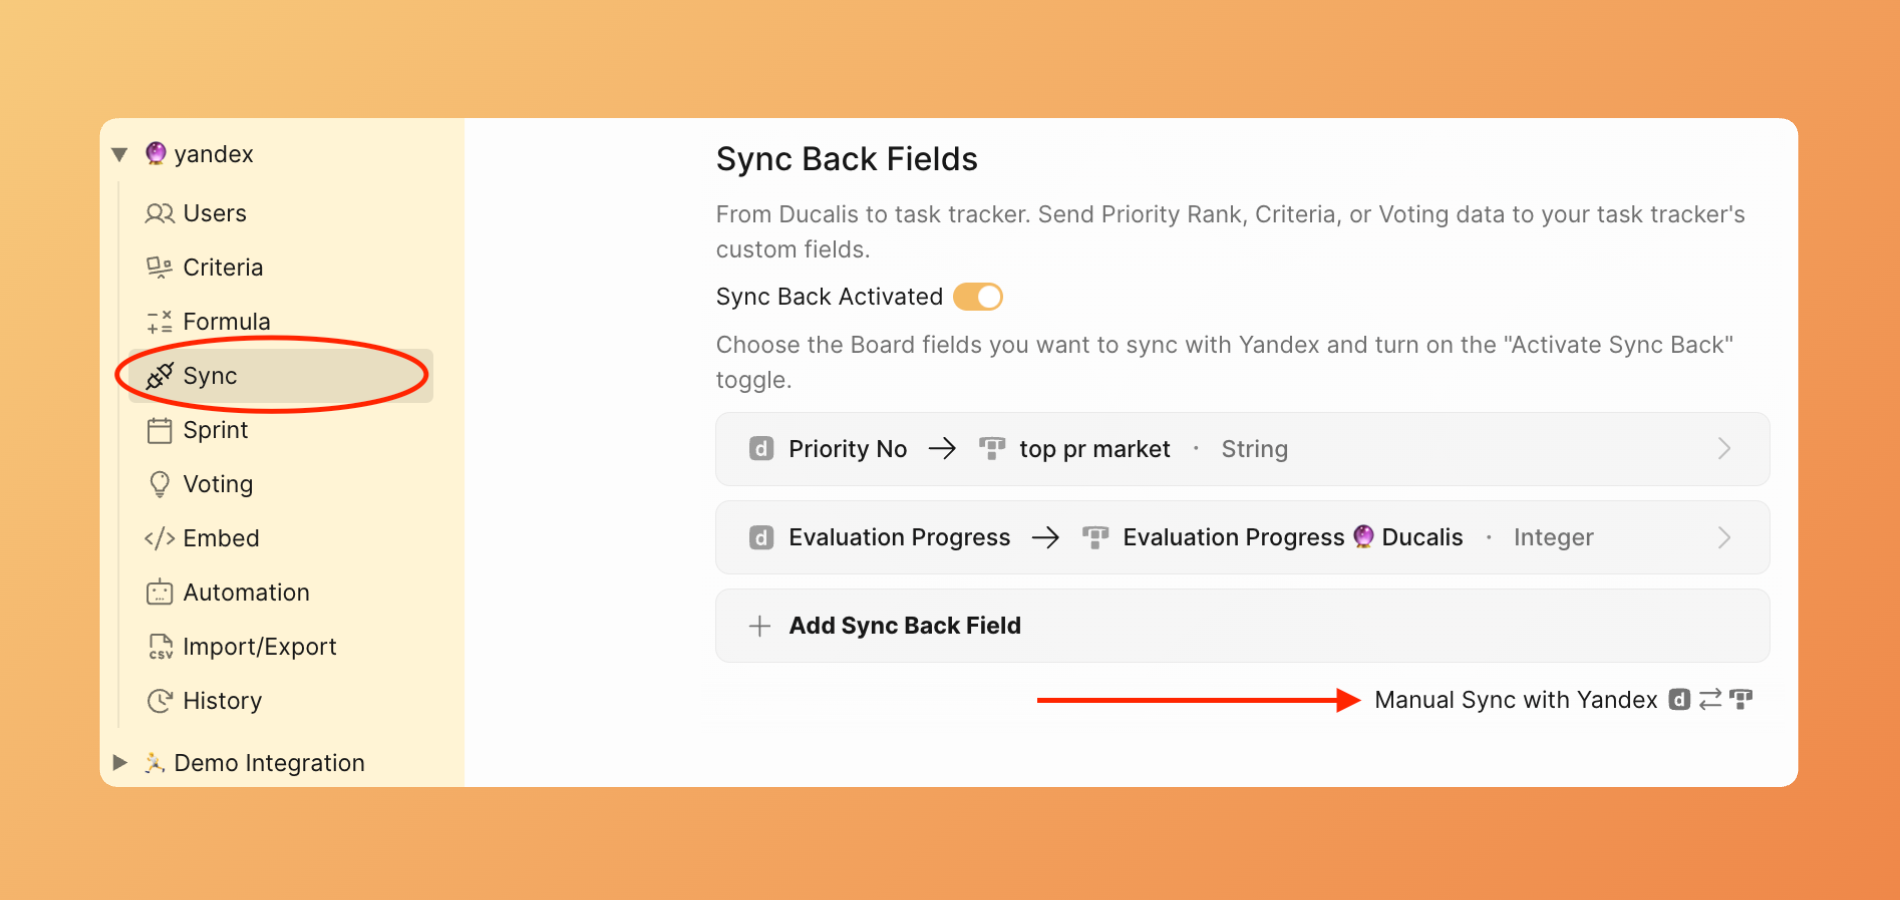
- Ducalis sends current prioritization data to Yandex.Tracker immediately.
Disable Sync Back
To stop syncing prioritization data to Yandex.Tracker:
-
Go to Sync settings.
-
Toggle Activate Sync Back to off.
-
Existing data in Yandex.Tracker fields remains. No further updates are sent.