Existing fields
Sync your priority data to ClickUp using fields you already have instead of creating new ones. This keeps your ClickUp workspace clean and uses your existing field structure.
You can use existing ClickUp custom fields for Sync Back in two ways:
- Rename existing fields – Change field names in ClickUp to match Ducalis field names
- Map fields – Connect Ducalis fields to existing ClickUp fields without renaming
This guide shows how to rename existing ClickUp fields to match Ducalis field names.
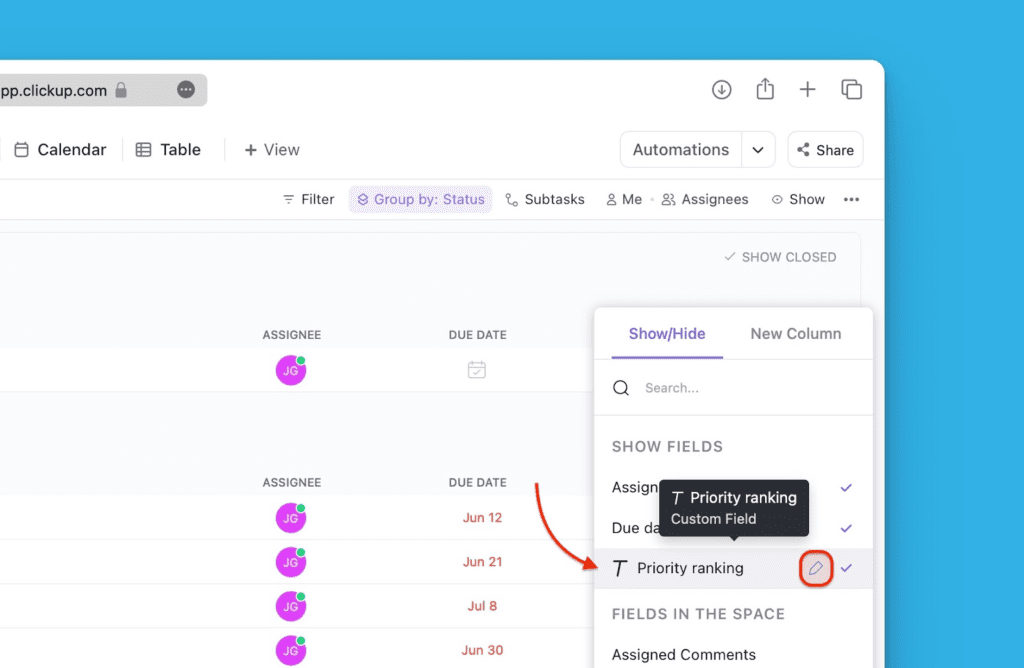
Access field settings
-
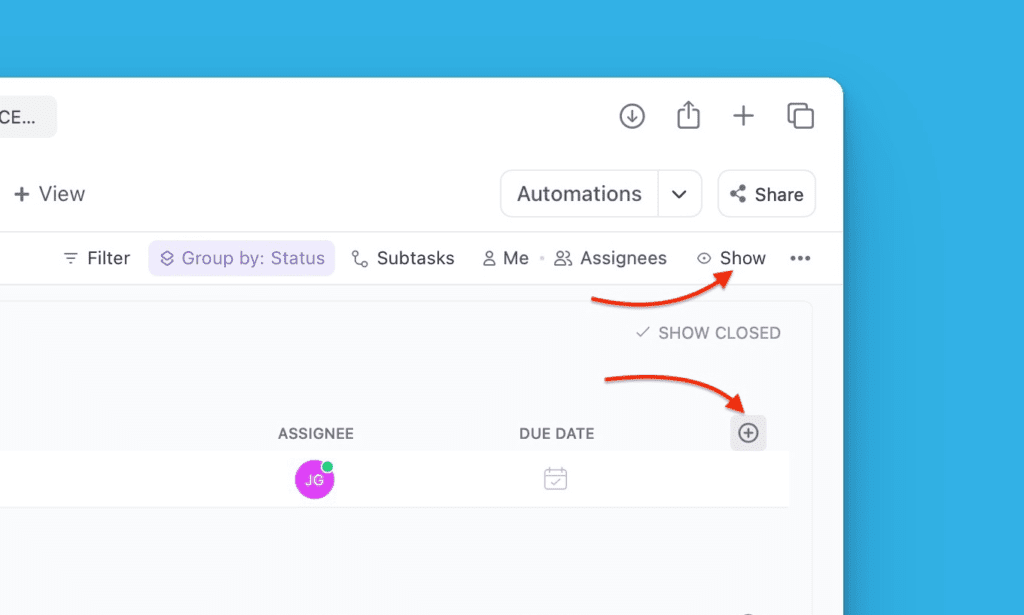
In your ClickUp Workspace or Space, click Show or Add column.
-
Select Columns from the dropdown, then click Show/Hide.
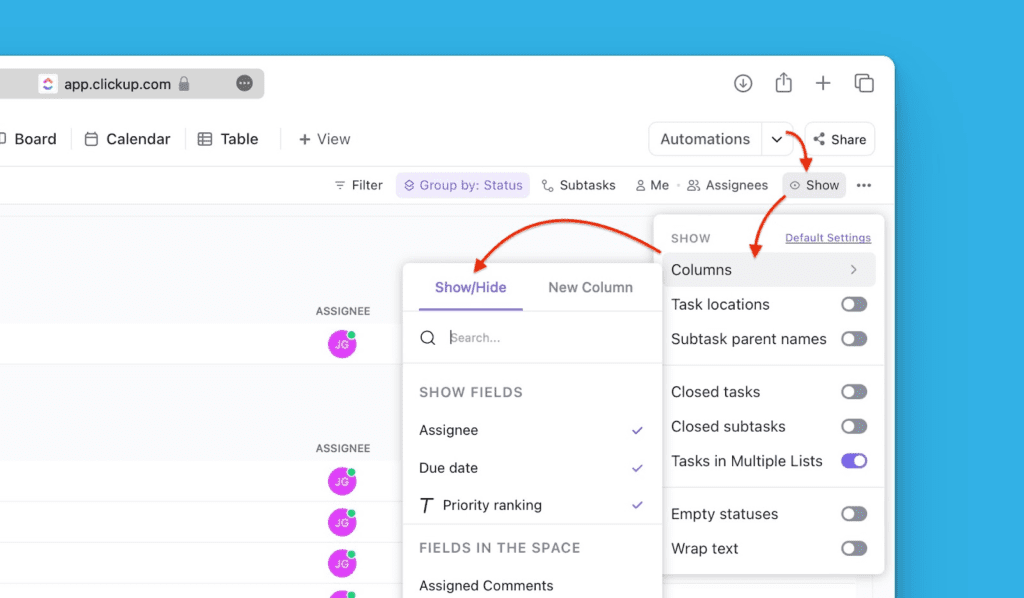
If you clicked Add column instead, go directly to Show/Hide.
-
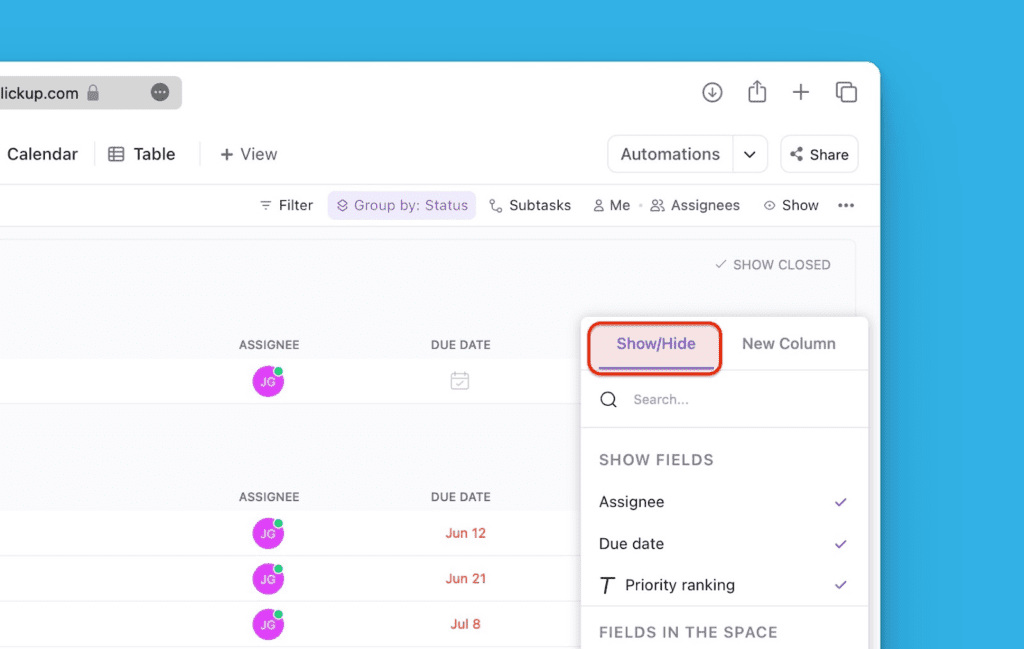
Find the field you want to rename, then click the edit icon.
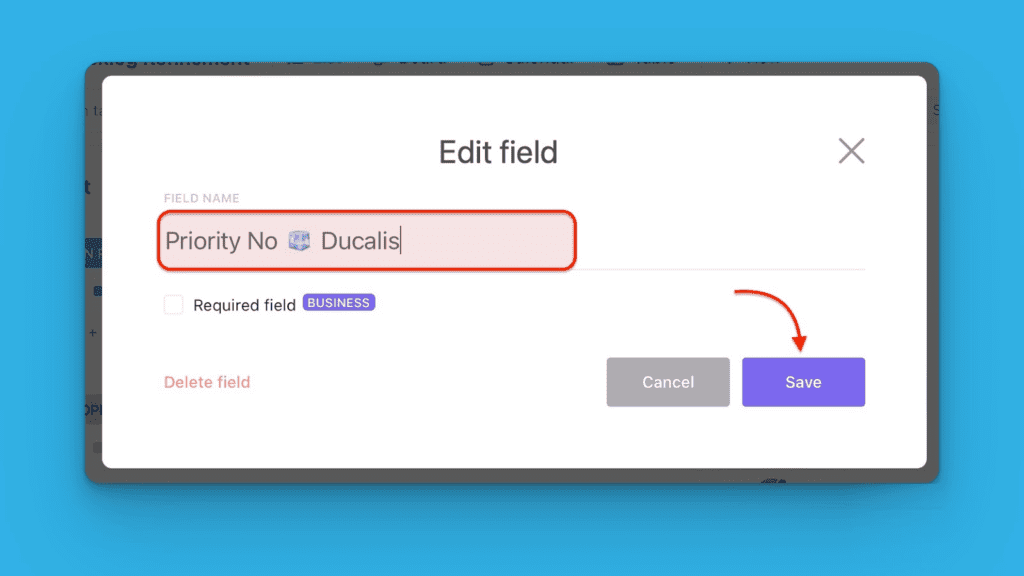
Rename the field
-
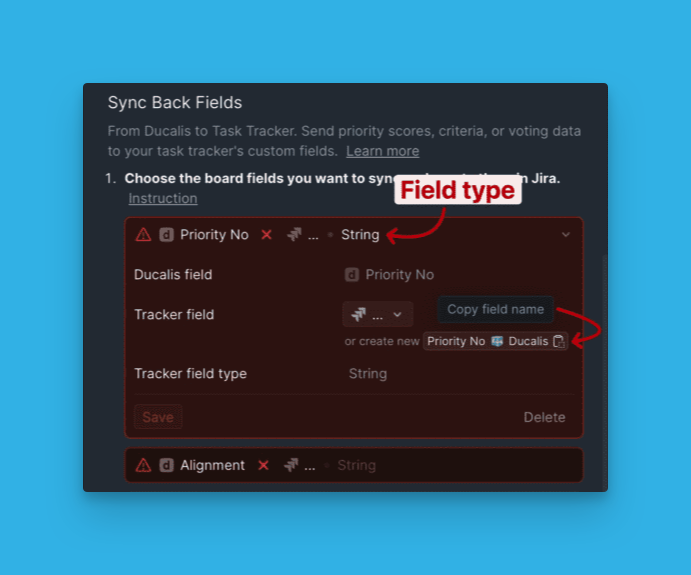
In Ducalis, copy the name of the field you want to sync back to ClickUp.
-
Paste the copied name into the ClickUp field name box, then click Save.
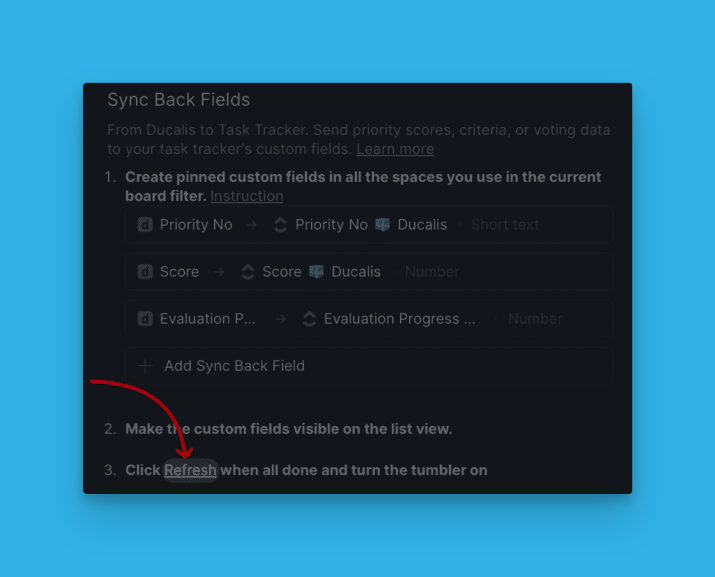
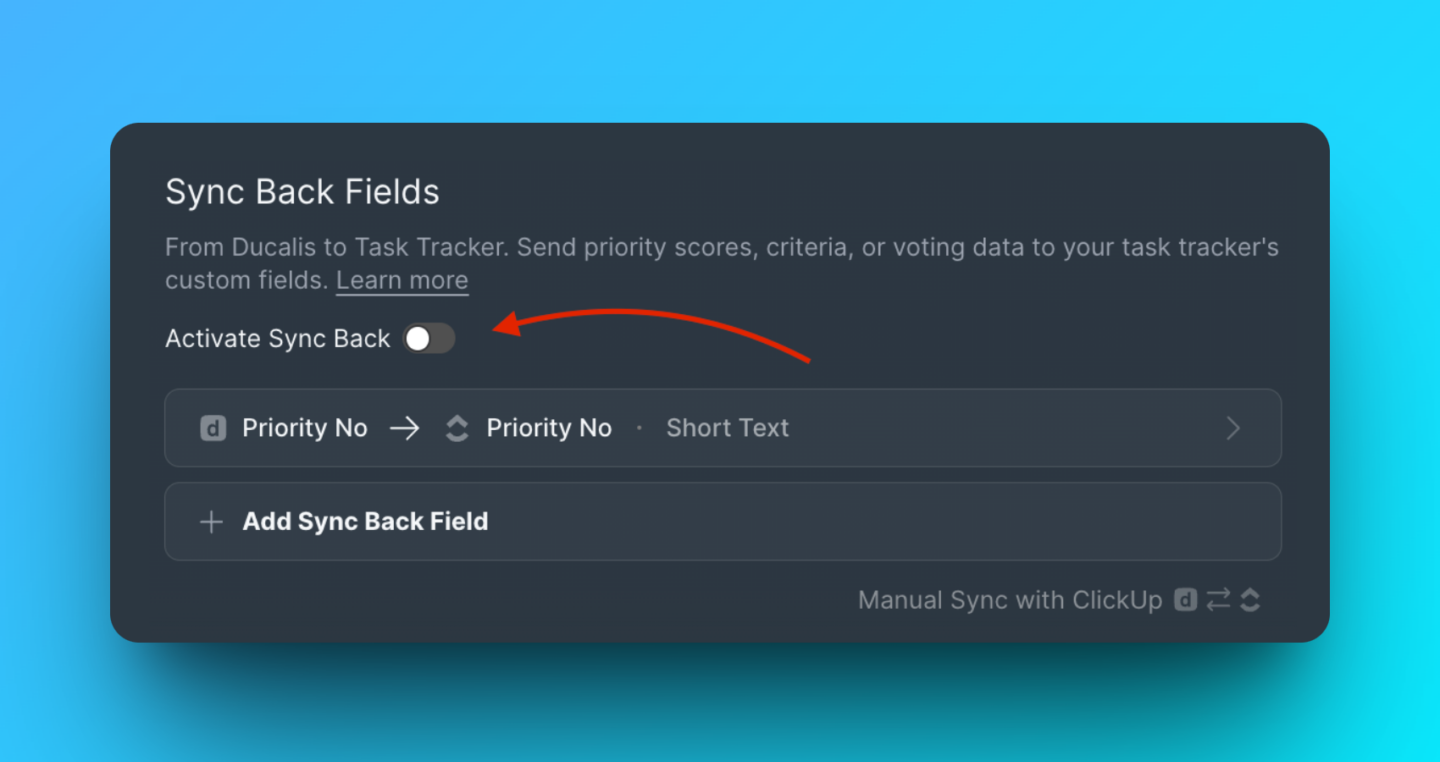
Activate Sync Back
-
After preparing your fields, click Refresh in Ducalis Sync Back settings.
-
Toggle the switch to activate Sync Back for the renamed field.
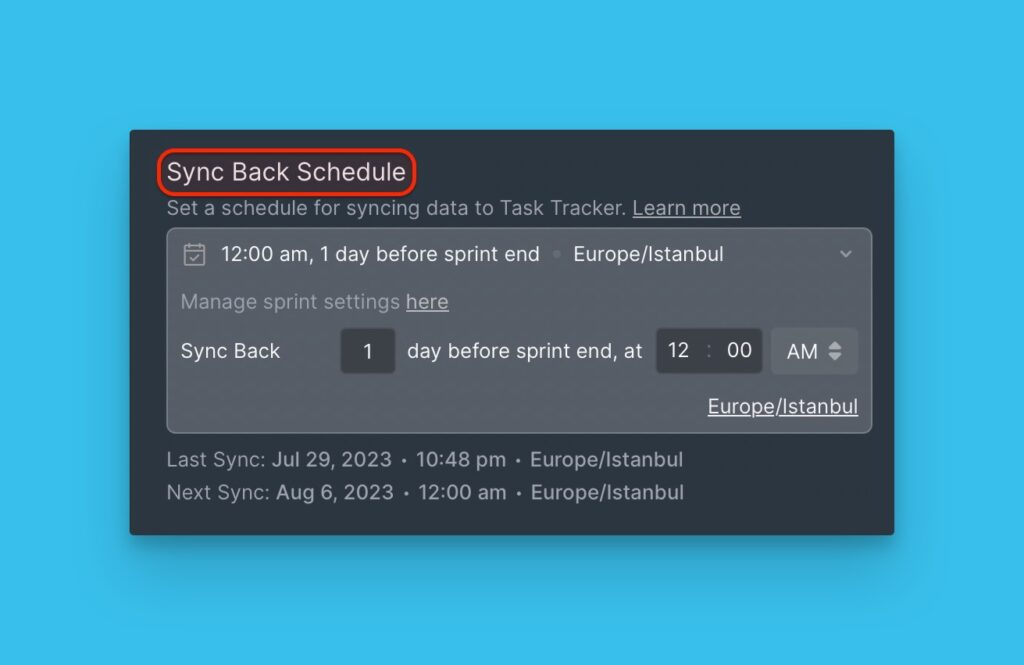
Schedule sync
Choose the day and time to sync priority rankings back to ClickUp. For example, schedule sync a day or two before your sprint planning meeting.
You can change the timezone if needed.