Space-level fields – Part 2
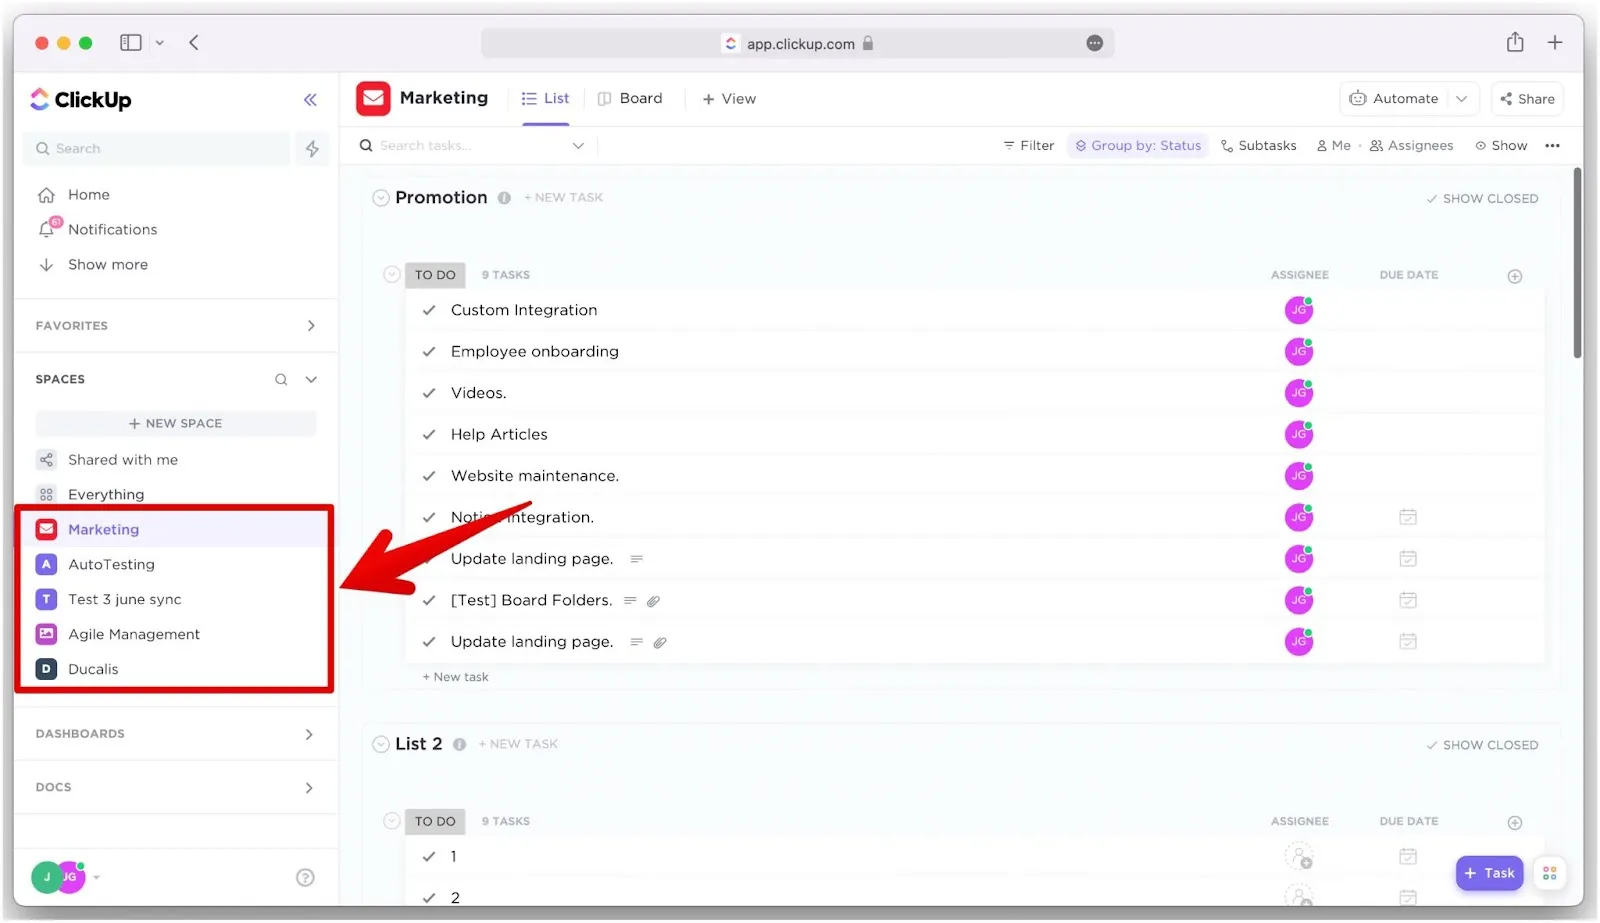
Add custom fields to individual ClickUp spaces to sync Ducalis data at the space level. This approach keeps synced data isolated to specific workspaces instead of sharing it across your entire ClickUp account.
Complete Part 1: Workspace-level fields first to understand the workspace-level approach. This article covers the space-level alternative.
To sync Ducalis data, you need unlimited use of custom fields in ClickUp. This feature is not available in the Forever Free plan.
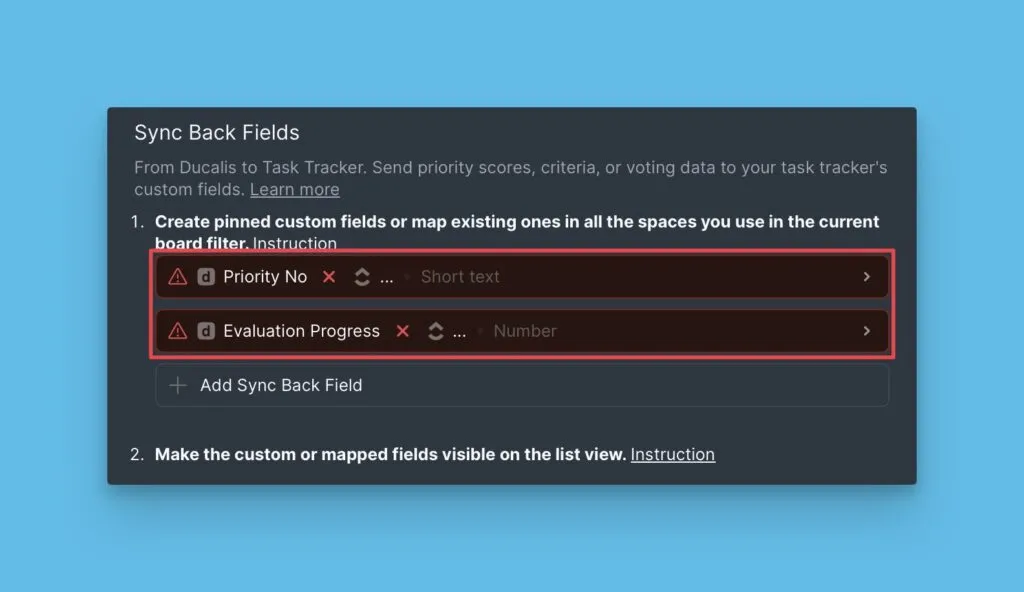
Choose Ducalis fields to sync
Before creating custom fields in ClickUp, select which Ducalis data you want to sync.
-
Go to Sync settings in Ducalis.

-
You'll see two default fields: Priority {emoji} Ducalis and Alignment {emoji} Ducalis.
-
To remove a field, hover over it and click the trash icon.
Create custom fields in ClickUp
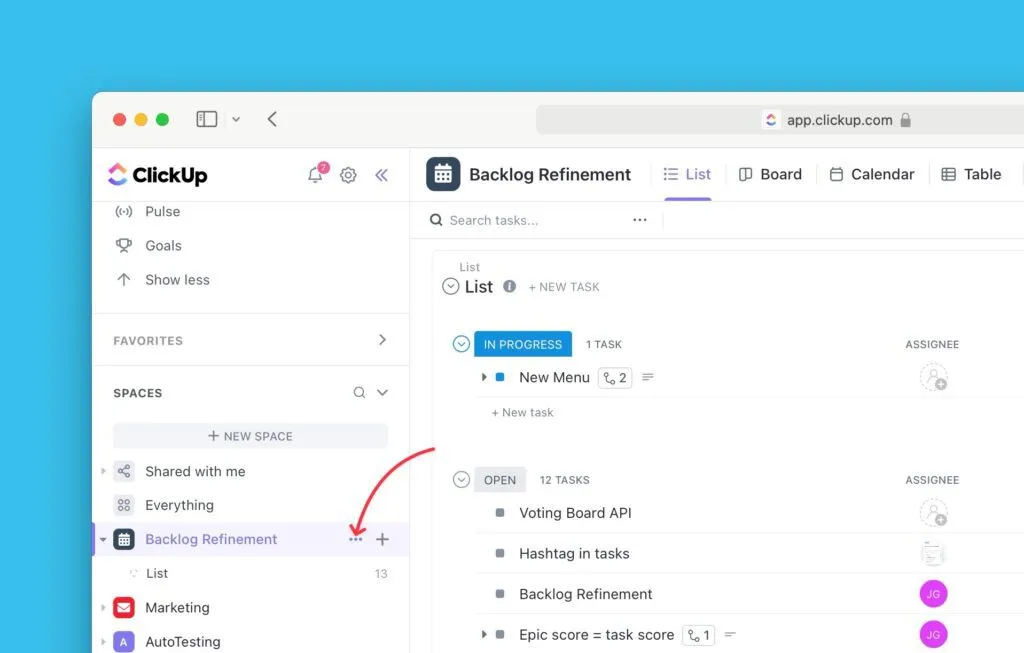
Add Ducalis custom fields to a specific ClickUp space.
-
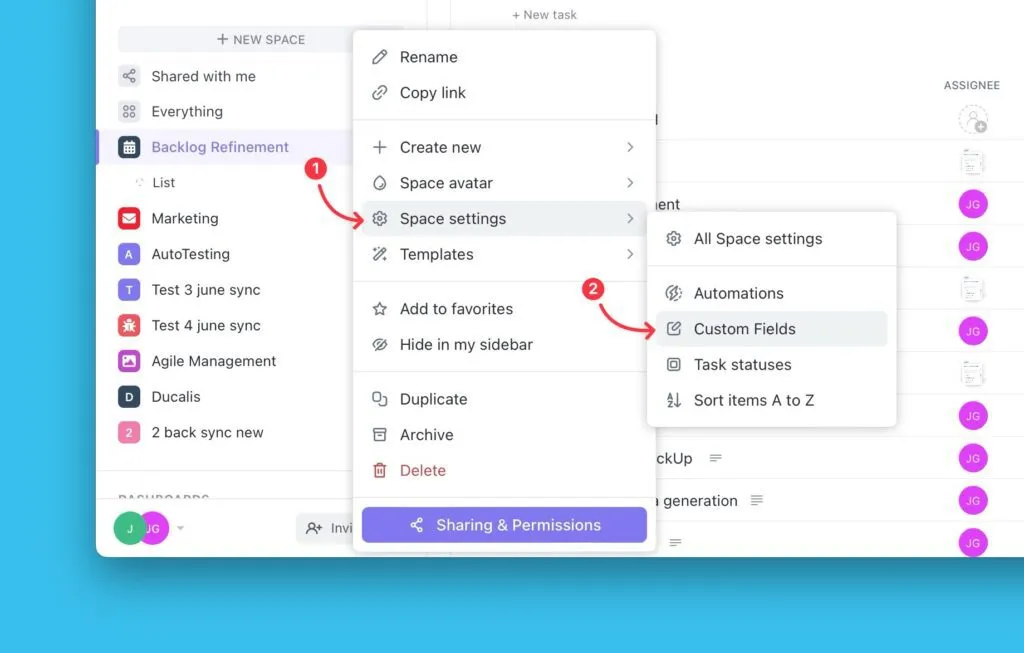
Click the ellipses (...) next to the space name.
-
Select Space Settings from the dropdown.
-
Click Custom Fields in the settings menu.
-
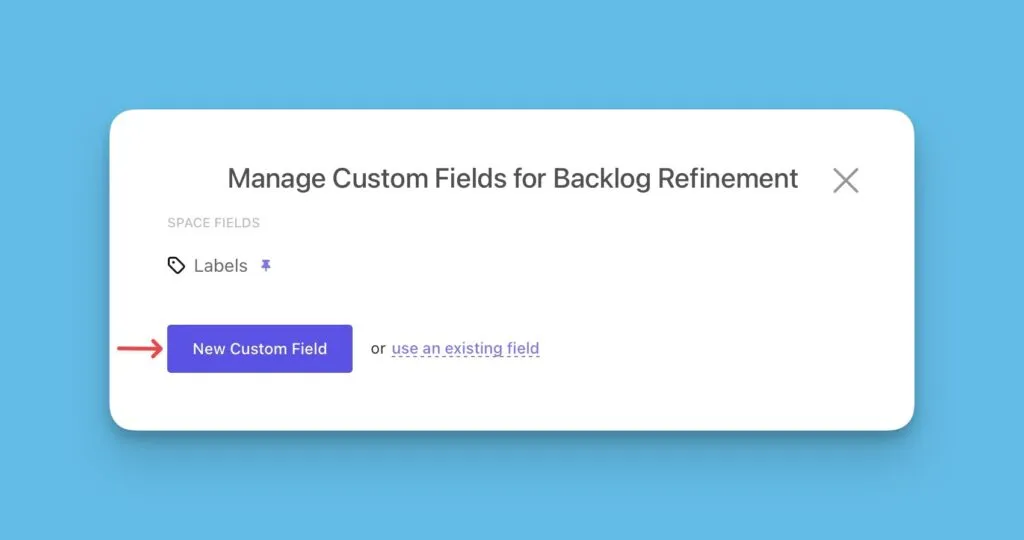
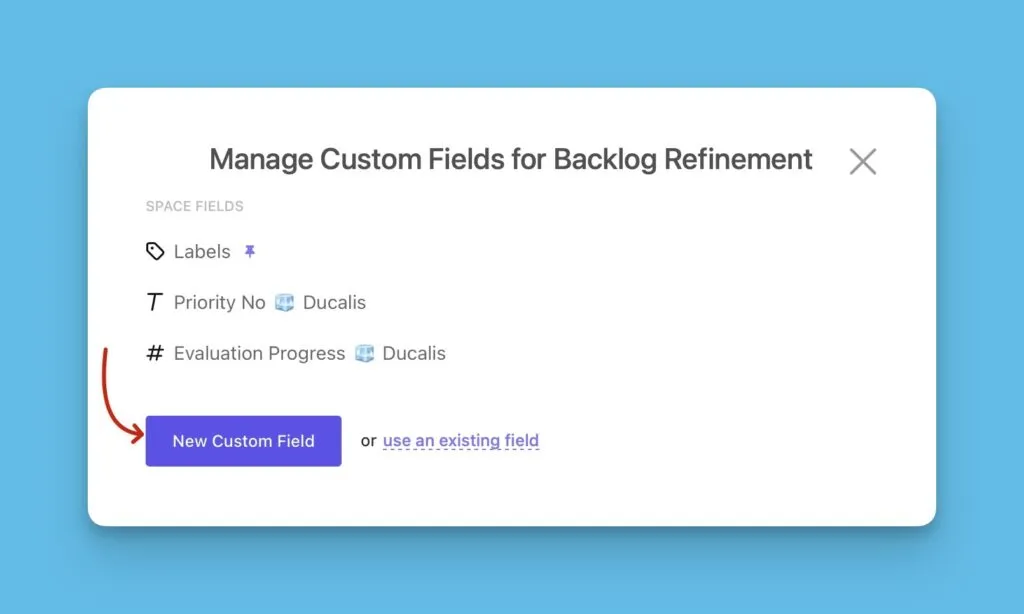
Click New Custom Field.
-
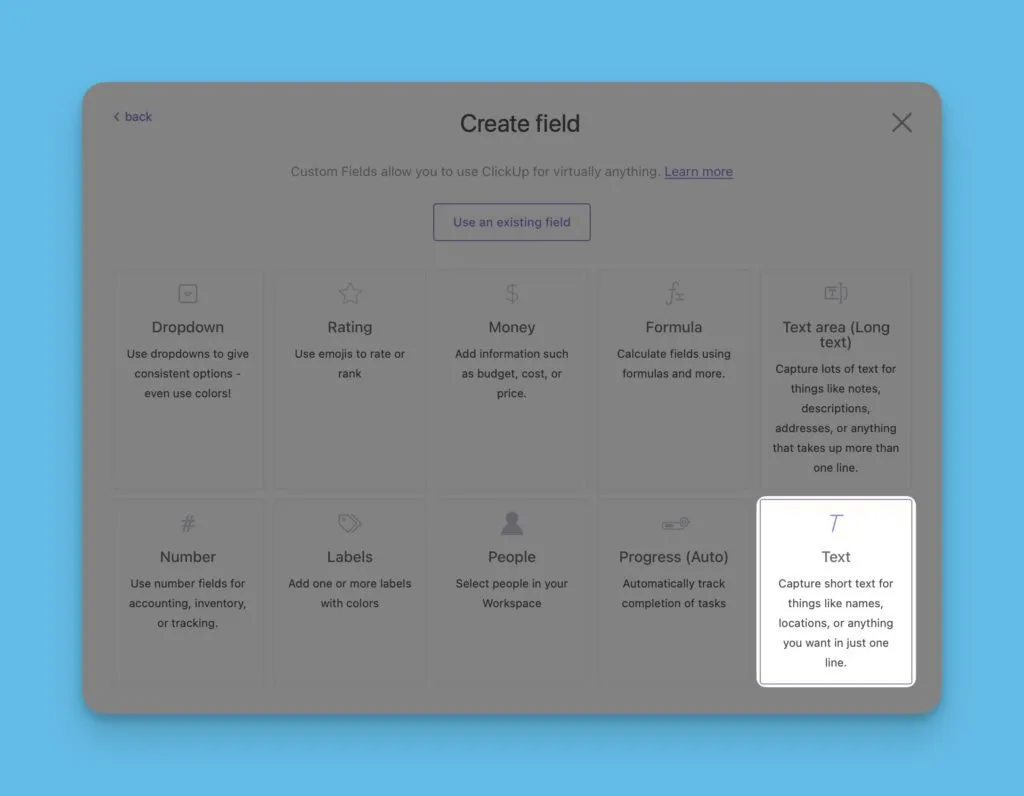
Select the field type that matches the Ducalis field type. For example, choose Text to create a text field.
-
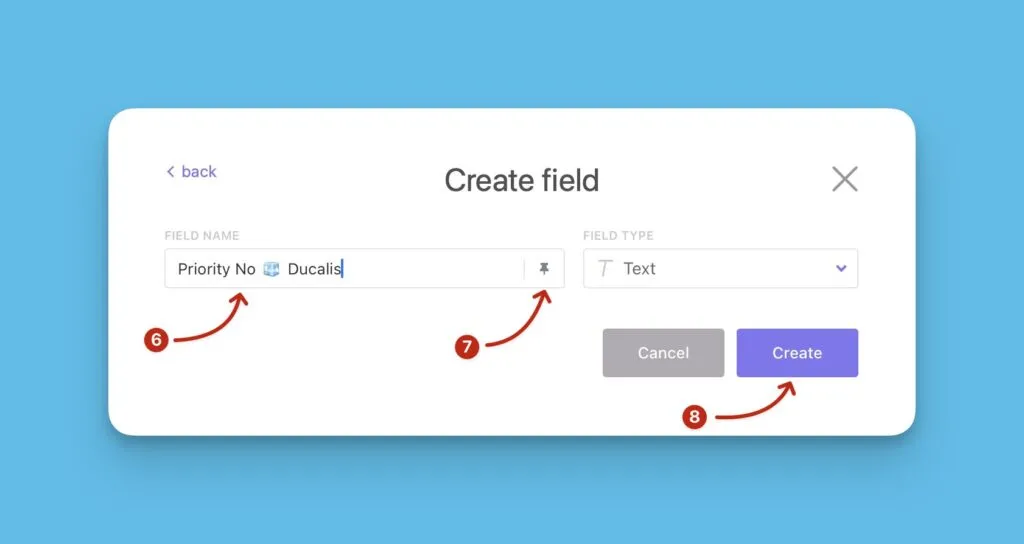
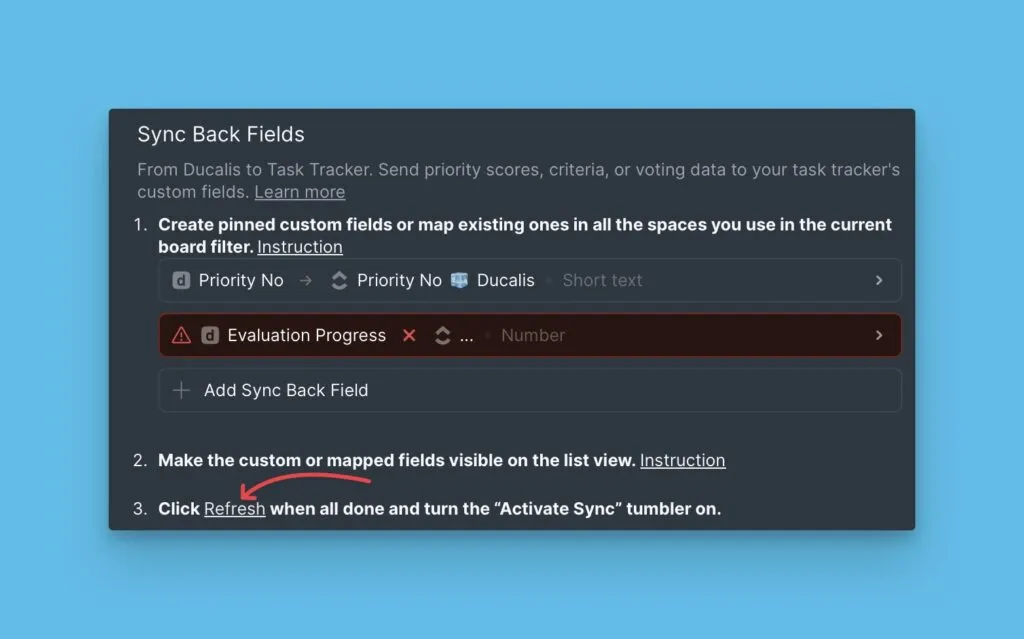
Copy the field name from Ducalis Sync settings.
-
Paste the name into the ClickUp custom field name box.
-
Click the 📌 Pin icon to pin the field.
-
Click Create.
-
To add more fields, click New Custom Field and repeat steps 5-9.
Make fields visible in list view
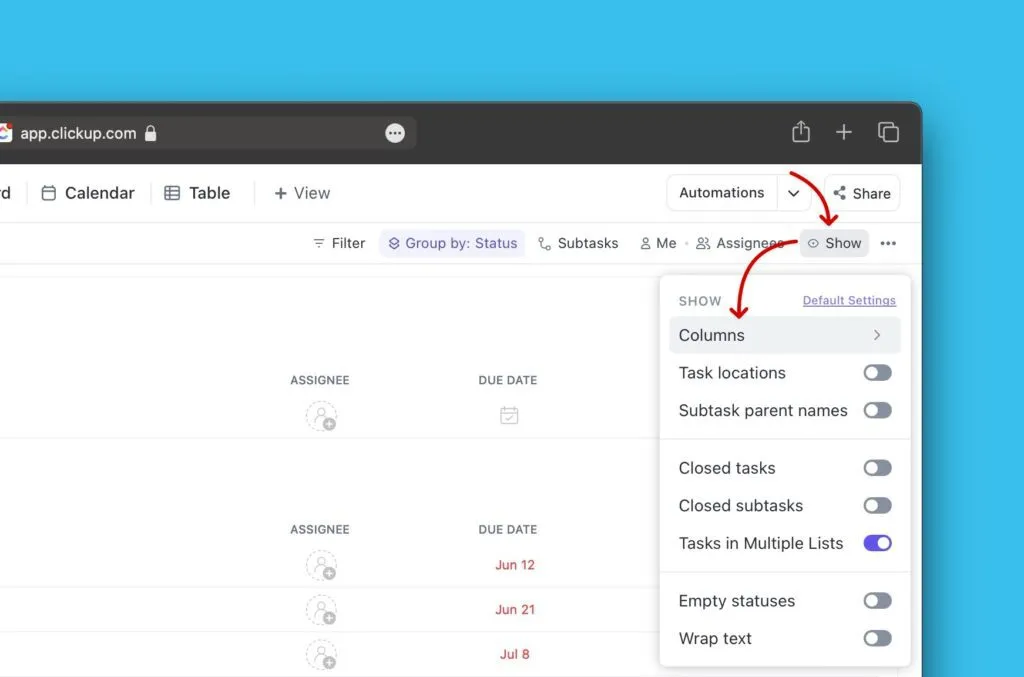
Custom fields are hidden from the list view by default. Add them manually to see synced data.
-
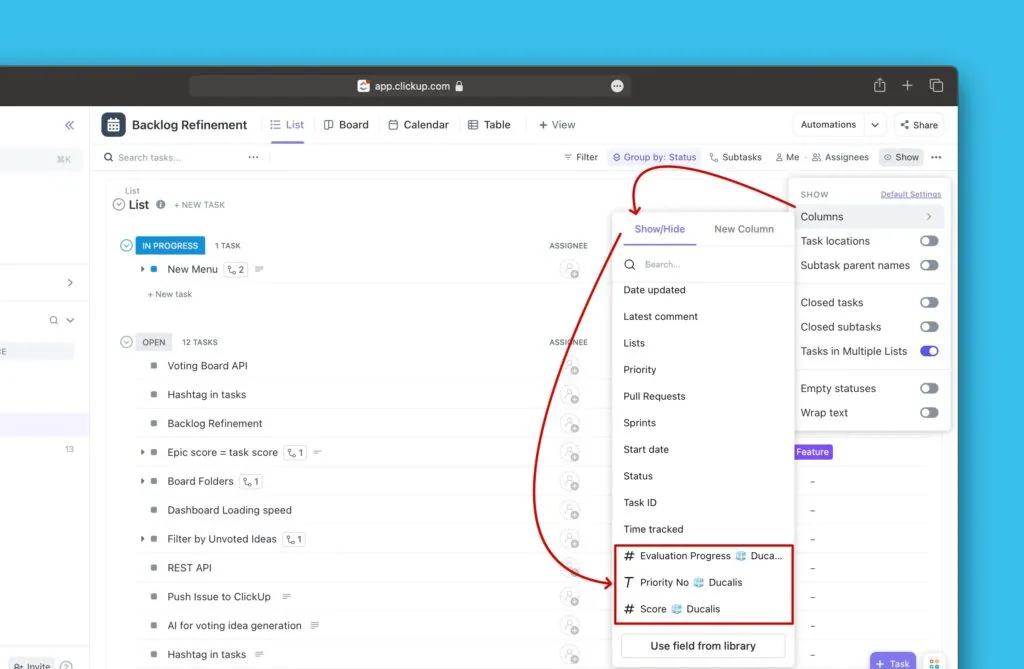
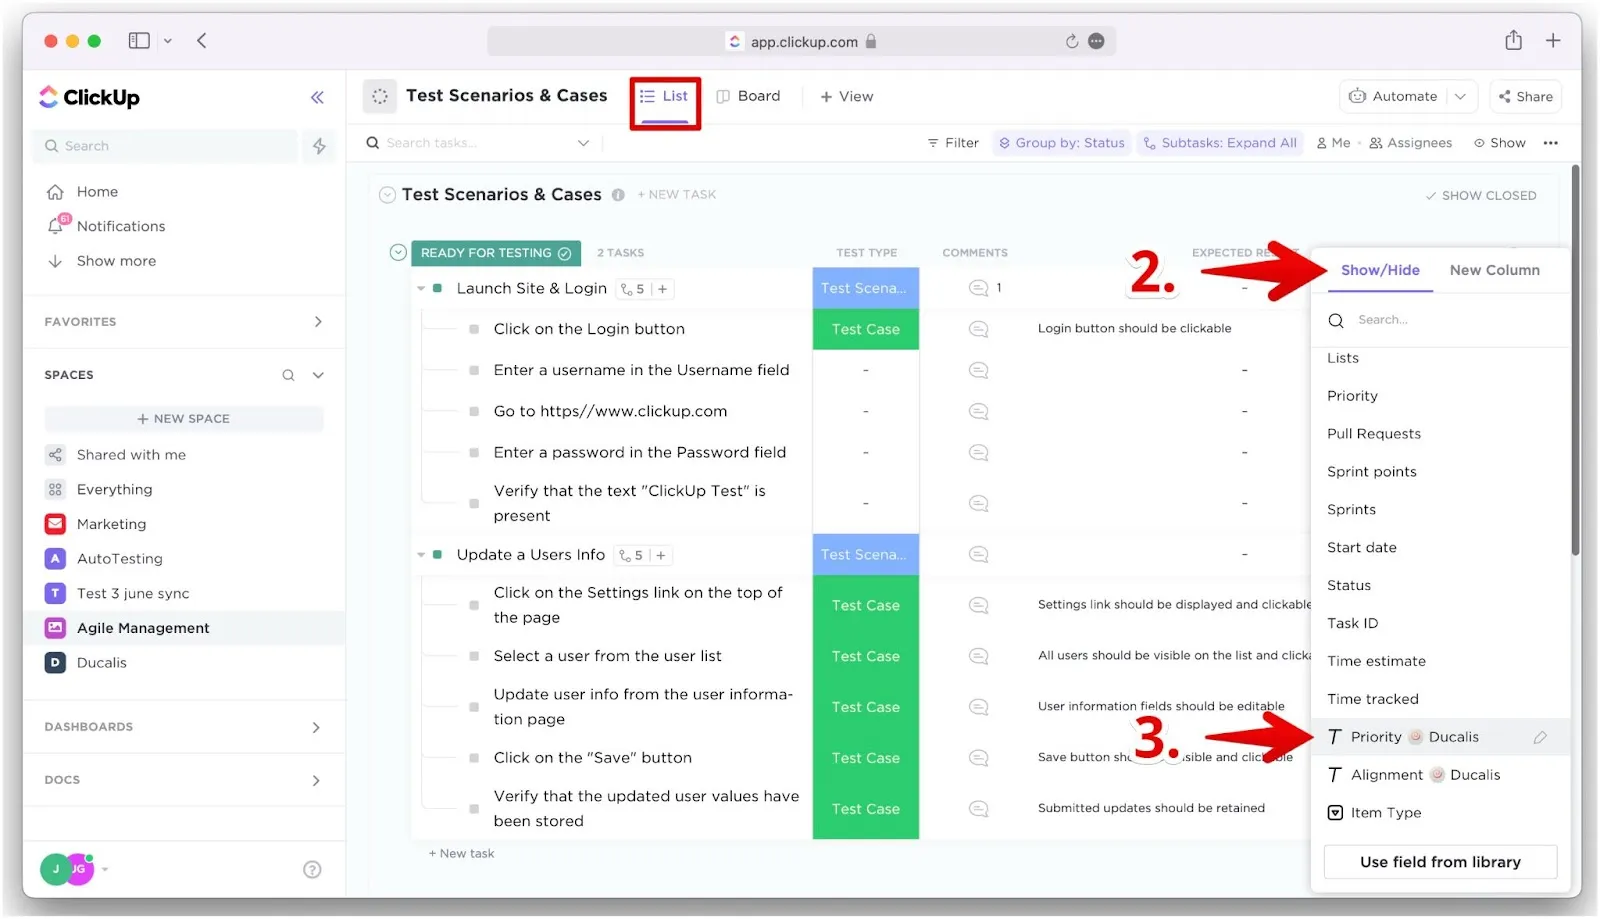
Click Show in the upper right corner, then select Columns.
-
Under Show/Hide, scroll to the Ducalis custom fields and click each field name to add it to the list view.
-
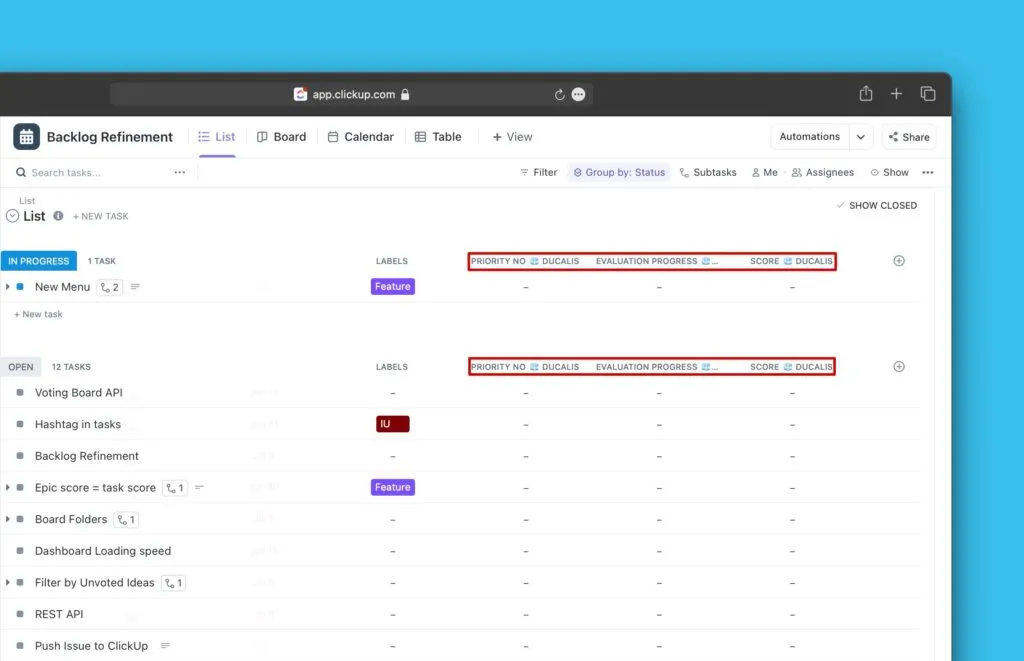
The Ducalis custom fields now appear in the list view.
-
Click Refresh in Ducalis Sync settings.
Issue ranking sync is now ready to activate.
Instead of creating new fields, you can edit existing ClickUp fields and rename them to match Ducalis field names. Learn more in Use existing fields for Sync Back.
Activate Sync Back
Configure when Ducalis syncs priority rankings to ClickUp.
- After refreshing, the Activate Sync Back toggle appears. Switch it on.
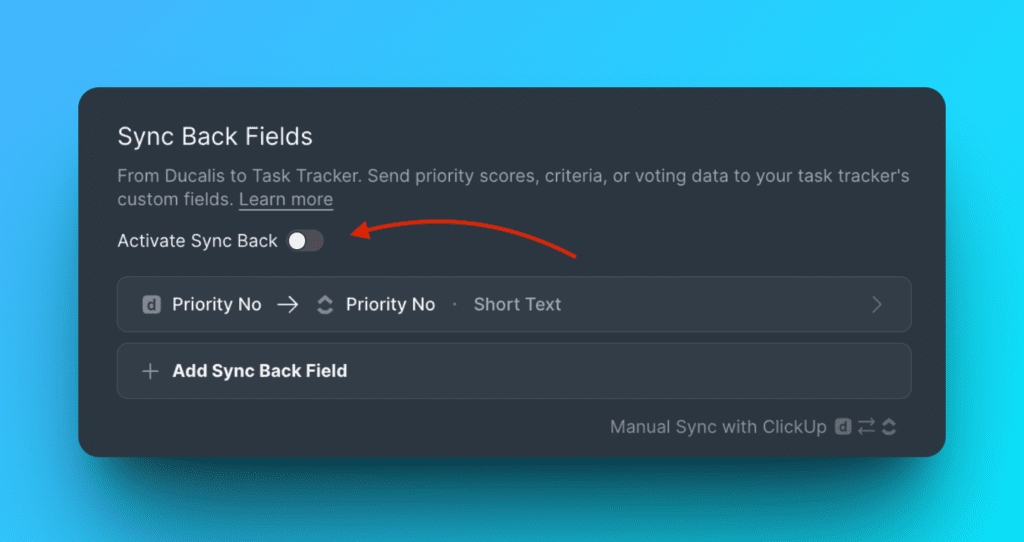
After activating sync, you can't add more fields. To add fields, turn off sync first, add the fields, then turn sync back on.
- Choose the day and time for automatic syncing. For example, schedule sync one day before your sprint planning meeting. You can change the timezone if needed.
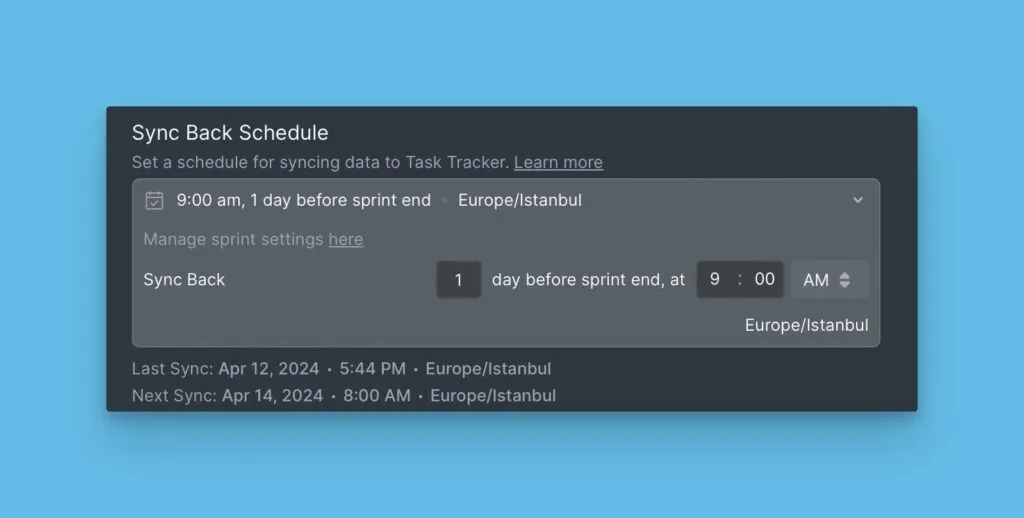
By default, sync happens automatically every planning day. Read more about Ducalis planning day settings.
- To sync immediately, click Manual Sync Back.

All synced data appears in the space where you added the custom fields. You can sort tasks by any field, including priority rankings, total scores, or criterion scores.
Add fields to different views
Display Ducalis custom fields in various ClickUp views.
First, select the space or list where you want to see the fields.
The following examples use the Priority Ducalis field, but you can add any Ducalis custom field using the same steps.
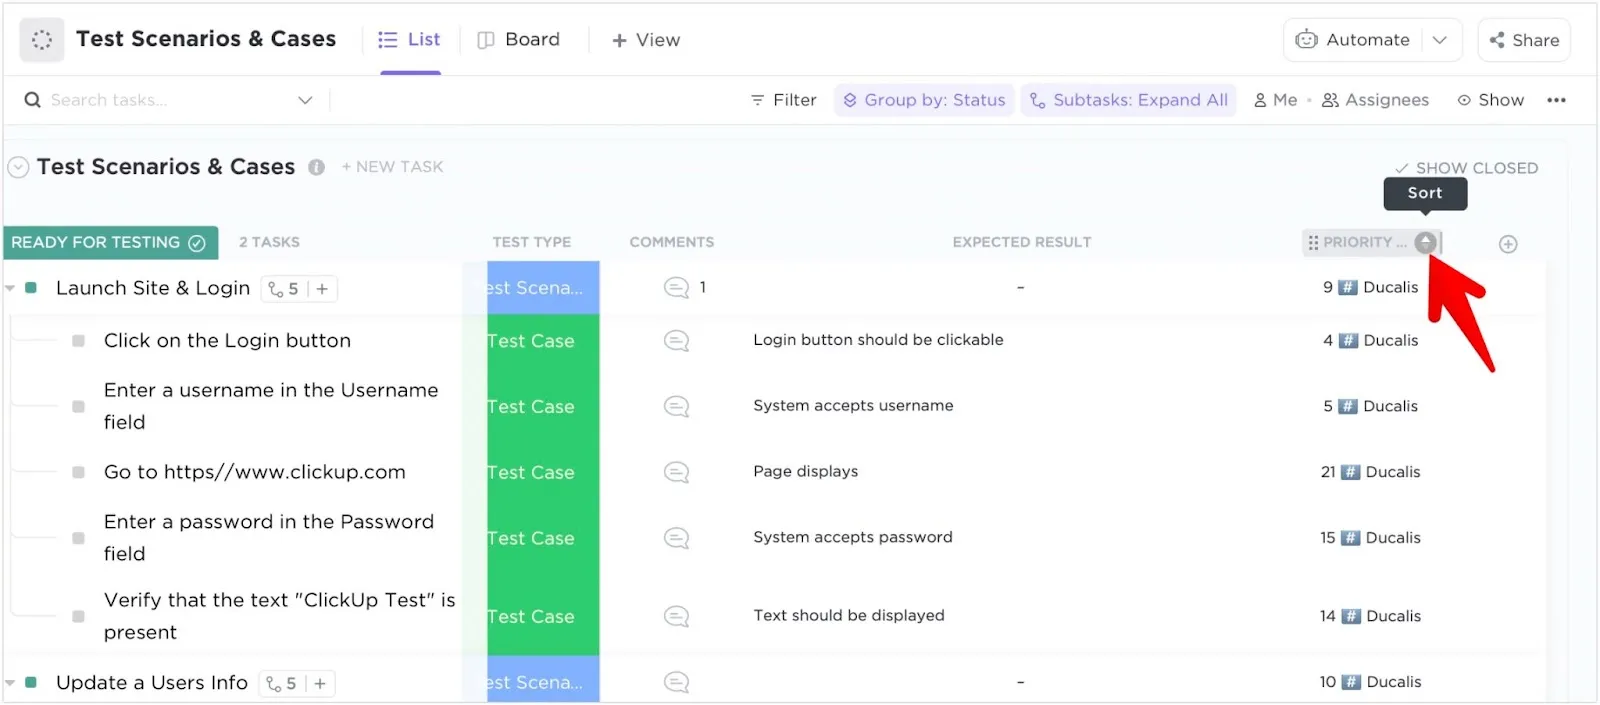
List view
-
Click the Plus (+) icon in the upper right corner.

-
Under Show/Hide, scroll down or search for Priority Ducalis.
-
Click the field name to add it to the view.
-
Click the Sort icon in the field header to sort tasks by priority.
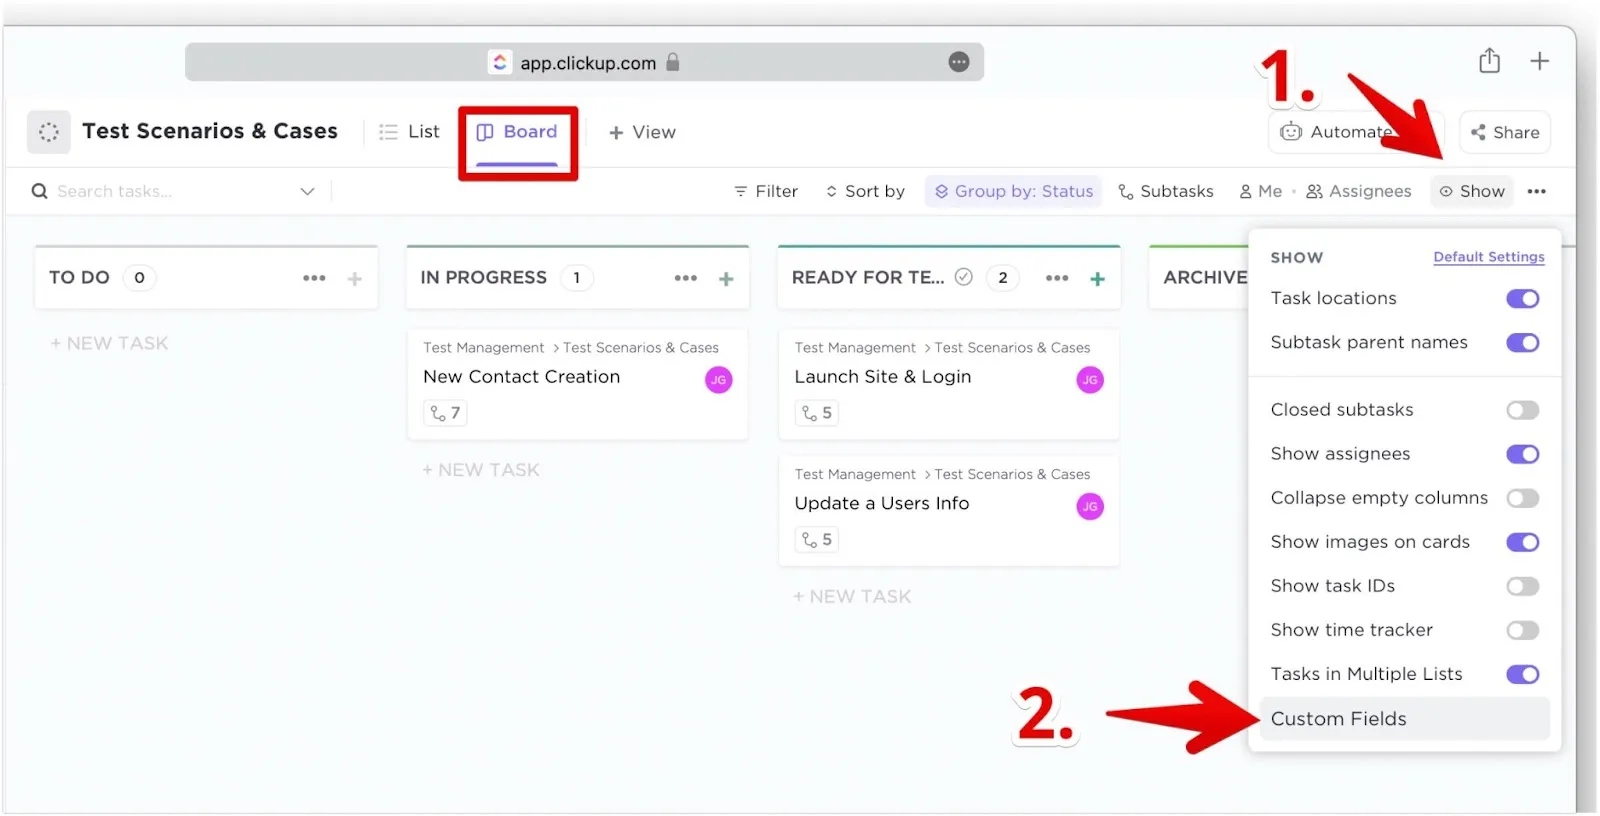
Board view
-
Click Show in the upper right corner.
-
Select Custom Fields.
-
Click Priority Ducalis to add it to task cards.
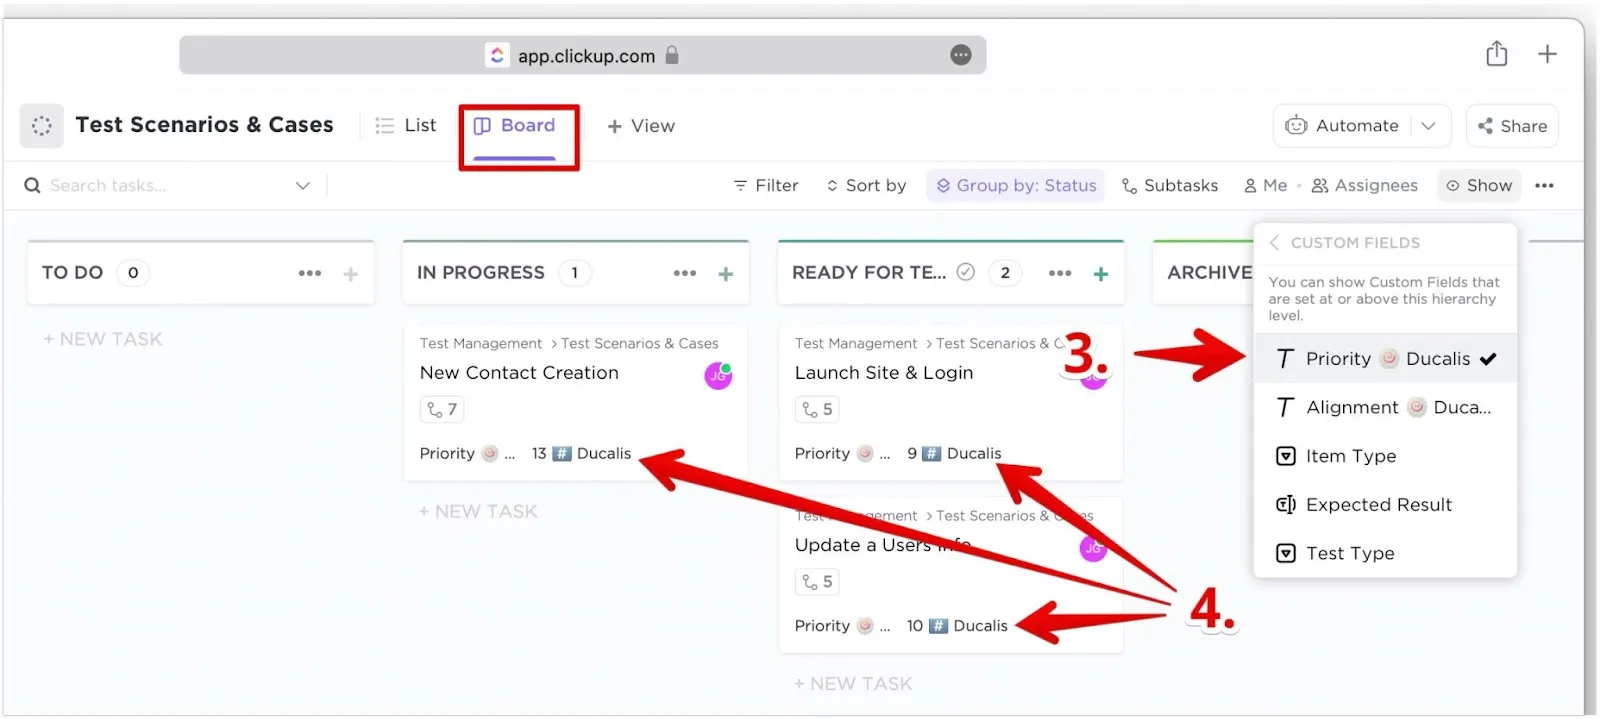
The priority rank appears on each task card.
Calendar view
-
Click Show in the upper right corner.
-
Scroll to the bottom and select Custom fields.
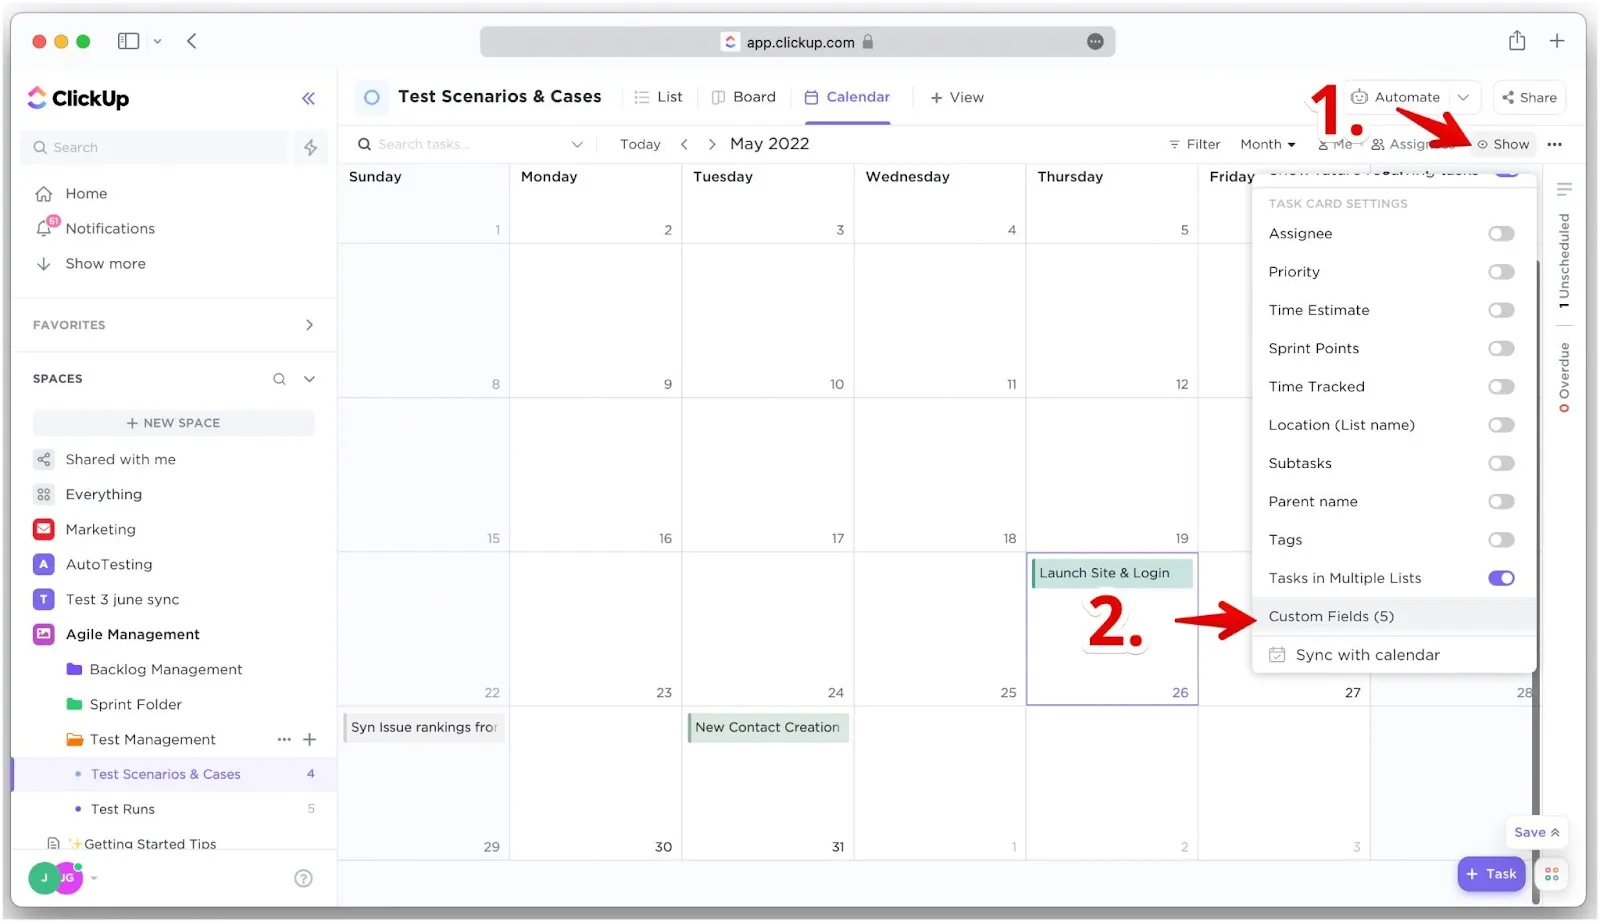
-
Click Priority Ducalis. The priority rank appears on each task card.
-
Click Save if Autosave is turned off.

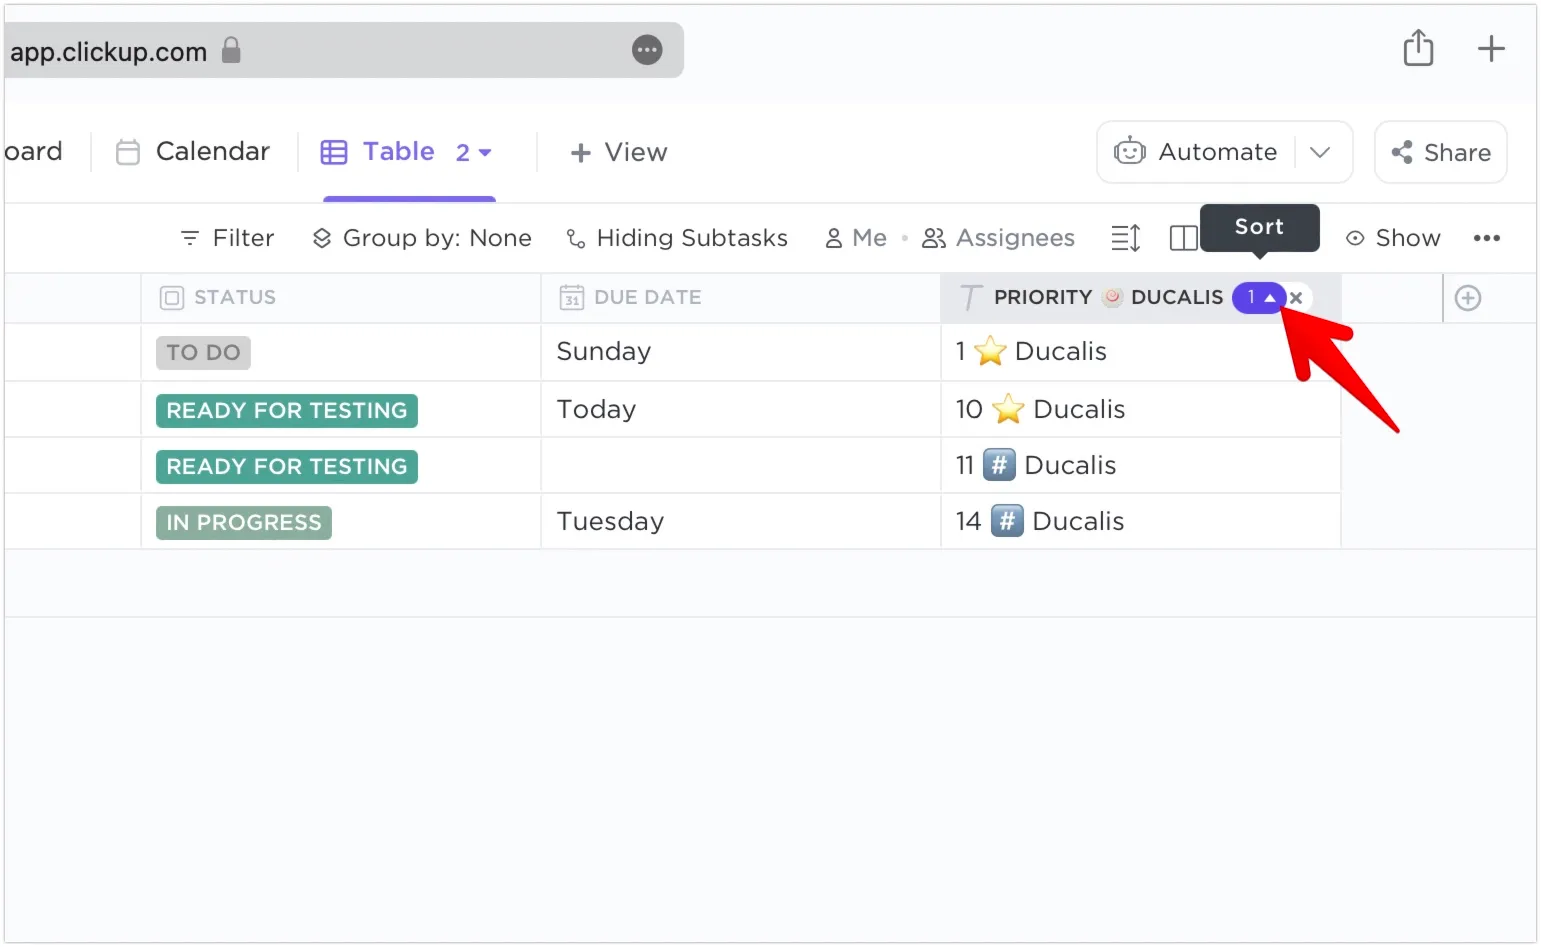
Table view
-
Click Columns.
-
Scroll down and turn on Priority Ducalis.
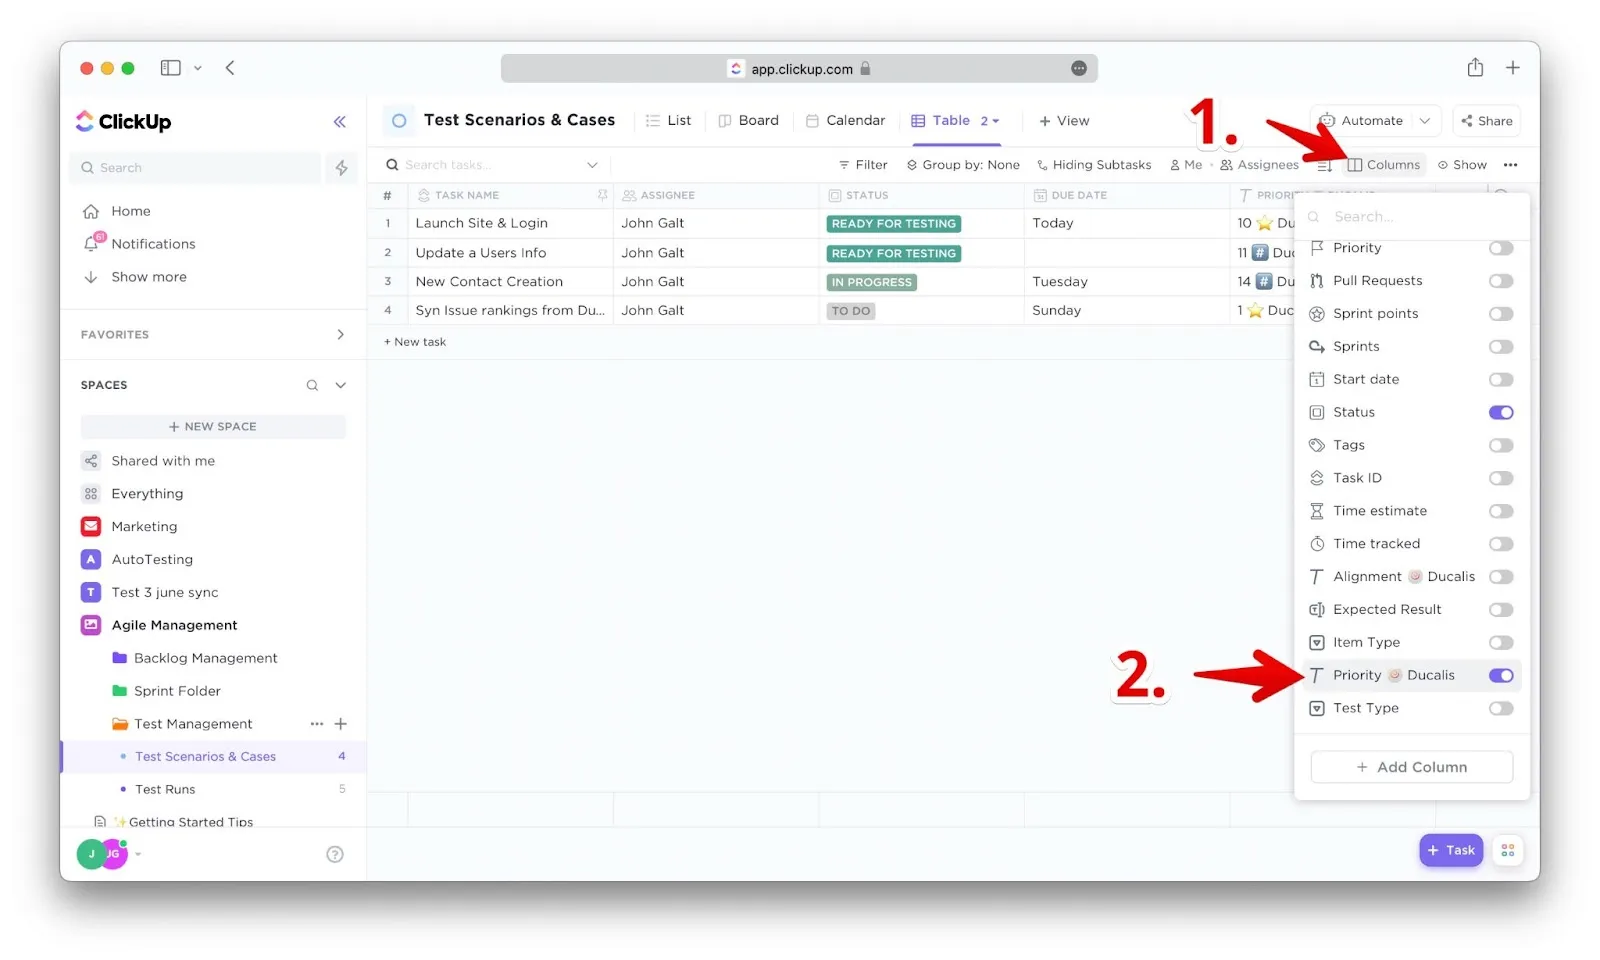
-
Click the Sort icon in the field header to sort tasks by priority.