Sync Back
Sync Back sends your prioritization results to Jira Server automatically. Sync data like total scores, priority rankings, criterion scores, score statuses, and score percentages. This eliminates manual switching between Ducalis and Jira Server when viewing priorities.
You must import Issues from Jira Server before setting up Sync Back.
This guide covers four steps to set up Sync Back:
- Choose fields to sync
- Create custom fields in Jira Server
- Add custom fields to the Jira board
- Activate Sync Back
Step 1: Choose fields to sync
Select which Ducalis fields to sync to Jira Server.
-
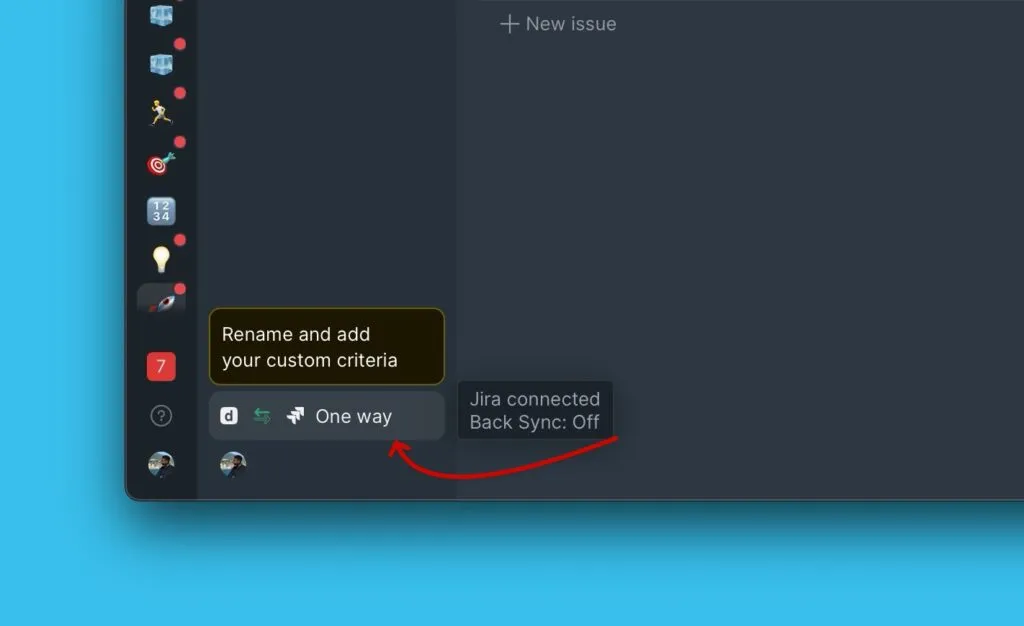
Click Sync to access Backlog Management settings.

-
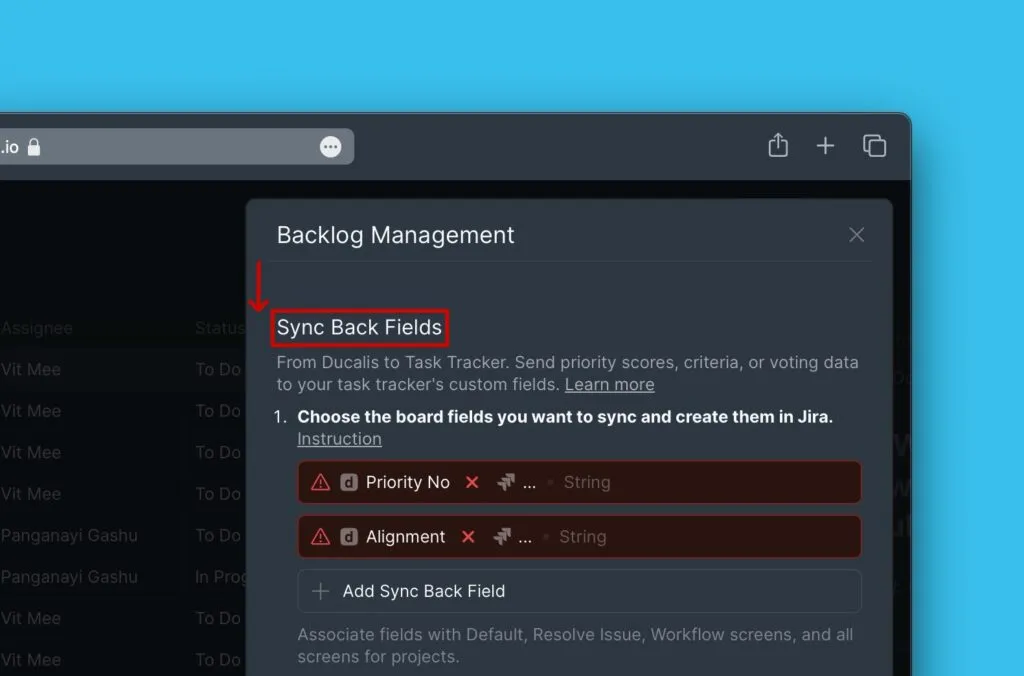
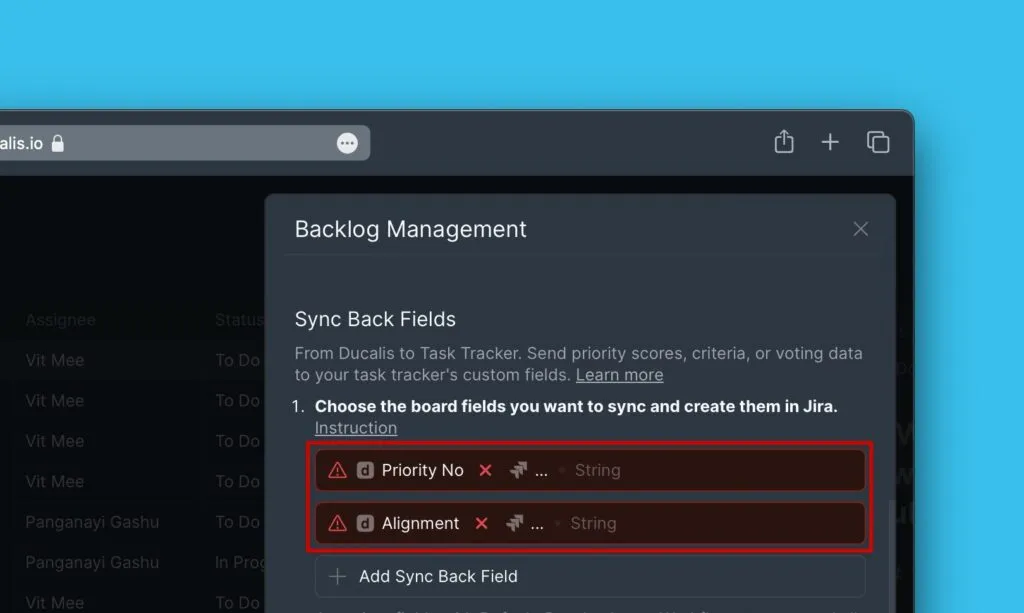
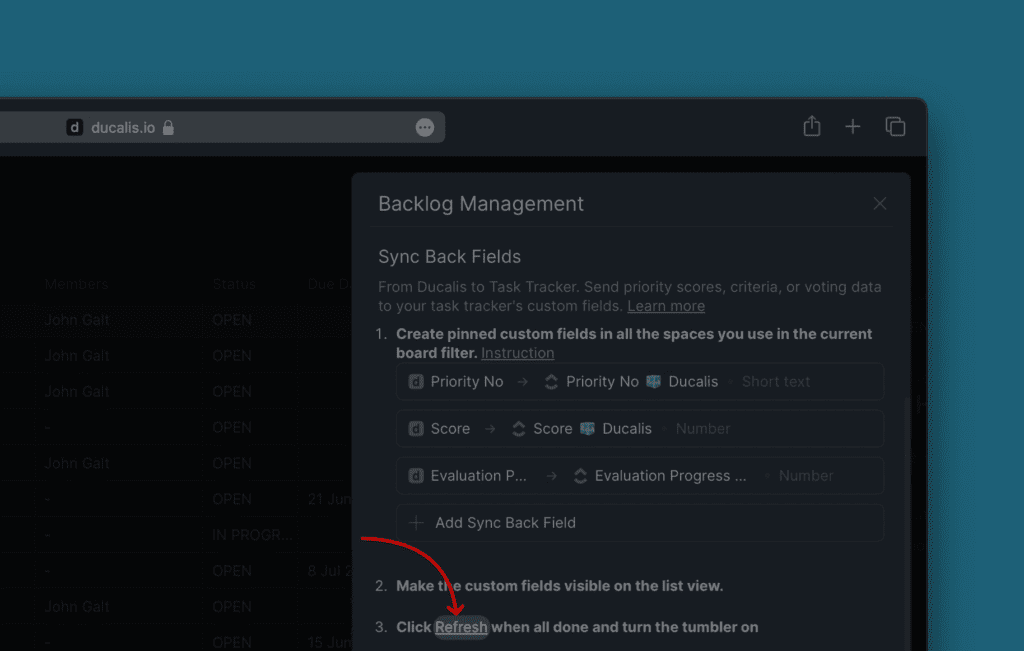
Scroll down to Sync Back Fields.
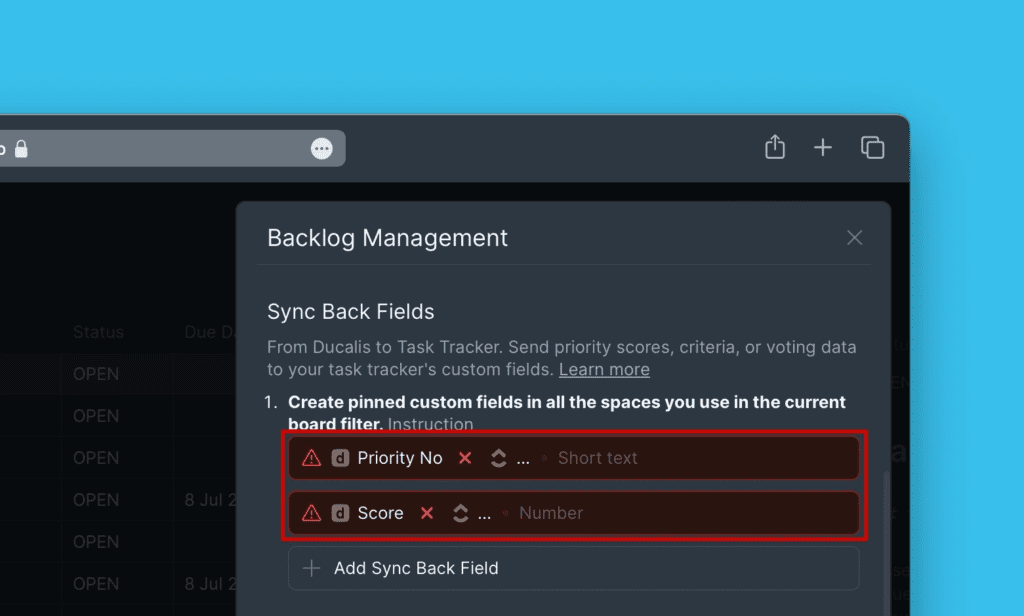
Two default fields appear: Priority {emoji} Ducalis and Alignment {emoji} Ducalis.
-
(Optional) Delete default fields if you don't need them.

-
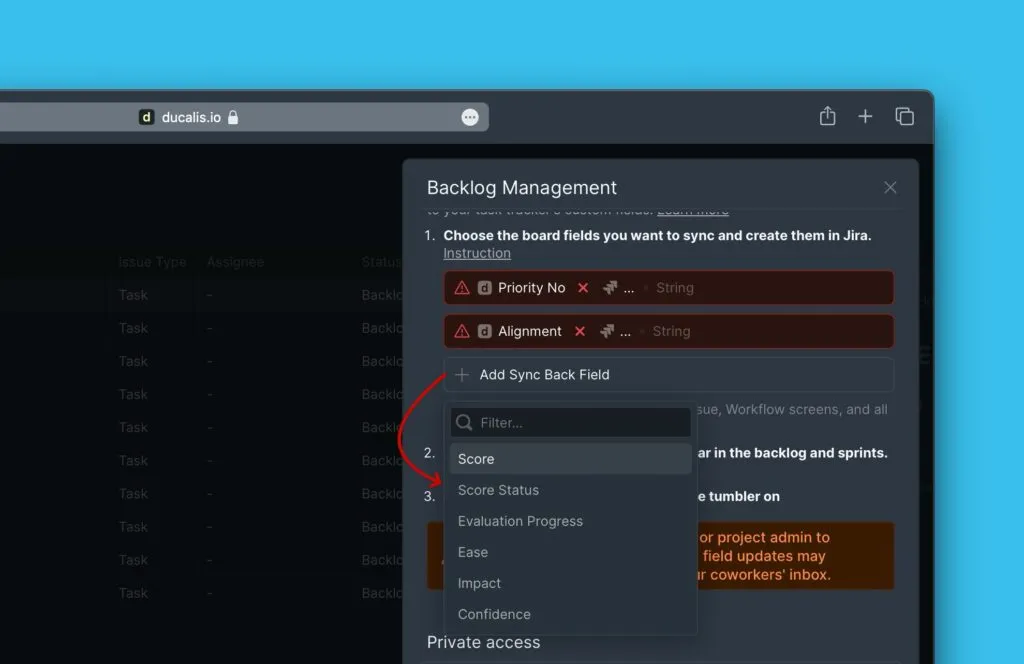
Click Add Fields to add more fields.

After selecting fields to sync, continue to Step 2 to create corresponding custom fields in Jira Server.
Step 2: Create custom fields in Jira Server
Create Jira Server custom fields to receive data from Ducalis. You have two options:
- Map to existing fields – Use custom fields you already have in Jira Server
- Create new fields – Create new custom fields specifically for Ducalis data
Map to existing fields
If you have existing custom fields in Jira Server, map Ducalis fields to them without creating new fields.
-
Go to Backlog Management settings.
-
Scroll down to Sync Back Fields.
-
(Optional) Keep the default Ducalis fields or delete them.
-
(Optional) Add another Ducalis field if the one you want to sync isn't listed.
-
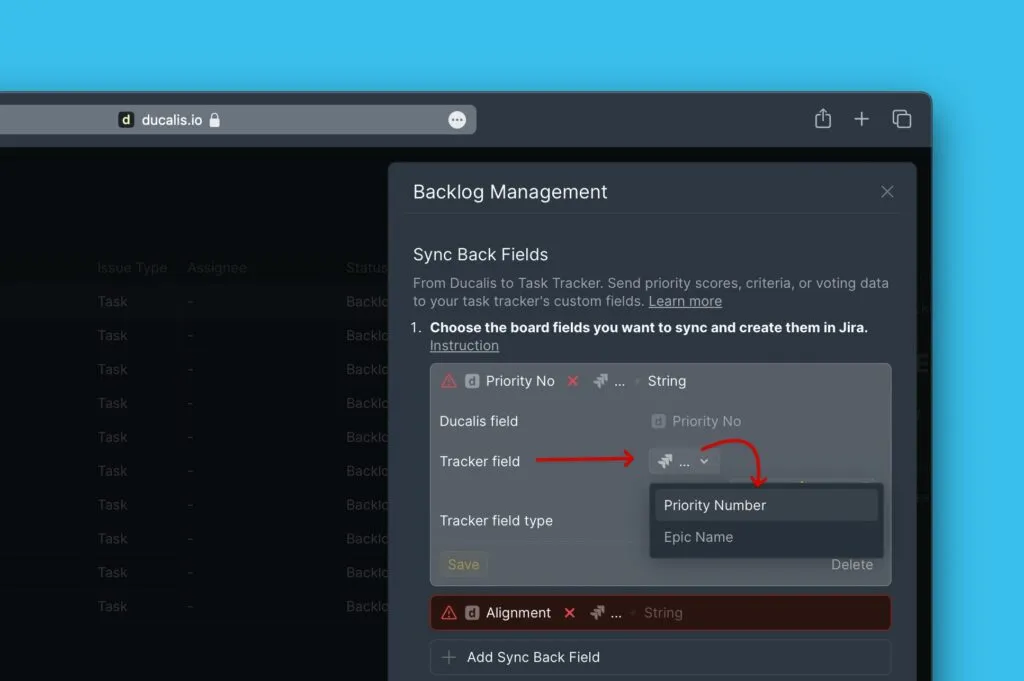
Next to Tracker Field, click the dropdown and select the Jira Server field to map.
-
Click Save.
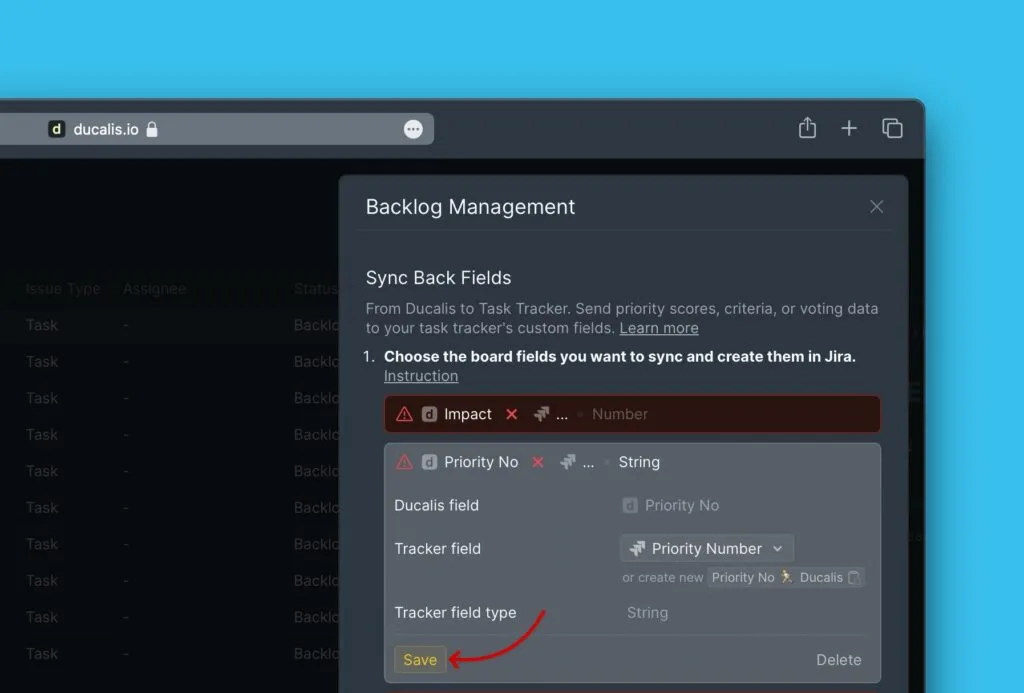
Each Sync Back will send data from the Ducalis field to the mapped Jira Server field.
Create new fields
Create new custom fields in Jira Server specifically for Ducalis data.
-
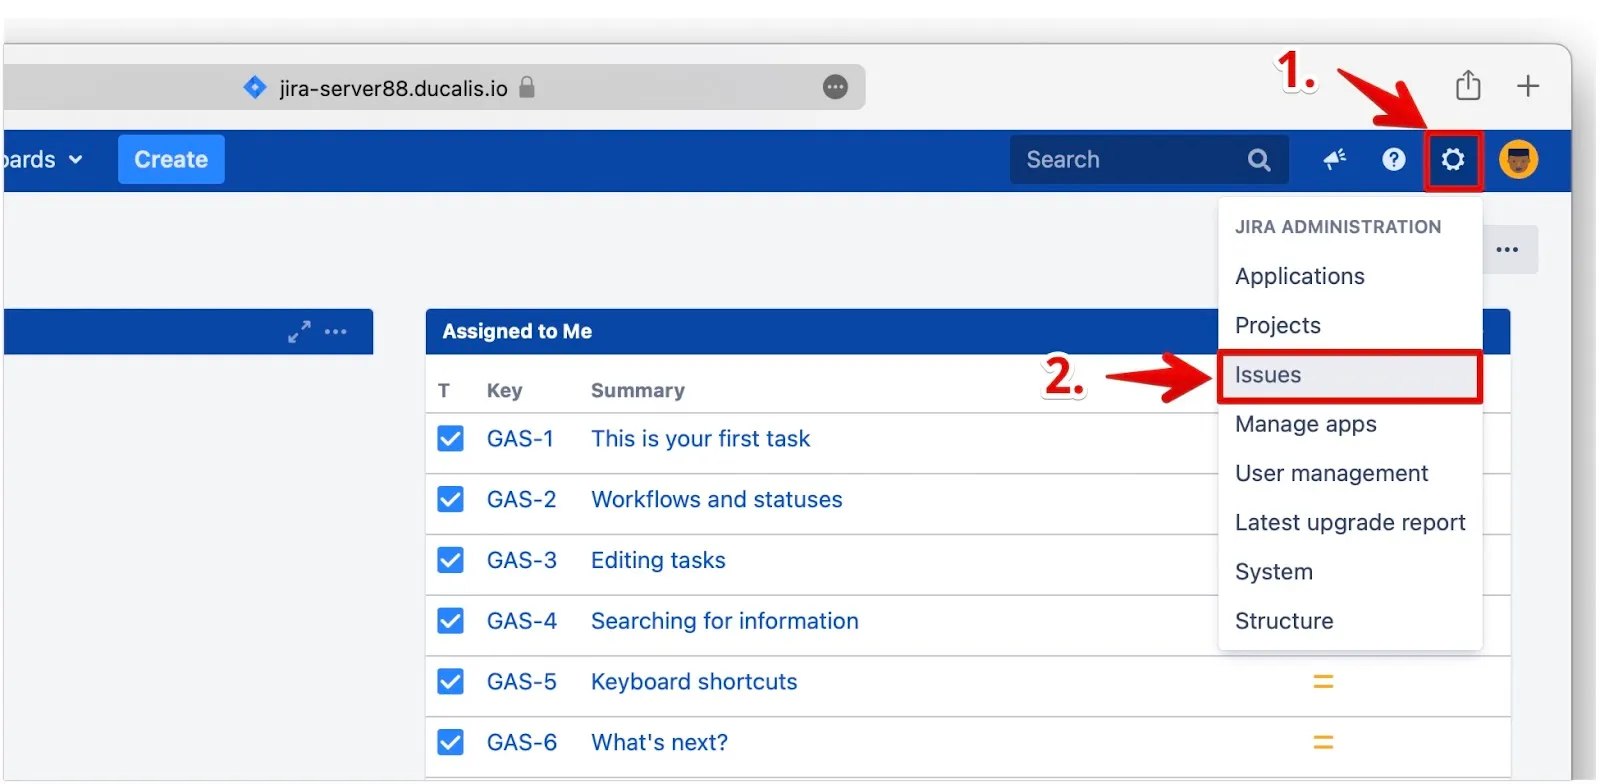
In Jira Server, go to Jira Administration.
-
Click Issues from the dropdown menu.
-
In the left sidebar, under Fields, click Custom Fields.
-
Click Add custom field.

-
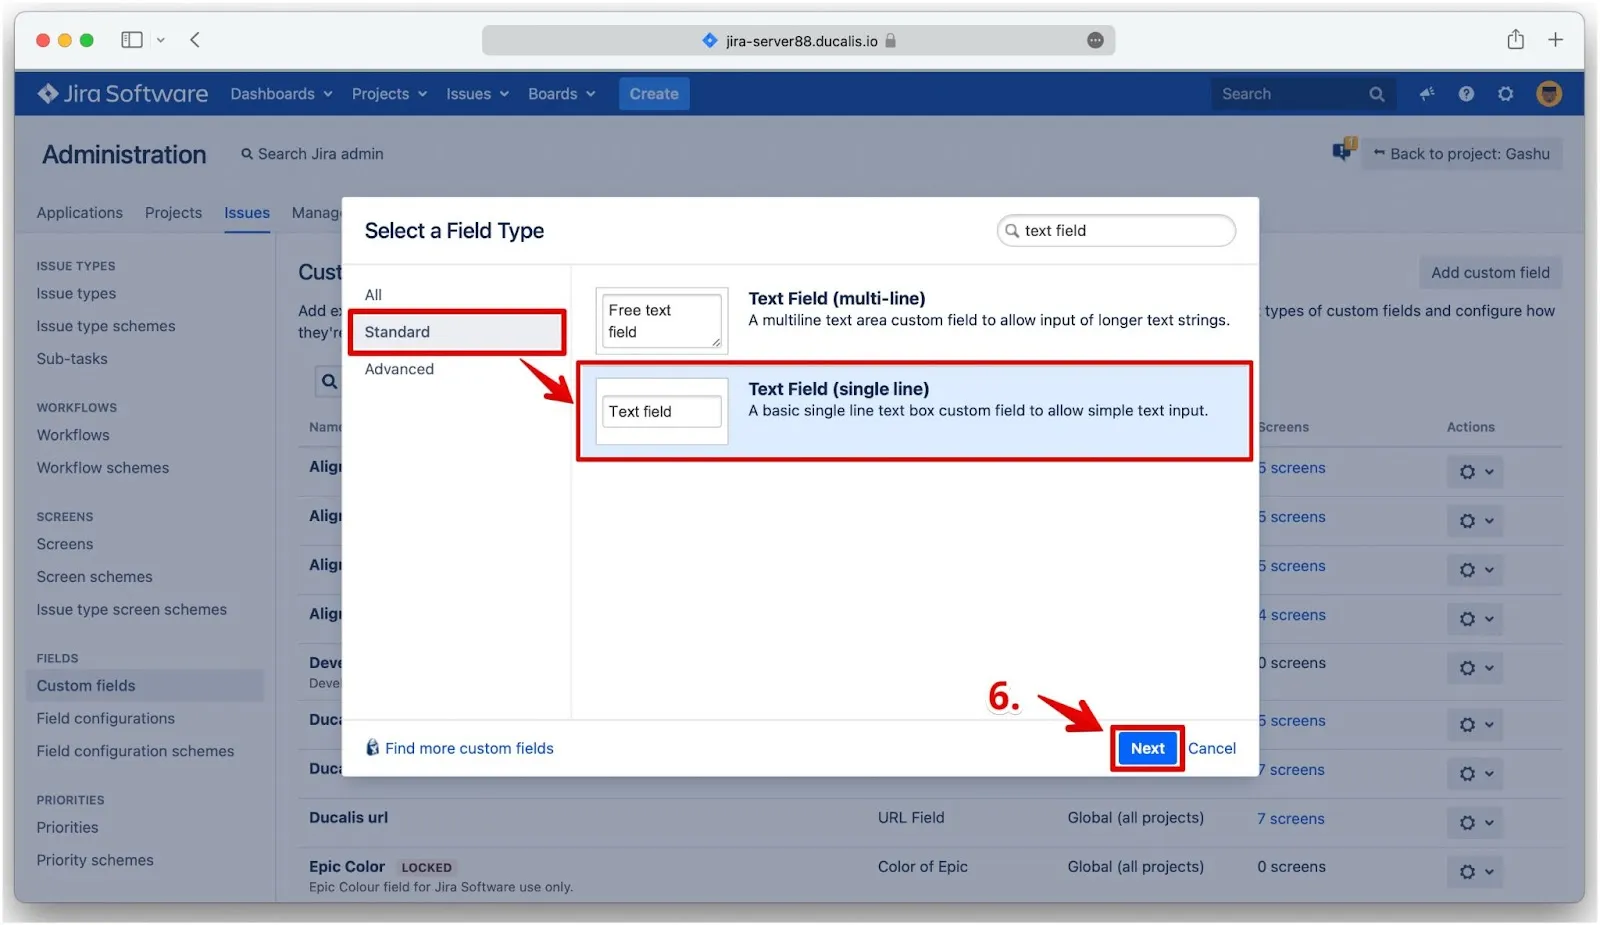
Select the field type that matches the Ducalis field type:
- Ducalis field type 'String' → Select Text field (single line) (in Standard section)
- Ducalis field type 'Number' → Select Number field
-
Click Next.
-
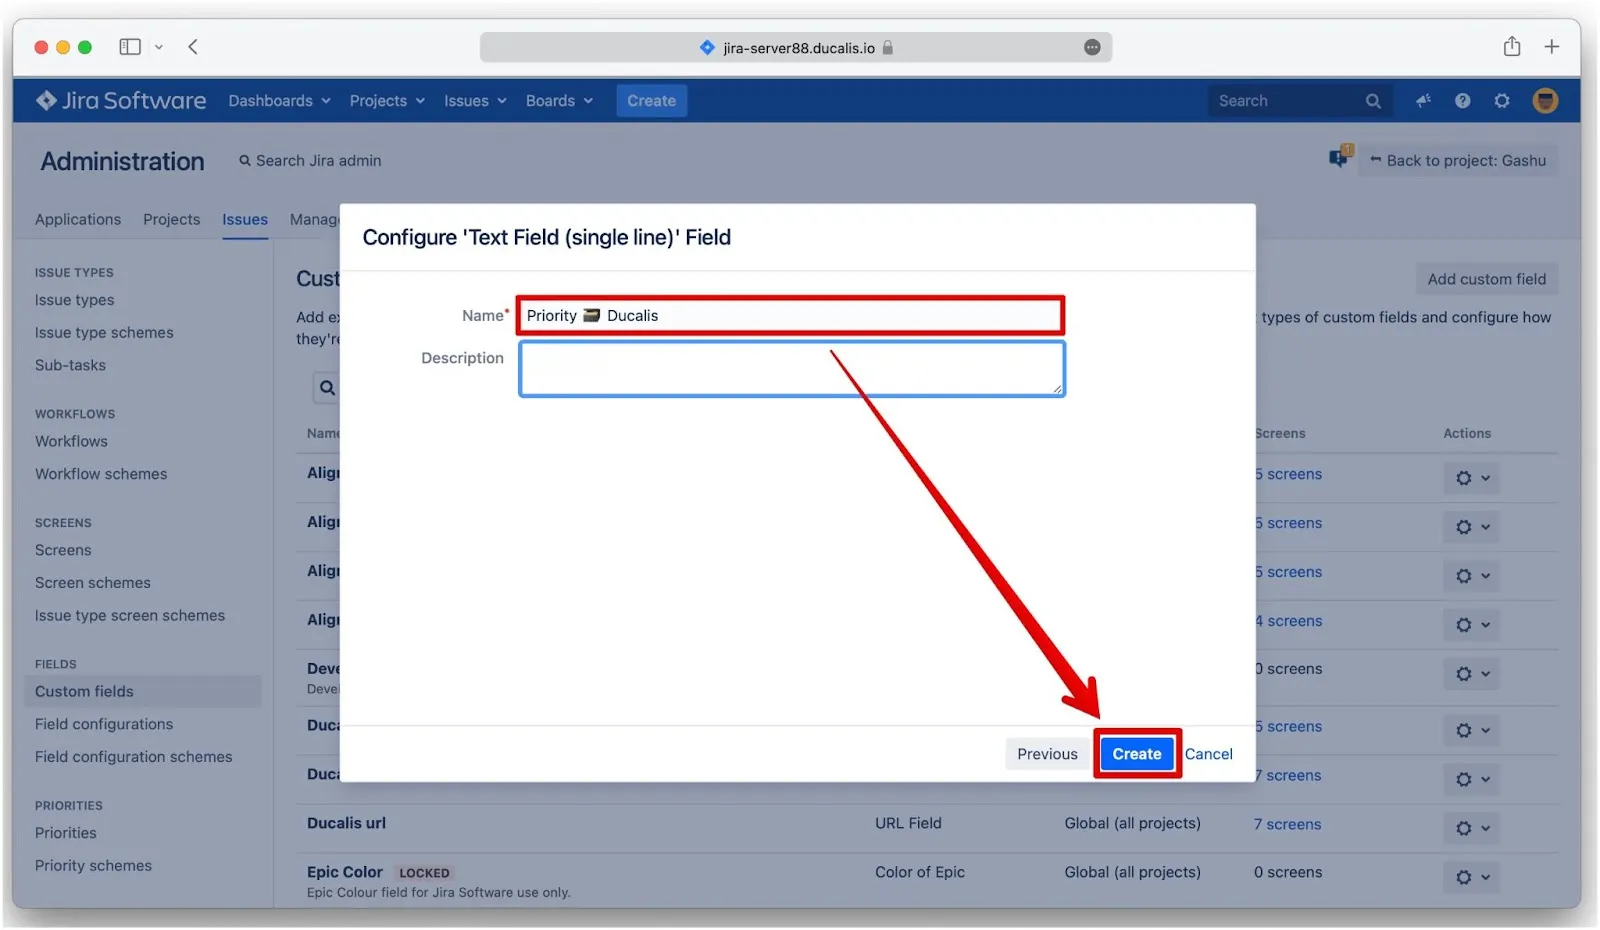
Configure the field name:
-
In Ducalis, copy the custom field name.
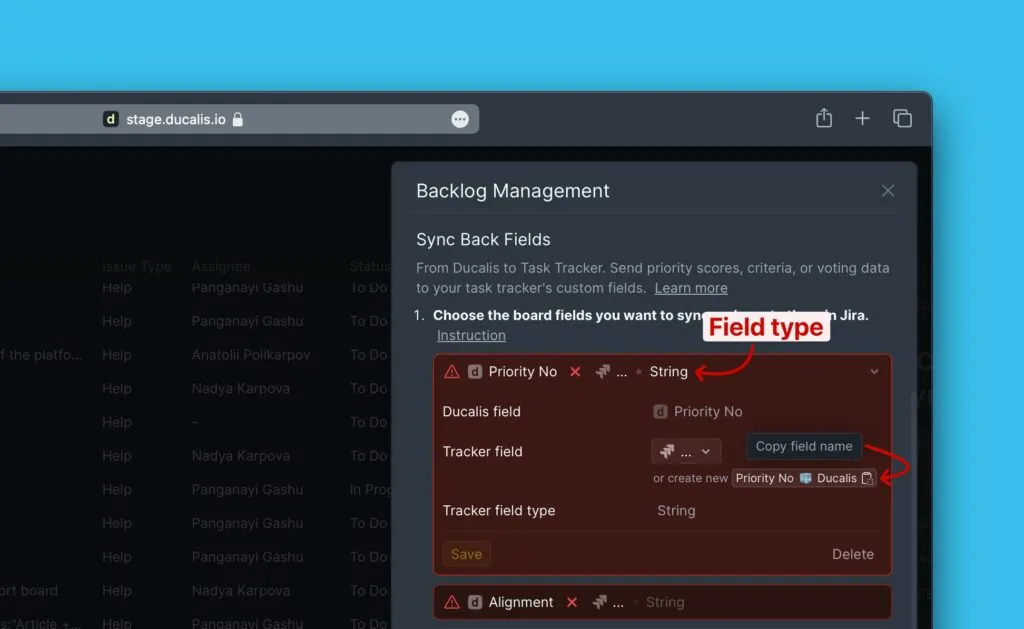
-
In Jira Server, paste the name and click Create.
-
-
Select the screens where this field will display:
-
Screens with the project key(s) you selected in Ducalis import filters
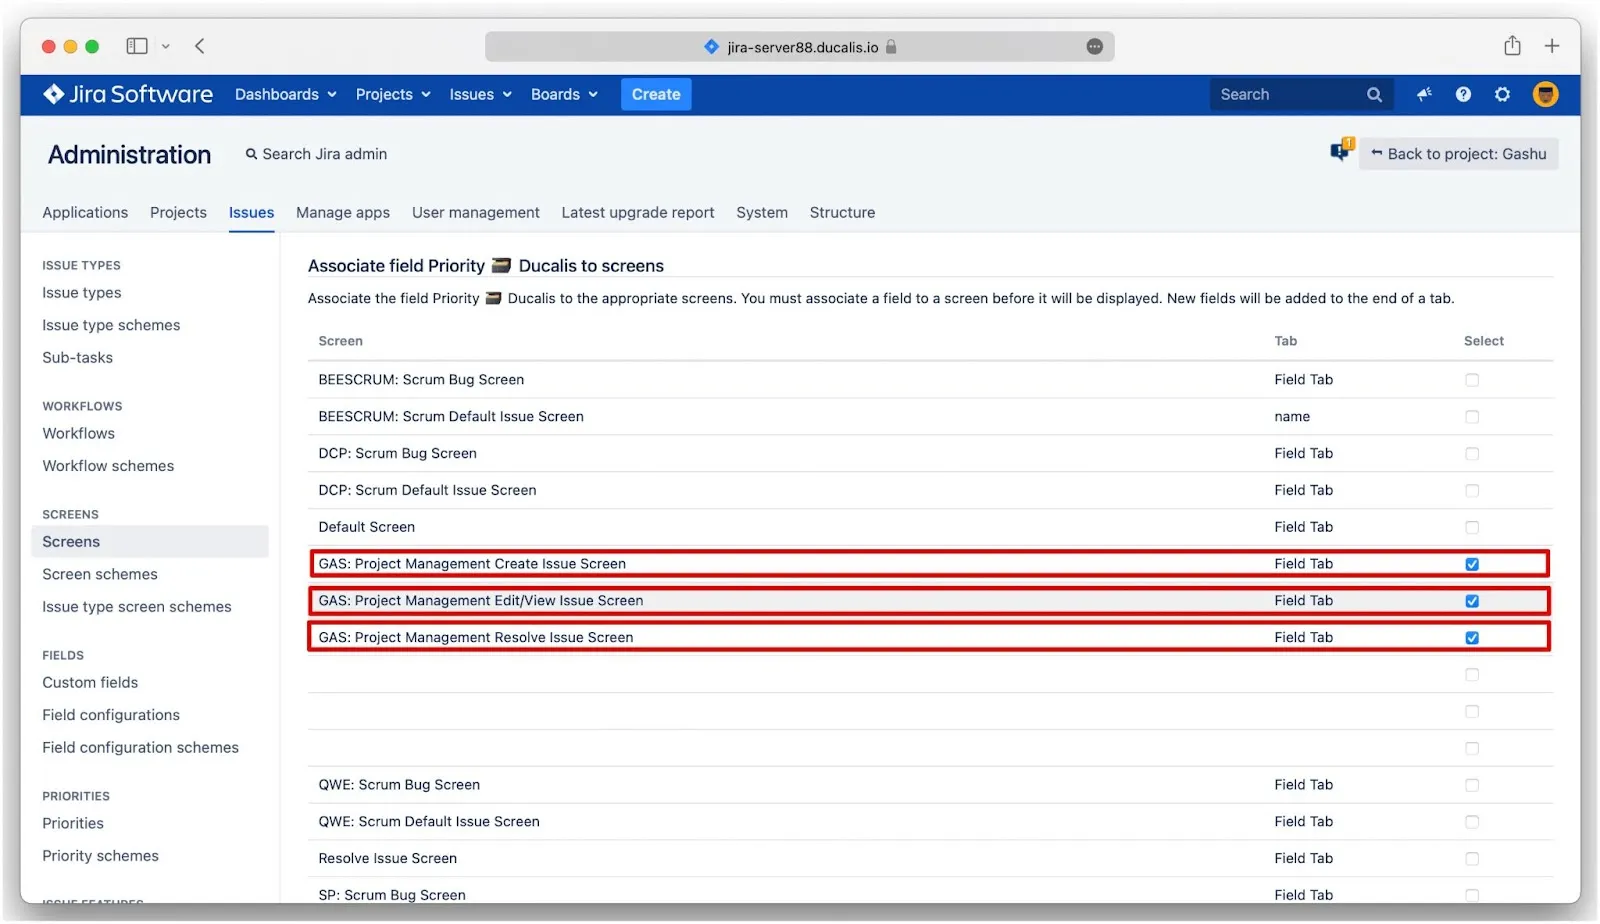
-
Default screens: Default Screen, Resolve Issue Screen, Workflow Screen
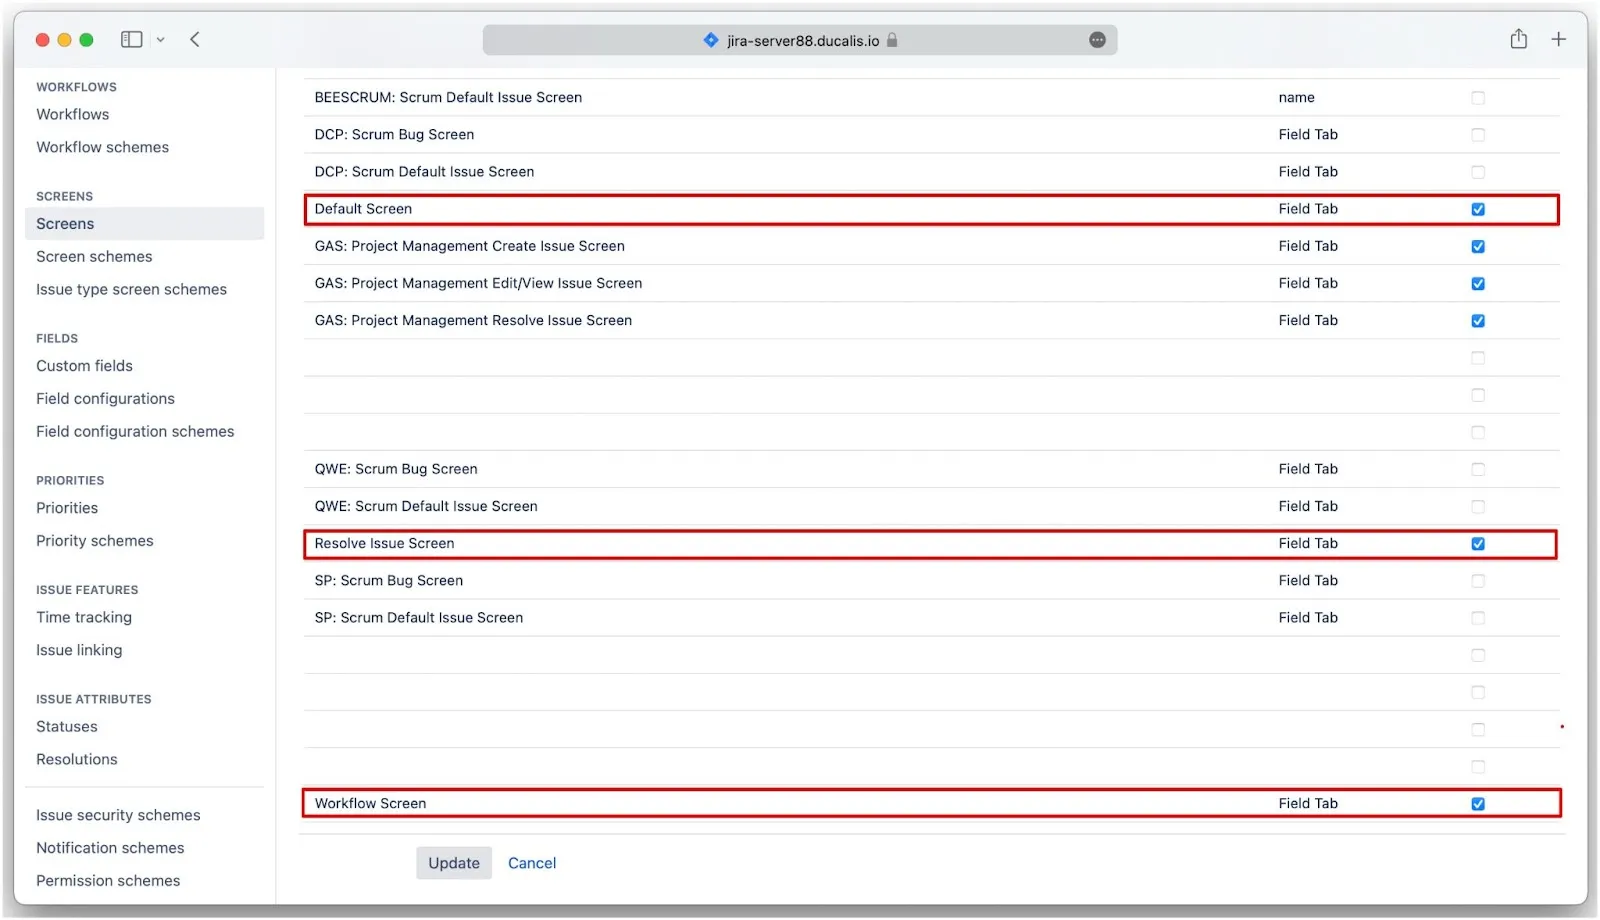
-
-
Click Update.

-
Repeat steps 1-9 for each Ducalis field you want to sync.

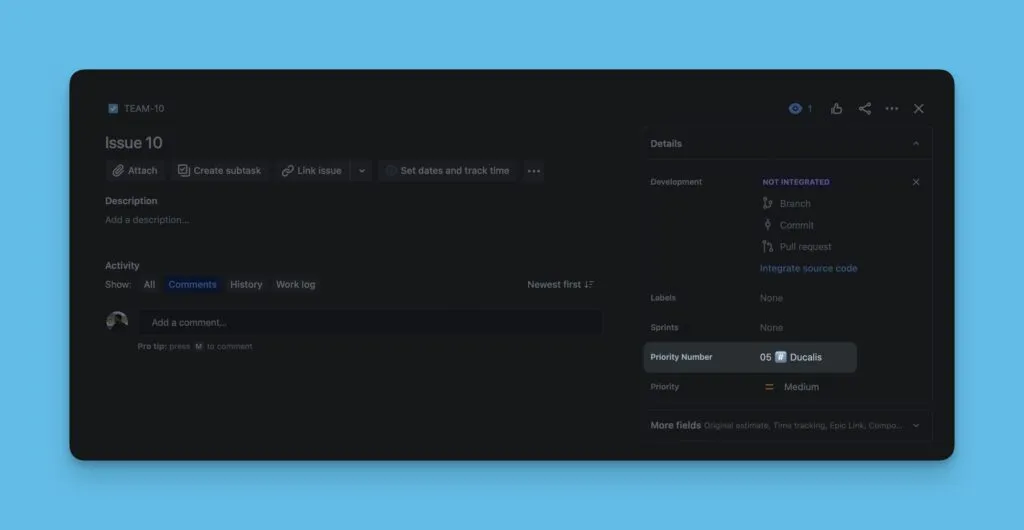
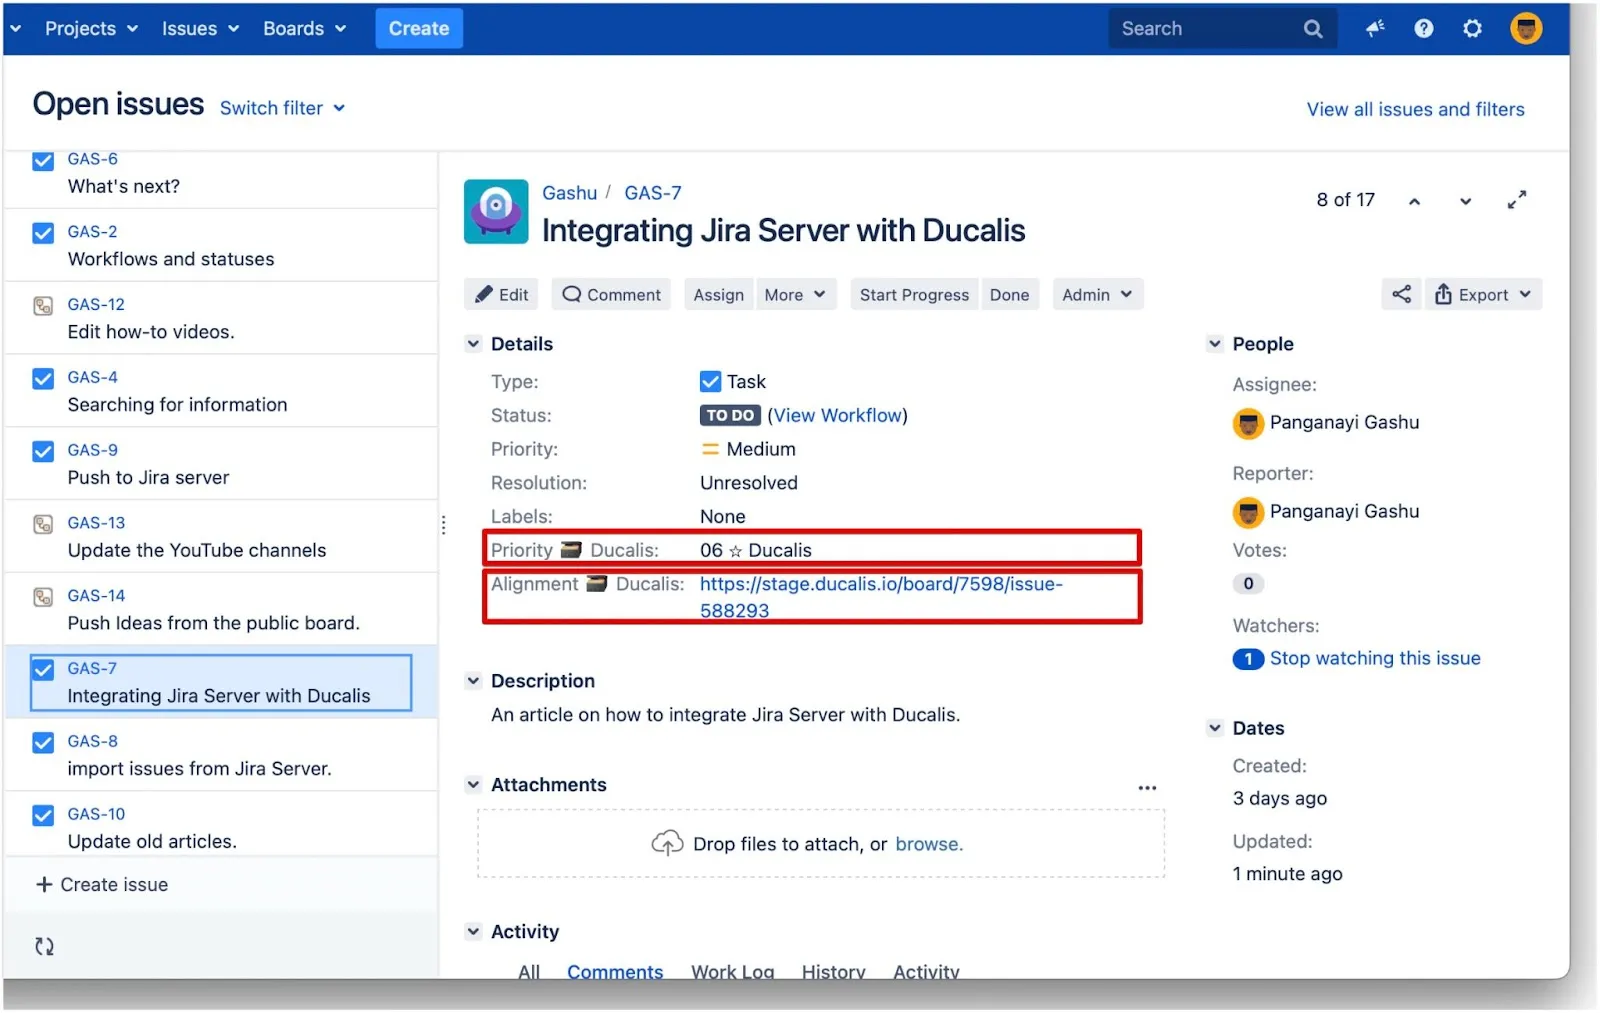
The Ducalis custom fields now appear inside Jira Server issue cards.
Step 3: Add custom fields to the Jira board
This step applies only to company-managed projects. Skip this step if you use team-managed projects.
Add Ducalis custom fields to your Jira board so they appear in the backlog view and active sprint view. This also lets you sort issues by priority ranking.
Step 4: Activate Sync Back
After creating custom fields in Jira Server and adding them to the board, activate Sync Back.
-
Click Refresh after completing steps 1-3.
-
Toggle Activate Sync Back to on.

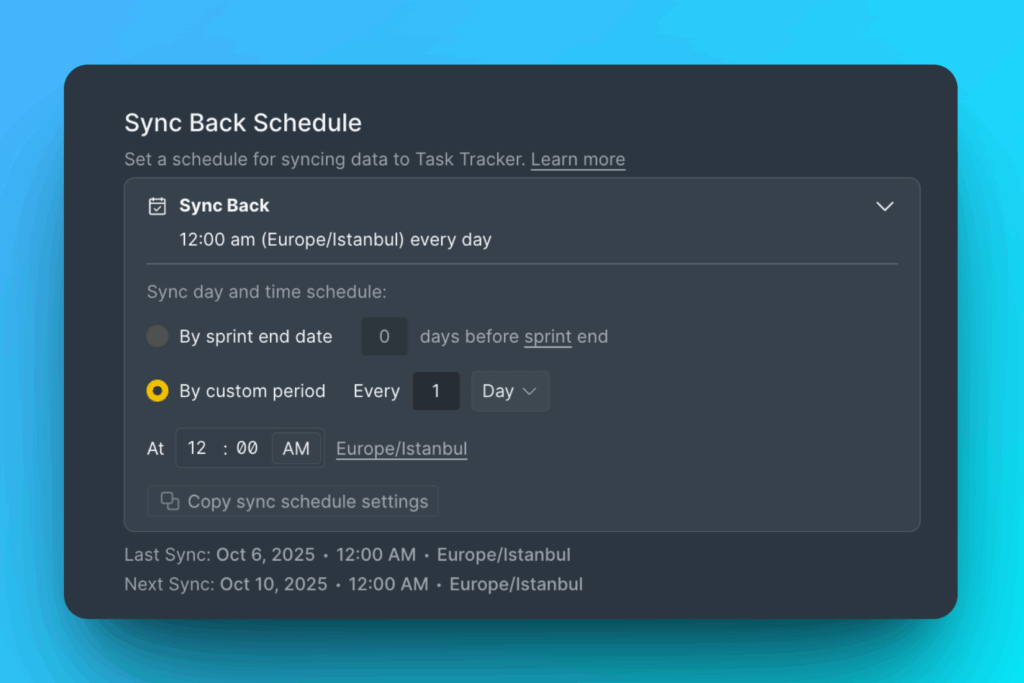
Sync Back schedule
Choose when to sync priority rankings to Jira Server. Two schedule options:
- By sprint end date – Syncs automatically when the sprint ends
- By custom period – Syncs at a specific day and time you set
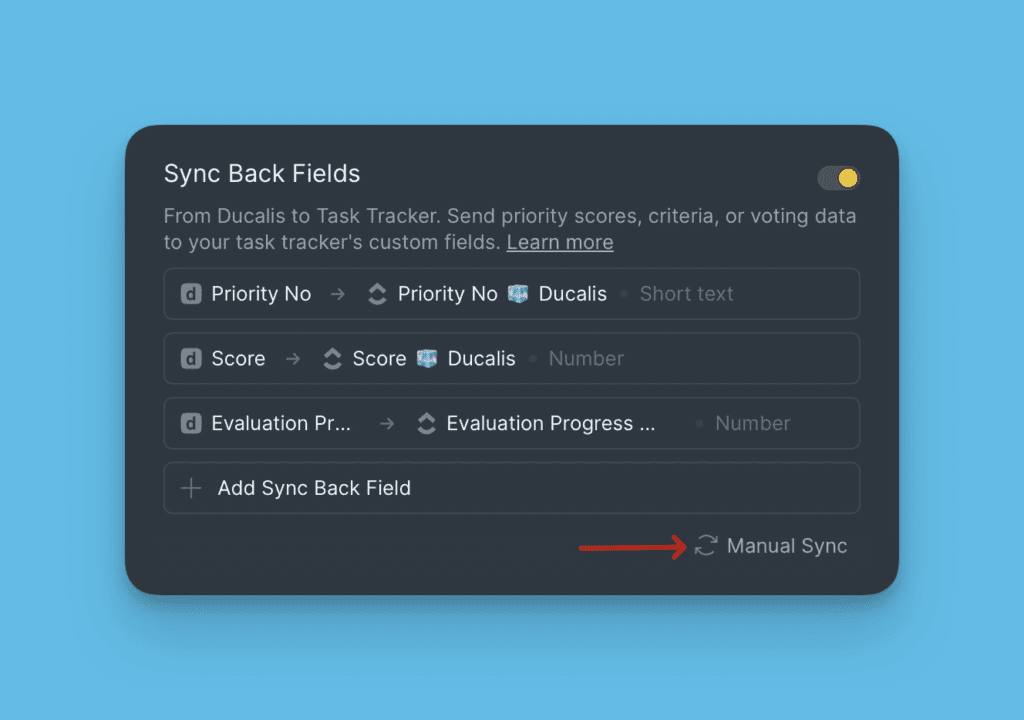
To sync immediately, click Manual Sync with Jira.
After activating Sync Back, you can't add more fields. To add fields, deactivate sync first, add the fields, then reactivate sync.
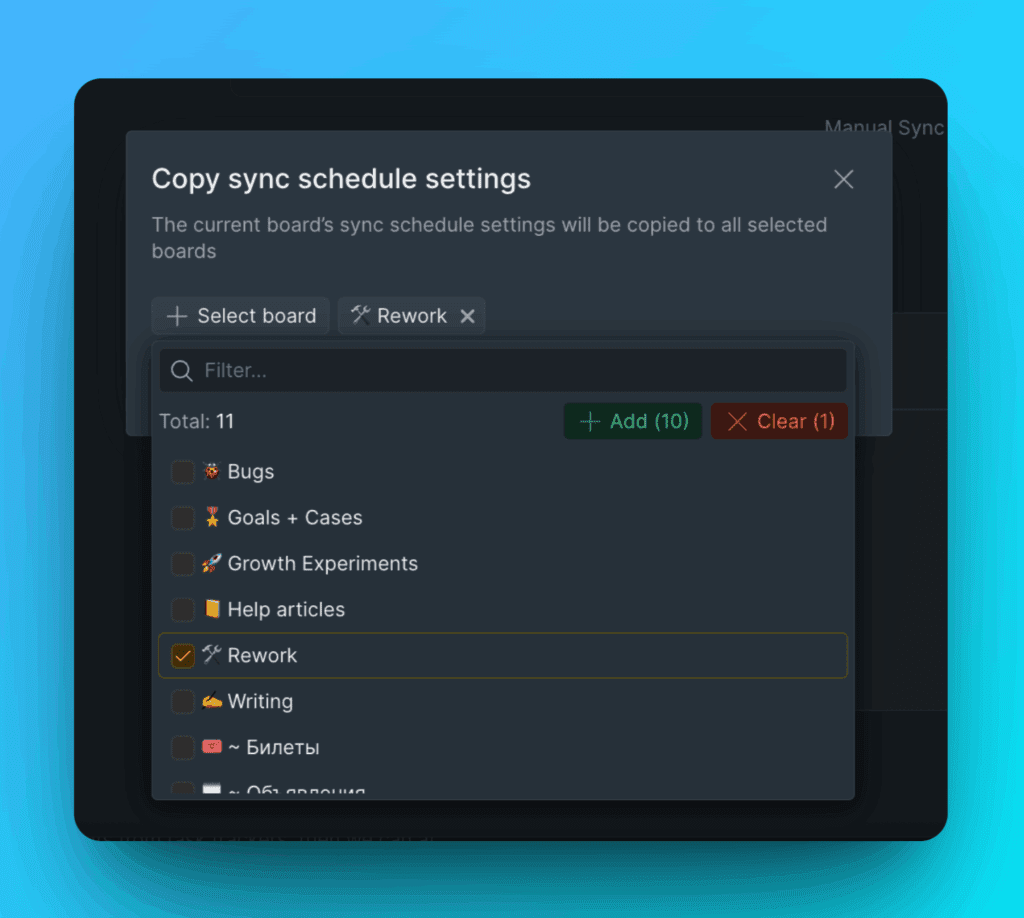
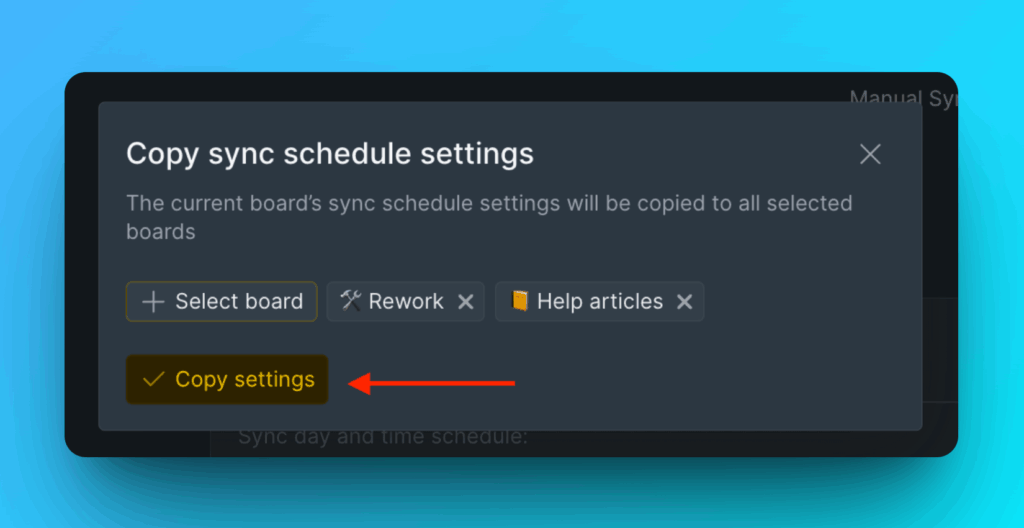
Copy Sync Back schedule settings
Copy Sync Back schedule settings to other boards in bulk.
-
Click Copy sync schedule settings.

-
Select the boards to copy settings to.
-
Click Copy Settings.
What's next
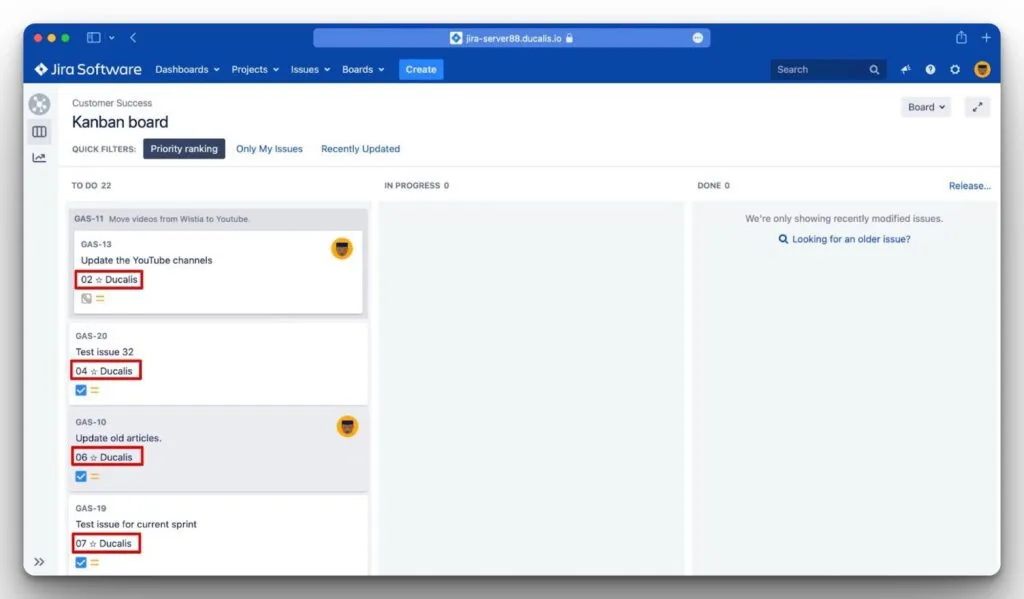
After setting up Sync Back, you can sort issues in your Jira Server backlog by priority ranking from Ducalis.
Learn how to sort issues by priority ranking.