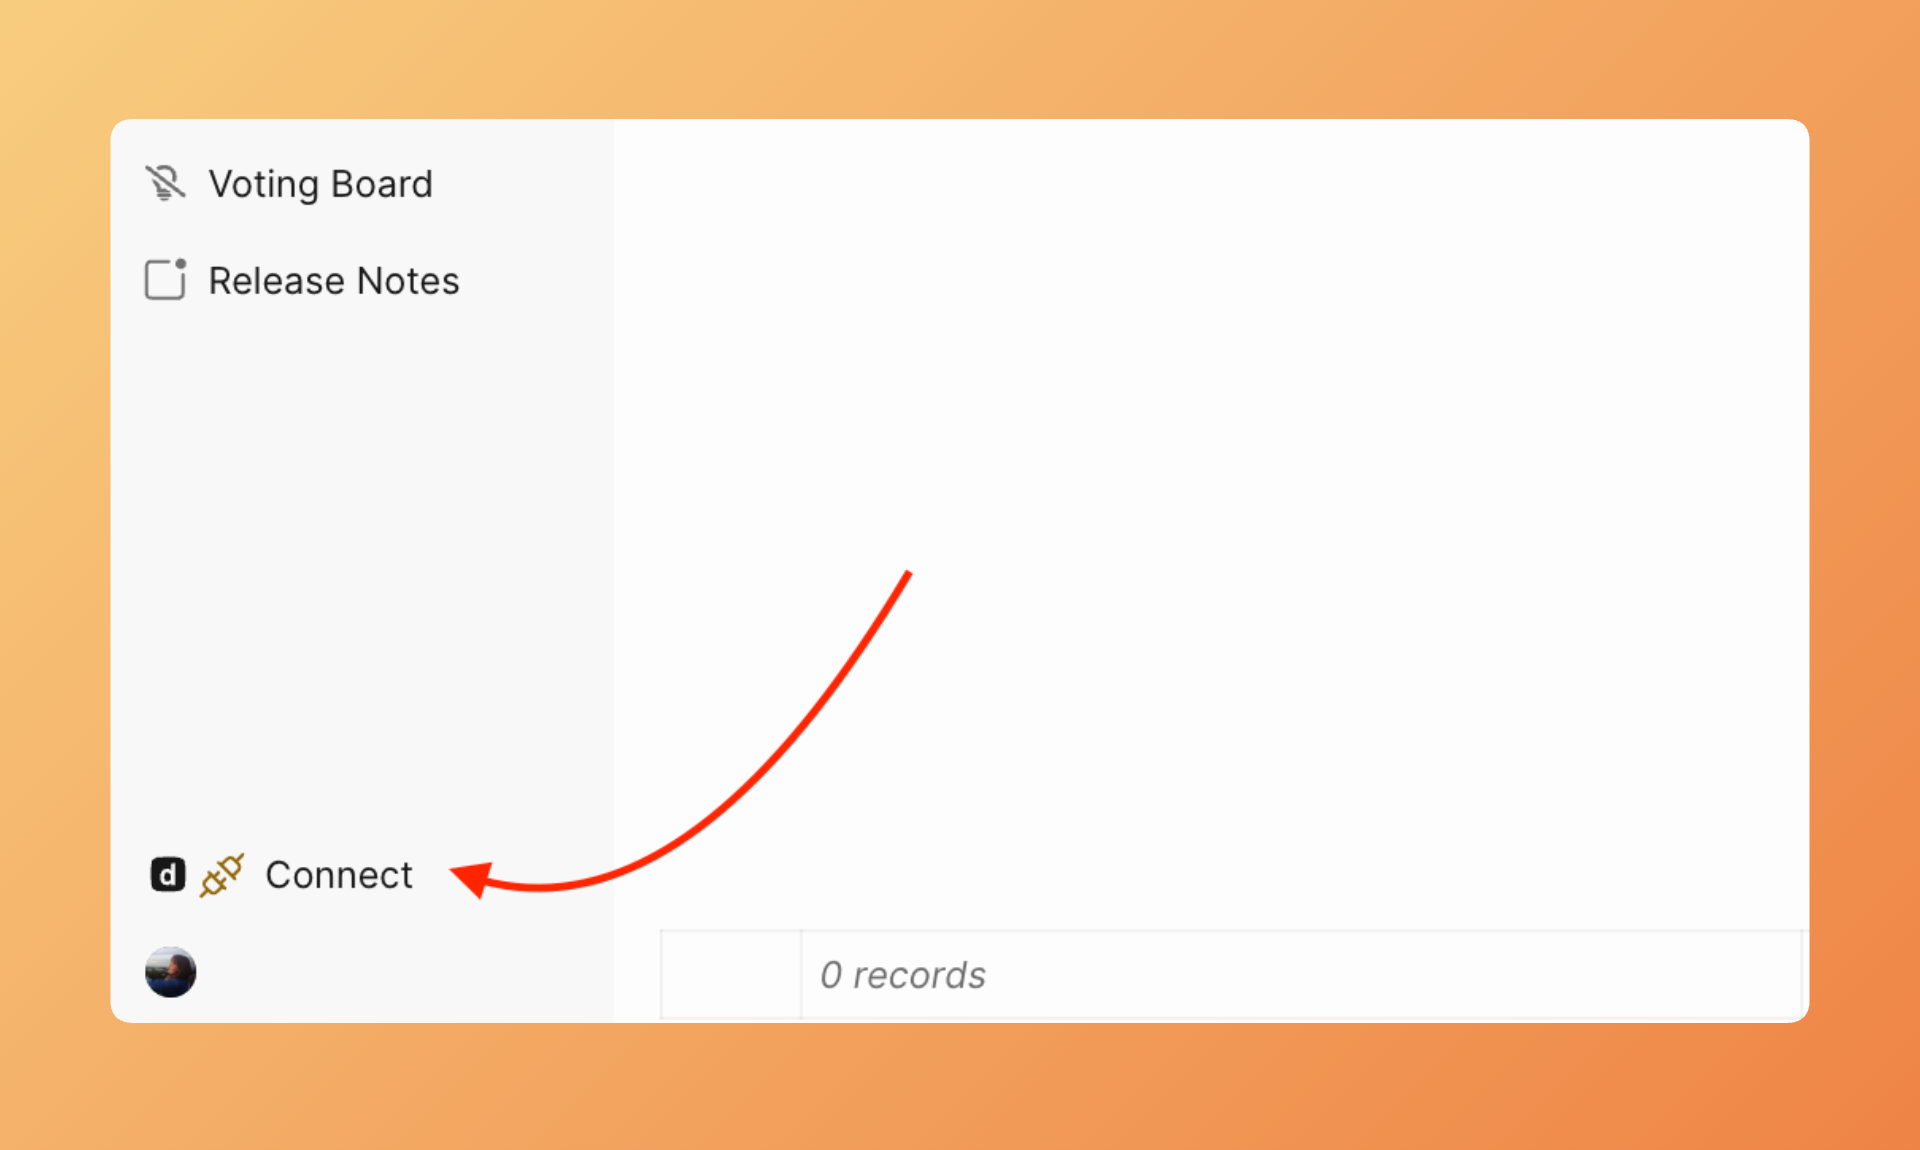
Connect
Connect Yandex.Tracker to Ducalis to import issues from your queues for prioritization. Once connected, data syncs continuously between both systems.
Before you start
Yandex.Tracker can be used with two different Yandex platforms. Before connecting, determine which one your organization uses:
- Yandex.360 for Business — Your organization and users are managed through Yandex.360
- Yandex.Cloud — Your tracker runs on Yandex Cloud infrastructure
The connection process is the same for both, but you'll need to select the correct option during setup.
Connect Yandex.Tracker
- Go to Sync settings by clicking the Connect button in the lower left corner of your board.
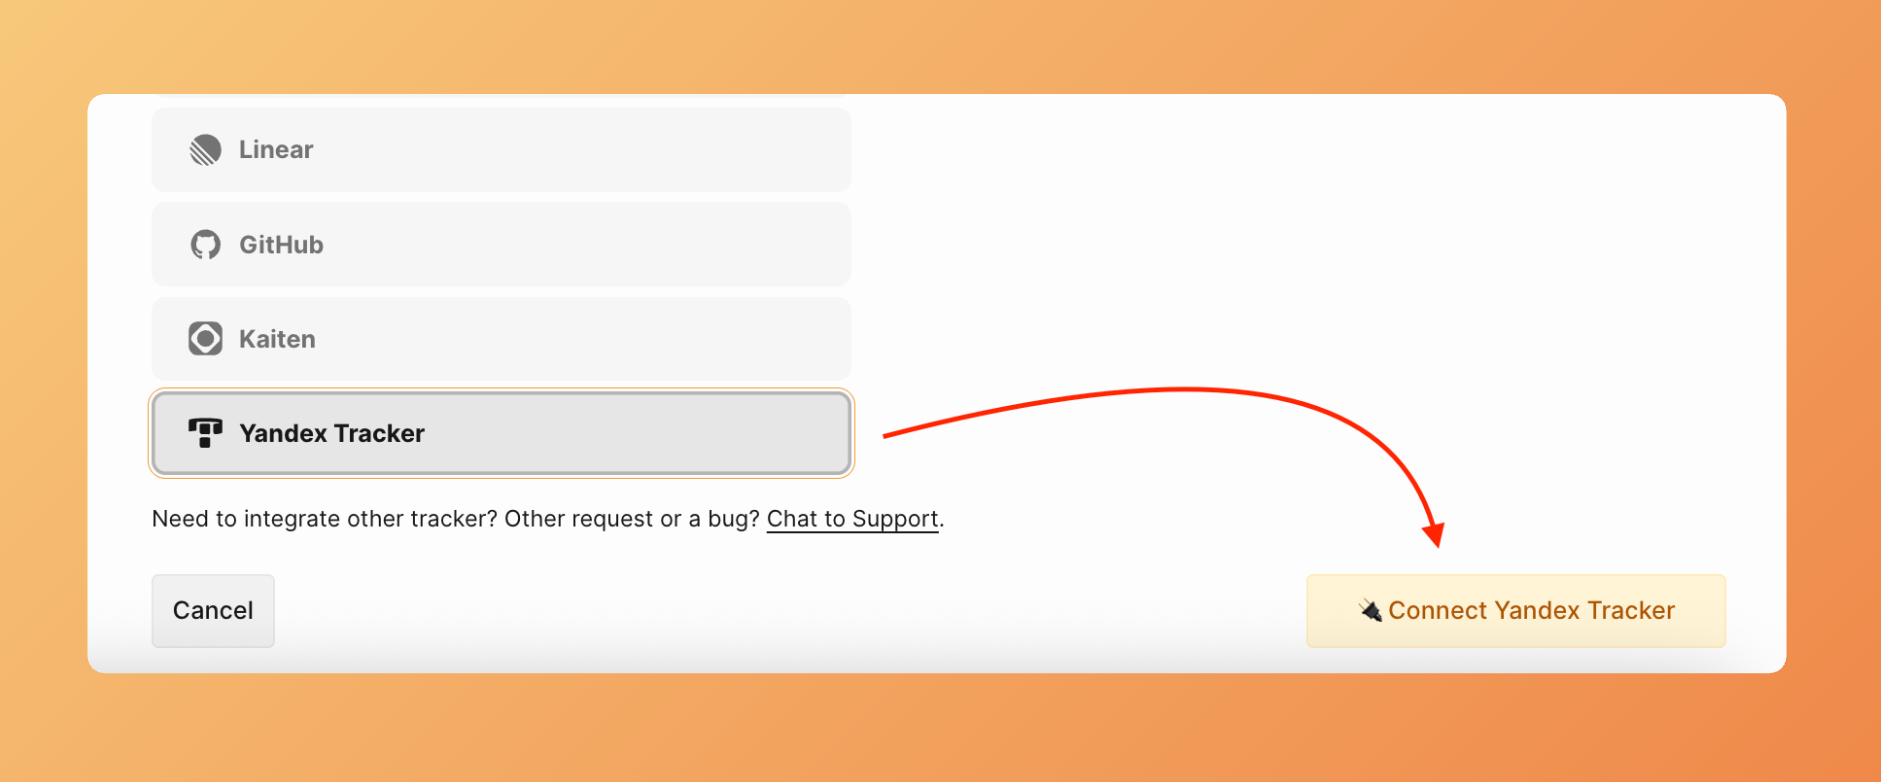
- Click Connect Issue Tracker.
- Under Source, select Yandex.Tracker from the list.

- Click Connect Yandex.Tracker.
- The connection form appears. Follow the instruction on the screen, or read it below:
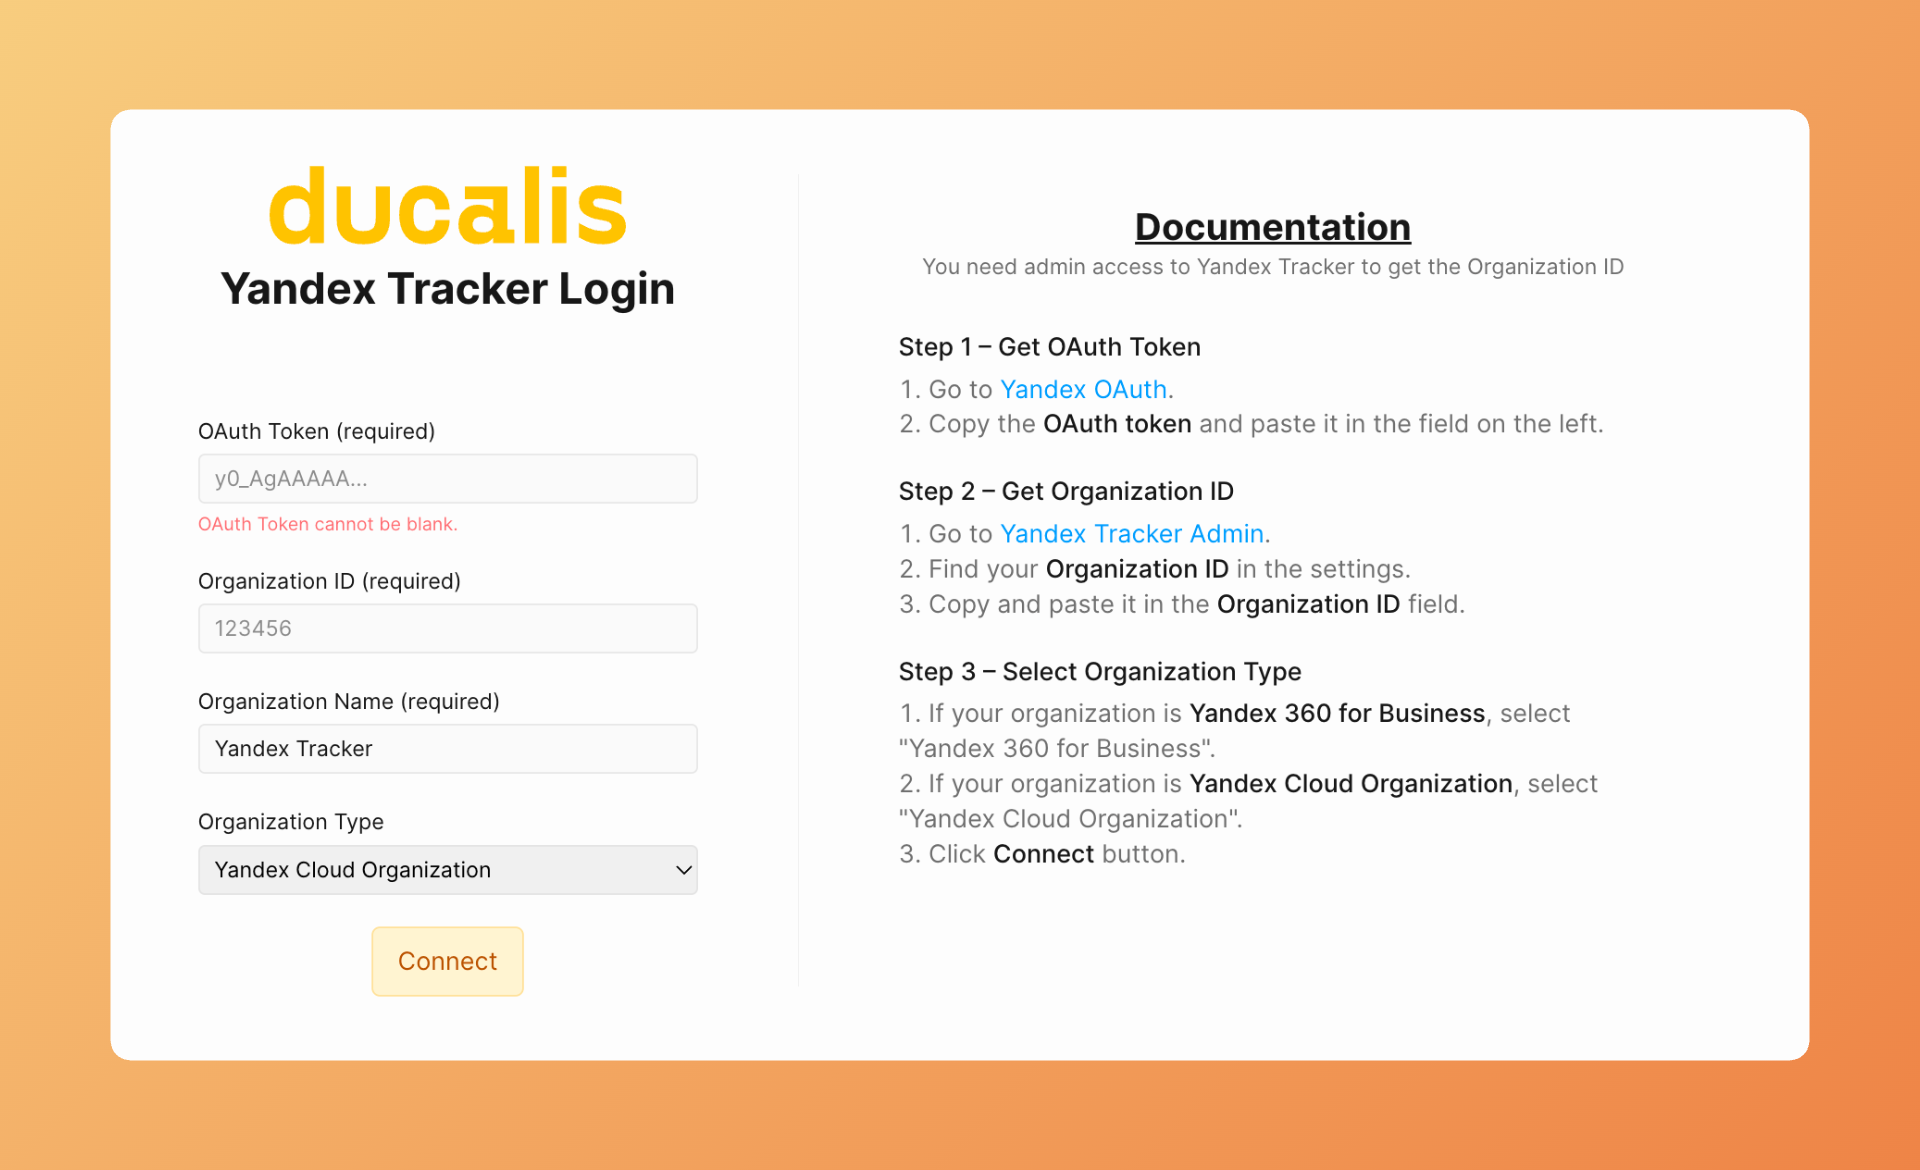
Get your OAuth token
- Click the link in the connection form to open the Yandex OAuth page.
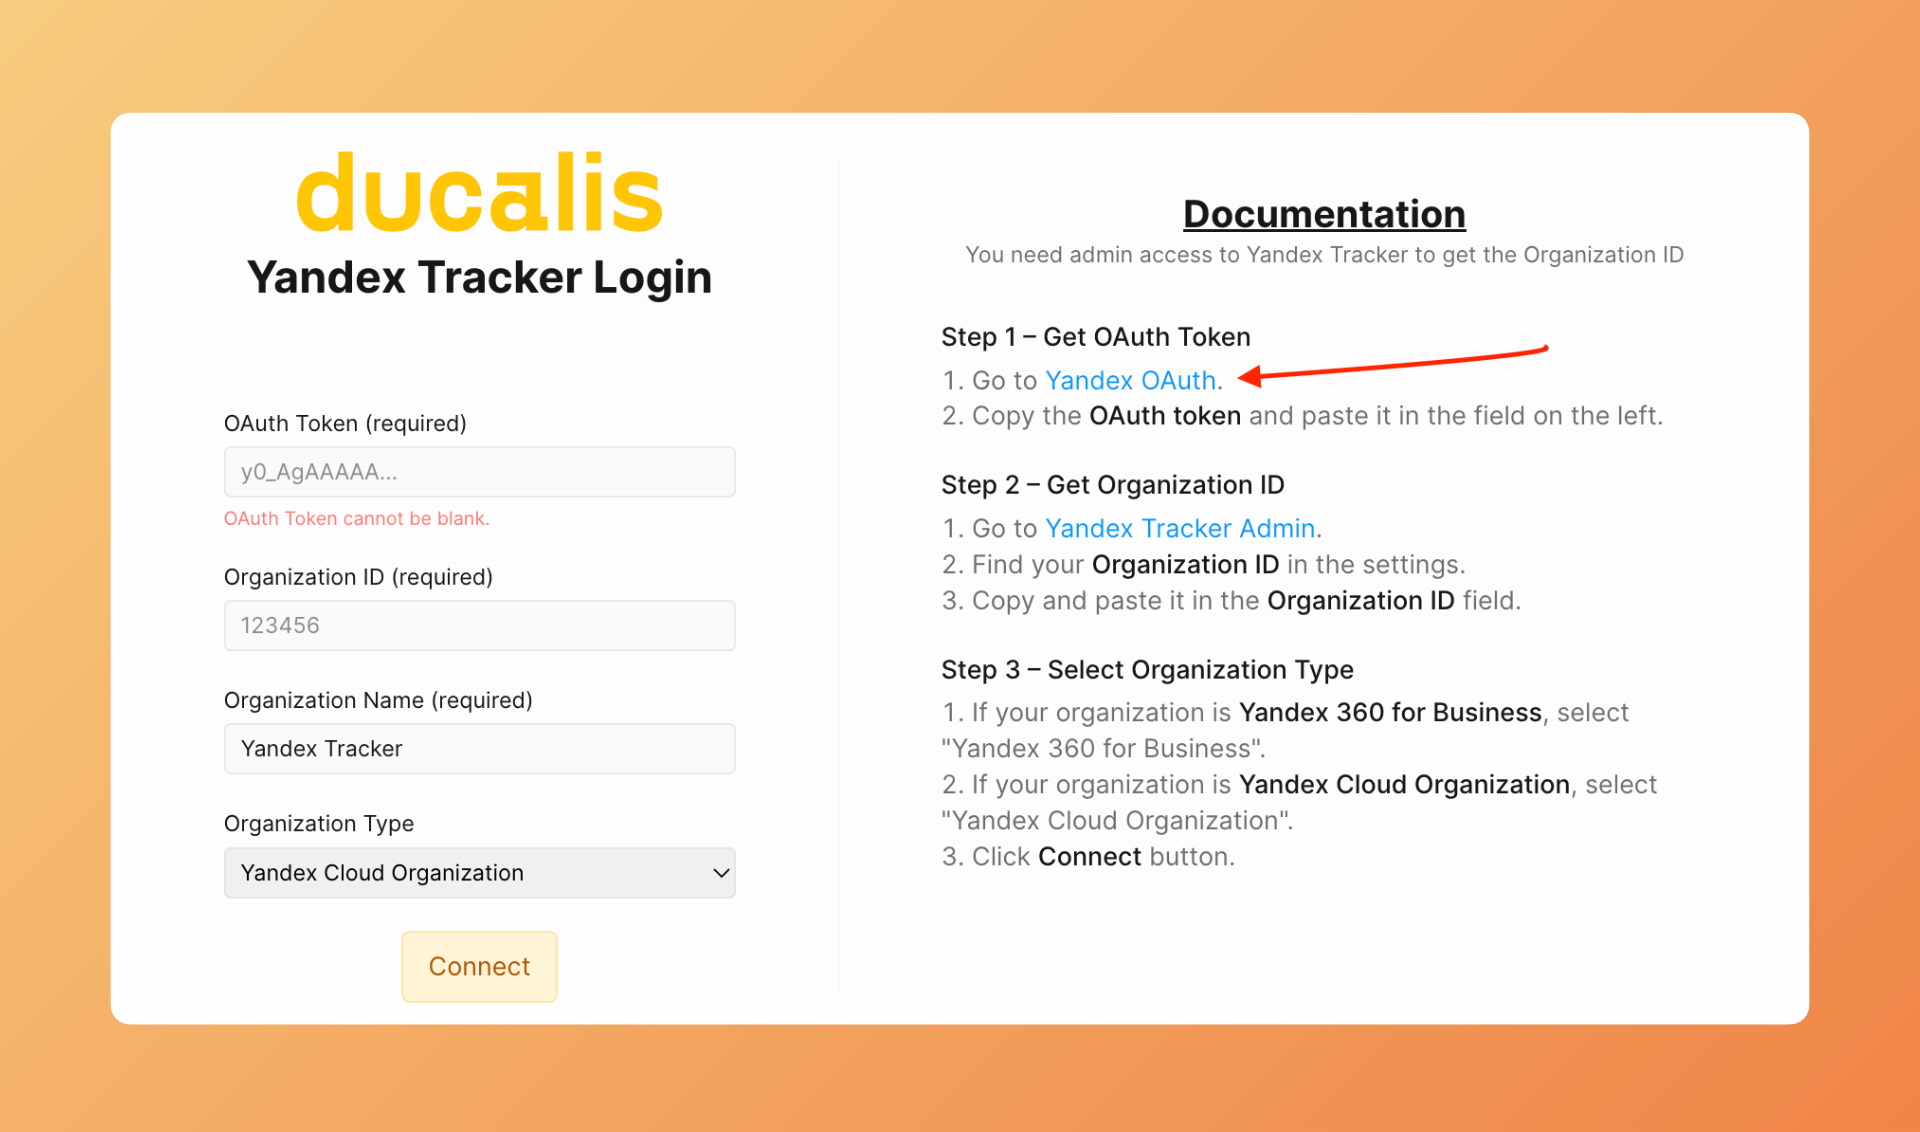
- Yandex displays your OAuth token. Copy the token.
- Return to Ducalis and paste the token into the OAuth Token field.
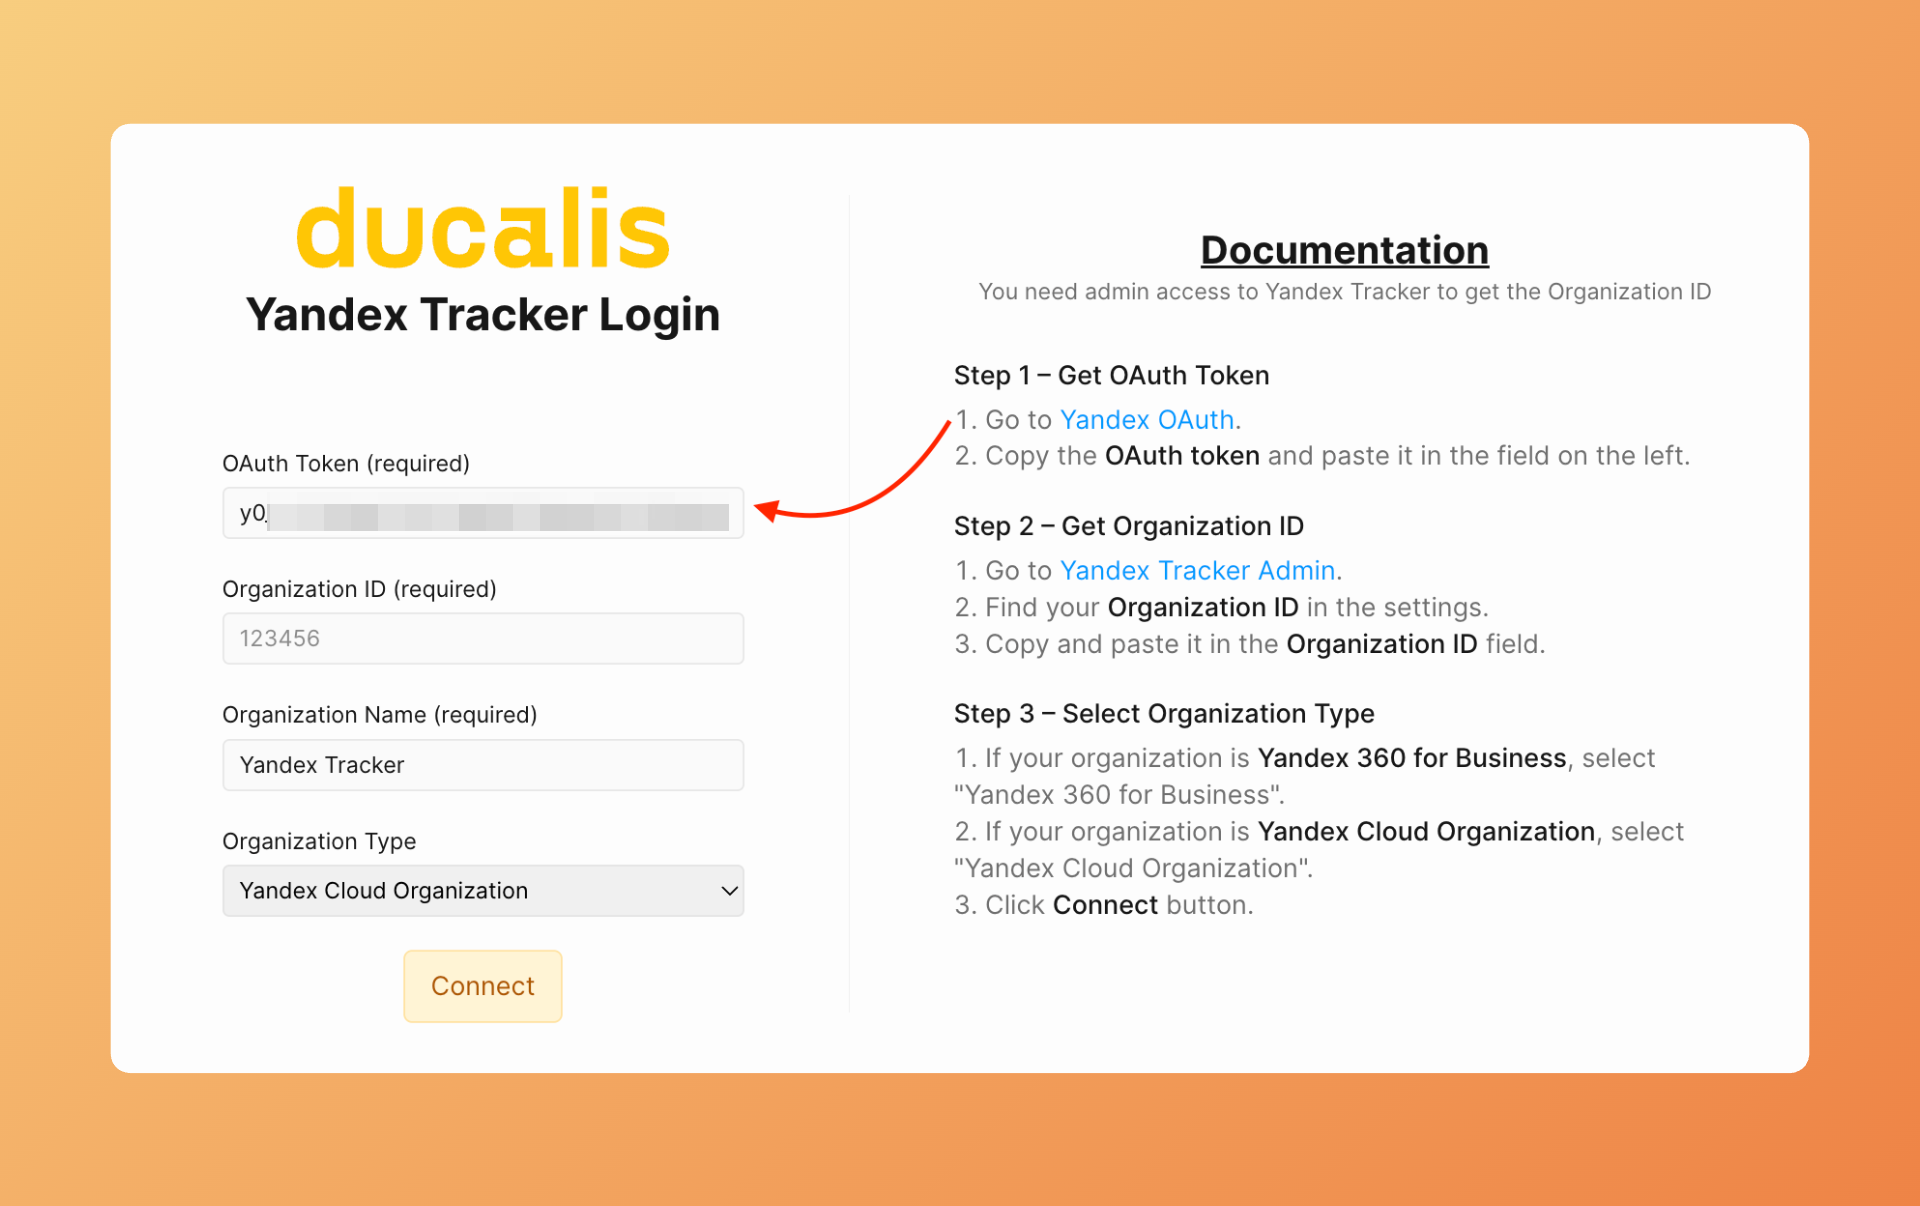
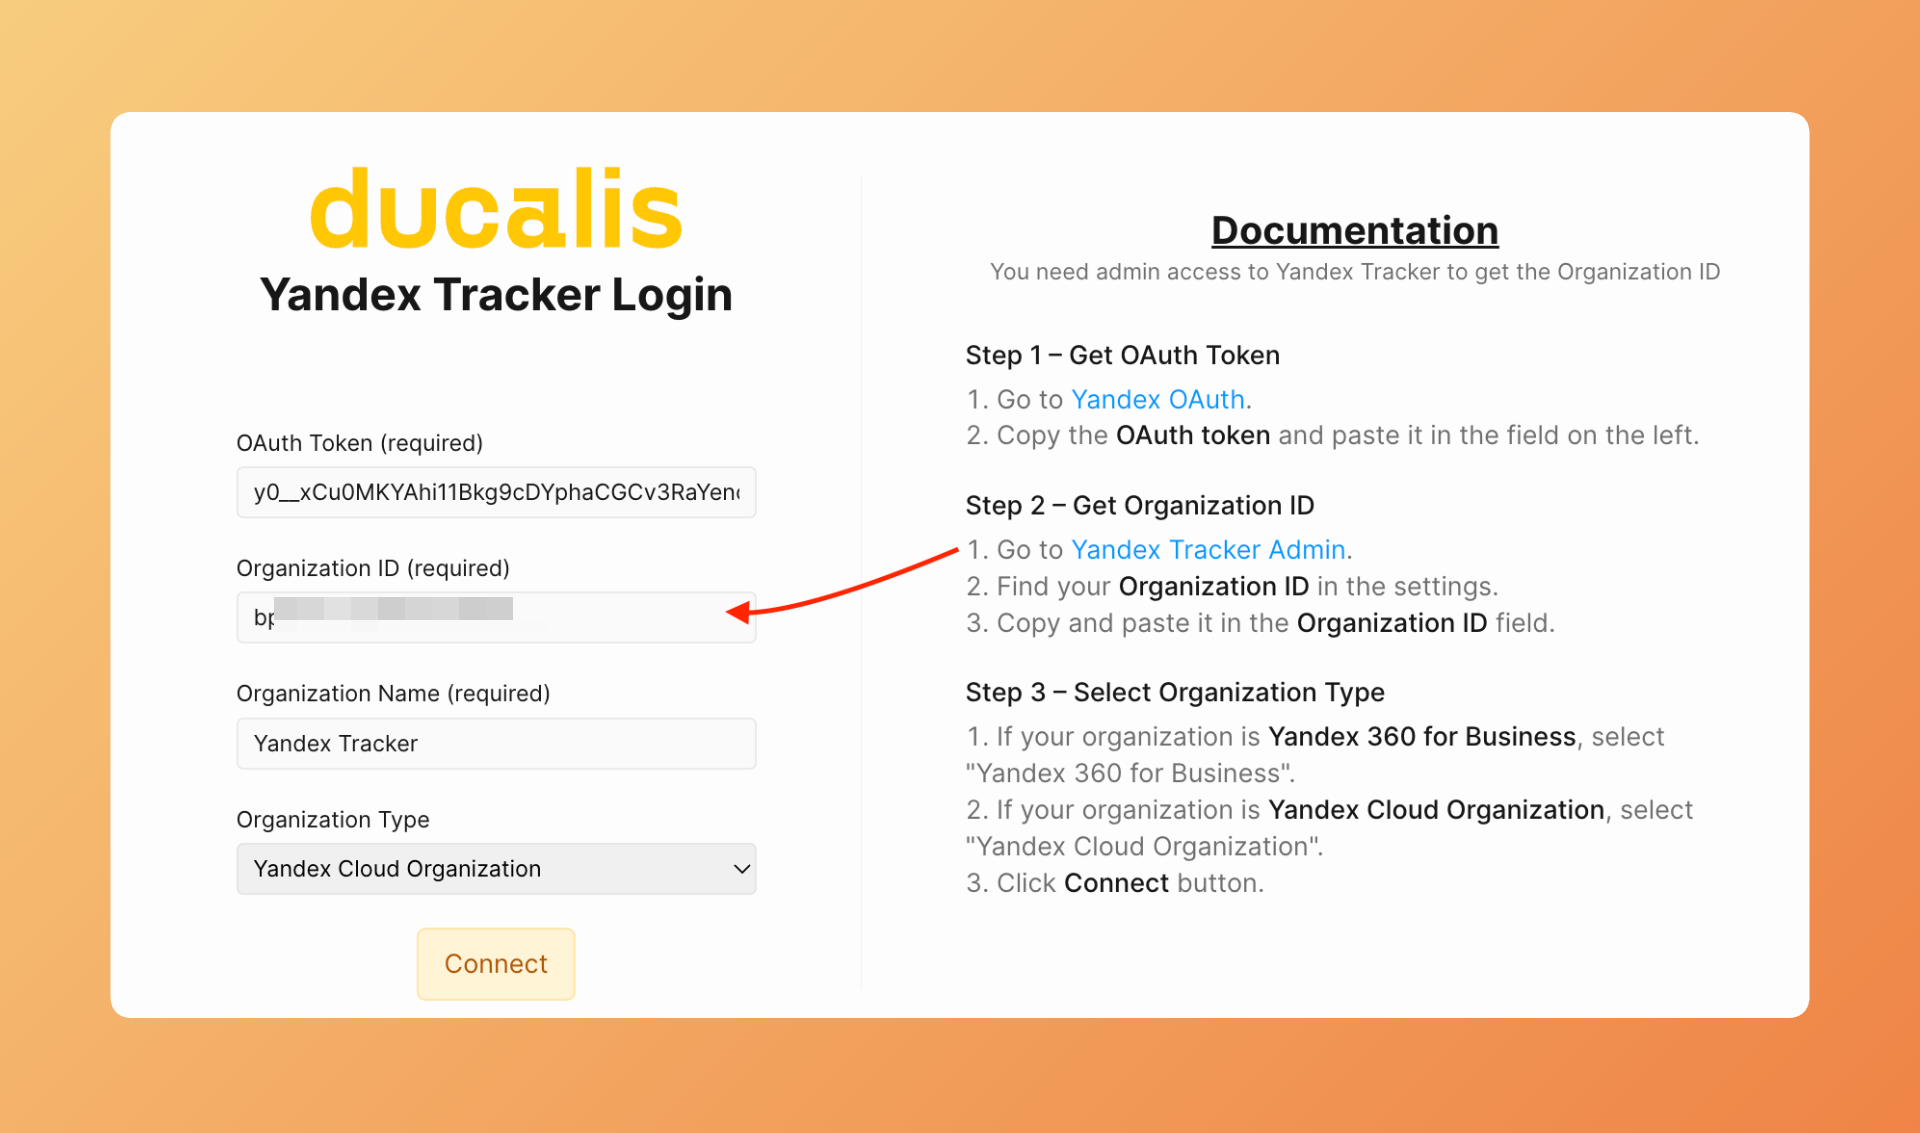
Enter your Organization ID
- Click the link and follow your Yandex.Tracker administration settings. Find the Organization ID on the administration page. Click to copy it.
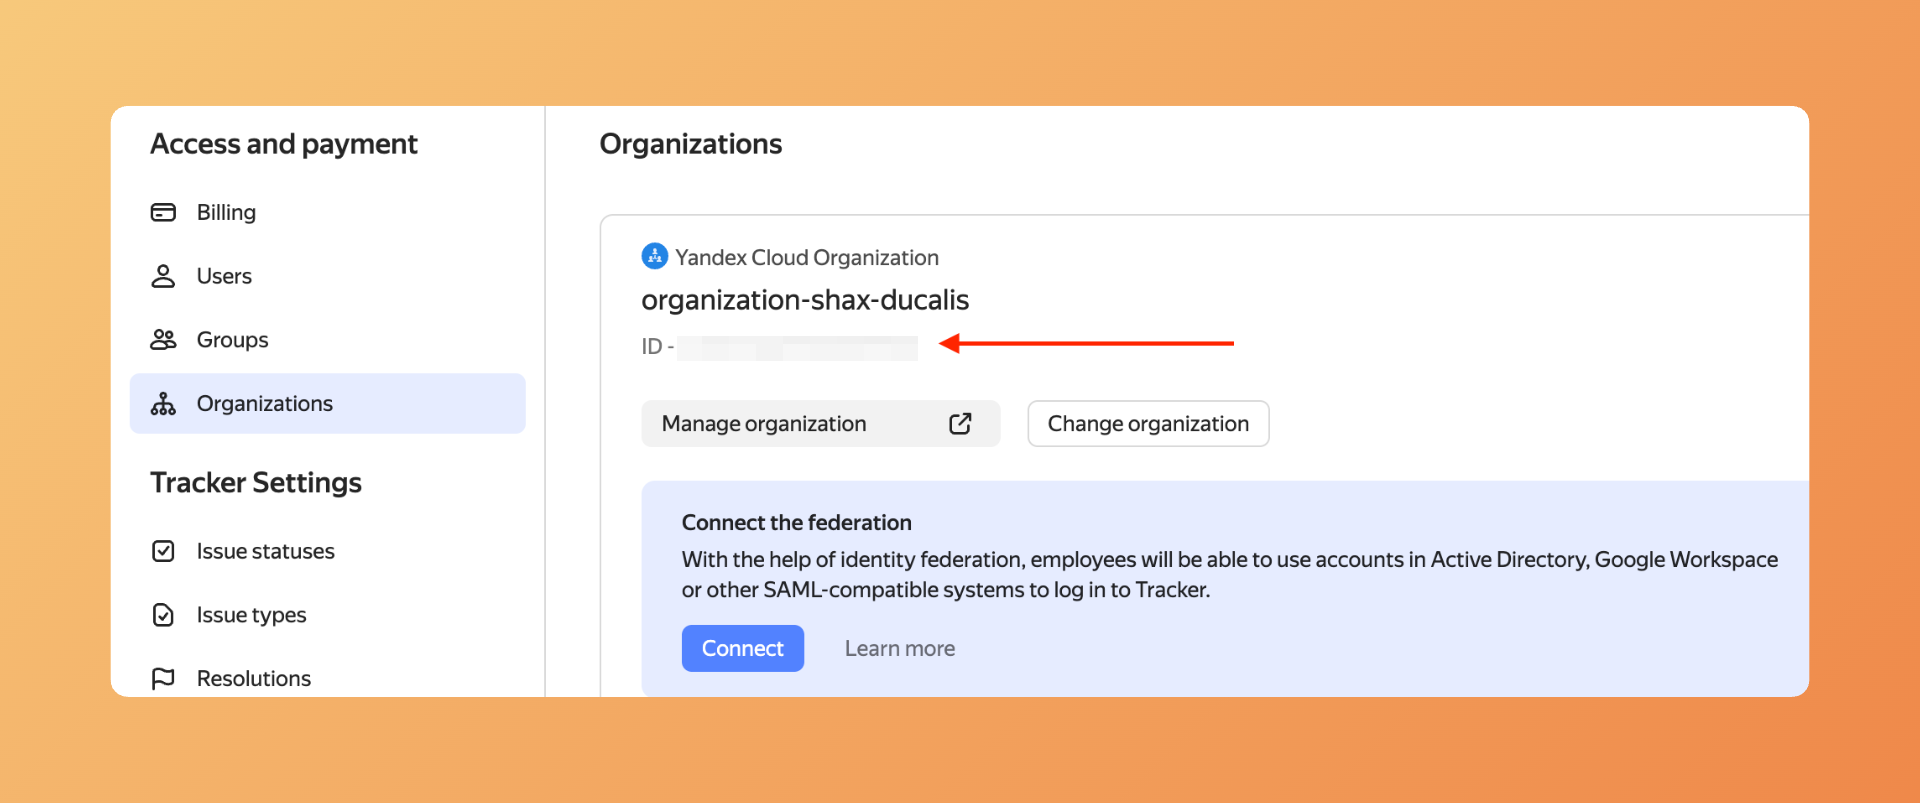
- Return to Ducalis and paste the Organization ID into the Organization ID field.
Enter your Organization Name
Enter the organization name. You can choose any name you want. This is for your internal reference in Ducalis.
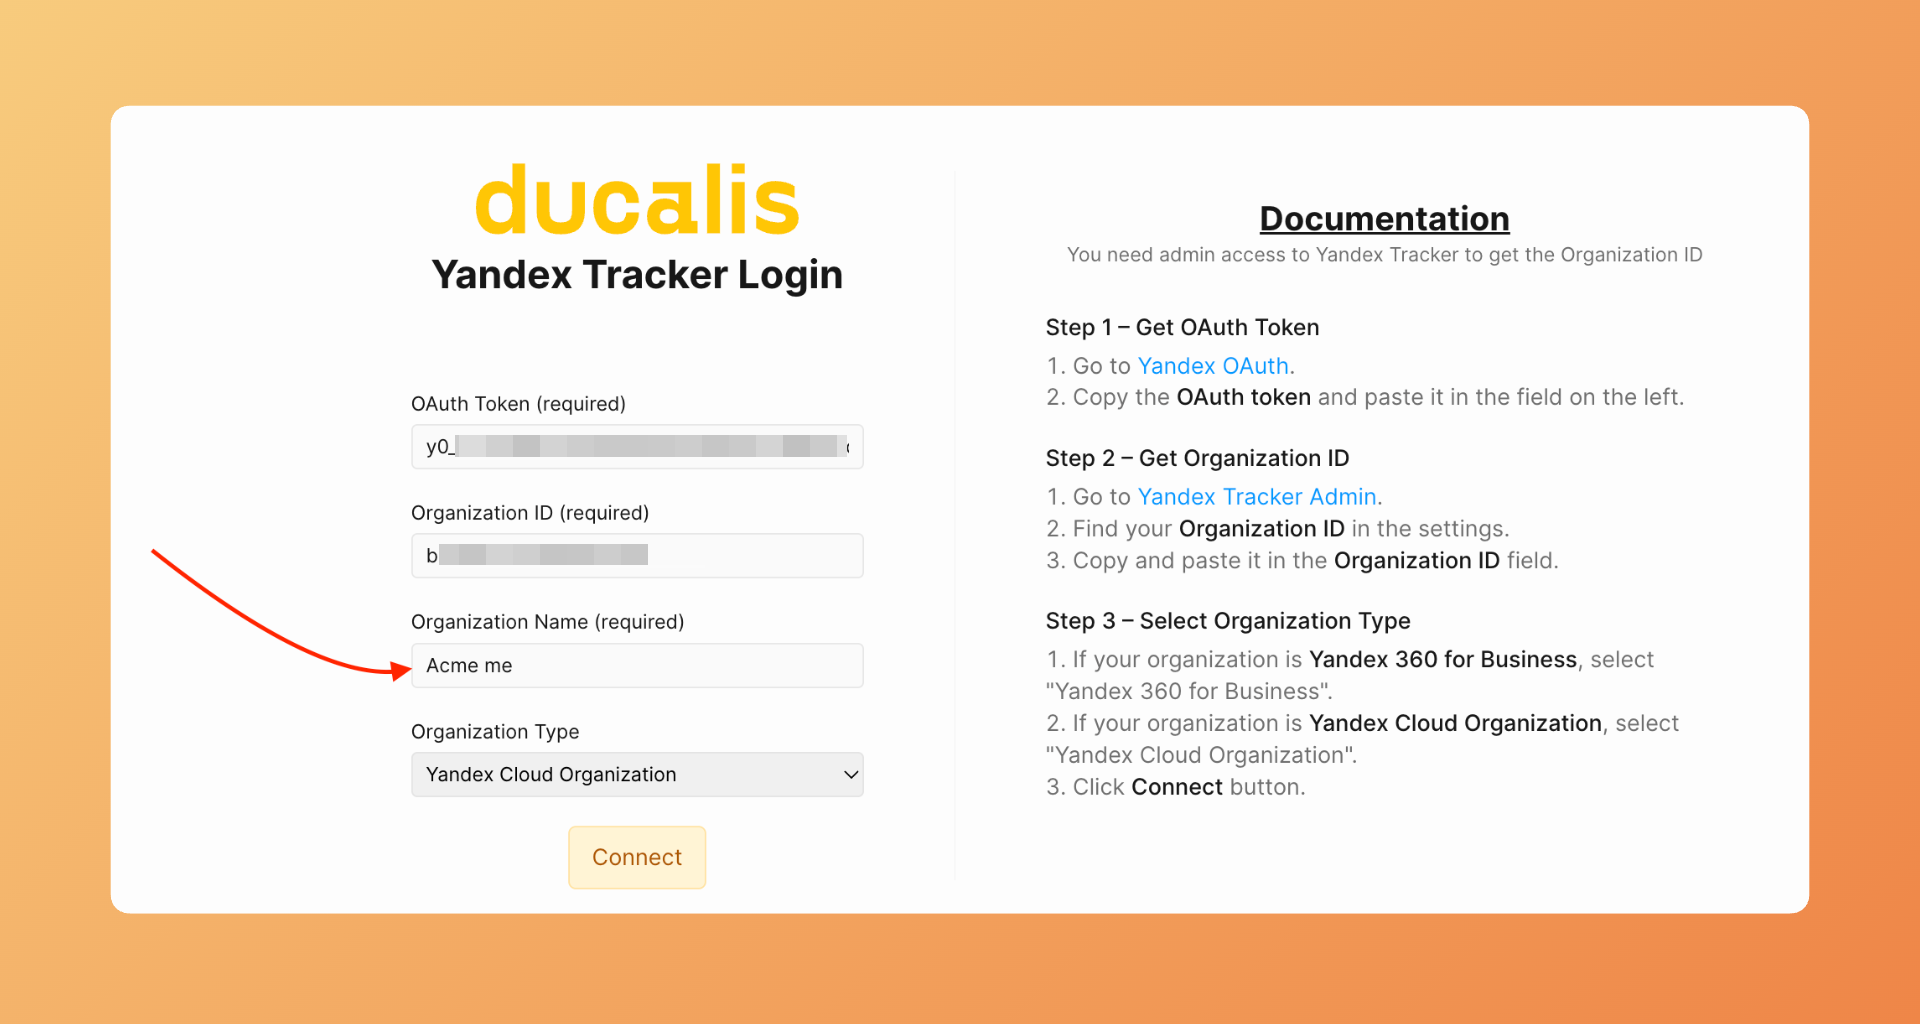
Select your Yandex platform
- Under Yandex Tracker Type, select which platform your organization uses:
- Yandex.360 — If your organization uses Yandex.360 for Business
- Yandex.Cloud — If your tracker runs on Yandex Cloud
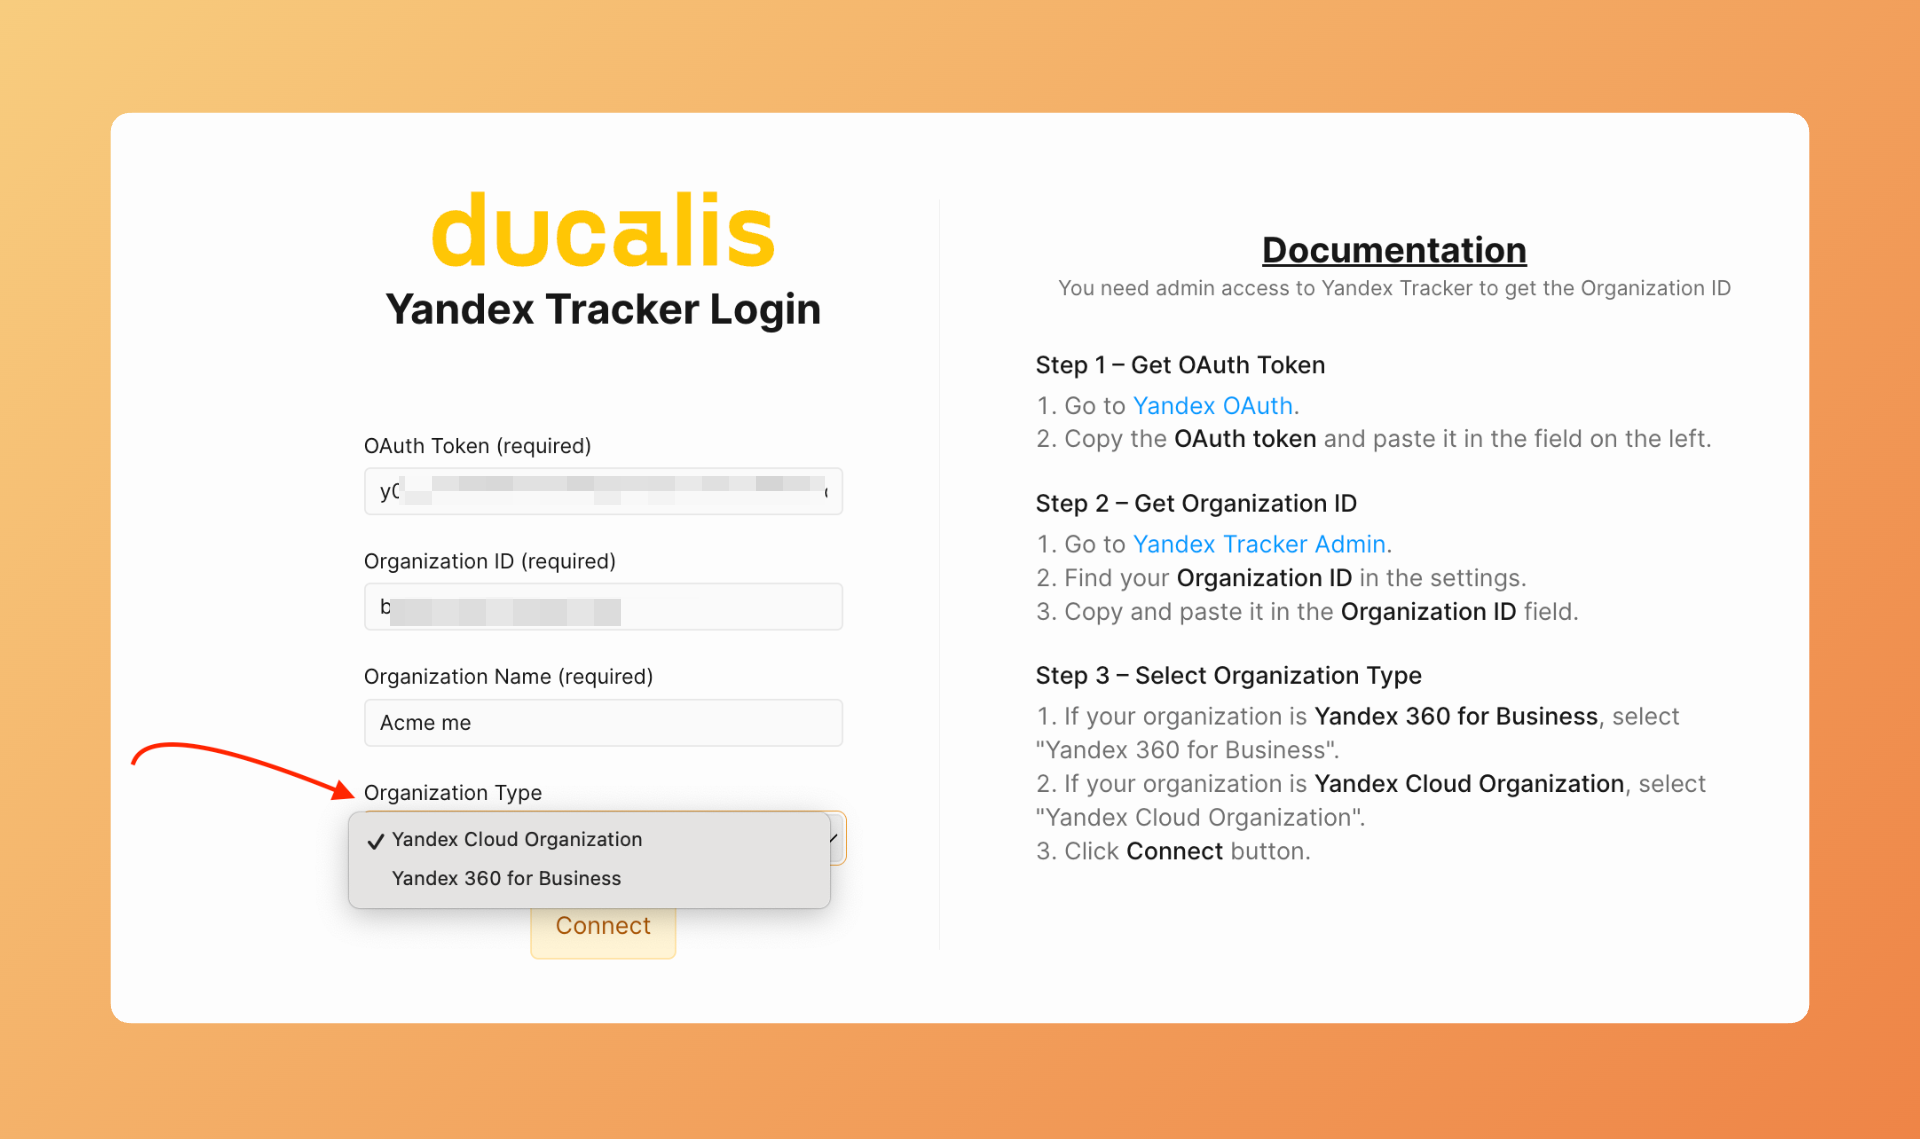
Selecting the wrong platform type will cause the connection to fail. Verify which platform your organization uses before proceeding.
- Click Connect.
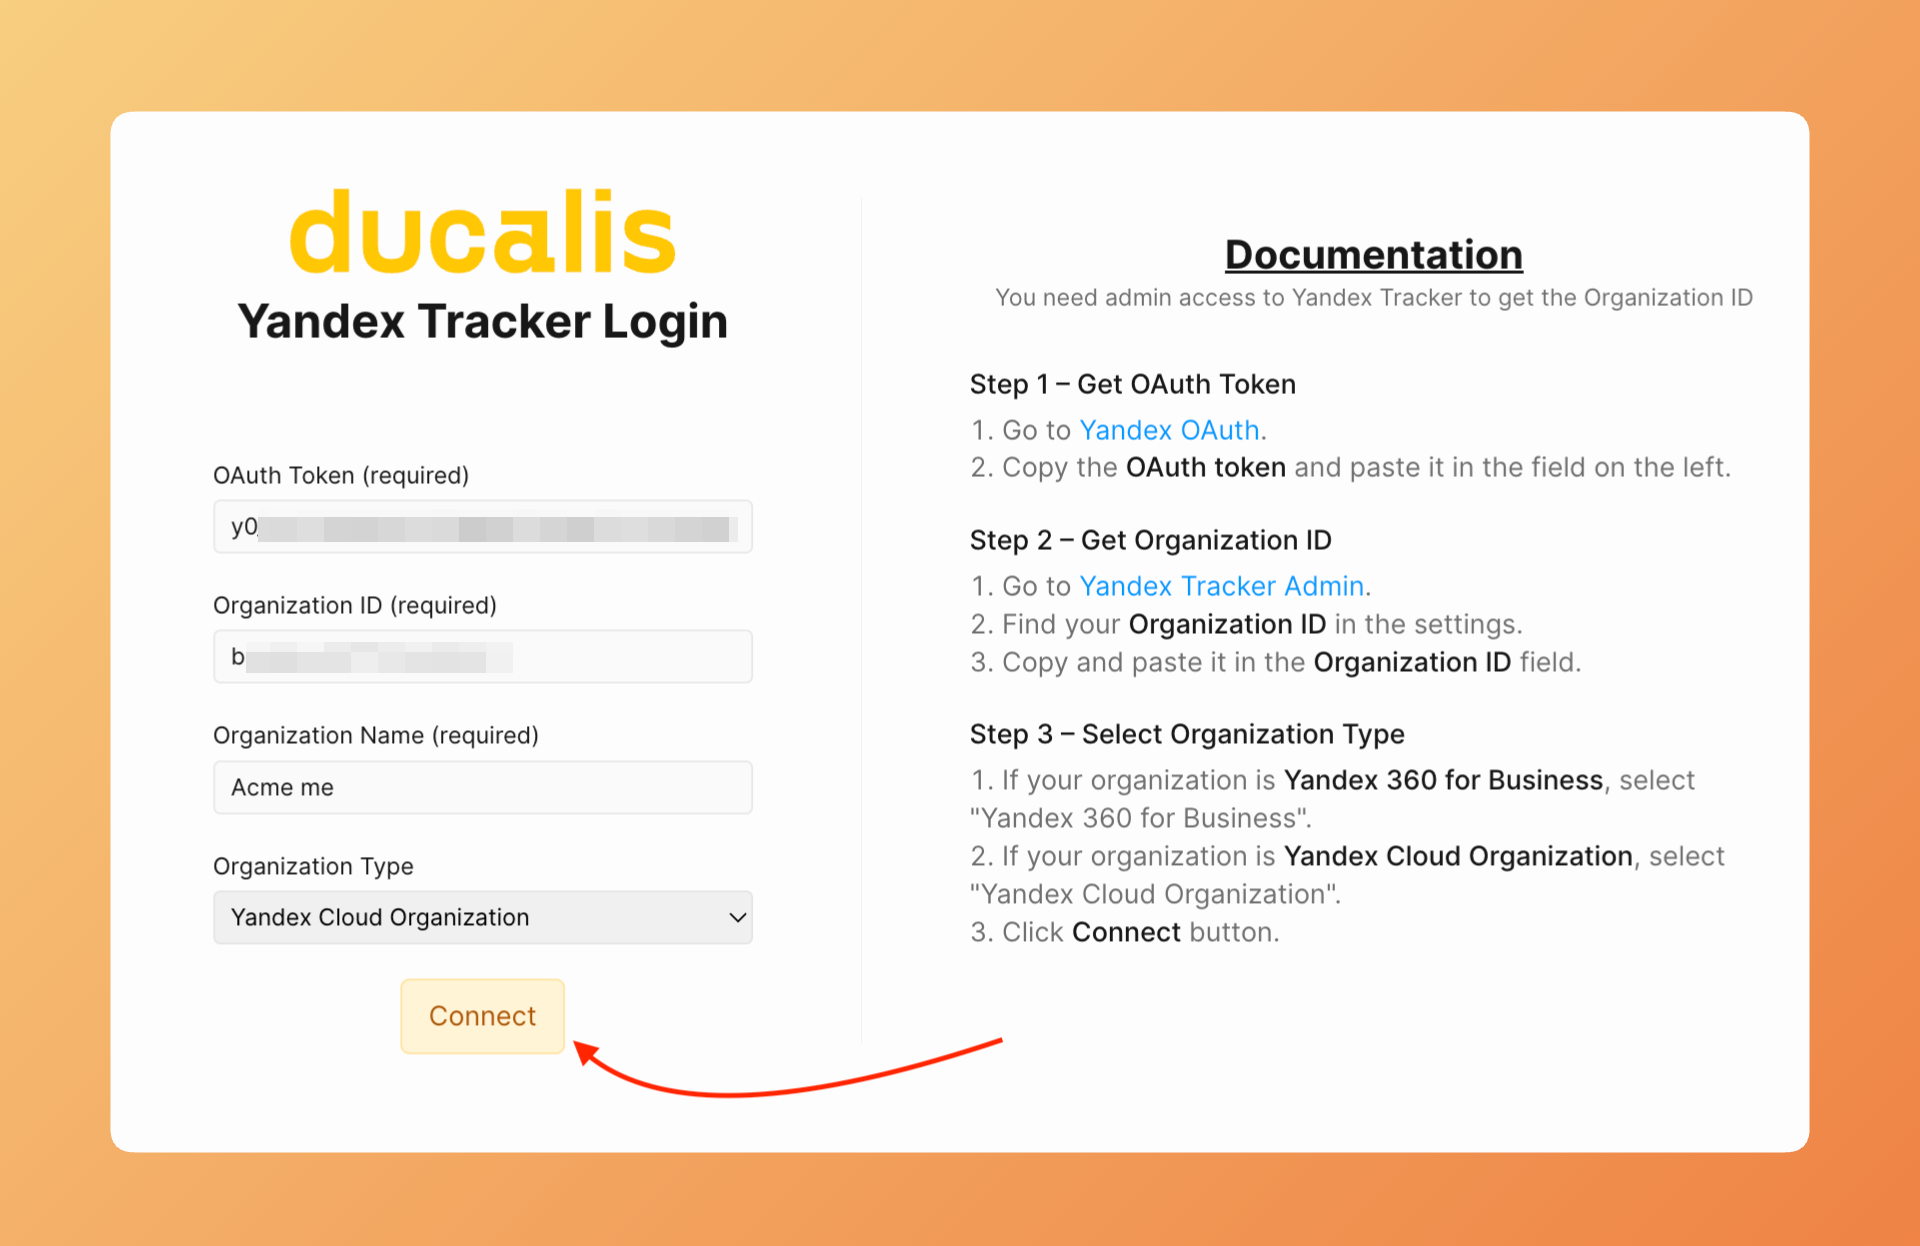
- Ducalis validates your credentials and establishes the connection. Wait for the confirmation.
Import issues
After connecting, configure which issues to import from Yandex.Tracker.
- Click Import from to start issues import.
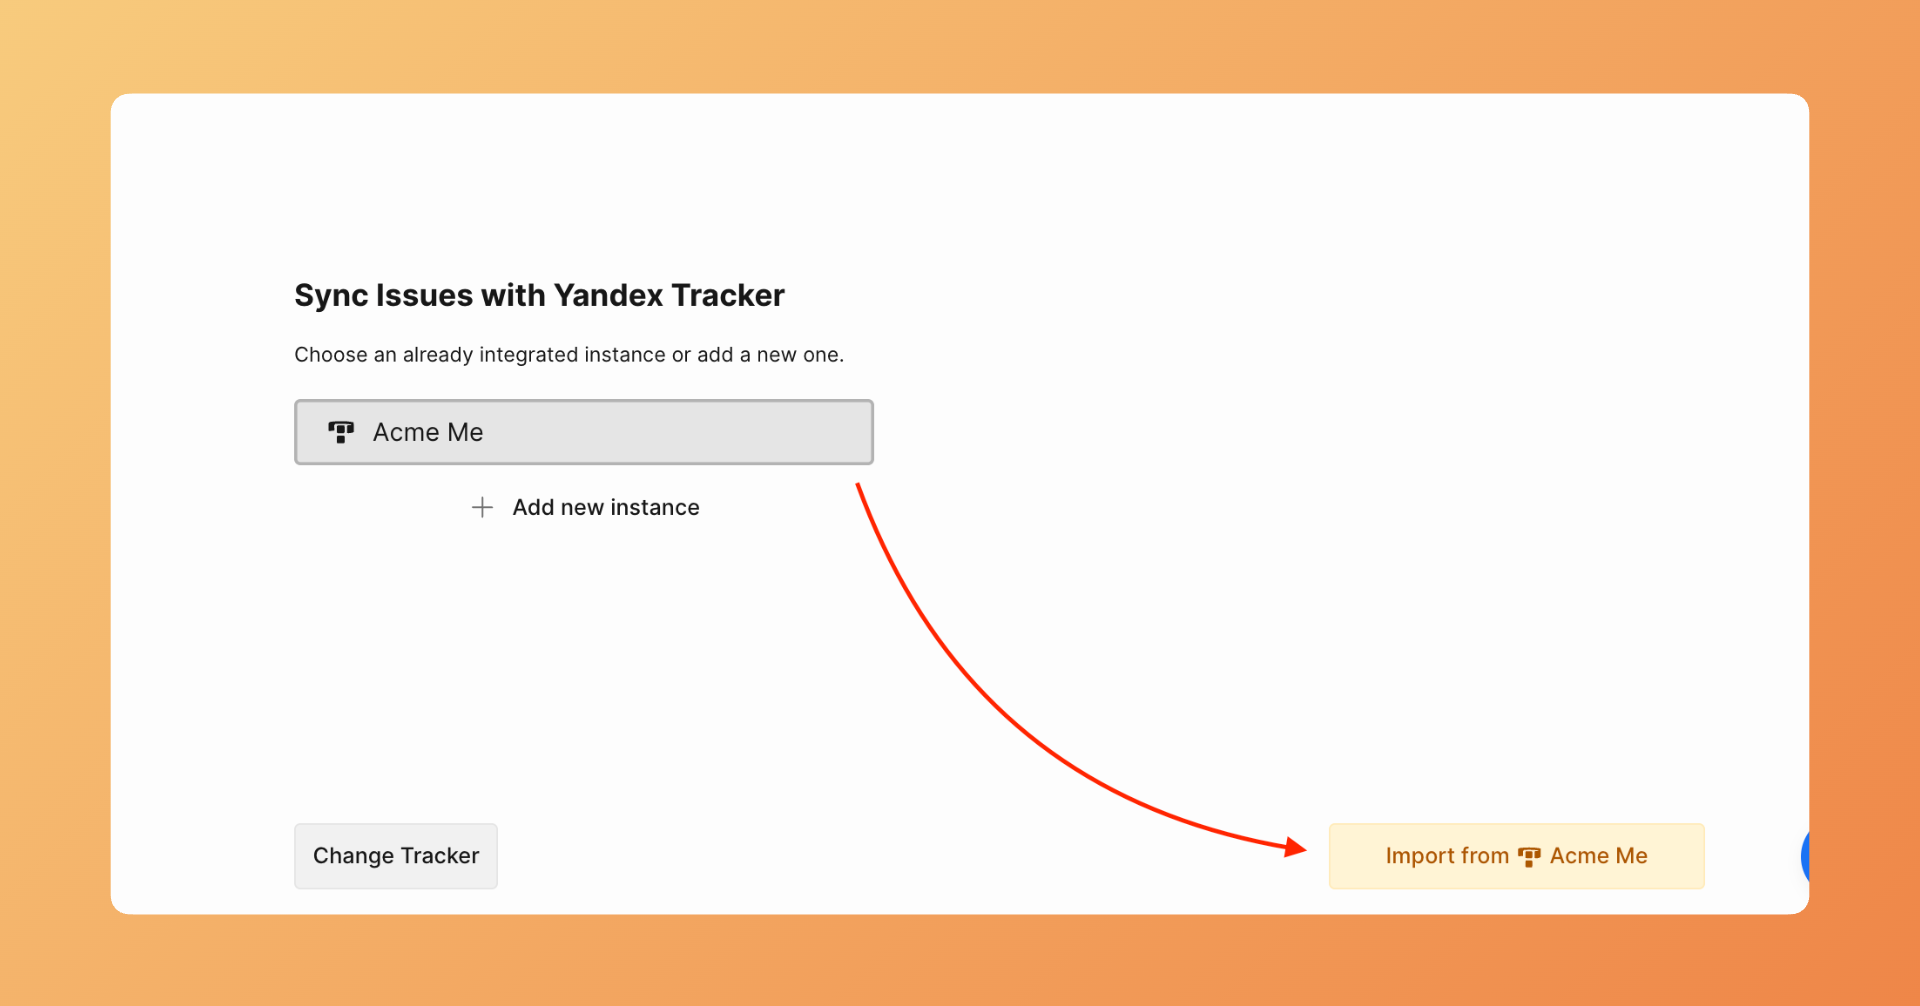
- Apply filters to choose which issues to import.

- Click Start Import.
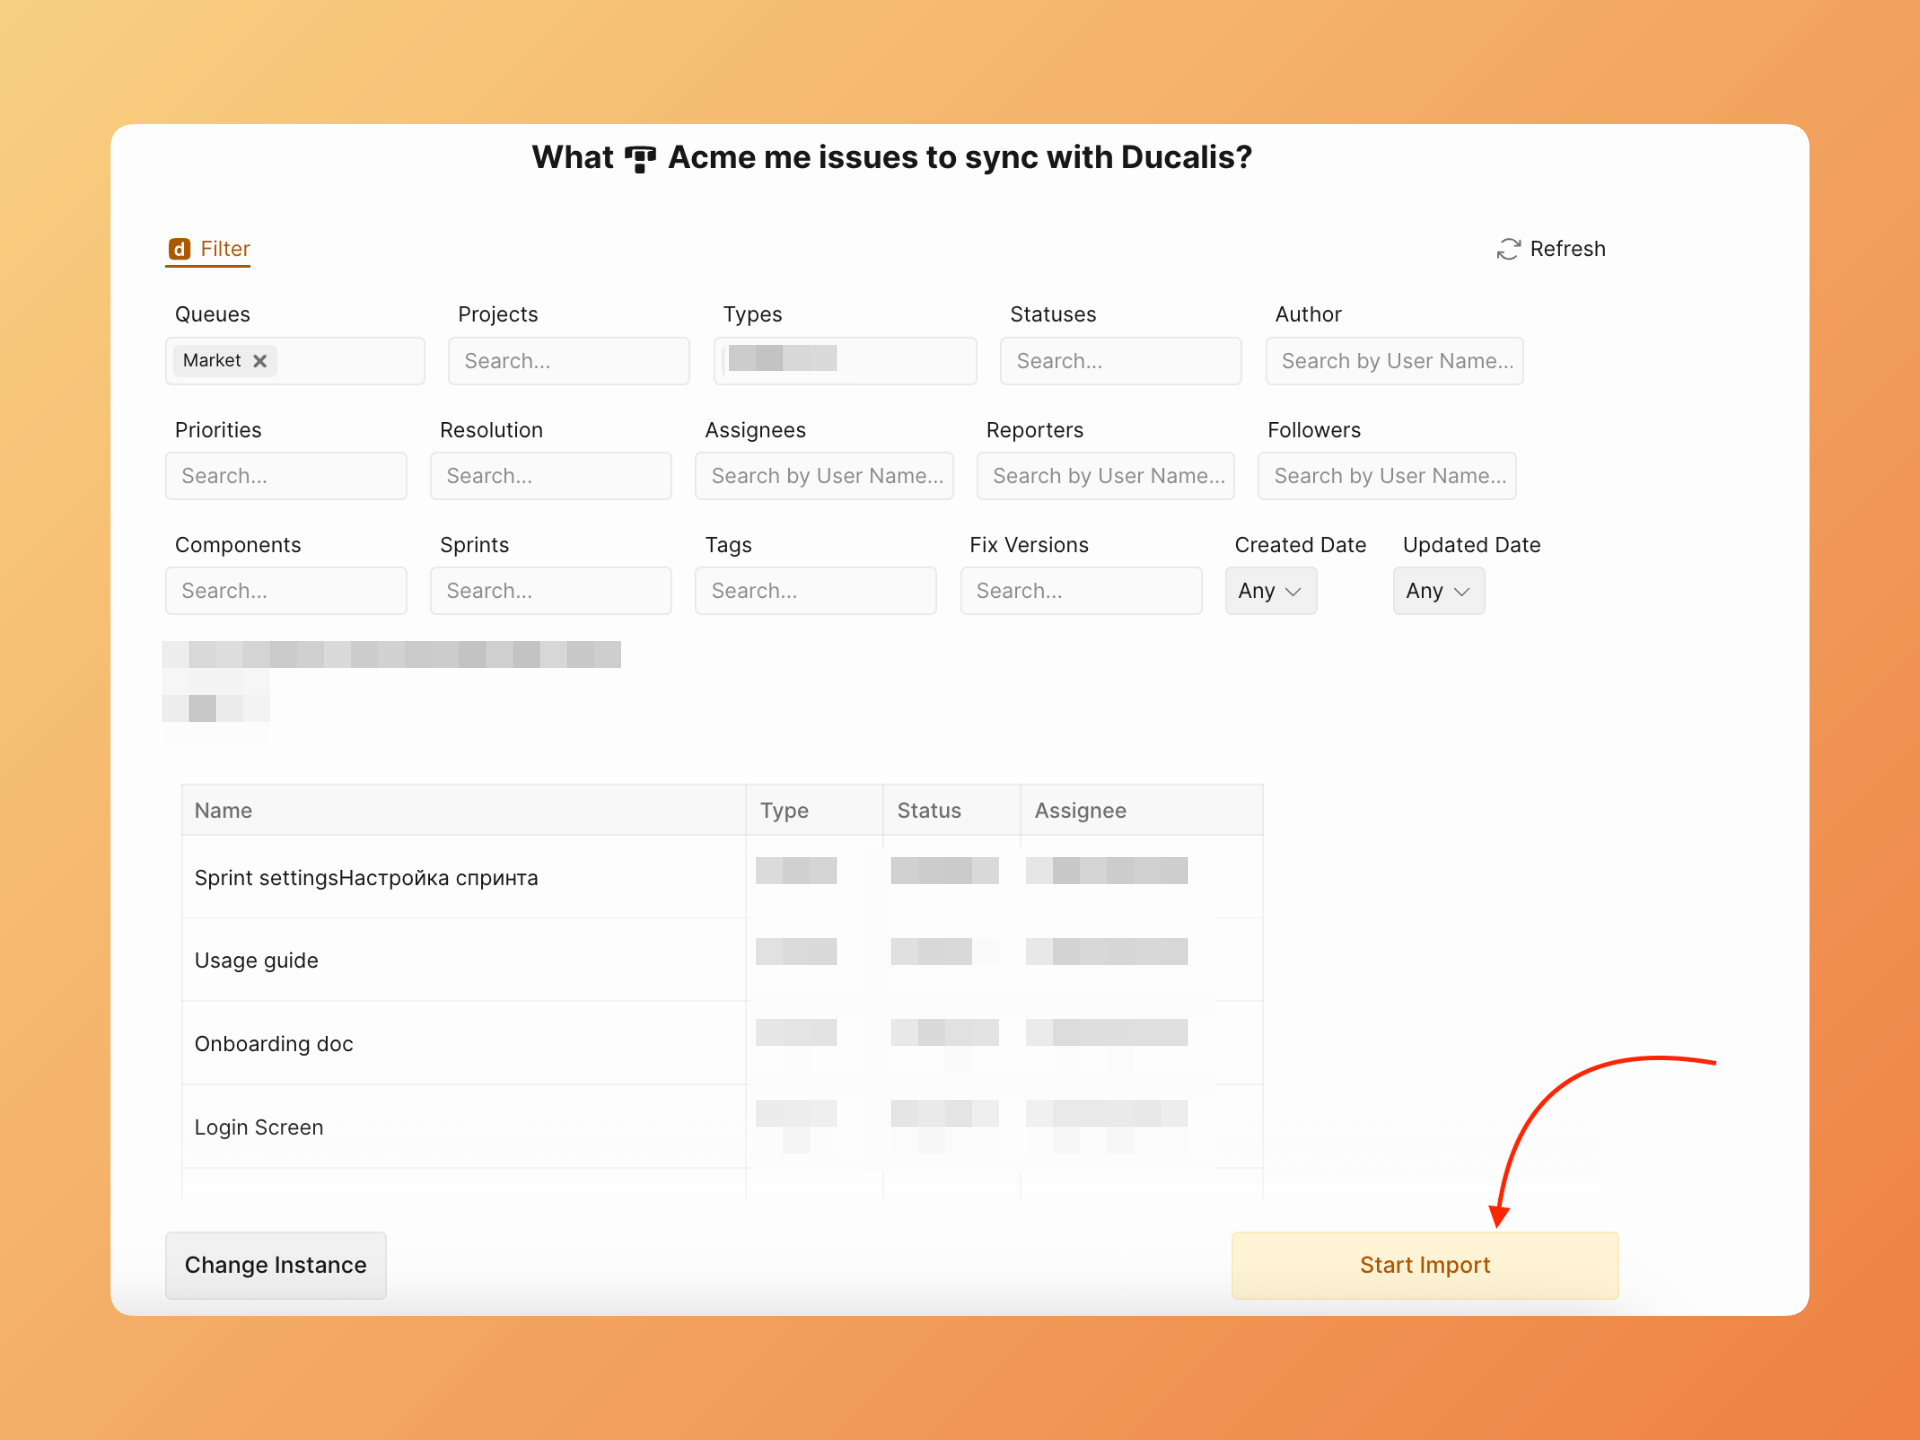
- Ducalis begins importing issues that match your filters. The import progress displays on screen.
Your Yandex.Tracker integration is ready. Issues appear in your Ducalis board for prioritization.
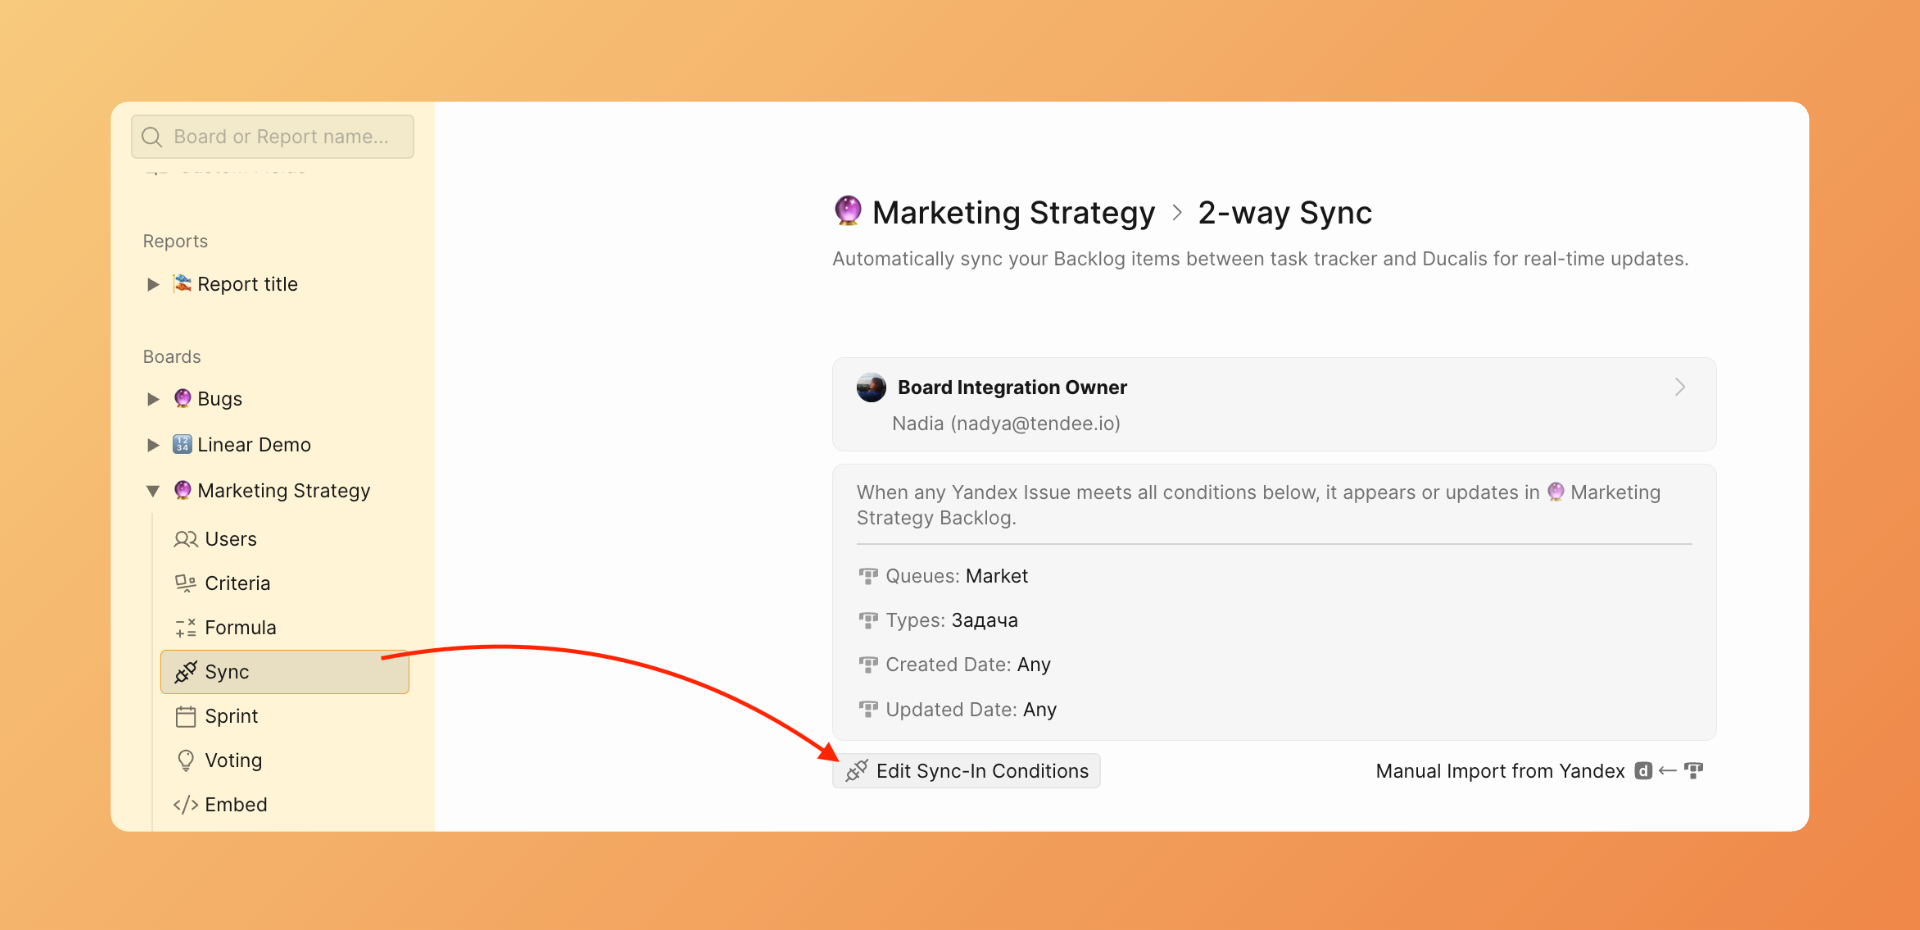
Edit Sync-In Conditions
After the initial import, modify your filters at any time.
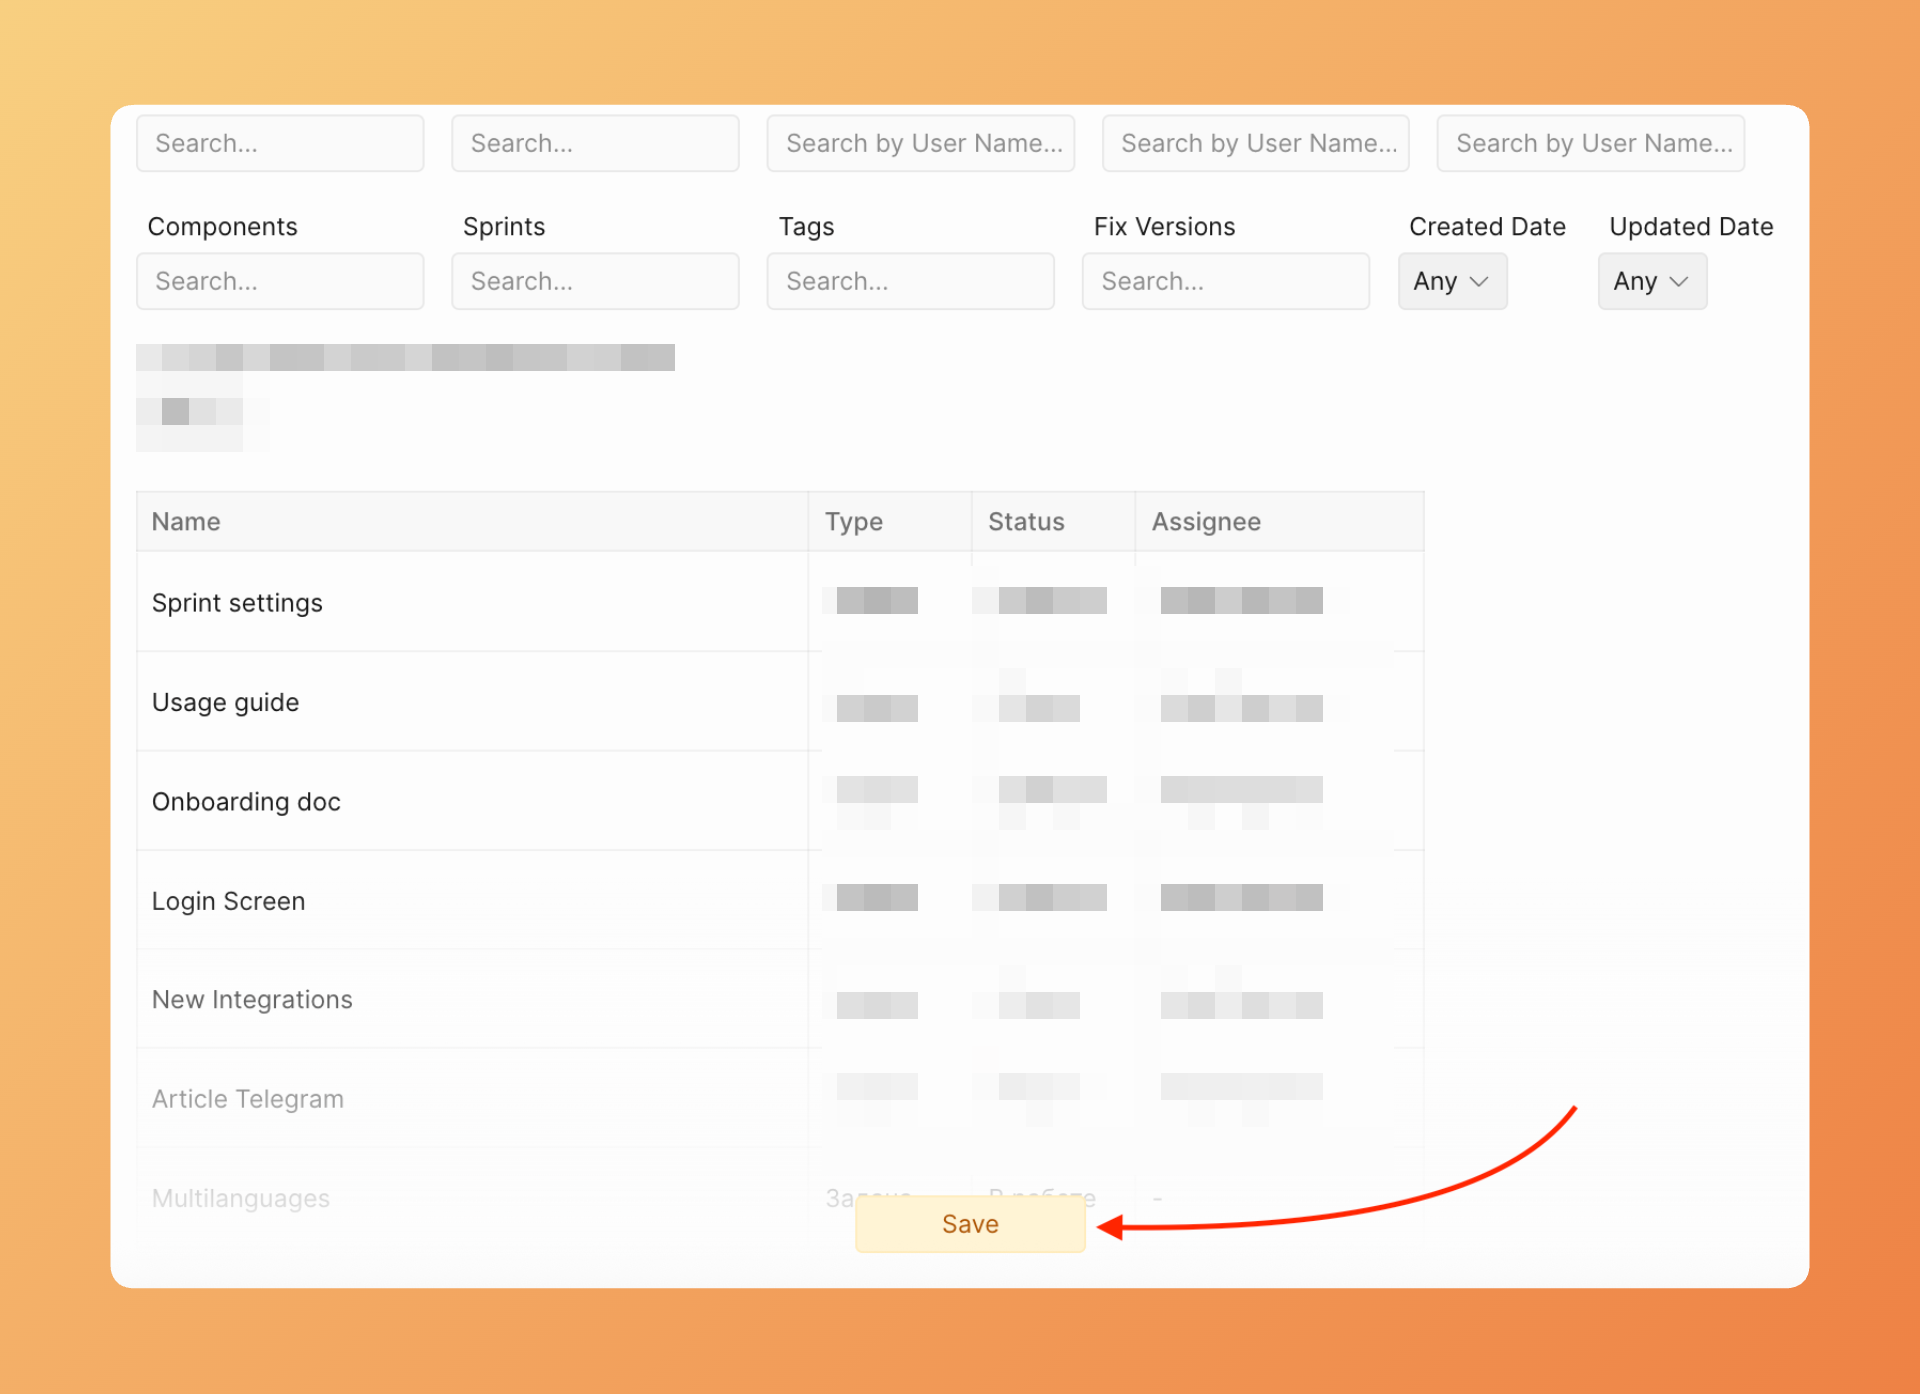
- Go to Sync settings and click Edit Sync-In Conditions.
-
Adjust your queue selection or filters.
-
Click Save to apply changes.
New issues matching your updated filters sync automatically. Issues that no longer match the filters remain in Ducalis but stop receiving updates.
Understanding queues vs projects
Yandex.Tracker uses terminology differently than other trackers:
- Queues — The primary container for issues, similar to Jira projects. Each queue has its own key prefix for issue identifiers.
- Projects — A secondary grouping that can include issues from multiple queues, similar to epics or initiatives.
What's next
After connecting and importing issues, set up two-way sync to send prioritization results back to Yandex.Tracker: