OAuth authentication
OAuth authentication lets you securely connect Jira Server to Ducalis for seamless integration. Use this method to import issues, sync priorities, and create issues without sharing passwords.
After connecting, you can:
You need Jira Server administrator access to create application links.
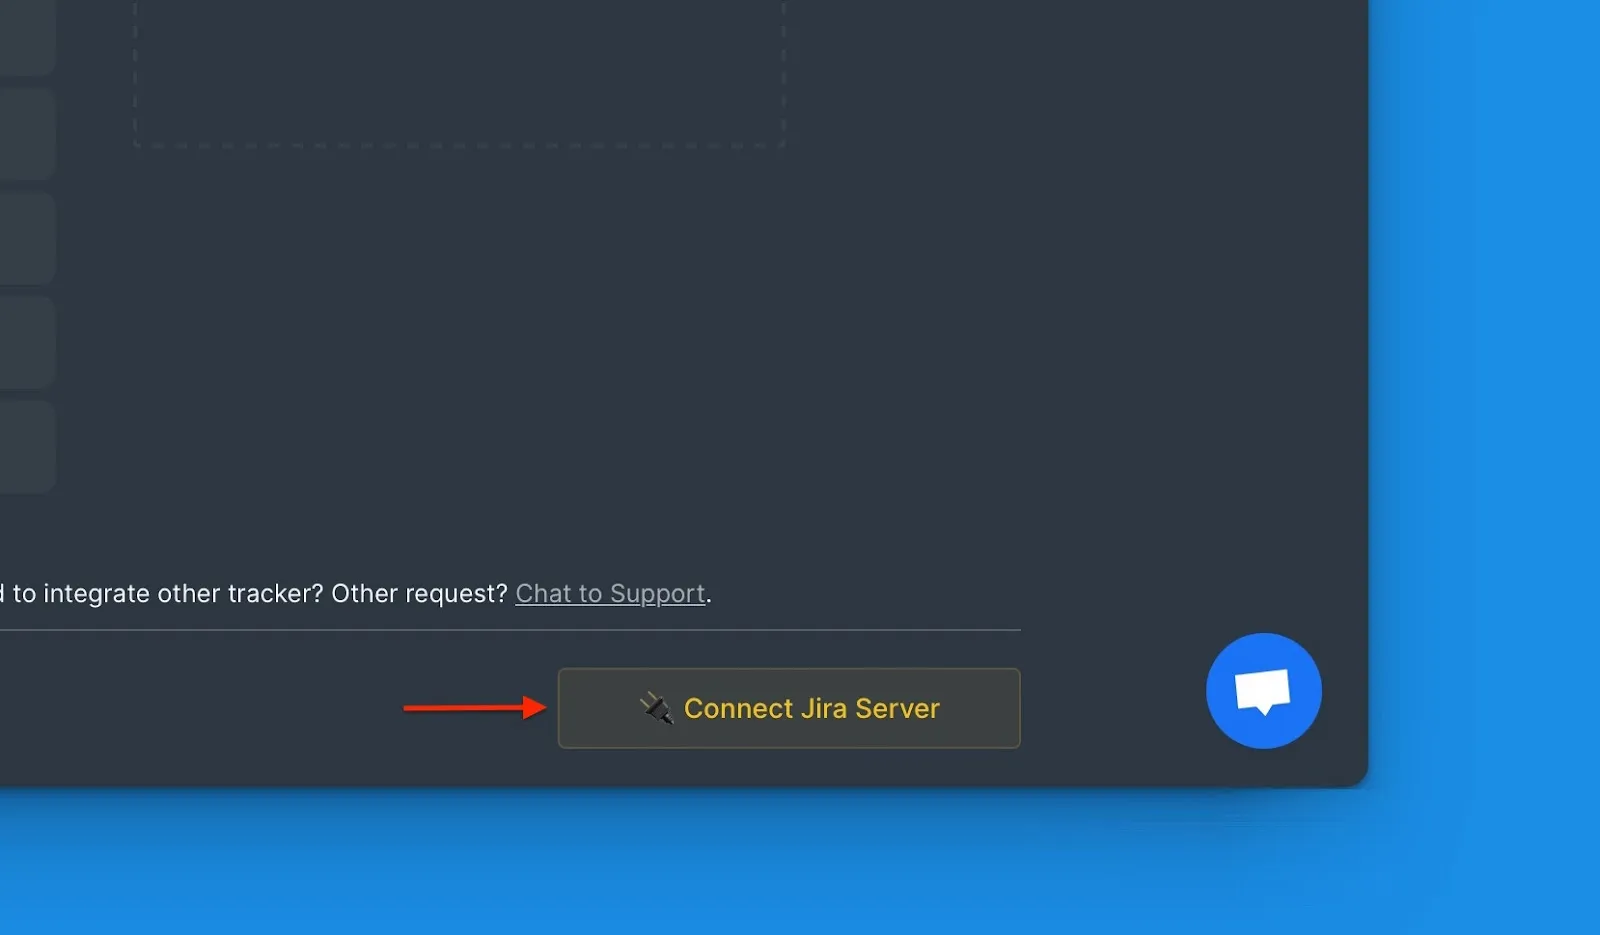
Connect Jira Server
-
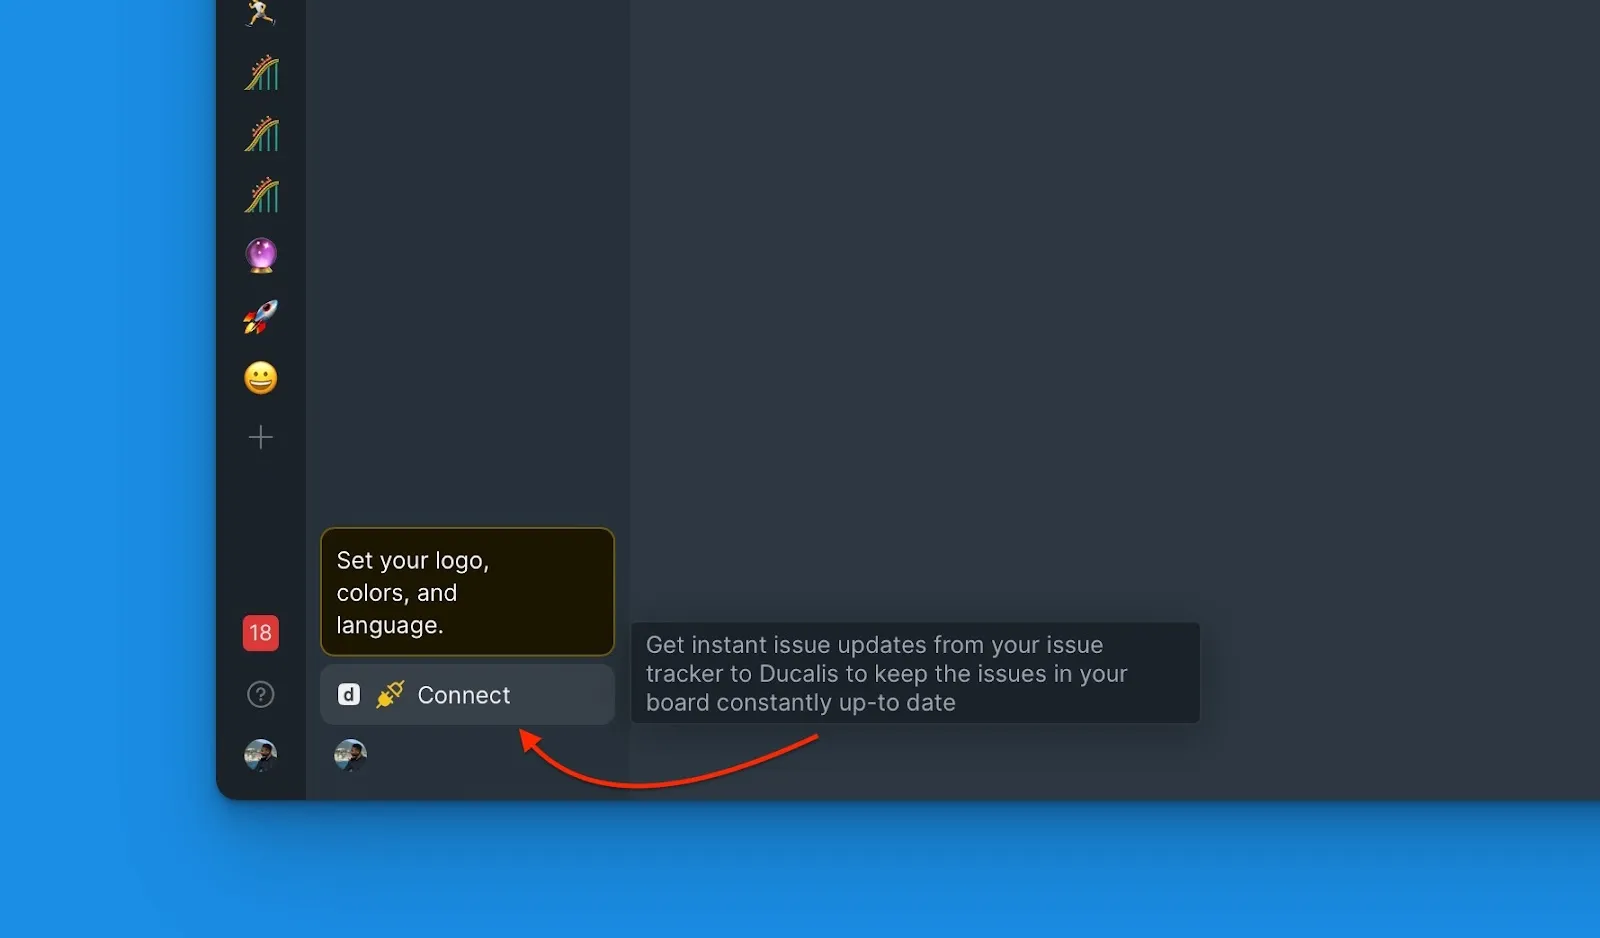
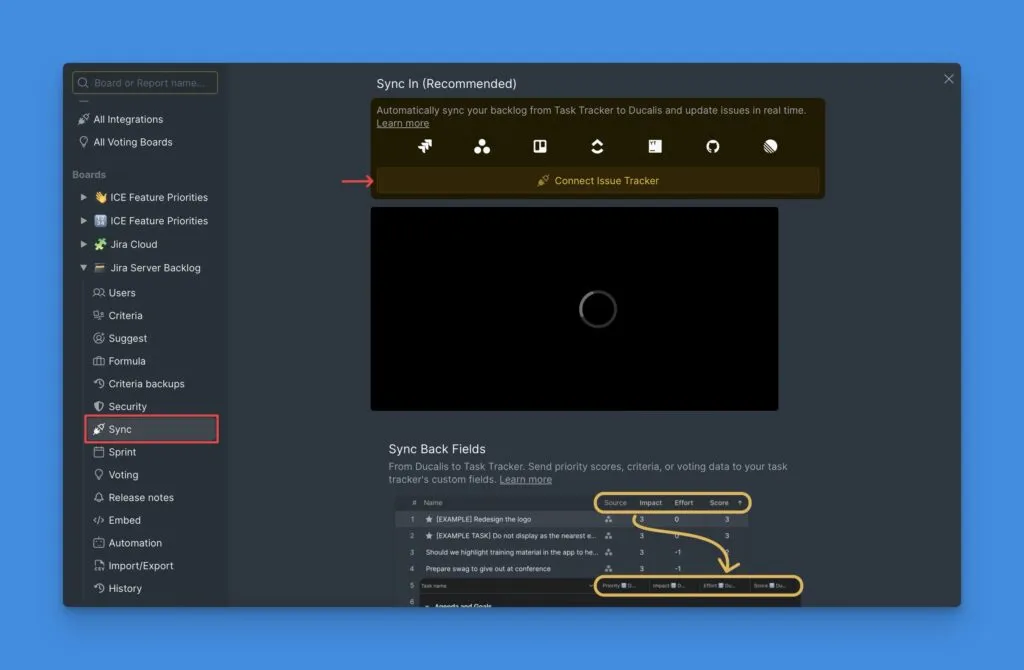
In your Board, click Connect in the bottom-left corner to open Sync settings.
-
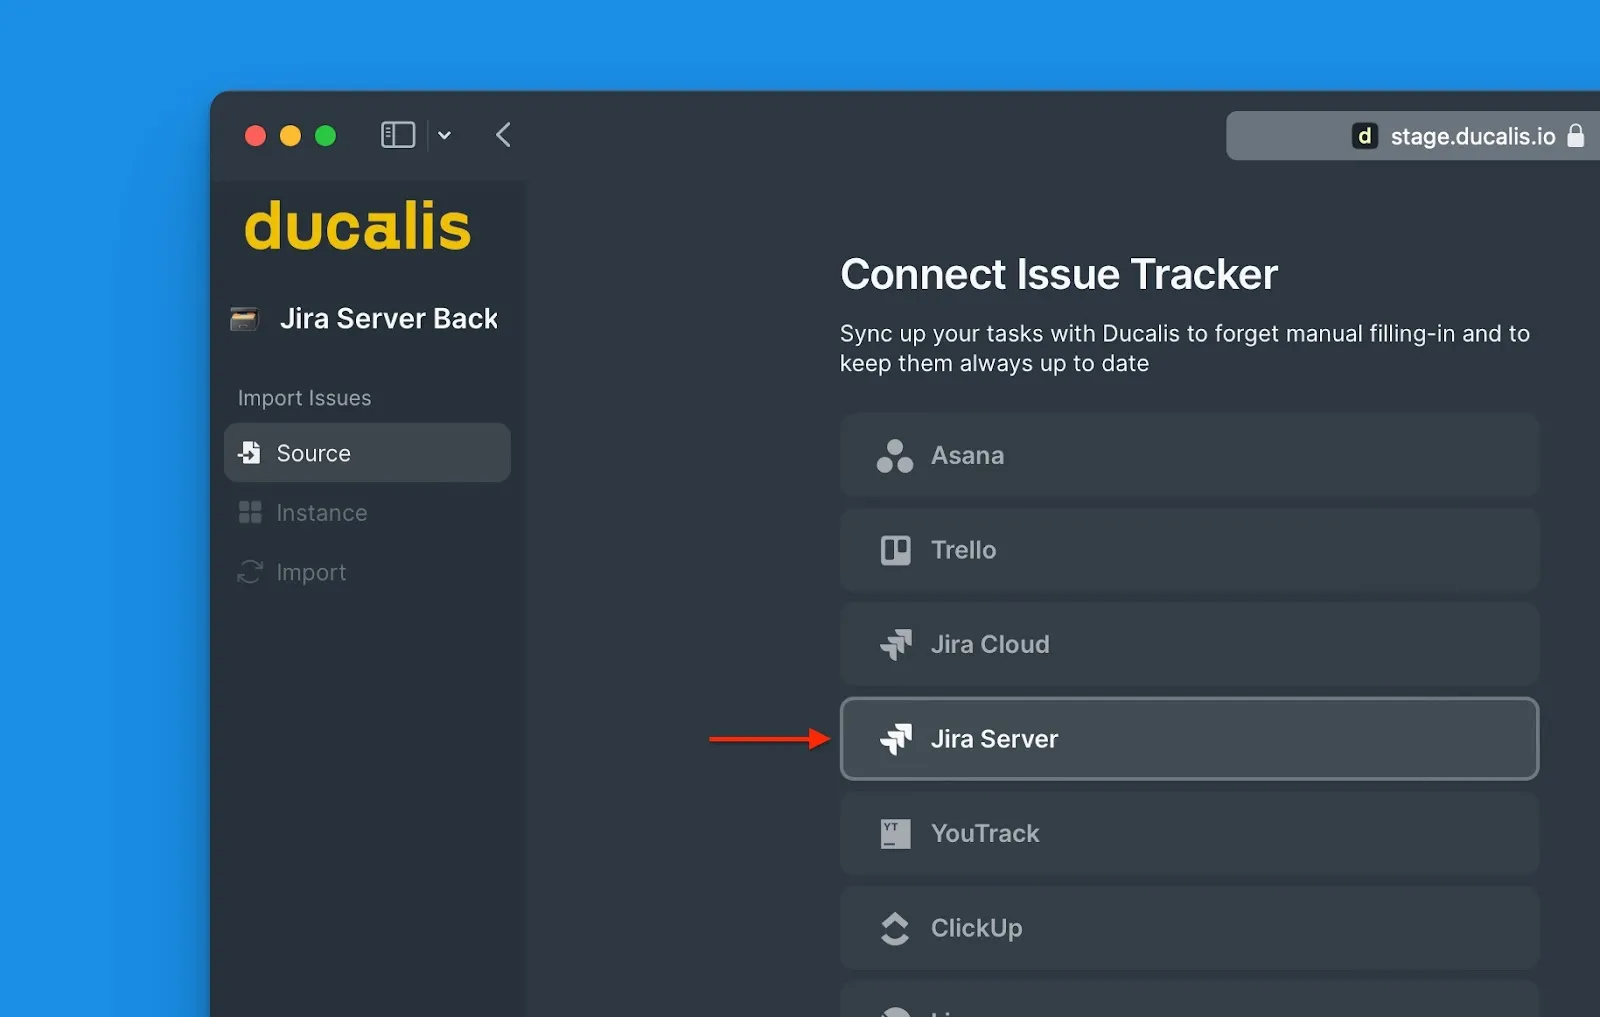
Click Connect Issue Tracker.
-
Under Source, select Jira Server.
-
Click Connect Jira Server.
Before proceeding, create an Application link in Jira Server. This links the two systems and allows Ducalis to access your Jira data securely.
You'll set this up once—future logins are automatic.
API endpoints used
Ducalis accesses these Jira Server REST API endpoints:
- status
- serverInfo
- user/search
- user
- project
- field
- webhook/*
- rest/webhooks/1.0/
- issue/createmeta
- search
- issue/*
- mypermissions
- issuetype/project
- project/*
- issuetype
- filter/favourite
- filter/search
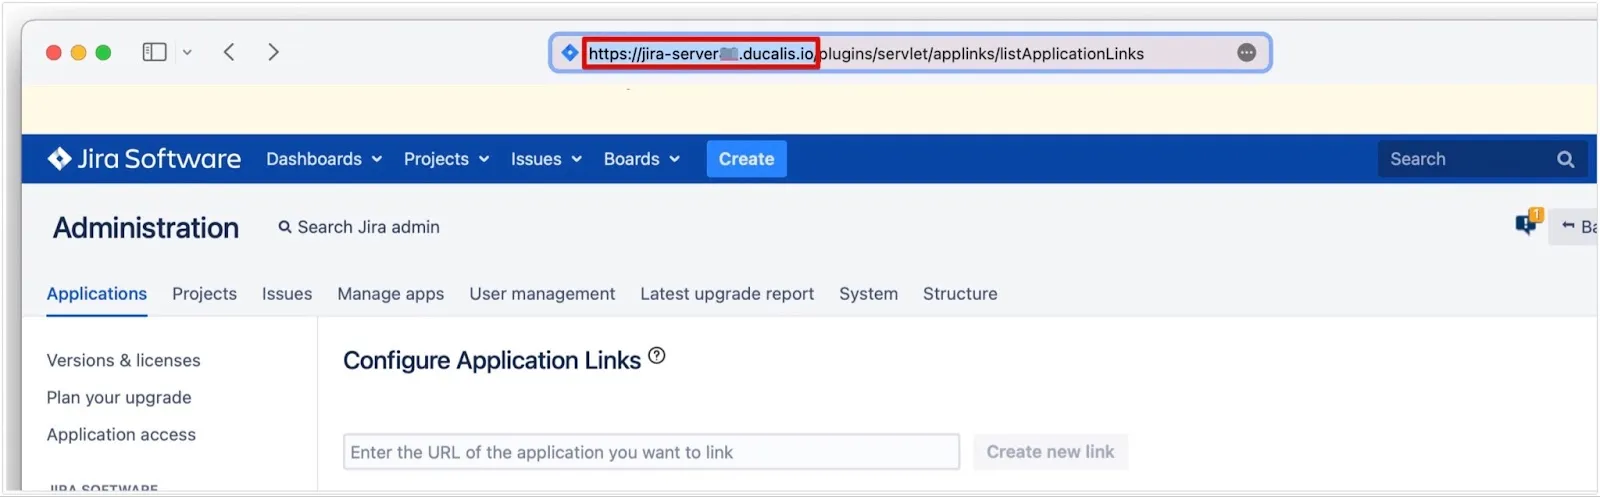
Create application link
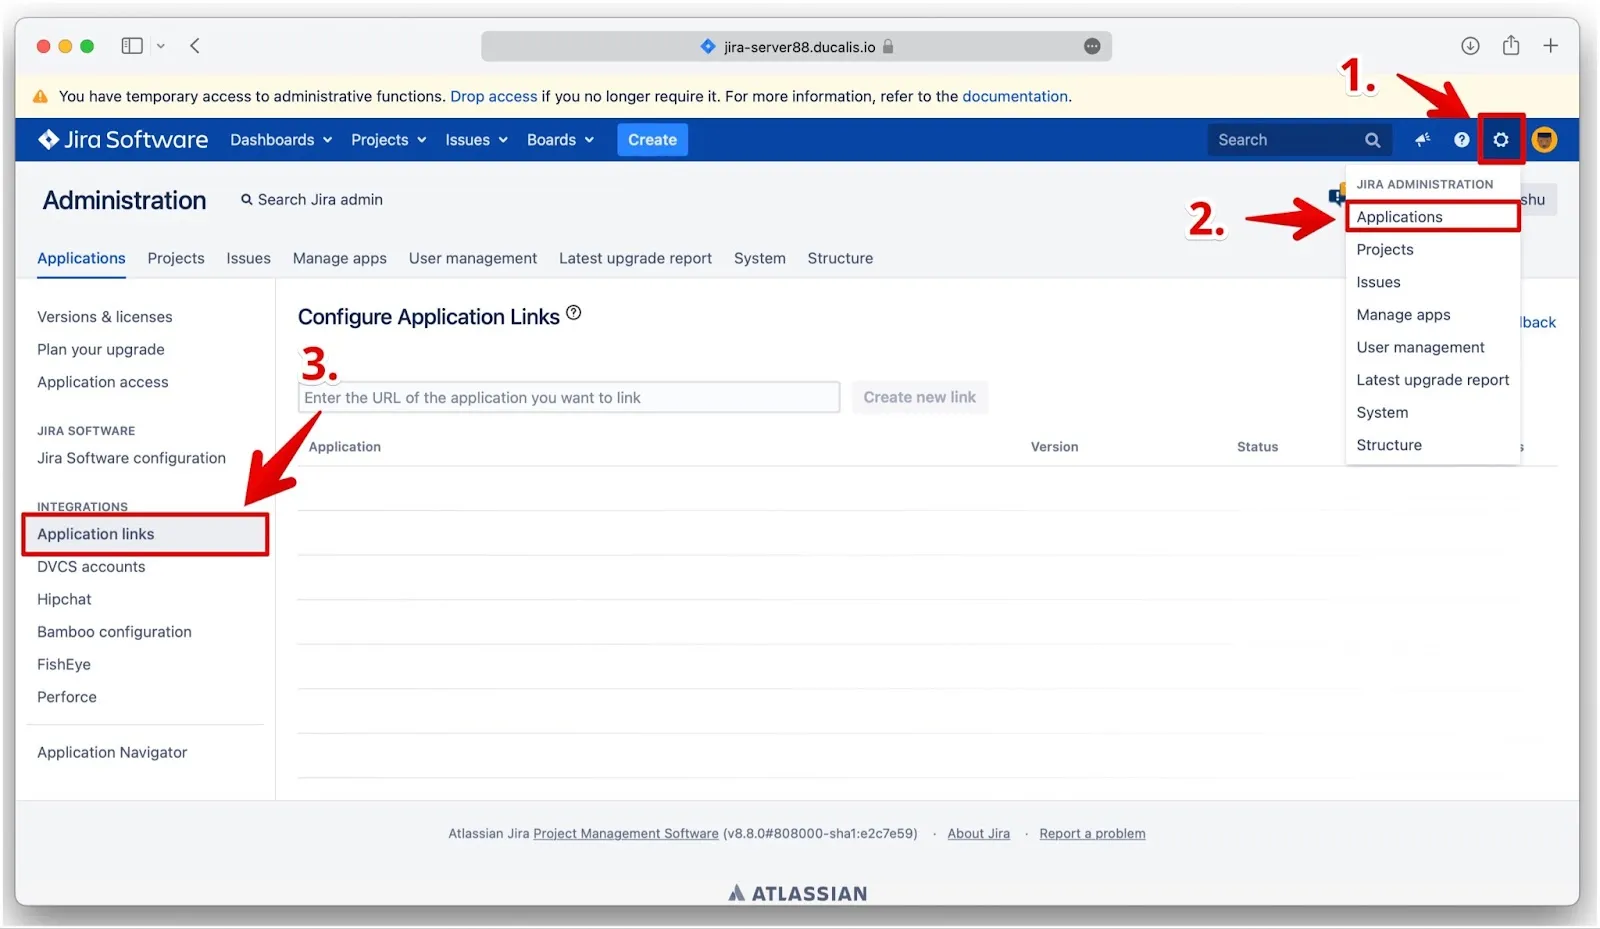
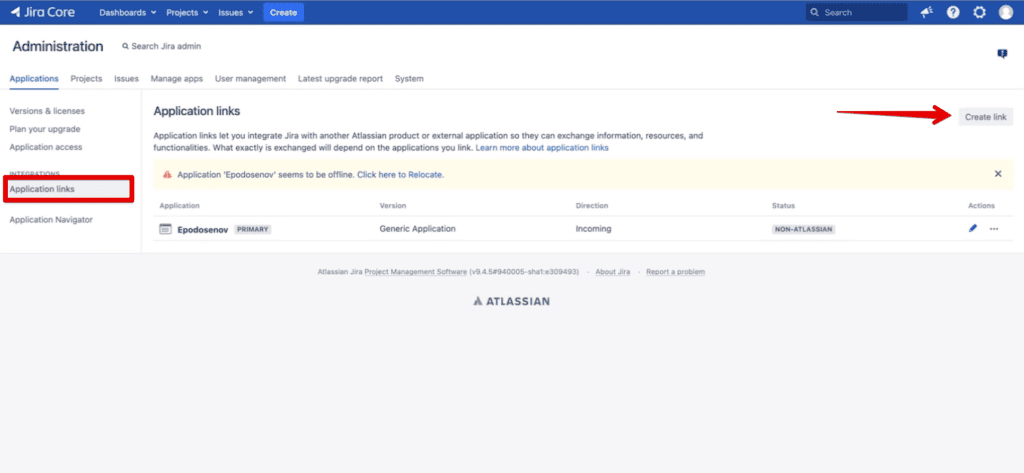
Access Application Links
-
In Jira Server, click the ⚙️ cogwheel in the top right corner.
-
Select Applications from the dropdown.
-
Click Application links in the sidebar.
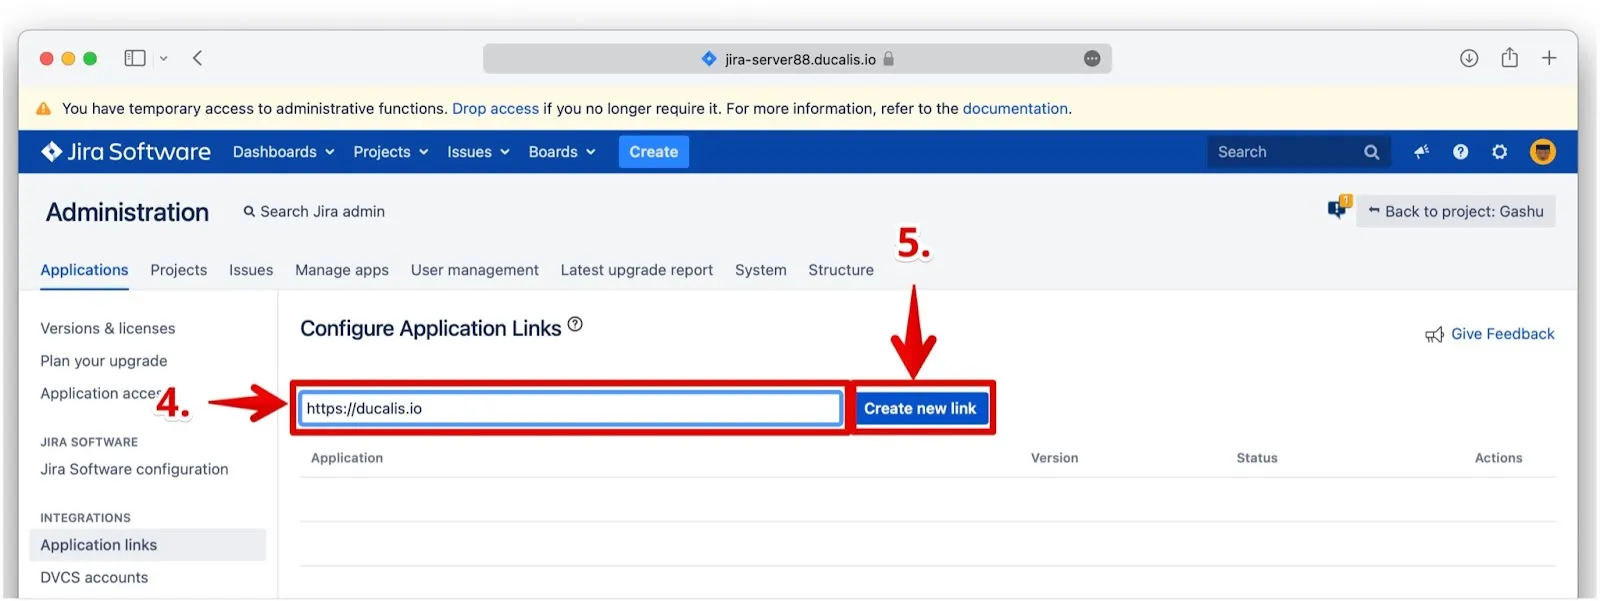
Configure the link
-
Enter the Ducalis URL:
https://ducalis.io/ -
Click Create New link.
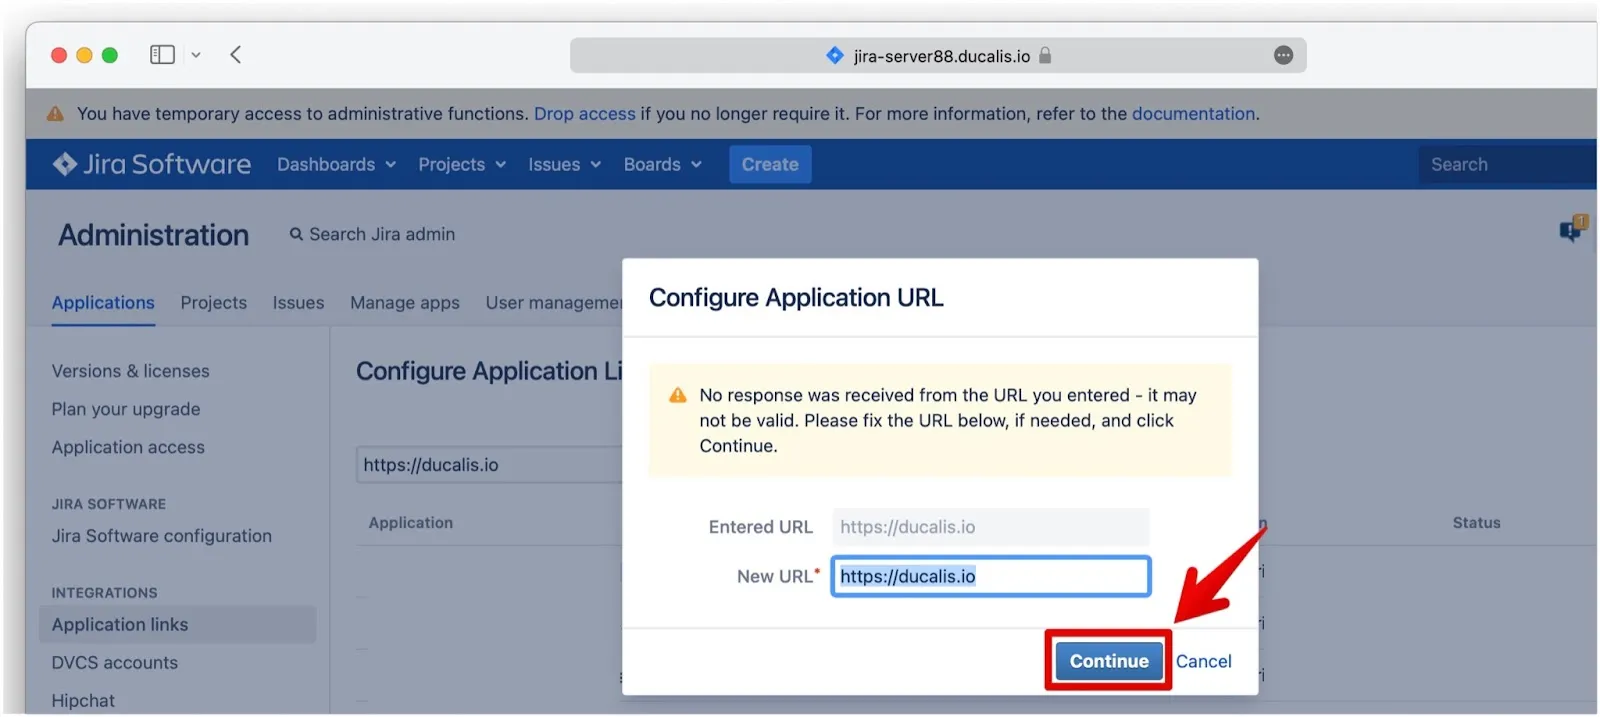
-
In the Configure Application URL dialog, click Continue (ignore the warning message—the link is valid).
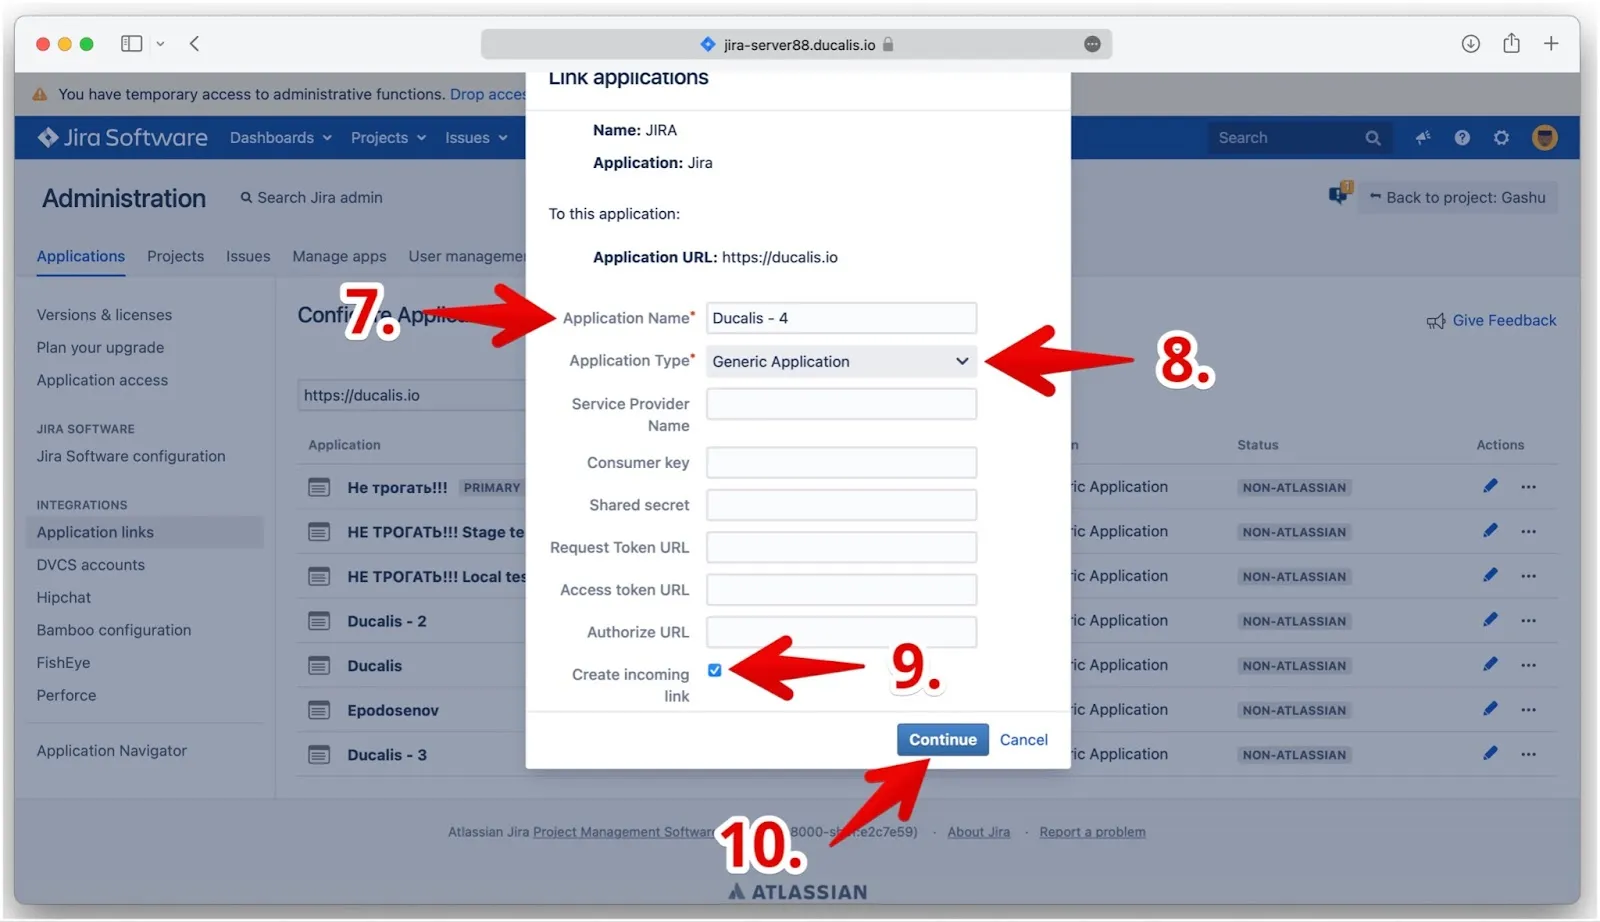
Fill in application details
-
Enter Application name: Ducalis (recommended).
-
Select Application Type: Generic Application.
-
Check Create incoming link.
-
Click Continue.
-
Copy the Consumer Key and Public Key from the Ducalis tab and paste them into the corresponding fields.
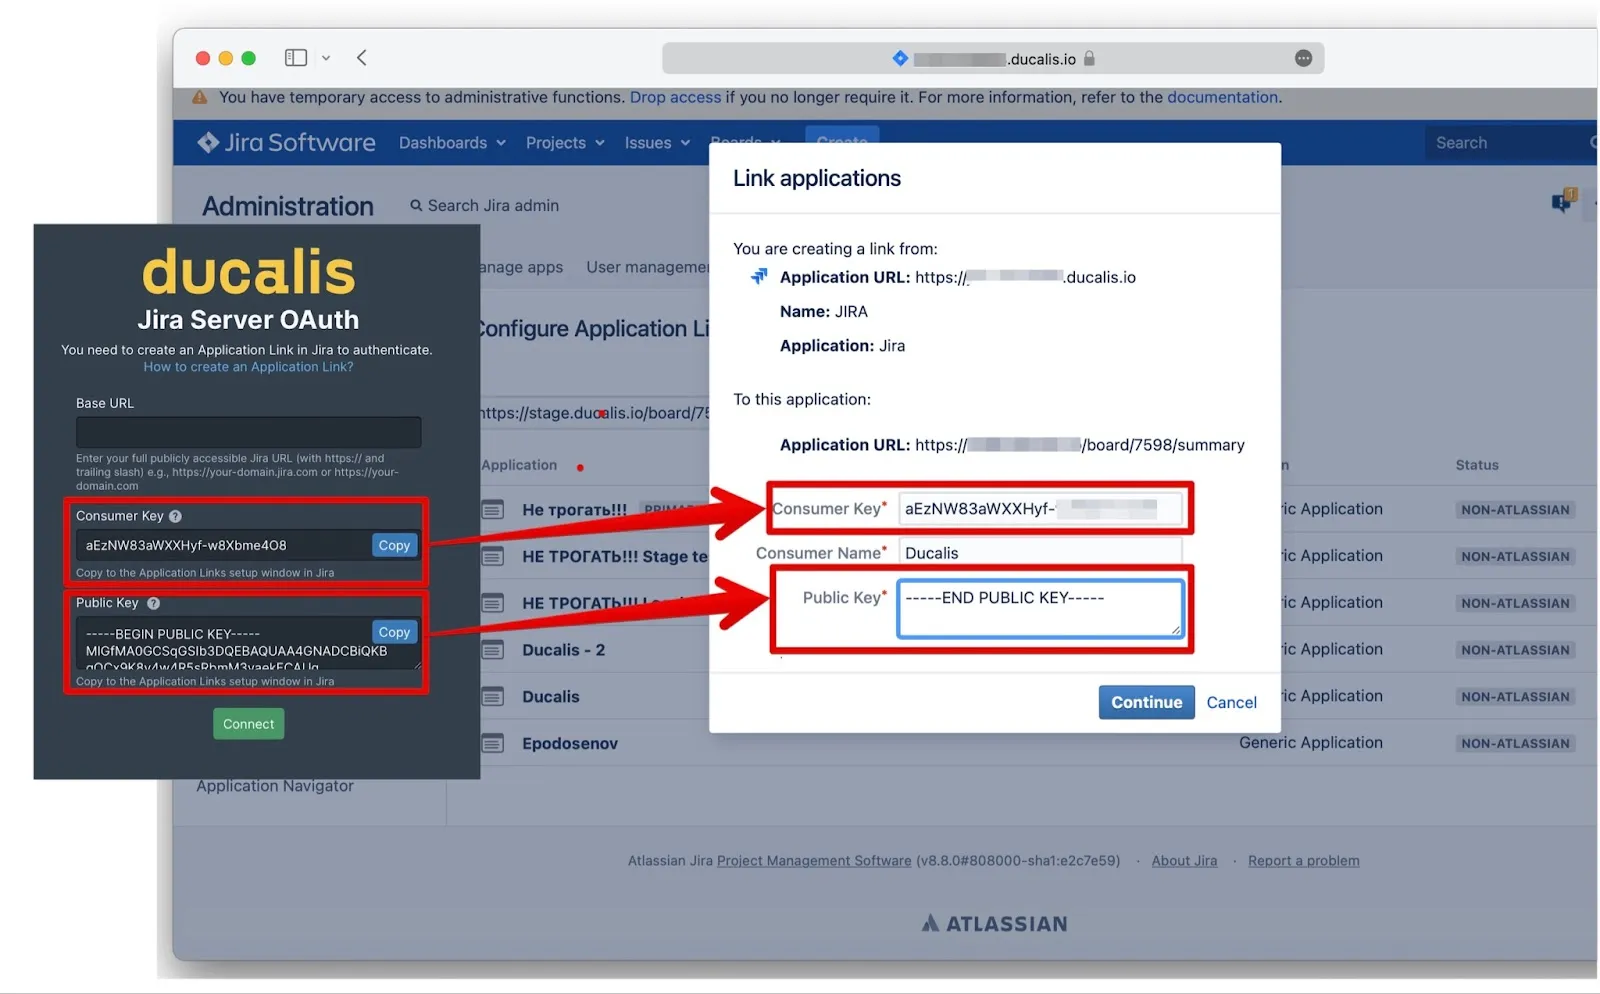
-
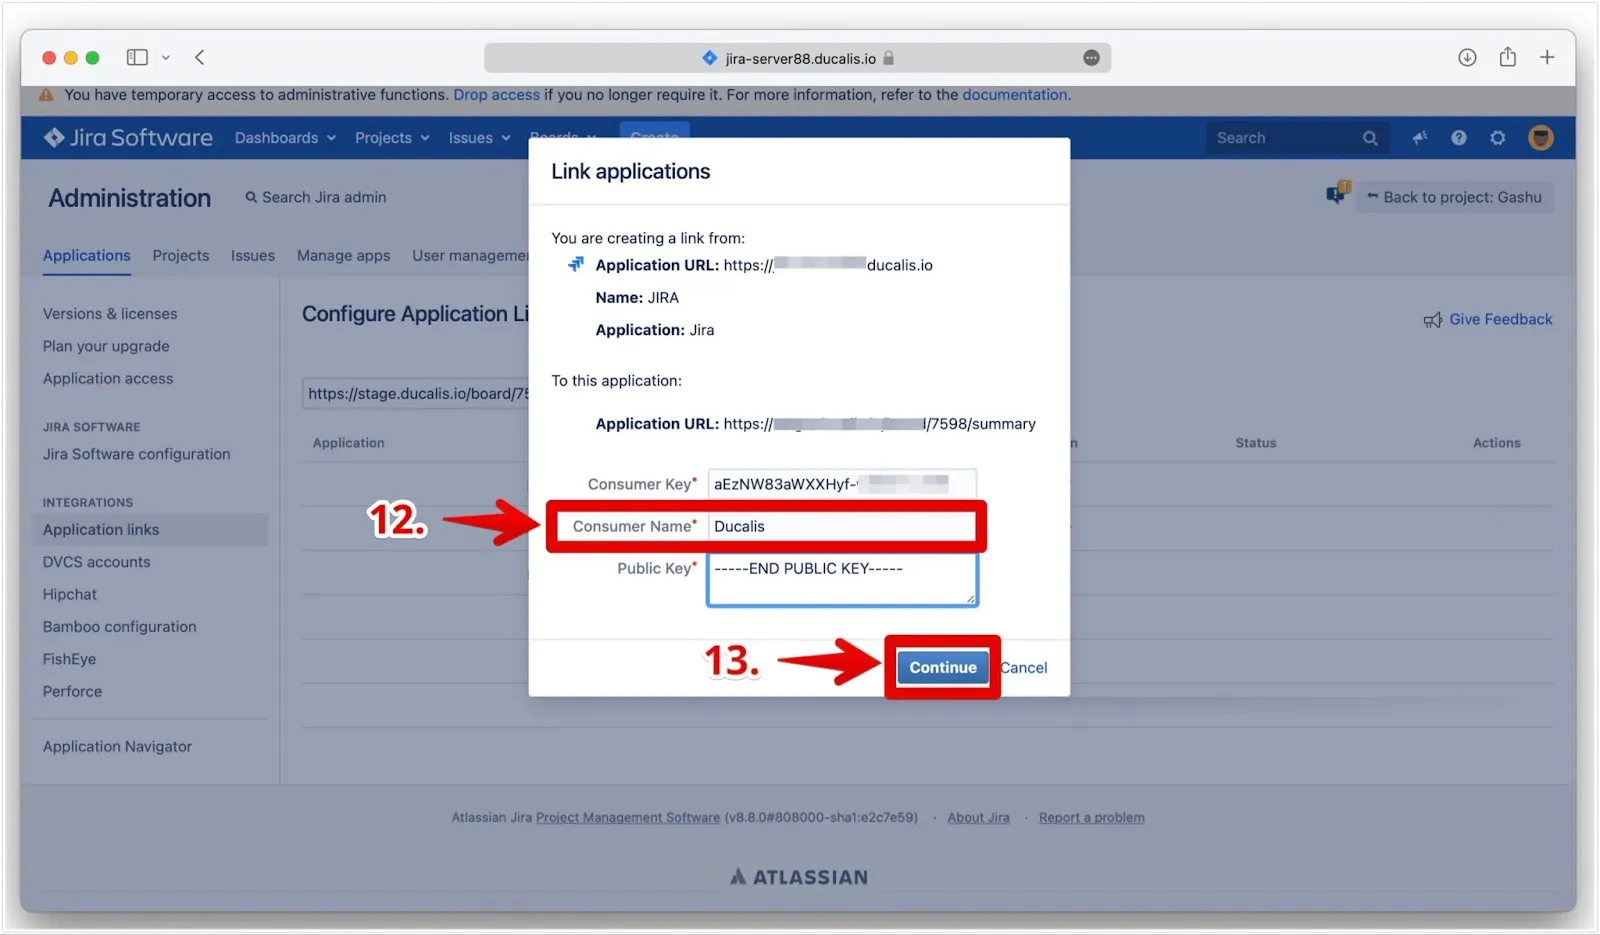
Enter any Consumer Name (your company or project name).
-
Click Continue.
The application link is now created.
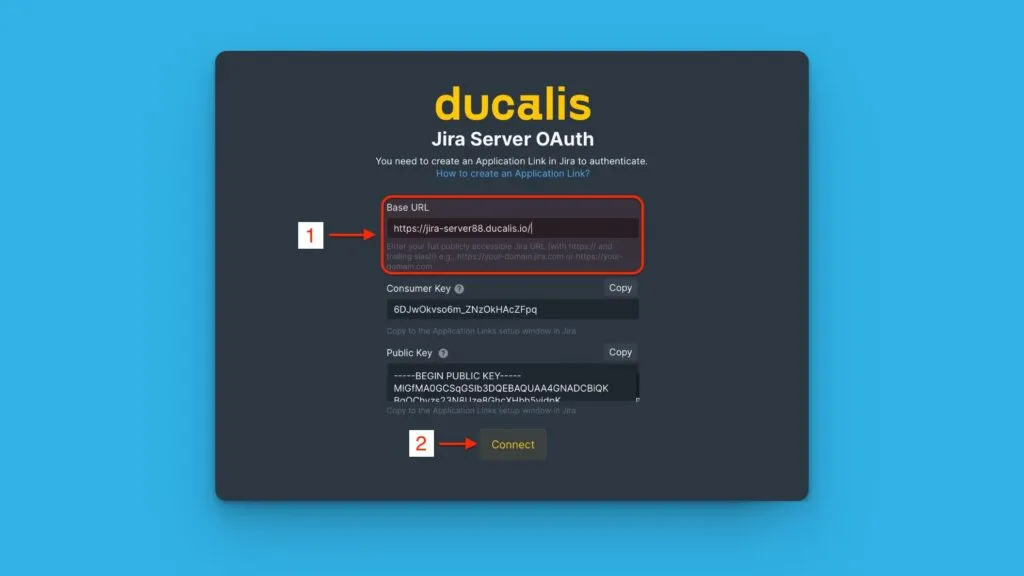
Copy Base URL
Before leaving Jira Server, copy the Base URL from your Jira account settings. You'll paste this into Ducalis.
Complete the connection
-
Return to Ducalis and paste the Base URL.
-
Click Connect.
-
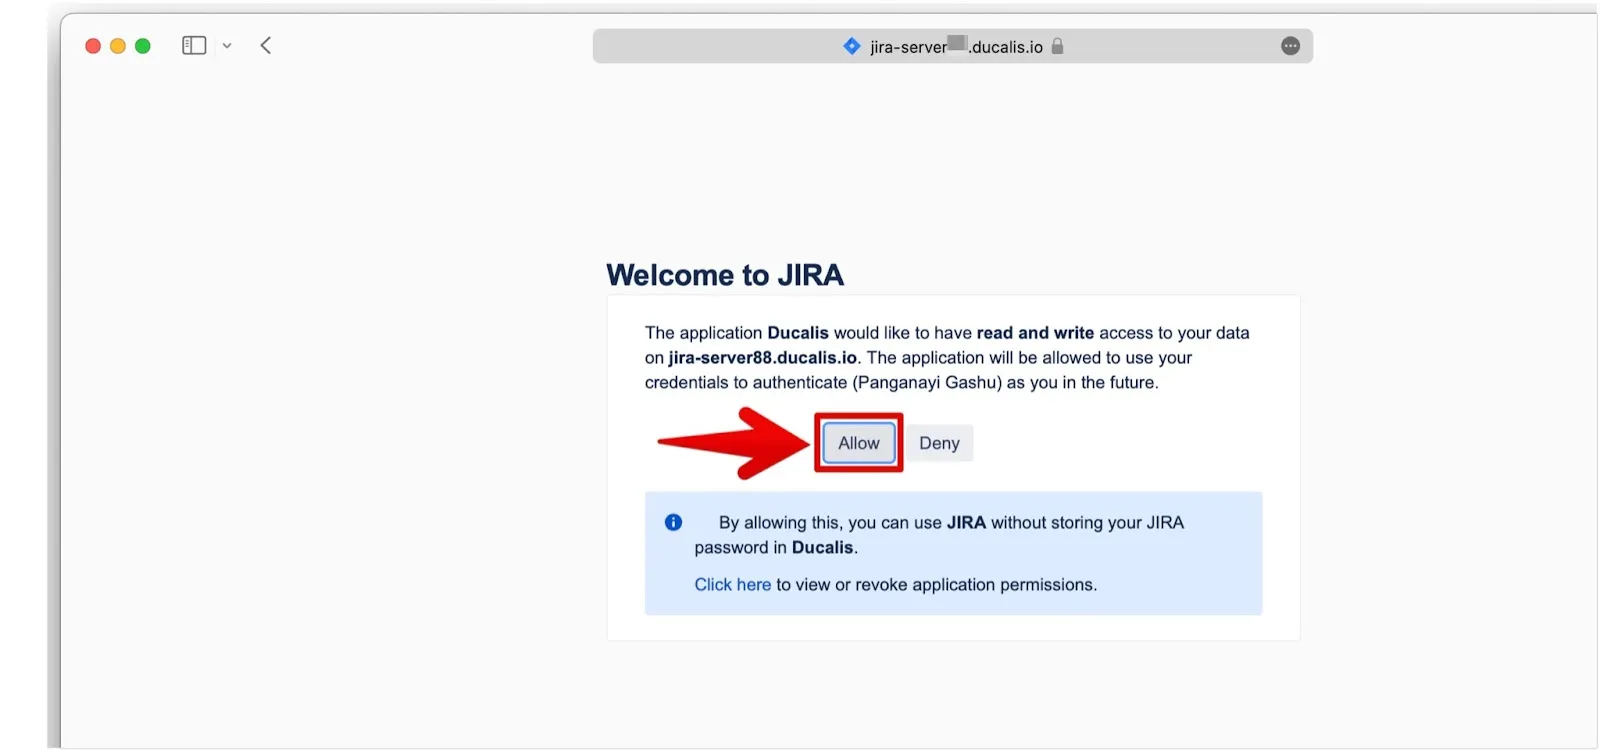
Click Allow to grant Ducalis permission to read your Jira data.
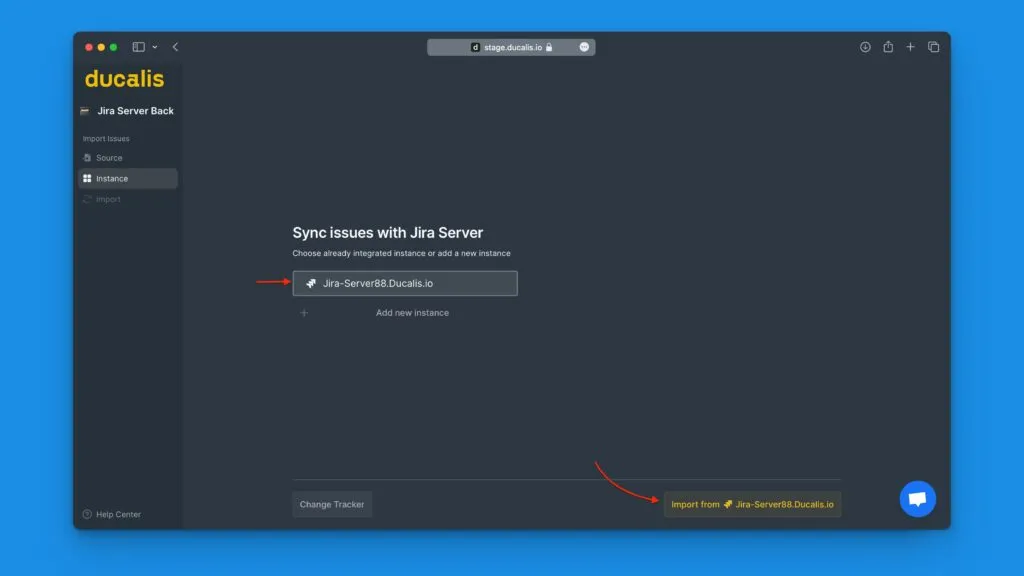
Your integration is ready. Choose an instance to import issues.
Jira Server 9+ interface
In Jira Server version 9 and later, the interface differs slightly:
-
In Application Links, click Create Link.
-
Select Atlassian Product and enter
https://ducalis.io/as the Application URL.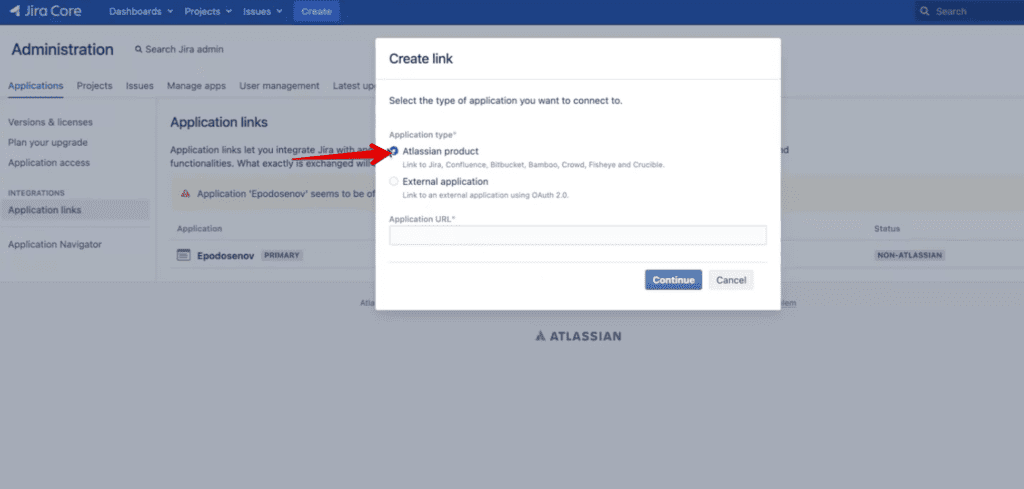
Continue with the application details form.
Remove integration
To disconnect Jira Server from Ducalis, see Removing a task tracker integration.
What's next
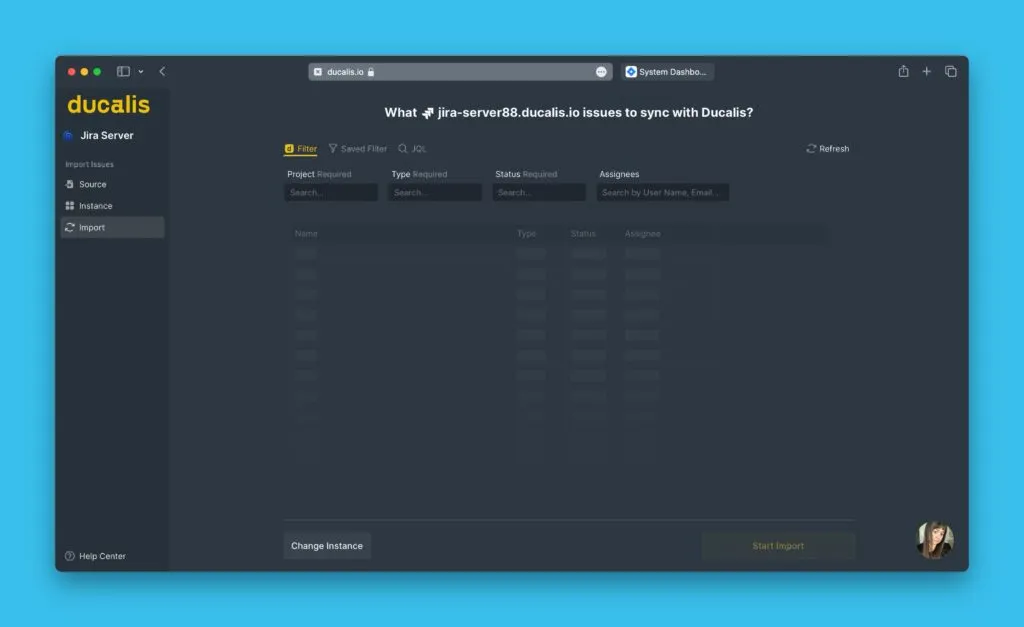
After connecting, import issues from Jira Server to start prioritizing.